When you click on links to various merchants on this site and make a purchase, this can result in this site earning a commission. Affiliate programs and affiliations include, but are not limited to, the eBay Partner Network.
I was planning to add LED lights to my 96 993 instruments. It took me an hour to get the clock out. I could not budge the speedometer and gave up after another hour plus trying from the front and back of the instrument. I do not want cause damage.
Is there a technique I am not aware of?
BTW, while I had the clock out I tested the clock with the LED lights and compared to my other instruments ... they were considerably brighter.
All of the gauges should push/pull out but the rubber retaining ring is likely hard and less pliable. Once the clock is out, the other gauges should push out from behind
These interior pry tools are a must have for jobs like this...patience and working around the instrument will yield the desired results. At a whopping $6.49 @ Walmart, they should not break the bank.
P.S. A tiny sprit of pene fluid at the top of the gauge, helps loosen stuck gauges. After one gauge is removed, pressing the gauge adjacent from behind, while working around the gauge rubber ring with the proper tool, should easily do the trick.
I tried for another two hours....even with a crow bar from behind. It’s like they are glued in place. I could remove the two outer instruments, but the three middle ones won’t budge. I have a very complete set of 16 pry tools, both plastic and metal....
Anyone want to make an offer on 11 brand new LEDs from SUPERBRIGHTLEDS.COM?
I tried WD40 with no success. I haven’t had instruments out in 20 years. It is as if the gaskets have bonded with the dash material. The two end instruments that came out with a great deal of effort still had pliable gaskets. I am giving up (for the time being).
thanks
I tried WD40 with no success. I haven�t had instruments out in 20 years. It is as if the gaskets have bonded with the dash material. The two end instruments that came out with a great deal of effort still had pliable gaskets. I am giving up (for the time being).
thanks
Dim the instrument lights as much as possible, that will make the instrument lights last noticeably longer!
Sooner or later You will have to find a soloution, but if You dim the lights it will be as late as possible!
Last edited by Railmaster.; 04-01-2019 at 04:50 AM.
Reason: Correction
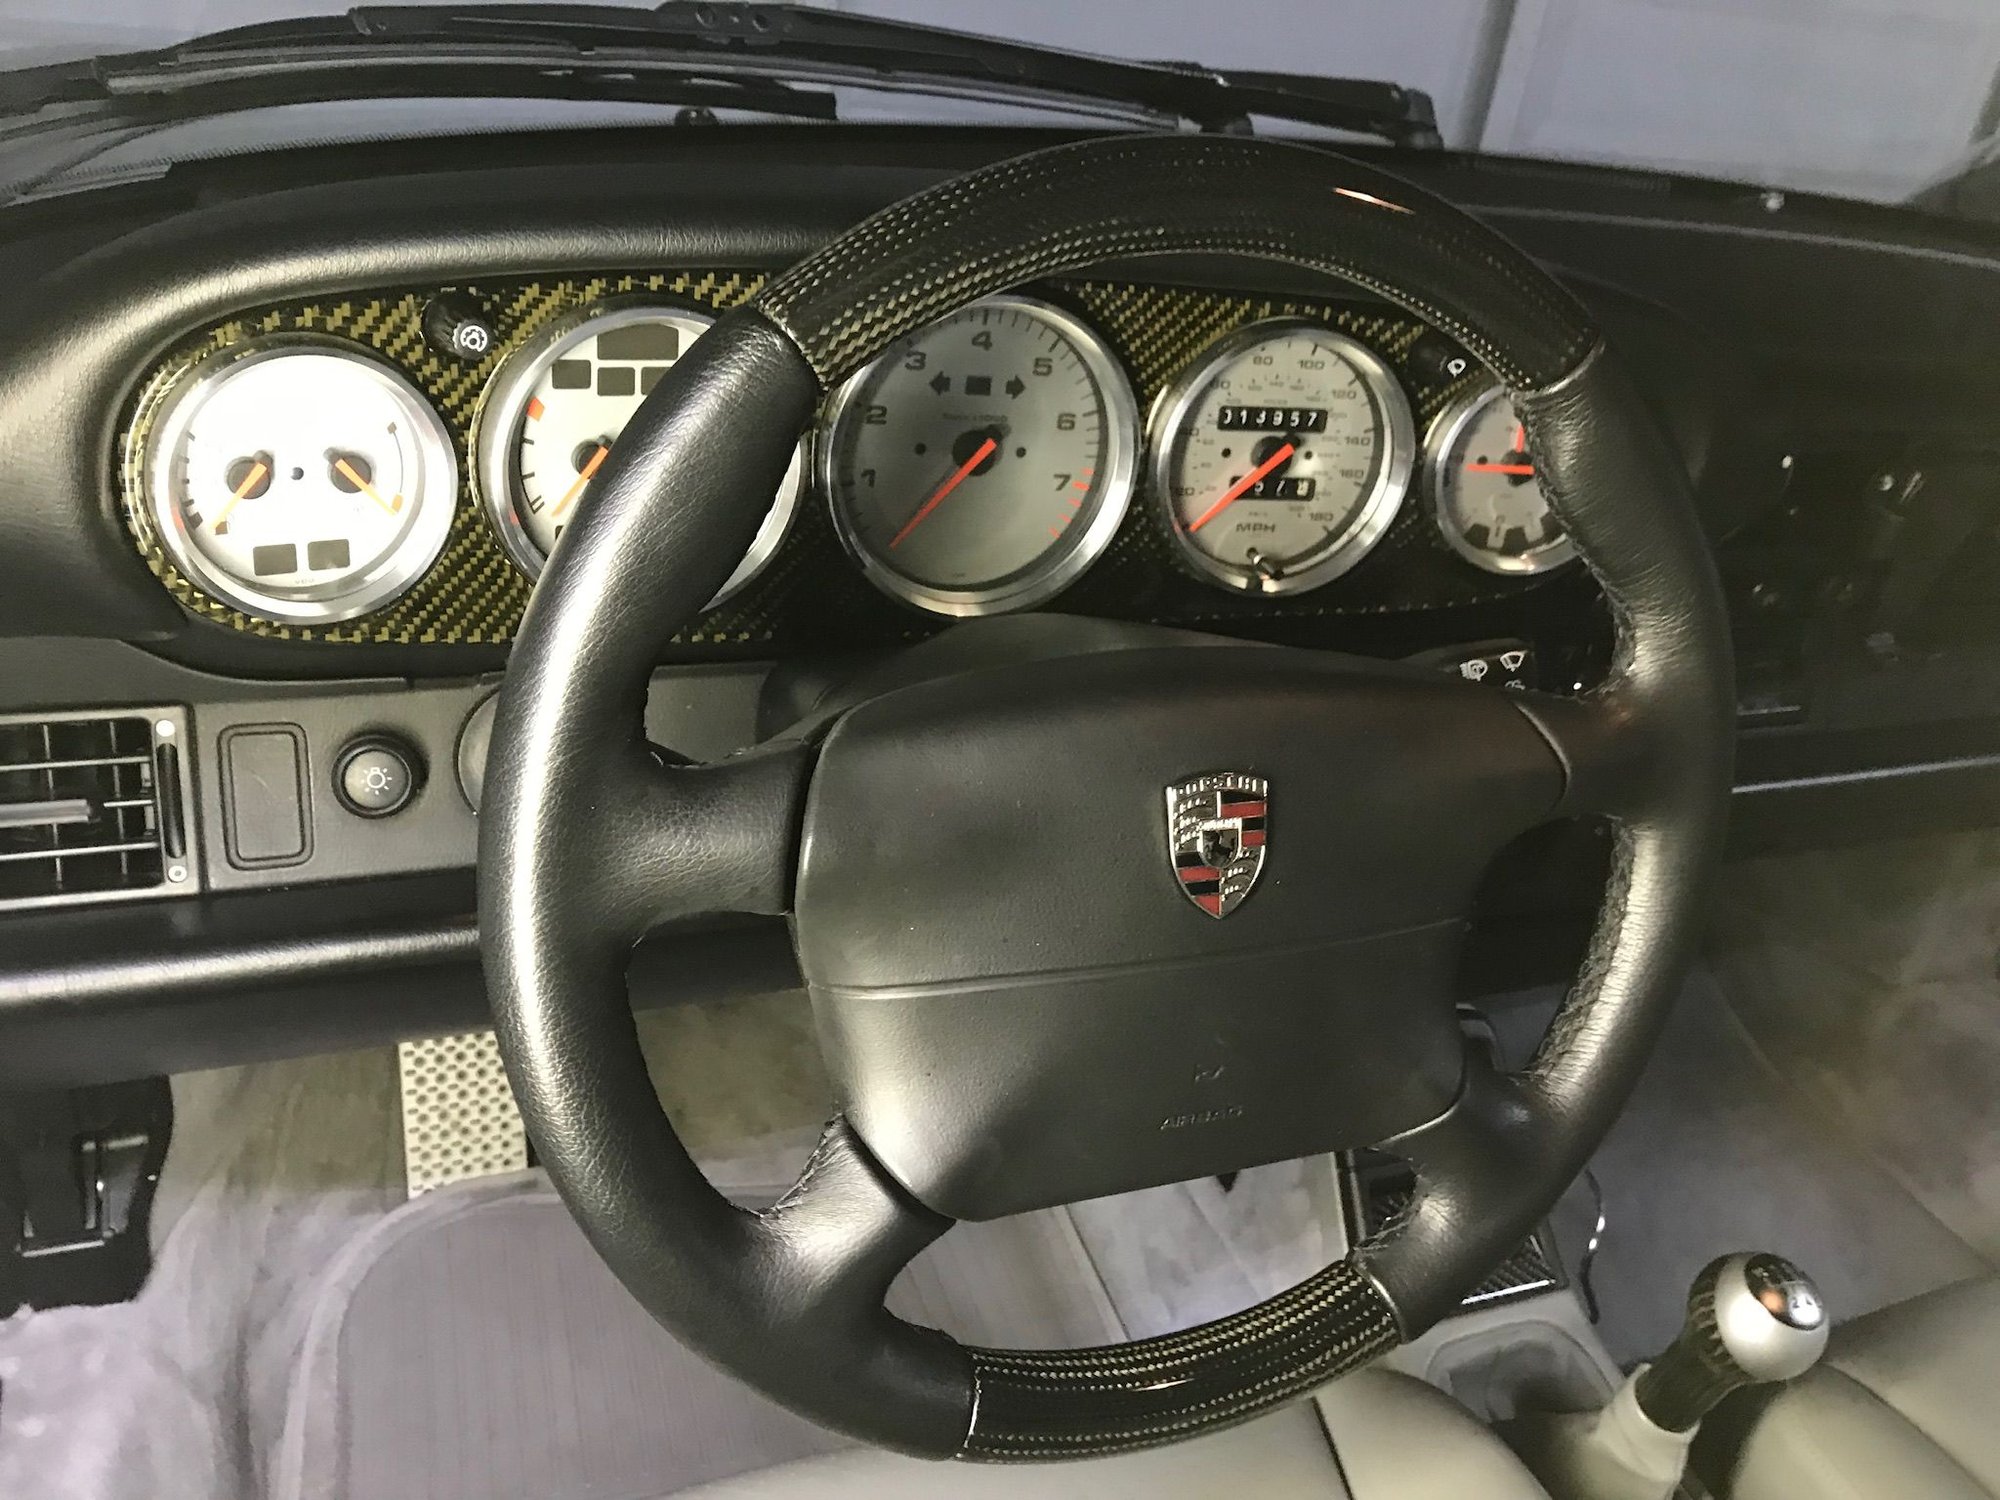
It looks like the flange edge of the original gauges may be captured behind the carbon fiber facia slipped over them or the glue used to hold the facia migrated to the original gauge rings. If this is the case no wonder they won't come loose. You may need to remove the carbon fiber facia or soften any glue present first but this probably will damage the carbon fiber facia in the process. Waiting for a warm day and putting your car out in direct sun with the windows up may warm up and soften any glue that may be present if glue is the issue. Finally, the original trim rings were probably thin and black, the bright metal ones in the picture may be glued on or replaced the original and may be contributing to the gauges seeming to be unremovable
It looks like the flange edge of the original gauges may be captured behind the carbon fiber facia slipped over them or the glue used to hold the facia migrated to the original gauge rings. If this is the case no wonder they won't come loose. You may need to remove the carbon fiber facia or soften any glue present first but this probably will damage the carbon fiber facia in the process. Waiting for a warm day and putting your car out in direct sun with the windows up may warm up and soften any glue that may be present if glue is the issue. Finally, the original trim rings were probably thin and black, the bright metal ones in the picture may be glued on or replaced the original and may be contributing to the gauges seeming to be unremovable
This would be my guess as well. Looks like the silver rings are locking the gauges to the carbon trim which is making it feel like the gauges are stuck.
I was planning to add LED lights to my 96 993 instruments. It took me an hour to get the clock out. I could not budge the speedometer and gave up after another hour plus trying from the front and back of the instrument. I do not want cause damage.
Is there a technique I am not aware of?
BTW, while I had the clock out I tested the clock with the LED lights and compared to my other instruments ... they were considerably brighter.
pp000830 may be onto something here regarding the carbon fiber piece holding the gauges captive. But if that's the case how did the clock come out of its socket? Do you have a photo? Did you reinstall the clock?
Did the car come with the carbon fiber, foo-foo piece, or did you install it?
Do you happen to have a photo of the clock removed from the dash socket and was the rubber gasket that surrounds the gauge, in place?
It is definitely not the Walrod trim rings holding the gauges in place, since the rings sit within the bore of the black gauge bezel itself which is all part of the gauge.
It looks like the flange edge of the original gauges may be captured behind the carbon fiber facia slipped over them or the glue used to hold the facia migrated to the original gauge rings. If this is the case no wonder they won't come loose. You may need to remove the carbon fiber facia or soften any glue present first but this probably will damage the carbon fiber facia in the process. Waiting for a warm day and putting your car out in direct sun with the windows up may warm up and soften any glue that may be present if glue is the issue. Finally, the original trim rings were probably thin and black, the bright metal ones in the picture may be glued on or replaced the original and may be contributing to the gauges seeming to be unremovable
^^ He beat me to it. Something looks wrong with how the previous owner installed that carbon fiber panel. Here's how I did mine, and gauge removal is just as easy as before the CF was added. Hard to say exactly what's going on with yours.
With the aftermarket trim rings, sometimes people use an adhesive and to much to boot - they are then very hard to get off.
Chances are some of the adhesive bonded to the CF panel.
A light tab of bathroom caulk is best used - easy to get off and won't take the paint off the gauges if a customer decides he doesn't lie them any more.


 03-30-2019, 06:58 PM