When you click on links to various merchants on this site and make a purchase, this can result in this site earning a commission. Affiliate programs and affiliations include, but are not limited to, the eBay Partner Network.
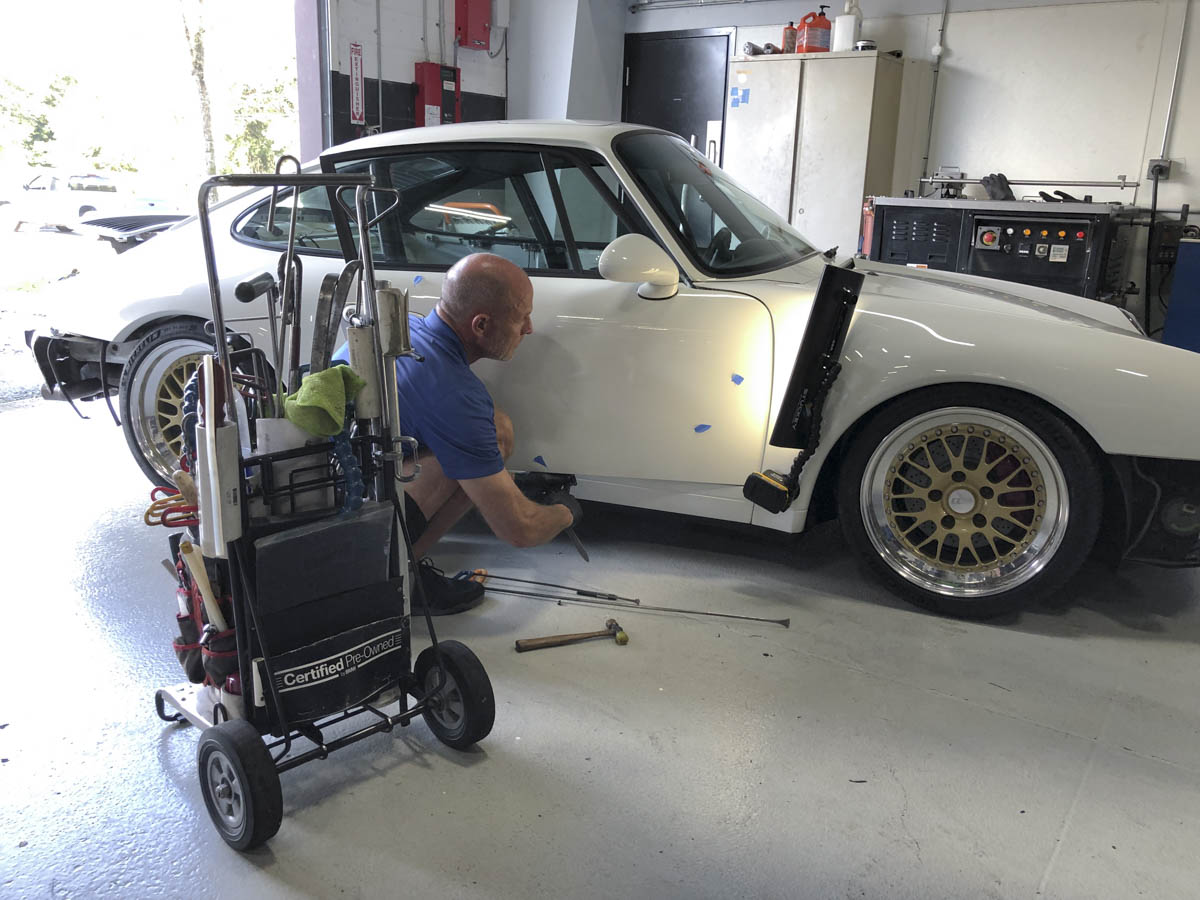
My lift time was quickly coming to a close, so it was full speed ahead on getting the underside of the car 90% complete so I could roll it over to the garage side.
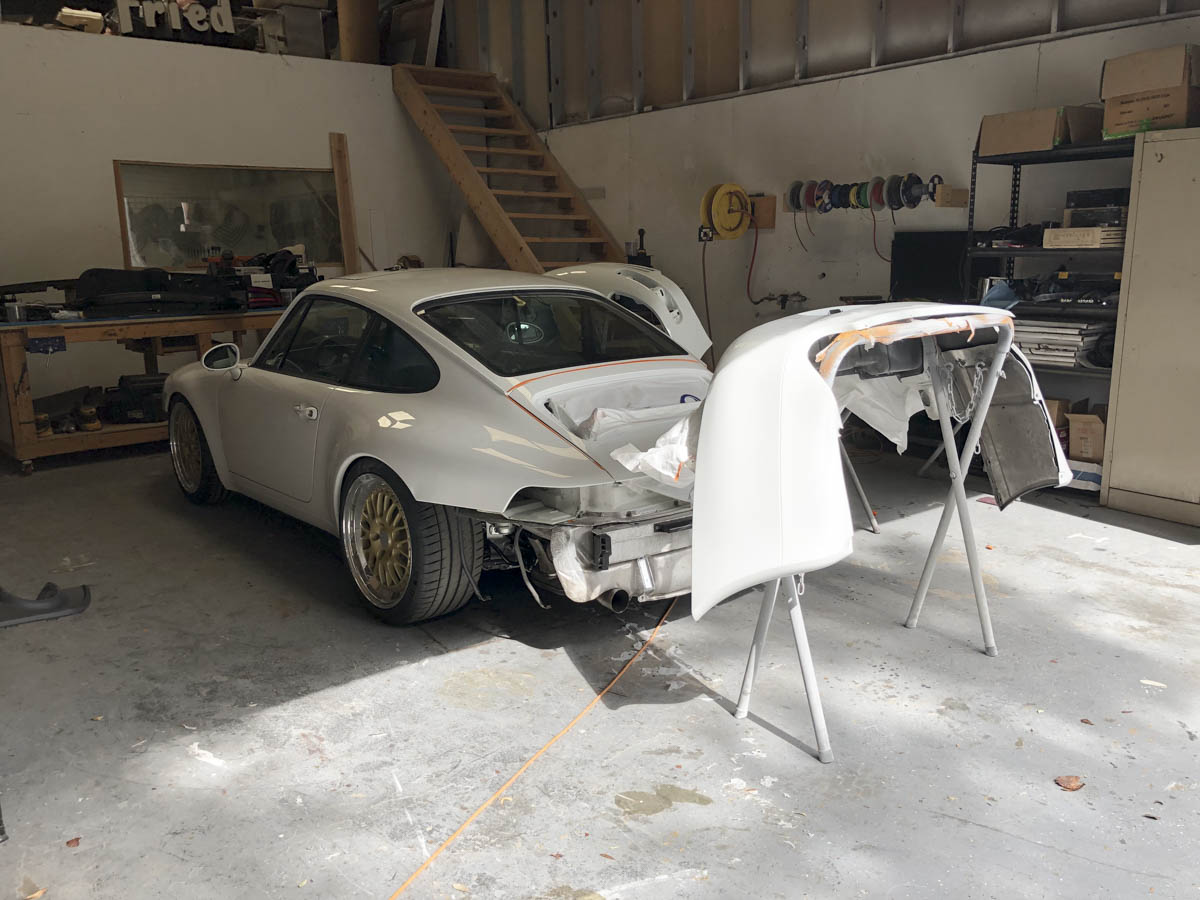
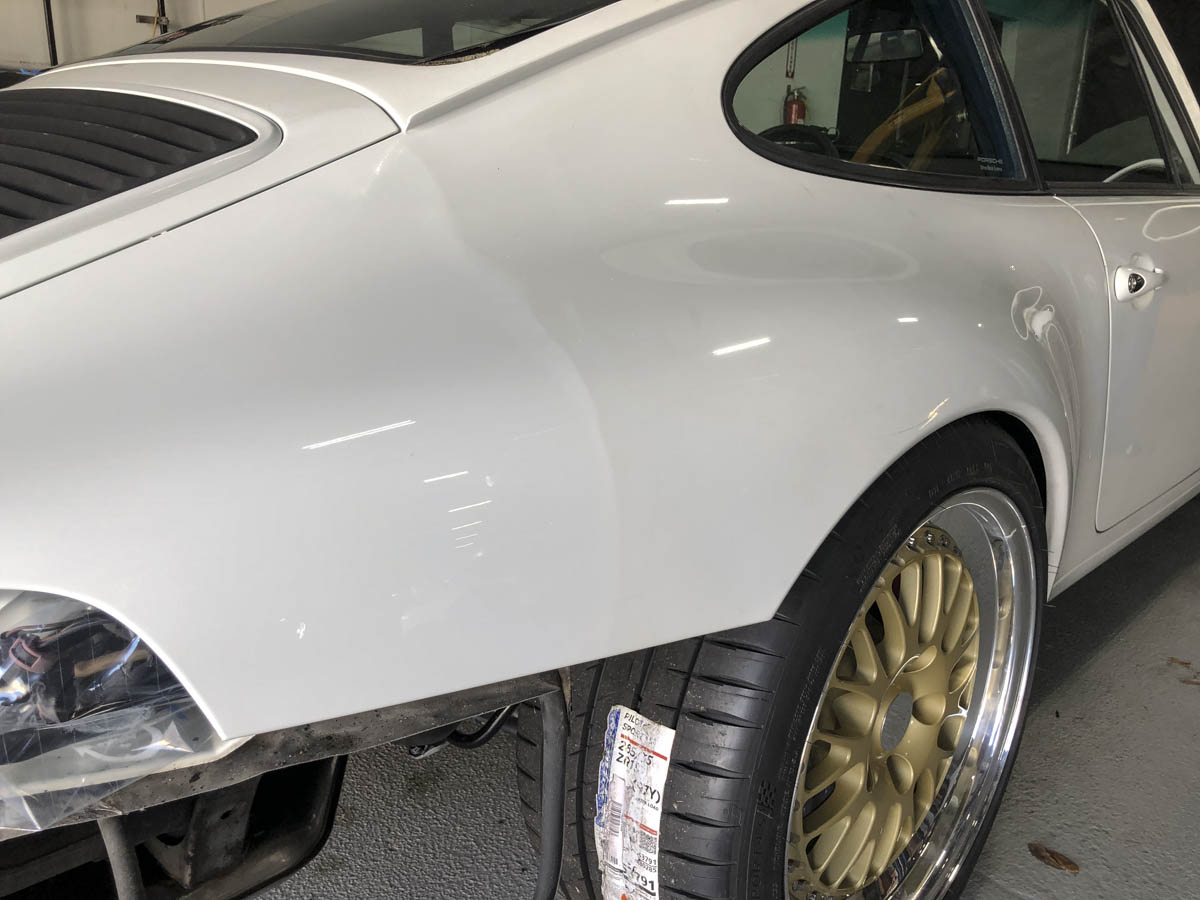
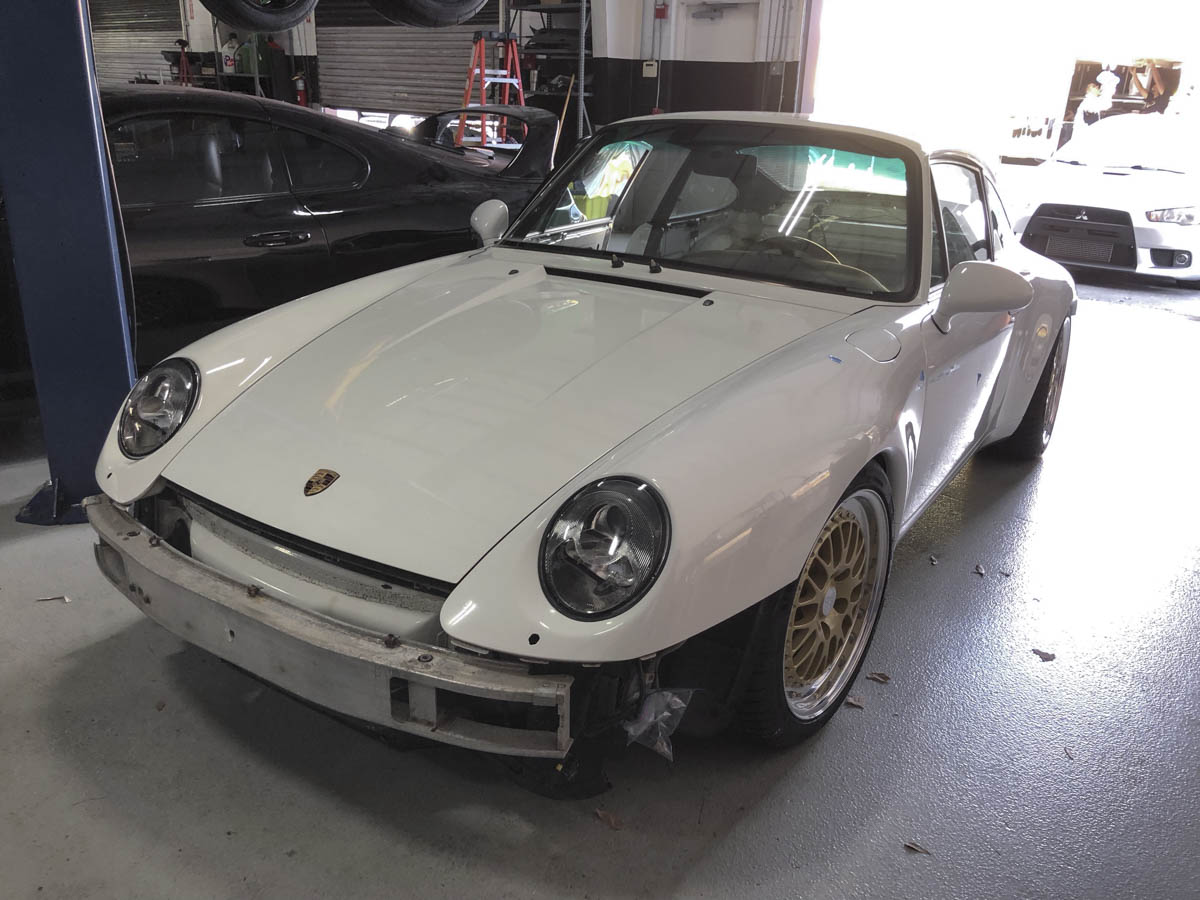
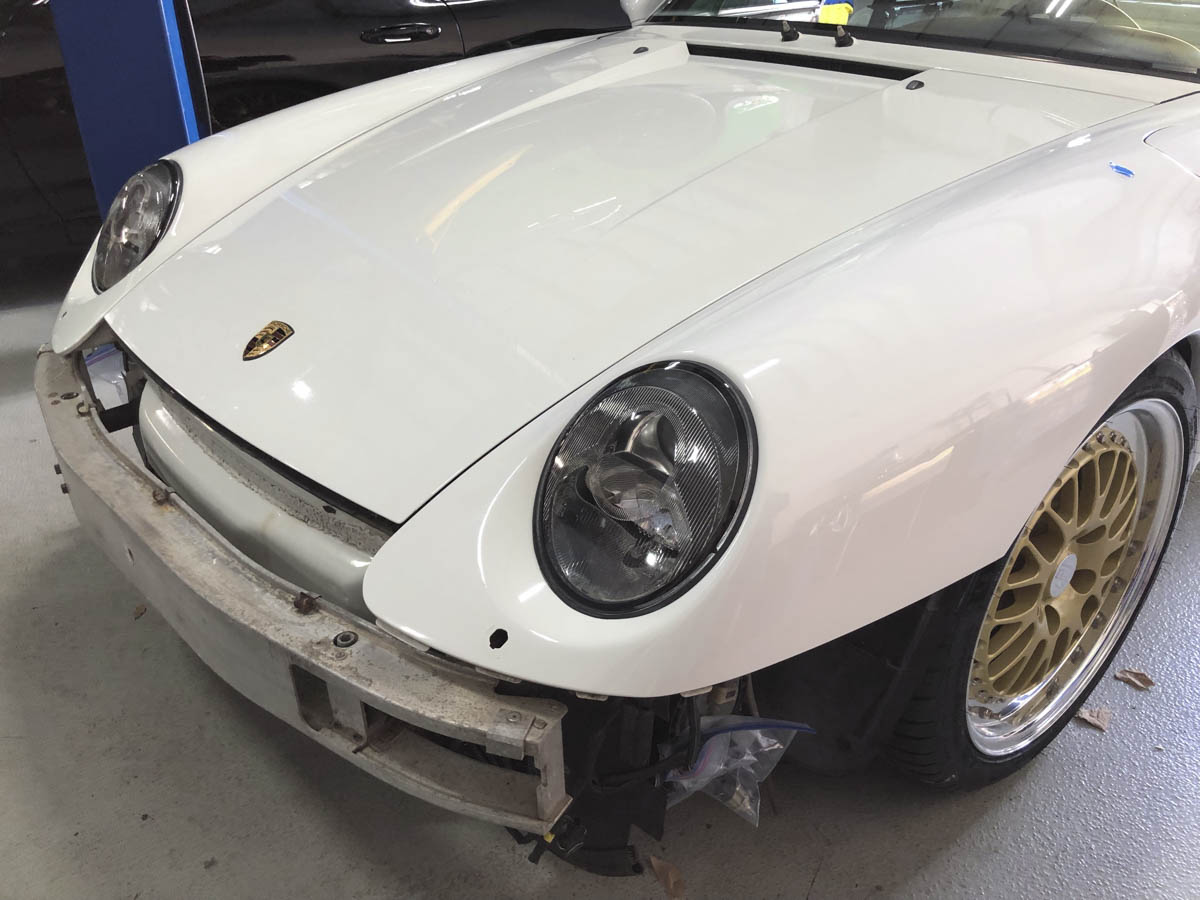
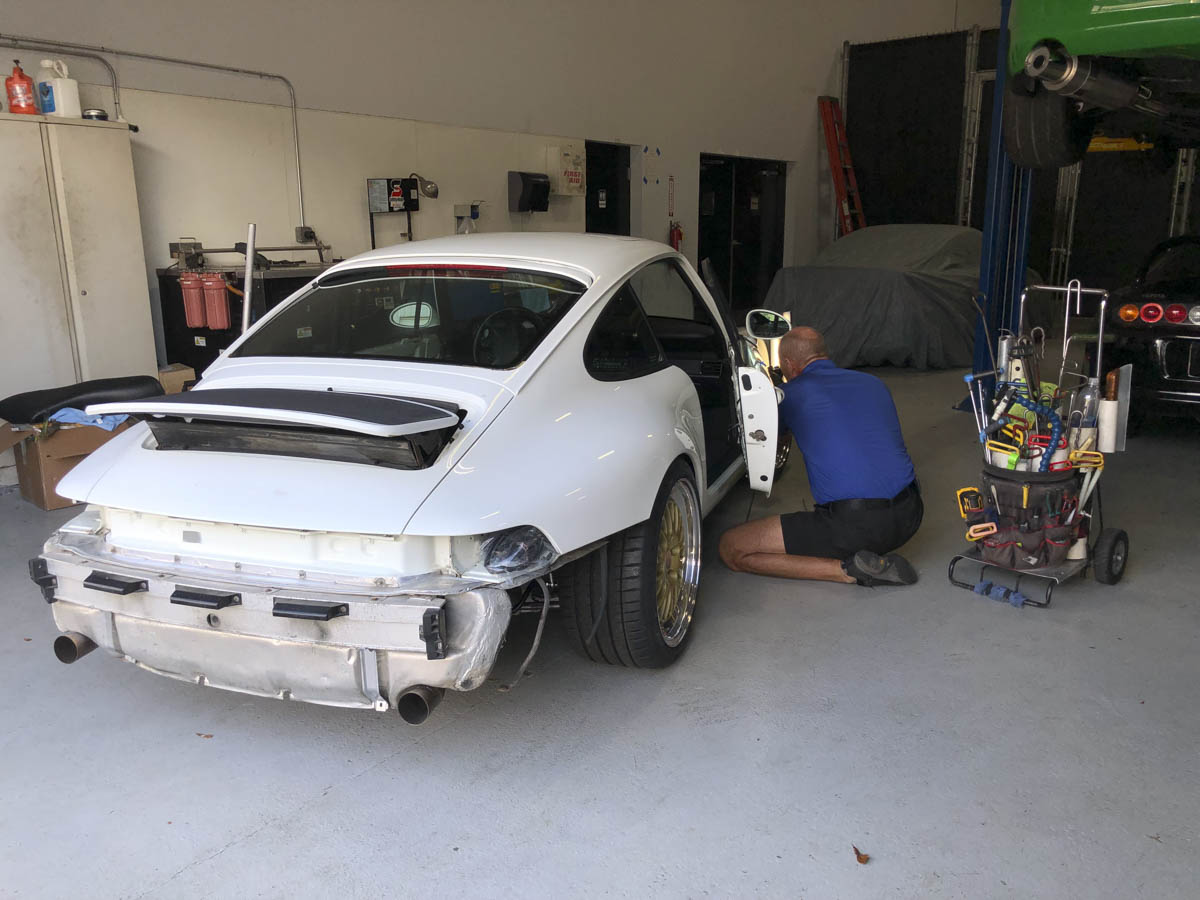
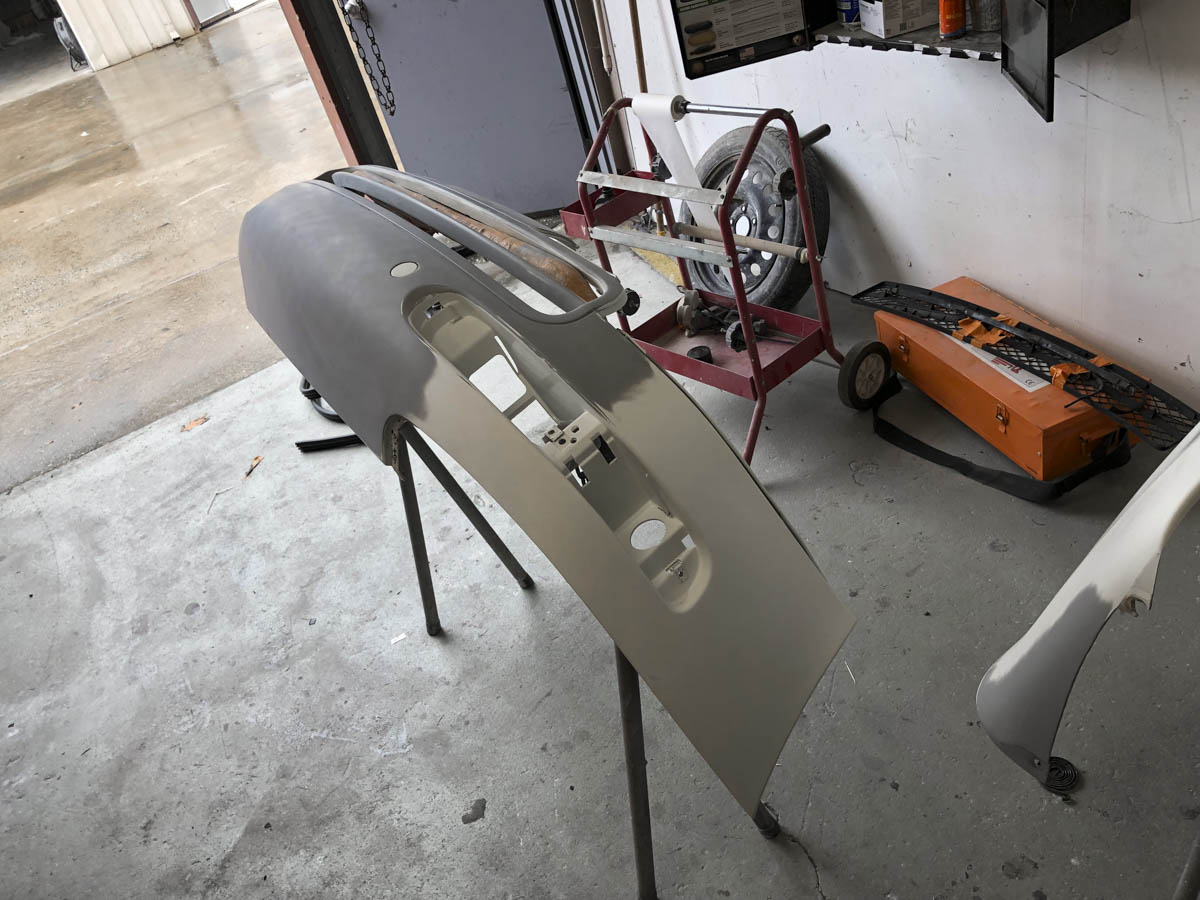
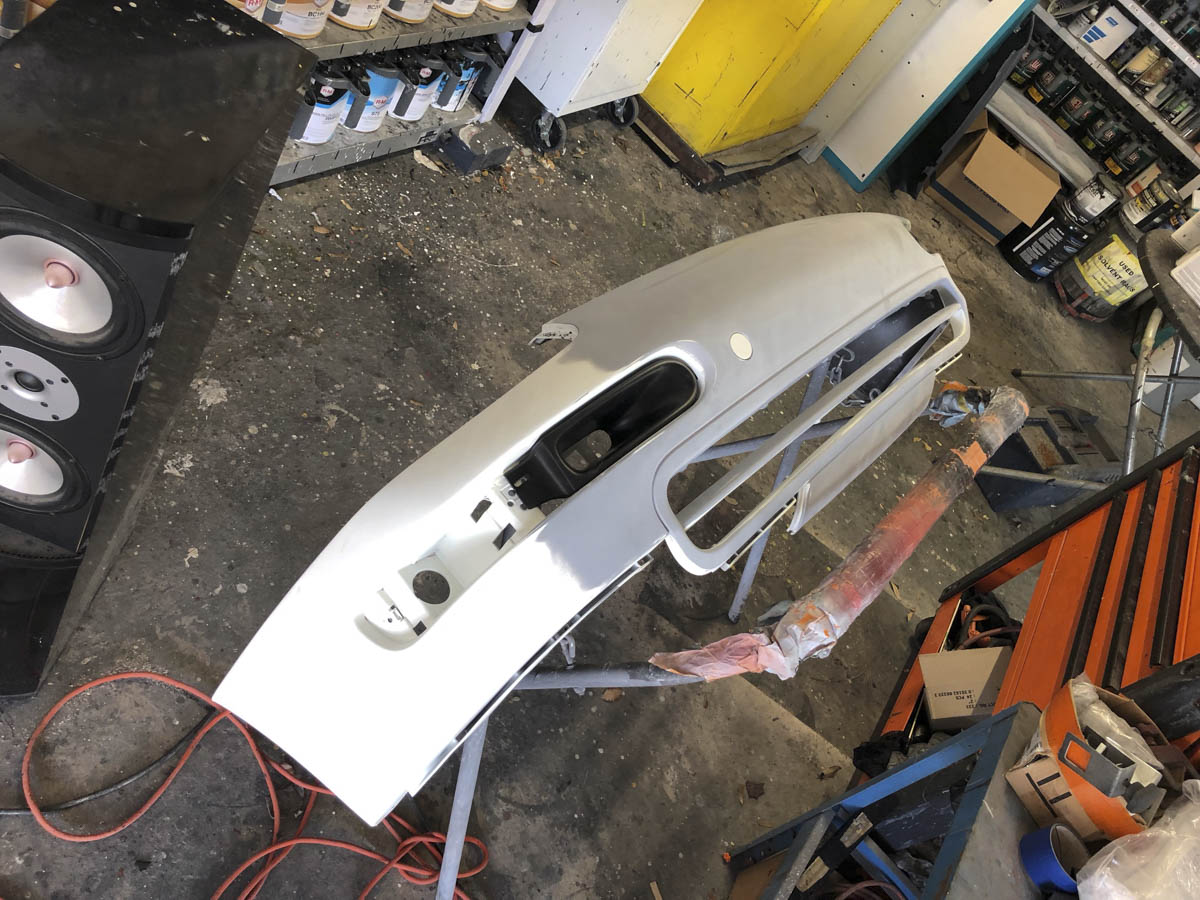
Pulled the front bumper off to prepare to send it over to the body shop so they can begin to prep it.
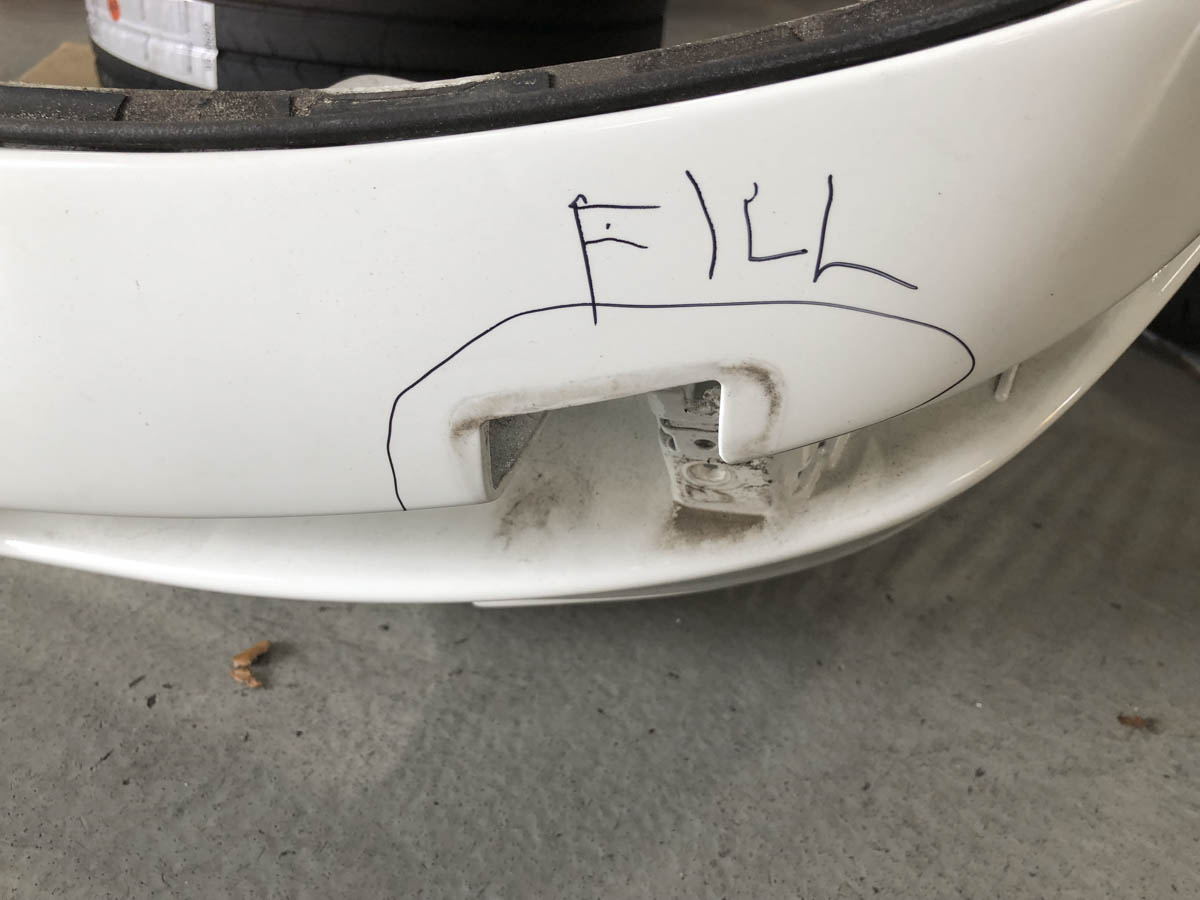
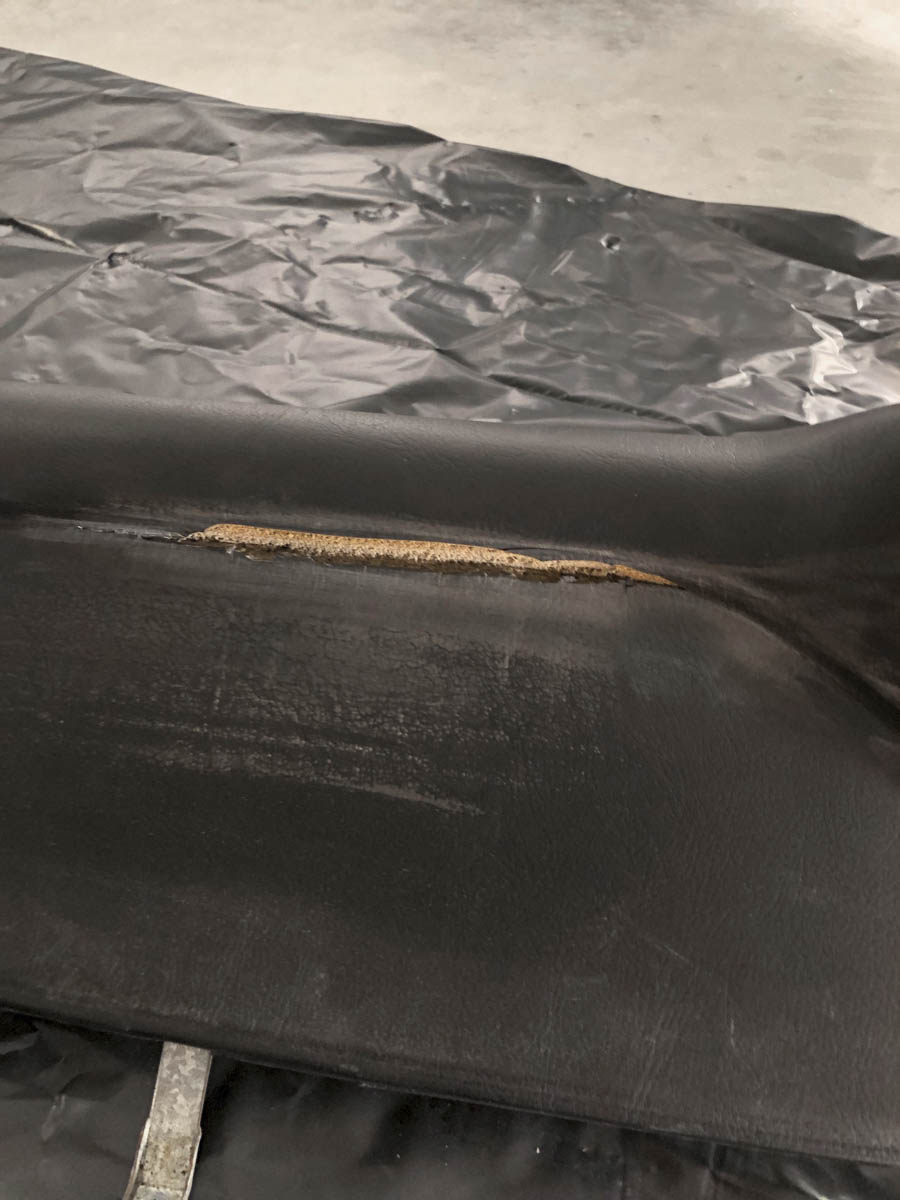
I can't stand the US bumperettes, so front and rear those will be getting removed and shaved. On the rear there was a nice aluminum bracket that needed to be removed, doing so requires drilling out 2 spot welds and prying from the crash bar.
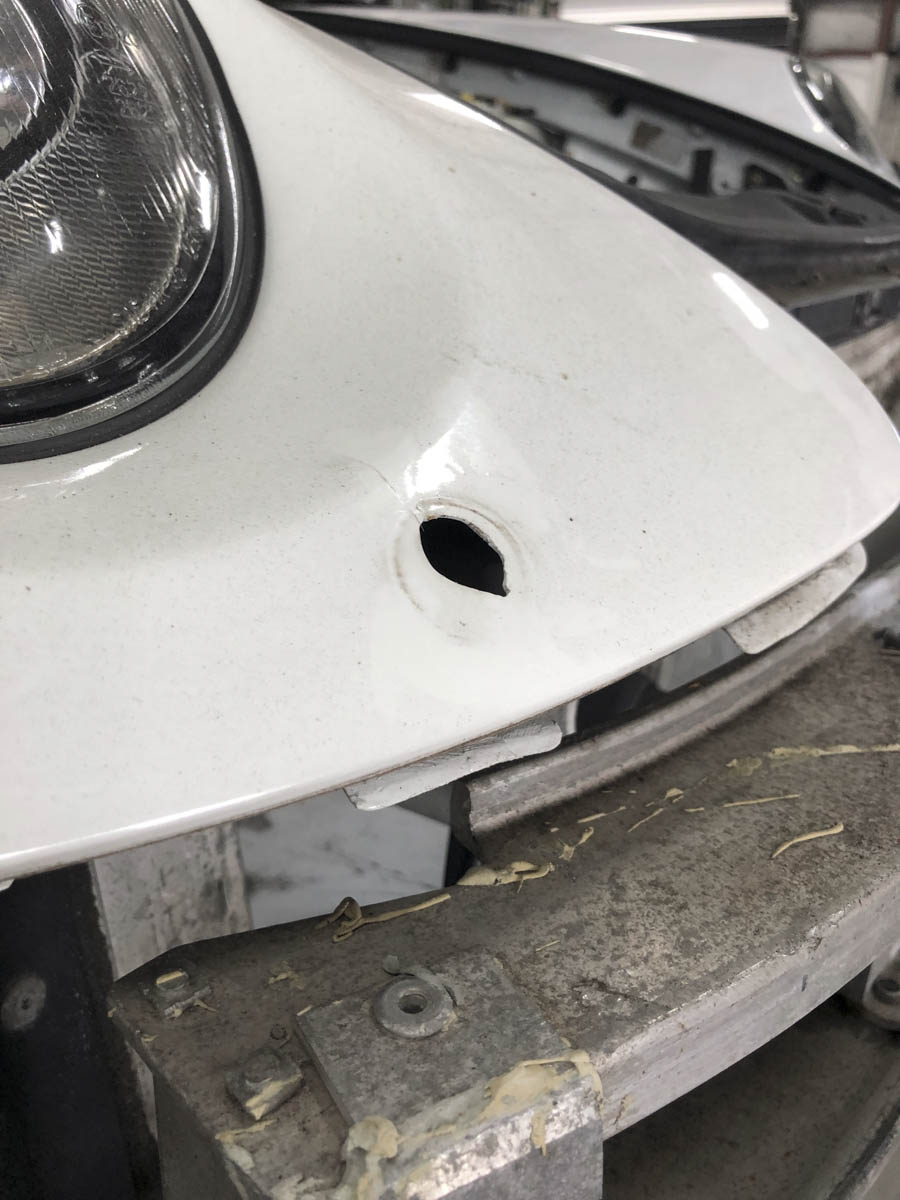
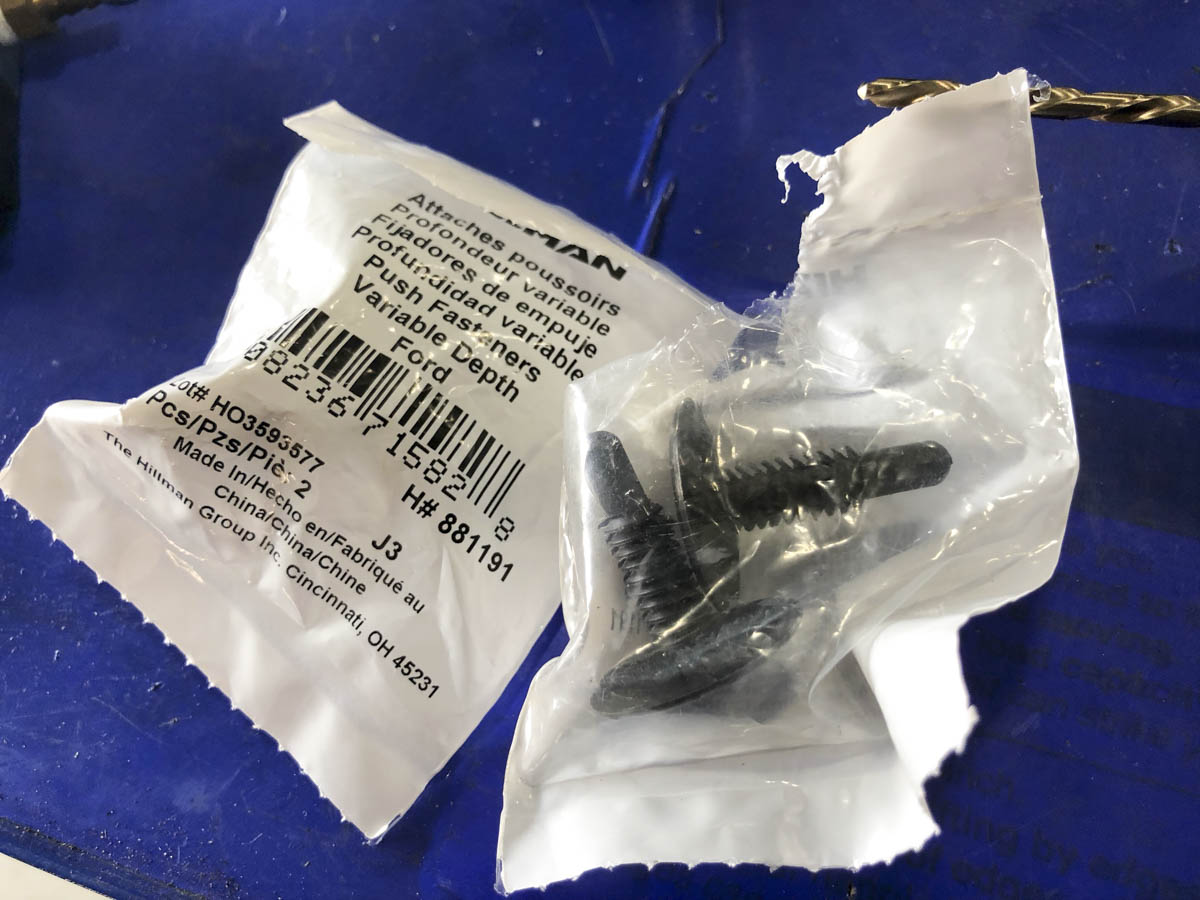
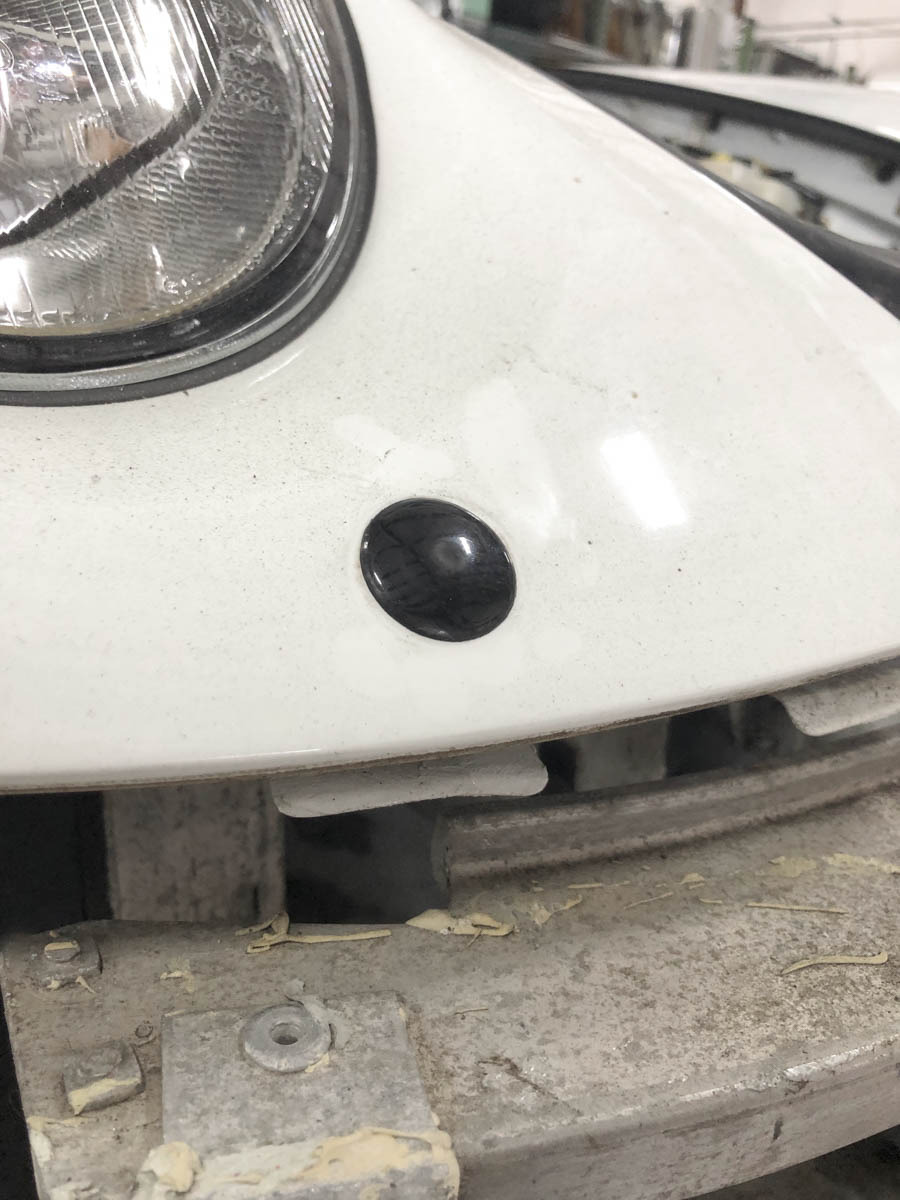
I'm also removed the washer nozzles for the headlights, a pair of Hillman 881191 universal plugs painted to match should fill the holes nicely and allow me to keep the original paint on the fenders.
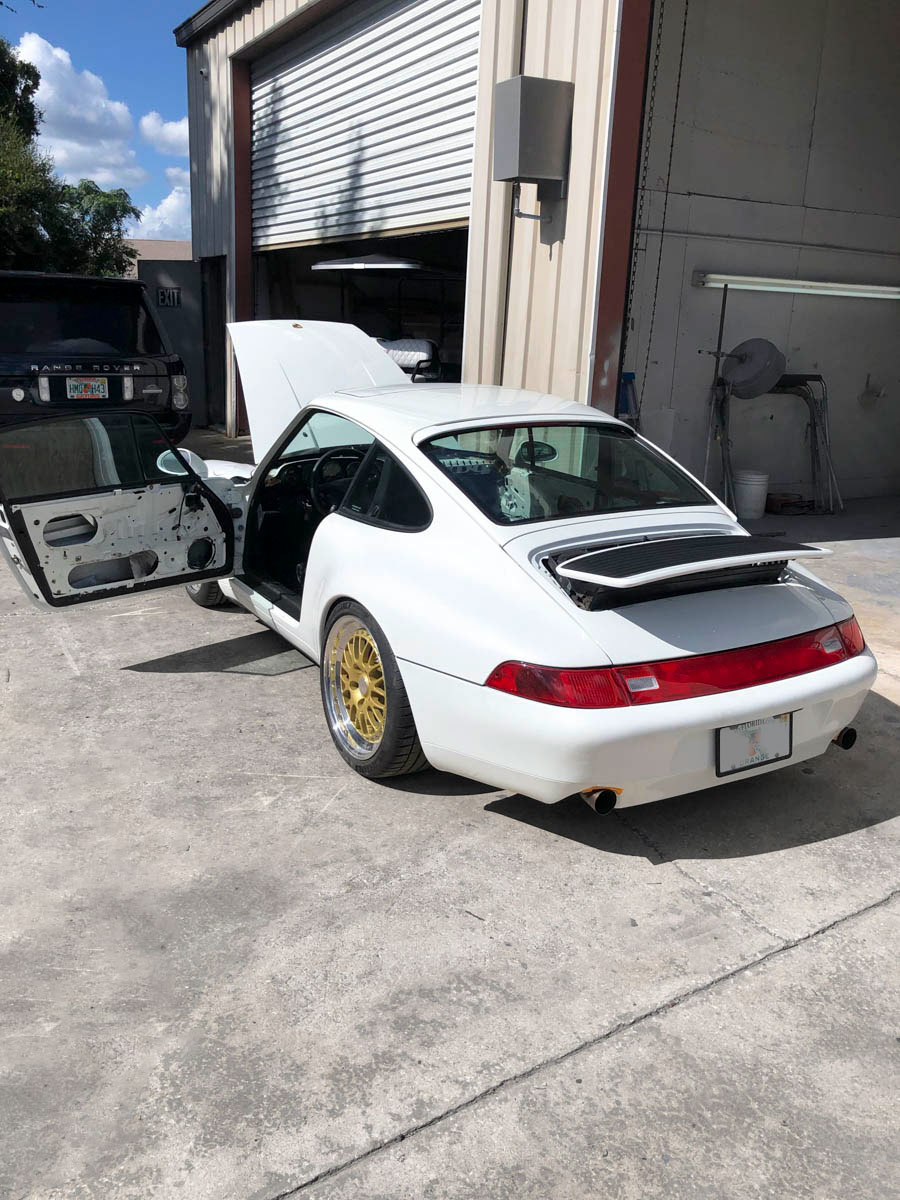
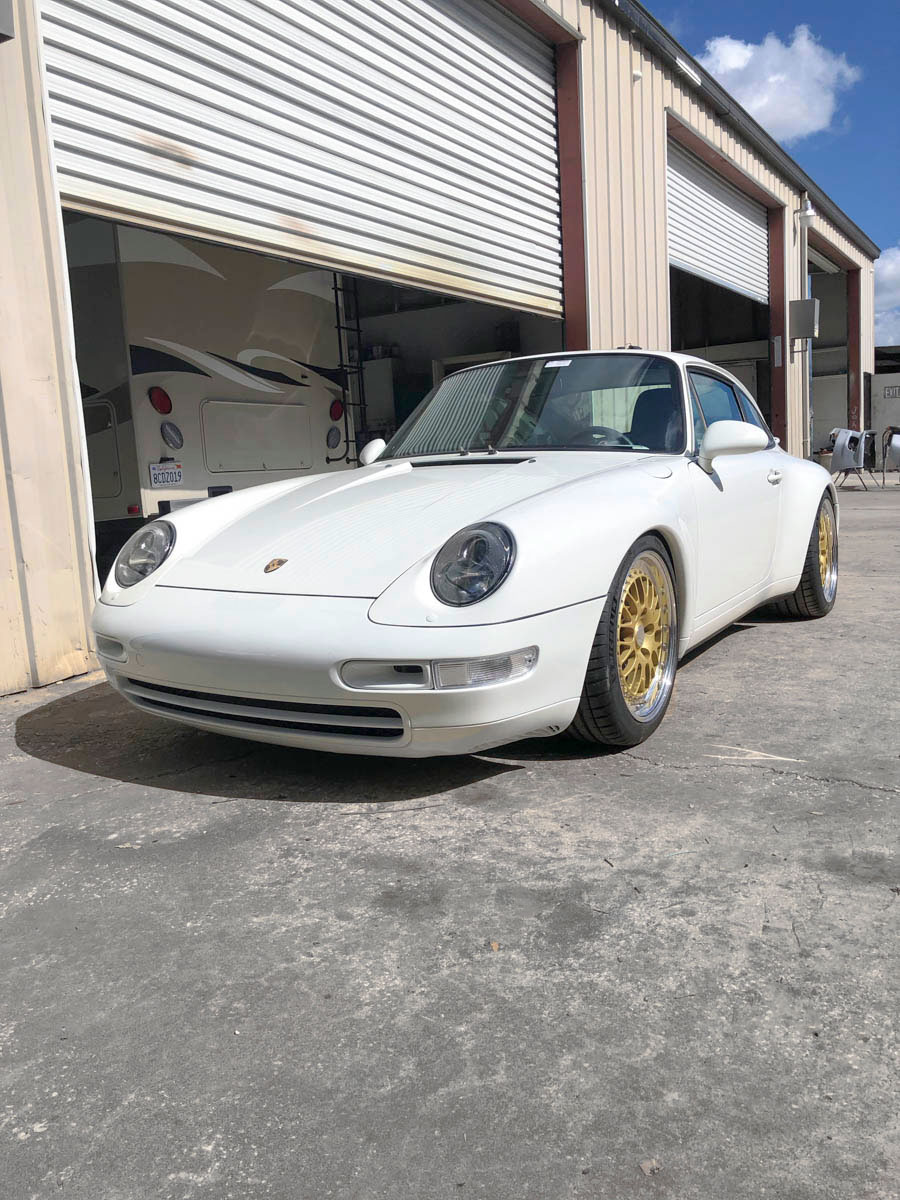
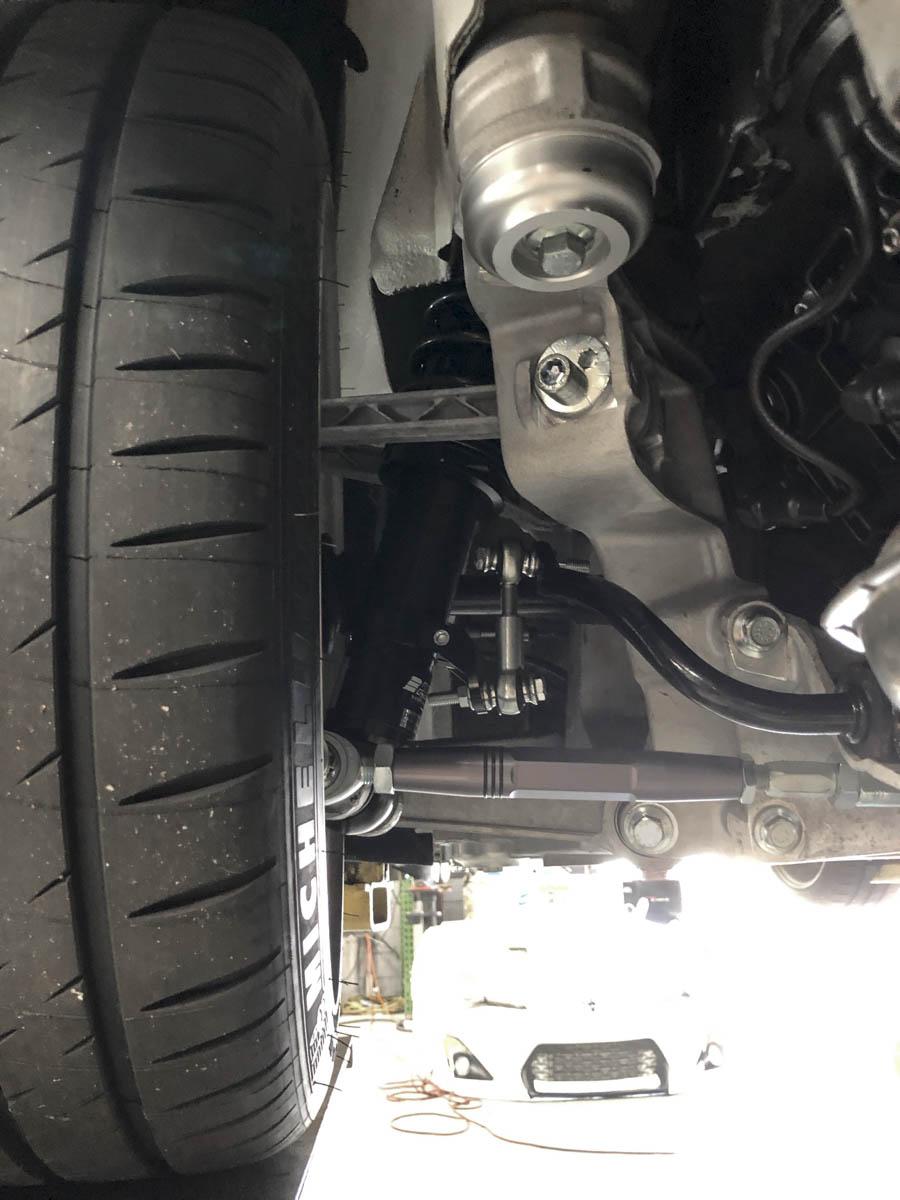
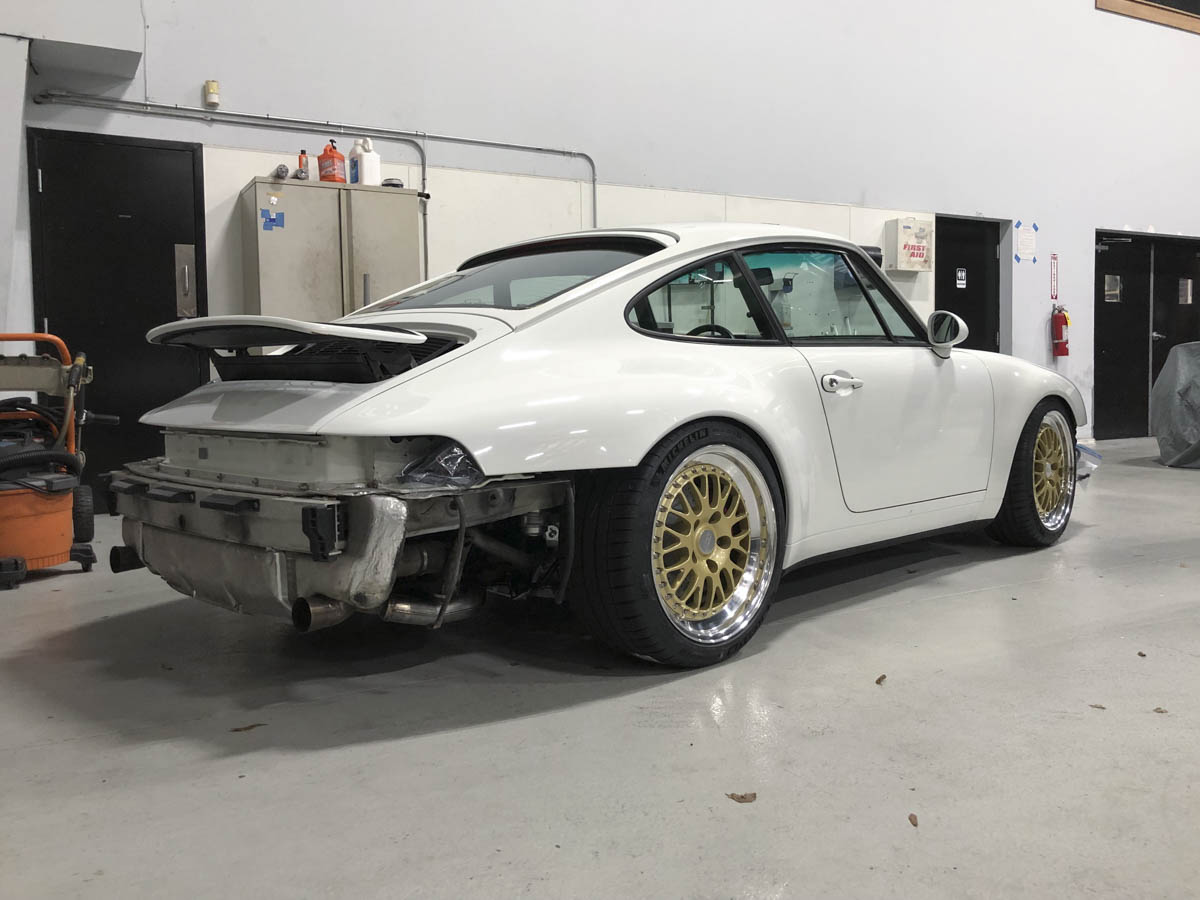
Buttoned up the rear suspension, really love how clean everything came out and pictures like this will be great proof how good everything looked once I start enjoying making it dirty again.
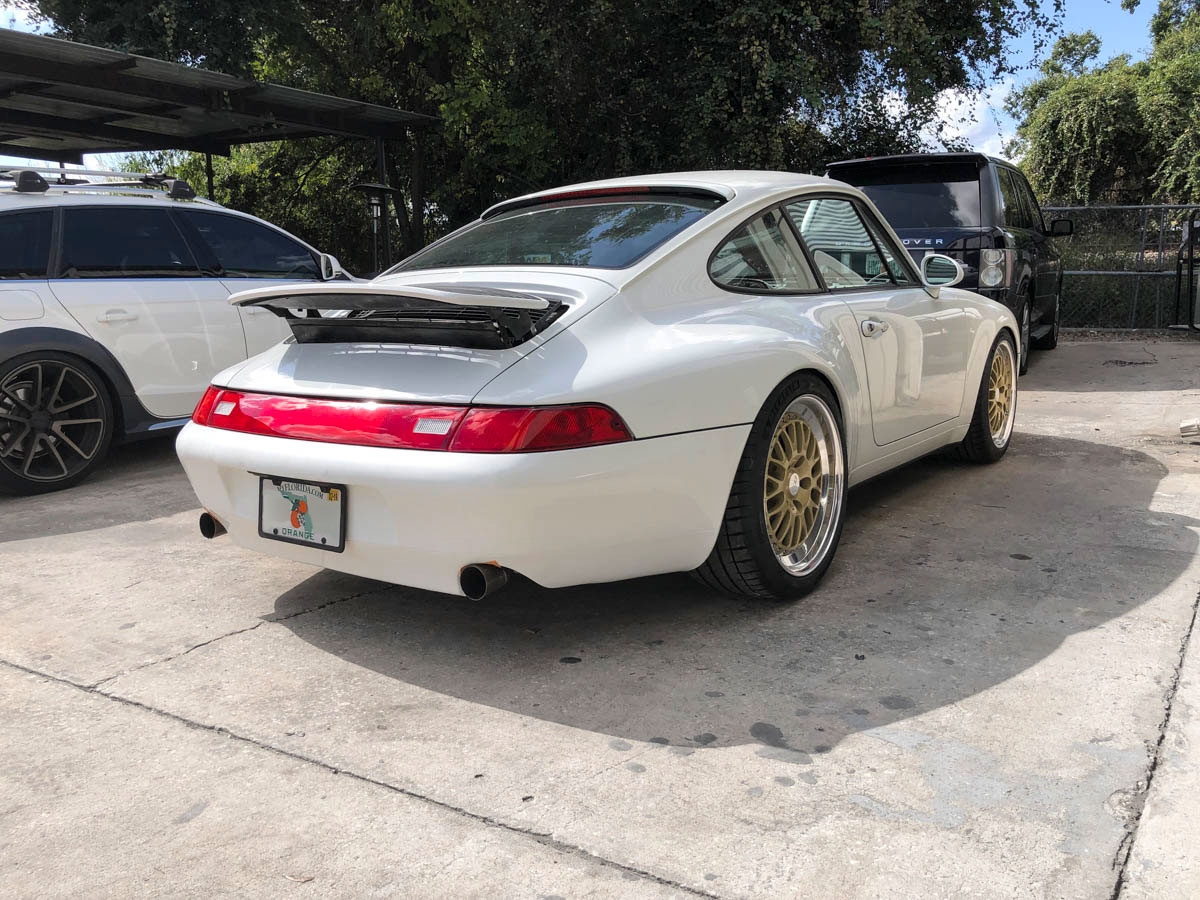
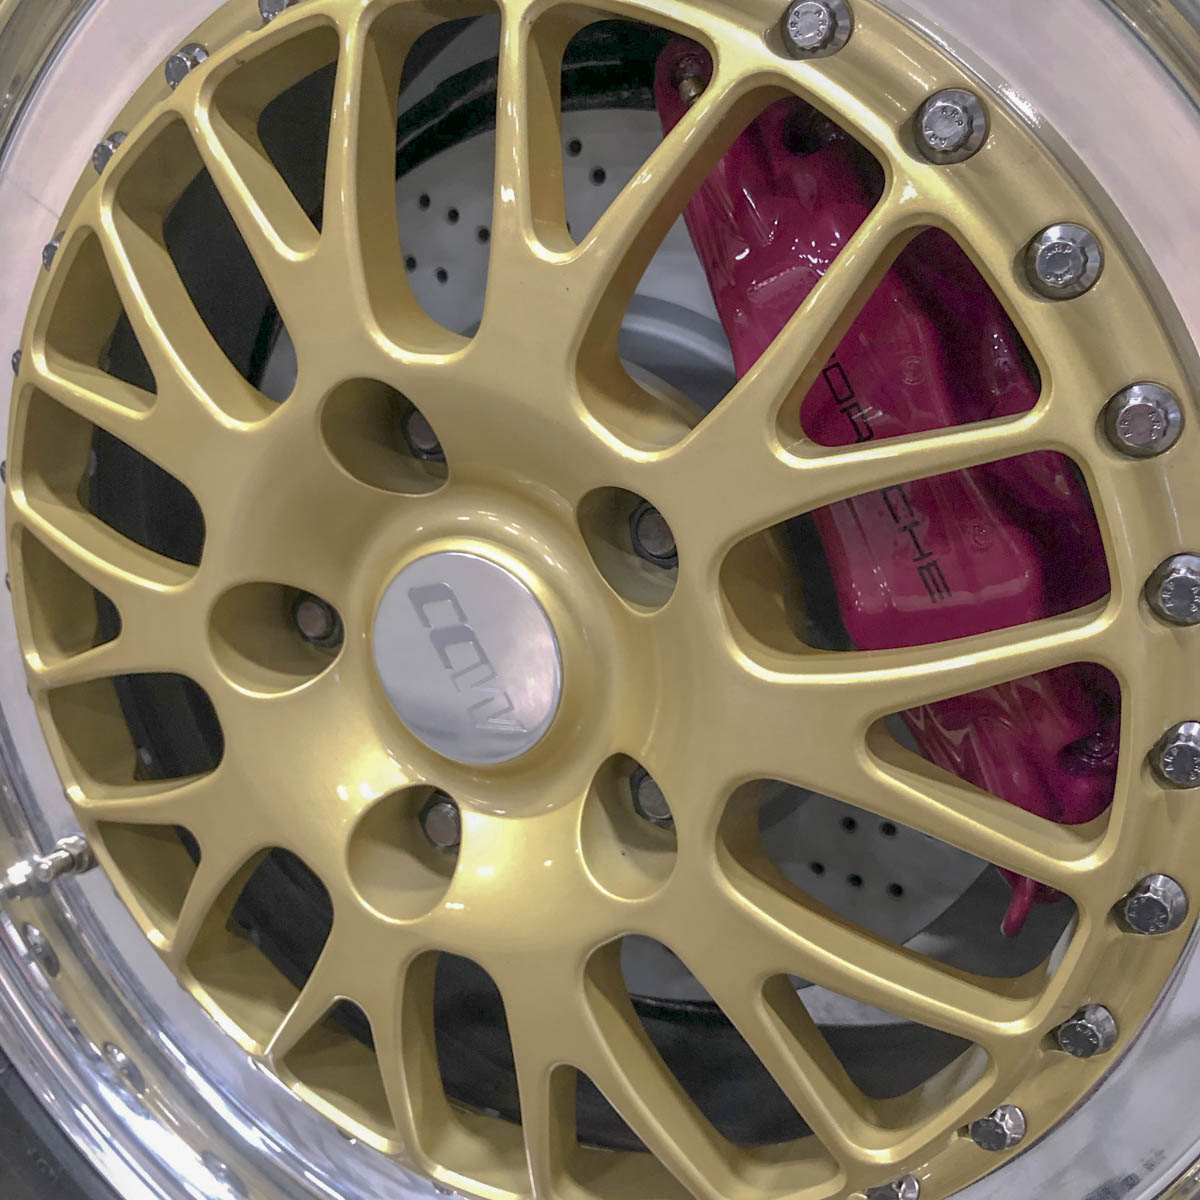
Bolted the freshly rebuilt wheels up and got to see the contrast with the Rubystone calipers. Won't be for everyone, but once the seats and cage go in I think the accent color will give it a subtle bit of uniqueness.
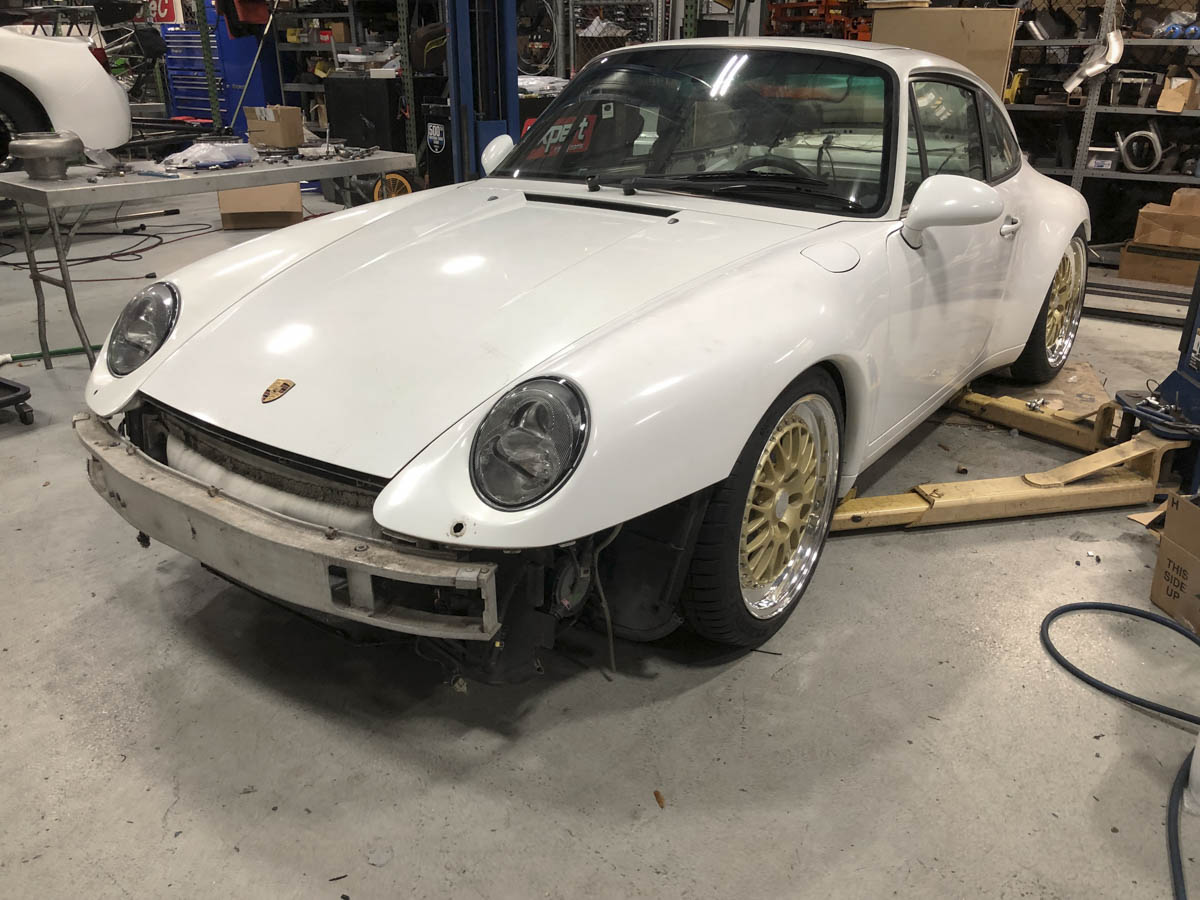
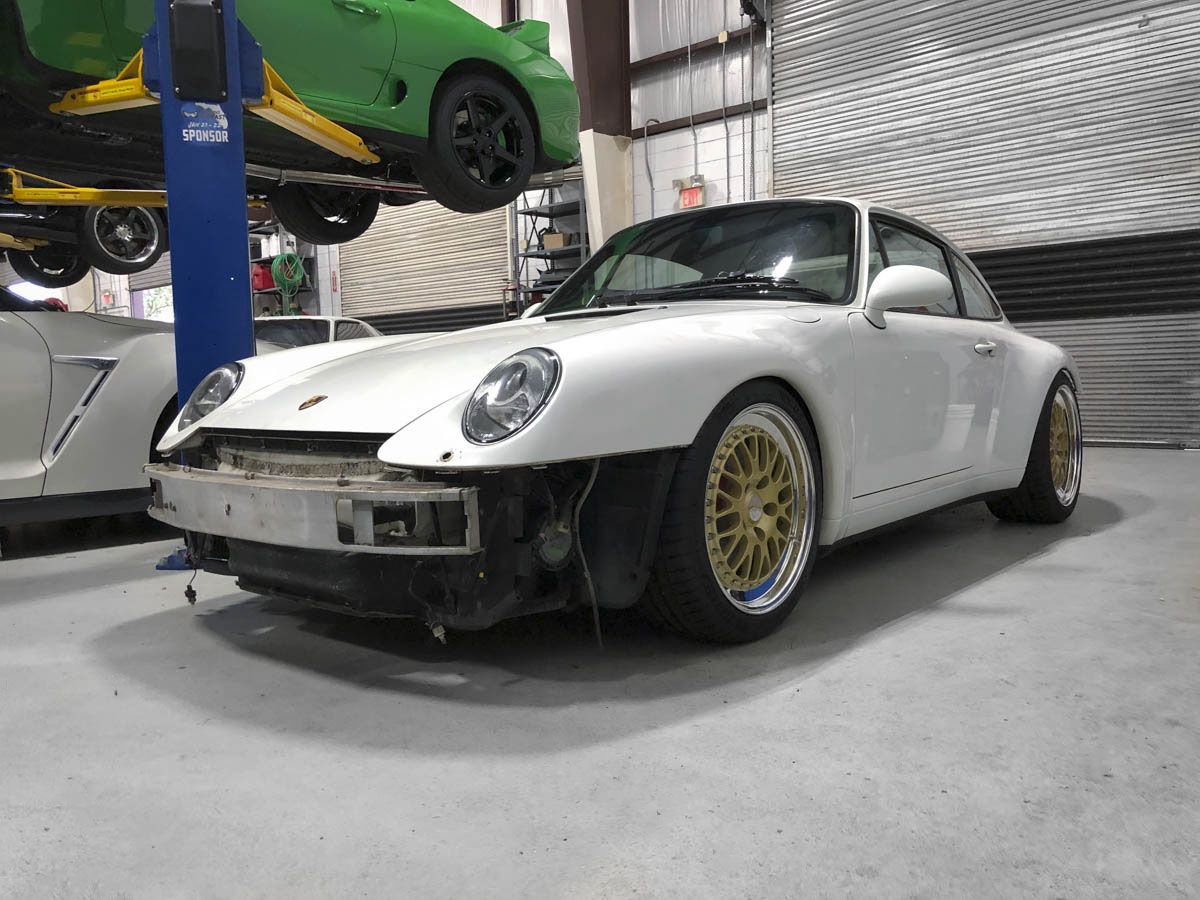
Rubber hits the ground, we wrapped up the suspension in just enough time, the tires literally hit the ground as our 2 race cars returned from Australia ready to be placed in my former lift space. Obviously the car is going to need quite the alignment after replacing everything, we lifted it back up and got things a little bit more square and then rolled it over to the other side of the shop.
In her new temporary spot, it was a really good feeling to see the car on the ground and rolling, with the initial stage of suspension and driveline primarily completed and home stretch of re-assembly beginning.
My detailer stopped by to work on another car and I prepped him for the fun job he was about to take on with the 993. He took a few minutes and began working on a test sections in the rear quarter panel, the results were nothing short of amazing. 20 years of hard road grime had yellowed and discolored the paint, it wasn't until this section was prepared and 2 step polished that the original white came through and showed through that the difference could be seen. This was another moment in the build that my eyes lit up knowing that the outside would end up looking much better than expected. The entire outside of the car will be 2 step polished and coated next week, along with a deep interior clean of the carpet while everything is out.
I'm glad I took the time to have it polished before delivering the car to the body shop to have the bumpers painted as the paint match and tinting would have been slightly off had I not.
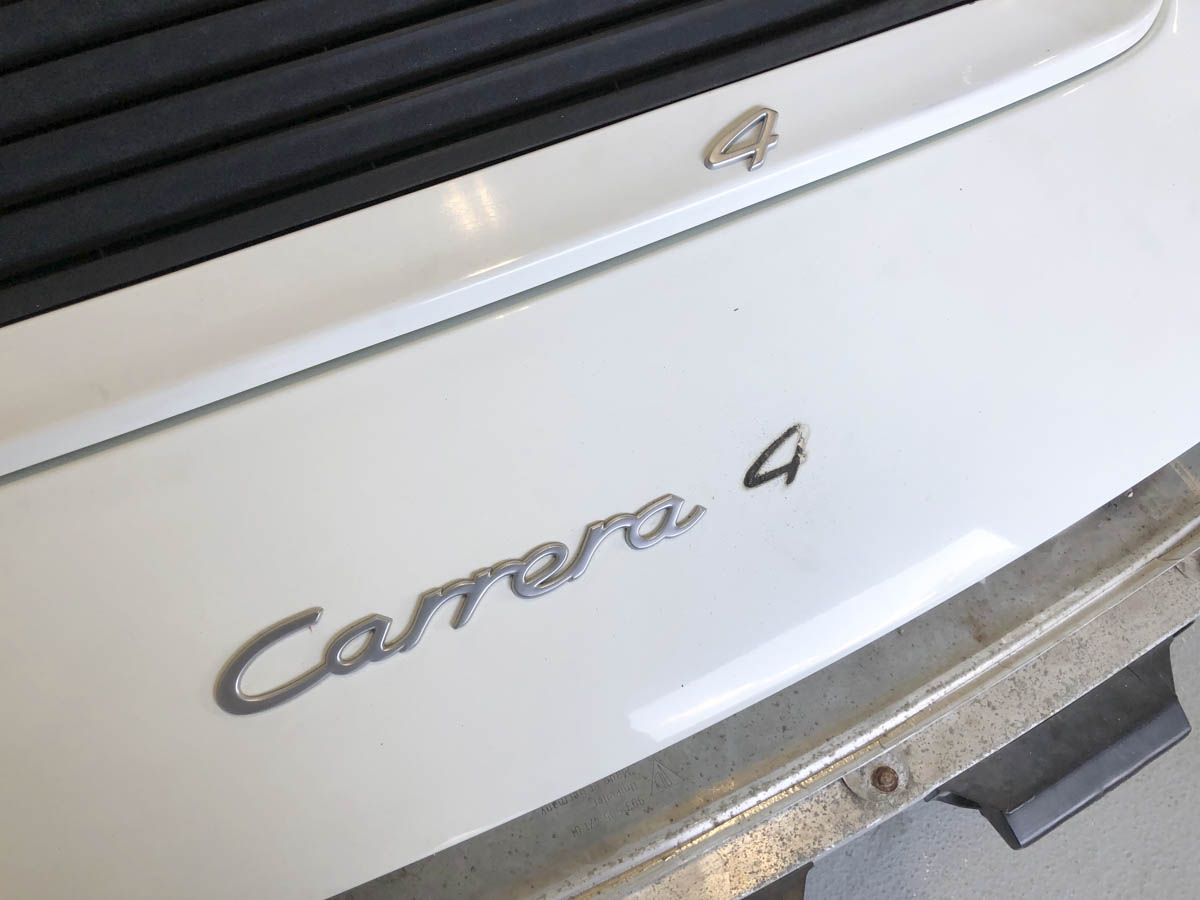
Removed the crusty badge from the rear to make it easier to polish, a fresh one is on the way but the the 4 will be going away for good.
Great progress! Looks amazing so far. The color difference between polished and un-polished is incredible. Makes me what to polish mine!
I couldn't believe it myself, this car is a 96 but surprisingly doesn't appear to have a clear coat which is probably what has led to the great results from compounding and polishing. The pictures really do not do it justice, anxiously awaiting the full polish on Tuesday and getting some freshly painted bumpers on it. Going forward going to make sure it's always got a nice seal on it to help protect it and it will likely spend much more time in the garage than it did while owned by the previous owner.
I couldn't believe it myself, this car is a 96 but surprisingly doesn't appear to have a clear coat which is probably what has led to the great results from compounding and polishing. The pictures really do not do it justice, anxiously awaiting the full polish on Tuesday and getting some freshly painted bumpers on it. Going forward going to make sure it's always got a nice seal on it to help protect it and it will likely spend much more time in the garage than it did while owned by the previous owner.
My land cruiser does the same thing. It's single stage white paint. I do a full detail on it every other year and the color changes just like your 96 does. It's amazing how dingy it gets in just 2 years. Your white looks amazing.
Great progress, and thank you for the inspiration.. I have been thinking about removing the Headlight Washers for some time, they ruin the lines for me.. I'll be getting a Full Respray soon, so will go with some bodywork/filler etc. rather than a plug..
And I love this shot..! 993 lowered looks absolutely perfect IMO..
Just returned from a short vacation and found some time to post last weeks progress. I had quite the busy week but fortunately most of the work I was planning was sub contracted out so the car still made some progress. My detailer came out as scheduled and polished the car, the results were in line and most of the cars discoloration is a thing of the past. This being a previous road warrior there were some imperfections we couldn't get out and a panel or two that may have previously been re-finished, however there was improvement across the board. Again I wanted to preserve the car rather than repaint the car both to help conserve costs, but also so that I could focus more on driving the car than continually trying to keep the paint perfect. Hopefully others who have a bit of OCD and have tried to maintain cars to perfection will understand my rationale. It took an entire day just for the polish coat, we'll be doing a more in depth "detail" and protection once the car gets back with the freshly painted body panels and the interior goes back in.
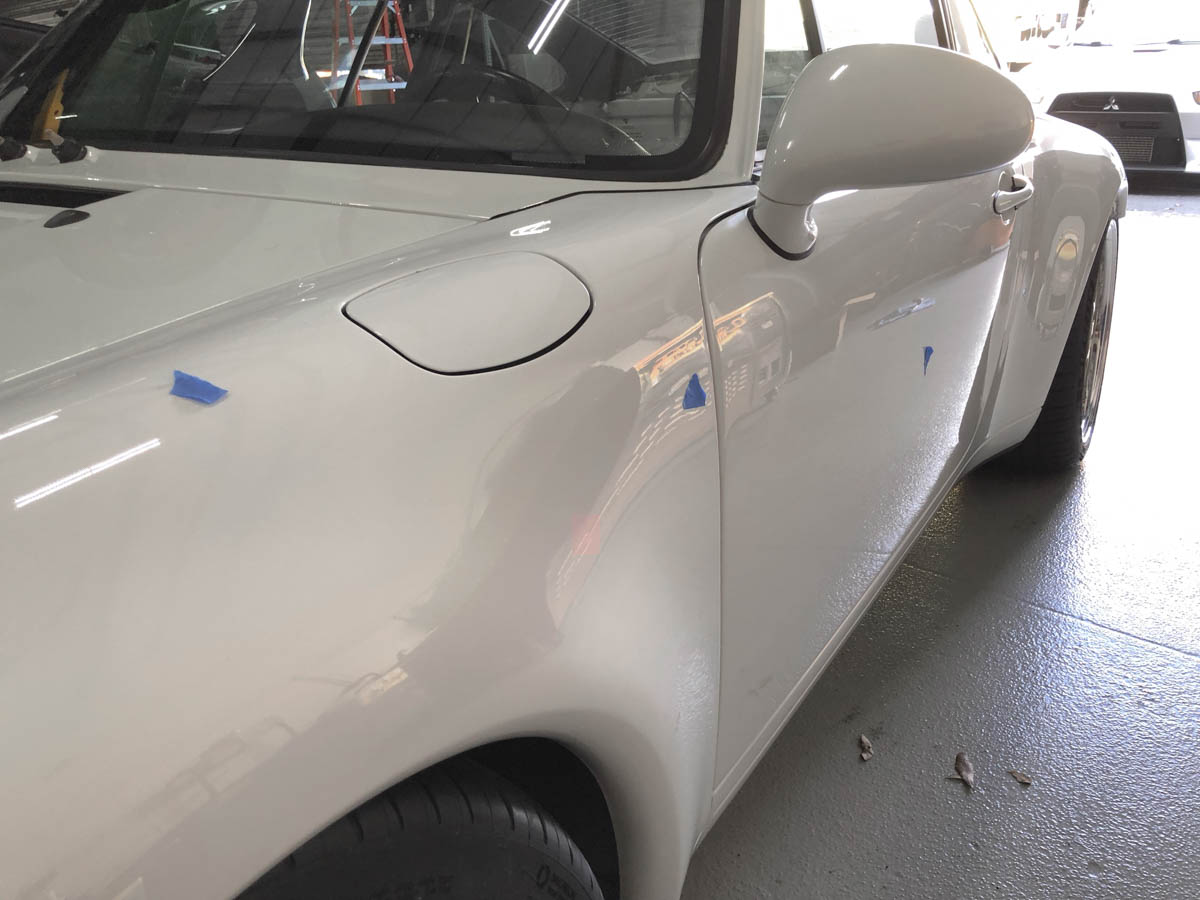
When he was complete I had my detailer go over the car and mark the dings and dents he found with a bit of blue tape. Small chips were also filled with a custom color matched paint pen that I ordered online.
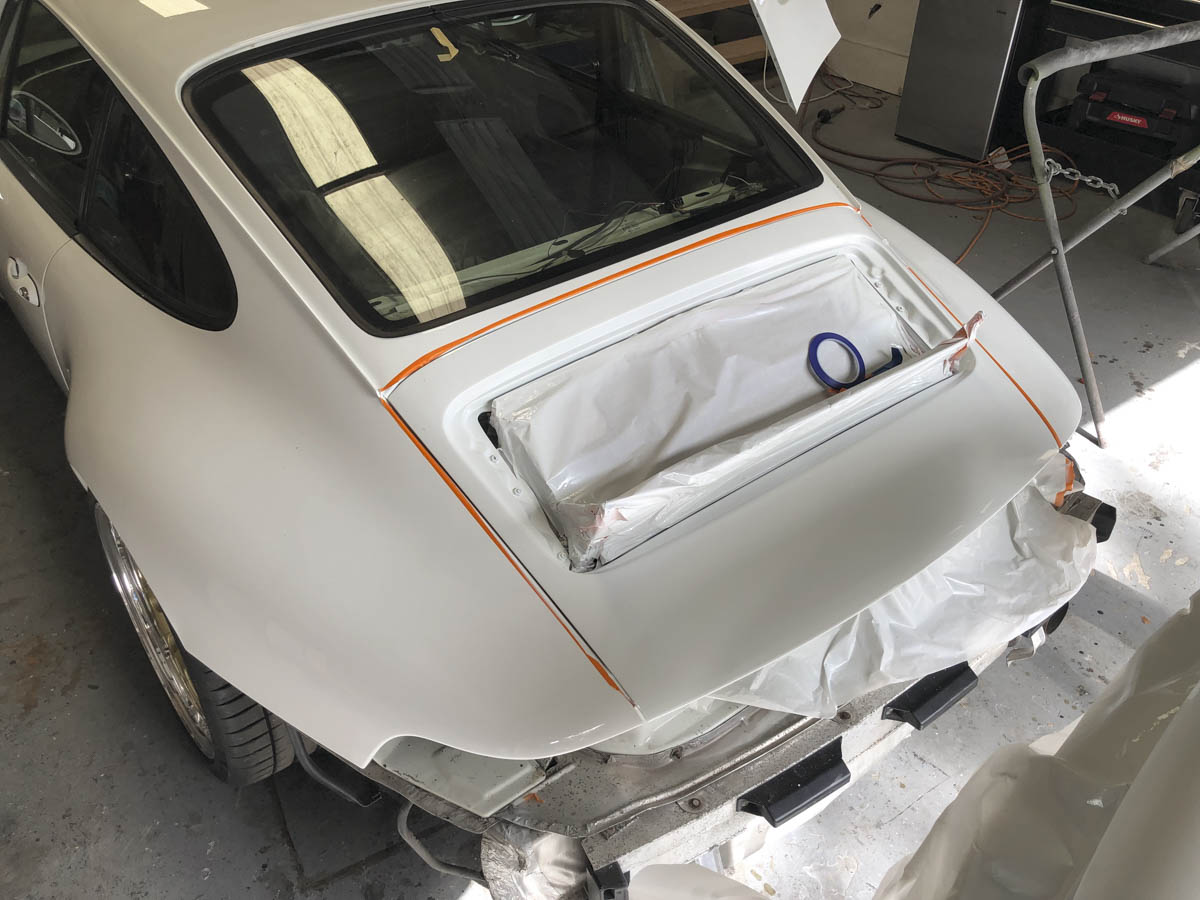
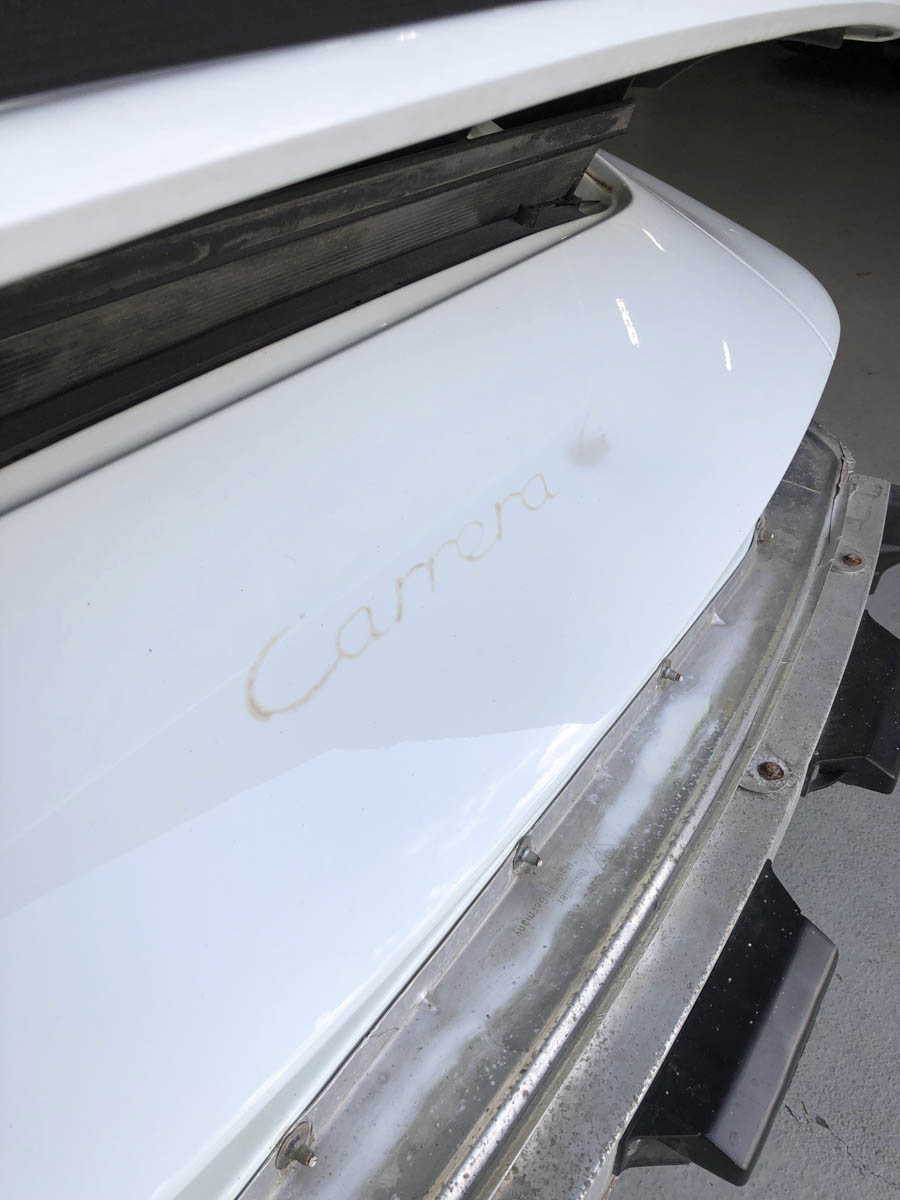
There were 2 areas of concern that I will need to have touched up when the car goes to the body shop, the engine cover/spoiler had too little paint to polish and significant paint flaws so this will need repainted. The OE rear emblem adhesive also had an odd reaction on the paint which dyed it yellow, if I was putting the factory emblem back on this wouldn't be a big deal, but I'm swapping to a Carrera emblem so we'll need to blend a bit of fresh paint over this portion.
The Dent Wizard attacked the door dings along each door as well as 1-2 smaller dings in the fender, he made quick work of them taking 1-2 hours to complete the job. It wasn't cheap project, however a worthy upgrade now that the freshly polished panels showed their battle scars significantly more.
Ready to head to the body shop, I have the front windshield being replaced and will have the rear pulled as well to install new interior and exterior seals. Any further small touch ups will take place as the bumpers are being painted and installed. I've also let my upholster know that the timeframe to get the few panels I've dropped off completed is rapidly approaching. In a perfect world he'll be able to wrap up the small pieces I dropped off while body work is completed..... but it never seems to work that way.
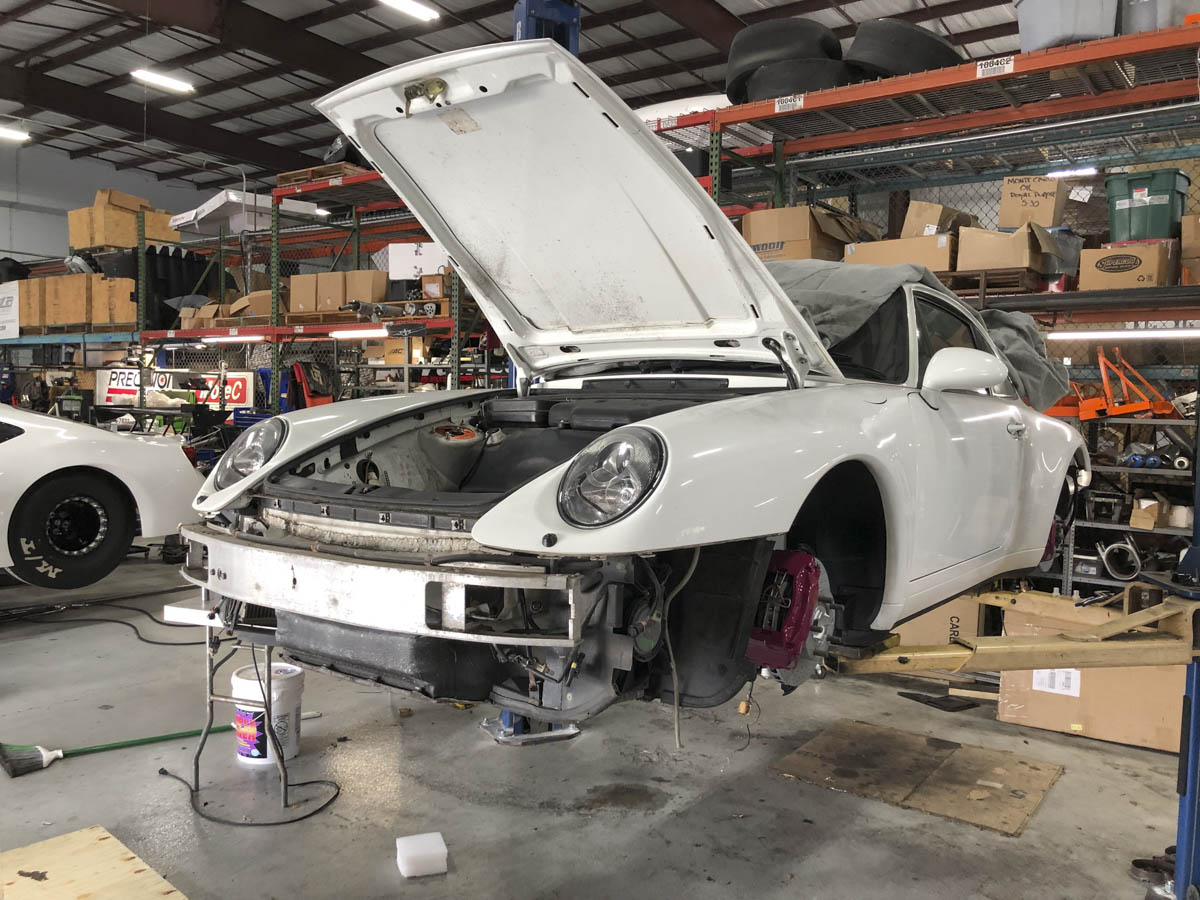
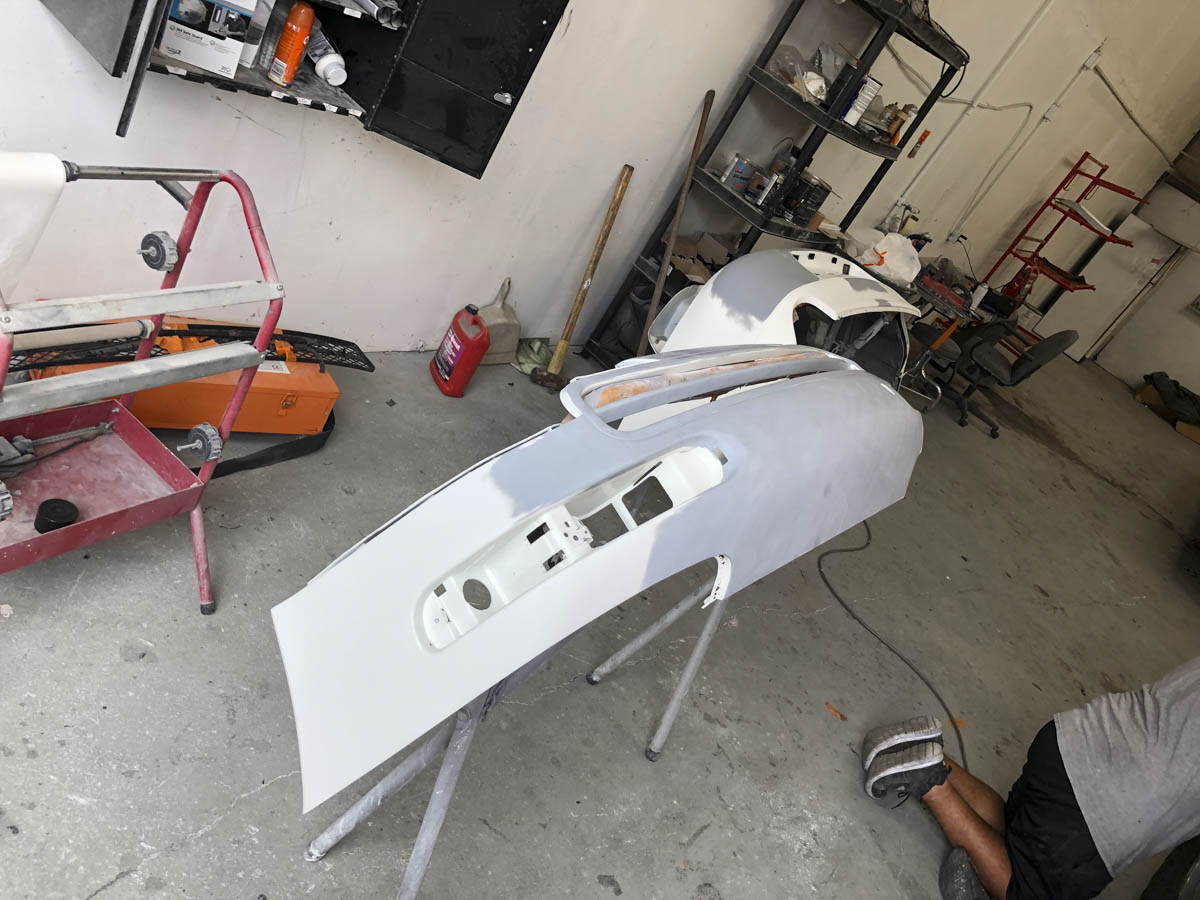
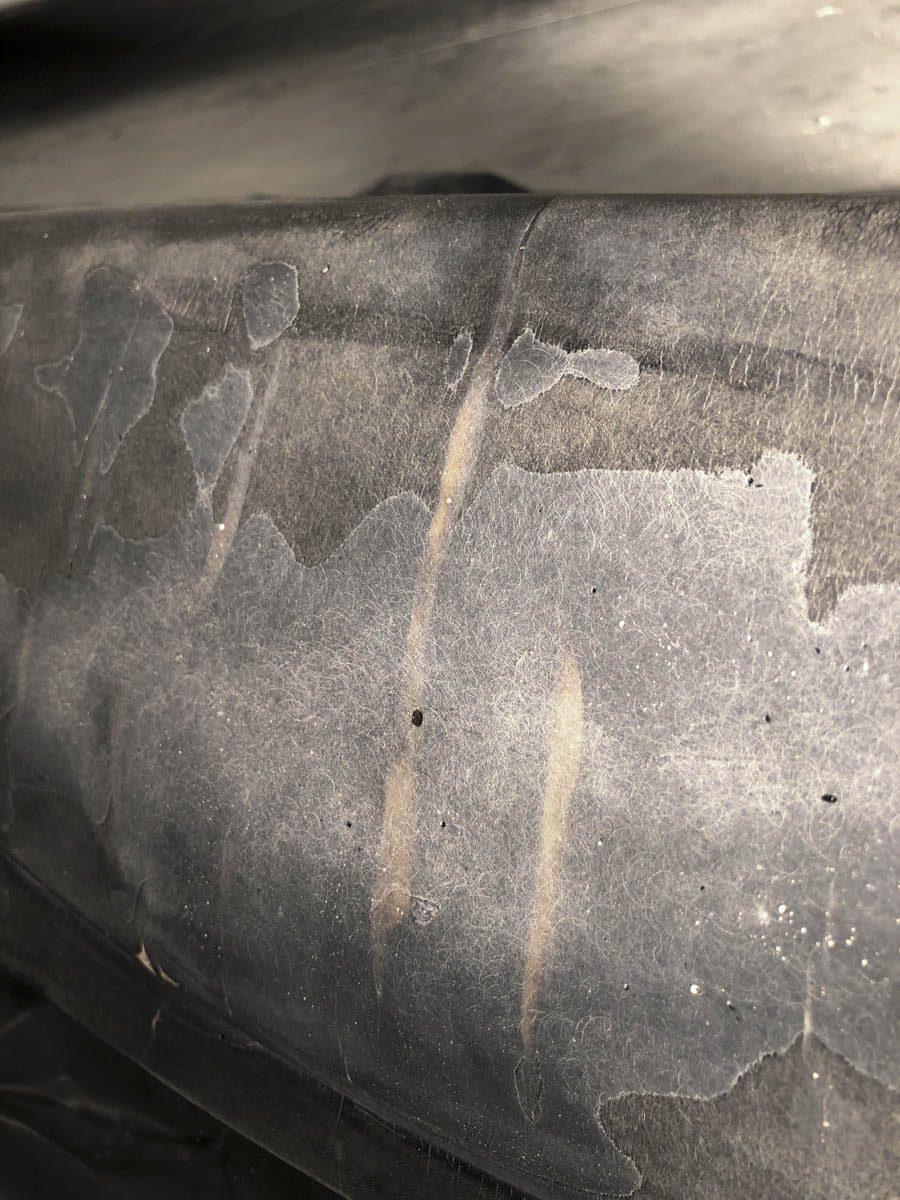
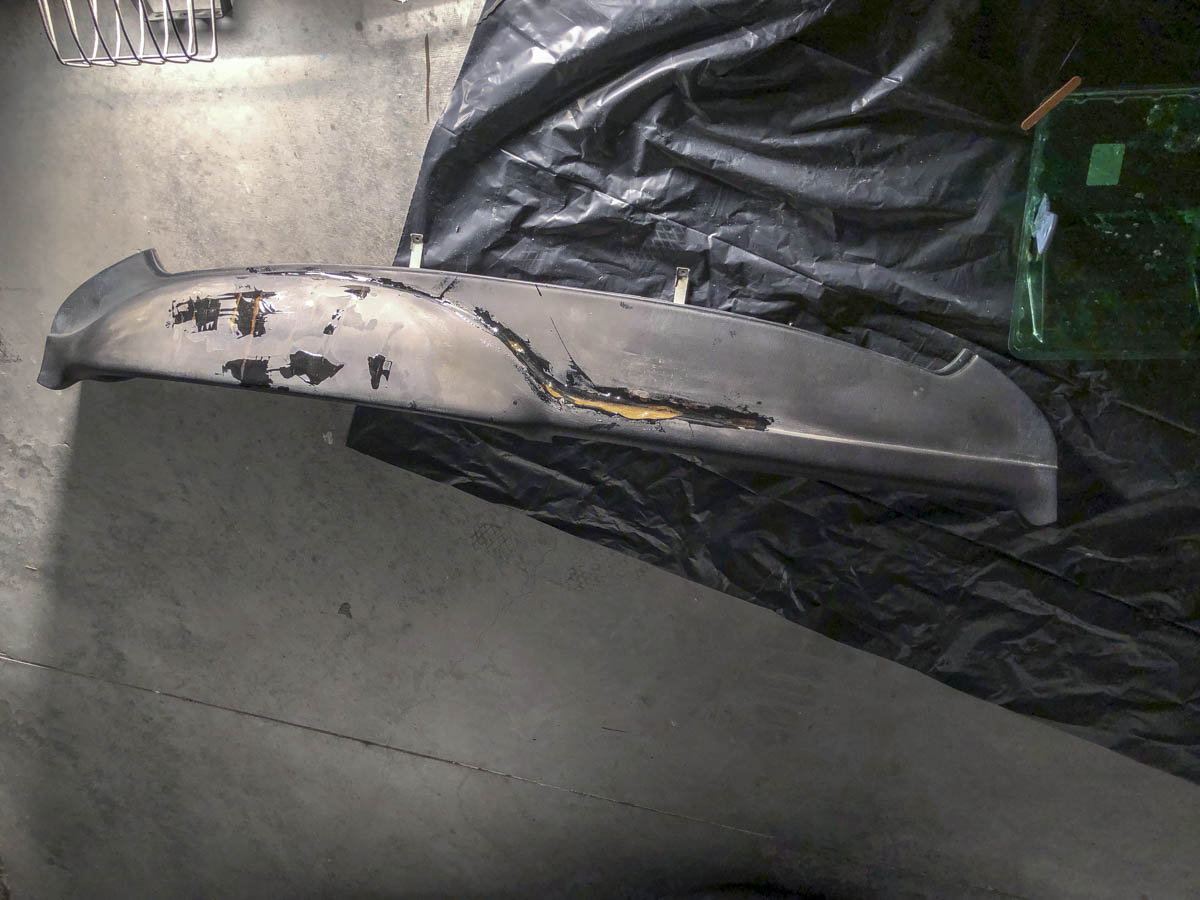
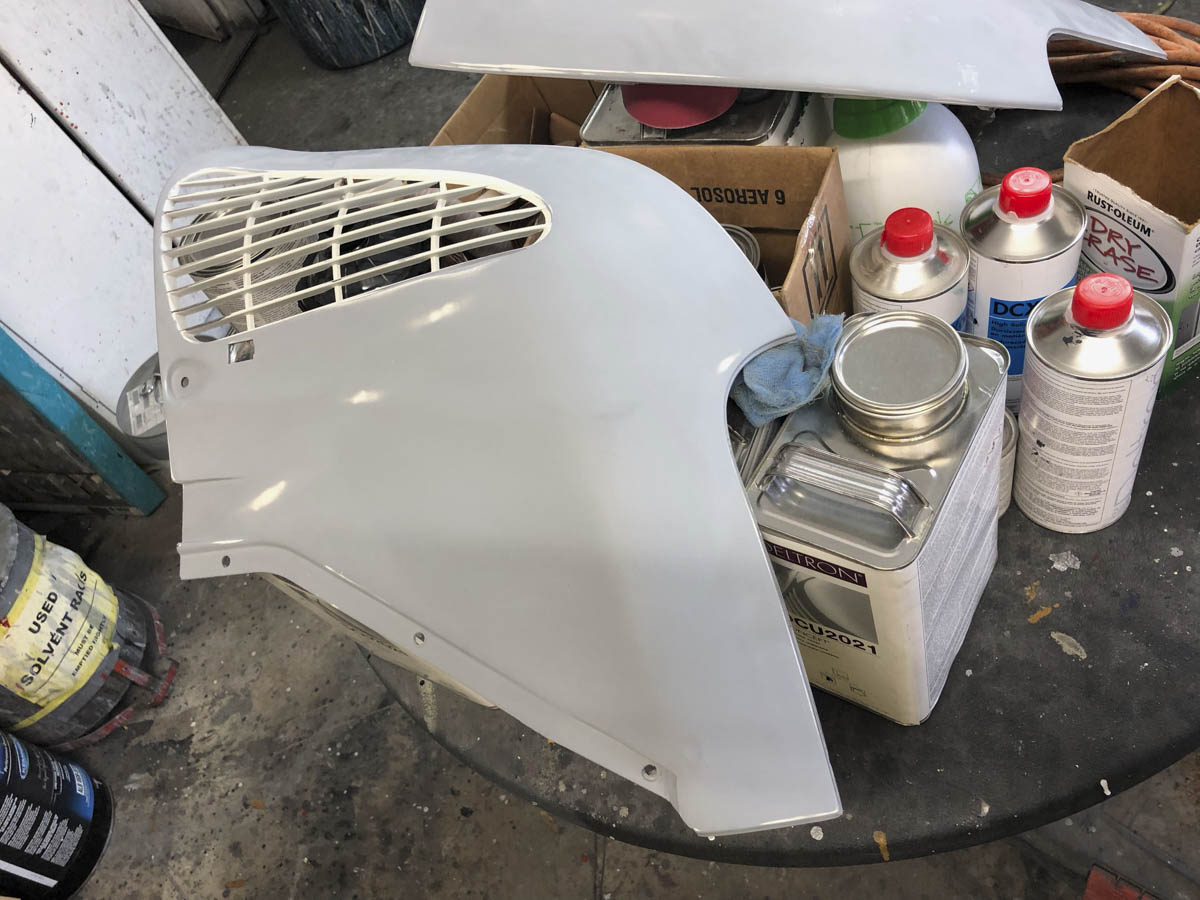
I had the car delivered to the body shop on a flatbed, I had previously dropped off the bumpers and a few pieces that needed painted to give them some lead time to prep the parts. Custom Empire is a great local shop in Orlando that we use quite a bit for paint and body work and have had tremendous results, I let them know my goals for the car, expectations and budget and we've come up with a decent game-plan to tackle it. I realized that while I am not striving for absolute perfection, my list of things to touch up had grown so the plan is to let the body shop handle some of the body re-assembly and I'll do some myself at their location until its ready for the interior. I had an extra set of front and rear bumpers and dropped both off and told them to take the best and prepare the necessary modifications including shaving the front and rear bumperettes.
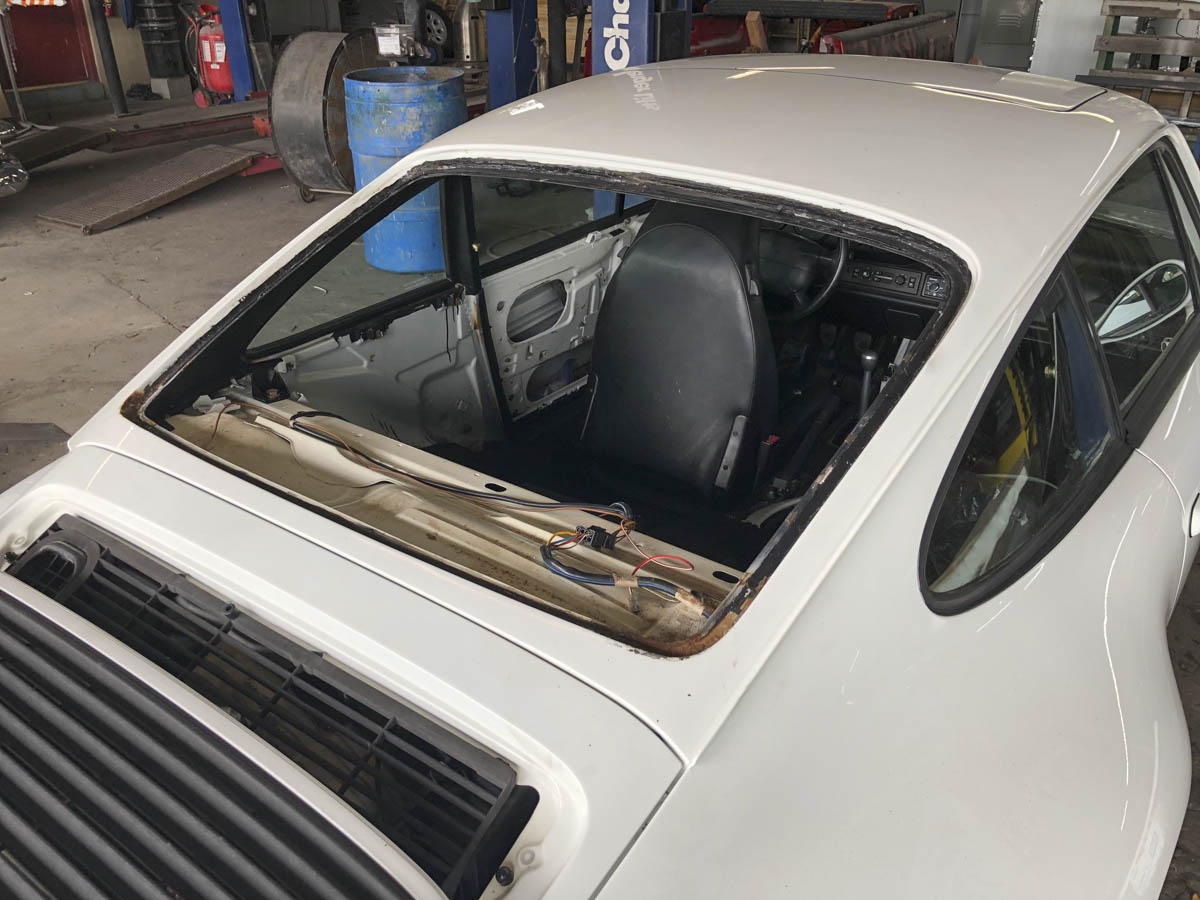
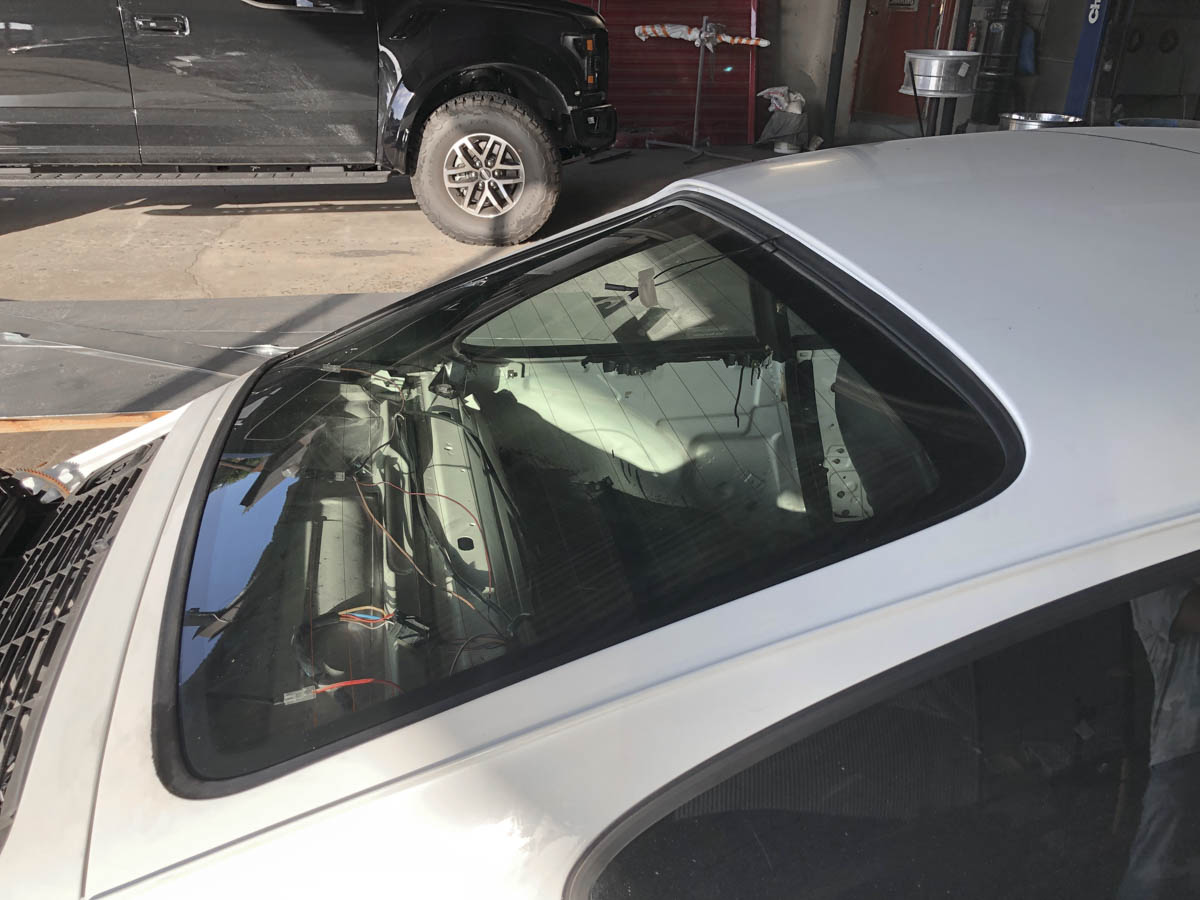
When I purchased the car the rear window seal was a mess in the corners, I had assumed it was rust related that is quite common in these areas but couldn't see for sure with all the poor attempt to re-attach the corners of the seals. I was in the process of having the windshield replaced and purchased new inner and outer rear seals for the rear so that the window could be pulled, any corrosion dealt with and then re-installed...... of course that didn't go as planned and the rear glass shattered upon removal. After taking al look at the glass and trim, it appears that the window had been replaced once before and the technician didn't do the best job, it then had the trim deteriorate and multiple rig jobs afterwards the window would be replaced correctly this time. The good news there was very little corrosion, just some minor surface rust from the repair attempts so we'll deal with this and then have the back glass re-installed.
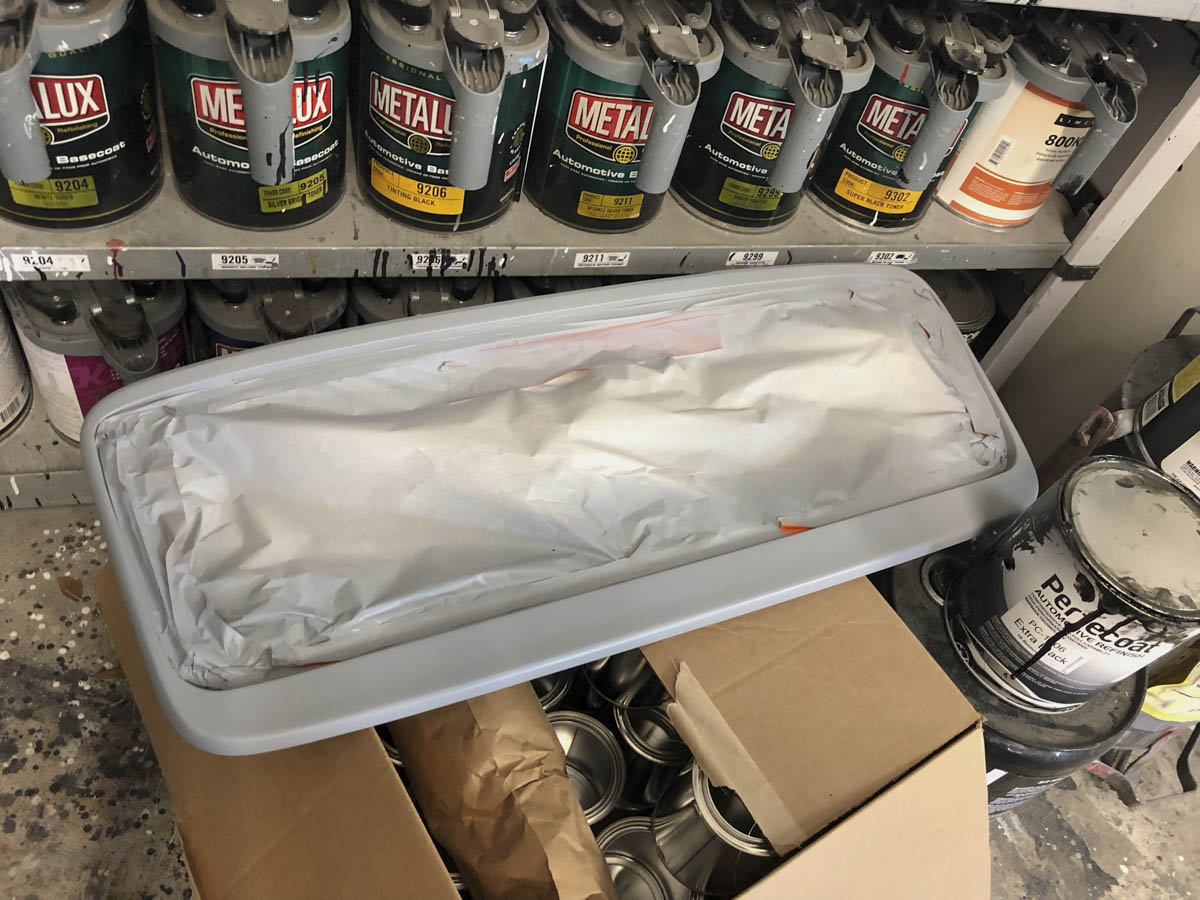
The rear deck lid wing paint was beyond saving so it will get re-sprayed as well. Since the emblem glue dis-colored the hatch, the whole panel will need blending so repainting this piece at the same time was not that big of a deal.
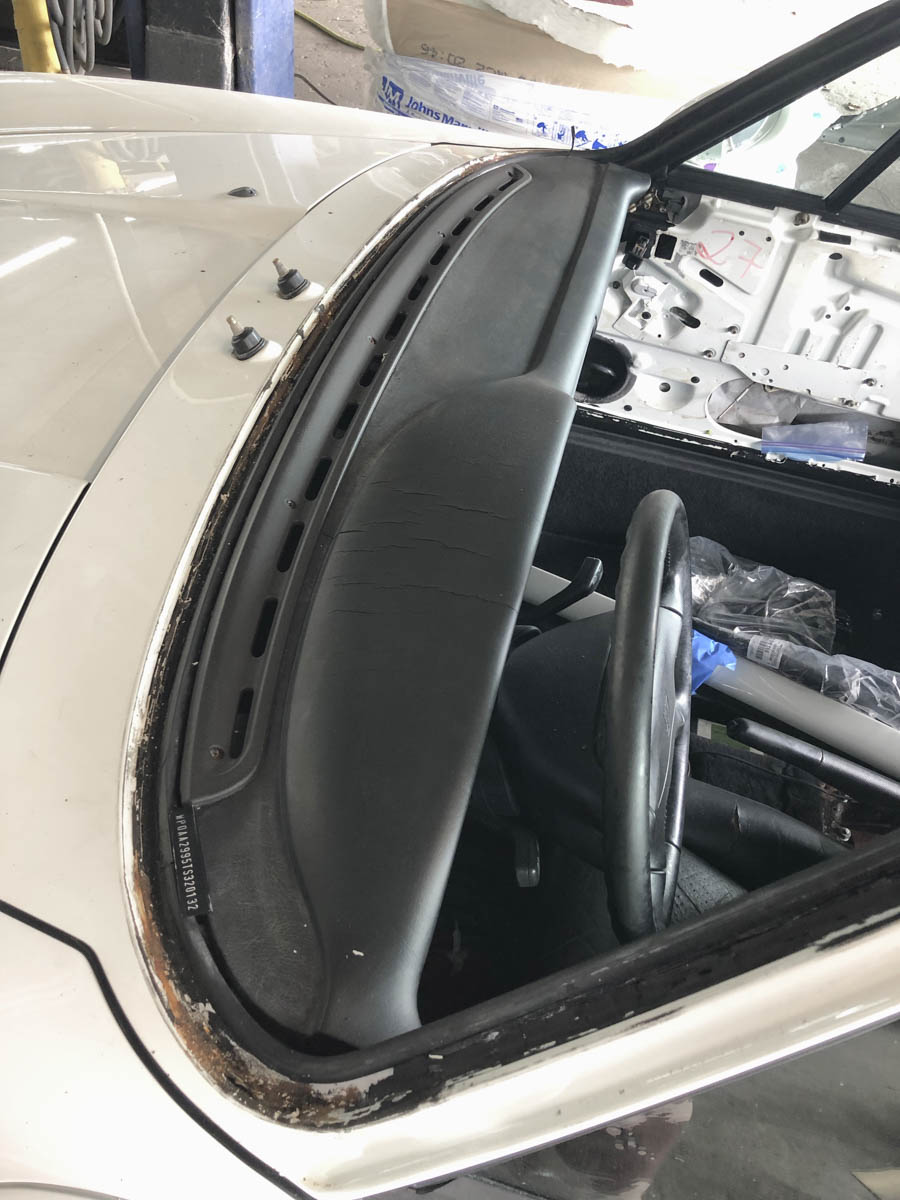
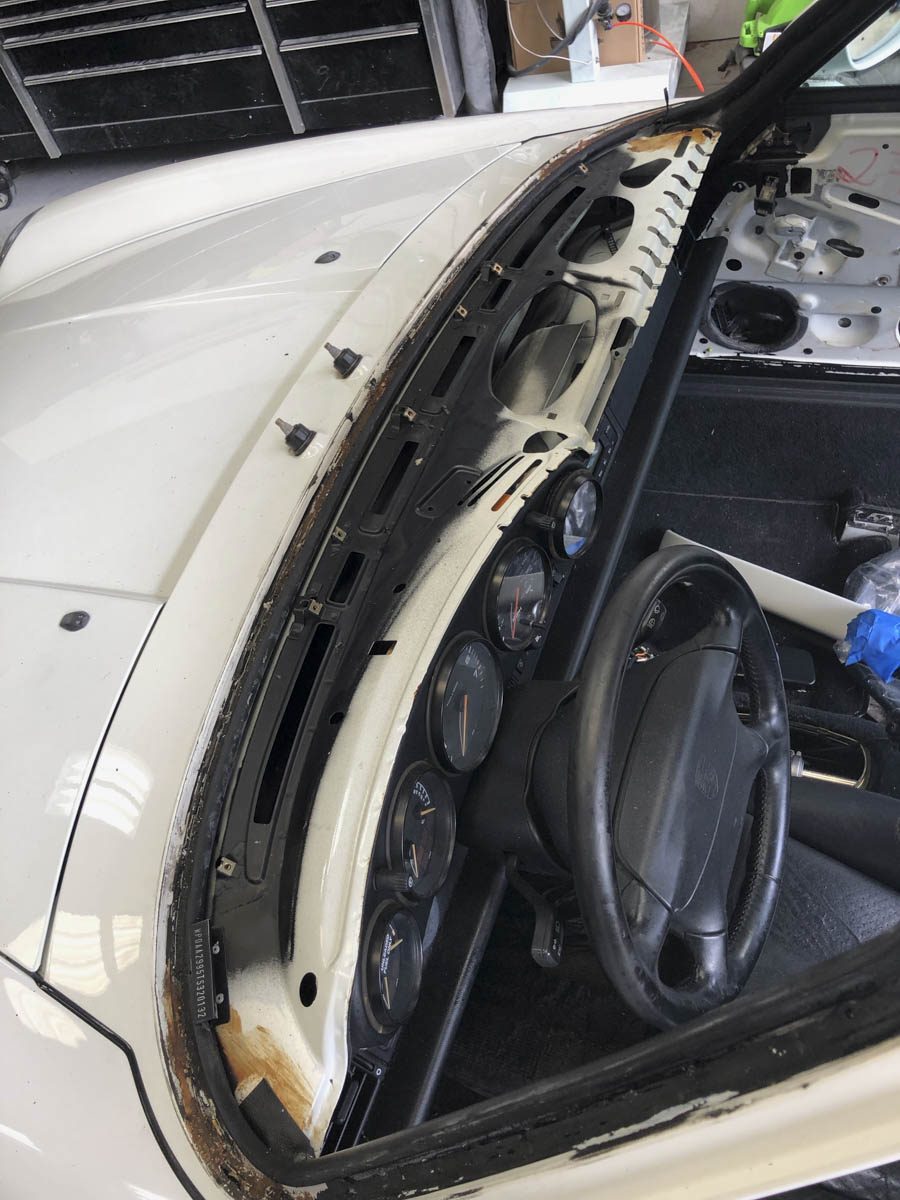
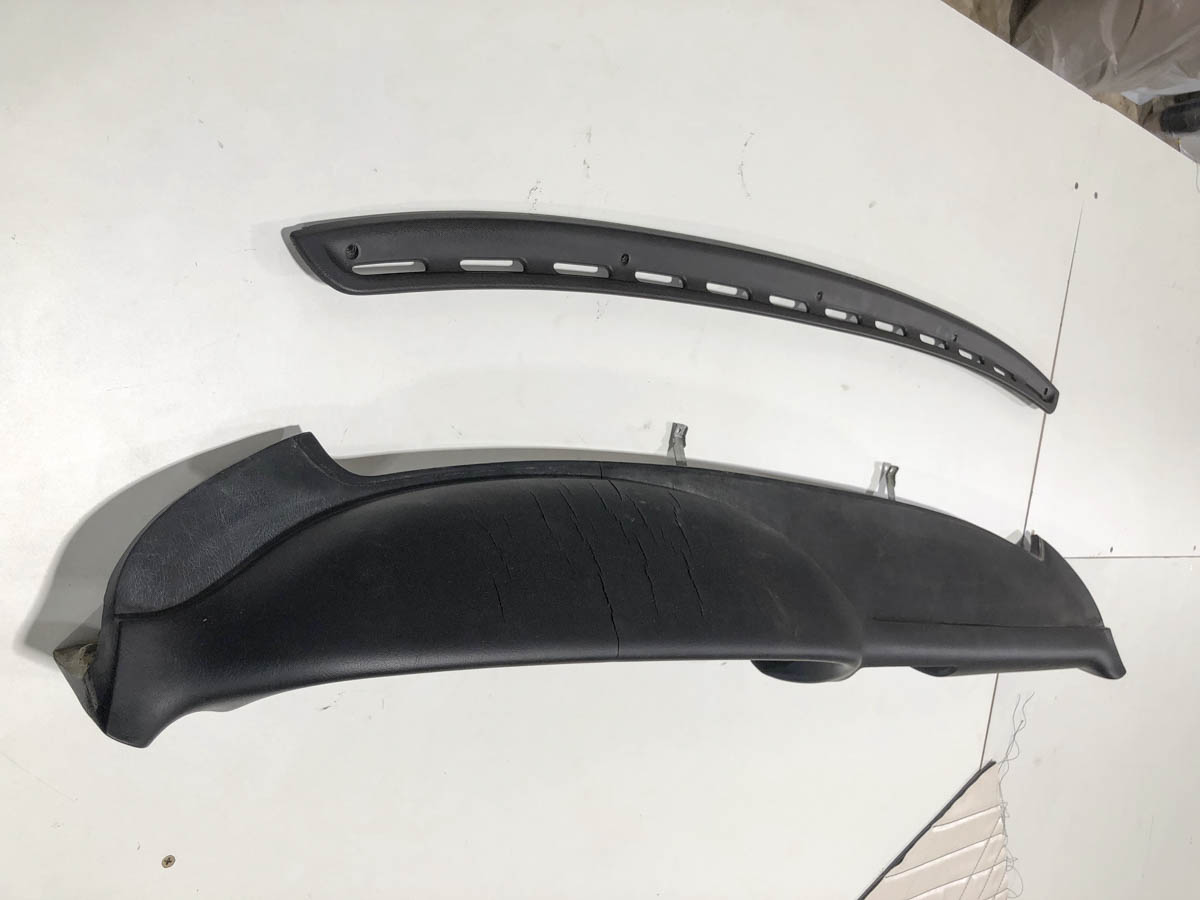
With the windshield out I kept staring at the cracked dashboard and realizing this was the time to address it. Unfortunately my upholster Fernando is one of the best in the business and schedules out quite far in advance....I made the SOS call and he said to bring it by for a look.
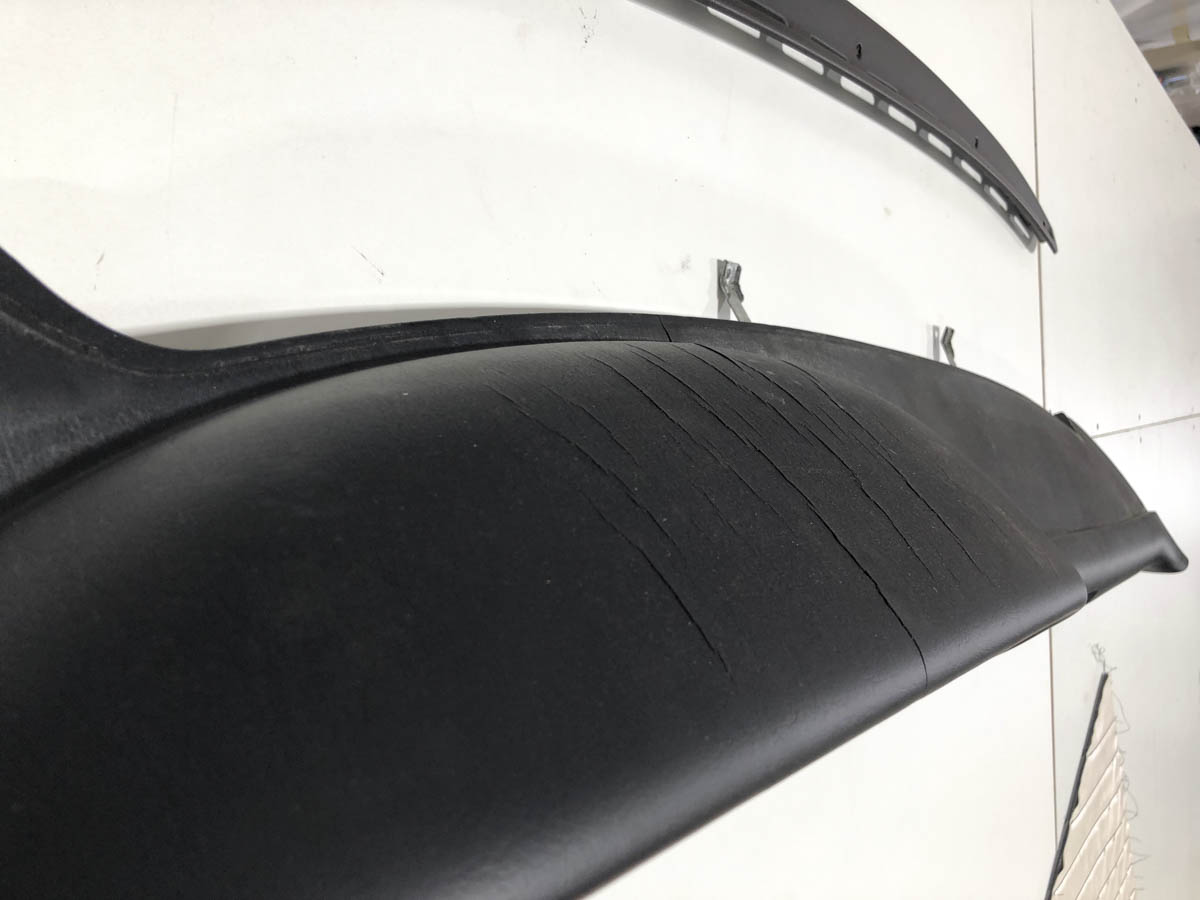
Giving the dash a closer look, Fernando said the cracks weren't too bad and primarily in the Vinyl surface. He didn't have a window in his schedule to do the whole job, however if I could address the cracks and fill them, he could handle recovering it in the next week so that the body shop and glass guy wouldn't be held up waiting for the dash.
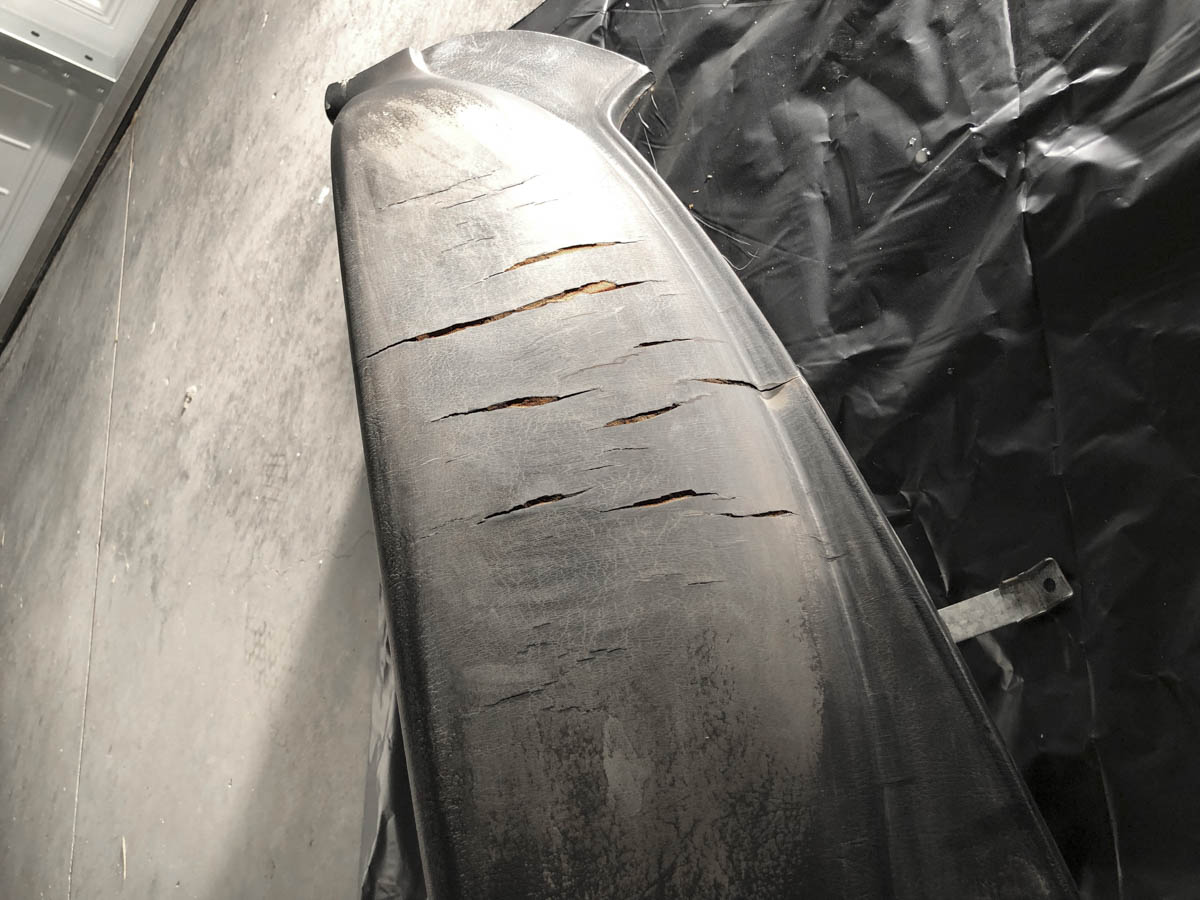
I did extensive research on how to handle the prep work and dealing with the cracks. The vinyl helps keep the foam in place, removing it would cause the whole dash itself to be quite brittle. The plan is to address the cracks using 2 part plastic and vinyl epoxy, and sand the surface of the vinyl to help adhere to the new stitched leather cover that will go over it. I started by looking for areas the vinyl adhesion was failing and dug out those areas feathering them to give more surface area for the epoxy. 320 grit sandpaper gave the surface a slight texture without going through the vinyl, giving the epoxy a better bond.
After the epoxy had ended its initial cure I transitioned it back and forth between the sun and AC to help it outgas and make sure it would deal with the temperature and environmental changes. Then using a DA sander I began to remove the excess and get things down as flat and even as I could. The epoxy I used dried with a yellow tint which made things interesting as you sanded over the cracks and could see through the epoxy and back into the cracks. Once everything developed a nice haze I hit it with a 600 grit sand paper as more of a block sanding guide. A few low spots and pitting showed through, as well as one are where I hadn't removed enough of a failed vinyl section in the corner. I mixed up a second batch of epoxy and worked it into these small imperfections and will repeat the sanding process again. If all goes as well the dash will get altered between hot and cold temperatures one more day before being dropped off for the new cover. Its important to make sure the epoxy has plenty of time to outgas before being covered to prevent the leather from bubbling up and loosing adhession.
I'm hoping to have the paintwork completed by weeks end, the dashboard re-installed and the glass work completed so the the interior re-assembly can commence.
Had some extra time this weekend, unfortunately the car hit a holding pattern.
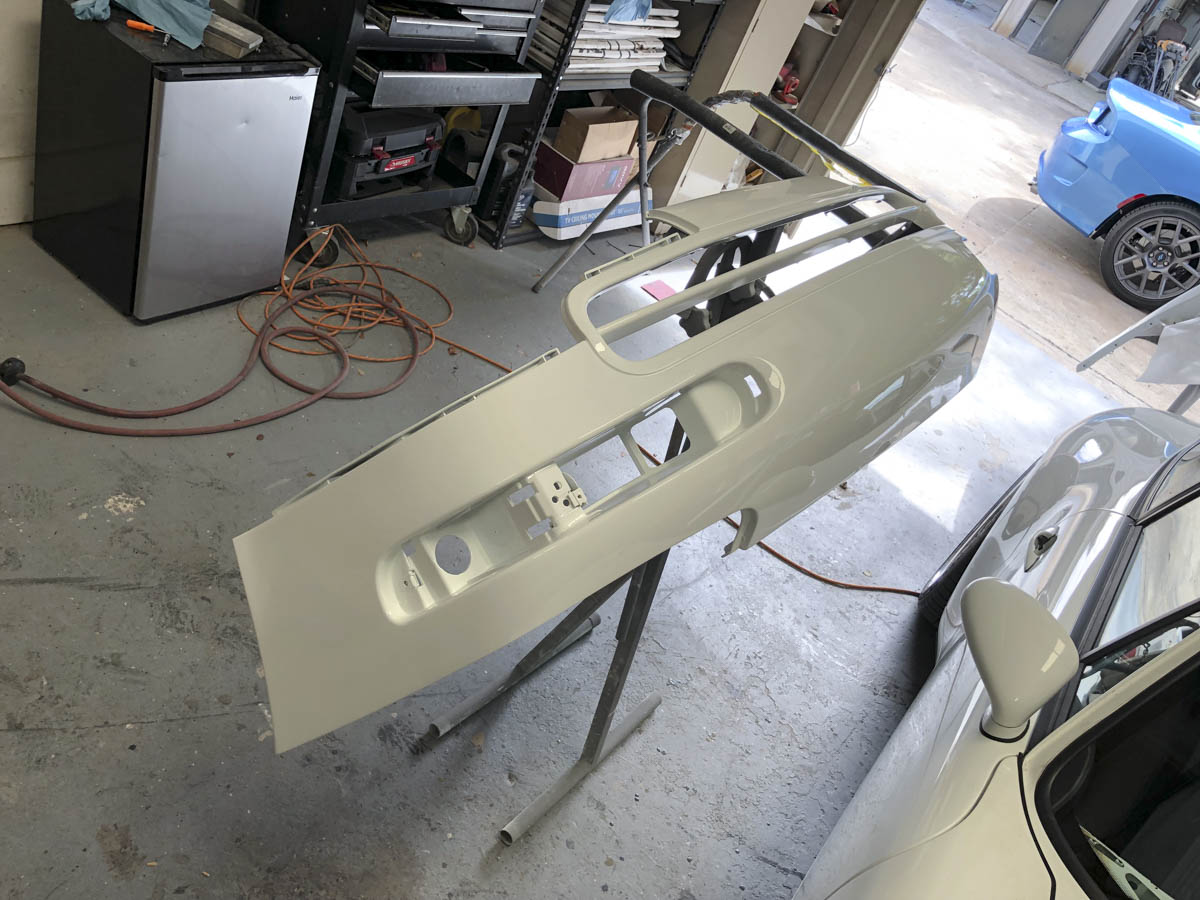
The body shop completed the panel repairs, everything is ready to go into the booth for primer and color.
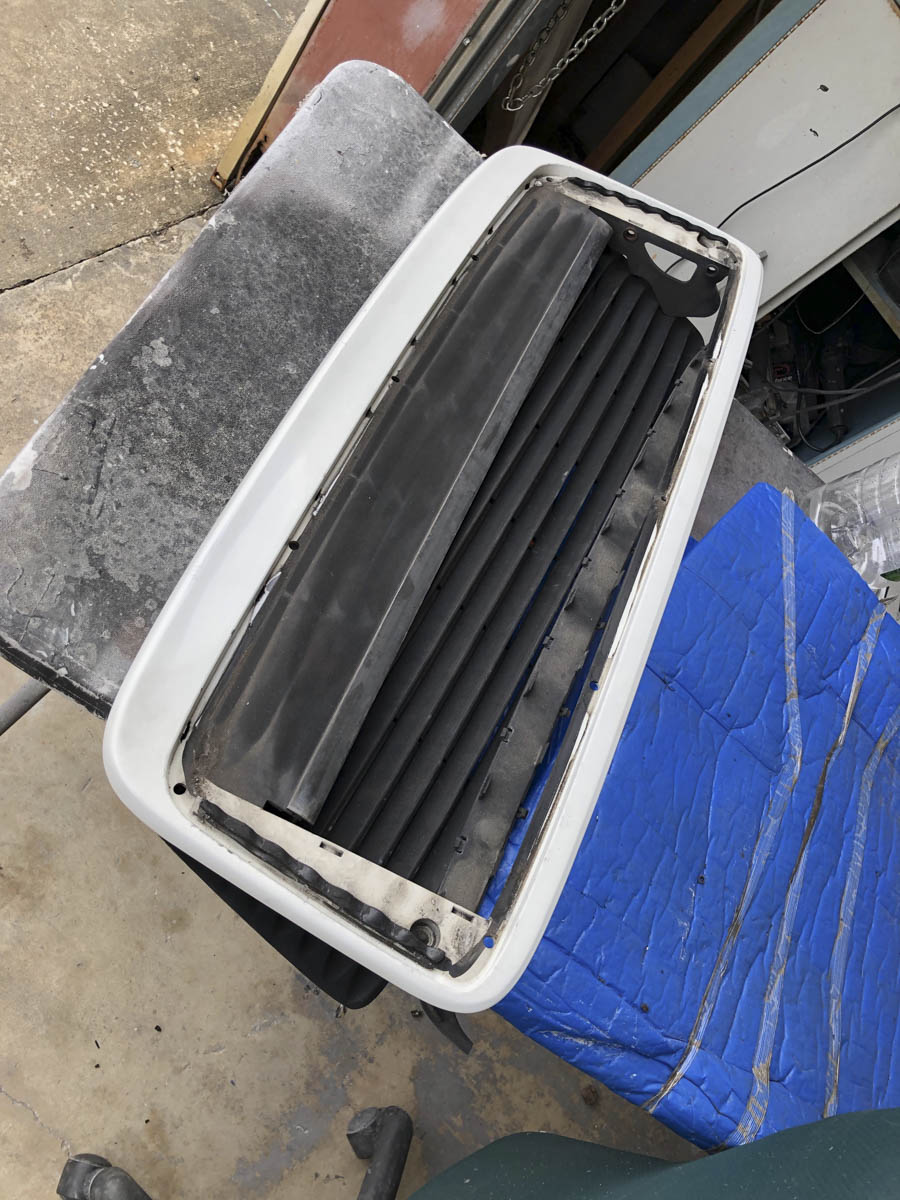
Cult Werk 993 Ducts - Fitment was very good right out of the box. I've always loved the way these looked on 964s so figured I'd give them a go on this car, if Its too much a new set of foglight will get ordered but so far I'm digging the little bit of extra they bring in.
The rear spoiler prepped and ready for color, this was in poor condition from the get go and showing its age with cracked paint that was well beyond polishing. Since the deck lid needed a bit of color from the emblem yellowing the paint, this will be an easy project to continue the color up and blend it out.
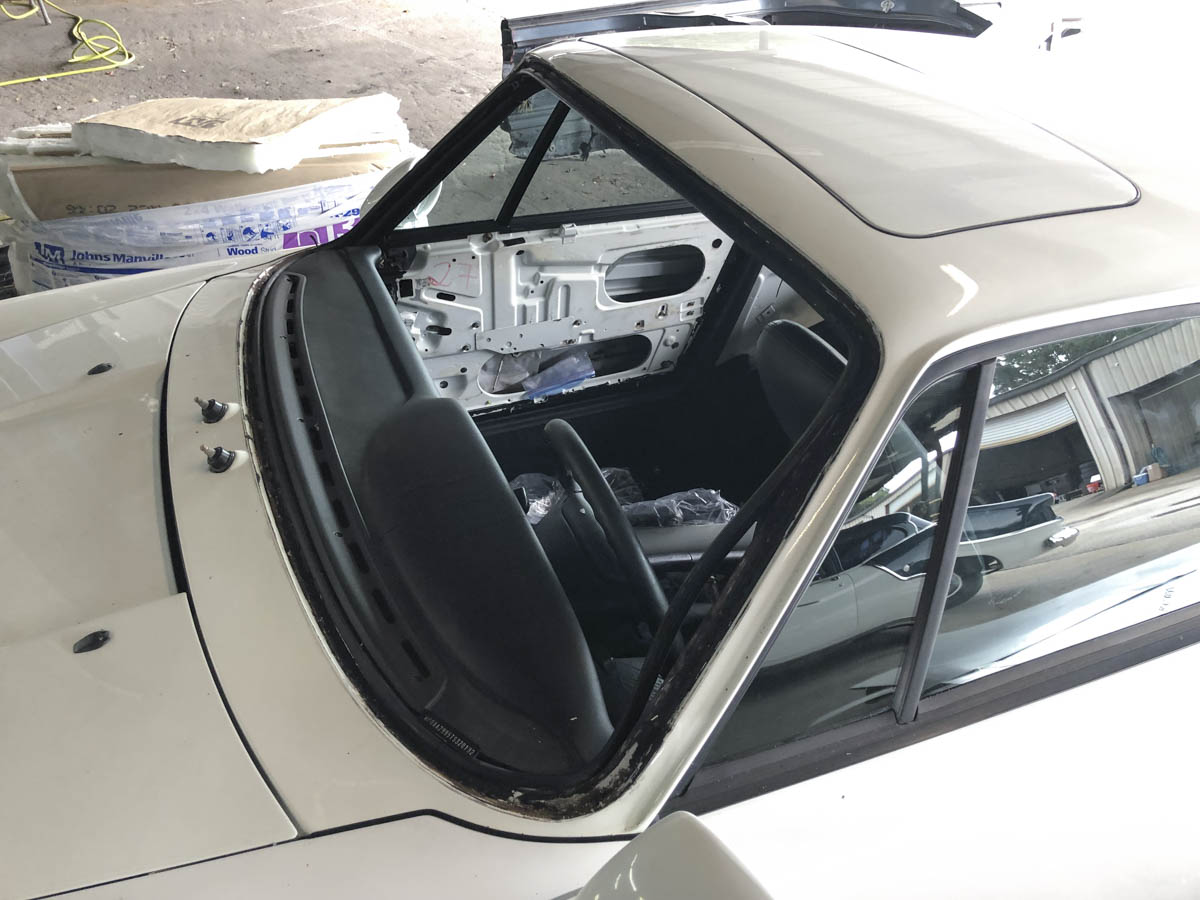
Front and Rear glass back in, I originally wanted to do this after the dash went back in, but my interior guy took a last minute vacation for a few weeks and I wanted to make sure the car stayed dry and I could bring it back to the shop to wait for the last of the interior bits.
The holding pattern with the car has allowed me to divert a bit of focus towards a side project I've been working on.....
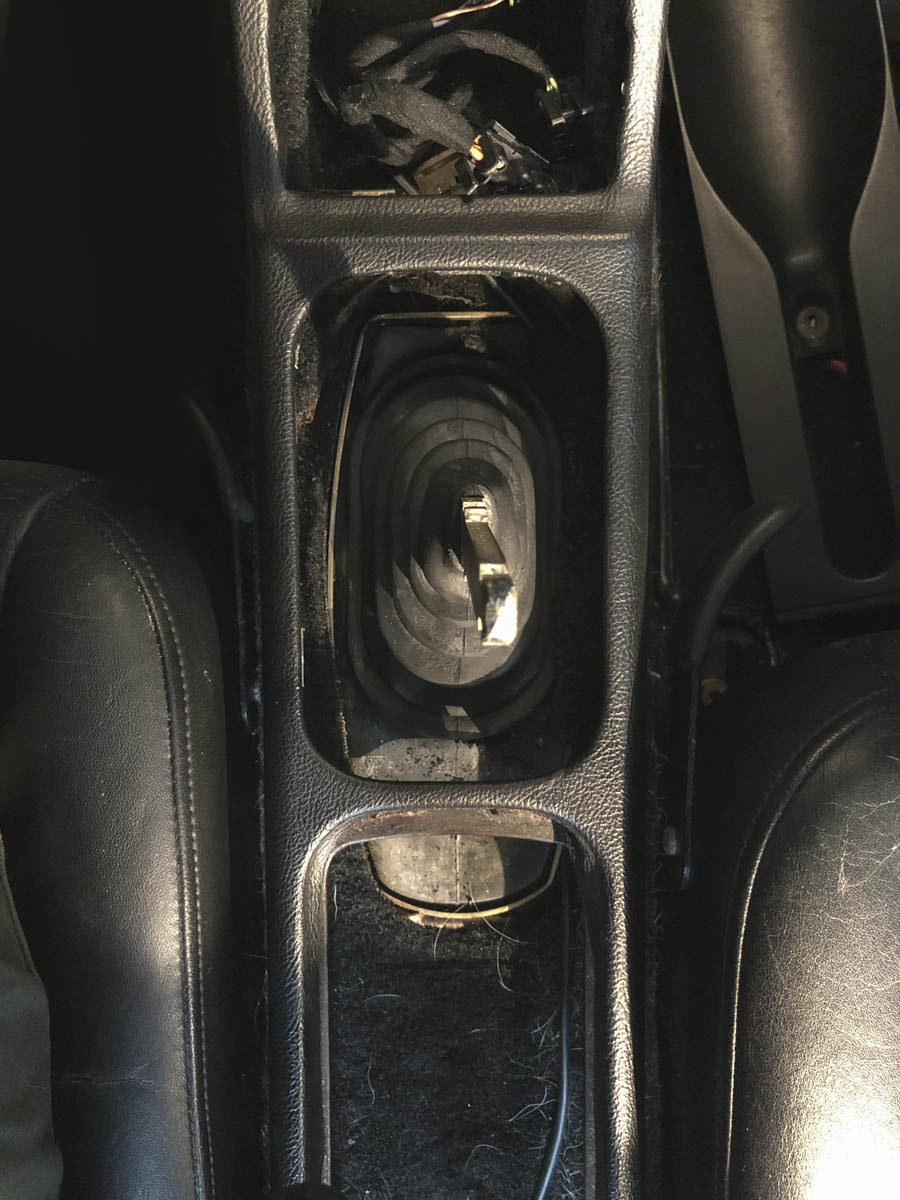
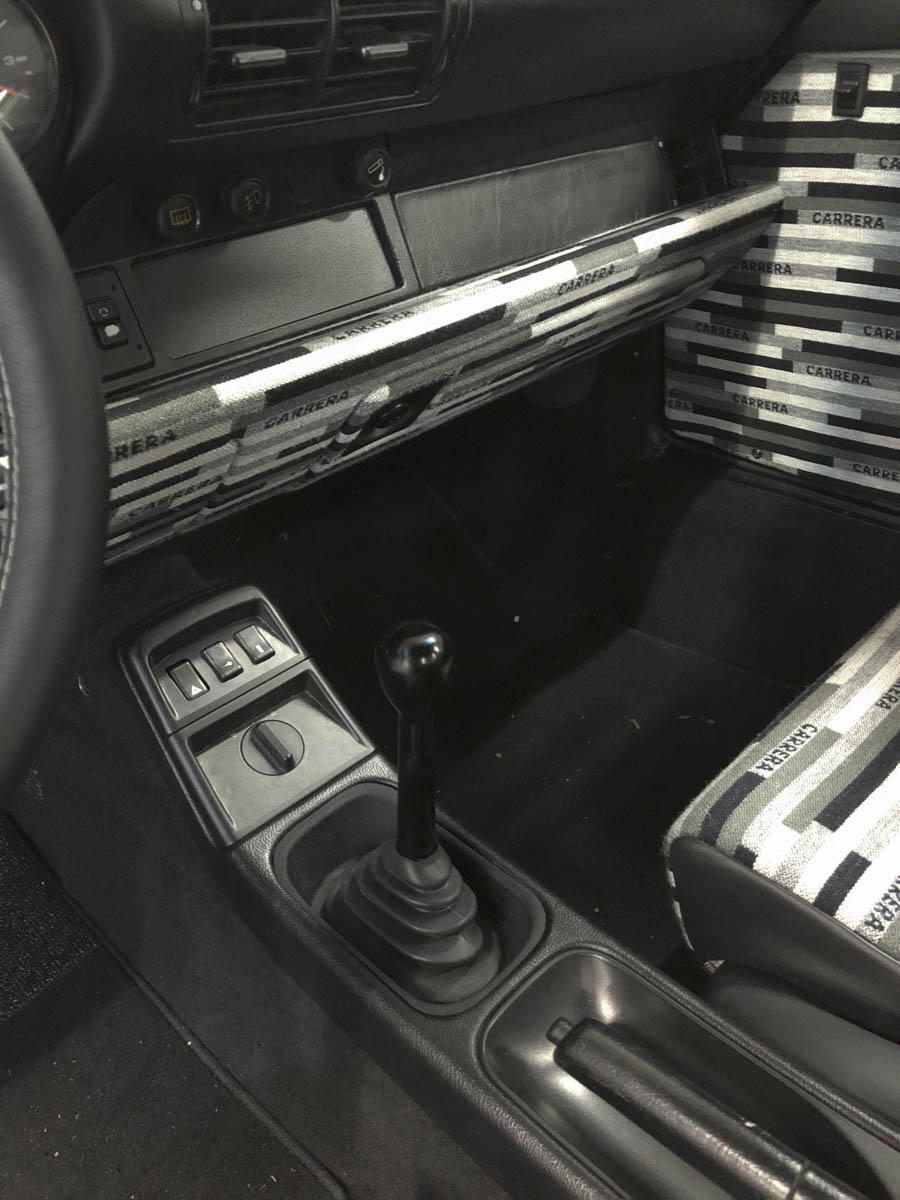
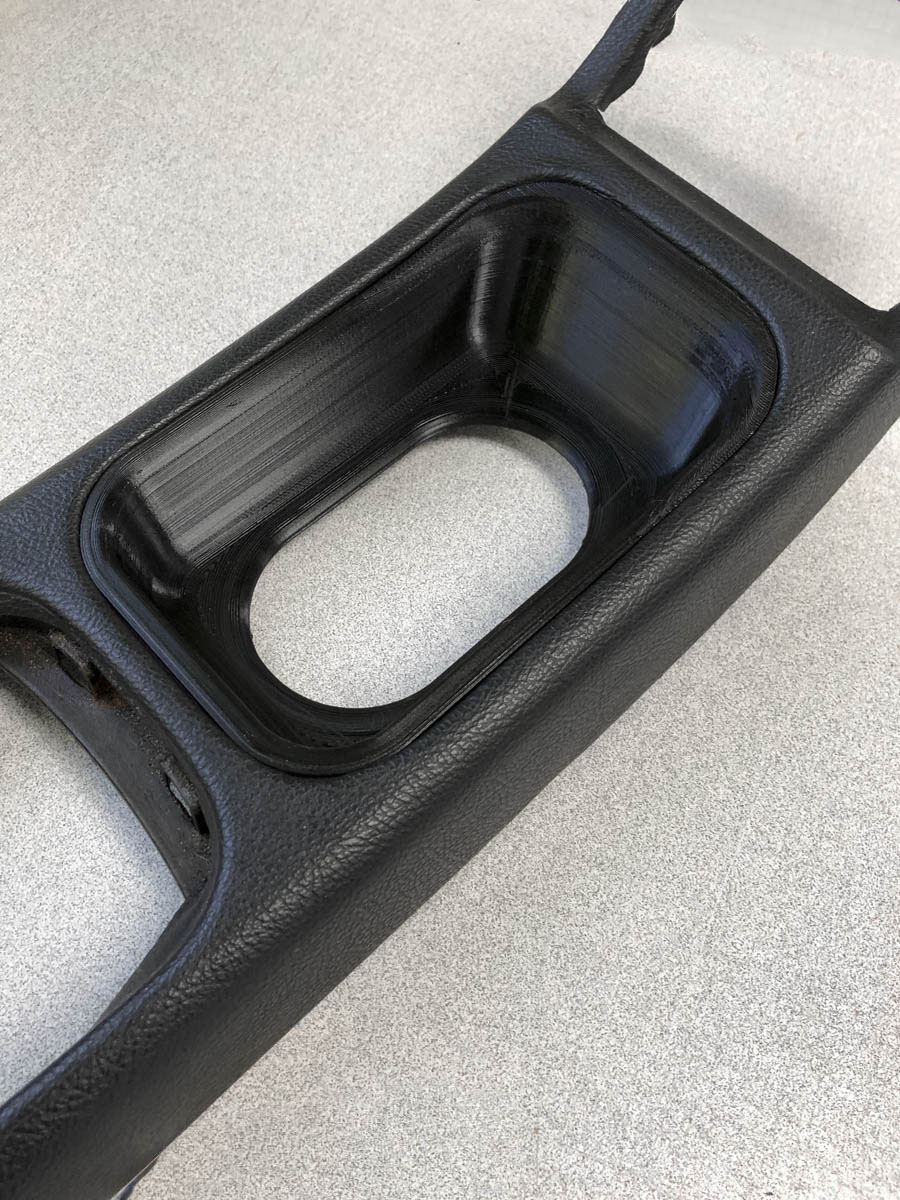
When I purchased the car I knew an aftermarket shifter or shift **** would be in the plans. It wasn't until I removed the OE boot that I realized what I would be working with.
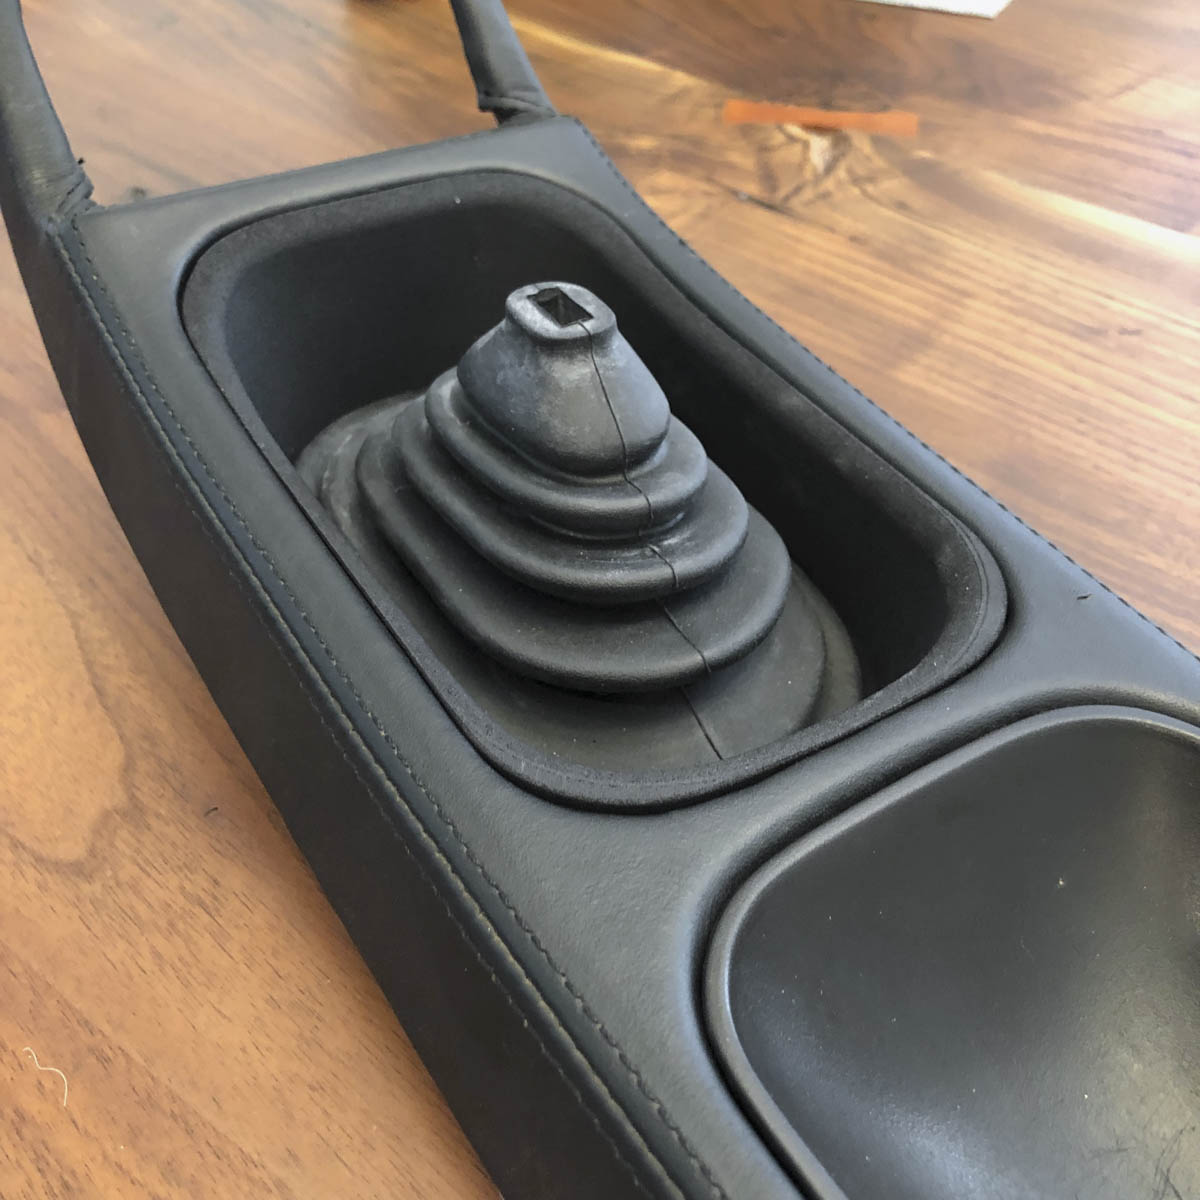
At the same time a number of friends had asked me to tackle the project for them to create a "Singer Style" shift console for their 964 and 993s. I've been working with CAD and 3d Printing and worked to developed a solution that would look OE and not require any hardware.
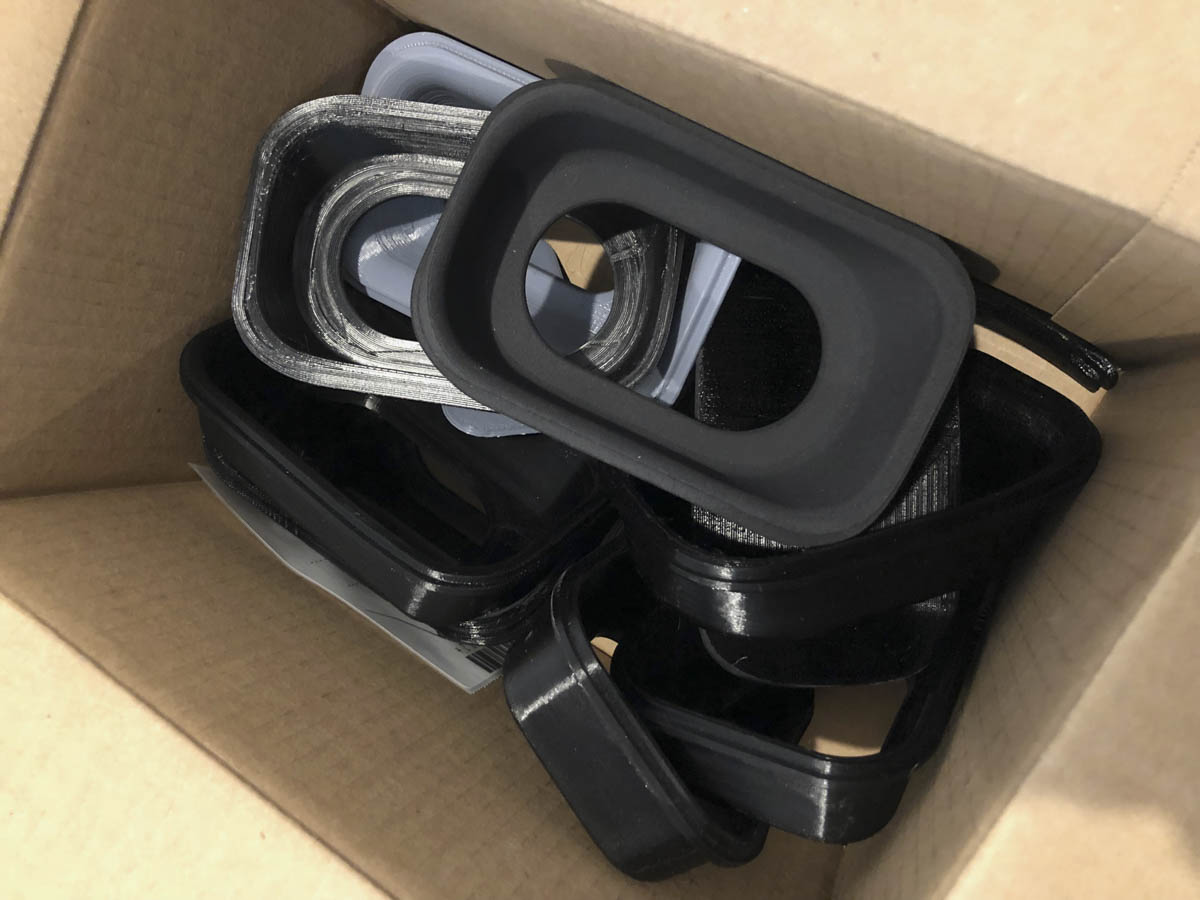
After a number of designs and failed prototypes I got something that was close using my FDM printer and sent the file off to be printed on an industrial SLA printer to very the print to a finer degree.
The results were good, however my attention to detail and OCD kicked in and I kept working the finer points of the design. The scrap pile grew but I was getting closer.
I sent one to my good friend Leh Keen to test in his backdate car, to ensure all shifting function would work with an actual shifter and factory console while my car was down. Everything worked as planned and the fitment was nearly perfect. I refined a few more data points to get a more OEM finish and printed one last version on my printed, bingo.
Months of obsession over this one small panels led me to taking the path to create a final production part. To produce multiples and retain an OEM like finish I opted to have the finish product created using an injection mold, just as Porsche had done in the 80s and 90s (and still to this day). The Rubber bellow is the existing piece located beneath the console, the trim panel clips into place utilizing the original shift boots locking mechanism so no hardware is needed to hold it in place.
After months of development, the Swine Eleven ReBoot was born, produced and now available for others to install in their cars. This works particularly well in cars equipped with the Rothsport Shifter, but also can be combined with other shift ***** with an integrated spacer to cover the flat shifter for a great look. My next project will be a shift **** that accomplishes this all in one, but for now the panel itself.
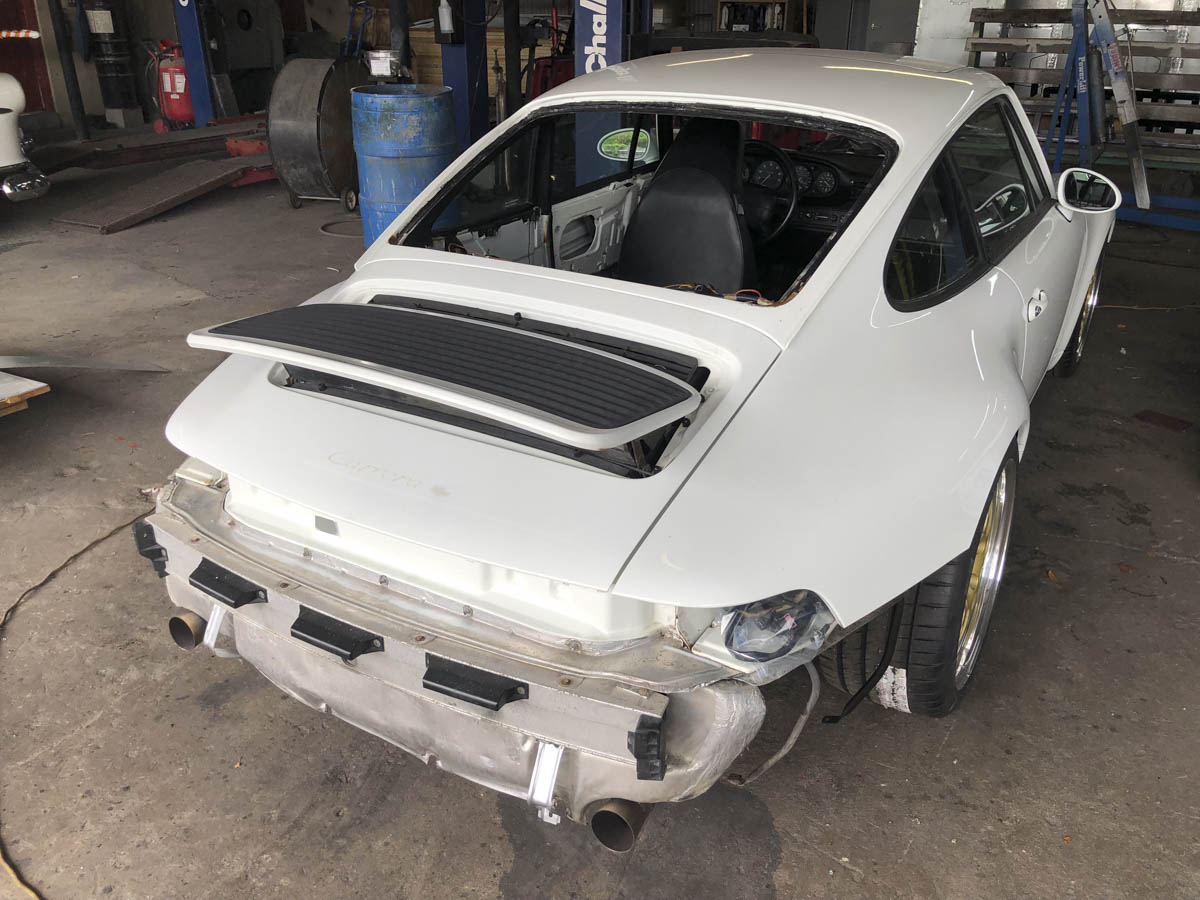
The body shop painted the required panels this week and began re-assembly of the car. The color match to the original single stage worked out great, the car likely had some previous paint touchups in the past, but nothing warranting a total repaint to me. At one point I had considered it while the glass was out, and even a full color change, but I've learned from the past that a perfect paint job sometimes will cause hesitation from driving it in certain scenarios. By preserving the original paint and giving it a fresh lease on life I can drive her with absolutely no worries about gaining some patina over time.
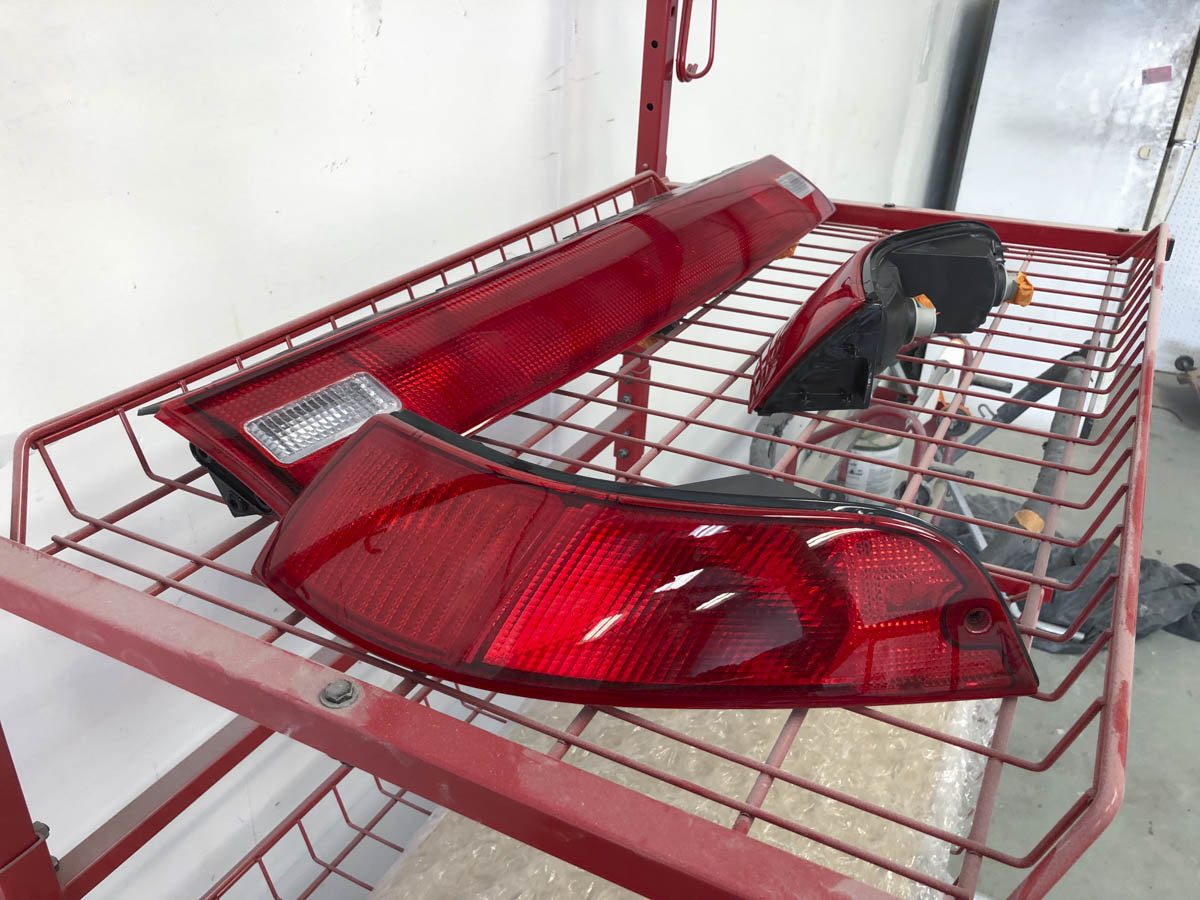
The original tail lights were in pretty poor condition when I purchased the car and had previously been polished and clear coated likely in a shade tree manner that was now failing. I spent a few hours sanding through the old clear, polishing them down to 1000 grit and then had the body shop apply a fresh coat of clear. They're not brand new condition, but I'm quite happy with the improvement and the savings over replacing them can be used elsewhere in the project.
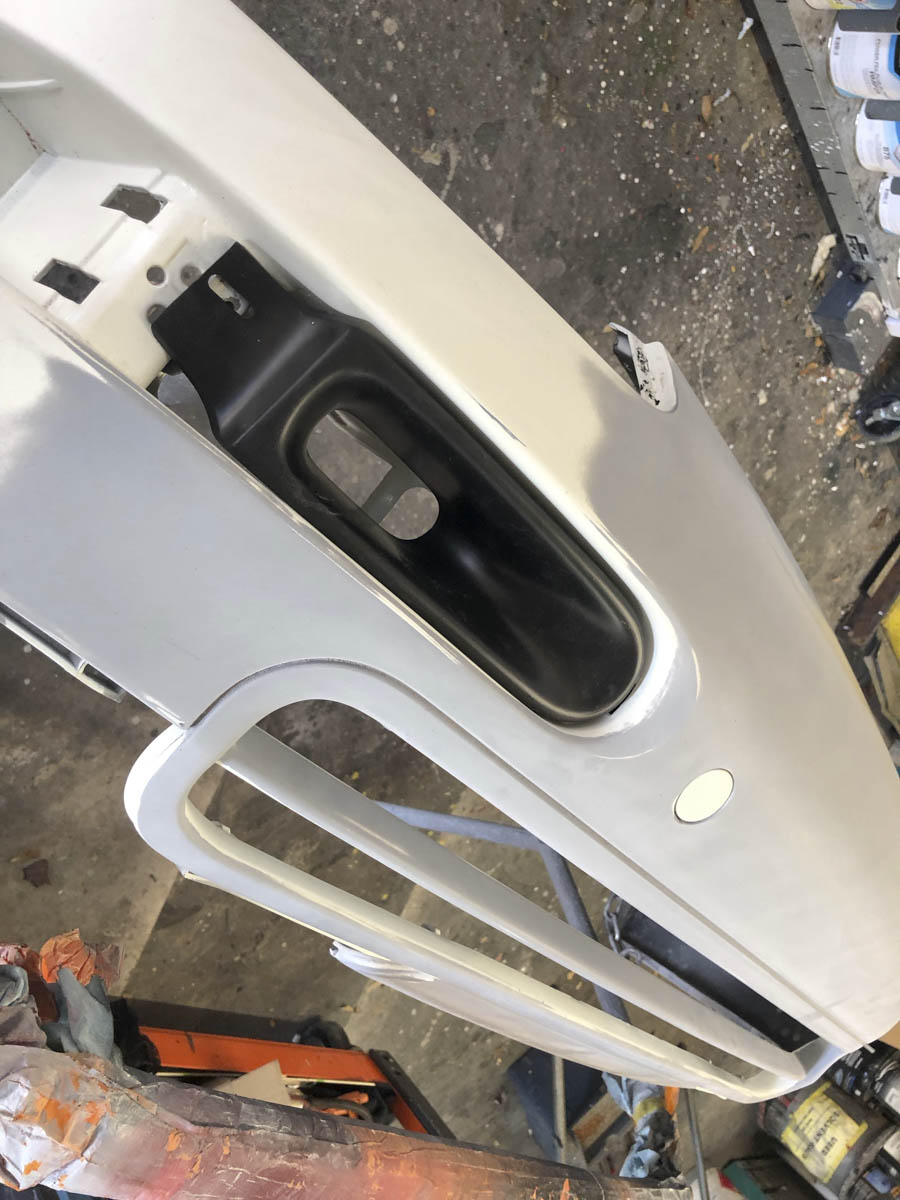
The bumpers were mounted back on the car to be wet sanded and polished, the rear still needed to be completed, but it was still a great feeling seeing the car back together for the first time in months. I have some minor adjusting to do with the rear heat shield / bumper and exhaust but will tackle that once it gets back to the shop.
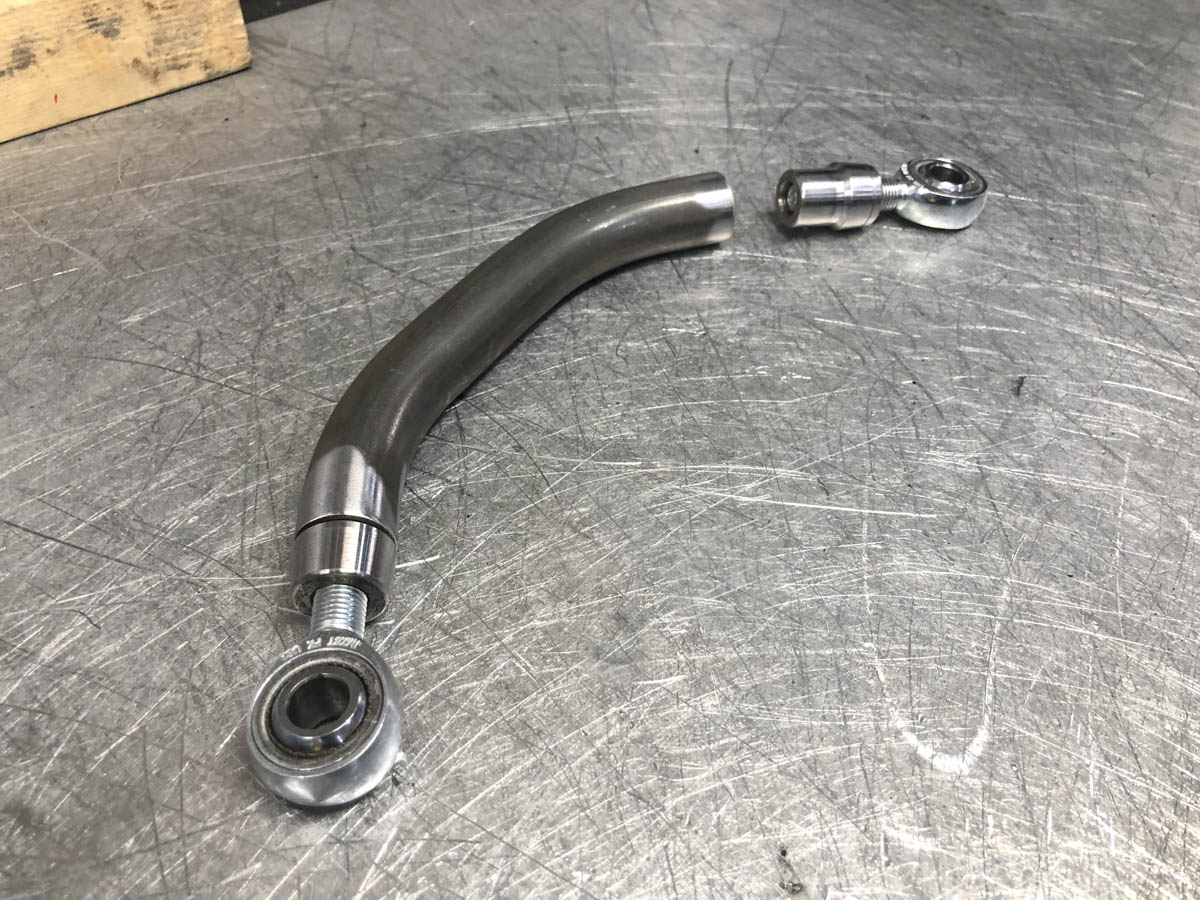
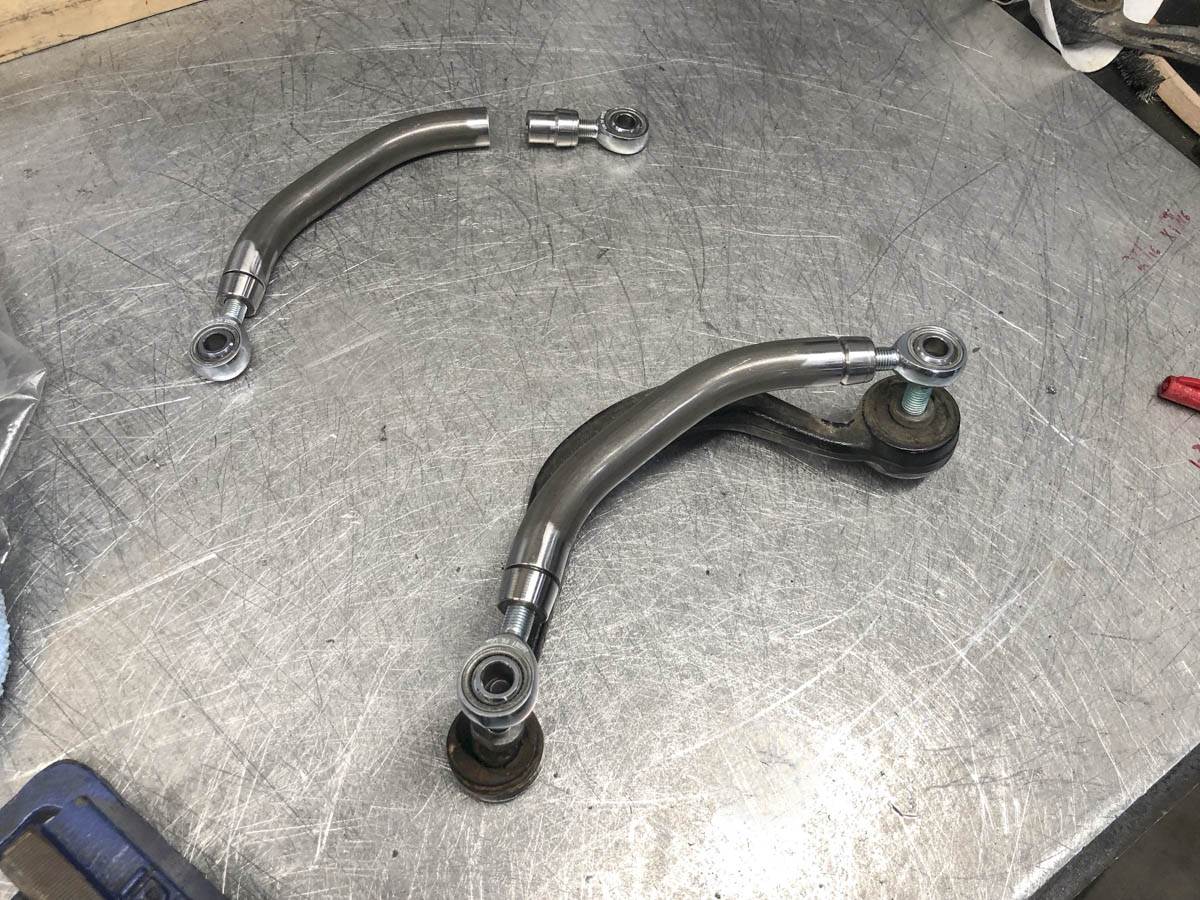
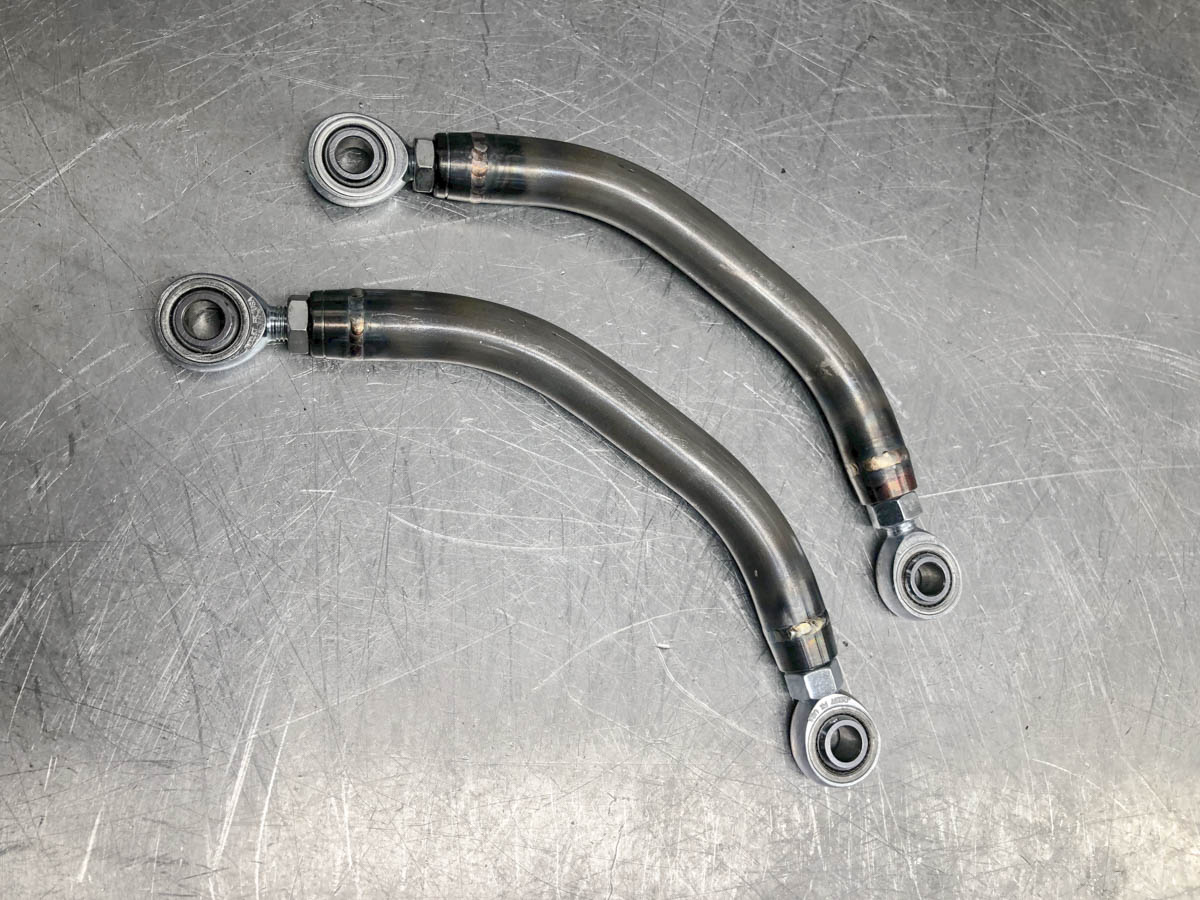
One of the loose ends that was on the short list to complete was the front Sway Bar links. At some point I plan on upgrading the sway bars but in the meantime the front links were absolutely shot. Took some scrap chromoly we had laying around and some spherical joints and had one of my fabricators help fab up a quick set to hold me over. A few coat of paint and I'll install them when the car returns.
I'm having the car delivered back to the shop tomorrow, this is the difficult but also rewarding part of the build where things look complete and you can enjoy the progress, but there are still plenty of small details to address. I'm hoping my upholster returns from vacation ready to put in some hours on the interior as that's the largest item left on the list.
I'm enjoying your thread and admire your skills and the speed of progress. Have to admit that I was hoping to see the sunroof deleted but that's just due to my hate for them.
Regarding your shifter housing modification; how does the rubber boot secure to your part?
I'm enjoying your thread and admire your skills and the speed of progress. Have to admit that I was hoping to see the sunroof deleted but that's just due to my hate for them.
Regarding your shifter housing modification; how does the rubber boot secure to your part?
I would have loved to..... I absolutely hate them as well, however my intension for this car was never to take it even this far.... so I had to pull the plug before I stripped it to nothing and got rid of the sunroof (time / space / money limitations). The next car I build I'd like to have a longer timeframe and ample space so that I can strip one to absolute metal and build it back from scratch, probably will be a SWB 911 at some point. My fabrication and paint and body skills could use a nice project for learning, but imagine a ton of time will be required to get it perfect.
The Rubber boot is already secured to the car below the center console with an existing plate. The opening in my trim panel is measured precisely to the size and height of the lowest portion of the rubber bellow holding it in place while still allowing movement from the upper portions of the boot.

 10-13-2018, 10:19 AM


