When you click on links to various merchants on this site and make a purchase, this can result in this site earning a commission. Affiliate programs and affiliations include, but are not limited to, the eBay Partner Network.
Background: With a Stage 1 tune, 992.1 S and GTS run hot during track days and you have to back off after just a handful of laps. Therefore, adding a 3rd radiator is needed to make the situation better.
For Base and T, one T owner with Stage 1 tune reported he could get away without a 3rd radiator on a hot track day (less power = less thermal energy to dissipate). Track layouts and laptimes will have an impact as well on the amount of heat you generate. T/S/GTS come standard with a 3rd radiator in what Porsche calls hot markets (code 8Z6). Probably Base too.
Quick DIY rundown with photos below.
Here's how all the parts stack up, front to rear.
Open grille frame (or cut your faux grille)
Center air duct
Stone guard
Radiator
Radiator bracket-rear duct combo (one part that serves two purposes)
Parts (these are spread out on 3 different sections in the Porsche parts diagrams):
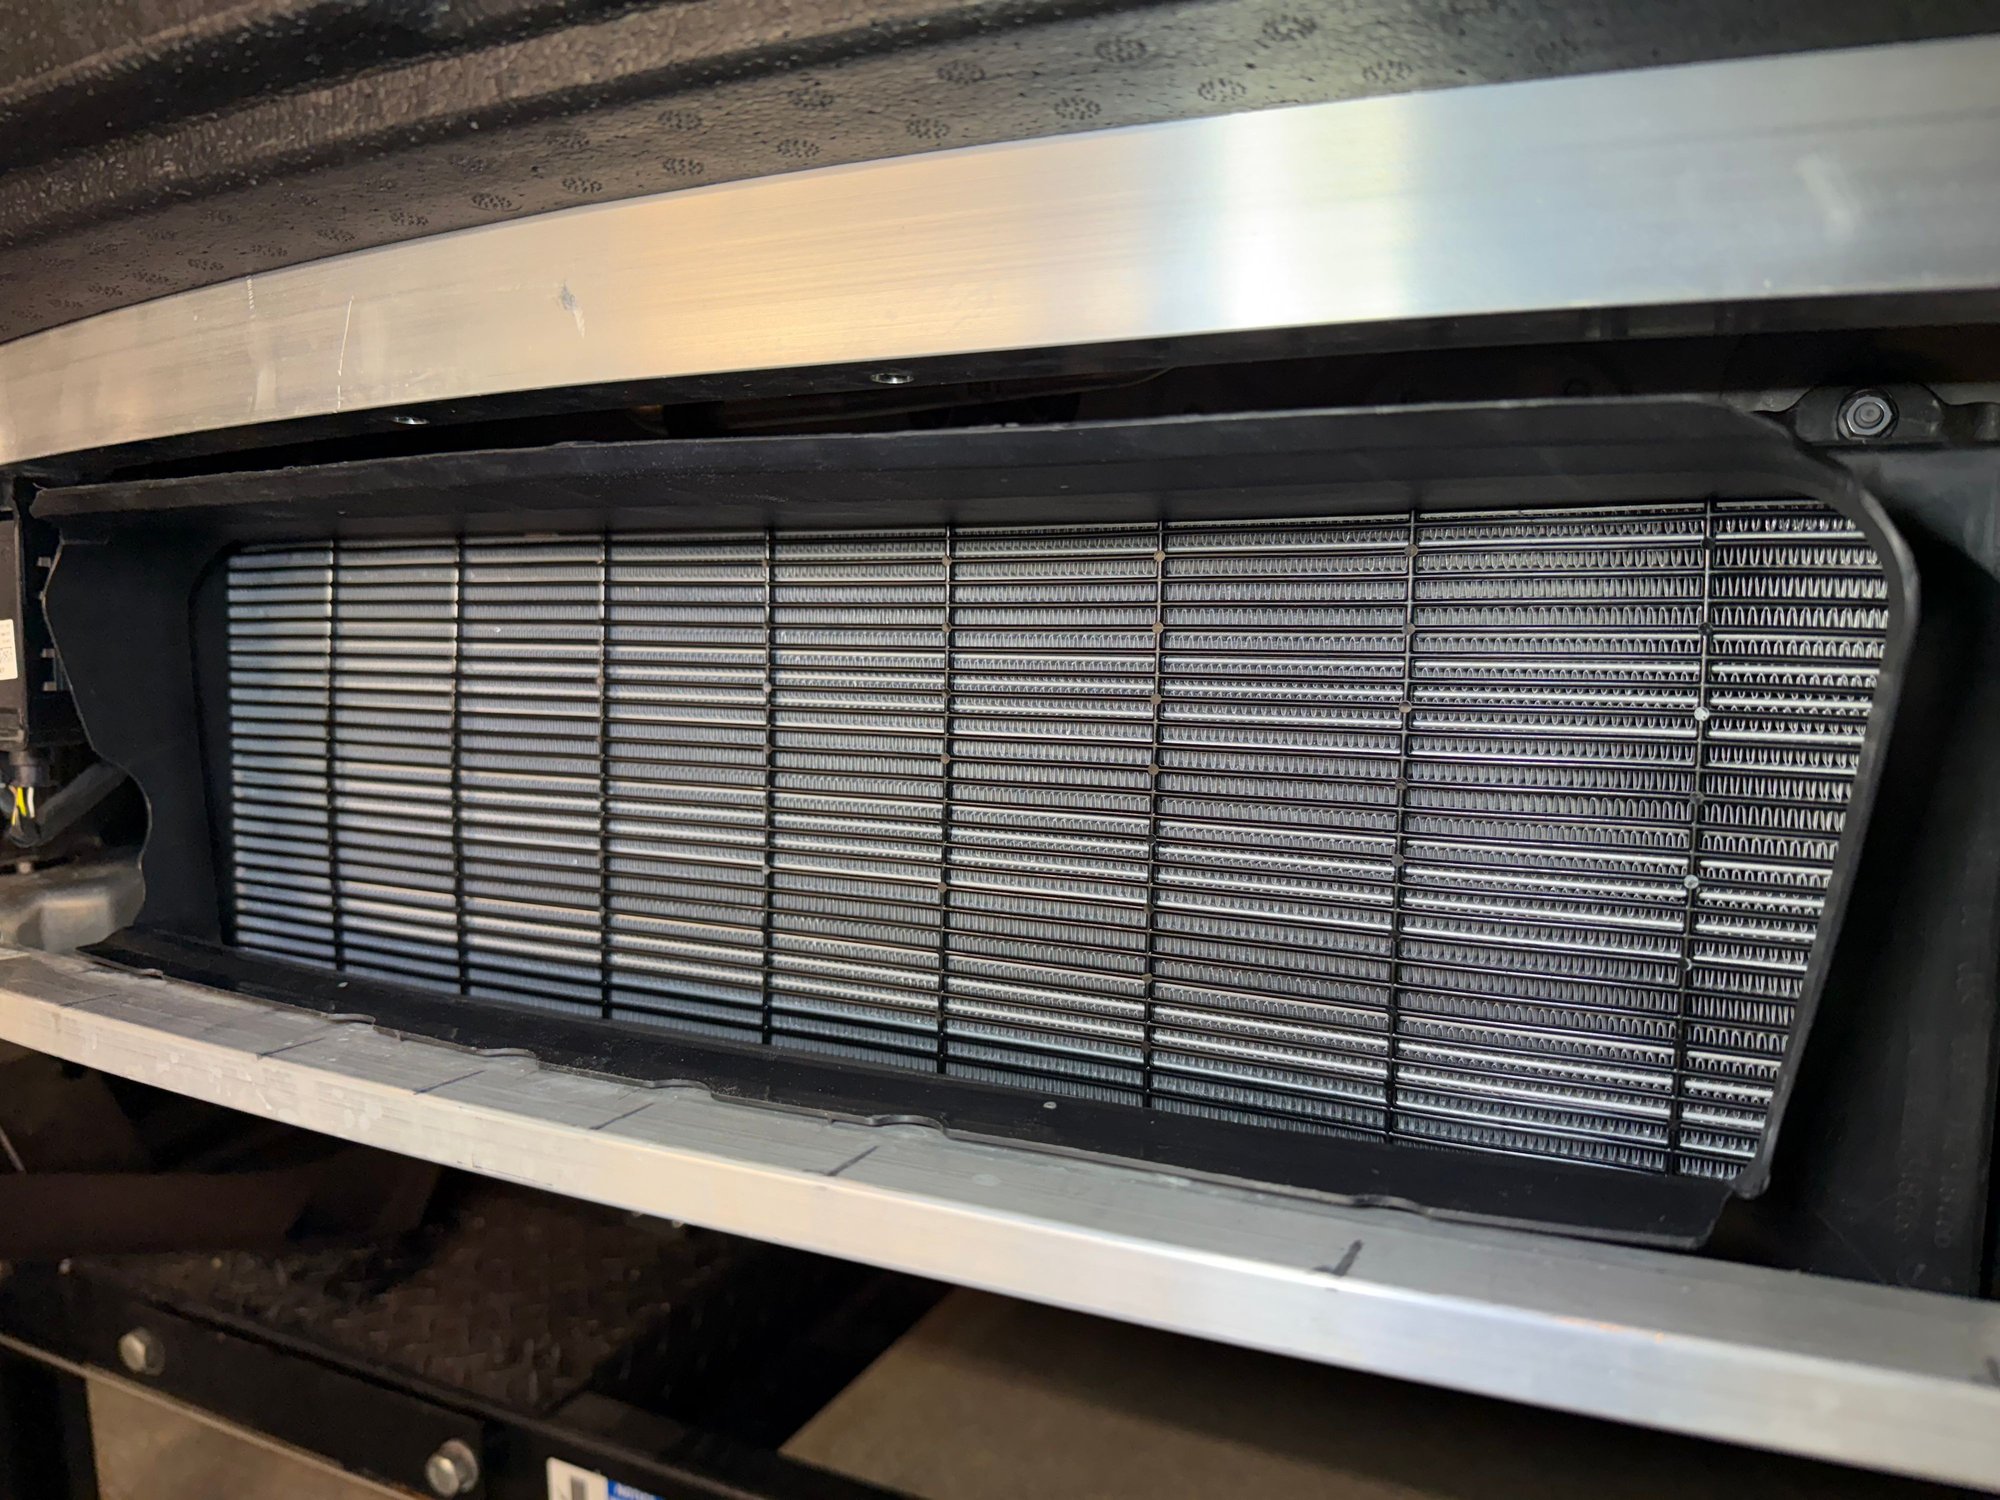
Center radiator
992121253B (OEM) or CSF 7243 (direct fit)
Hoses left and right
992121629A (1x)
992121630A (1x)
Center radiator rear air duct that also serves as mounting bracket (it attaches to already preexisting studs/tabs on 992 Carrera/T/S/GTS cars)
992121694 (1x)
4x plastic pins that are used to attach the radiator to the rear bracket/duct
992121577 (need 4x pins in total, 2 per side)
2x nuts and 2x bolts that hold the above duct/bracket with radiator in place in the car:
PAF902158 (need 2x M6 nuts)
N10759101 (need 2x M6 bolts)
A front stone guard that simply clips onto the center radiator, and a seal along the bottom of the radiator
992121557A (1x stone guard)
9P1121687B (1x seal)
Below parts fitment is unique to the options of each car, Consult a parts specialist before ordering.
1x front air guide that seals the air path from the bumper opening to the front of the radiator:
992815217OK1 (Standard bumper, with front and rear cameras, without ACC, without Night Vision)
Note: There are several suffixed versions of this part number such as 992815217AOK1, 992815217COK1 etc and it requires a Porsche parts specialist to determine which one that fits the exact combination of options for your car. For Sport Design with 360 camera, no ACC, no Night Vision, dealer says 992815217DOK1. Another variety might need a different part.
1x bumper center "grille" that is just an open hole frame, unless you choose to cut open your existing faux center grille. This part number varies a lot. My dealer said the following:
992807681BLOK1 for Standard front bumper with 360 cameras, without the large ACC center grill sensor and without night vision lens
992807681AHOK1 for Sport Design with 360 cameras, without the large ACC center grill sensor and without night vision lens NOTE: This OPEN grille is very pricey at the time of writing this. A good option is to buy an original CLOSED grille which costs 1/4 or 1/3 of the OPEN version, then cut it open yourself. Or cut open the one you already had on the car. The cutting is not difficult once removed from the bumper skin, and it overlaps perfectly with the center air duct, just like the pre-cut OPEN grille does.
To source an extra Standard CLOSED grille (no ACC, no night vision), that part has both 992807681BDOK1, and 992807681BJOK1 stamped on it.
How to instructions:
1. Jack up front of car, higher is better
2. Disconnect battery (-)
3. Remove front wheels
4. Remove side markers
5. Remove front bumper incl fender liners, several T25 torx screws and connectors in both wheel wells (see existing Youtube video for 992 bumper removal, same process for Carrera and Turbo)
6. Unclip and remove side radiator shrouds
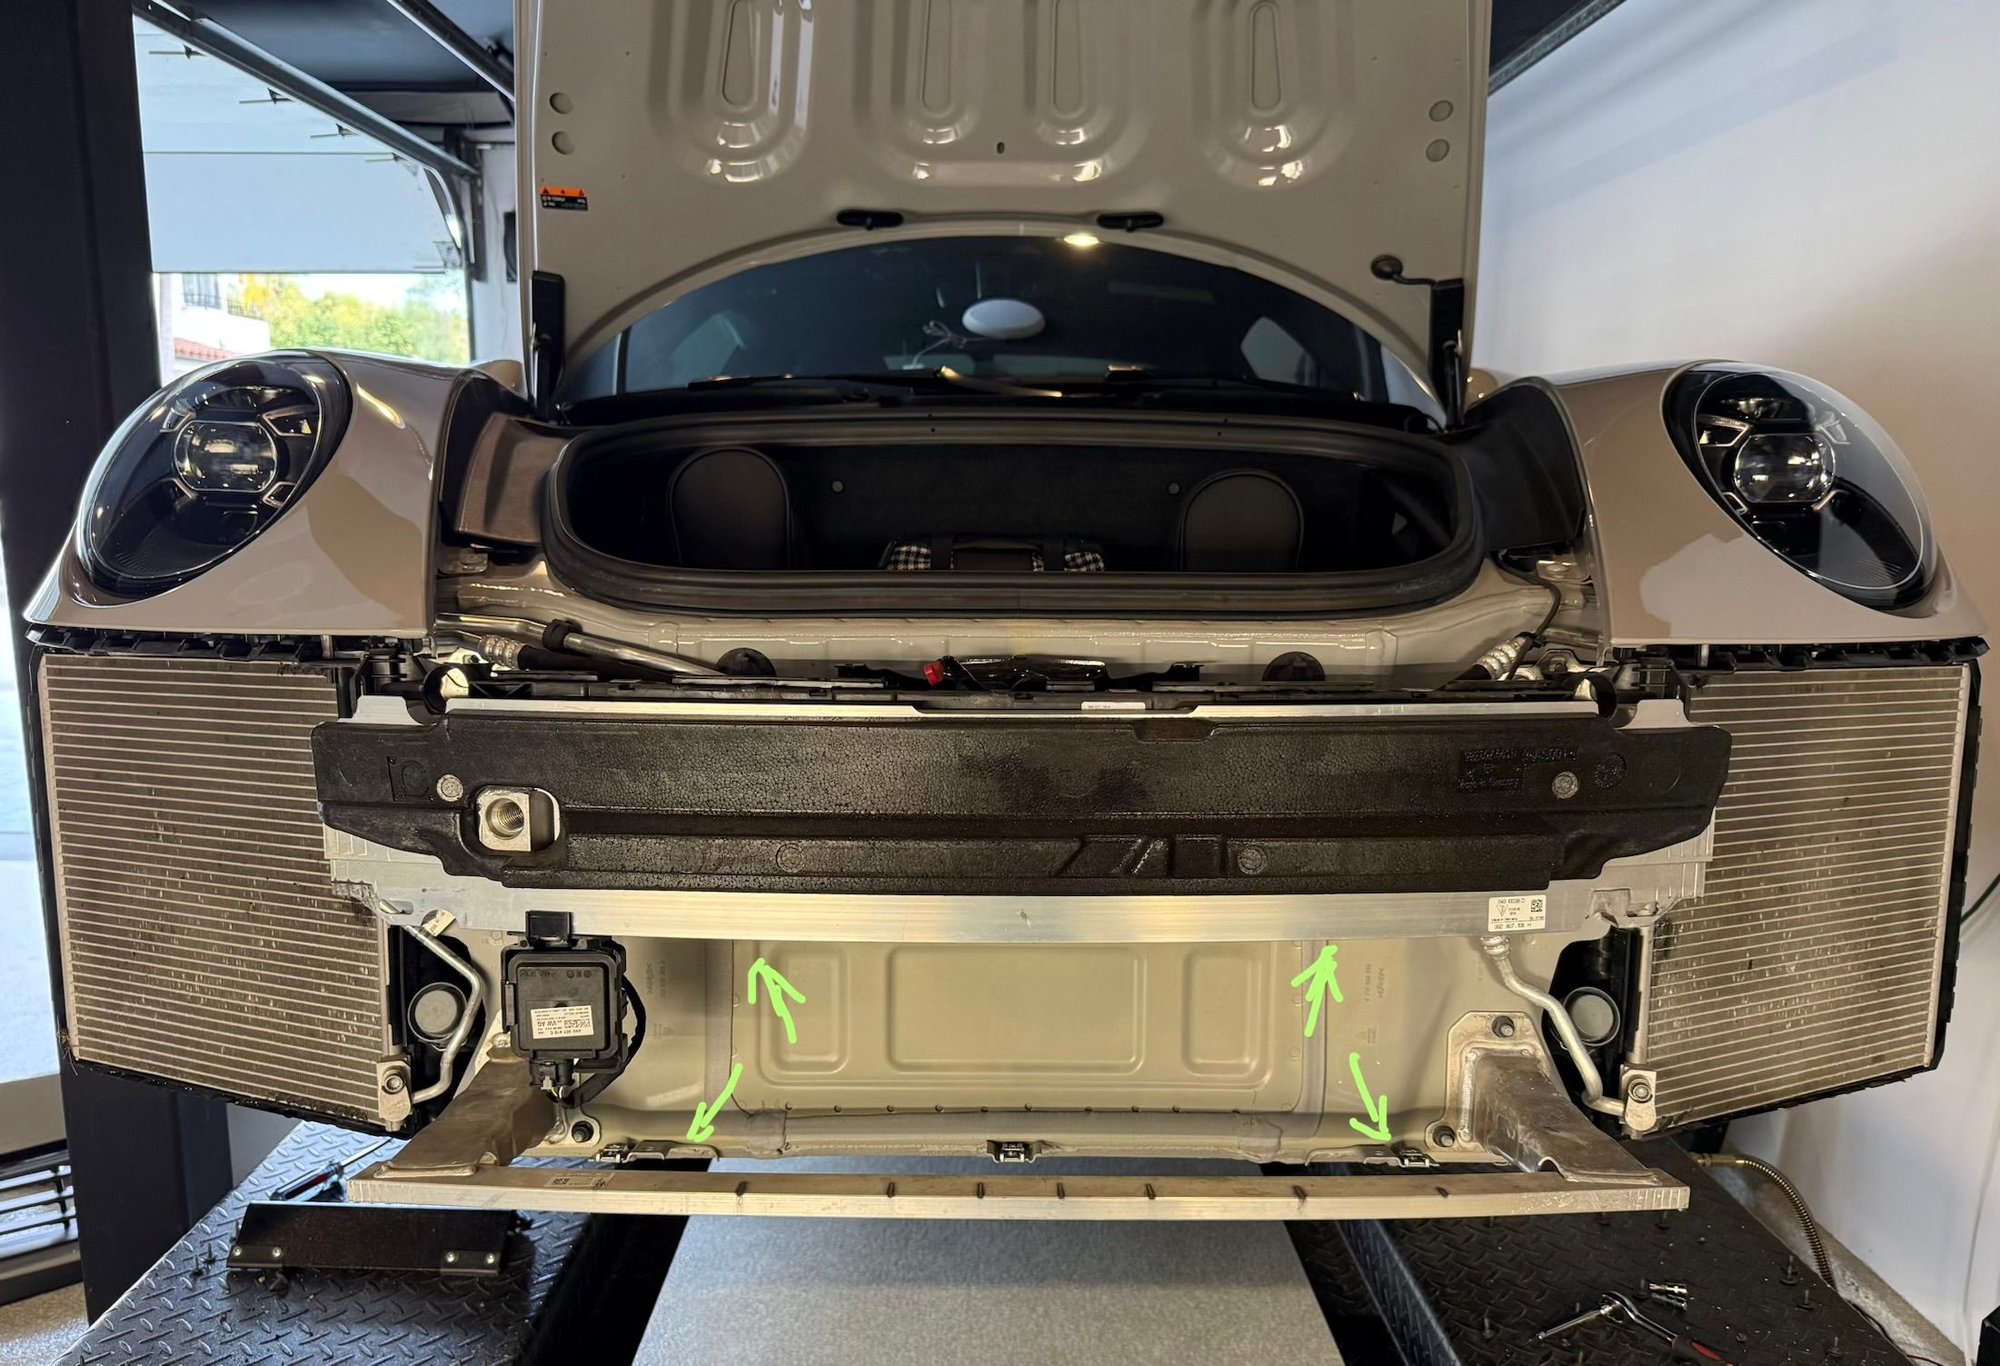
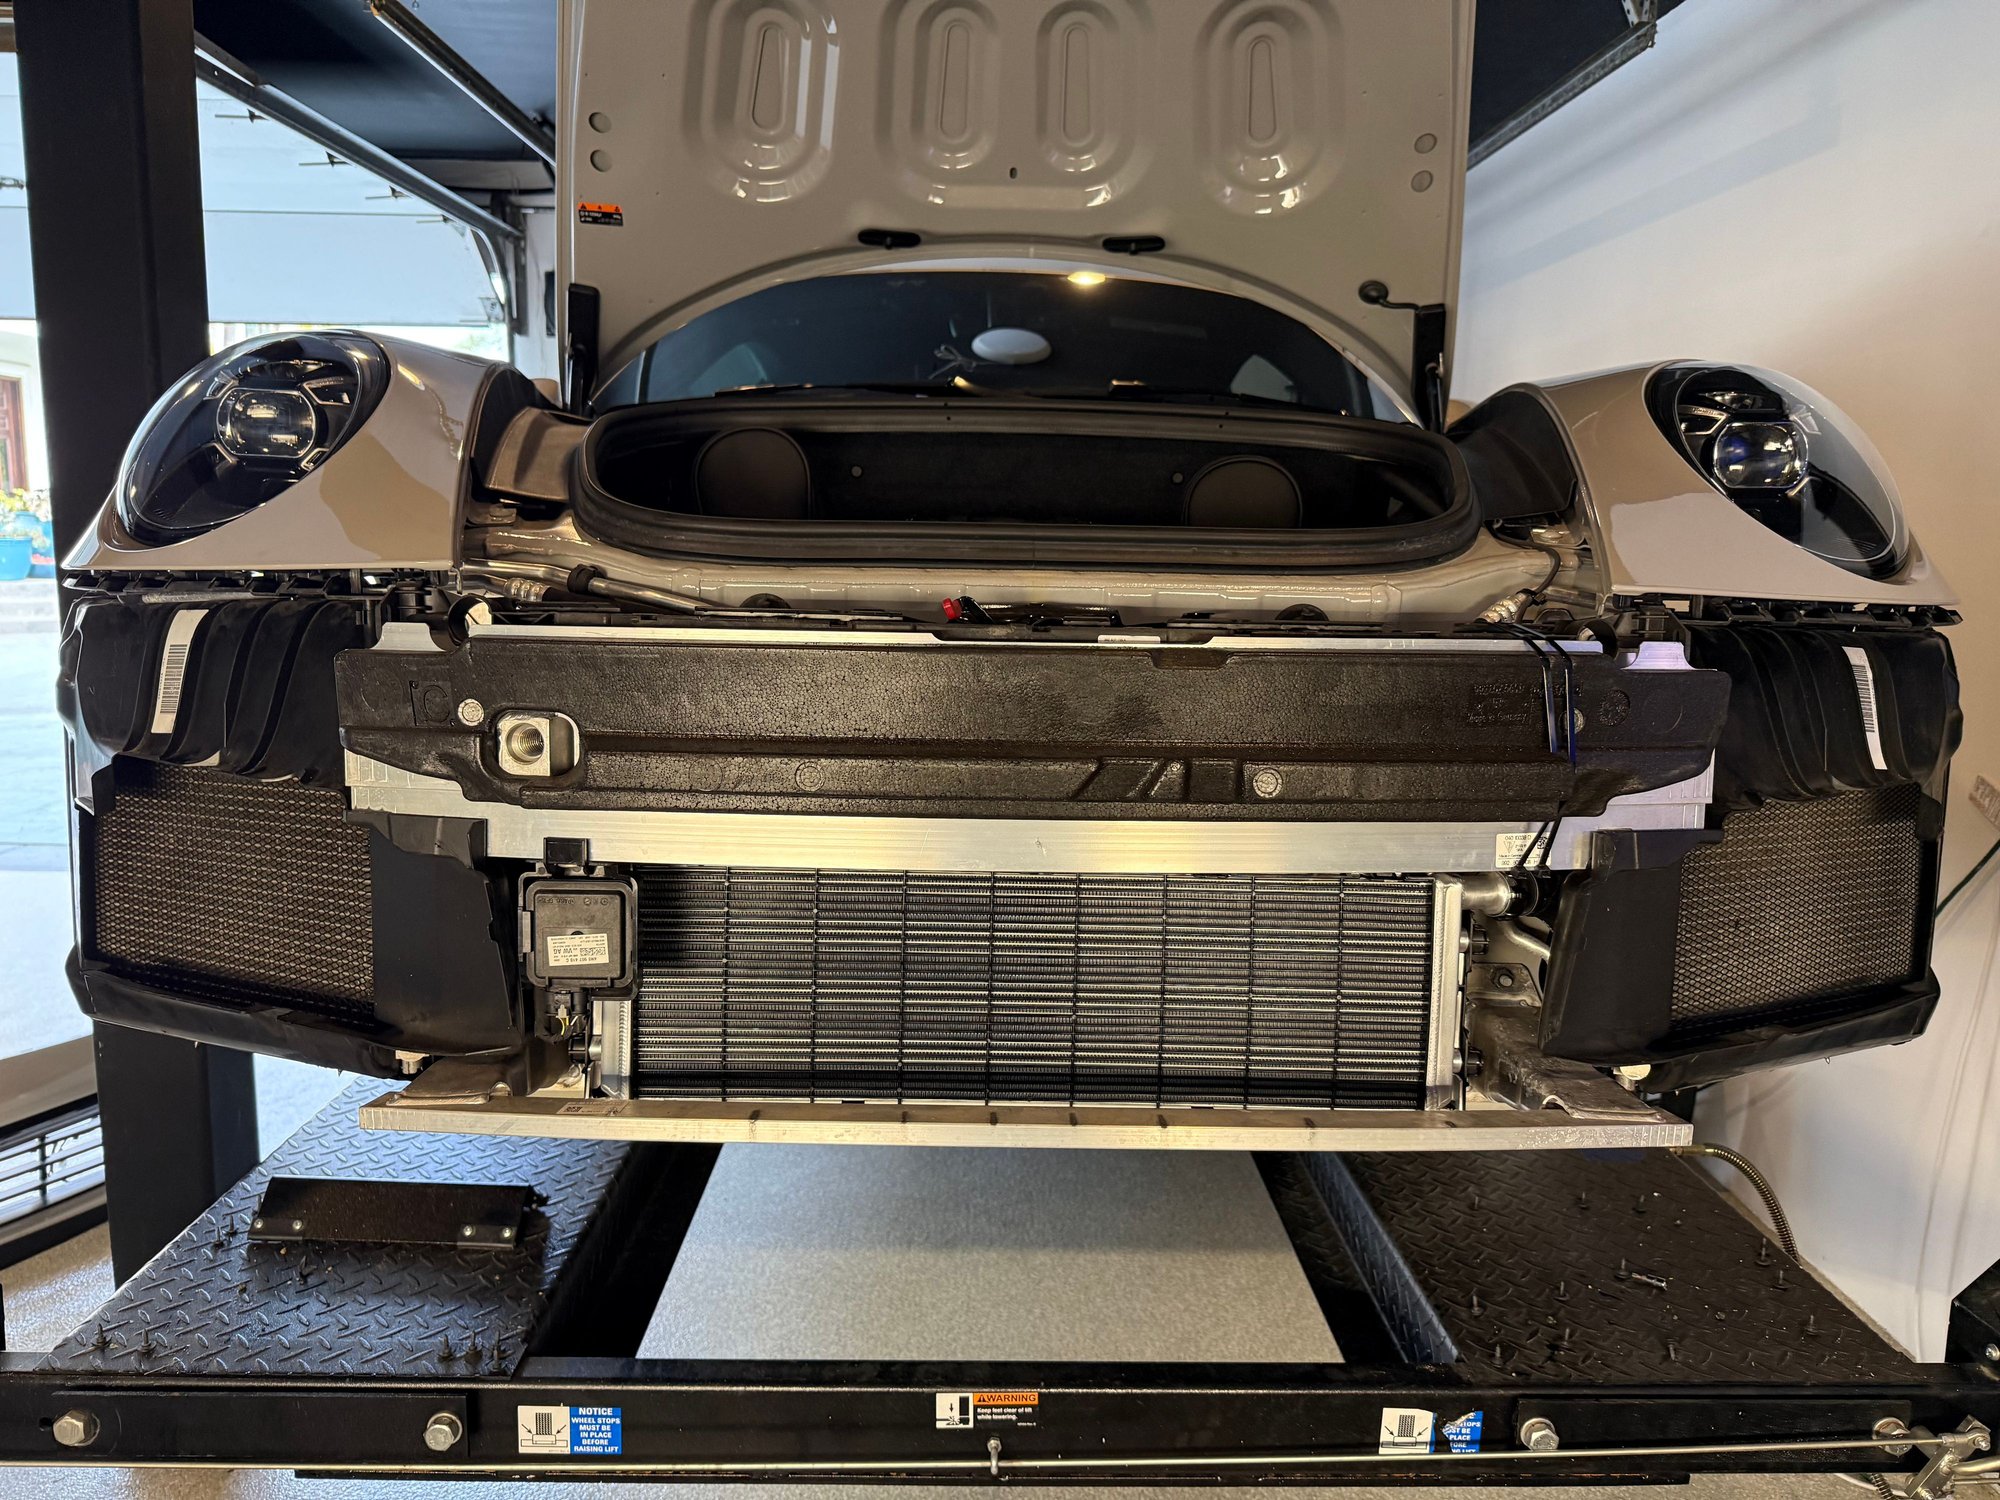
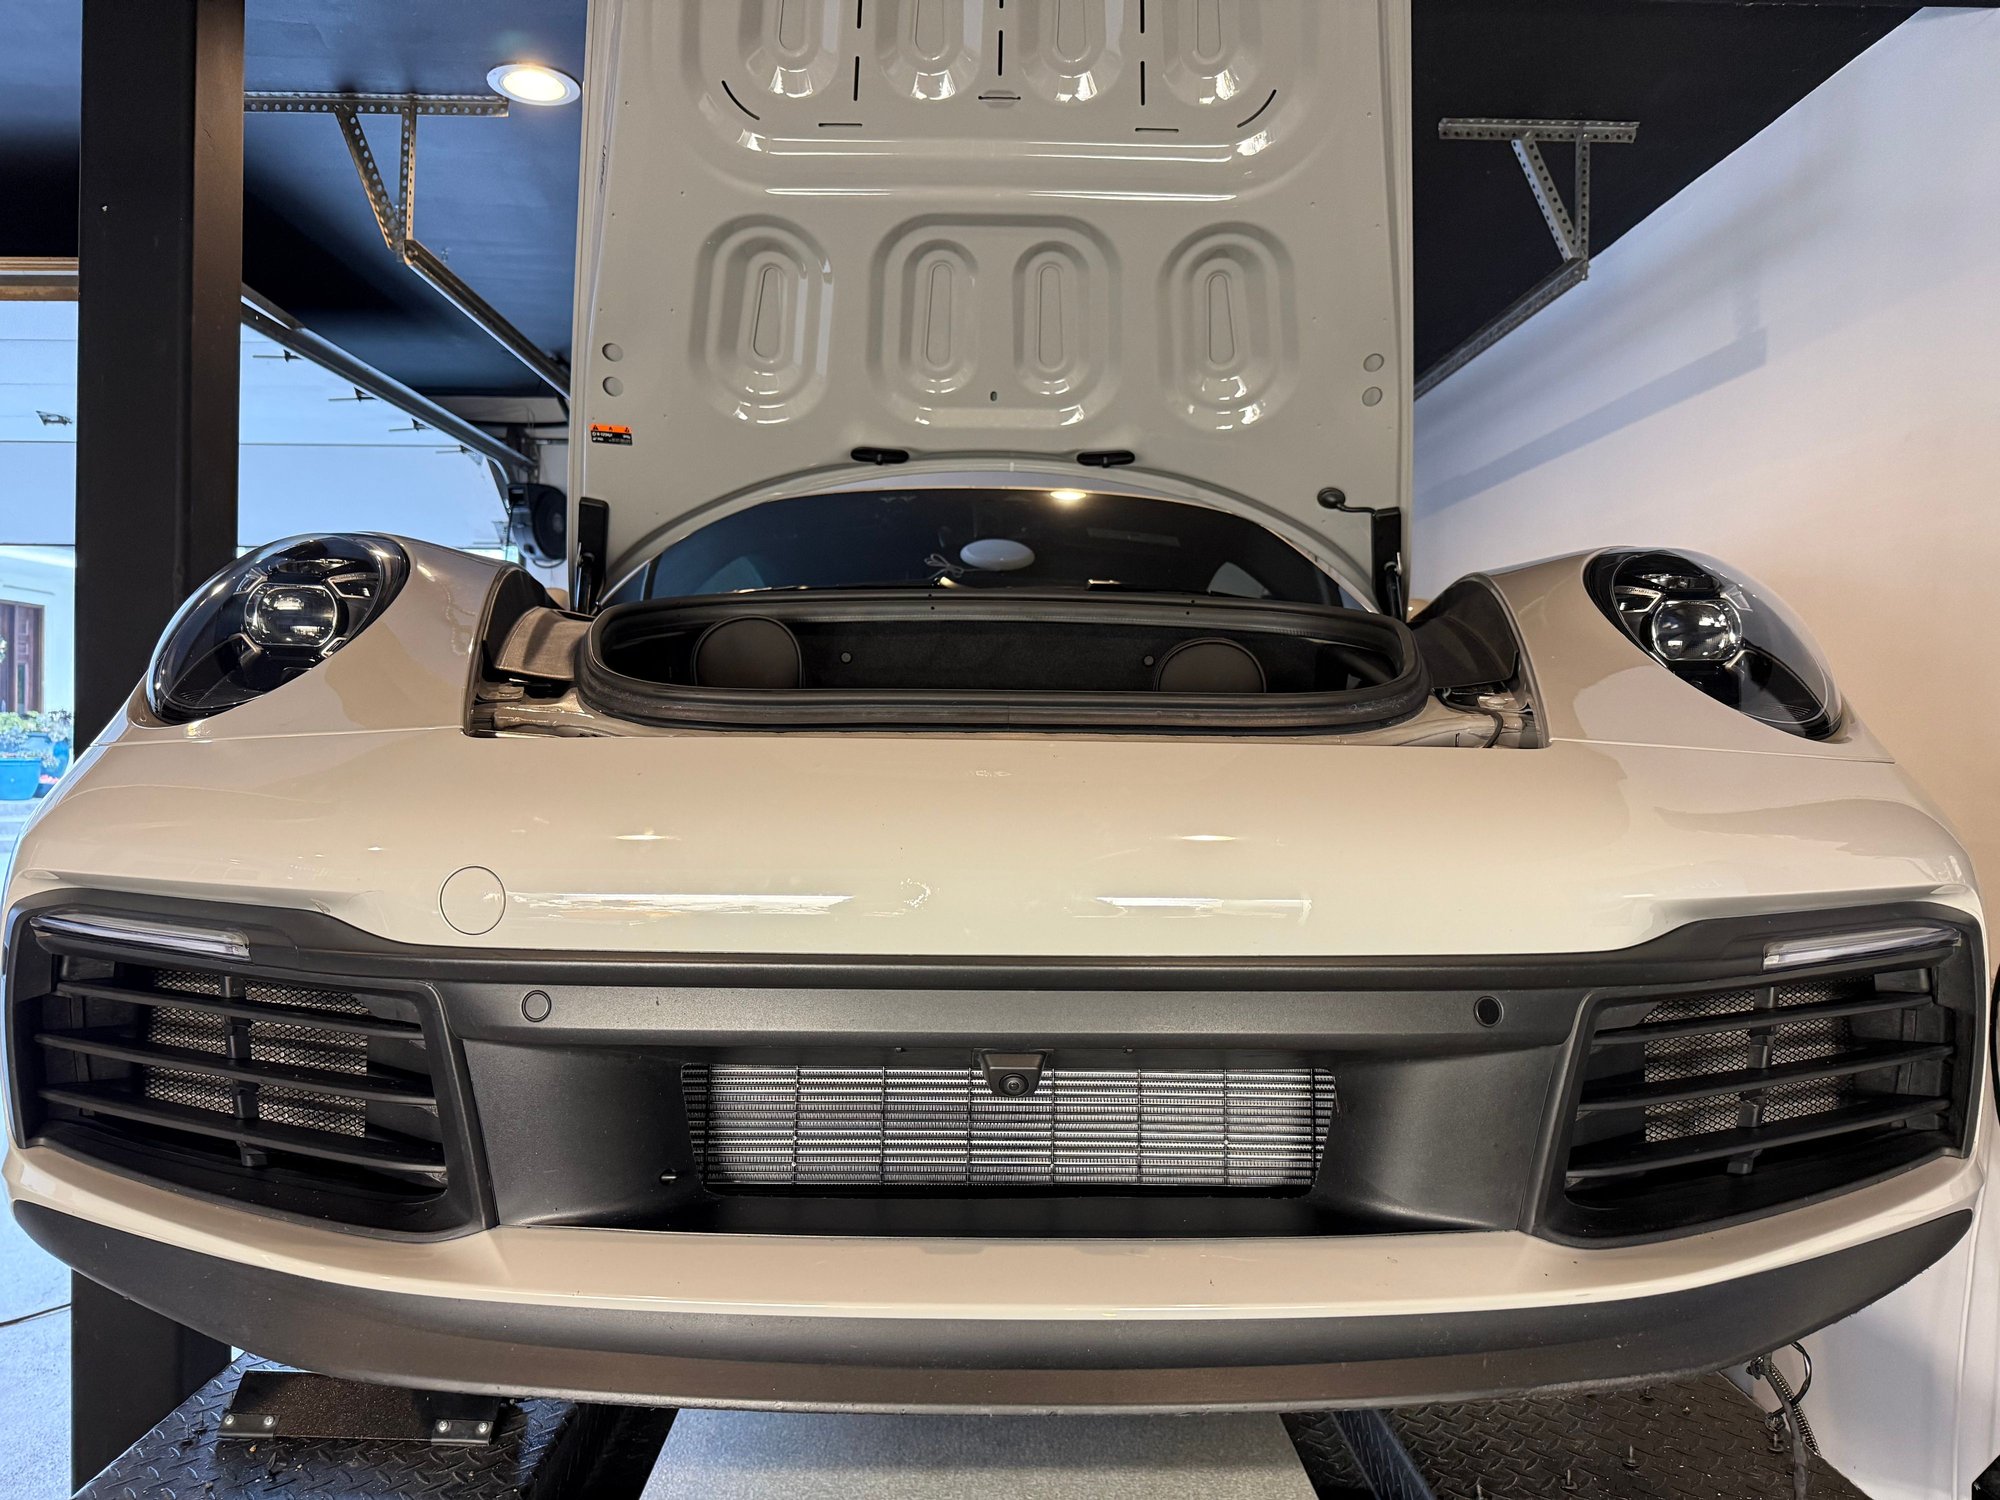
The car is now ready for the 3rd radiator!
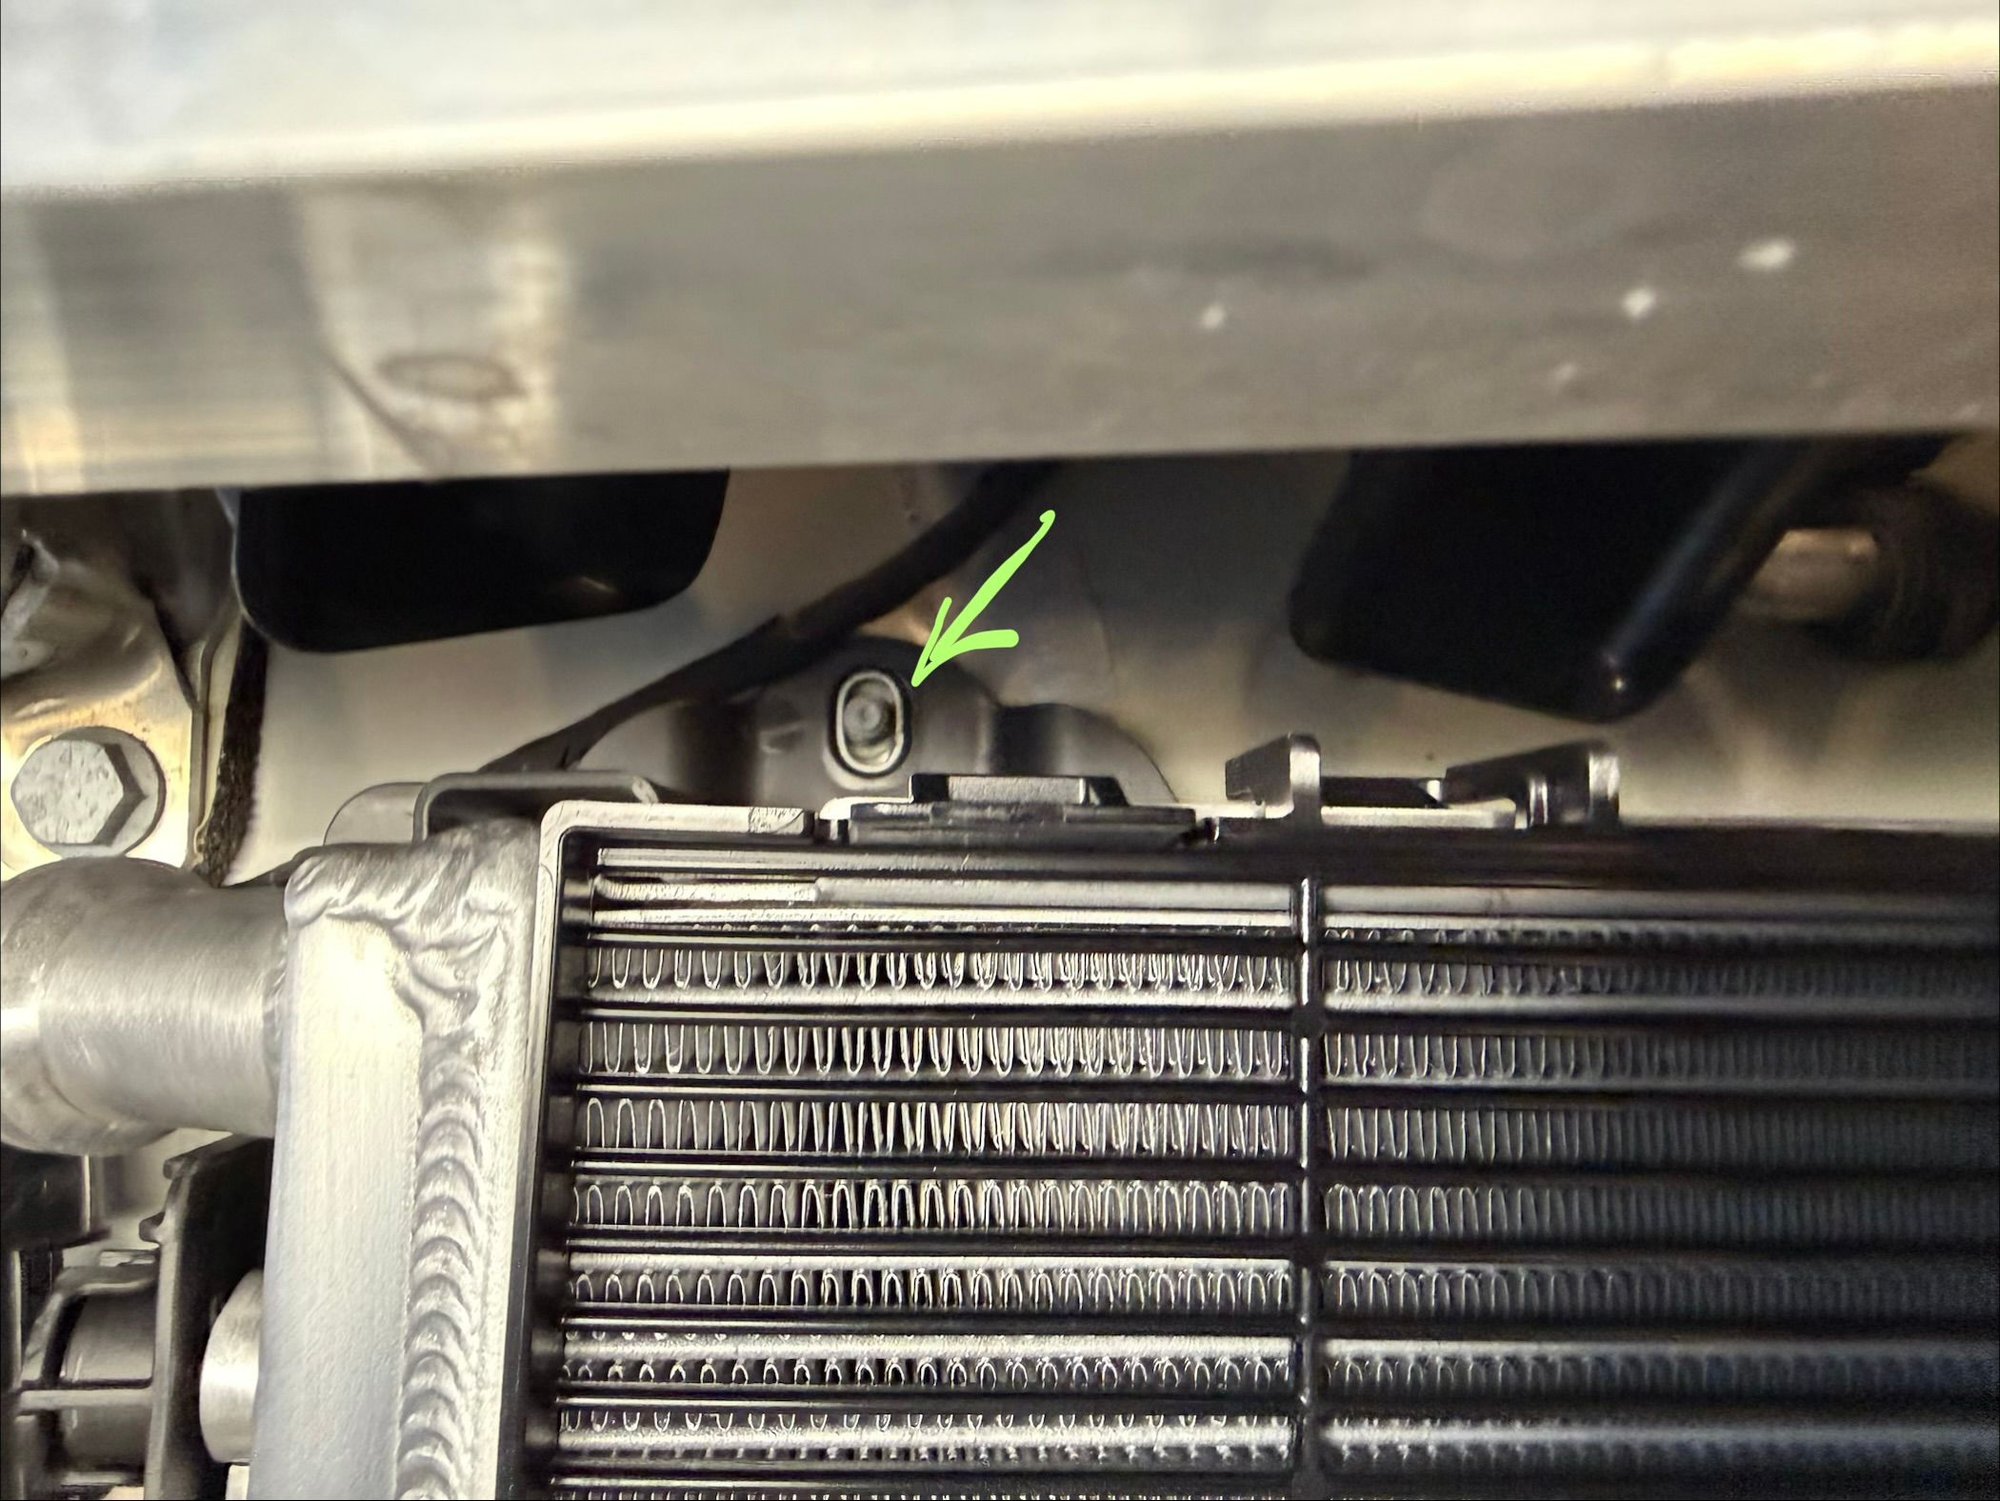
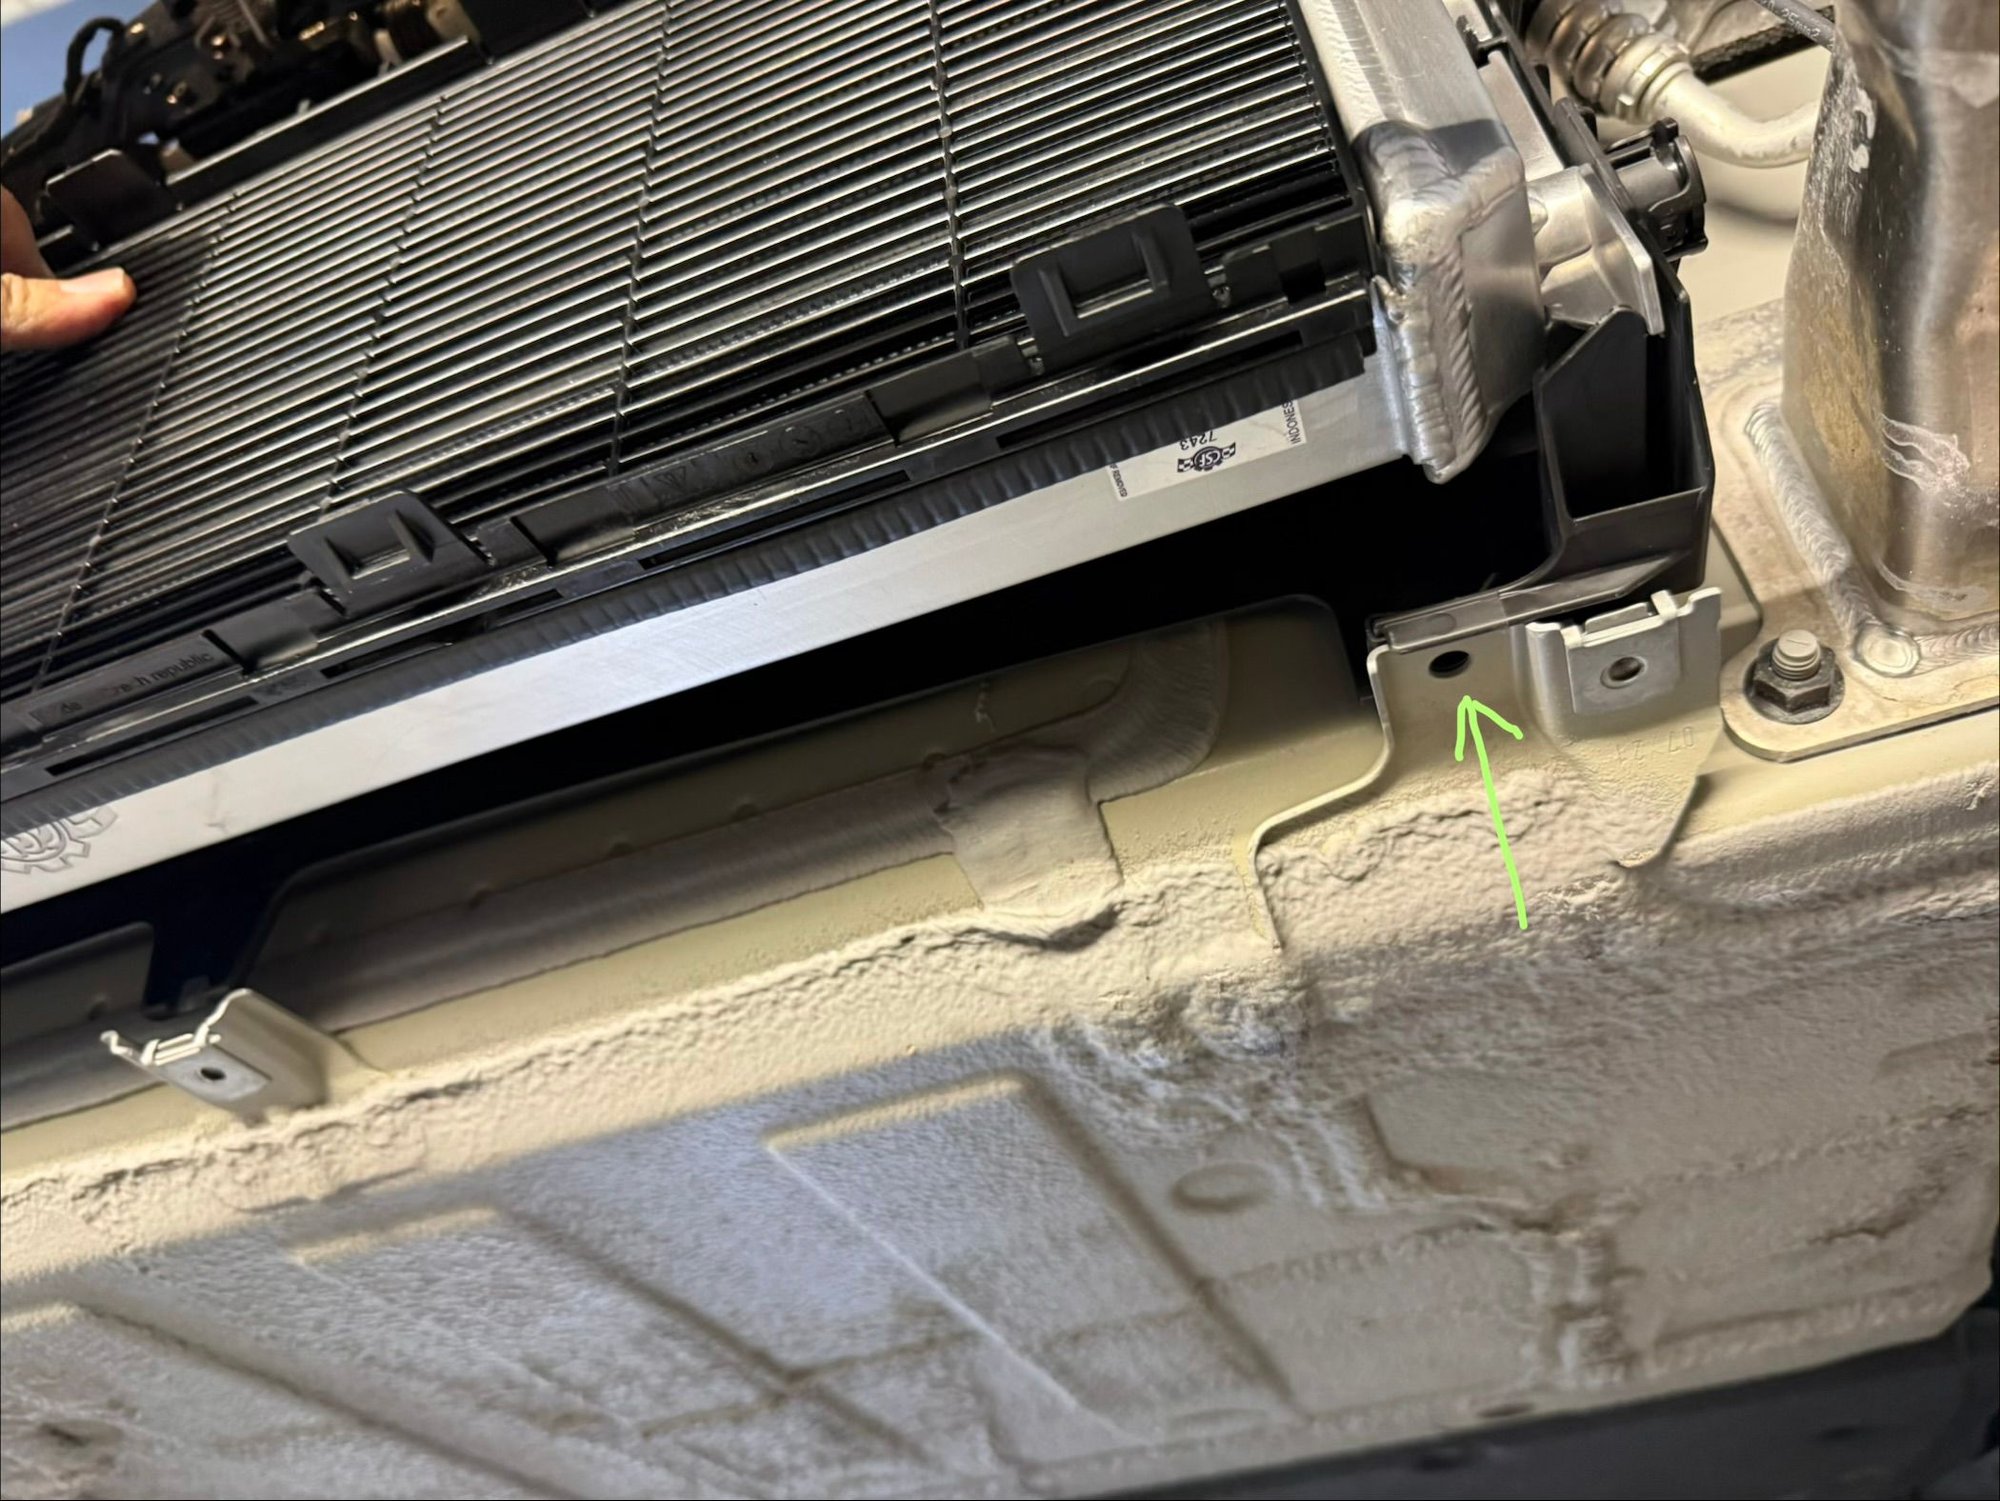
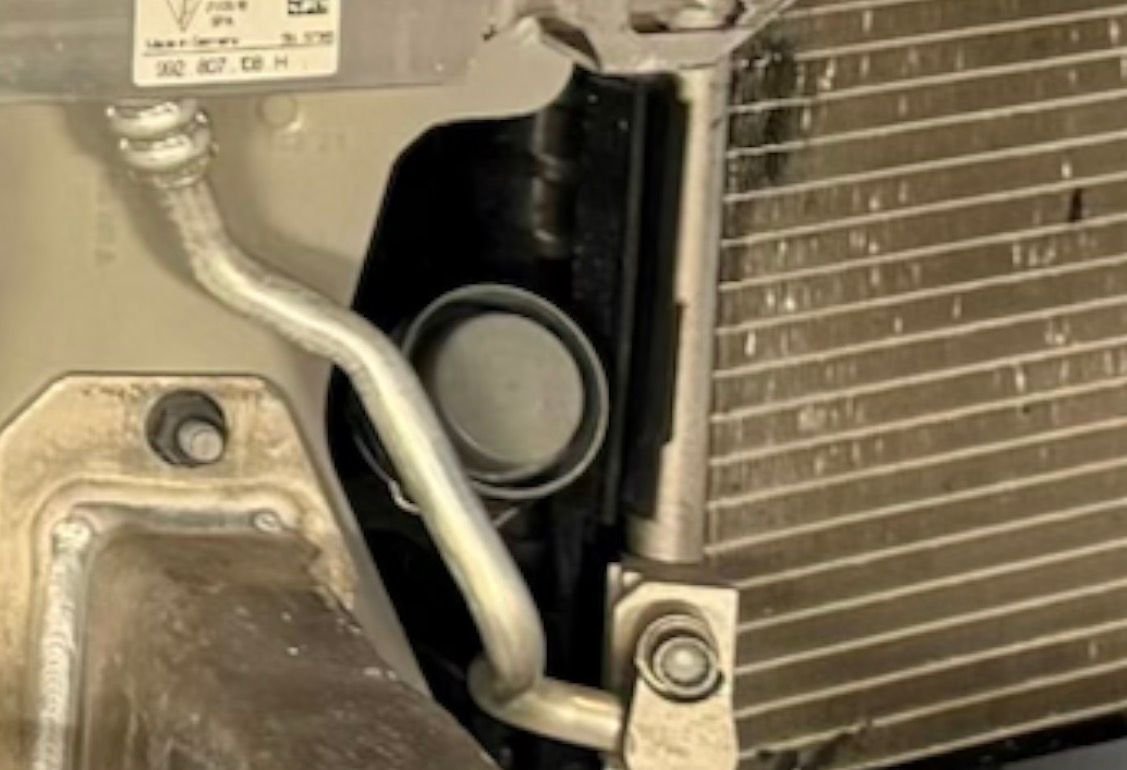
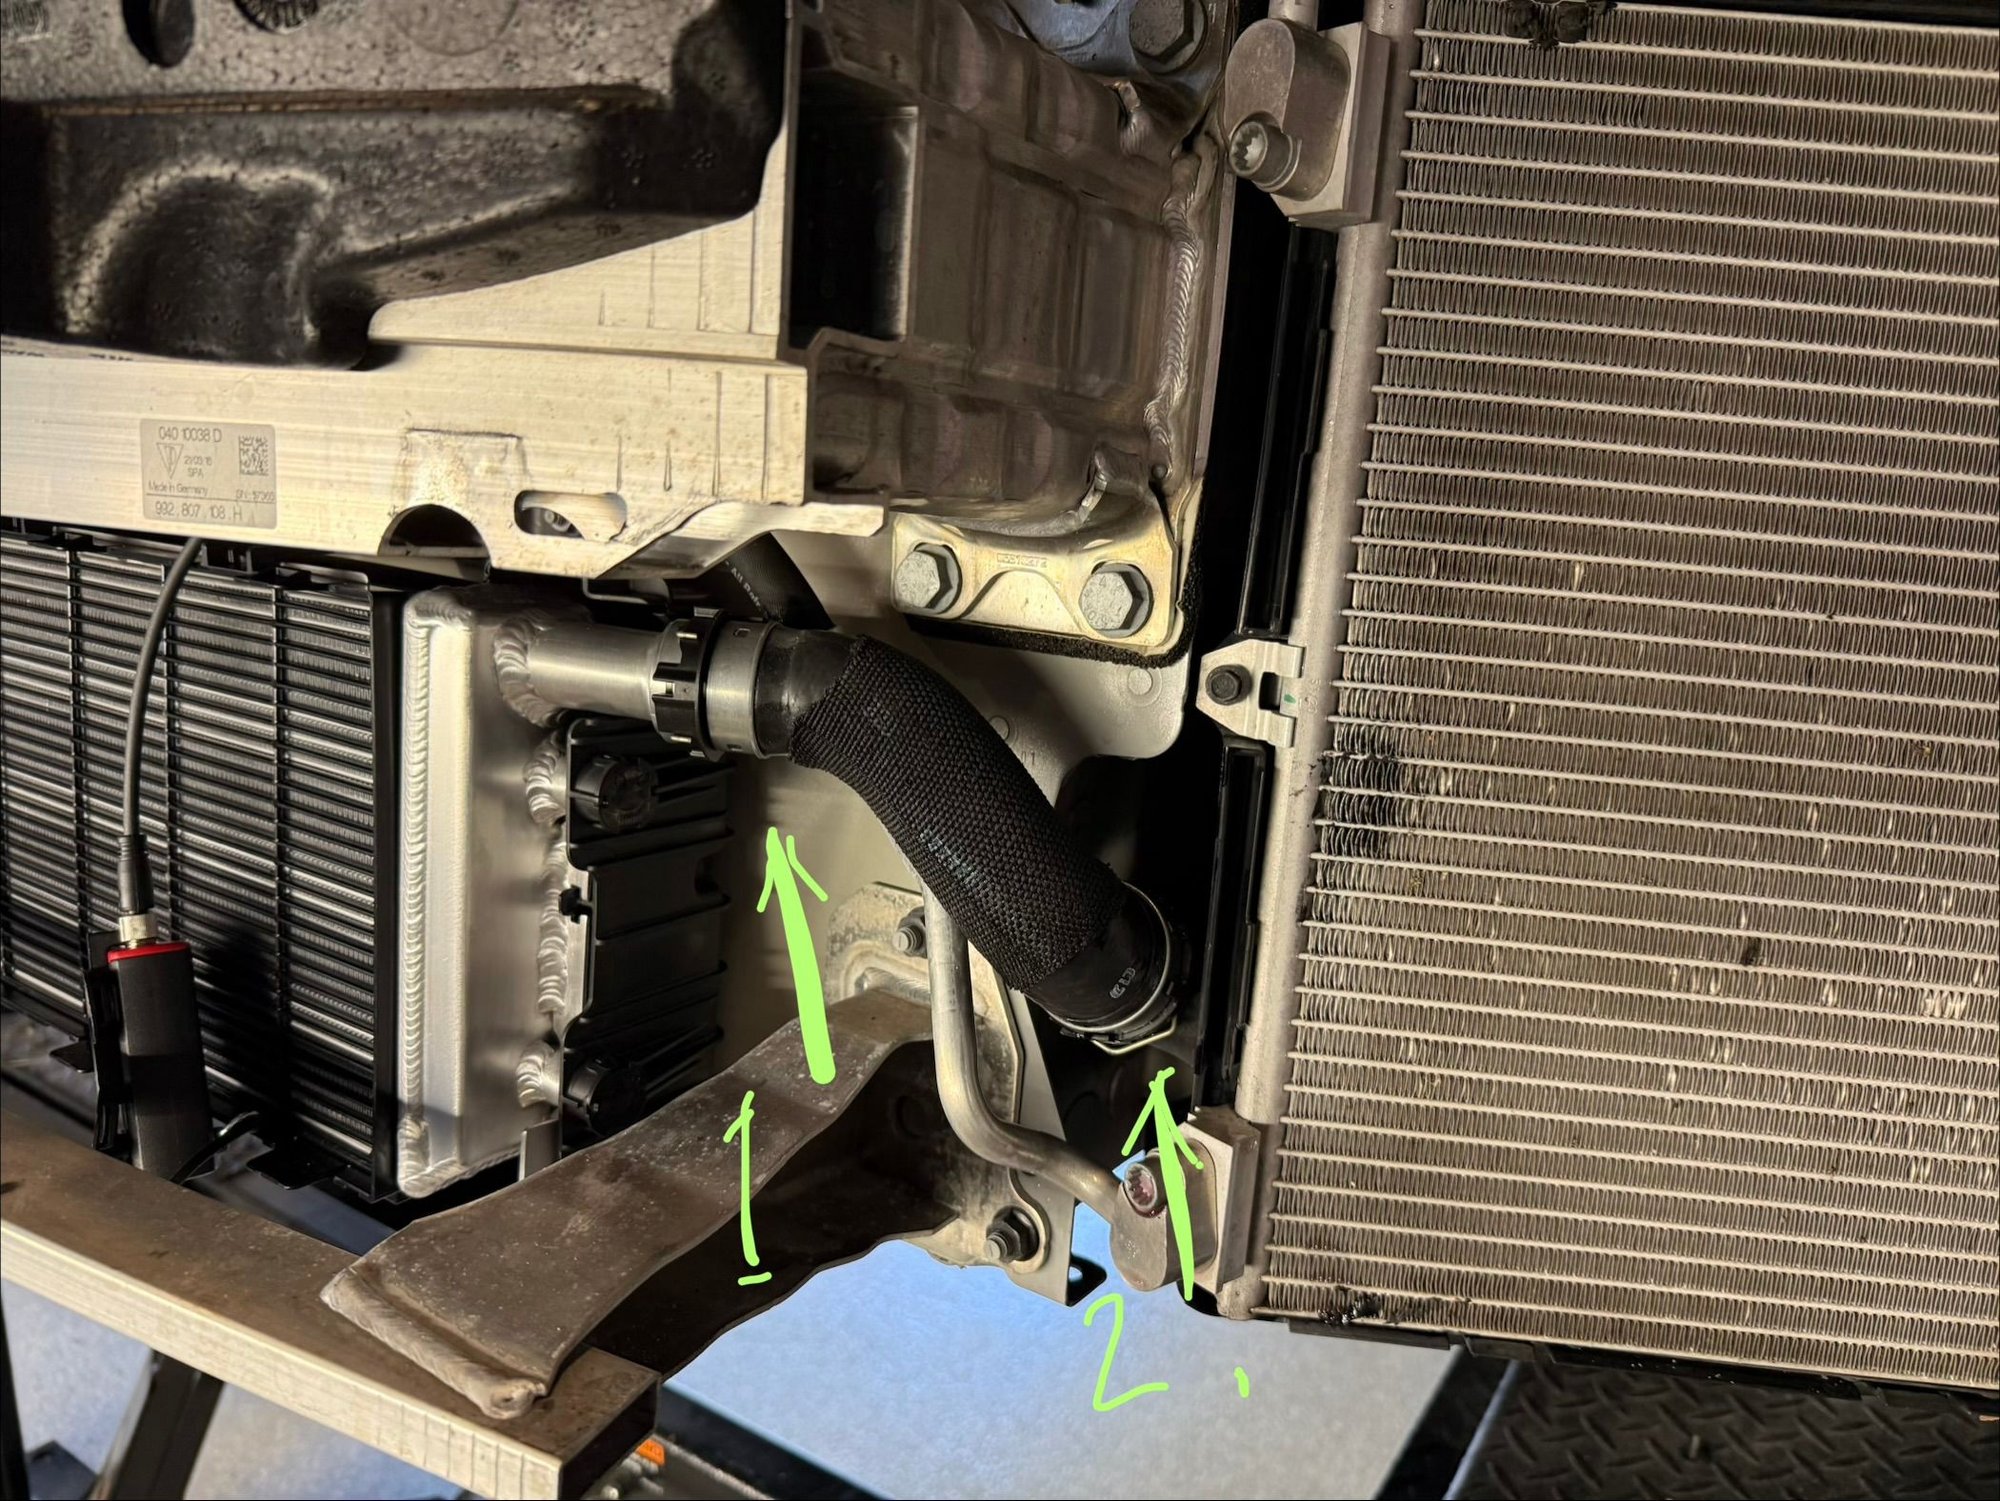
The top arrows point at existing studs on the tub wall that line up with the radiator rear shroud that doubles as radiator bracket.
The bottom arrows aim at existing tabs that the "feet" of the radiator rear shroud will stand on.
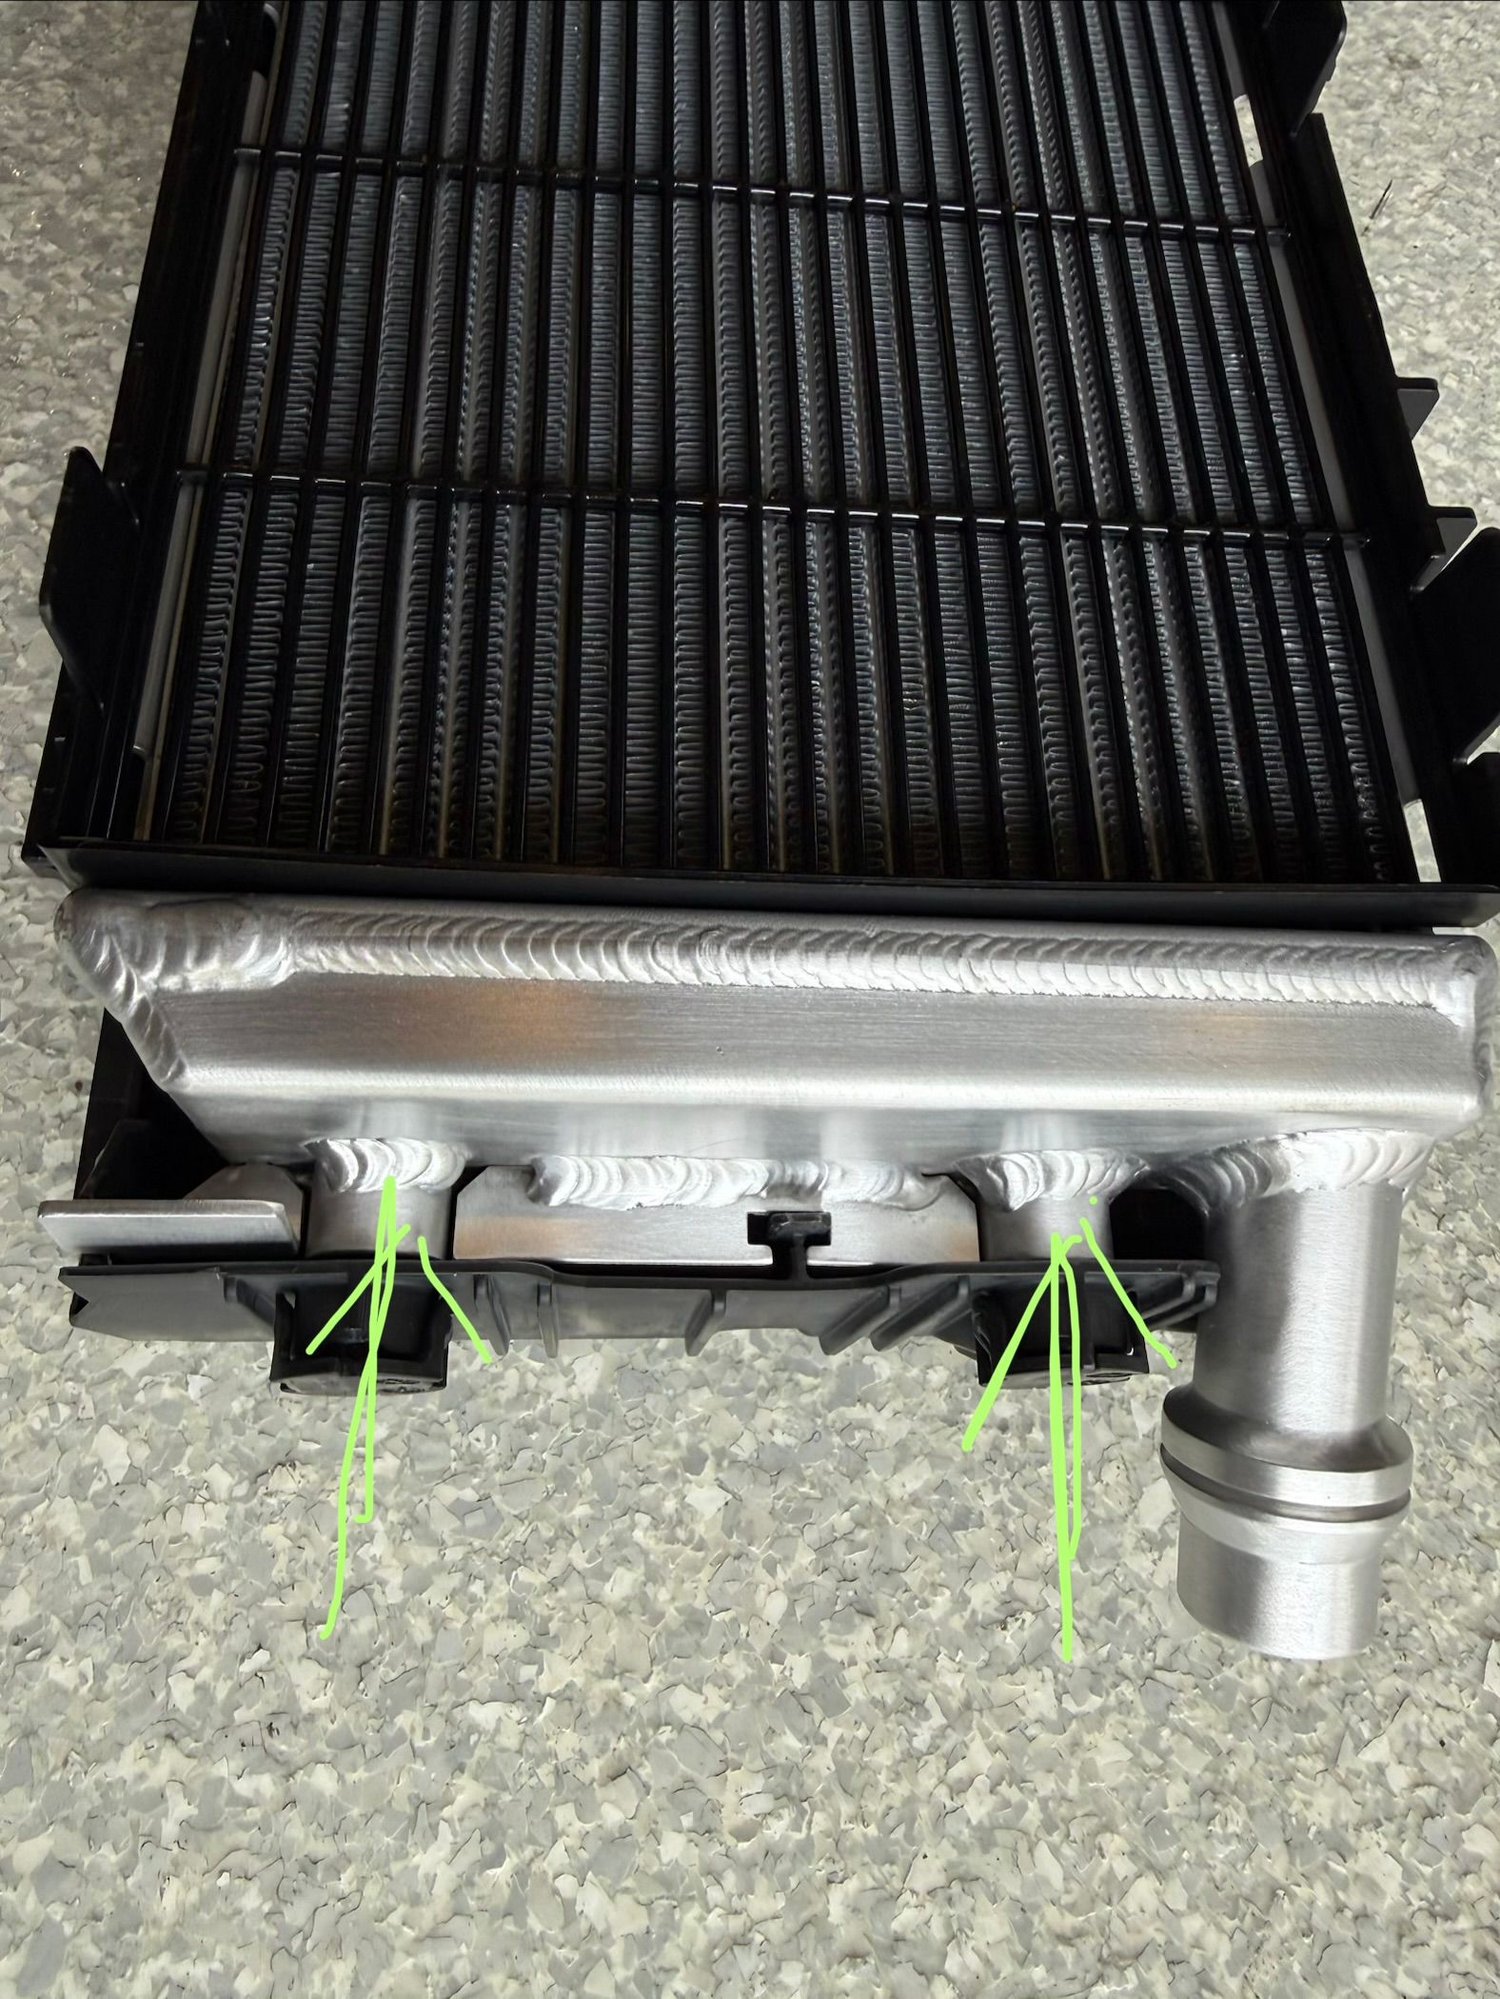
7. Assemble the radiator on the rear shroud, by inserting 2 plastic pins on each side. The radiator tubes go on top, the opening of the duct behind the radiator sends air to the underside of the car (unless you do a GT3 duct that vents upwards and needs holes in the hood).
8. There's a plastic rock guard that clips onto the front of the radiator with built in tabs and a straight seal strip that you put along the bottom of the radiator edge.
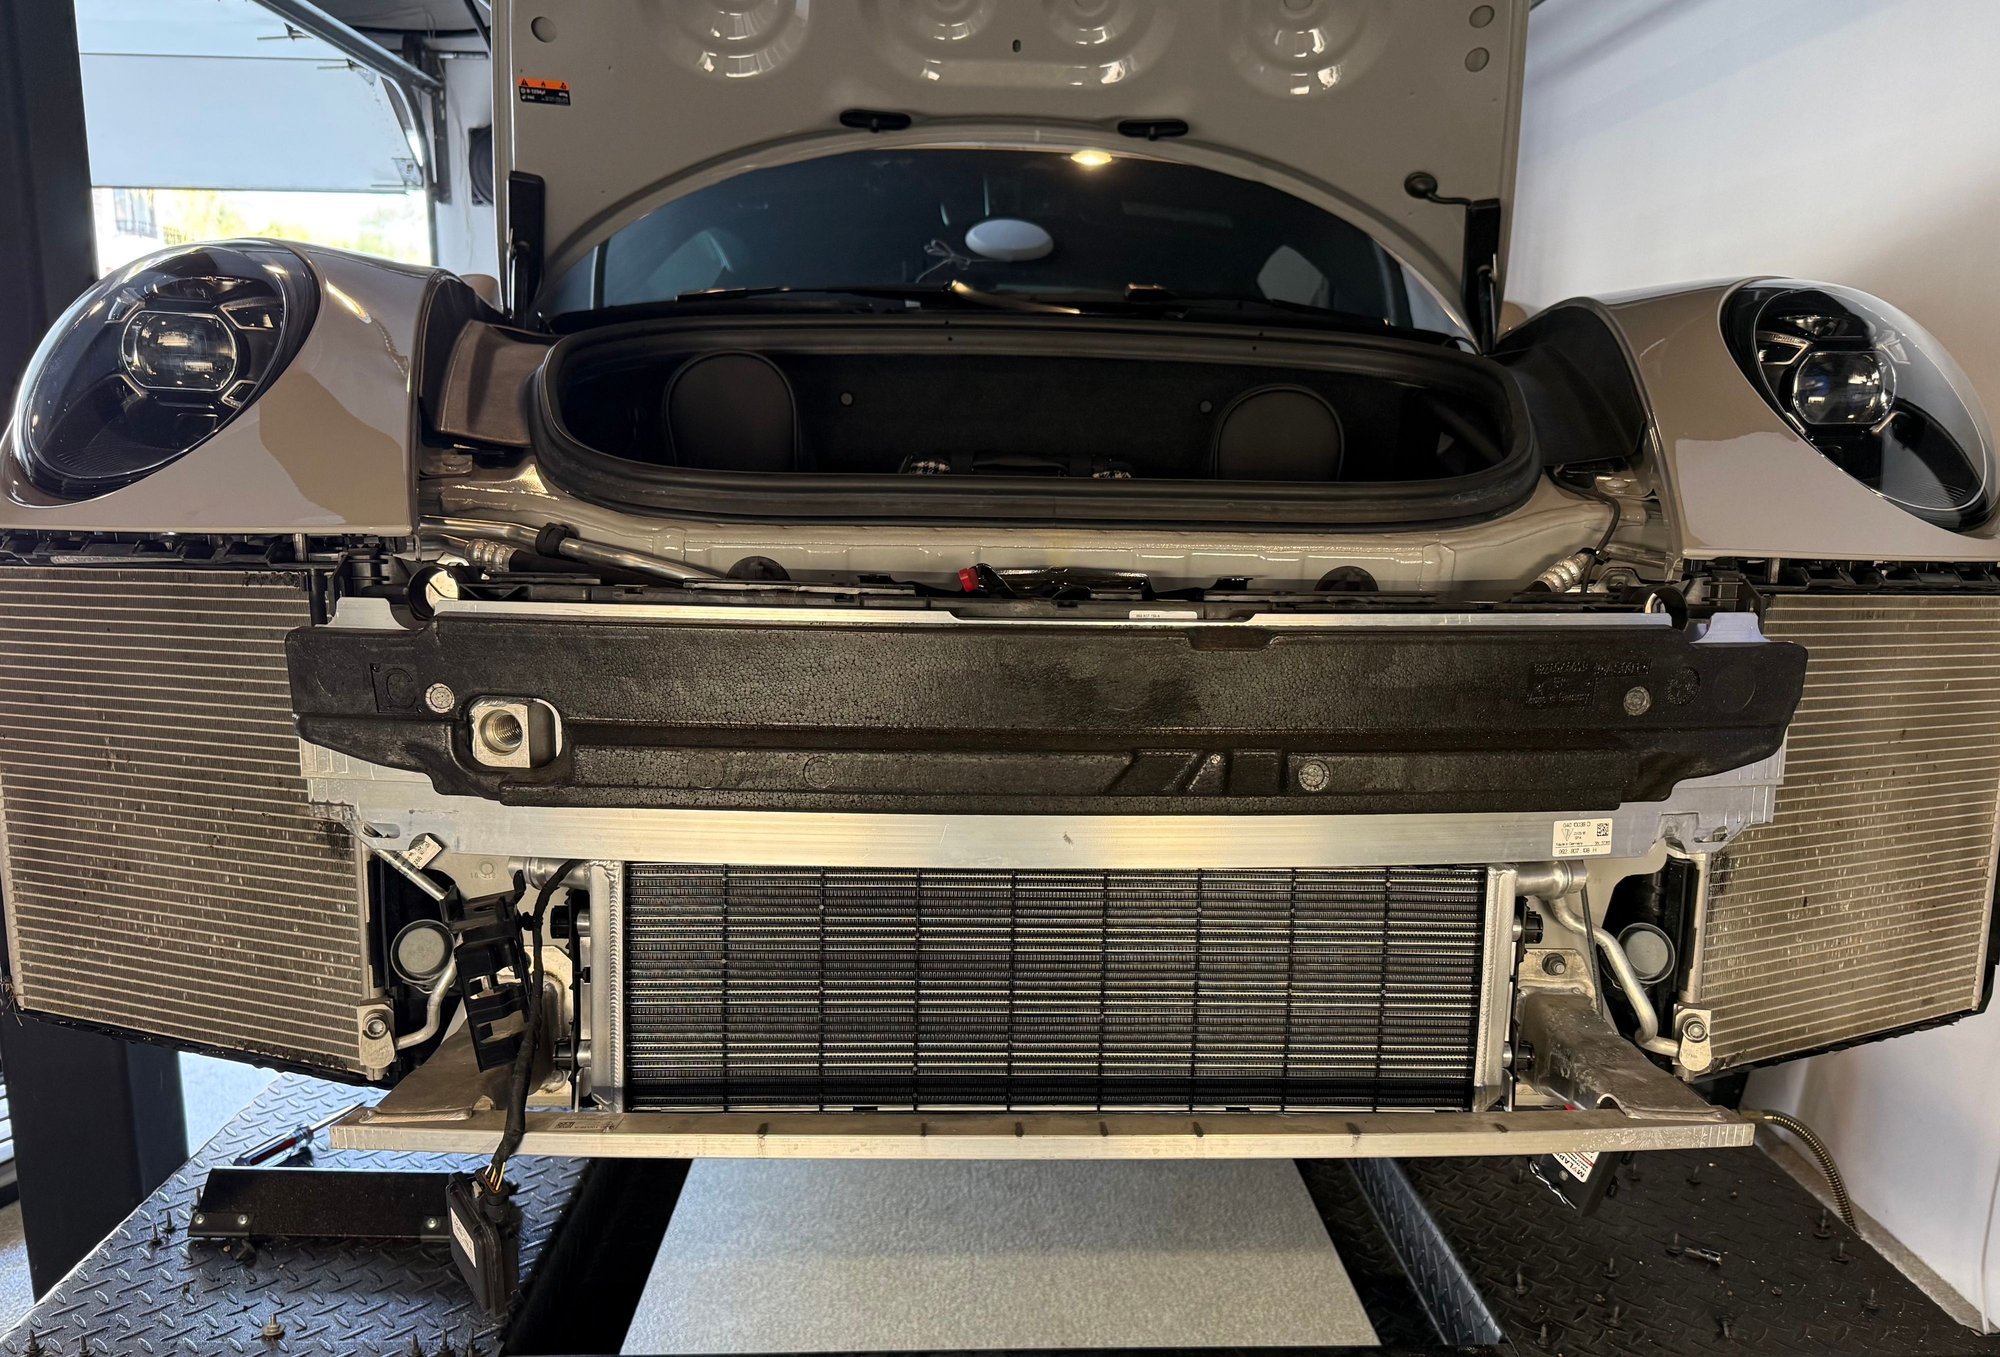
Below: No action just a mock placement inside the bumper.
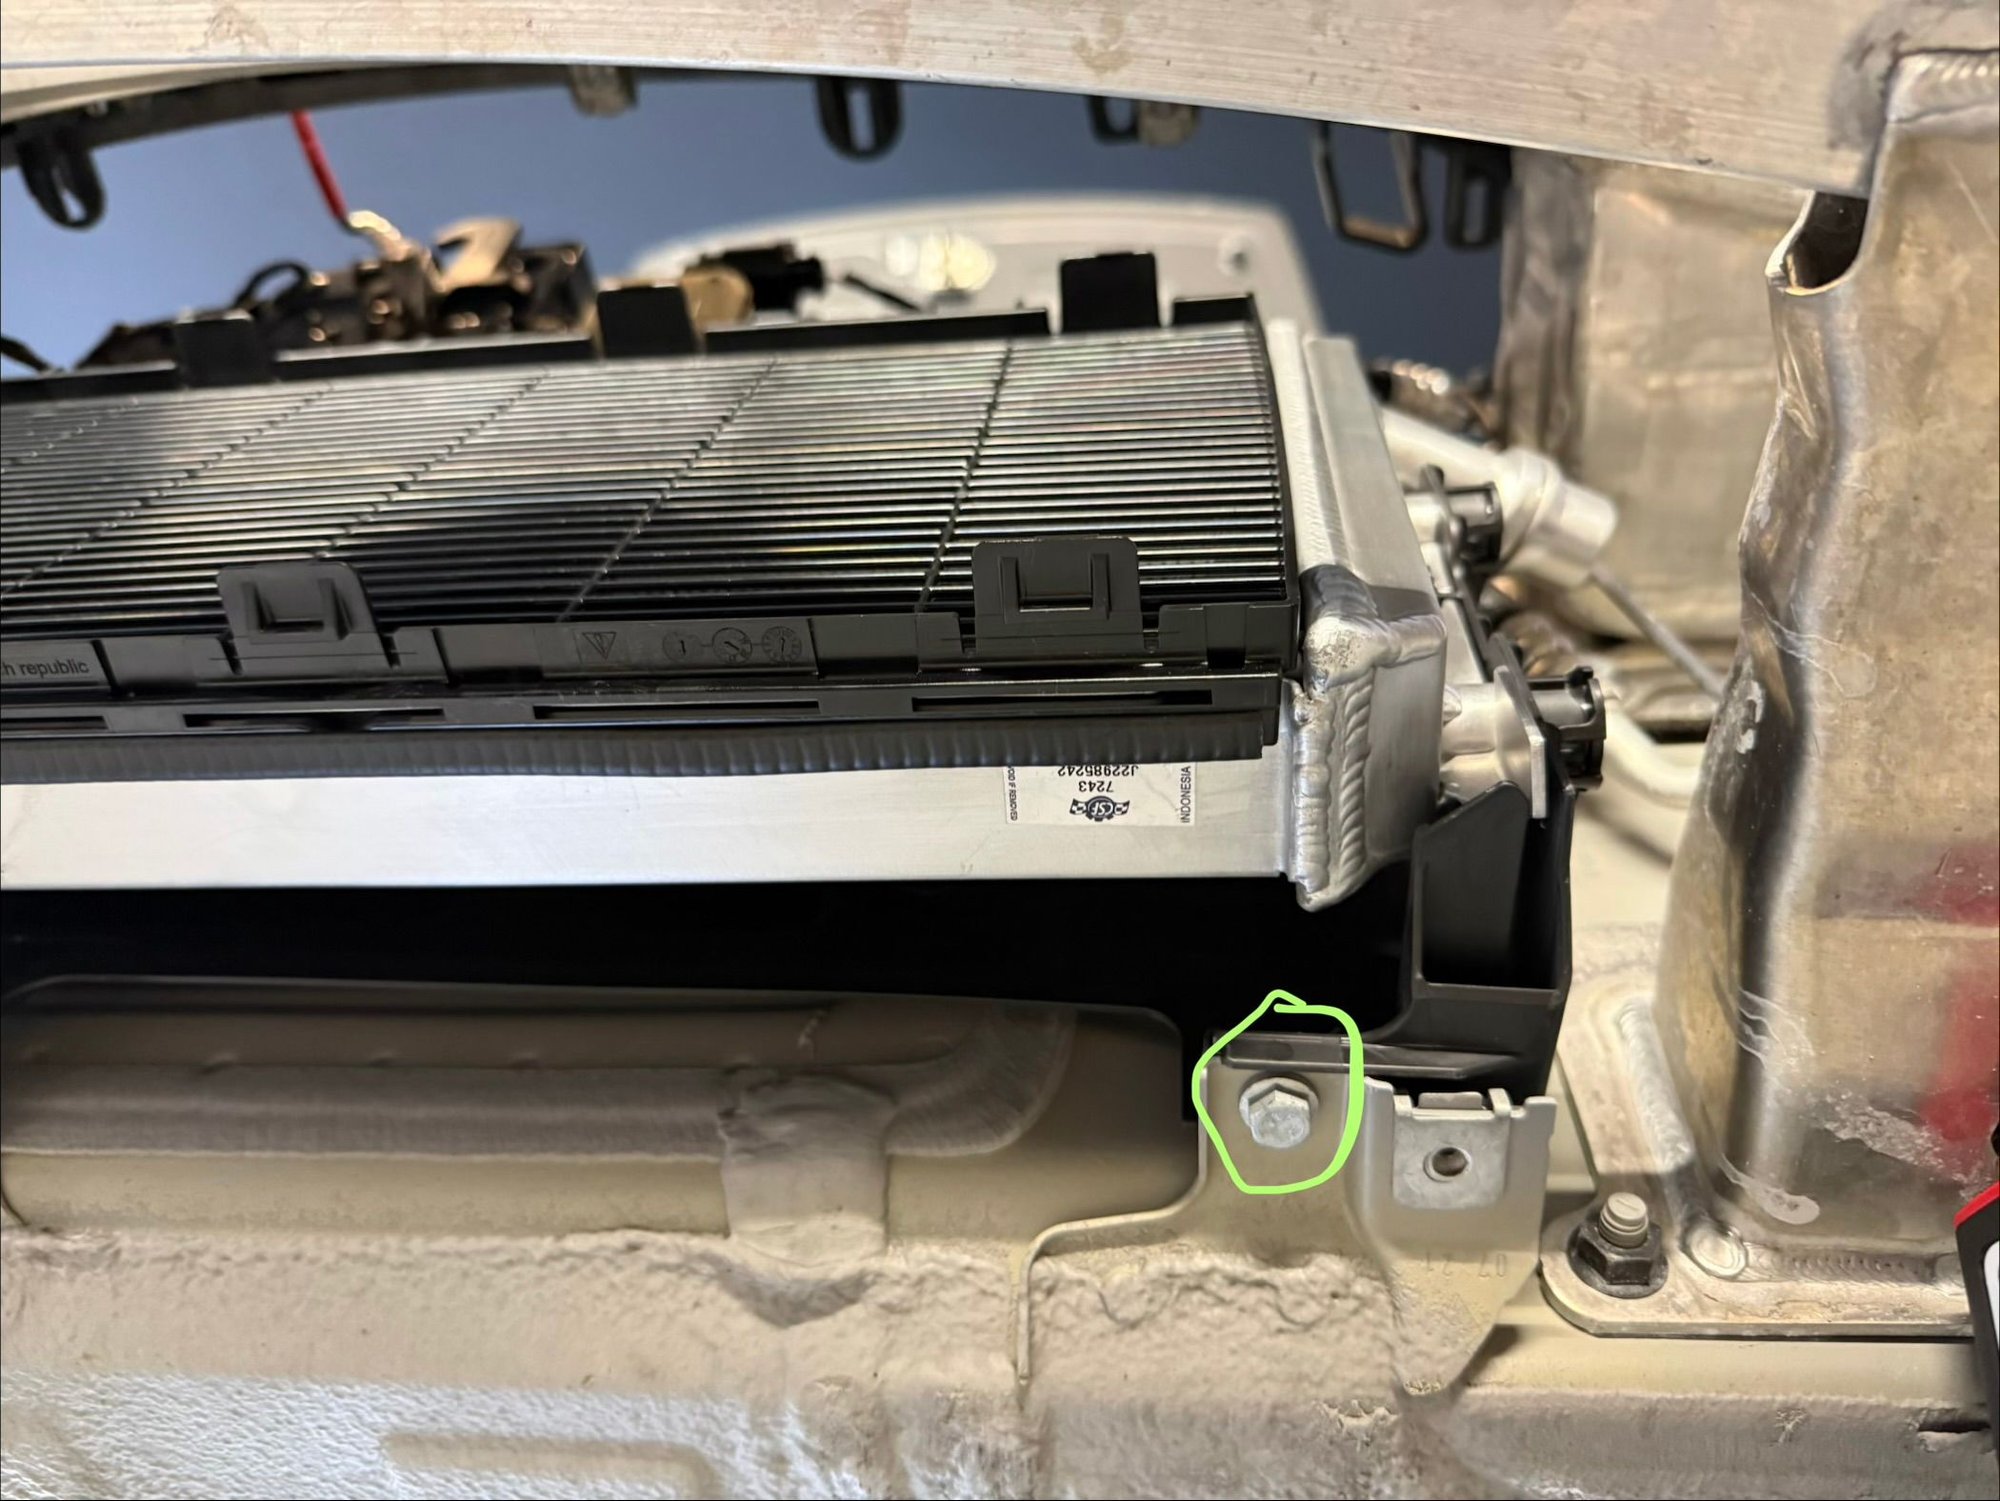
9. Easiest to put the radiator up from the bottom and hang on the upper studs and hand tighten the nuts.
10. Install lower screws from the bottom.
Connect hoses
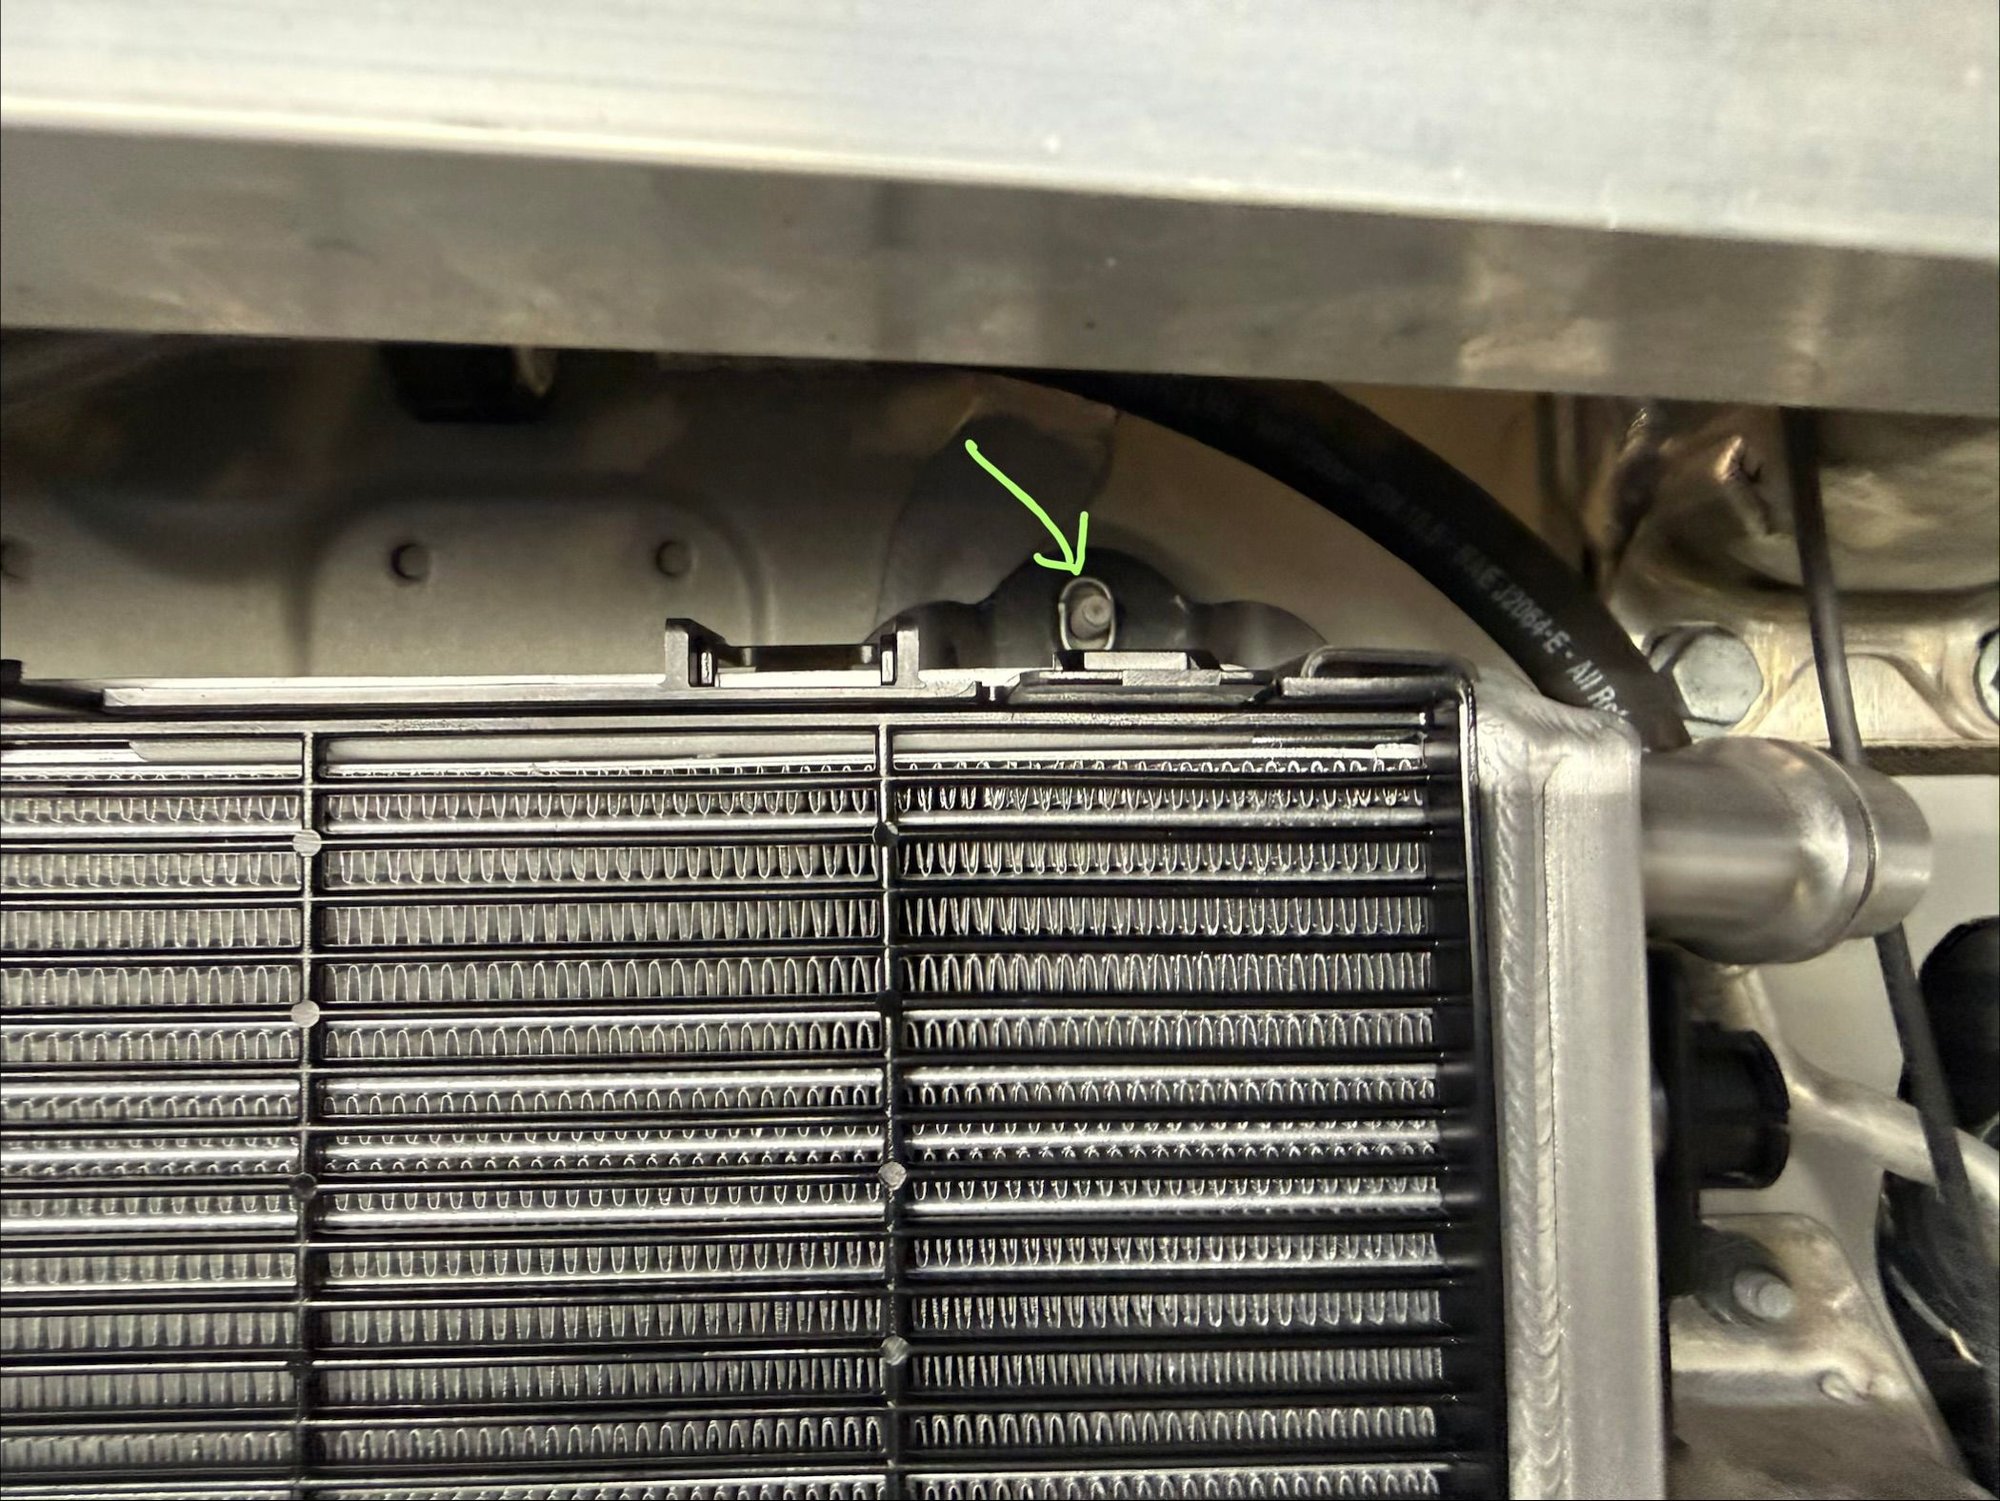
11. Remove the cap from the existing passenger side radiator. Here's how:
11a. Put a bucket below the passenger side radiator.
11b. Slide the hose end retaining clip down fully with a long screwdriver
11c. Grab the cap edge with strong pliers and pull/jiggle/rotate and it pops out easily, just need to be persistent with force, no need to mutilate the cap
A little coolant will come out. The higher the front is jacked up, the less coolant comes out.
12. Attach the pass side hose. Make sure the sliding retaining clips click in and hoses are firmly on.
13. Driver side:
13a. Connect the hose loosely on the new radiator first, turn it up as much as possibly and use a funnel to fill up the radiator to the brim.
13b. Remove the cap from the existing driver side radiator (again use a bucket, slide the retaining clip all the way down and pull/jiggle/rotate the cap out with strong grip pliers)
13c. Connect the hose on both sides, again ensuring the retaining clips click and hose is firmly on.
Below: Bucket with spillage, it's not much. Appr half from opening the rads and half is spill from when I filled the 3rd radiator, I poured too fast.
14. Reinstall the side ducts.
(zipties to the right in this photo were temporarily holding a permanently powered racetrack transponder sat behind the impact bar, this has now been moved to a better location)
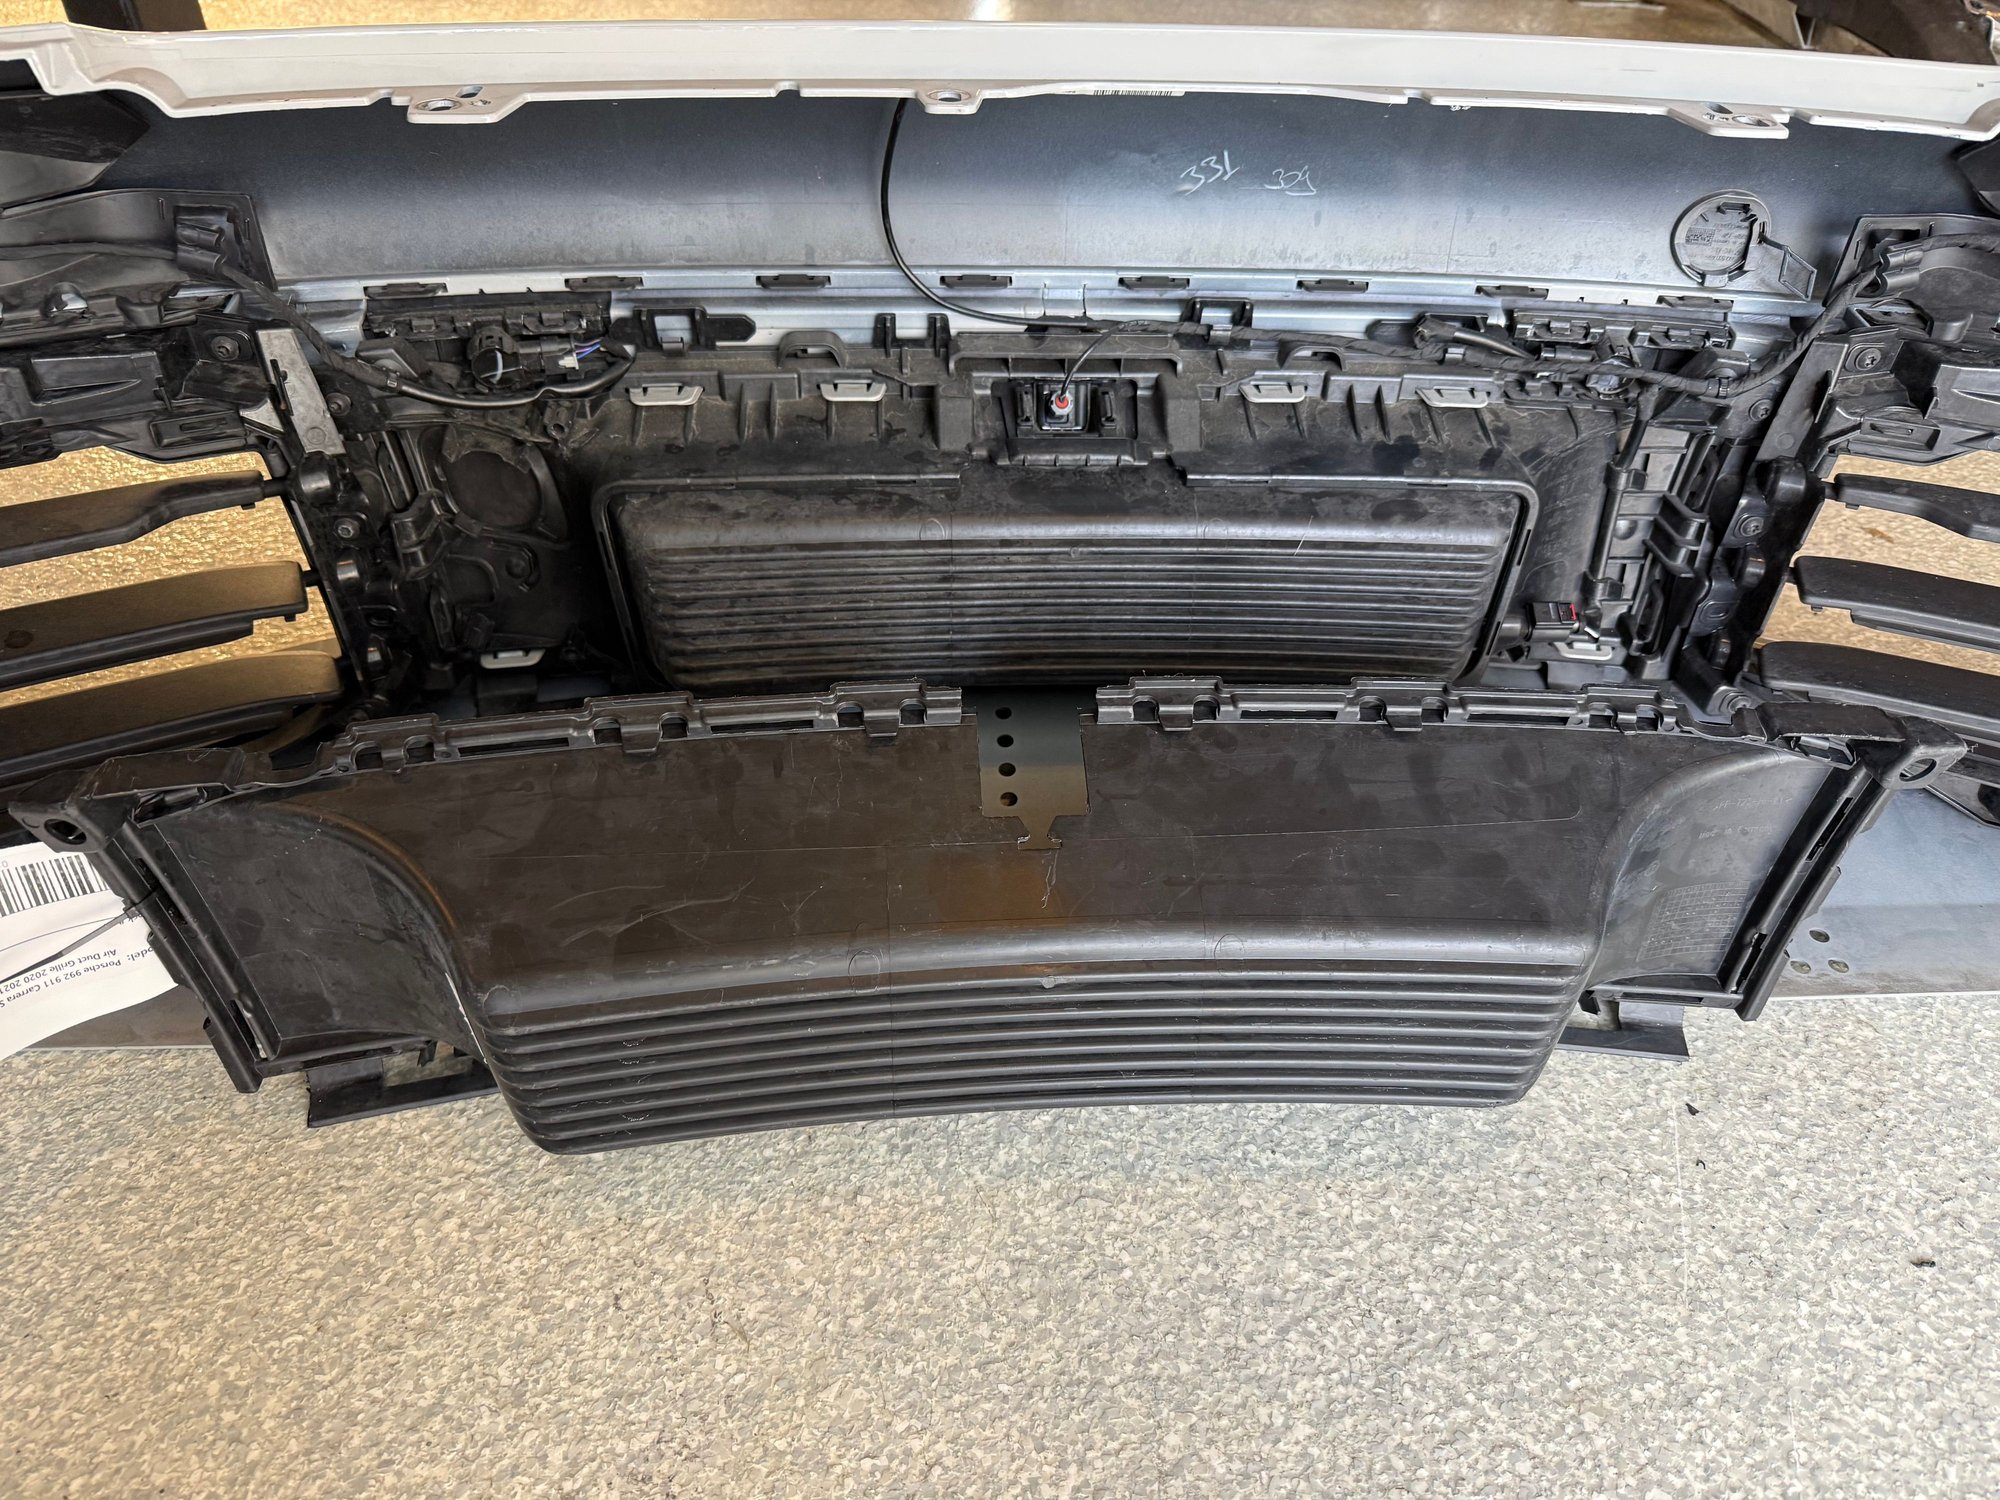
15. Remove the center faux grille and install the new part that is open.
You can also cut the center open which saves some time but it is harder to get good access angles for a phenomenal result. If cutting, use the forward facing air duct to trace how large the opening should be.
Bleed and leak check:
16a. Test fit bumper
16b. Plug in all connectors
16c. Lower the front of the car
16d. Raise rear of the car high (chock front wheels).
16e. Plug in battery.
17a. Open coolant fill cap.
17b. Idle car just until thermostat opens and burps air. Fill up coolant right after it burbs and turn car off. Wait a little and do it again, keep repeating until it doesn't burb. Never run car hot, just enough to open thermostat, and let it cool a bit between each cycle.
17c. When you definitely refilled more than spilled out, put back the coolant fill cap securely.
17d. Run the car a little longer now and attentively monitor coolant temperature until fully hot and observe when temp reading reacts (drops) thanks to the thermostat opening. If it doesn't briefly cool down you still have air trapped somewhere.
18. Before putting the bumper skin back on, add the front center air guide. It clips right in.
19. Finally, once all air is bled out, assemble bumper, fender liners etc.
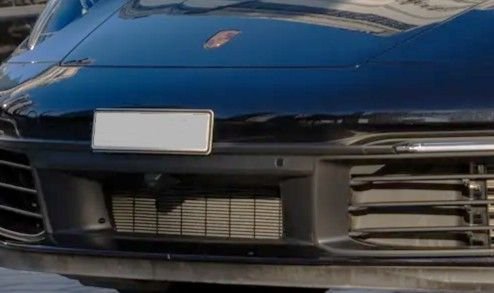
Here is a hot market car for comparison.
All in all this was a really quick upgrade, only a couple of hours added to identify the correct bumper grille and center air duct part numbers.
It’s interesting that even the GTS does not come from the factory w the center radiator. The 991.1 X51 (GTS) did come with one. If I tracked in the desert SW then maybe. Great write up tho. Thx for posting. Btw Suncoast has the kit for $1500.
It�s interesting that even the GTS does not come from the factory w the center radiator. The 991.1 X51 (GTS) did come with one. If I tracked in the desert SW then maybe. Great write up tho. Thx for posting. Btw Suncoast has the kit for $1500.
If you add a Stage 1 tune these cars need a lot more cooling at the track for sure. Temps just keep rising until you have to let off, no fun.
I saw the Suncoast kit but opted for the CSF radiator itself, then got the duct, pins, seal, hoses and nuts/bolts from a dealer. CSF's radiator is allegedly more effective at same or lower cost.
Fantastic. And what time you took to document this! Silly question. What is the flow path of the coolant between the center and side radiators?
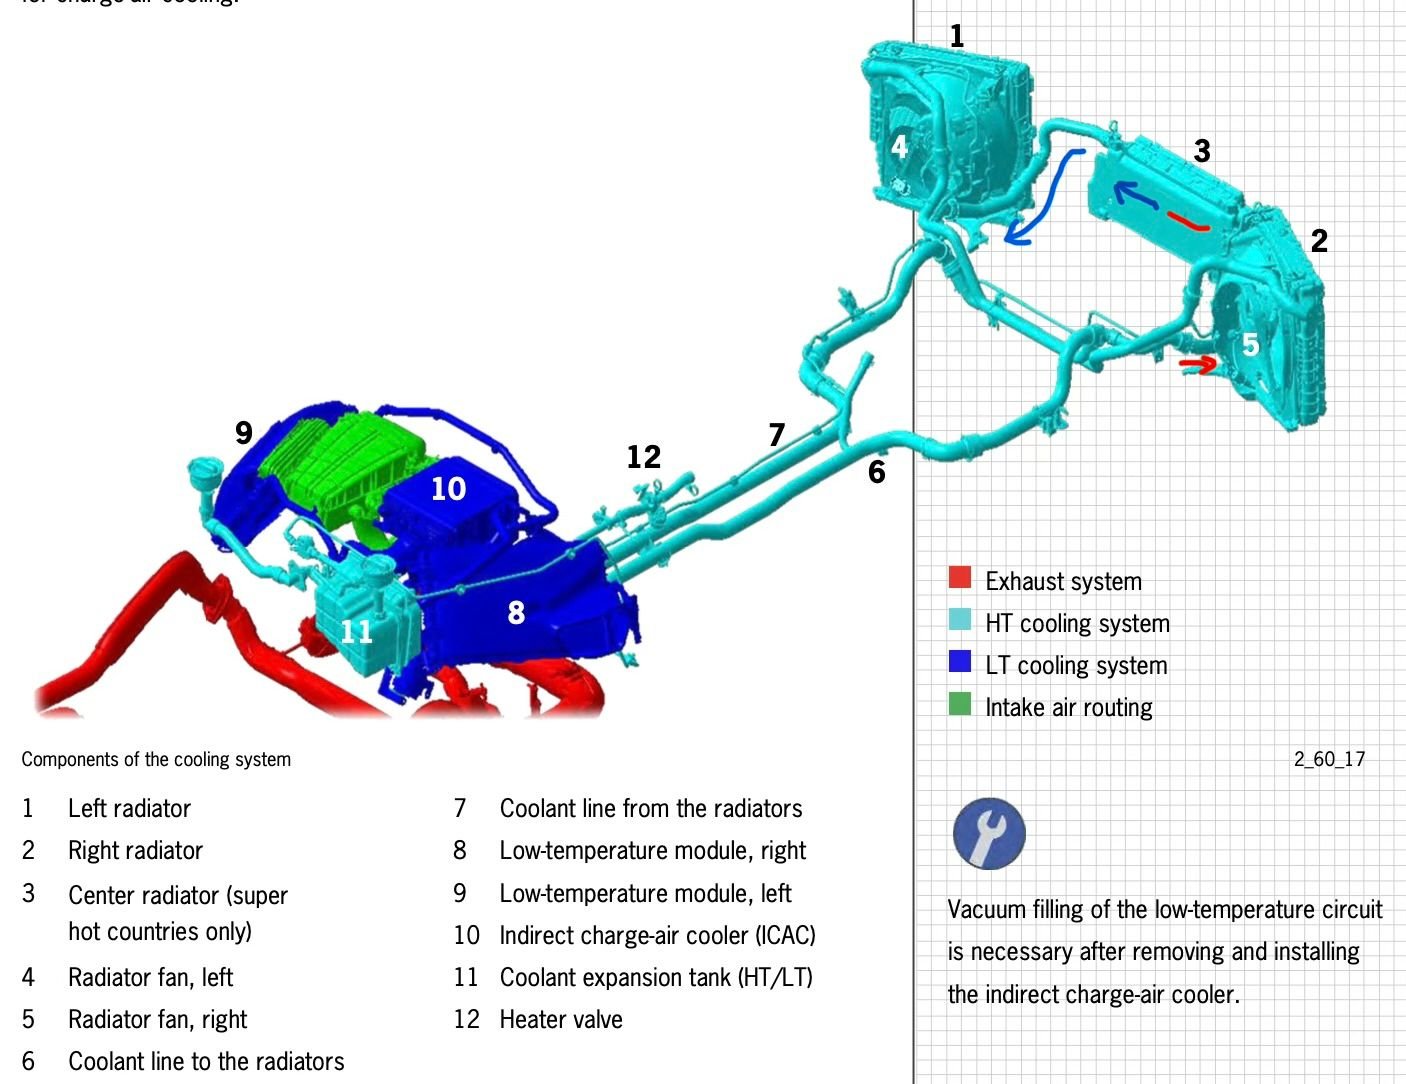
This is a recent 718 diagram, may or may not be like 992, but this is consistent to prior 3 radiator setups on earlier generations (although the direction was the opposite at least on 996TT).
Based on the flow direction shown here, the hot pressure side splits off into the center radiator on the passenger side and the cold side rejoins the cold side on the driver side and flows back to the engine.
Thanks but I can�t imagine a more confusing picture. The passenger has an in and out but I guess it also feeds the center. The center looks like it returns and the left is on its own.
If you add a Stage 1 tune these cars need a lot more cooling at the track for sure. Temps just keep rising until you have to let off, no fun.
I saw the Suncoast kit but opted for the CSF radiator itself, then got the duct, pins, seal, hoses and nuts/bolts from a dealer. CSF's radiator is allegedly more effective at same or lower cost.
I had a stage 1 on my 991.2 T and had zero issues at the track, 90* plus days in August, the temps were very reasonable. Oil never over 250. Does the 992 8 speed PDK have additional cooling with the 3d radiator? That would be a big plus.
I had a stage 1 on my 991.2 T and had zero issues at the track, 90* plus days in August, the temps were very reasonable. Oil never over 250. Does the 992 8 speed PDK have additional cooling with the 3d radiator? That would be a big plus.
Thanks, added a note about base and T. They produce less power = less thermal energy to dissipate.
At ~35% thermal efficiency a Stage 1 S/GTS making 50hp more than a Stage 1 T, generates an extra 100hp worth of just heat that needs to be dissipated.
PDK is a dual clutch system and a shift actuator that replaces foot and hand operated mechanisms. The transaxle itself is constructed like a manual with gears, not automatic type converter, and would have similar cooling needs. My PDK 992.1 didn't come with a 3rd radiator.
9 Vehicles Porsche Helped Engineer that Aren't Porsches
Slideshow: Long before engineering consulting became trendy, Porsche was quietly helping other automakers build everything from supercars to economy hatchbacks.
9 Features and Characteristics That Only Porsche People Understand
Slideshow: Some brands build cars. Porsche builds traditions, obsessions, and a few habits that stopped making sense decades ago but somehow became part of the charm.
This Builder Is Turning Heads With Its Slantnose 911 Creation
Slideshow: A small Polish tuner has reimagined the Porsche 911 Slantnose for the modern era, blending 1980s nostalgia with widebody tuning culture and serious performance upgrades.
Porsche 911 GT3 Artisan Edition Pays Homage to Japanese Culture
Slideshow: Porsche has created a Japan-only 911 GT3 Artisan Edition that blends track-ready hardware with design cues inspired by traditional Japanese craftsmanship.
Porsche Reveals Coupe Variant of the Electric Cayenne With a Fresh Look
Slideshow: Porsche's latest electric Cayenne Coupe blends dramatic styling with supercar acceleration, turning the brand's midsize SUV into a 1,139-horsepower flagship.