When you click on links to various merchants on this site and make a purchase, this can result in this site earning a commission. Affiliate programs and affiliations include, but are not limited to, the eBay Partner Network.
How to run a cable from the front overhead console to the rear windshield for a rear Dashcam.
These instructions are for a FitCamX, but may be used for other wiring to the rear windshield, as well.
This approach of using a string to pull the cable allows us to work from the passenger side window seal, where access is easier and more comfortable.
Items Required
1. Front Dashcam
2. Rear Dashcam
3. Dashcam cable
4. Thin flexible hangar wire
5. Strong string (such as thick nylon string)
6. Needle nosed pliers
7. Duct tape
8. Scissors
9. Hobby knife or similar (optional, to cut Duct tape)
10. Rubbing alcohol (optional, to remove tape residue)
Preparation
1. Cut off the hook part of the hangar wire and straighten it out.
2. Use needle nose pliers to tightly loop both ends, so they are not sharp.
3. Bend one end of the hangar wire into an L shape to act as a handle and provide leverage.
4. Tightly wrap the front tip of the hangar in Duct tape, to prevent it from scratching anything. Also wrap the back end of the hangar wire for the same reason.
Front Cable
First, we will run the cable to the front Dashcam.
1. If you have a sunroof, open it and slide it back.
2. Turn off your car.
3. Remove the overhead console. (Instructions are available in other threads).
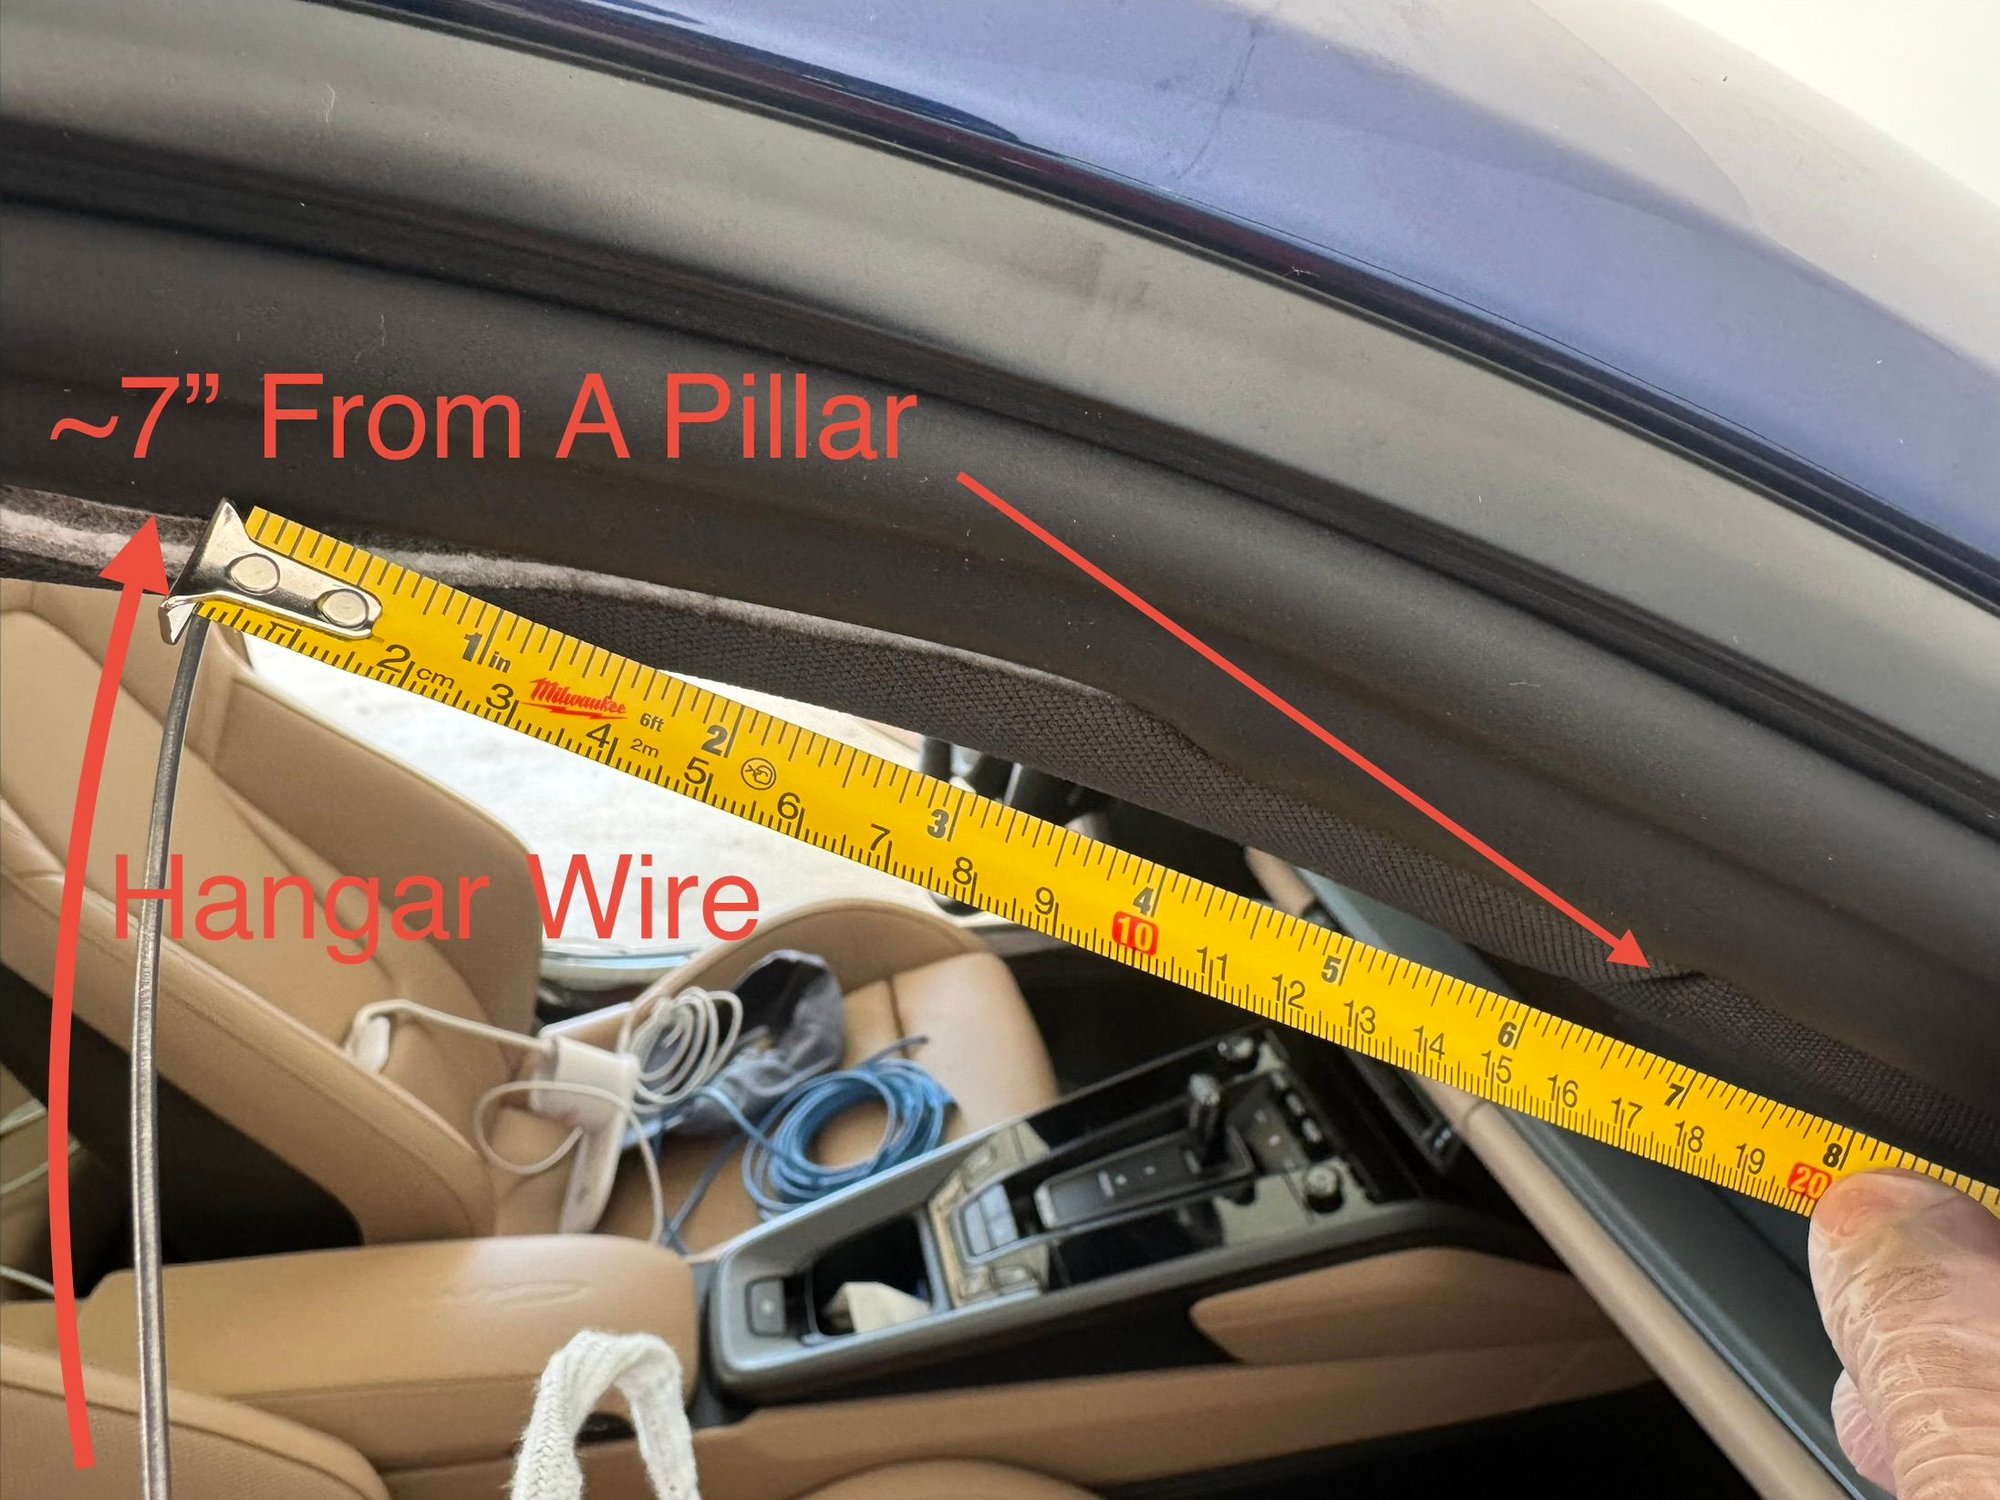
4. Gently pull the rubber trim above the right passenger window and expose the headliner.
5. Approximately 7“ from the A pillar, insert the tip of the hangar wire.
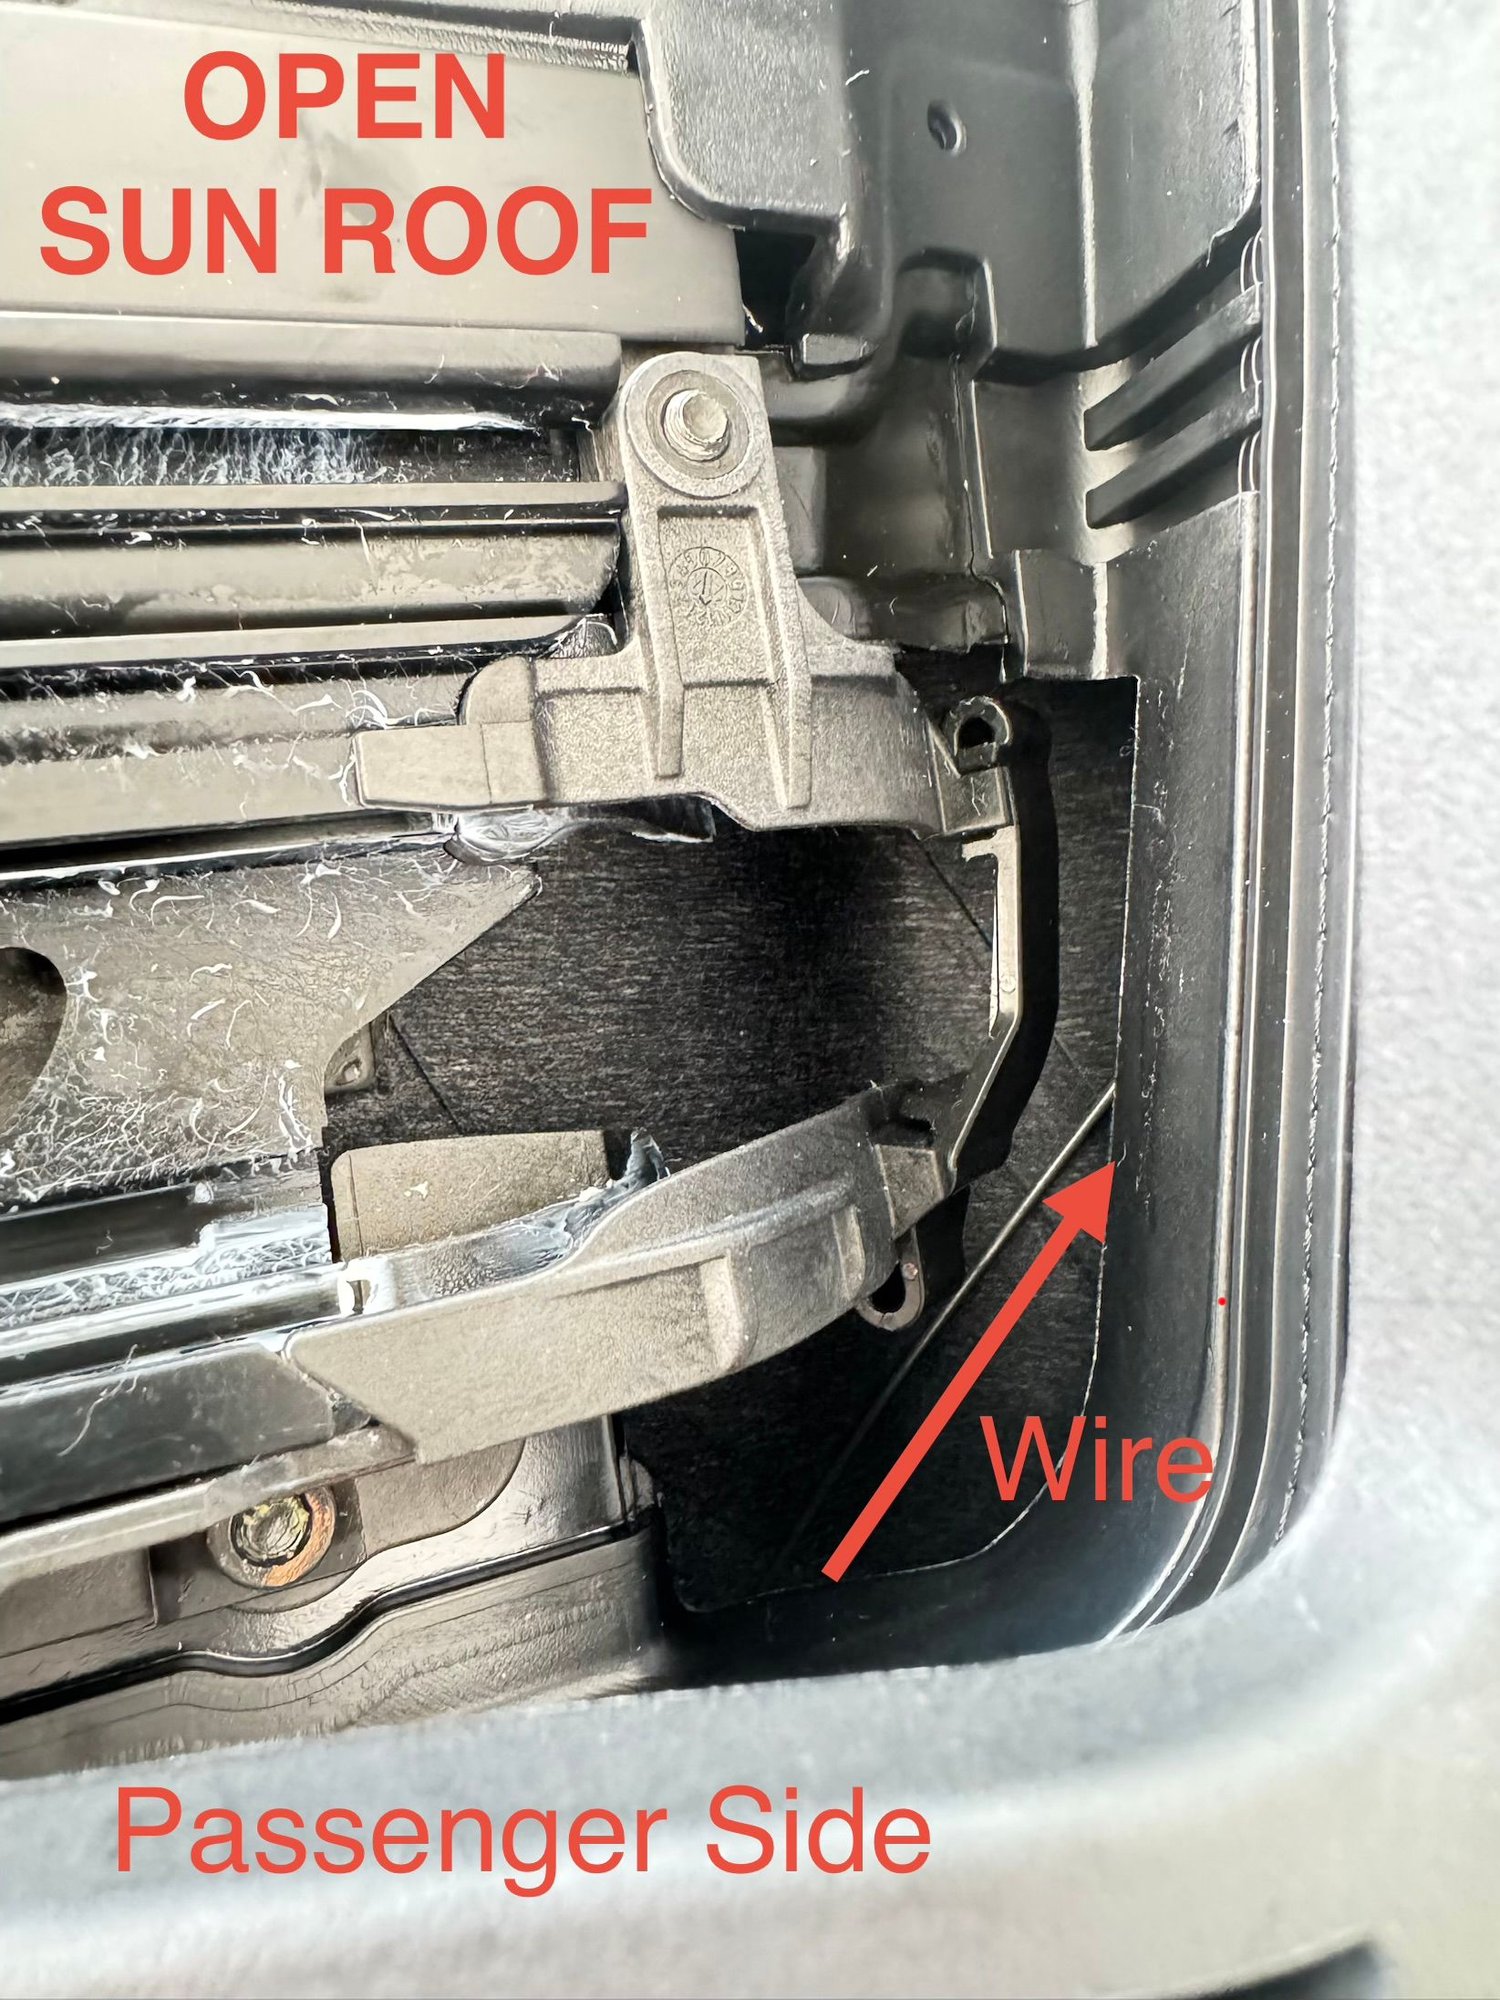
6. Angle and carefully insert the wire towards the overhead console. If you have a sunroof, aim for the right front corner of the sunroof opening. You will actually see the wire pass past that corner, if you look from the top.
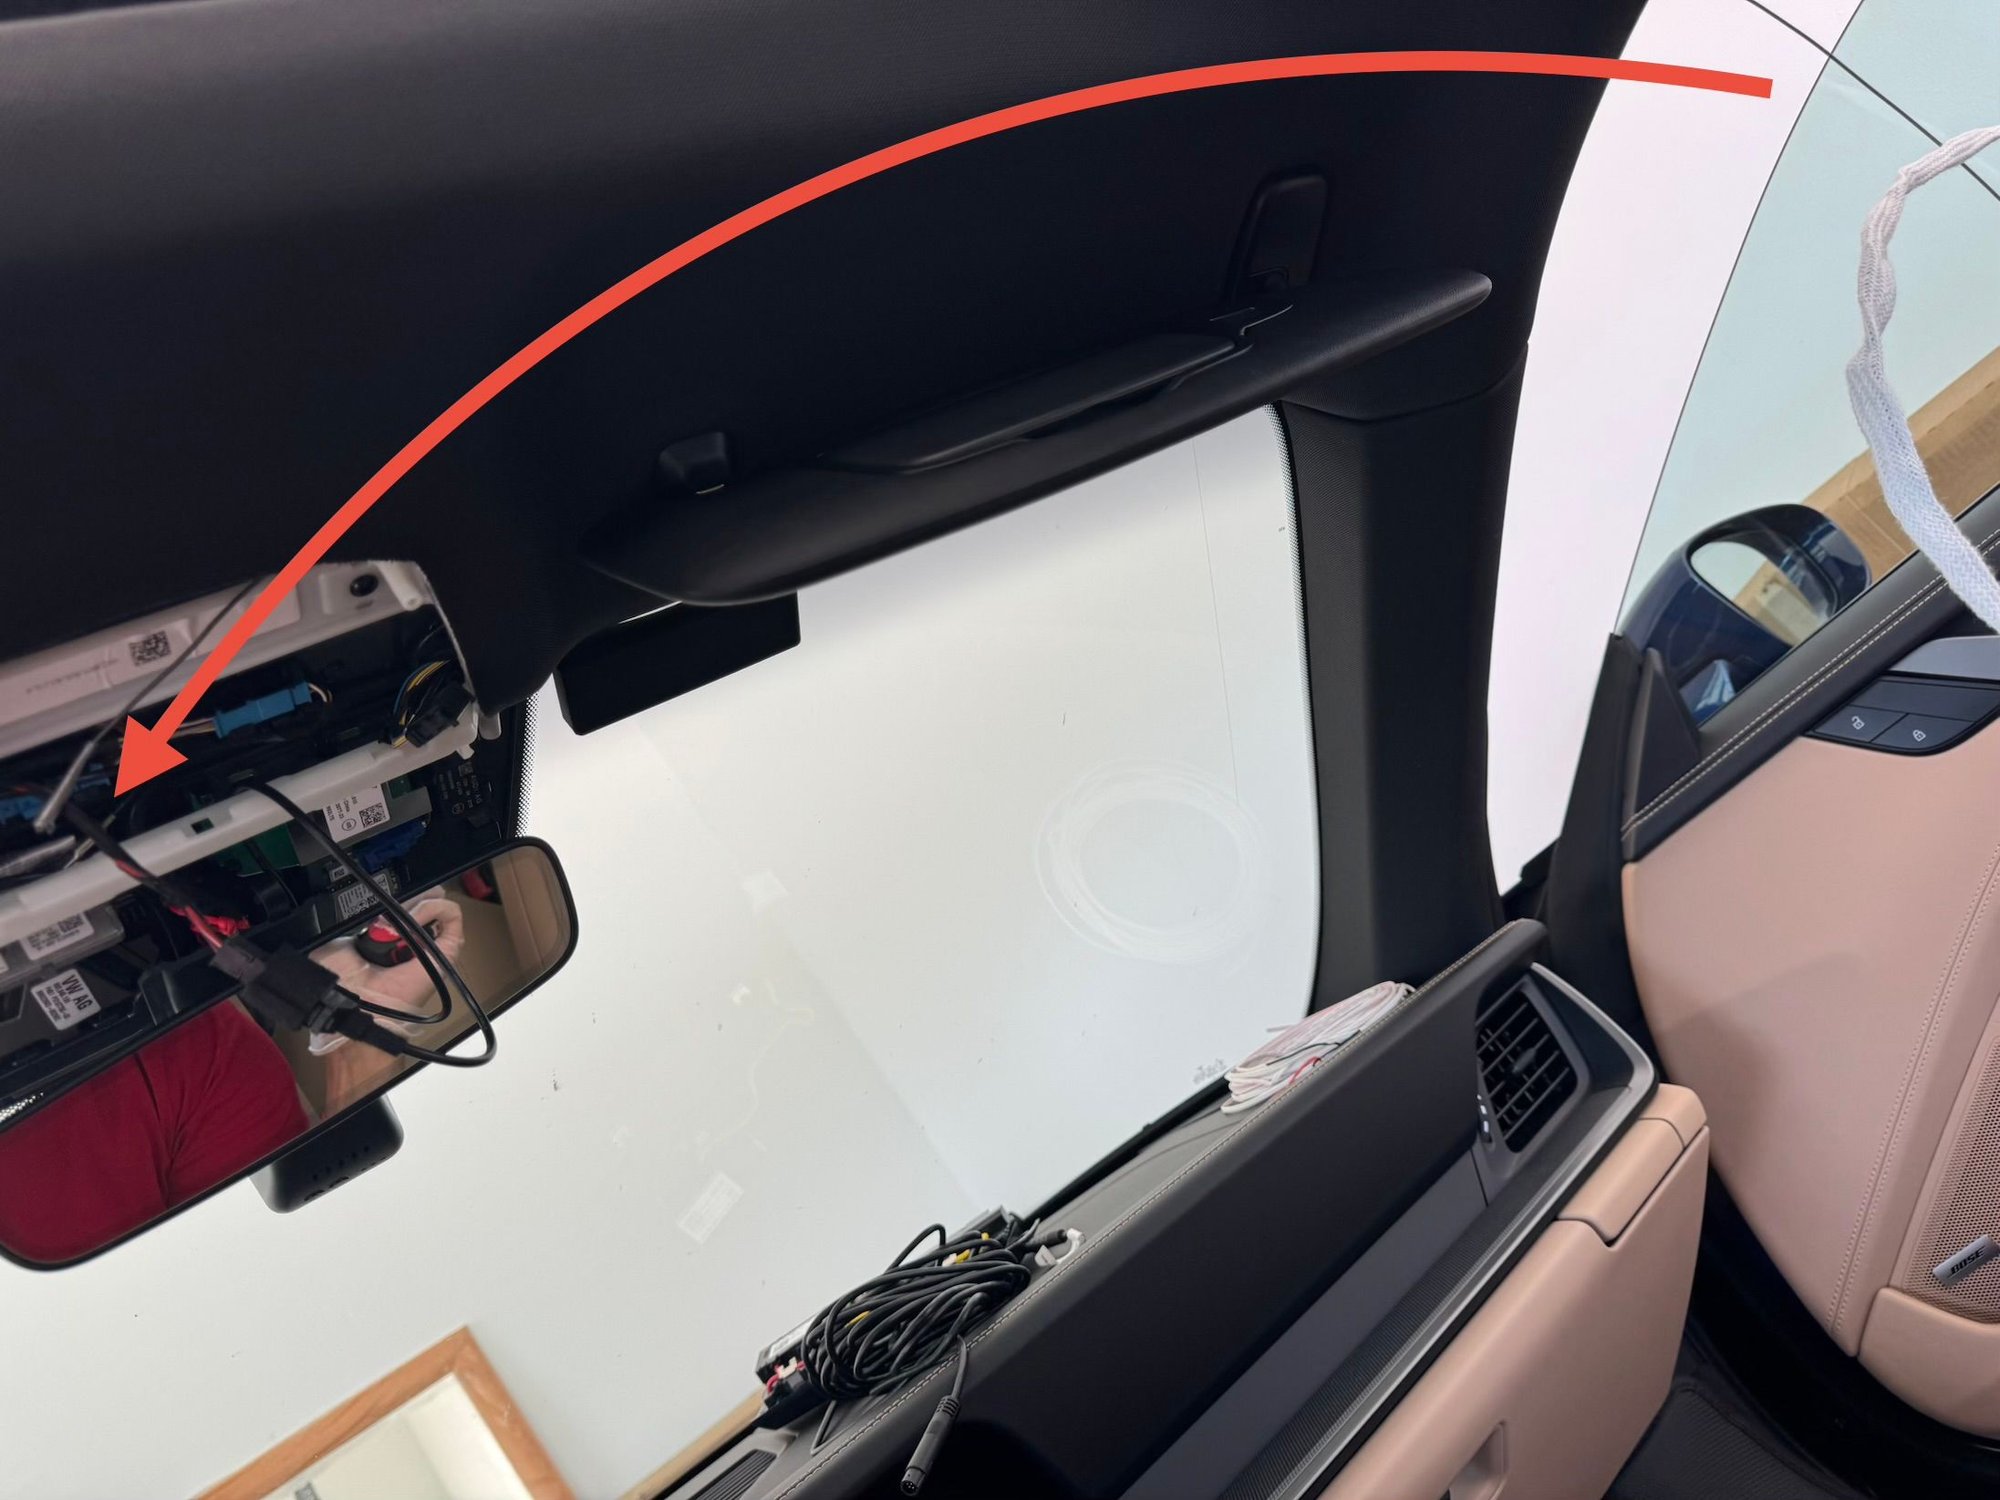
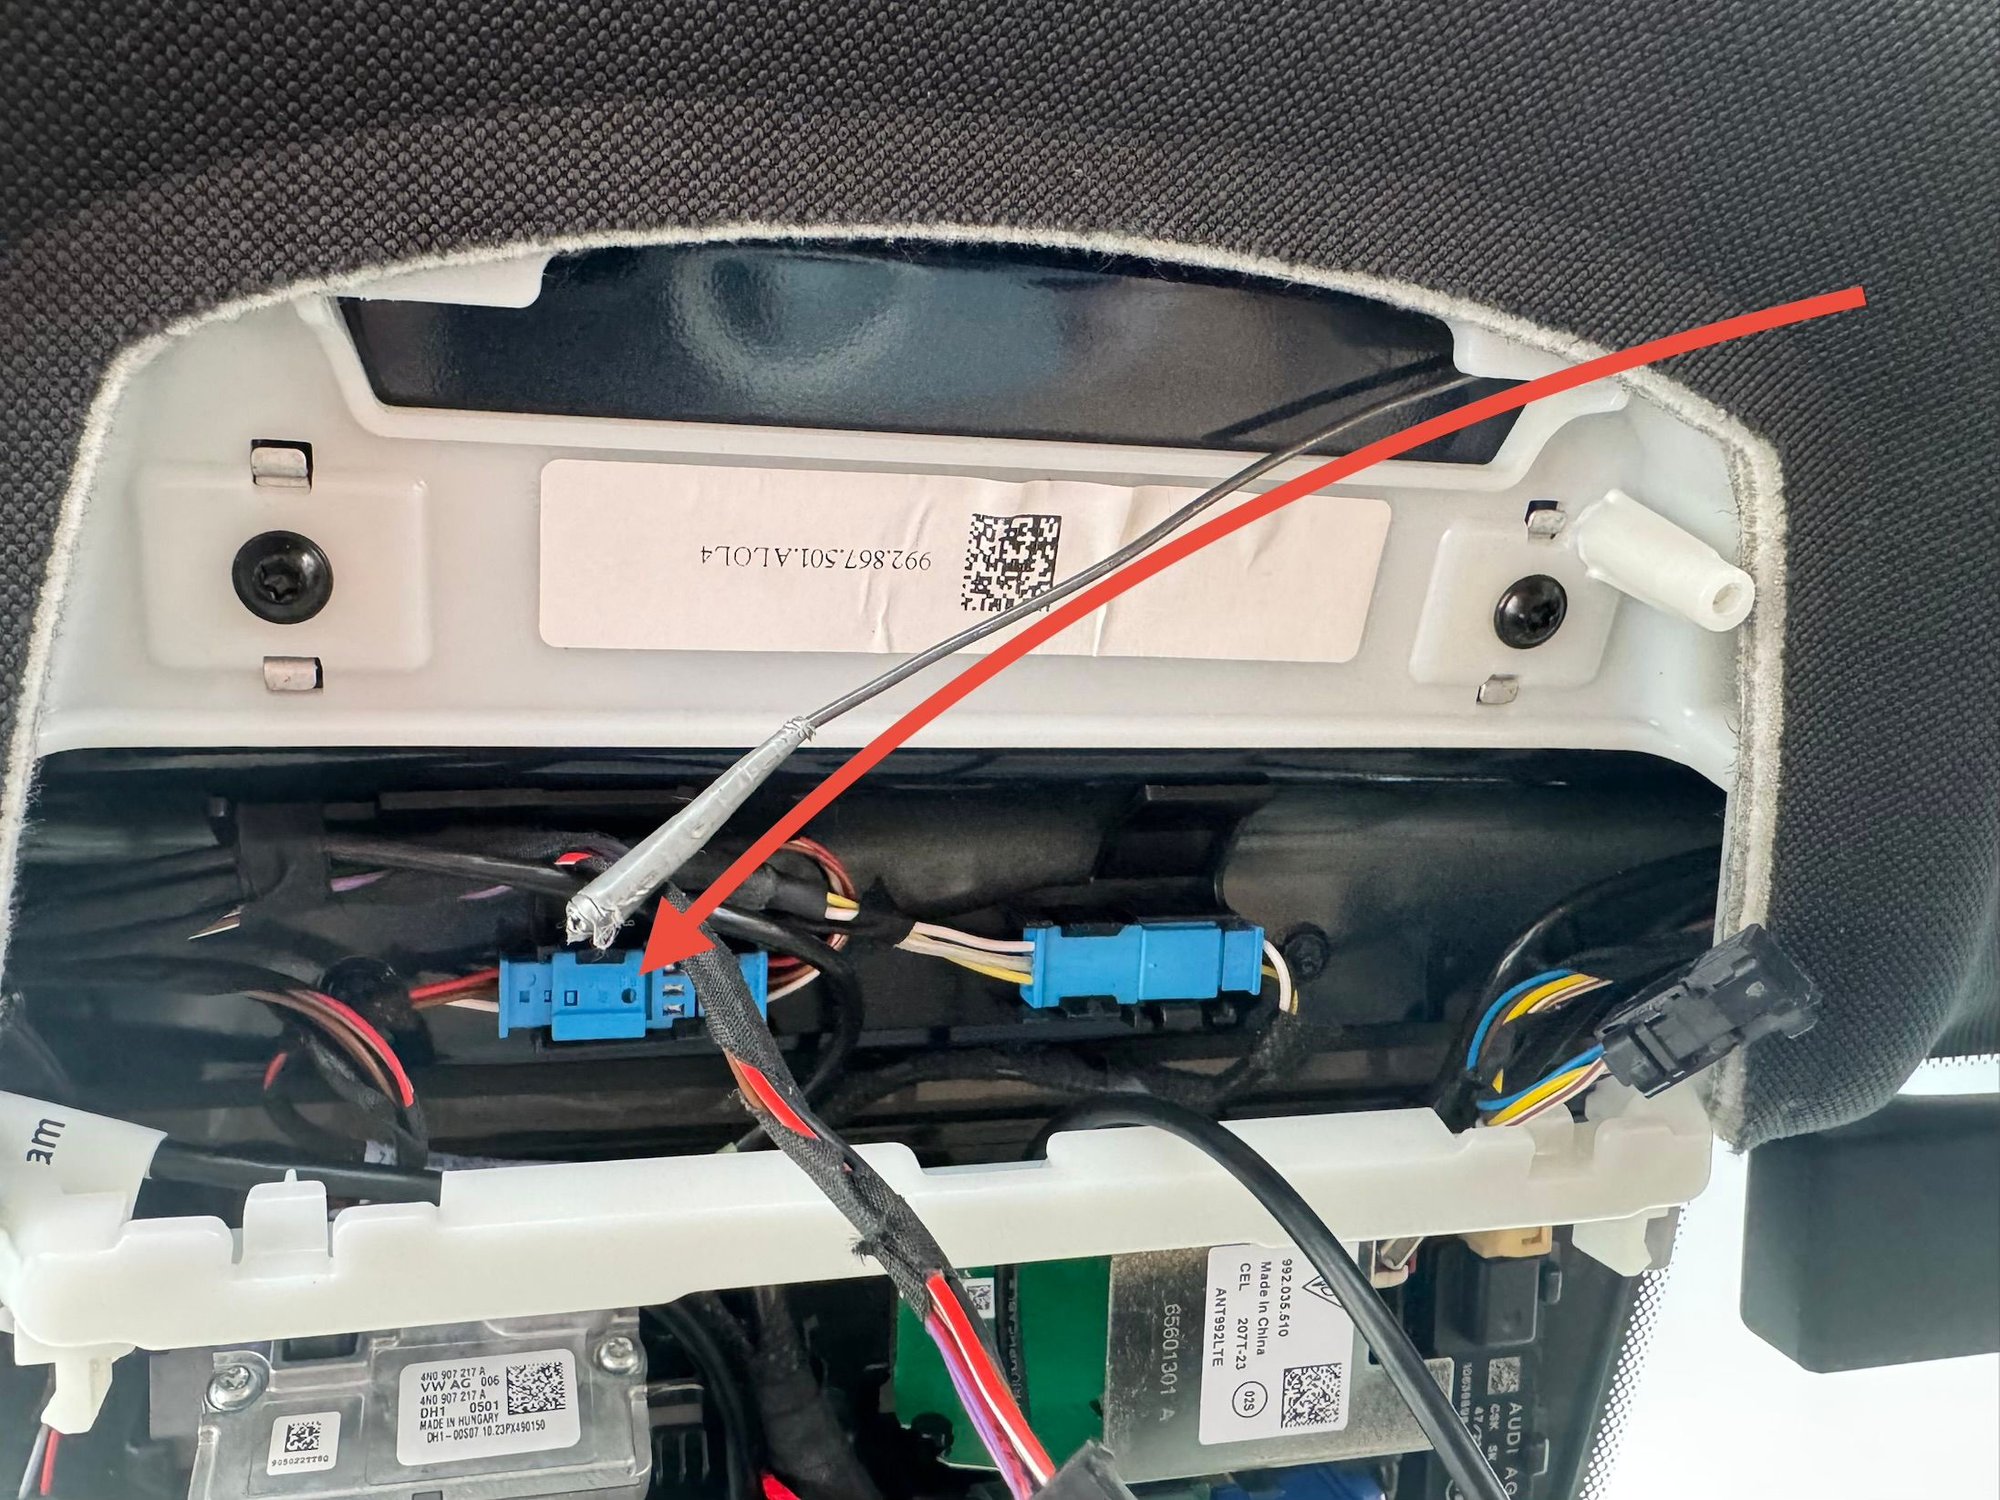
7. Keep pushing the wire until you see it poke out of the overhead console.
8. Securely tie the string to the wire tip.
9. Now pull the wire back, dragging the string along with it. The other end of the string should be dangling from your overhead console.
10. Pull until the wire is out and the string appears. Untie the string from the wire.
11. Now, tie this end of the string to the Dachcam cable plug. Make sure you select the correct end of the Dashcam cable that plugs into your front Camera.
12. Wrap the plug and string with Duct tape, to make it streamlined, so it doesn’t get caught on anything.
13. Now carefully pull on the string dangling from overhead console. This will pull the Dashcam cable with it. Stop pulling when the cable plug is exposed and is long enough to reach your front Camera.
14. Cut the Duct tape off and untie the string. Remove the Duct tape residue if necessary.
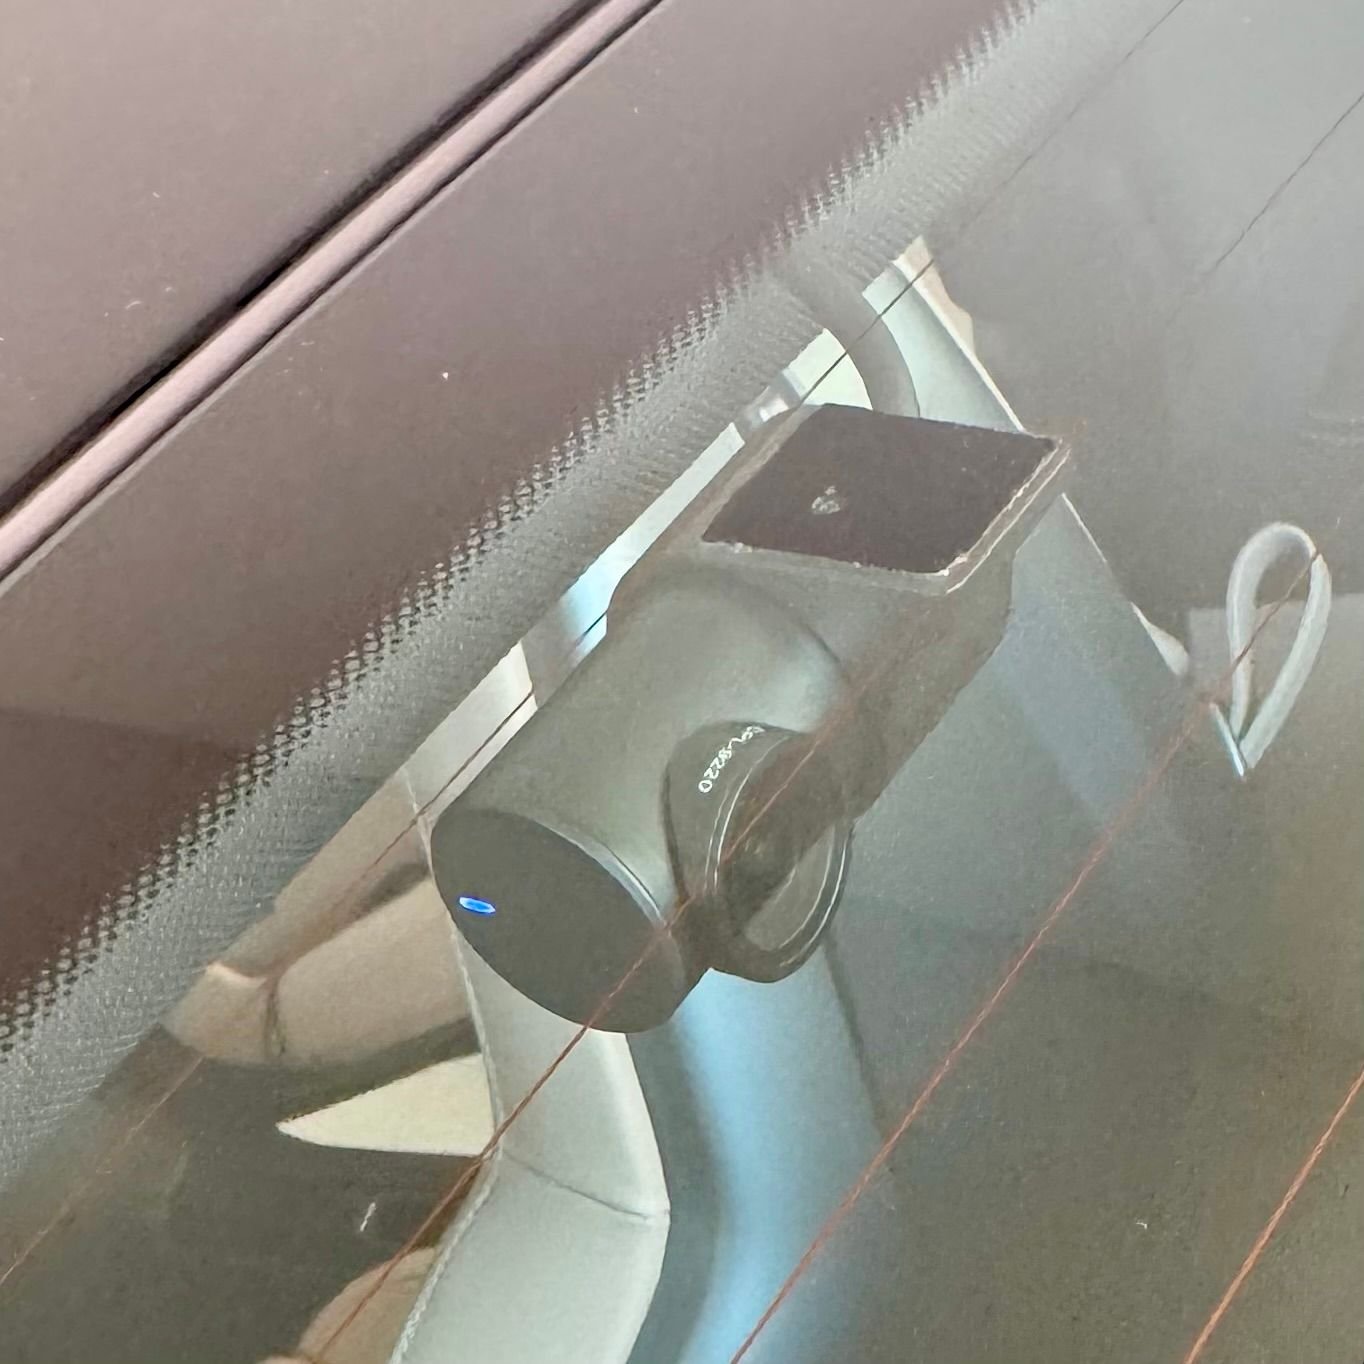
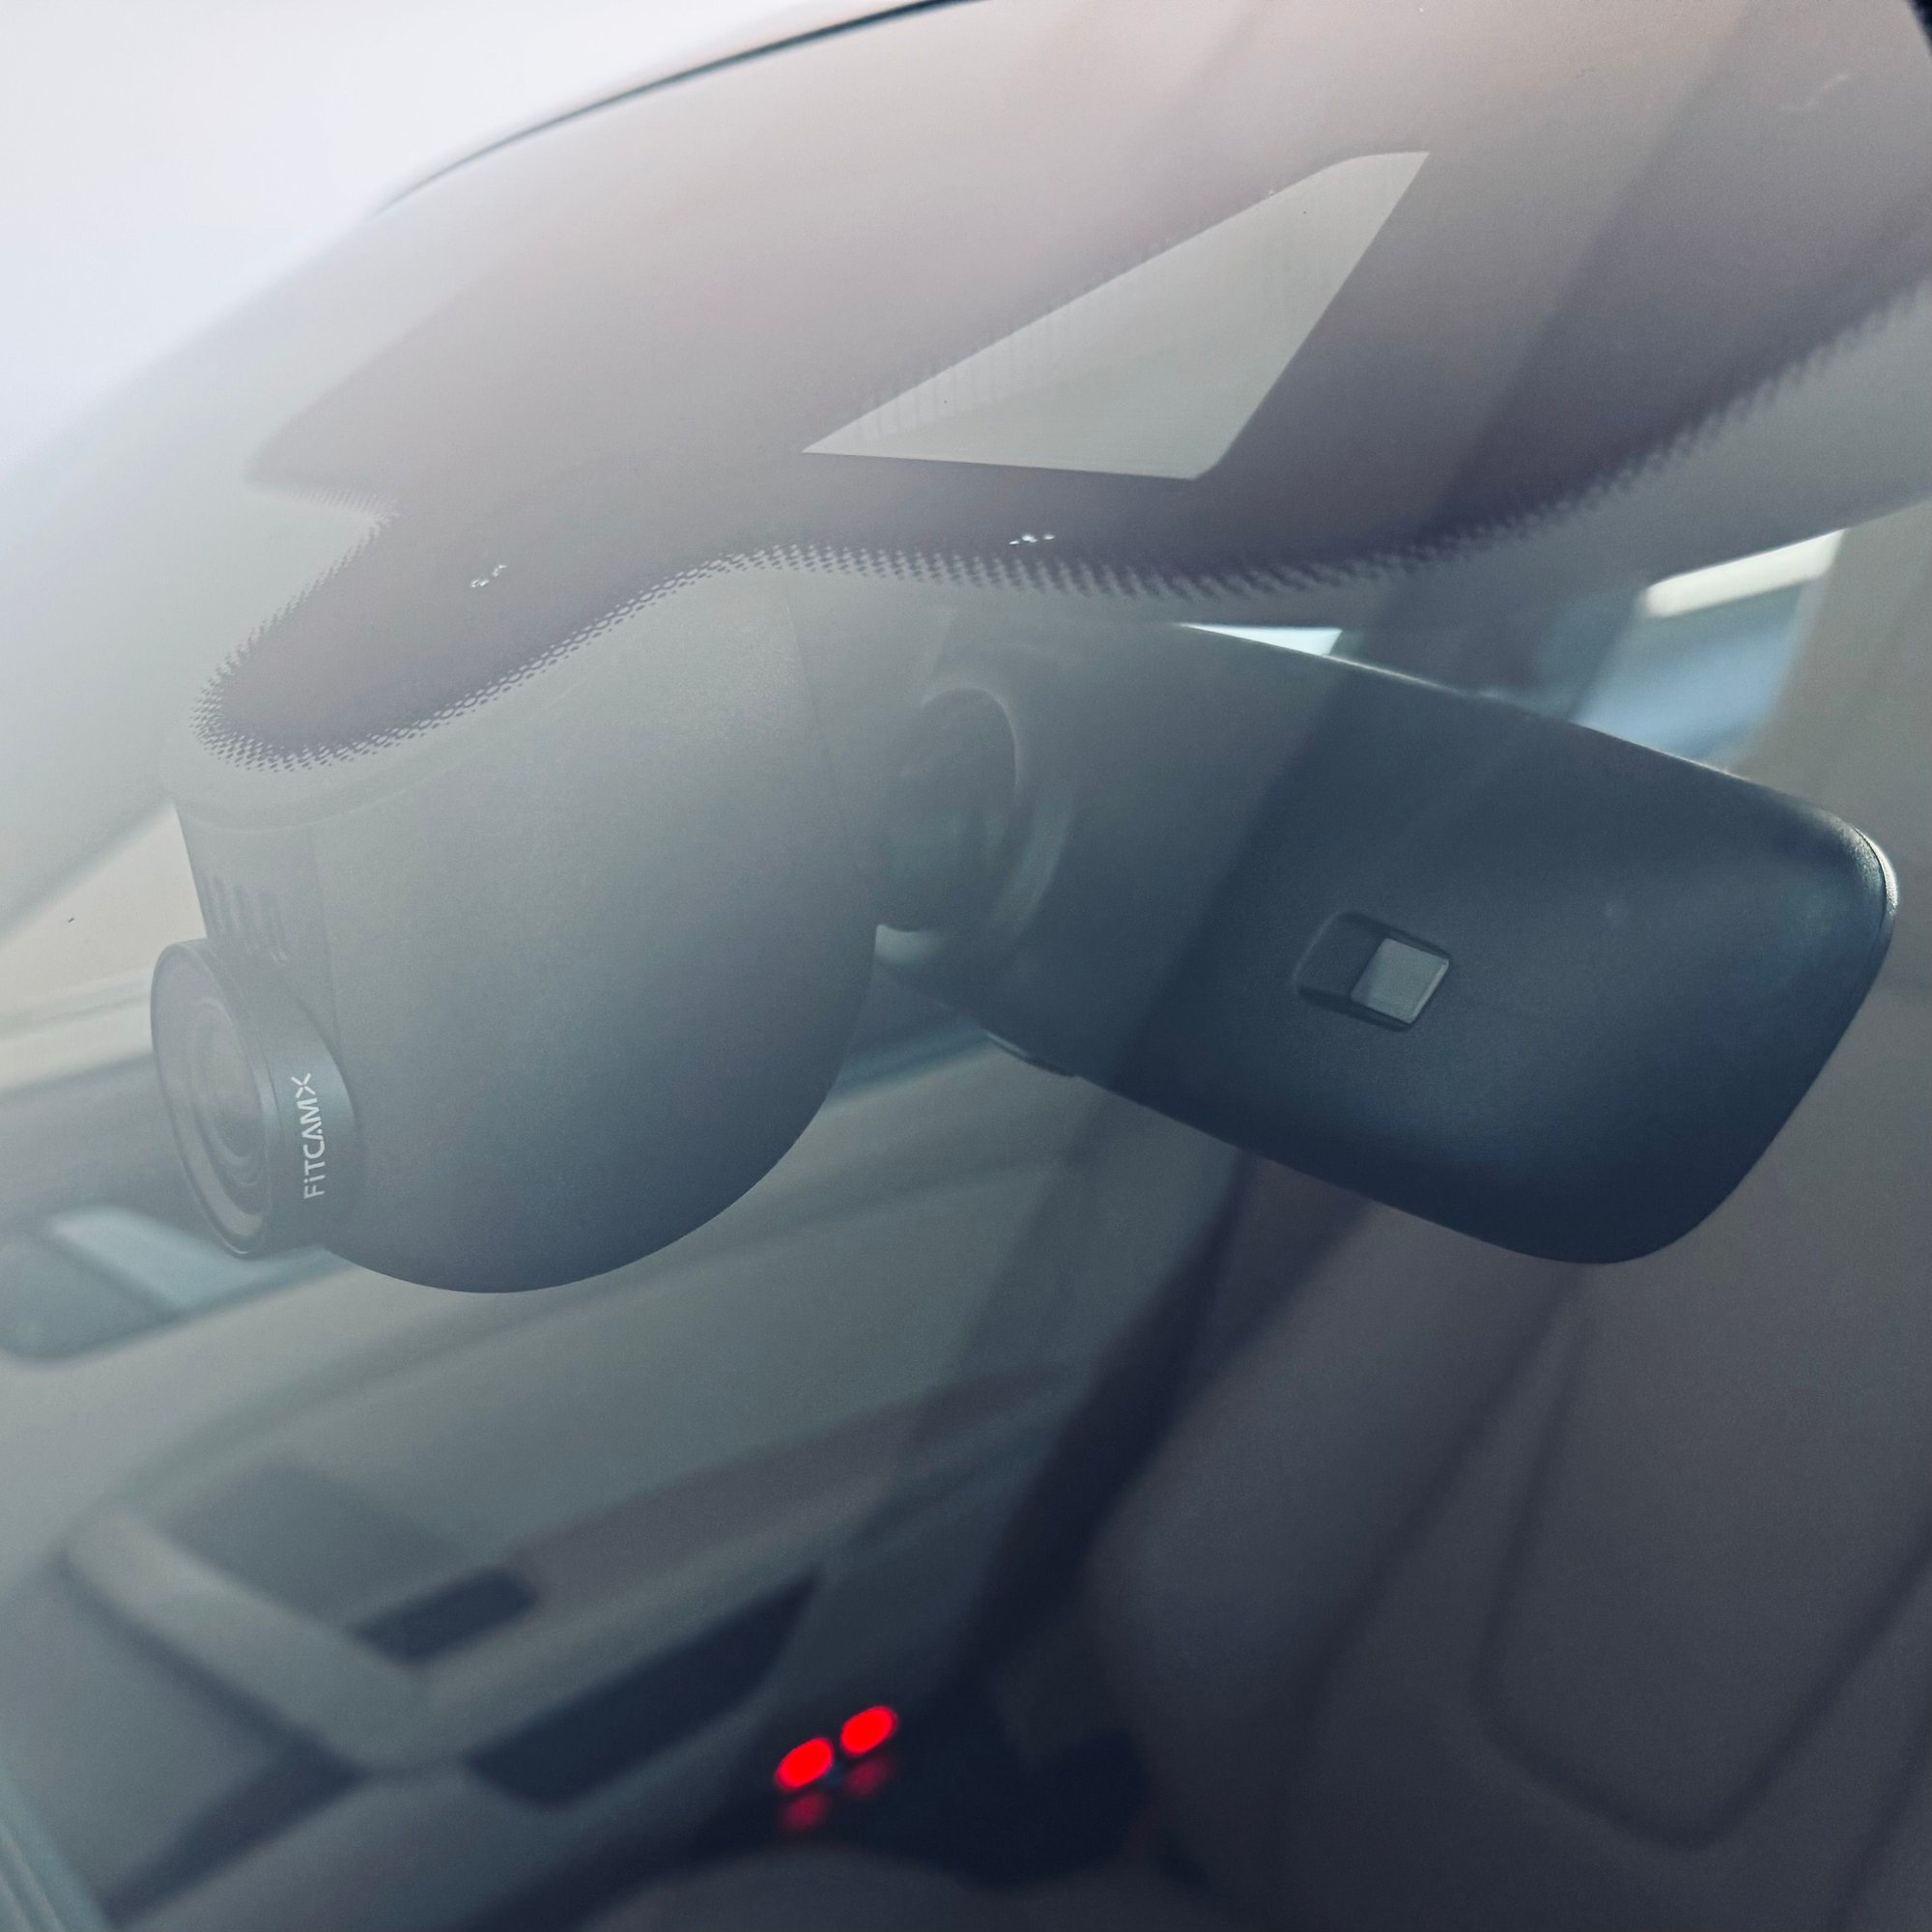
15. Plug in the front Dashcam to the cable you just inserted.
Rear Cable
Next, we are going to do the same thing for the rear Dashcam.
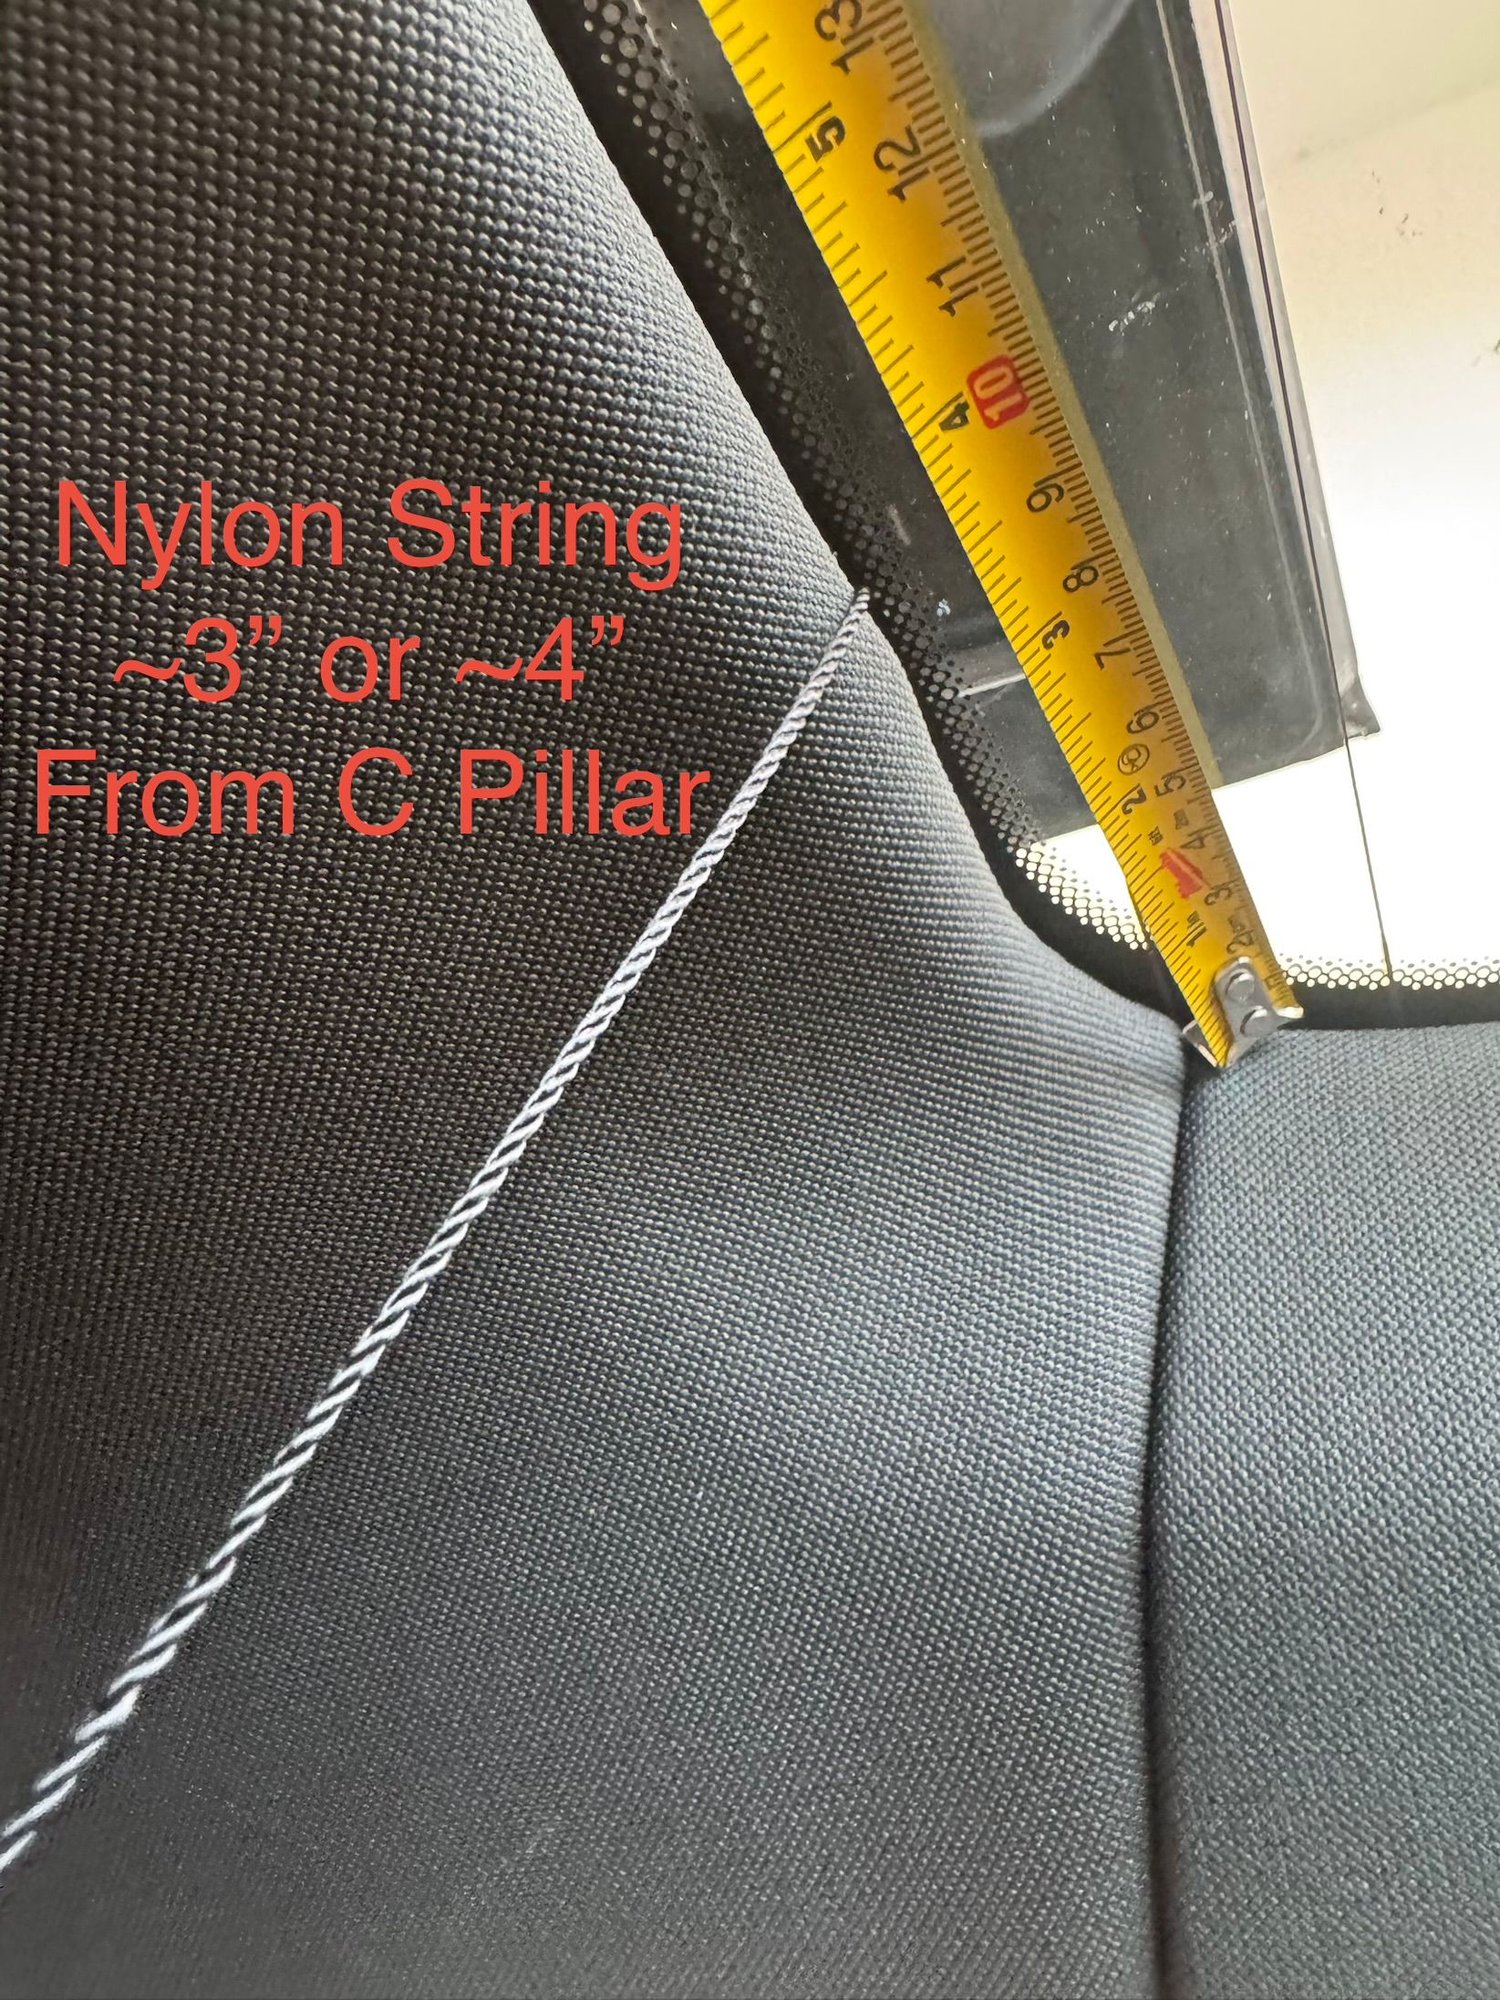
1. Push your hangar wire from under the headliner, above the passenger window, towards the rear windshield. Target about 3” or 4” from the right C pillar. (Do not aim for the center of the rear window).
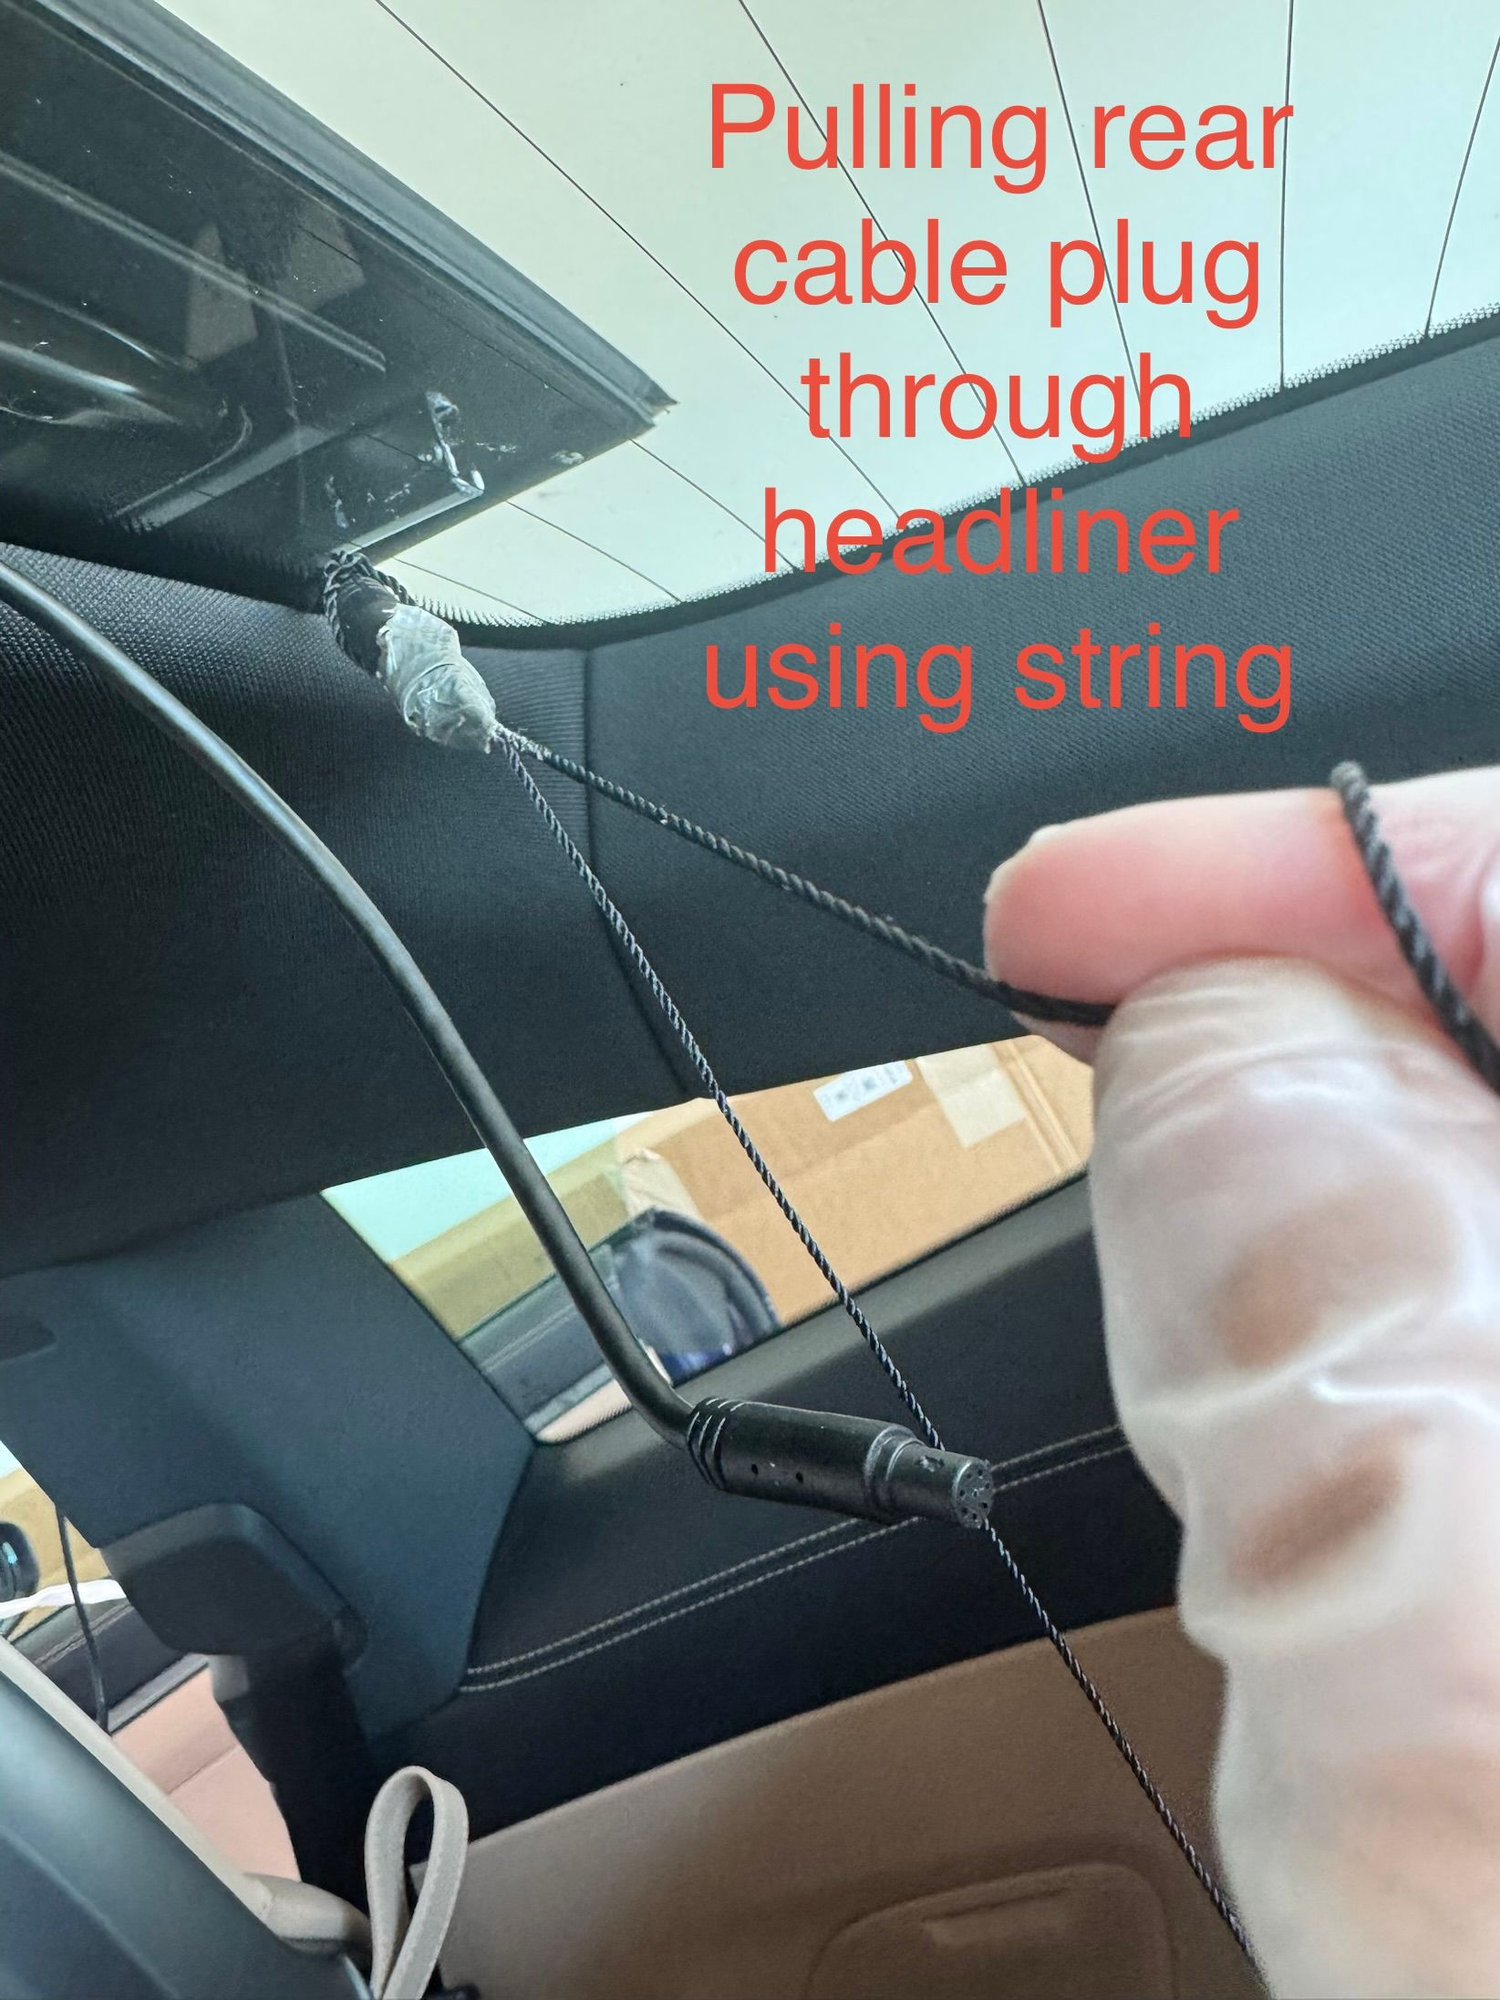
2. When the hangar wire pokes out, Securely tie the string to the wire tip.
3. Now pull the wire back, dragging the string along with it. The other end of the string should be dangling from the headliner in the rear.
4. Pull until the wire is out and the string appears. Untie the string from the wire.
5. Now, tie this end of the string to the Dachcam cable plug. Double check this is the correct end of the Dashcam cable that plugs into your rear Camera.
6. Wrap the plug and string with Duct tape, to make it streamlined, so it doesn’t get caught on anything. This is really important to get the thick plug past the headliner above the rear window.
7. Now sit in the back seat, and carefully pull on the string dangling from overhead console. Make sure your sting remains about 3” or 4” from the right C pillar. This will pull the Dashcam cable with it.
8. Stop pulling when the cable plug gets blocked at the back. Do not yank.
9. Carefully pull the headliner down a little, just enough for your fingers to grab the plug and pull it out. Be careful not to break the headliner or pull it too much.
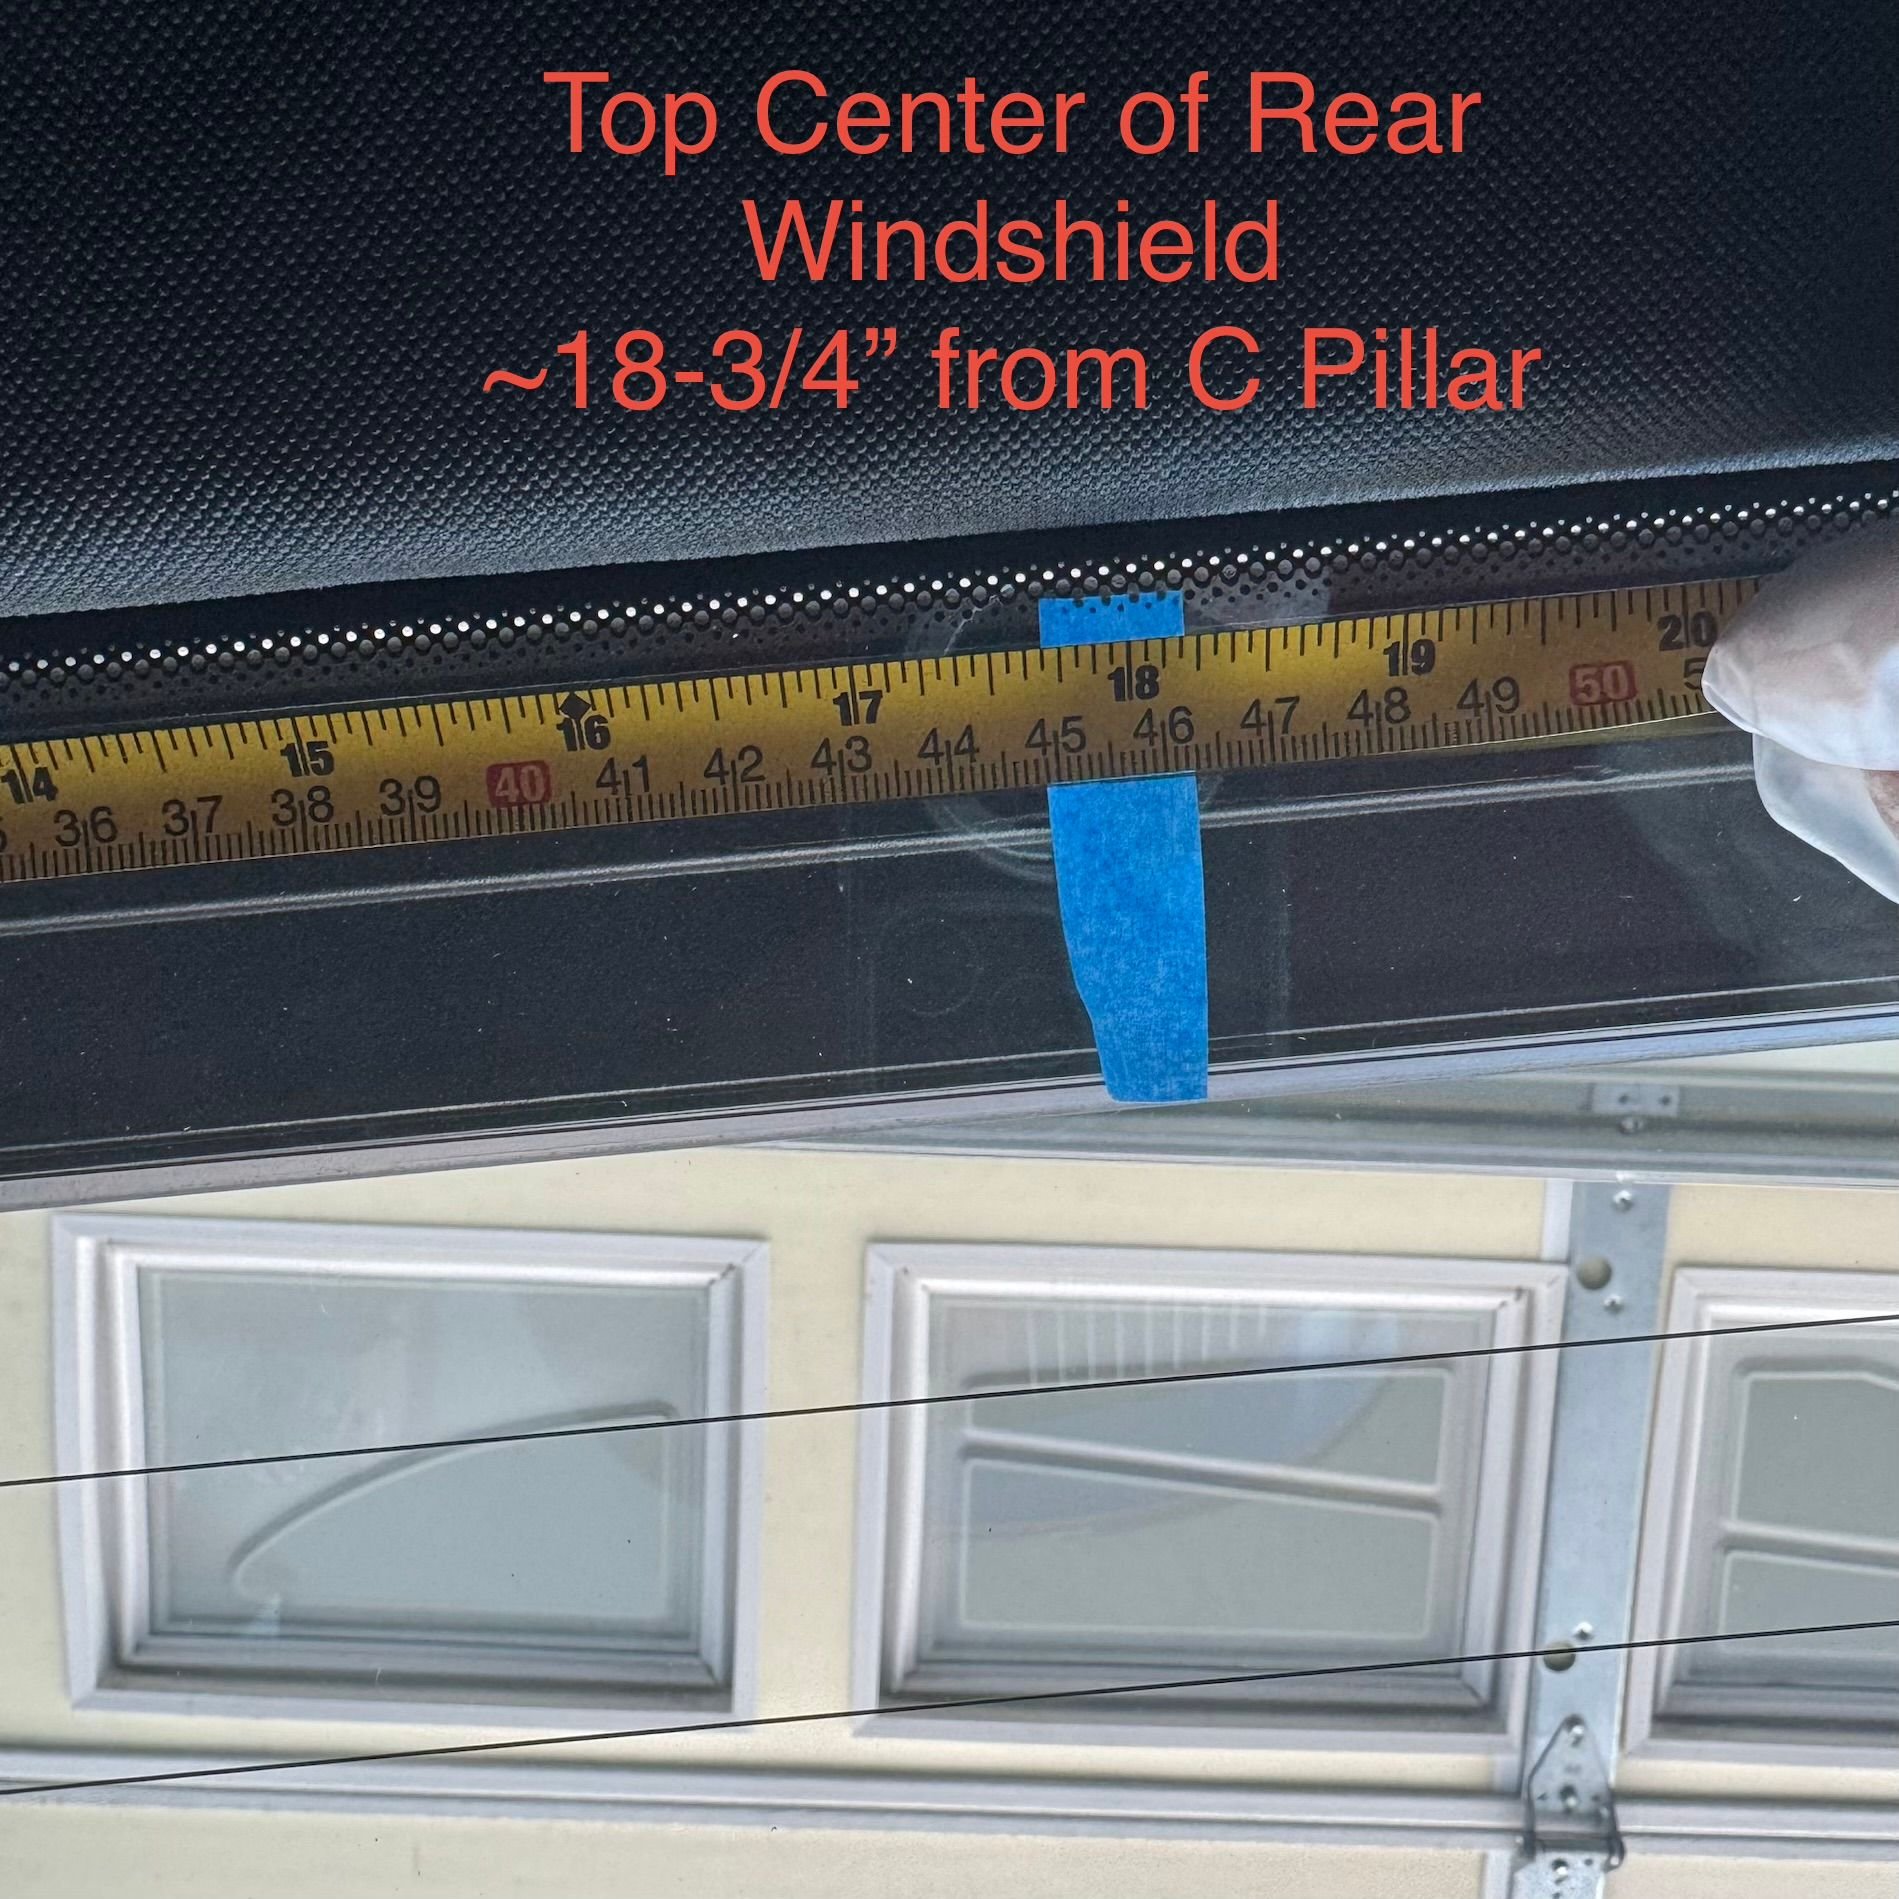
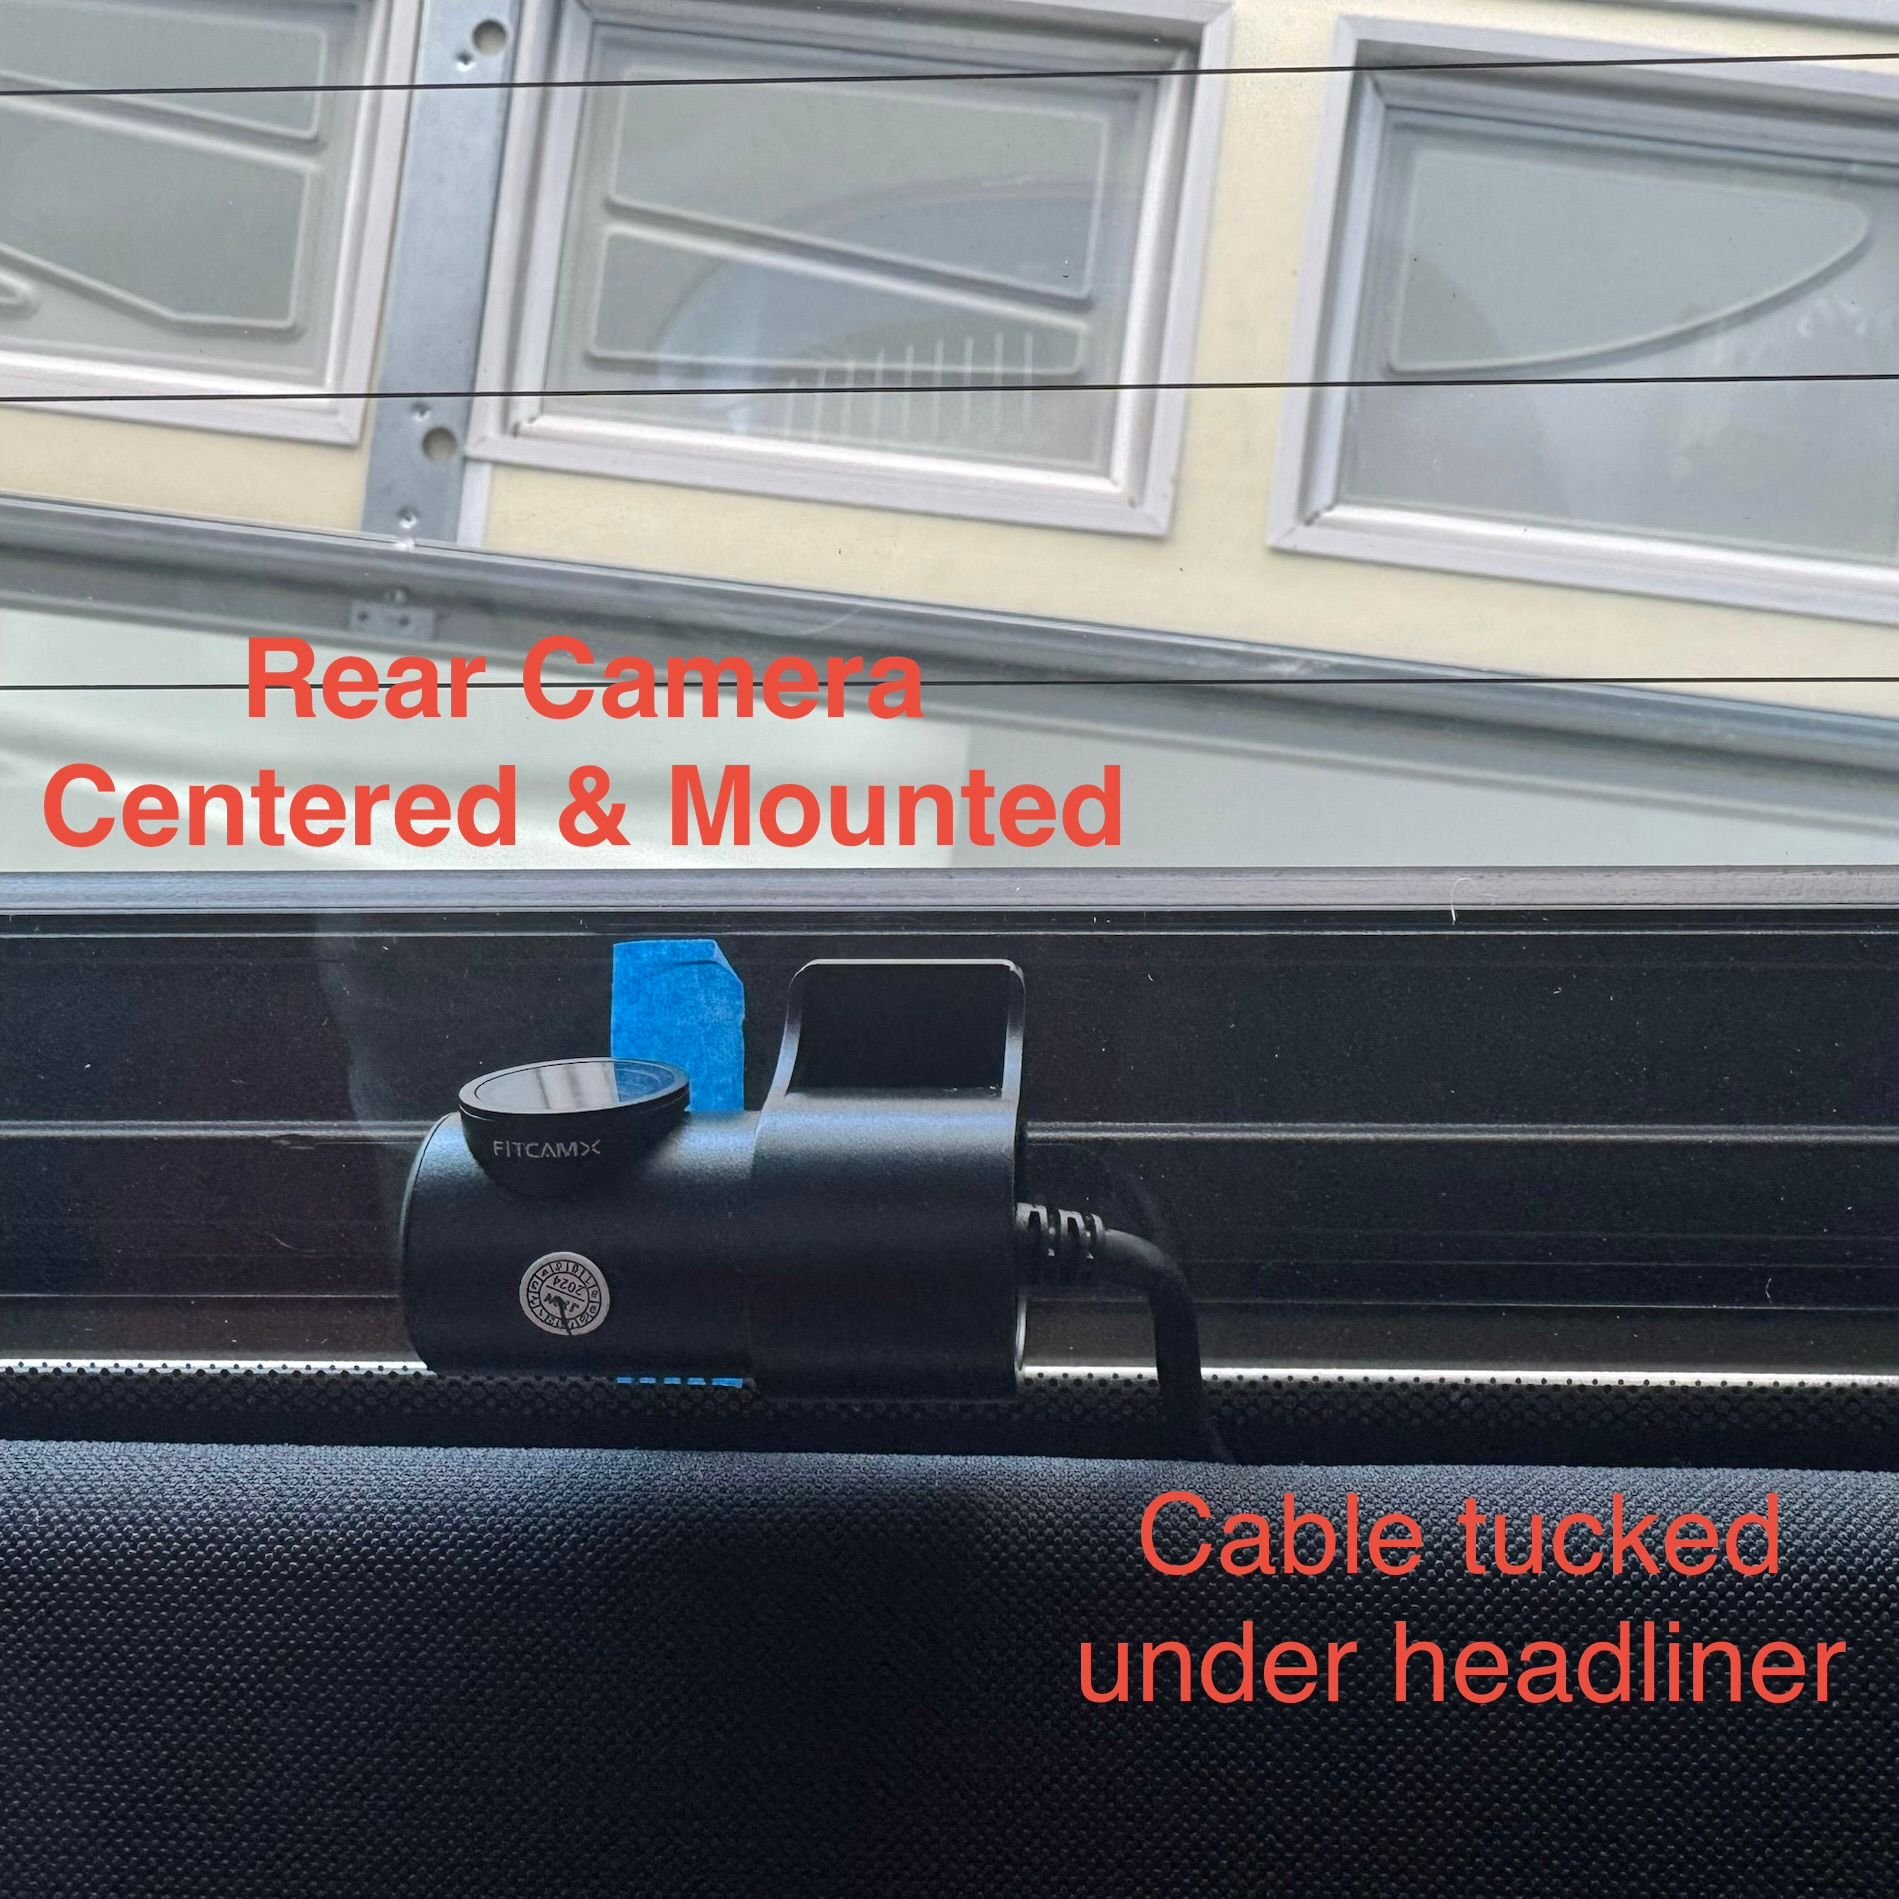
10. Mount your rear Dashcam to the windshield. (I measured 18-1/4” from the edge of the C Pillar to the top center of the rear windshield.
11. Pull out a few inches of wire, so it comfortably reaches the plug for the rear Dashcam.
12. Cut the Duct tape off and untie the string. Remove the Duct tape residue.
13. Plug in the rear Dashcam to the cable you just inserted.
14. Tuck the exposed cable and plugs under the headliner along the top edge of the rear windshield.
Testing
1. All overhead console plugs must be reconnected before testing, so reinstall the overhead console.
2. Now power up your car and test that both your front and rear Dashcams are working properly.
Finish Up
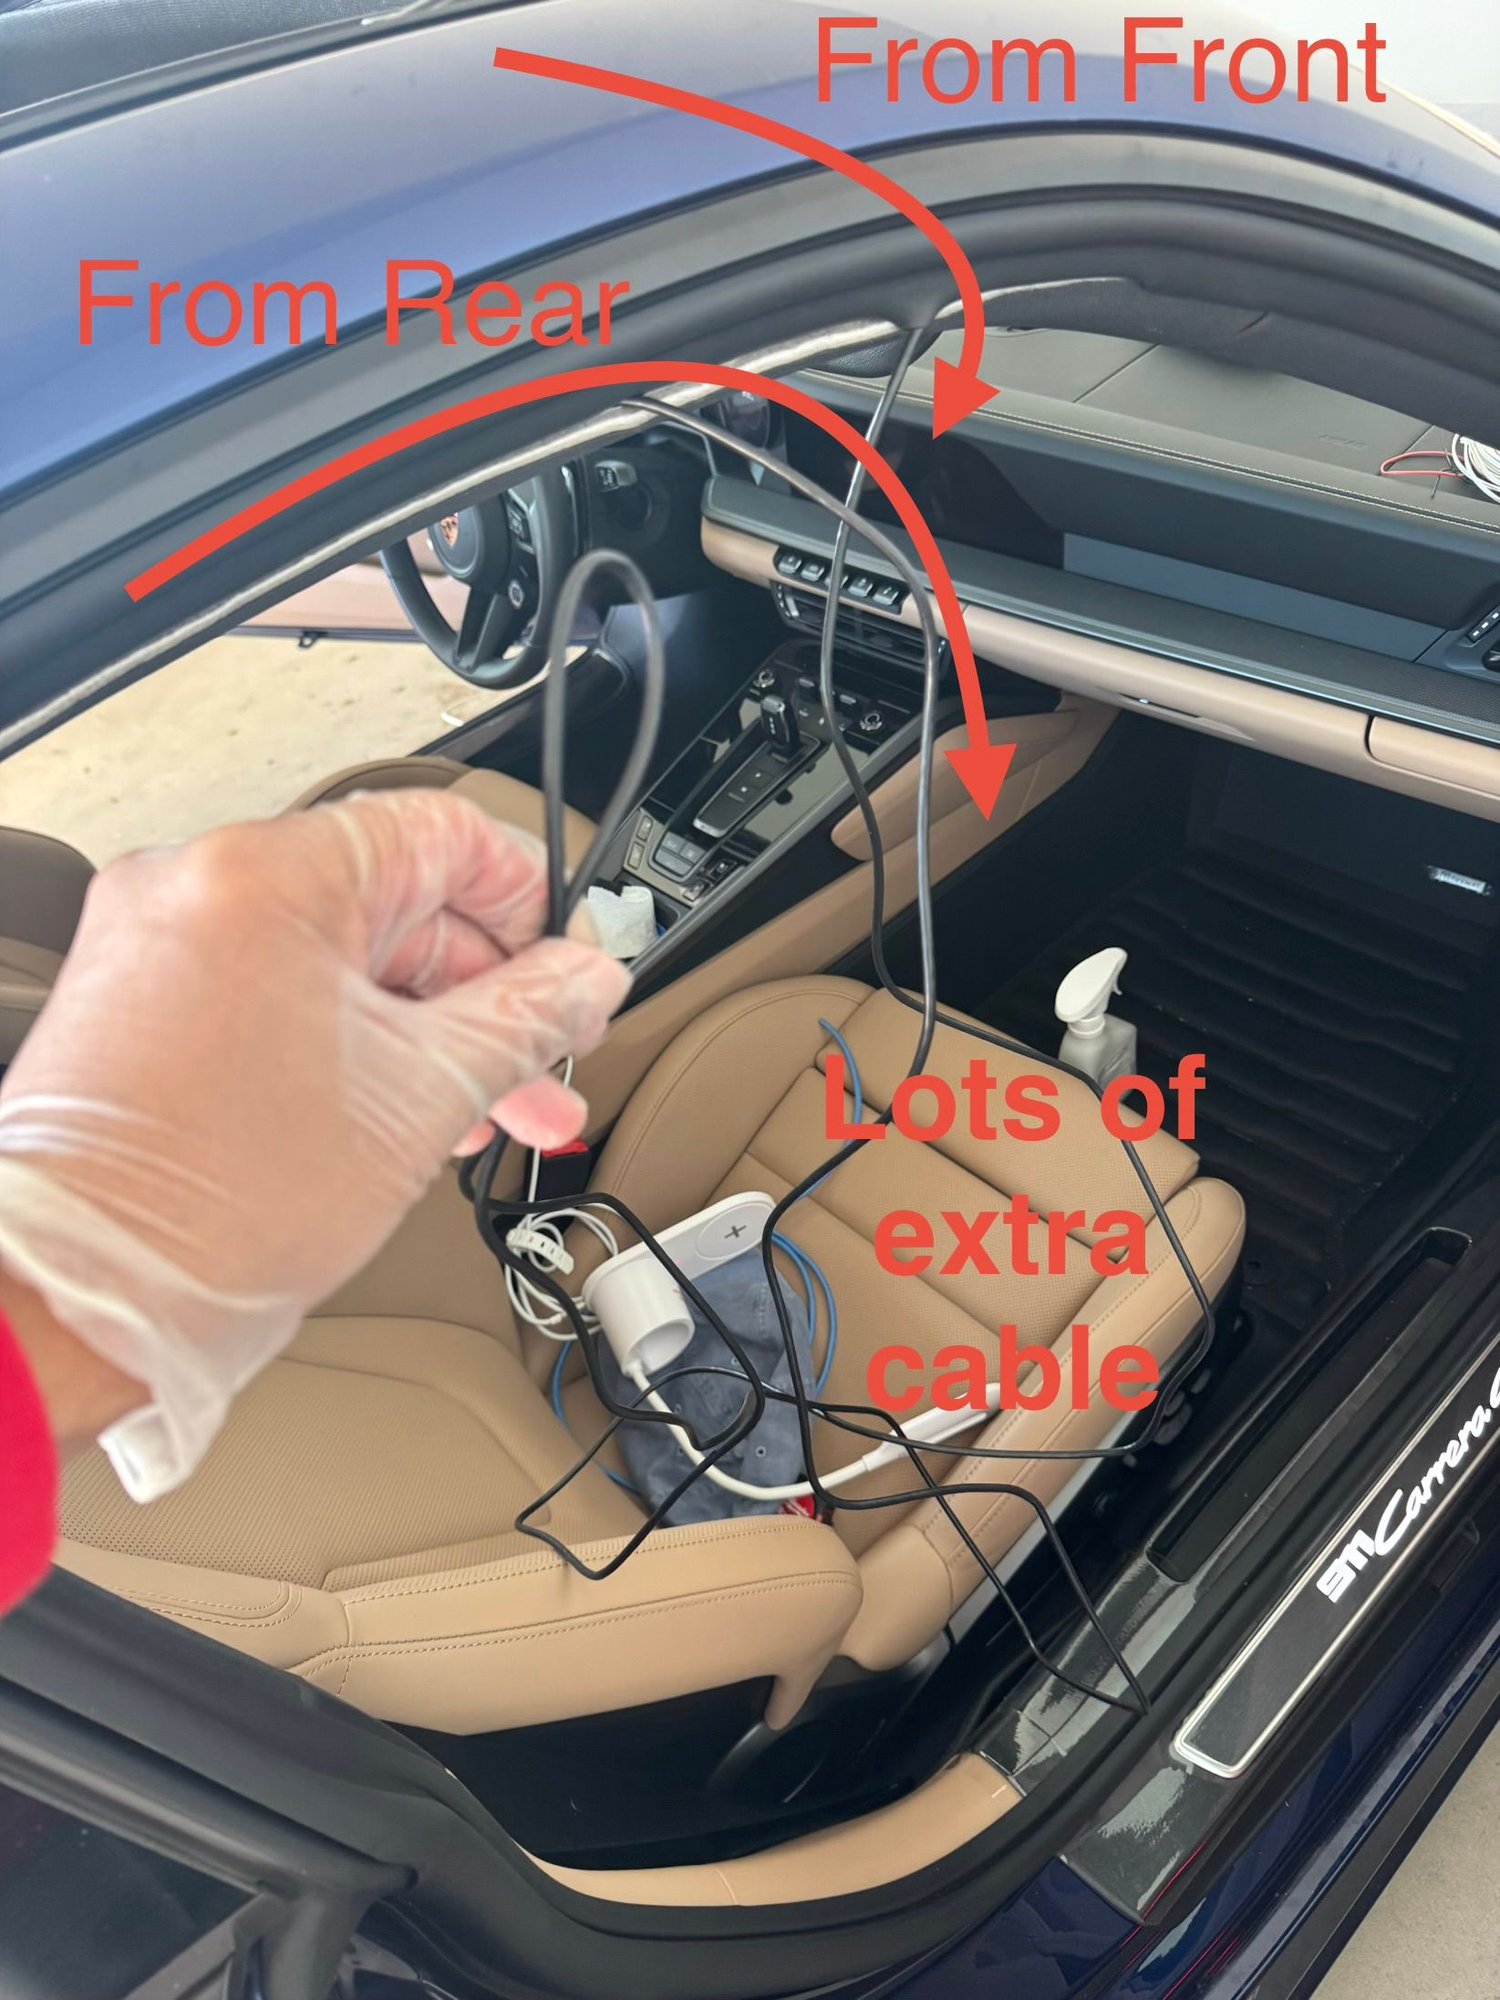
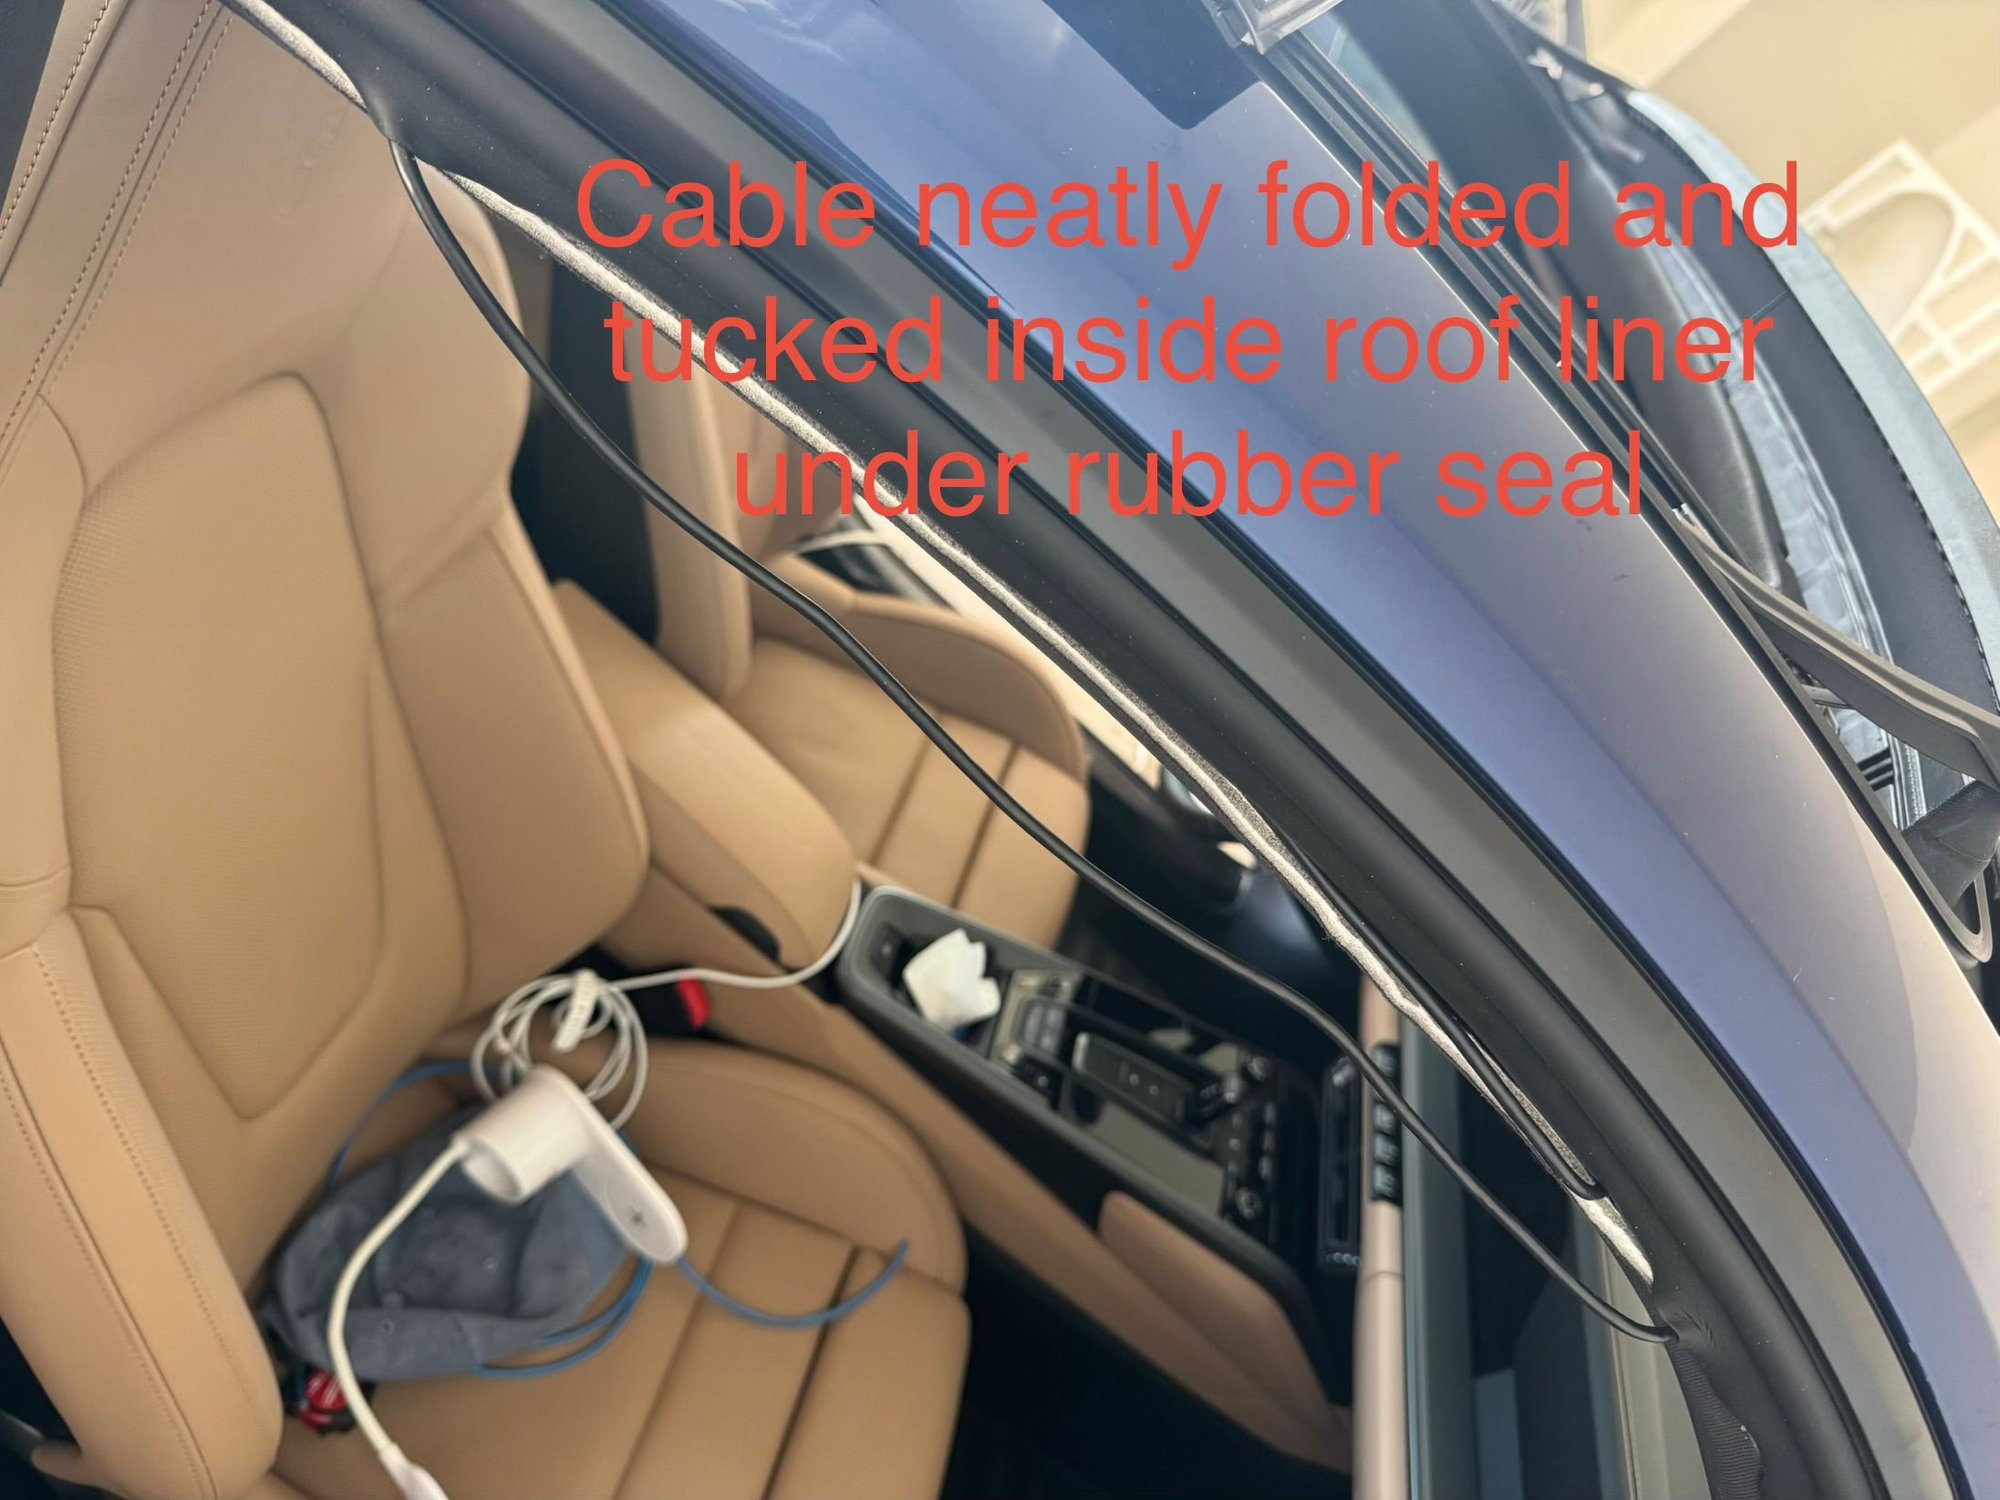
At this point, you will have a lot of cable dangling out of the rubber seal above the passenger window.
1. Tuck the front Dashcam portion of the cable under the rubber seal, working it rearward towards the B pillar. Once you reach the B pillar, loop it back and continue to tuck it forwards.
2. Then tuck the rear Dashcam portion of the cable under the rubber seal, working it forwards towards the A pillar. Once you reach the A pillar, loop it back and continue to tuck it backwards.
3. Repeat this tucking process until all of the excess cable is hidden under the rubber seal above the passenger window.
Final Result
Last edited by PSPorsche; Oct 1, 2025 at 06:46 PM.
@PSPorsche great DIY write-up. The added annotations and words on the pictures make this very easy to understand. Reminds me of work instructions I used to write as training materials for operators assembling products. Well done.
Porsche's Top 5 Most Questionable Naming Decisions
Slideshow: For a company obsessed with engineering precision, Porsche has occasionally named its cars in ways that left even loyal enthusiasts scratching their heads.
Pogea Racing's 964 Porsche 911 Reimagination Stands Out in a Crowded Field
Slideshow: Pogea Racing's latest Porsche 964 project blends carbon-fiber construction, modern chassis upgrades, and up to 500 horsepower while keeping the air-cooled 911 experience firmly analog.
Talos Takes Your 991 Porsche 911 GT3 to the Next Level for a Cool $1.13 Million
Slideshow: Talos Vehicles has transformed the Porsche 911 GT3 RS into a carbon-bodied, race-inspired machine that costs well over $1 million before the donor car is even included.
9 Vehicles Porsche Helped Engineer that Aren't Porsches
Slideshow: Long before engineering consulting became trendy, Porsche was quietly helping other automakers build everything from supercars to economy hatchbacks.
9 Features and Characteristics That Only Porsche People Understand
Slideshow: Some brands build cars. Porsche builds traditions, obsessions, and a few habits that stopped making sense decades ago but somehow became part of the charm.




 DIY: How to Wire a Rear Dashcam