When you click on links to various merchants on this site and make a purchase, this can result in this site earning a commission. Affiliate programs and affiliations include, but are not limited to, the eBay Partner Network.
Extended height armrest console lid installation (heavy picture warning)
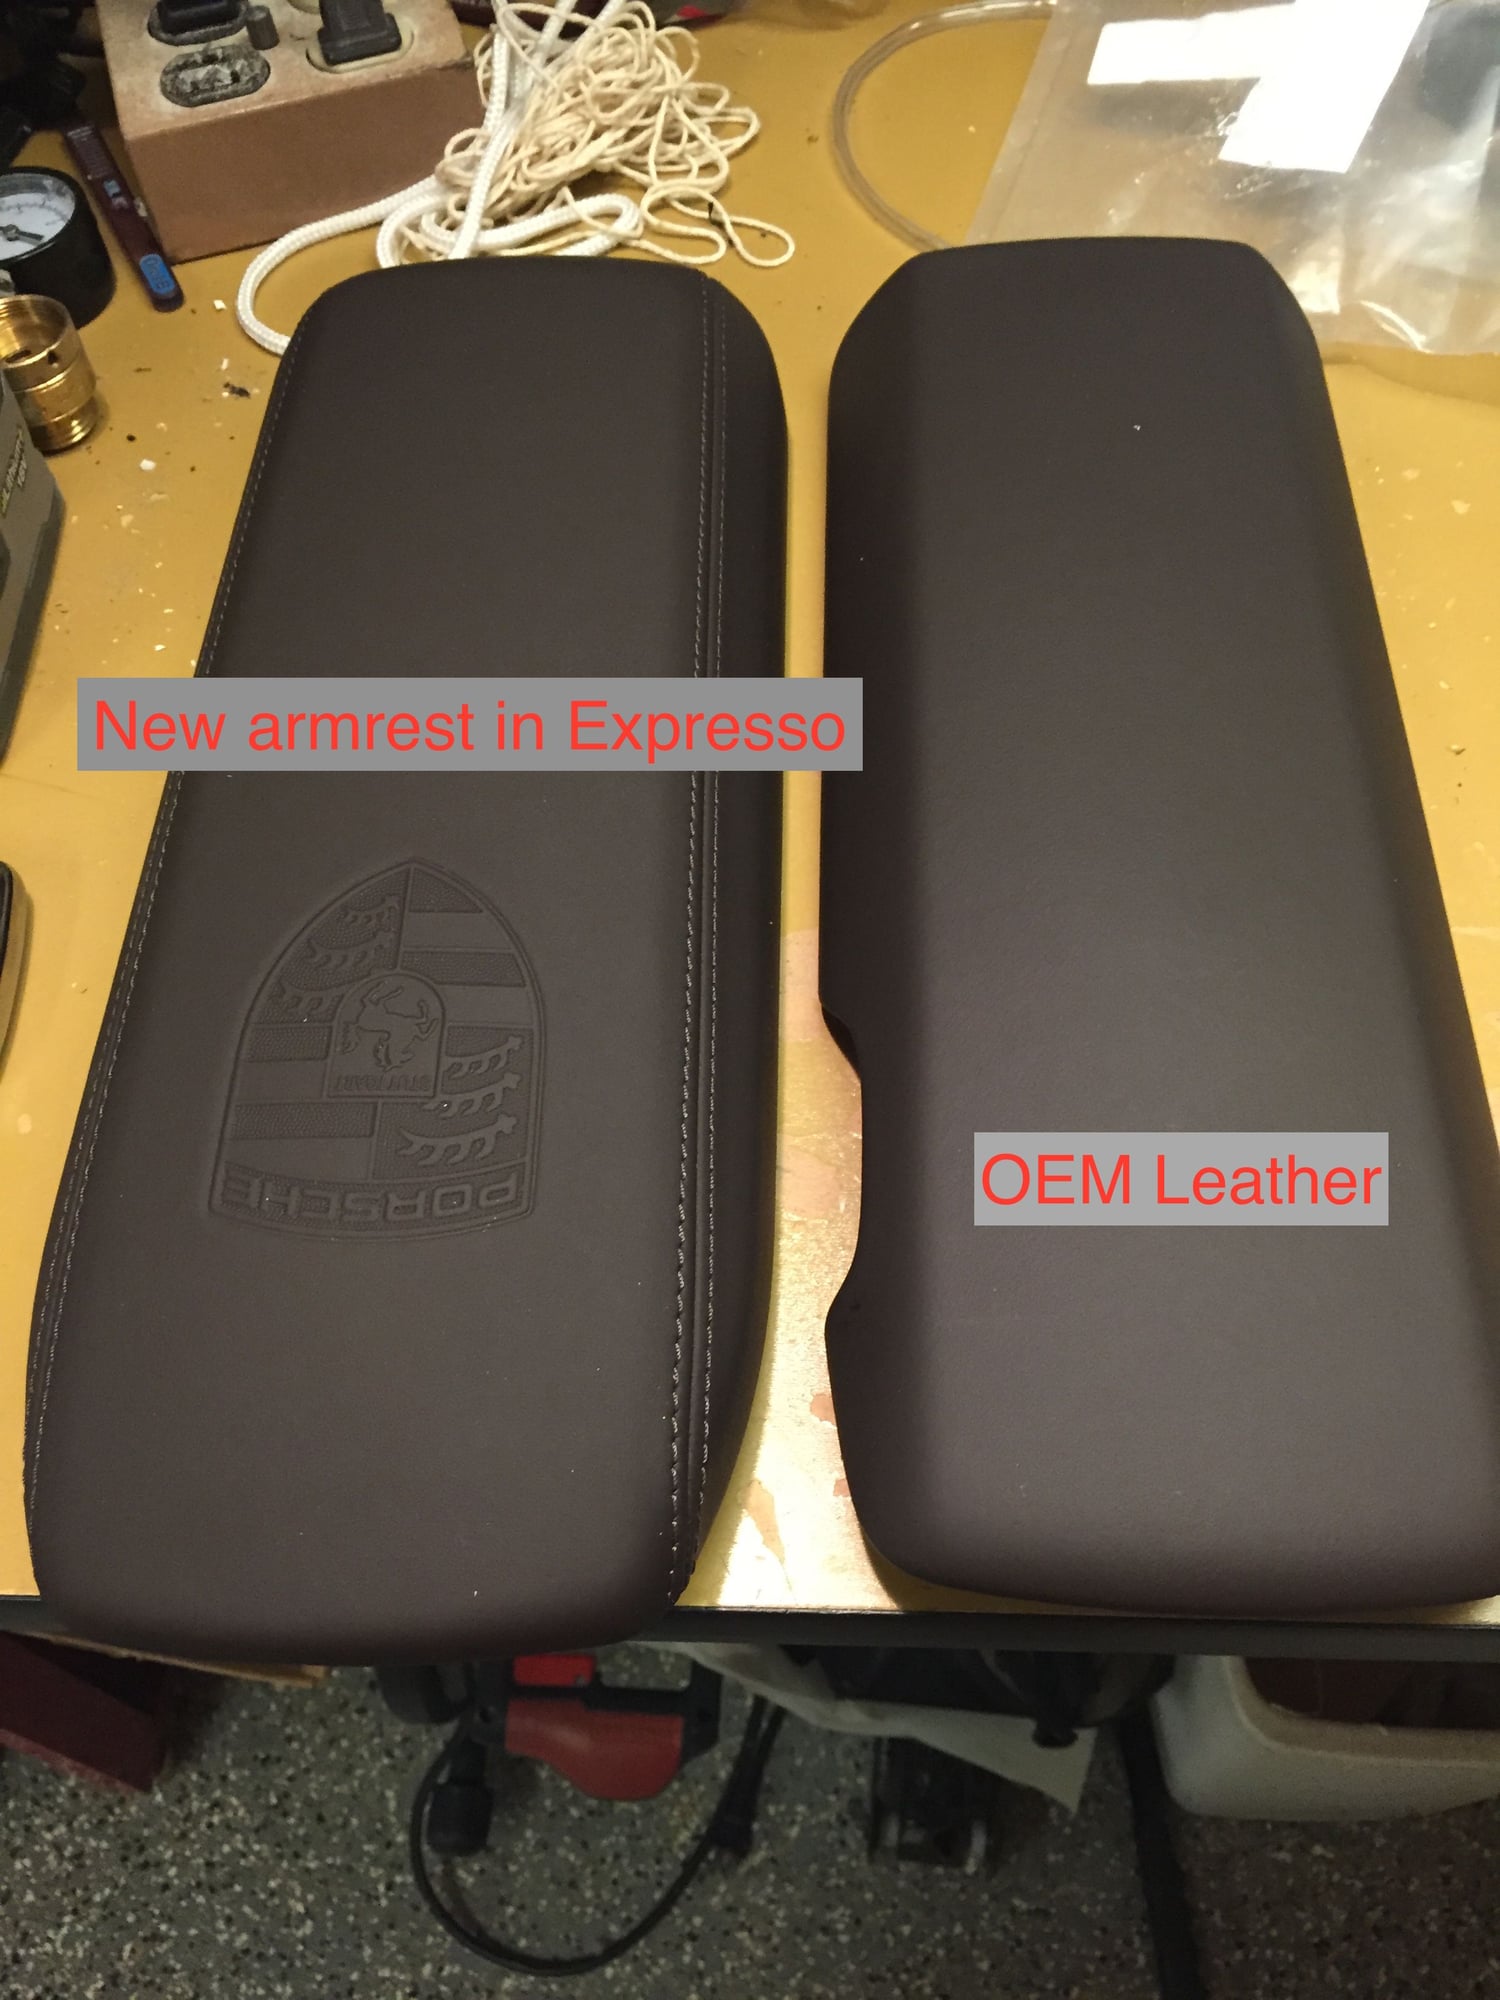
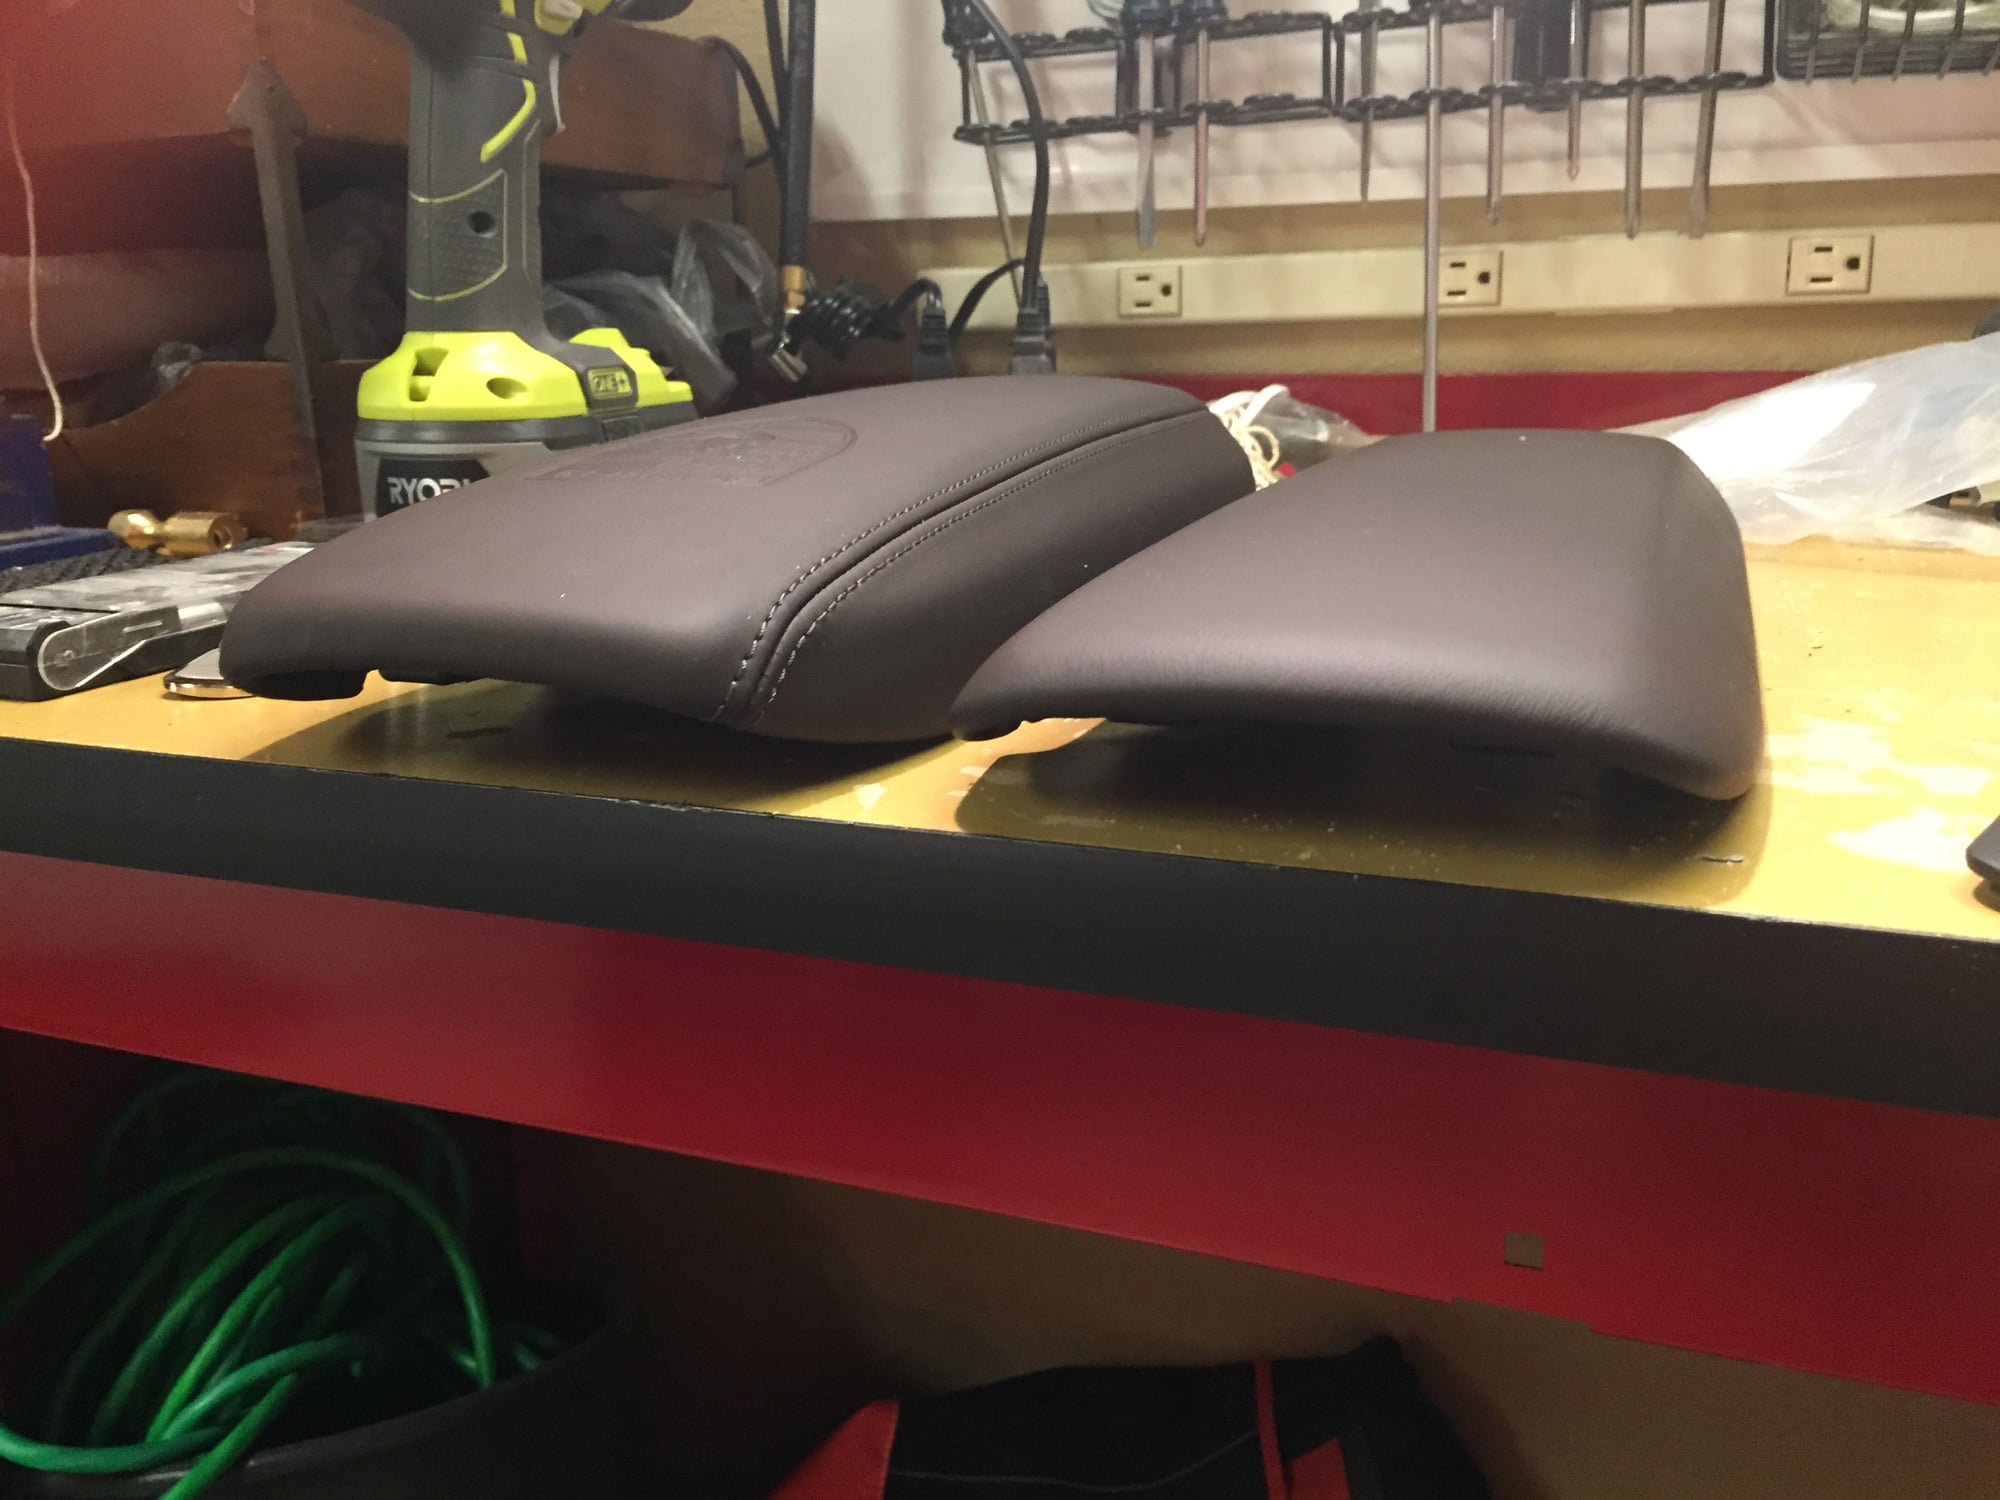
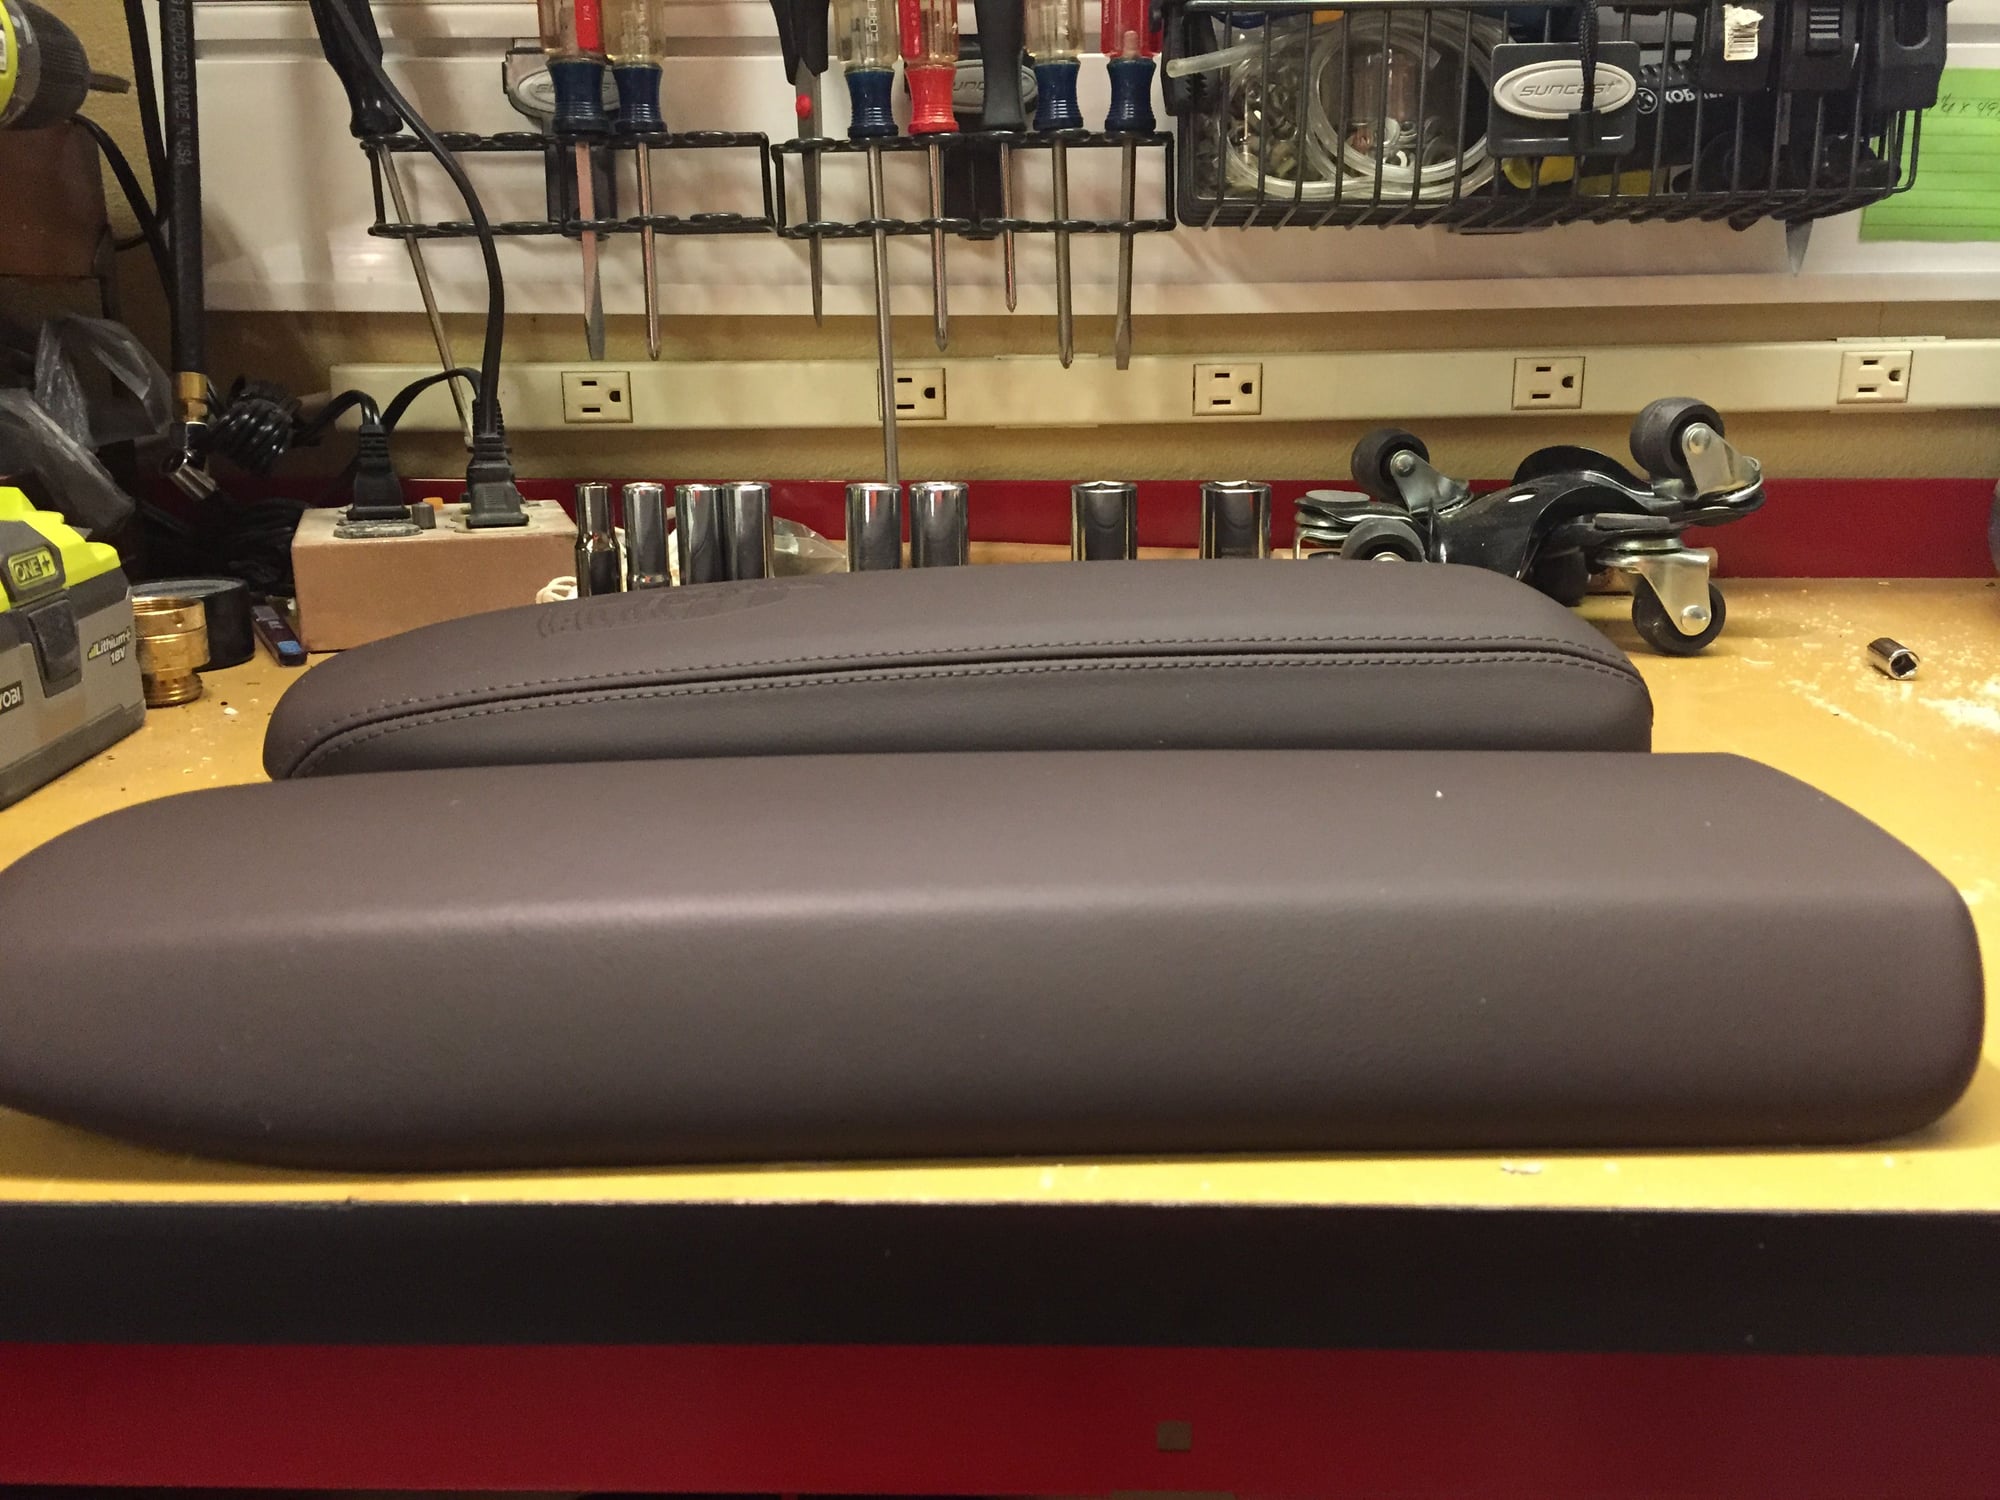
I ordered the extended height console lid from Suncoast in Expresso, there are no installation instructions, so I decided to give it a go on my own. Overall this should not take more than 1 hour max.
As with all mods or DIY articles, the information provided here is without warranty. I am providing the steps for your information, but beware that problems may occur and that you accept full responsibility.
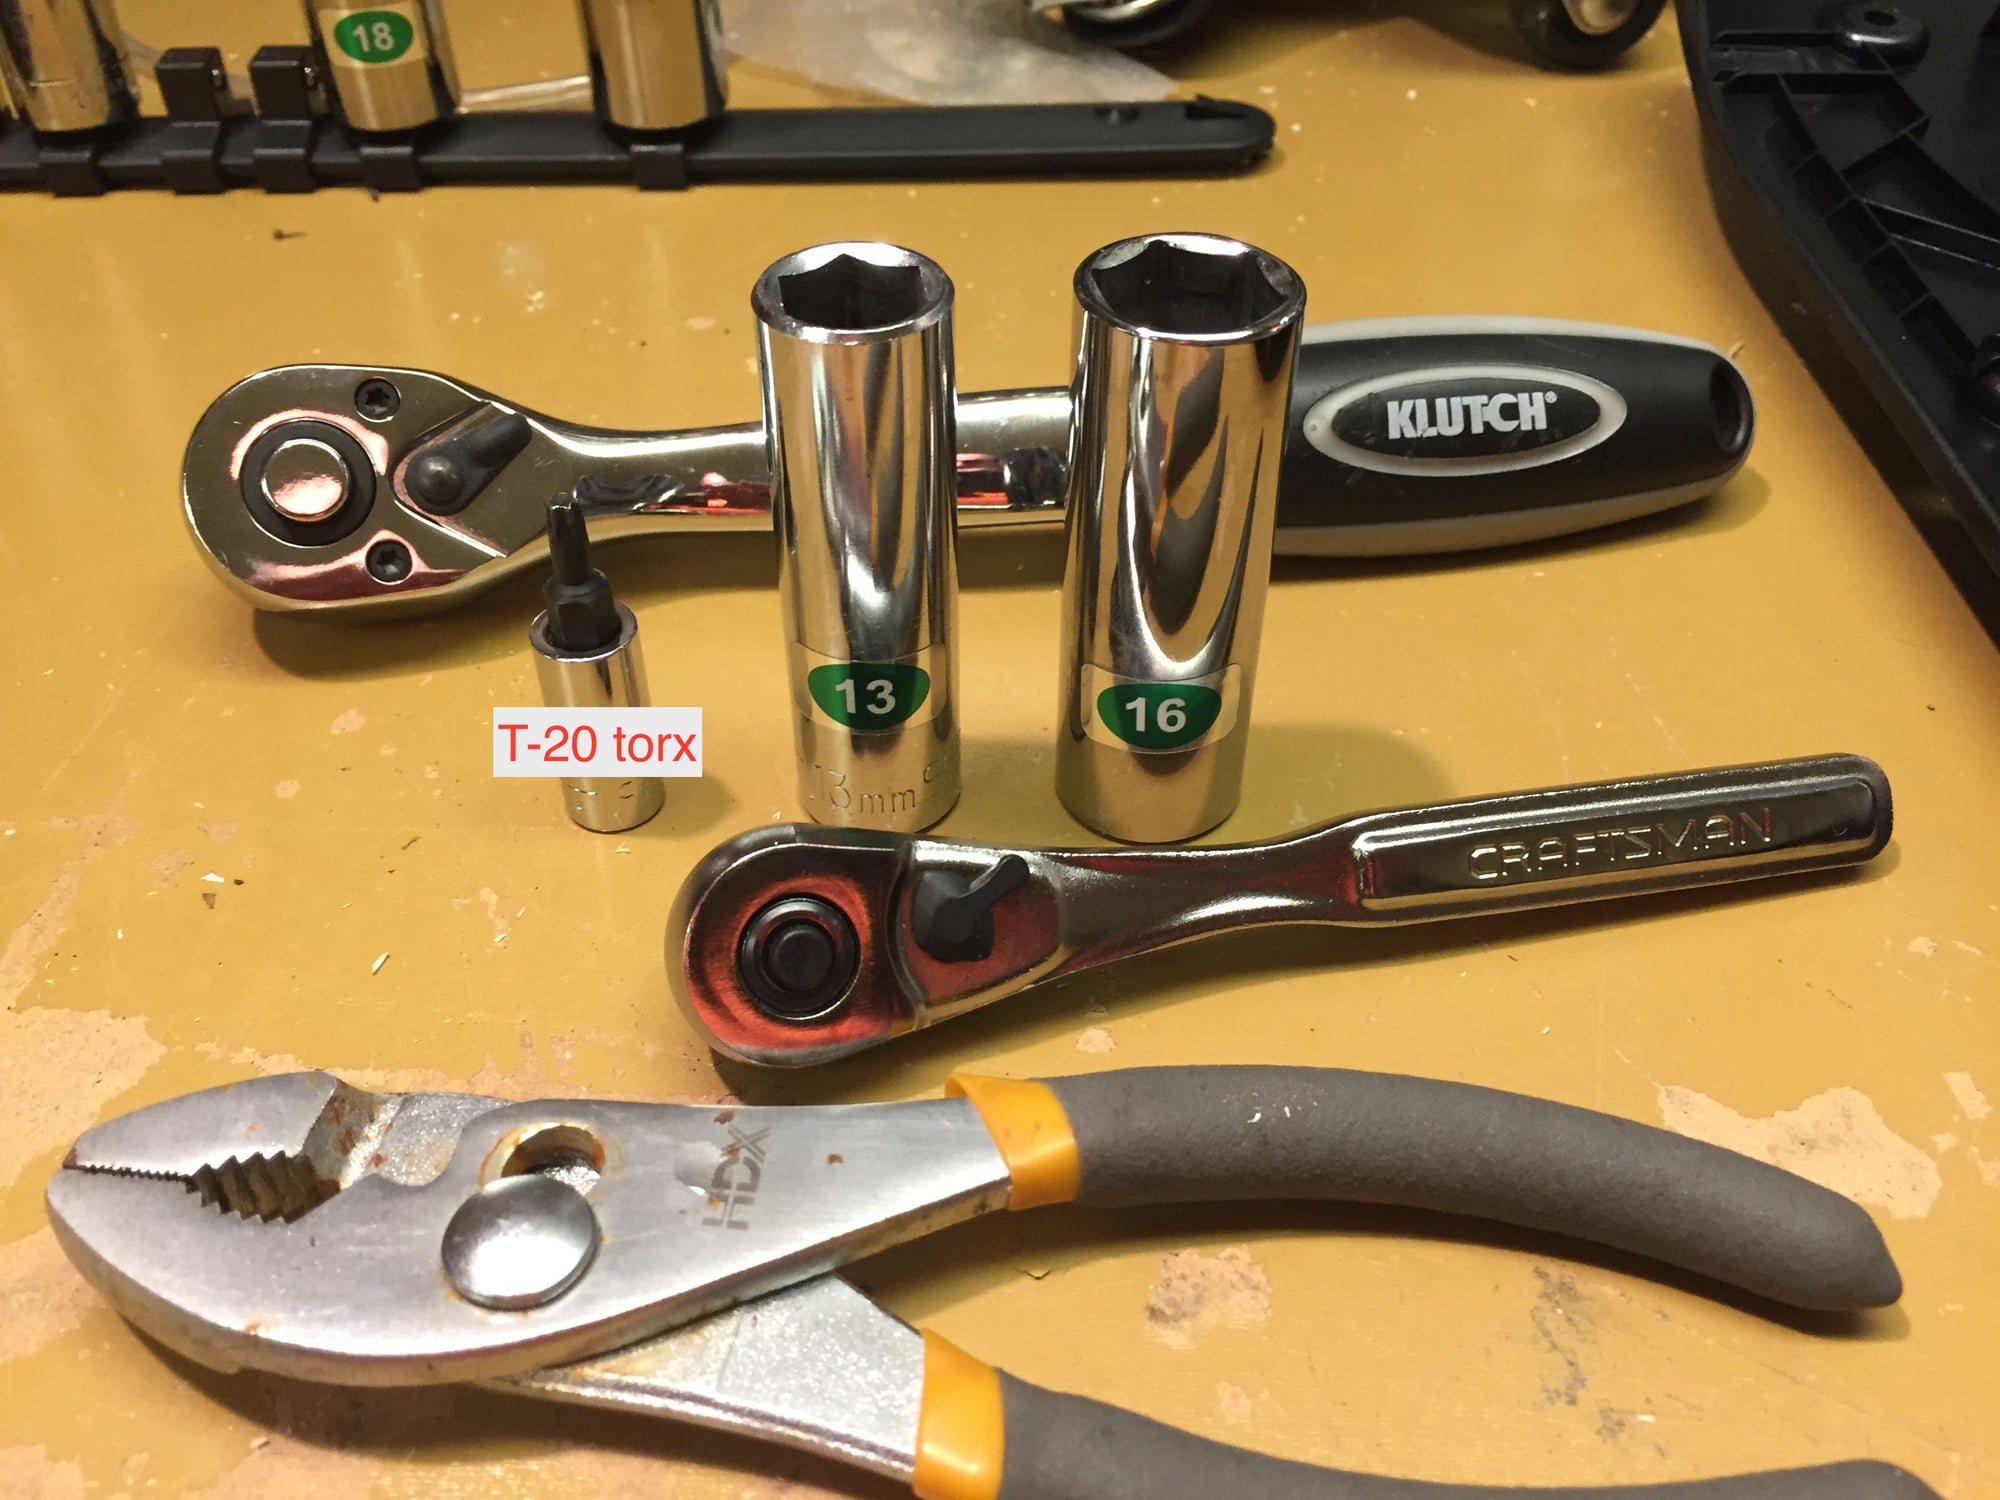
You will need the following tools:
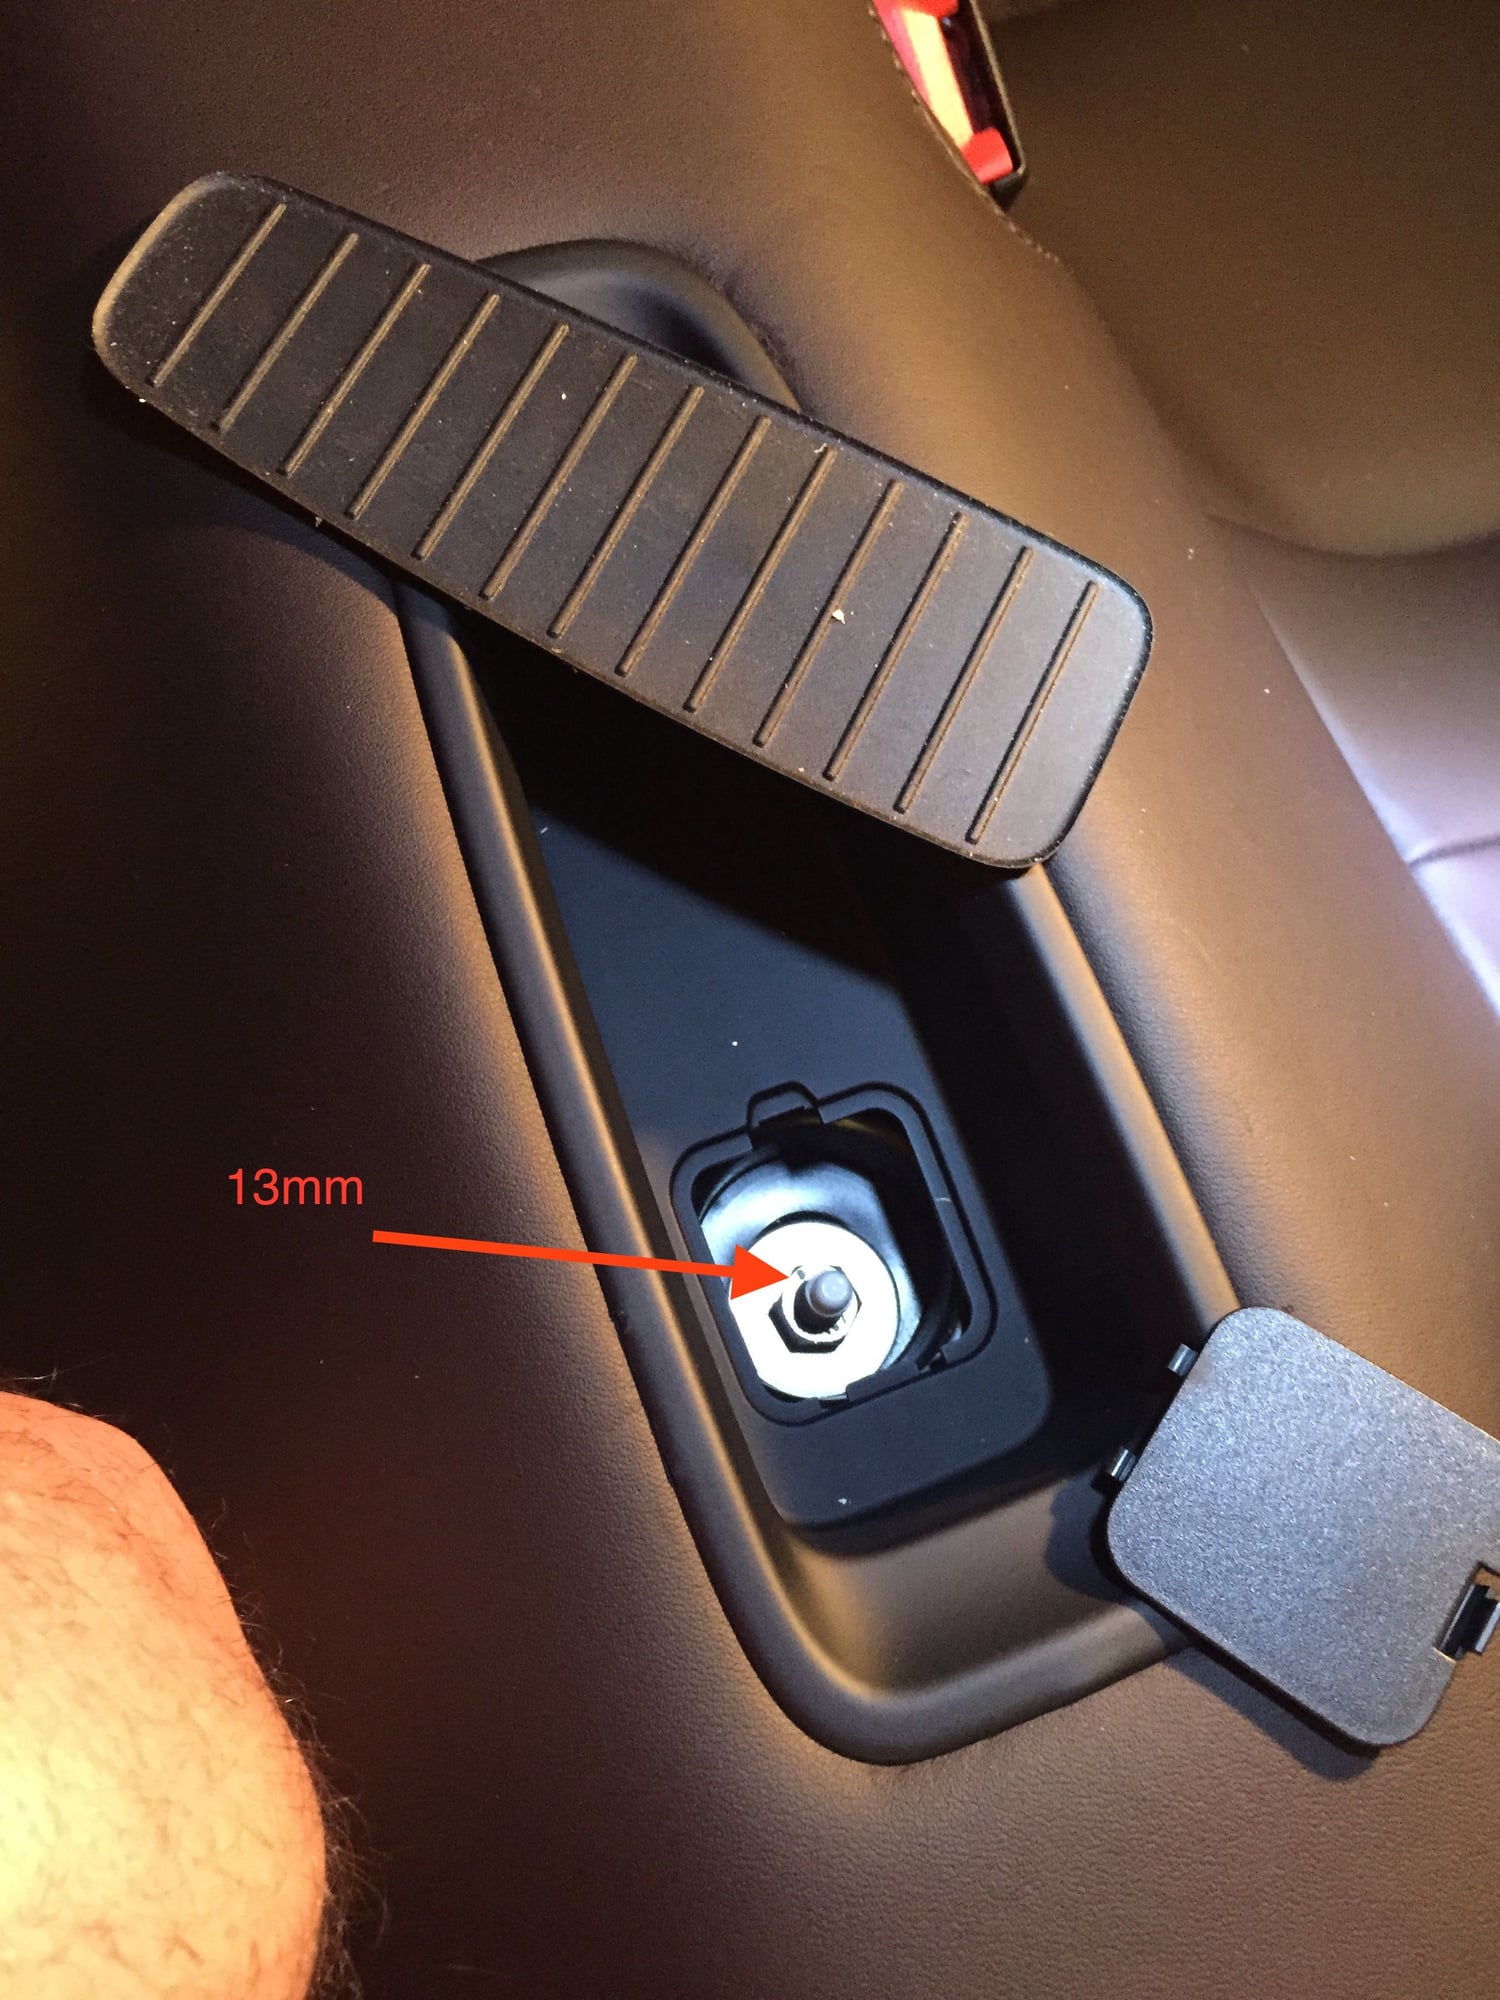
Remove the rubber tray in the back seat console, open the cover and remove the 13mm bolt.
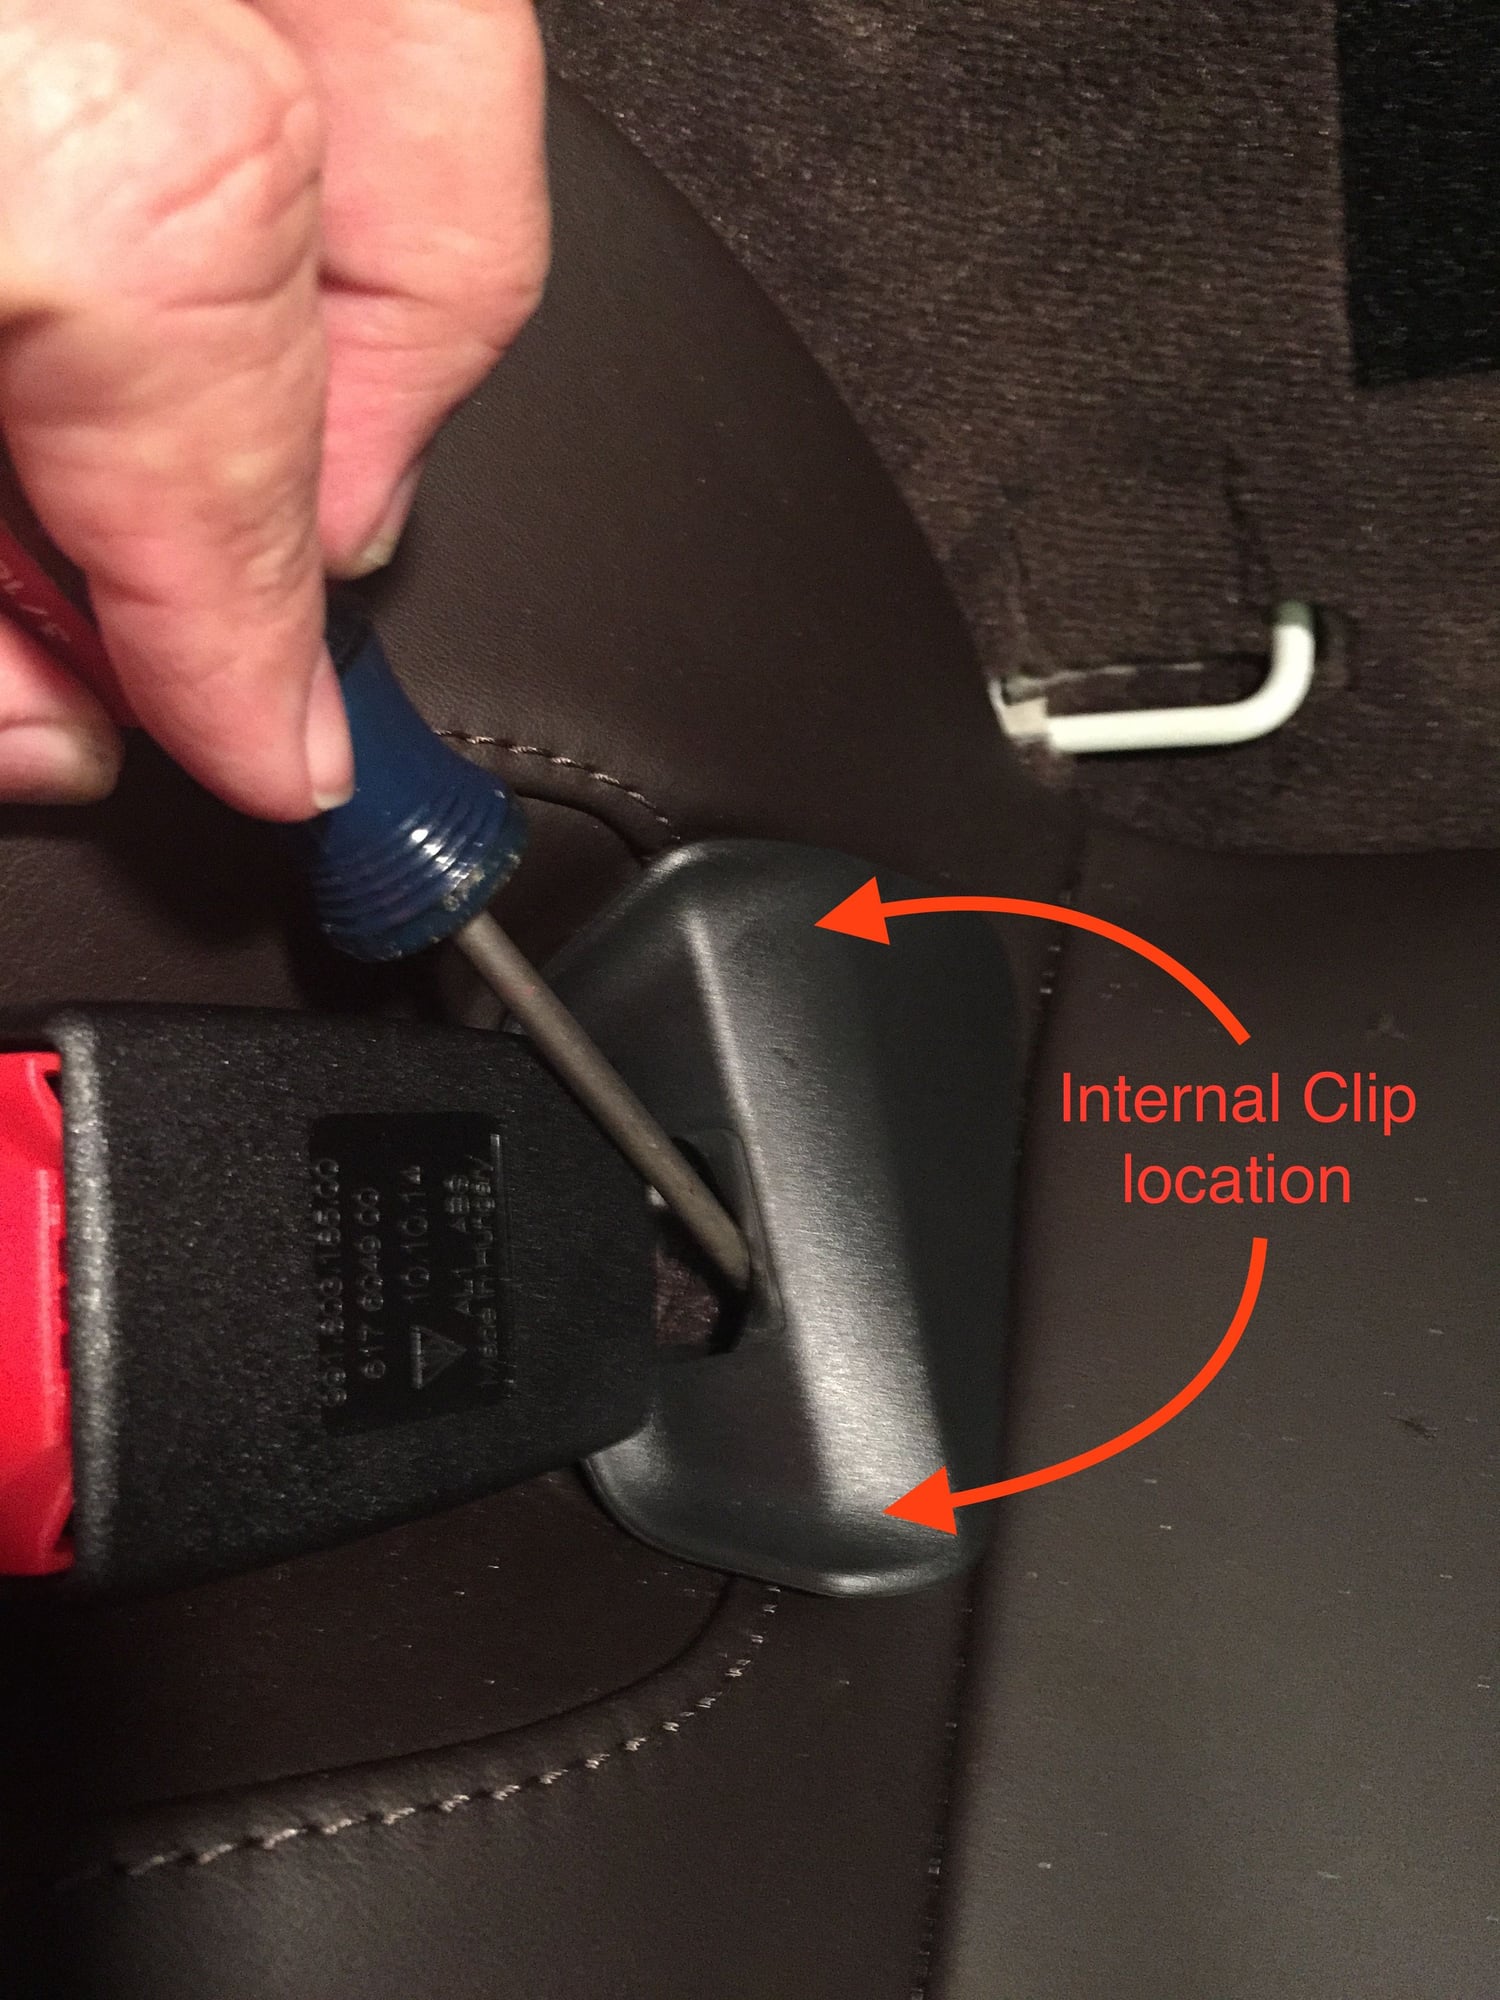
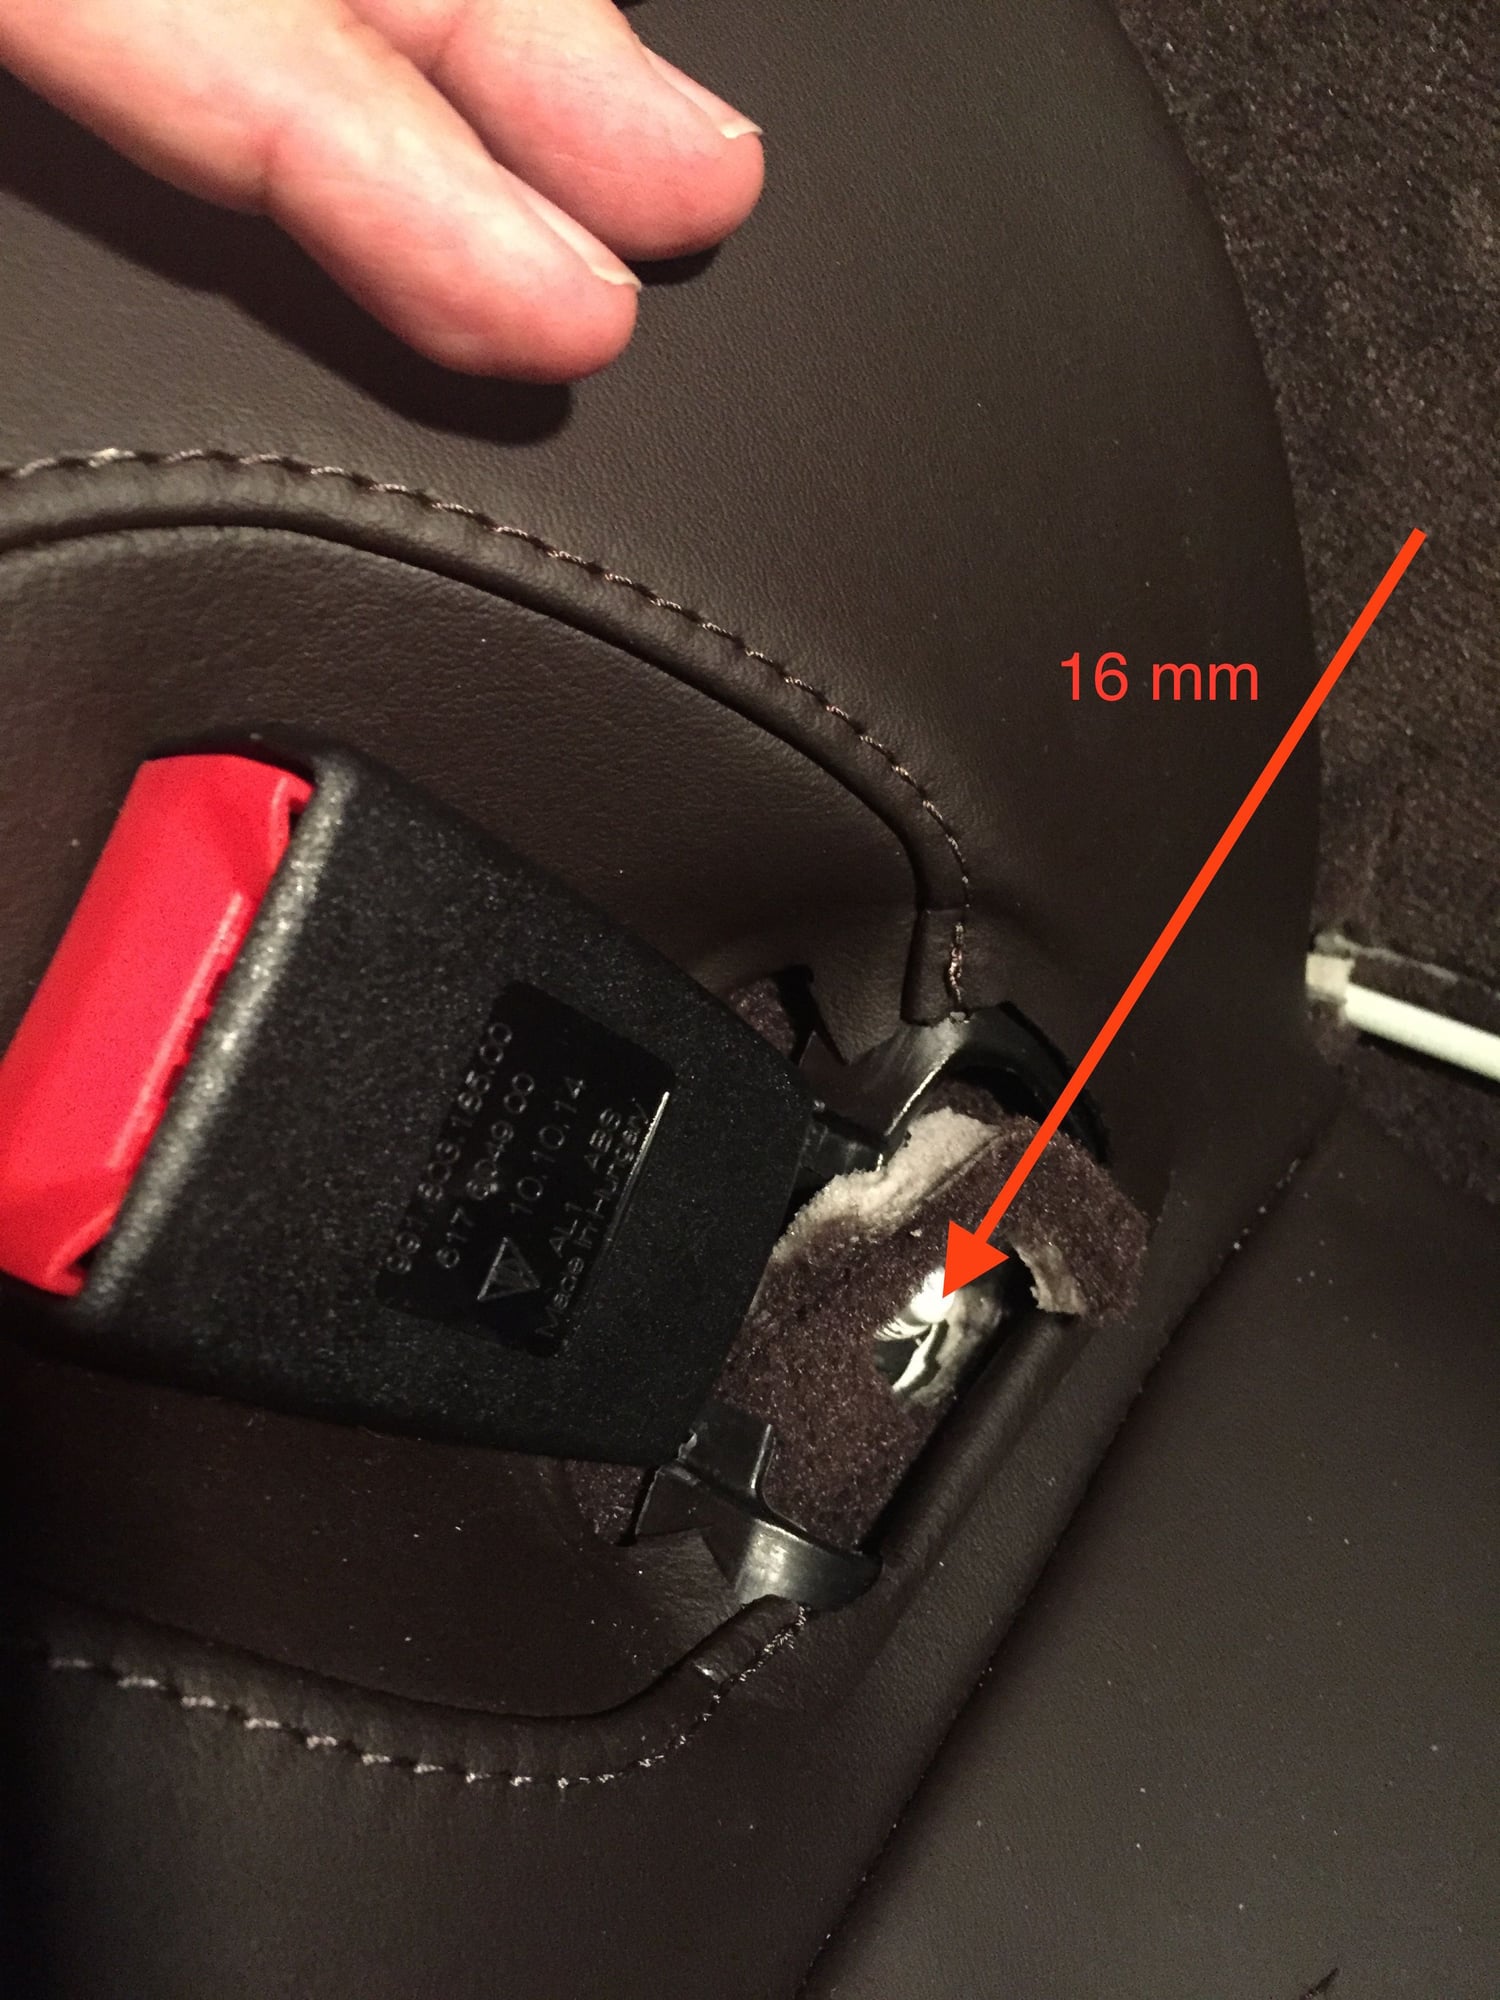
Remove the black plastic seat belt covers and remove the 16mm bolts.
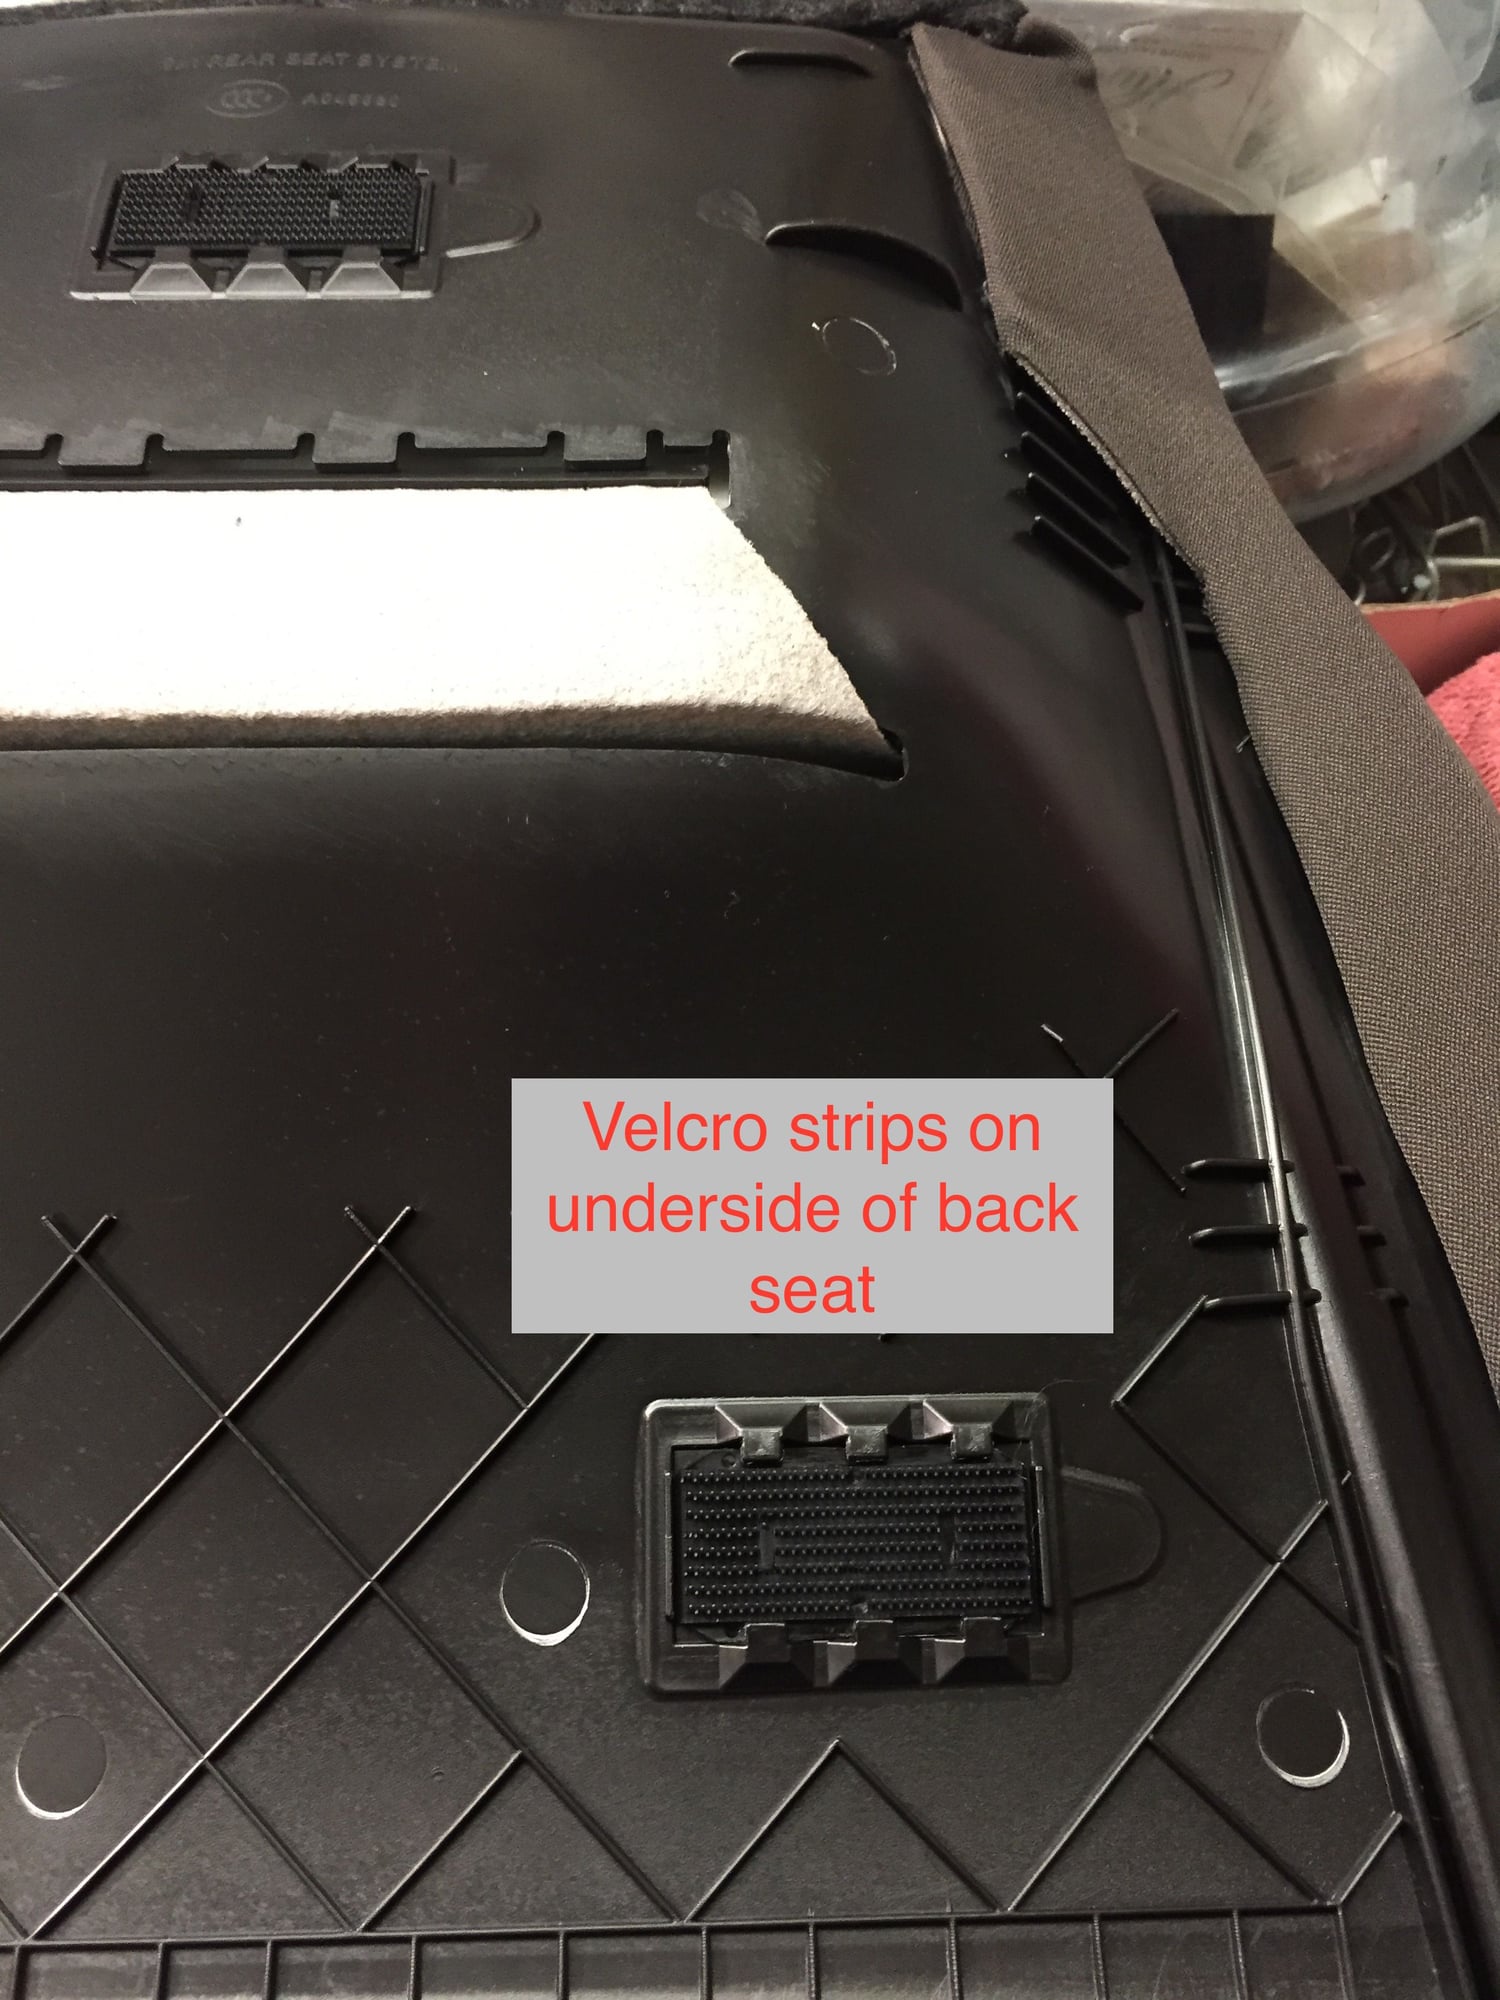
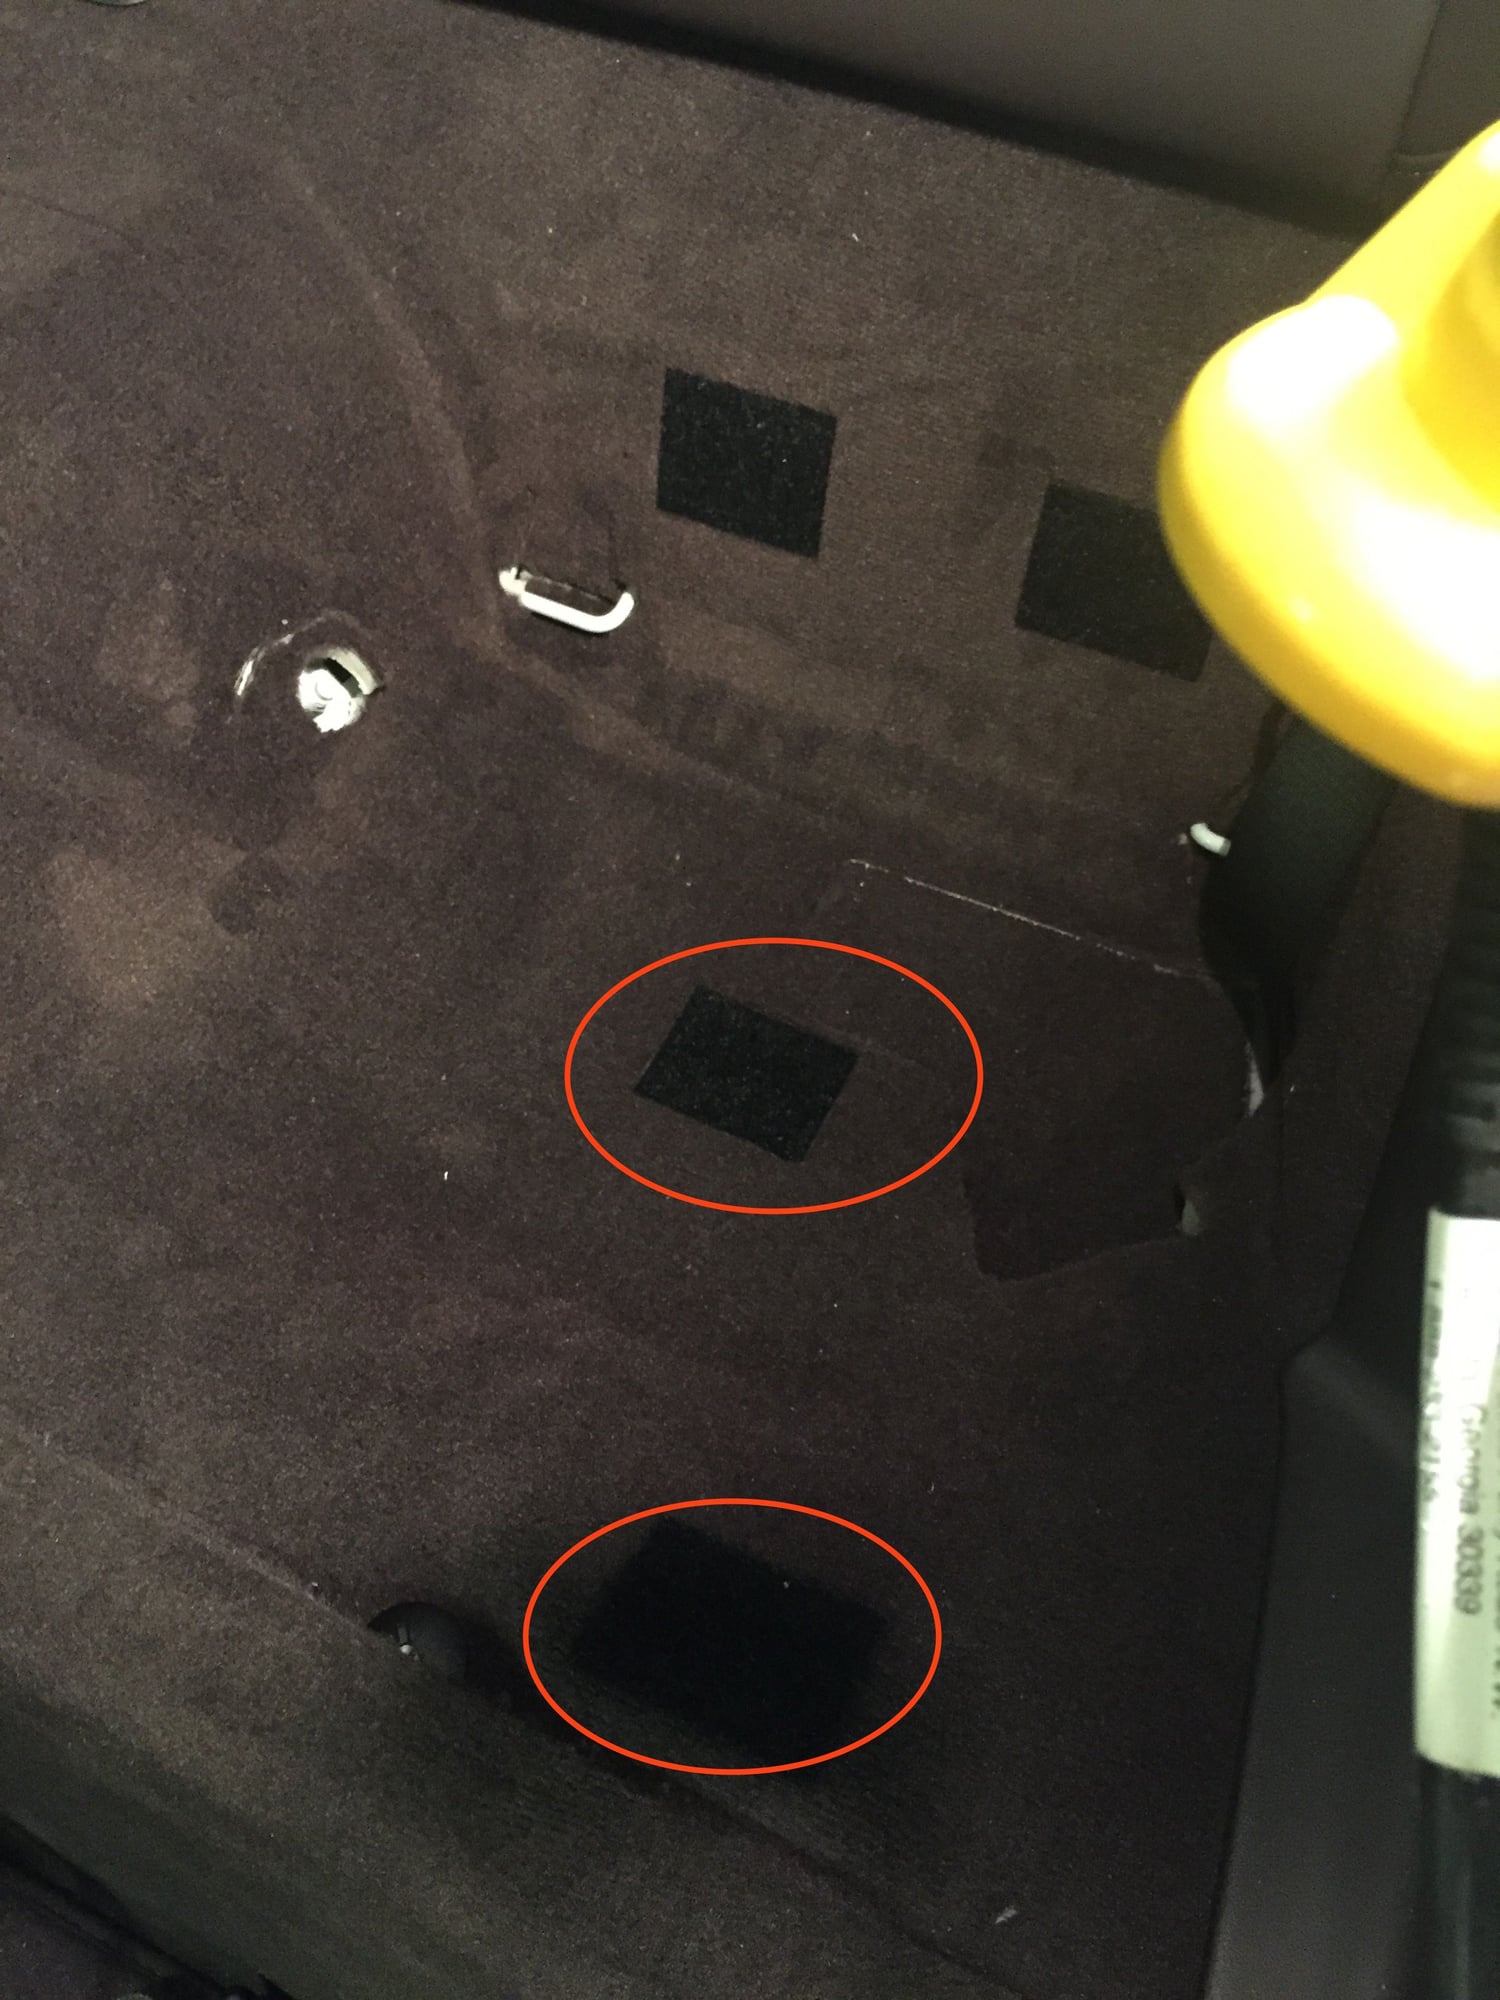
Reach under front and rear of seat cushion and give a good tug to release the velcro. Do the driver then passenger side, seat should slide out.
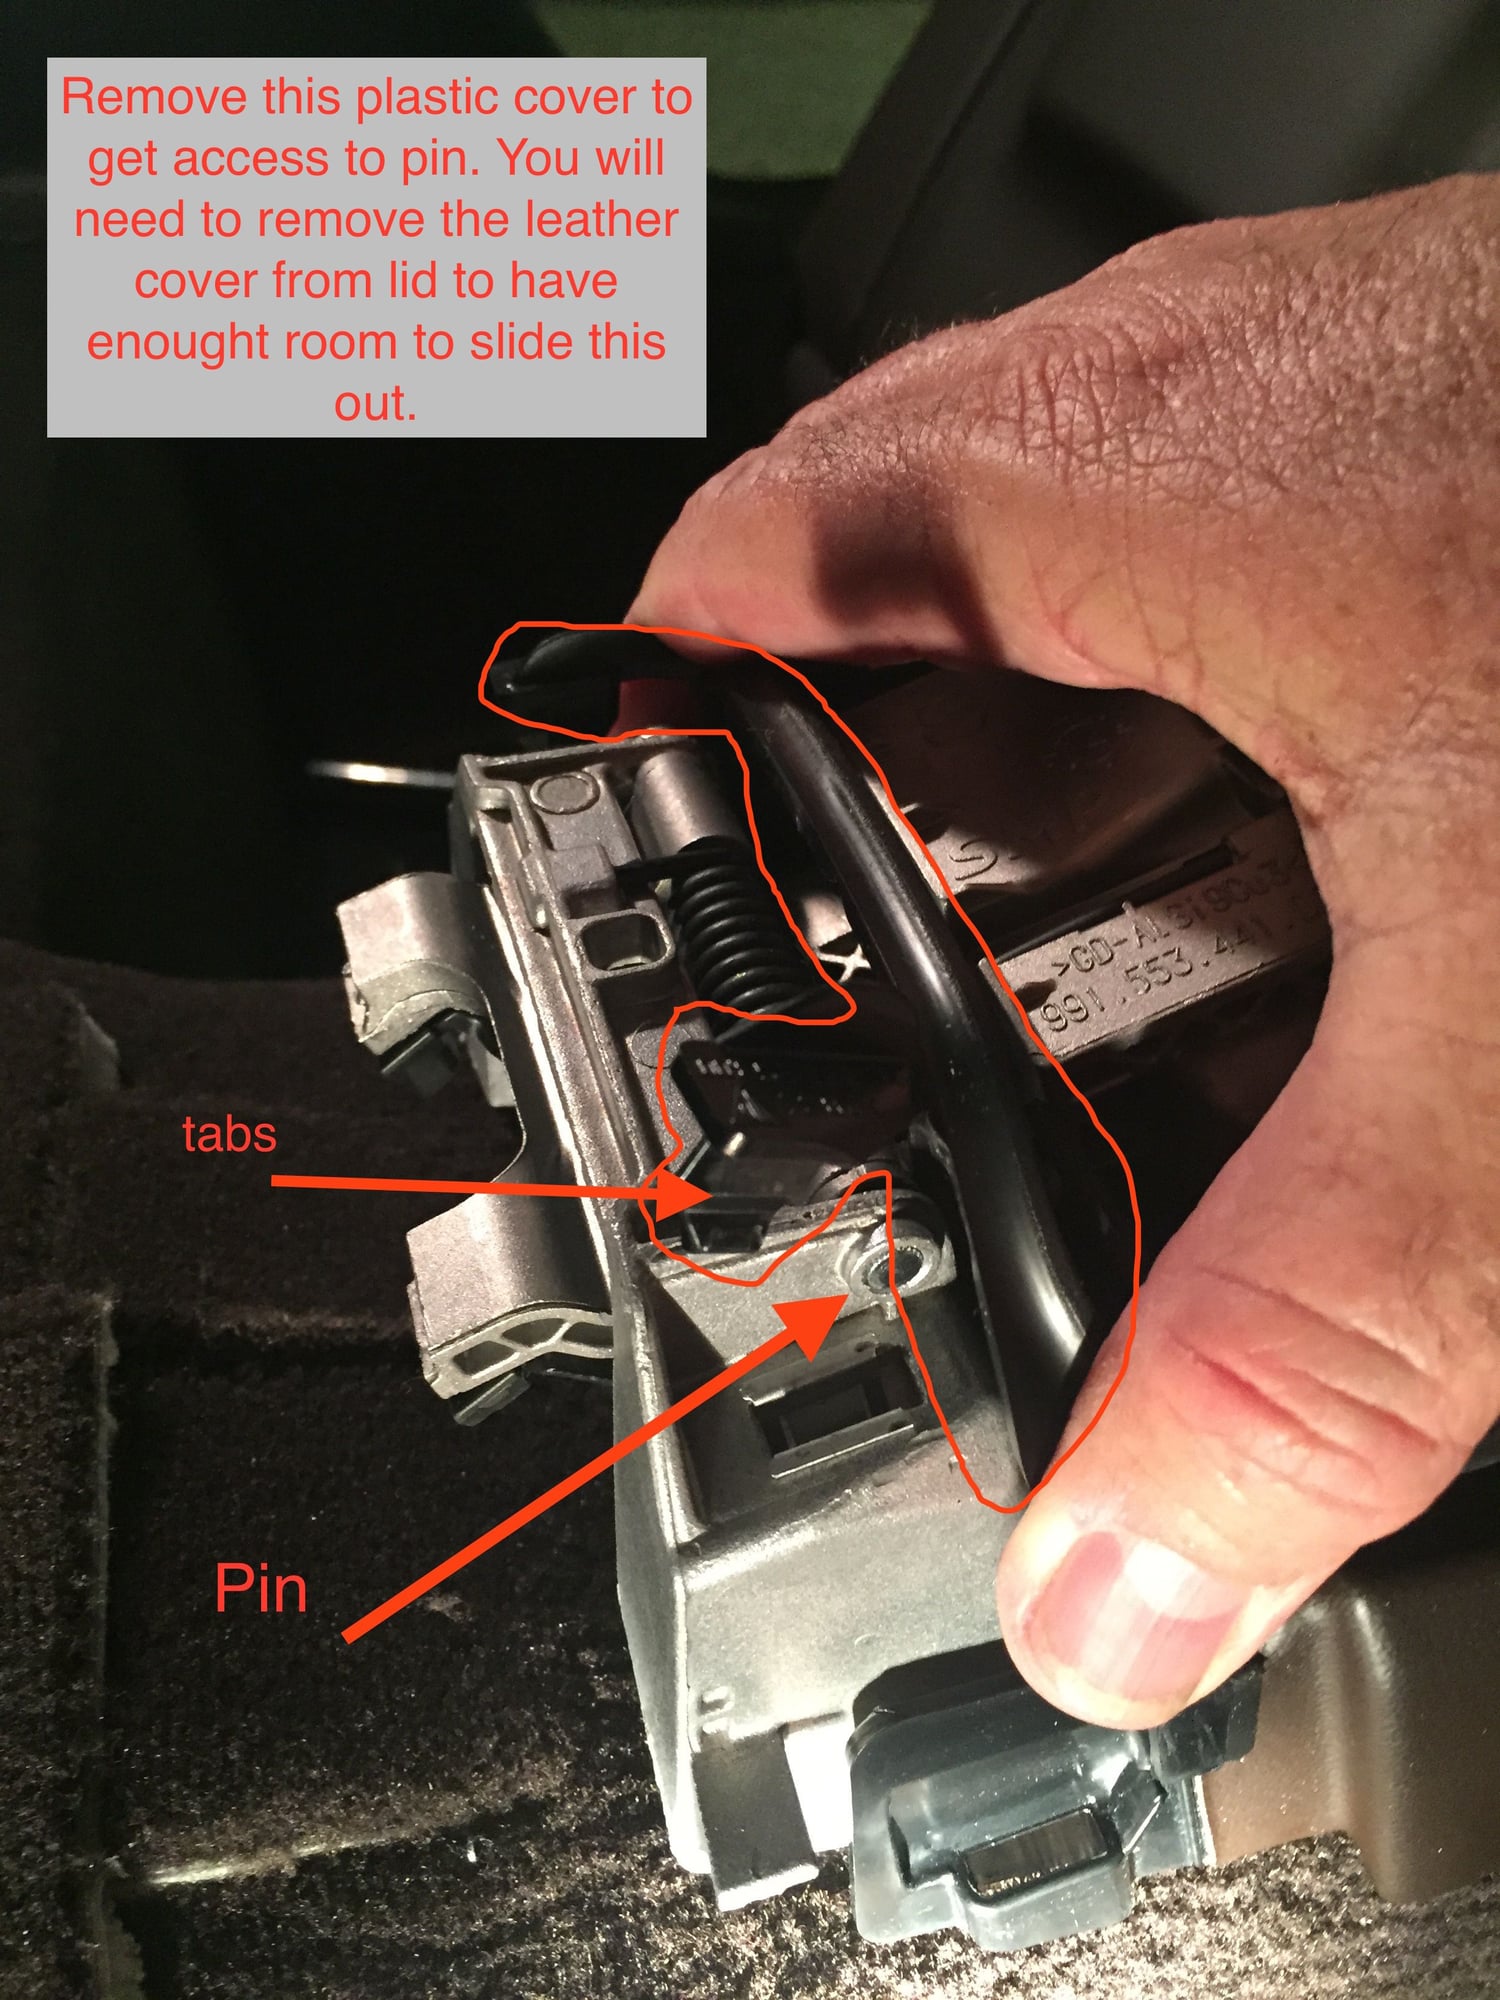
Remove the black plastic cover trim piece that keeps the pin from backing out. You will need to remove the OEM leather cover from the lid (use T-20 torx) to remove screws from underside of lid to give yourself enough wiggle room to slide the trim piece out.
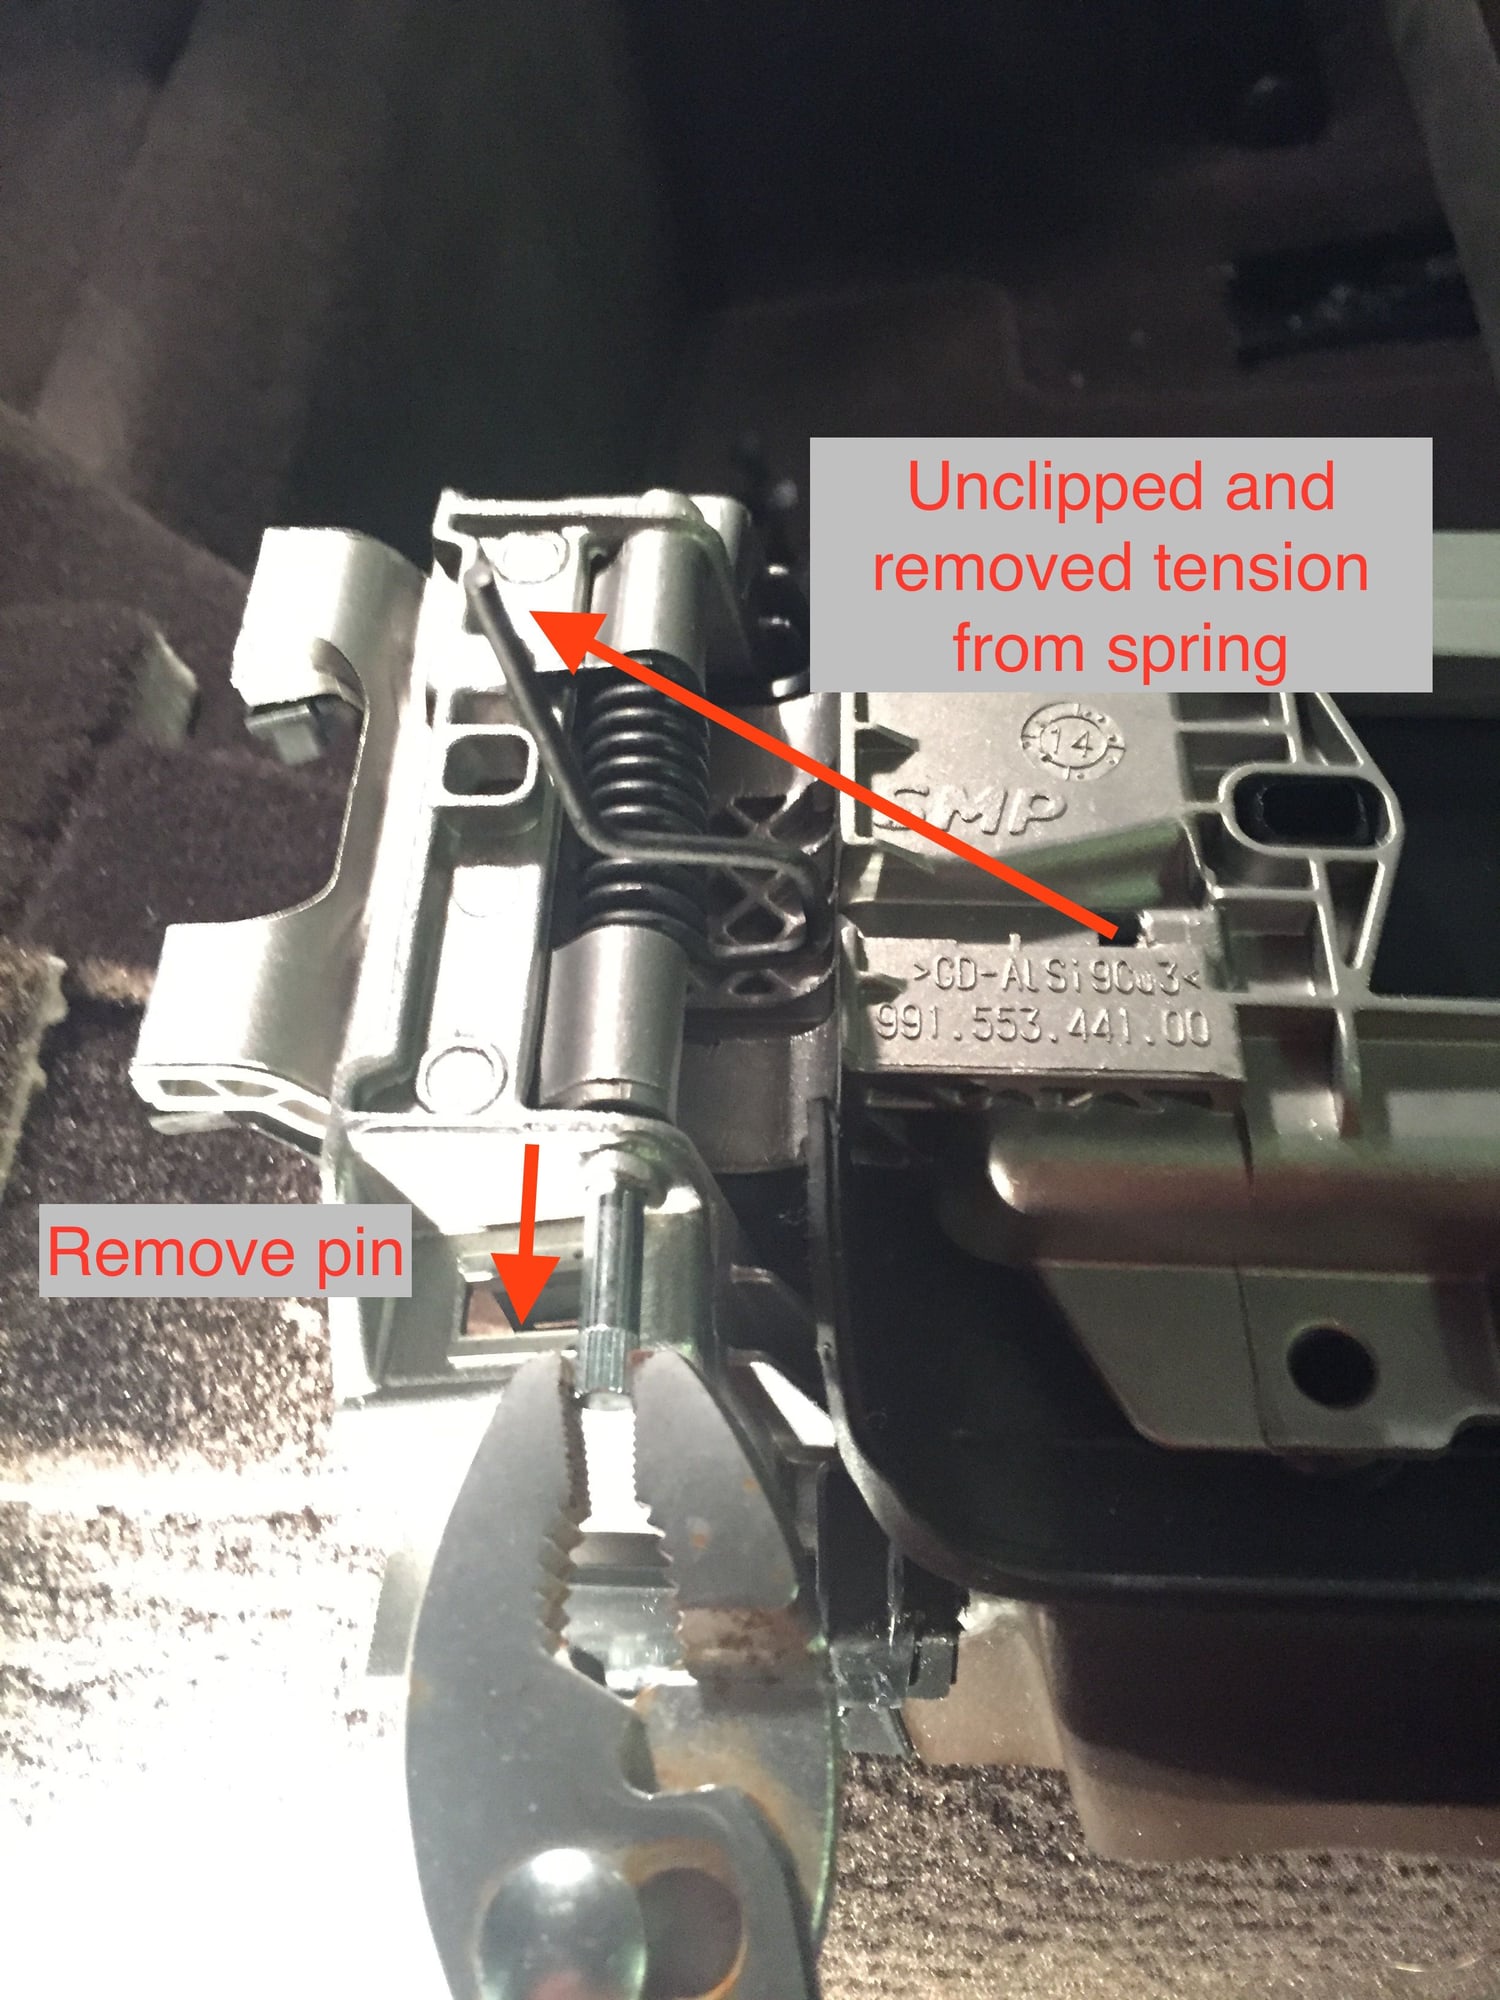
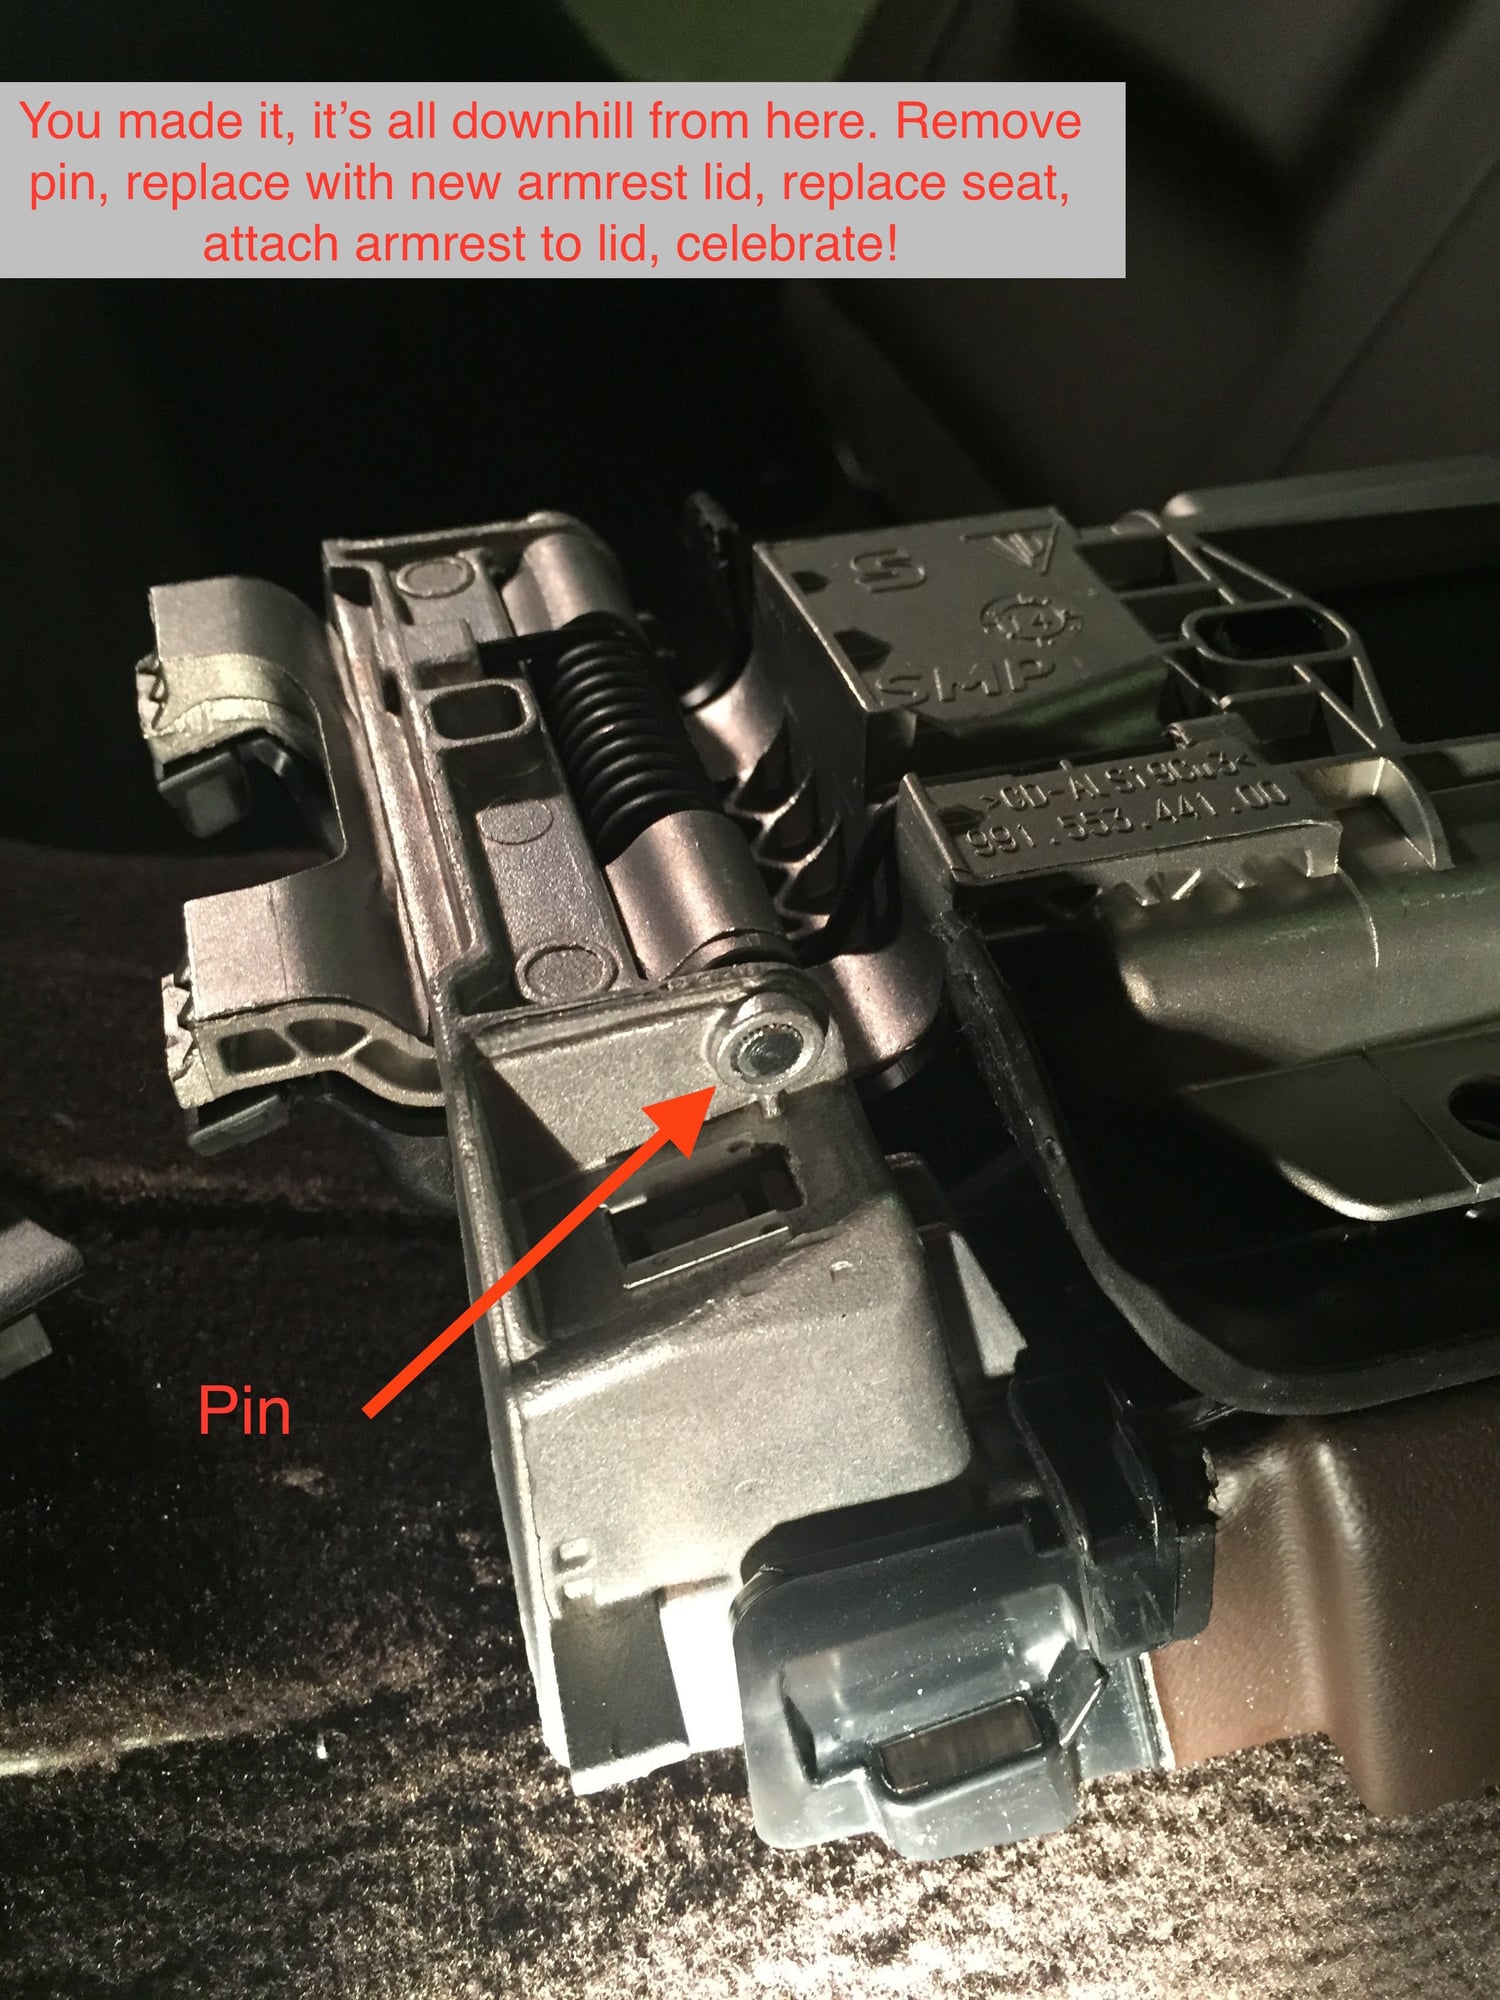
remove the pin
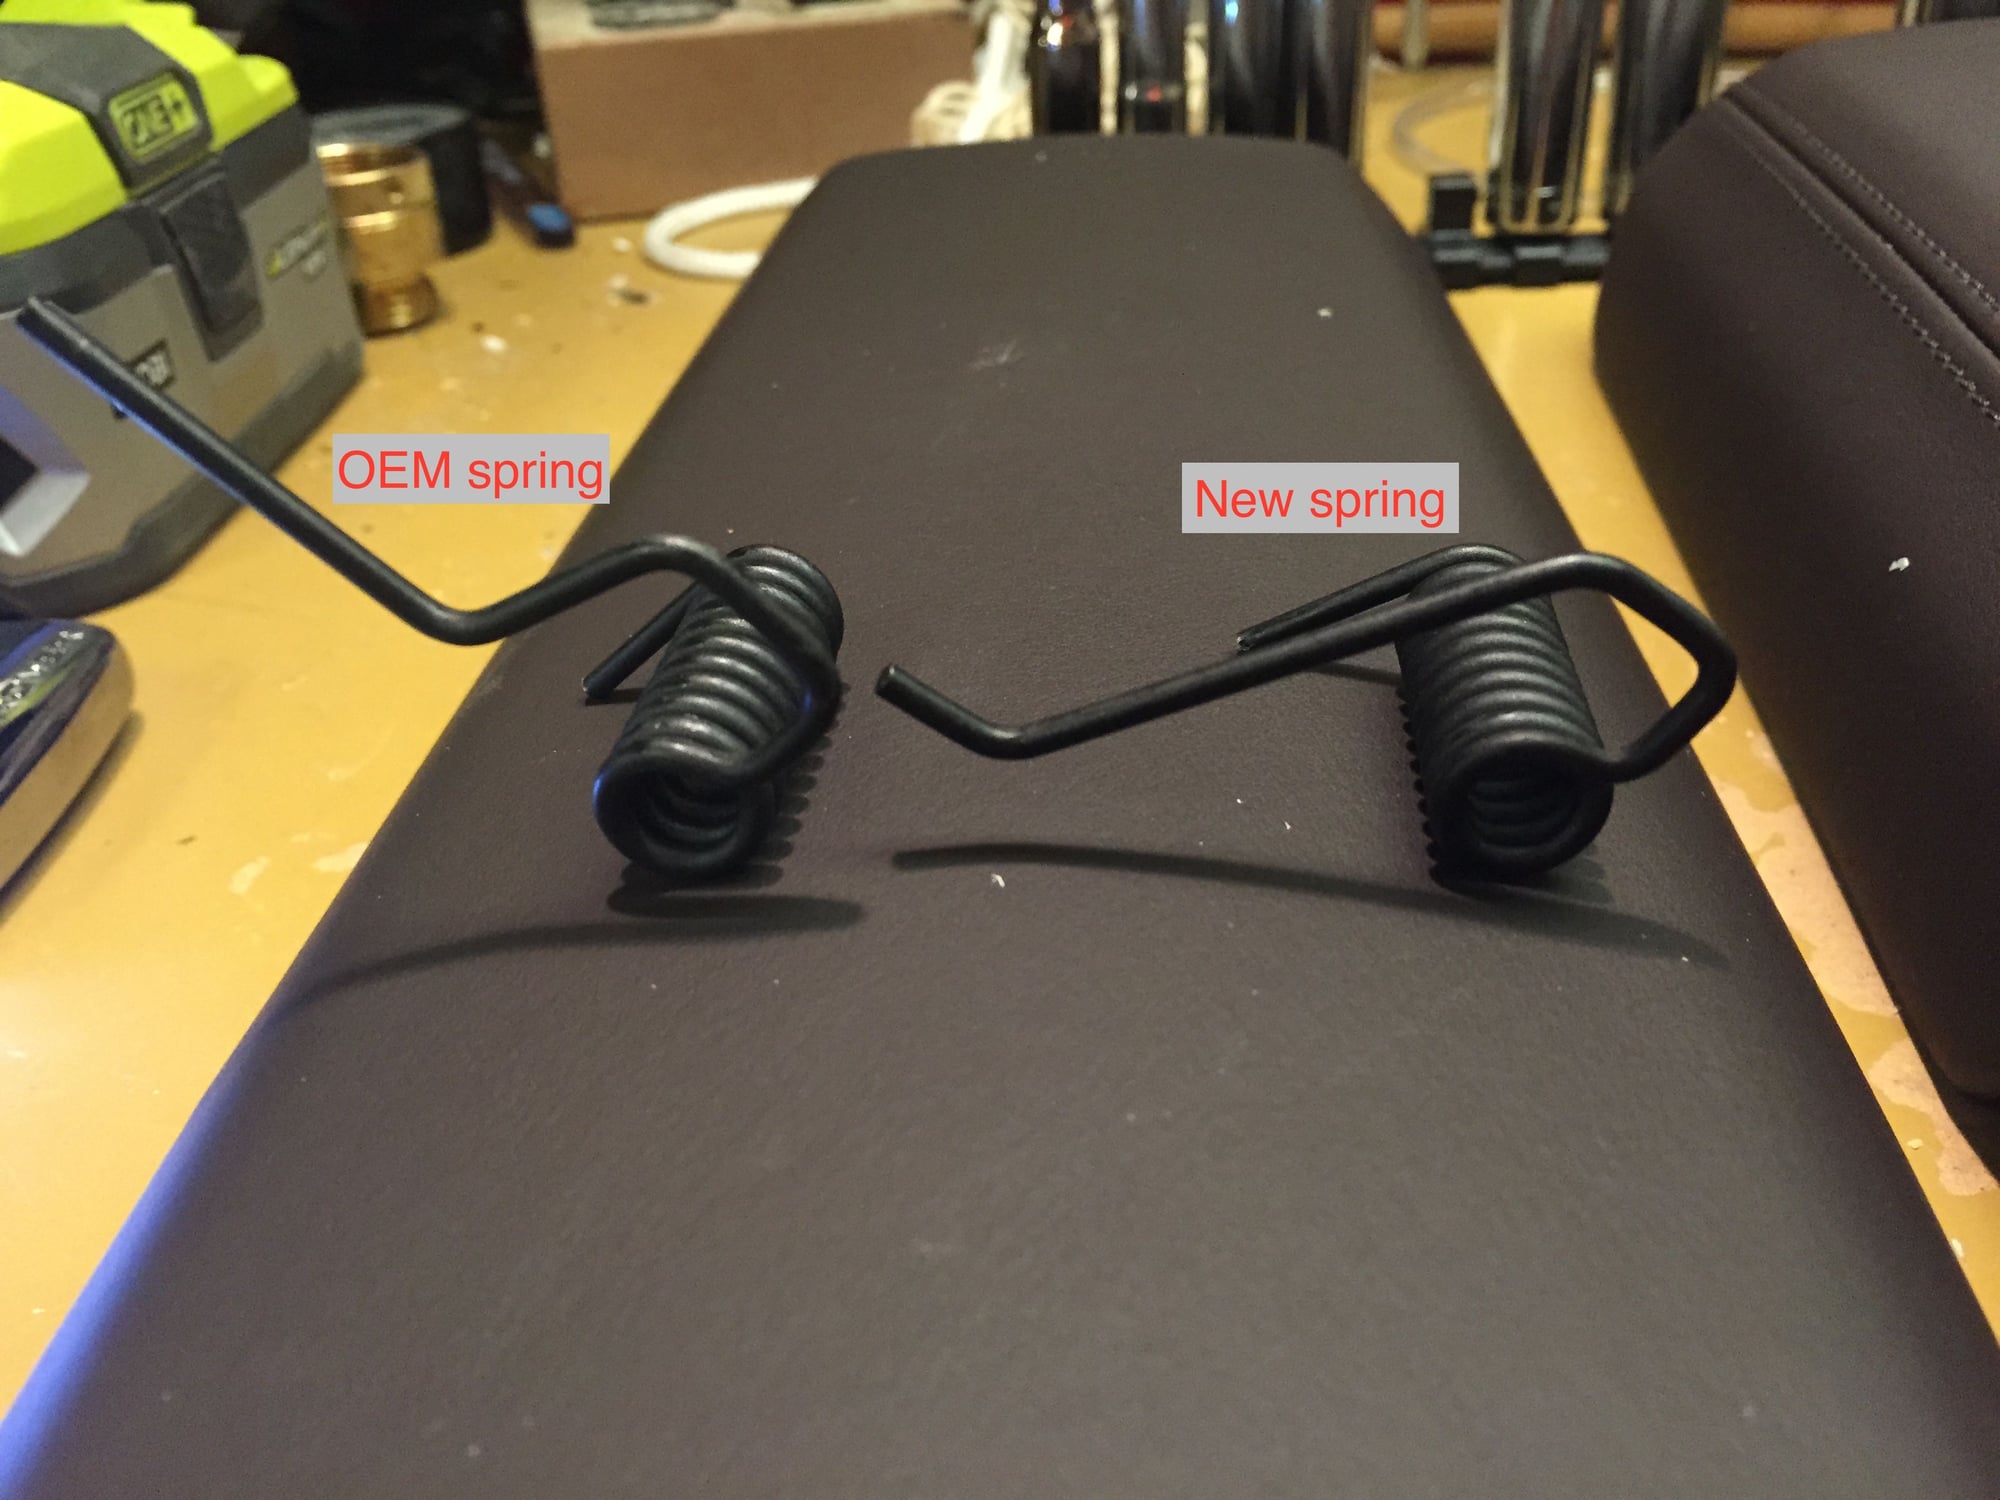
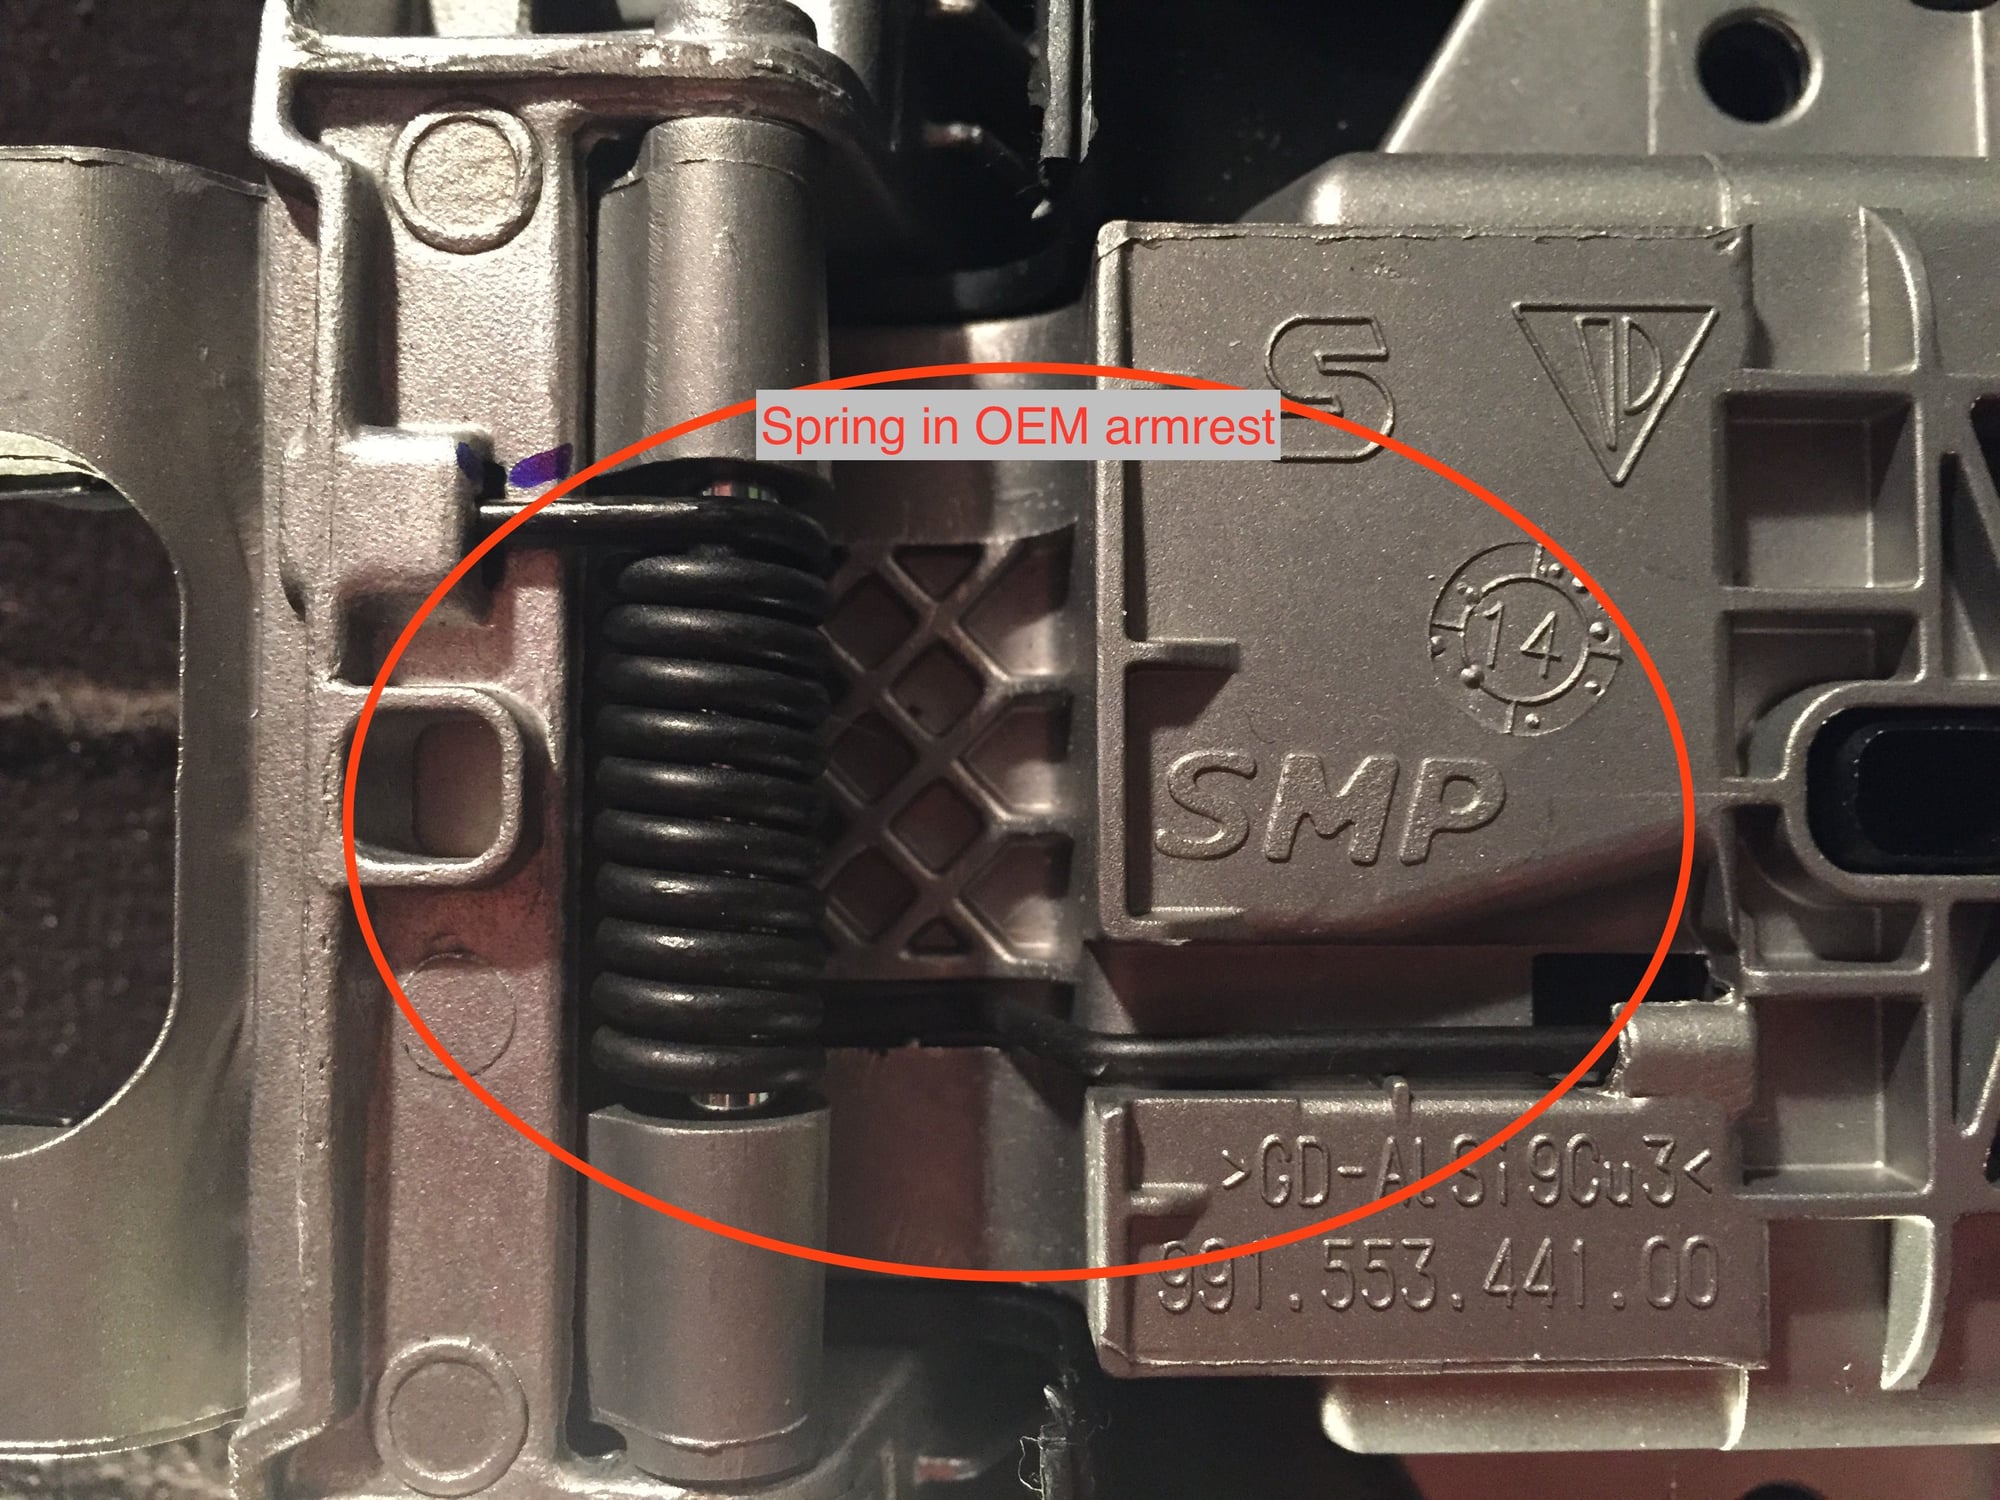
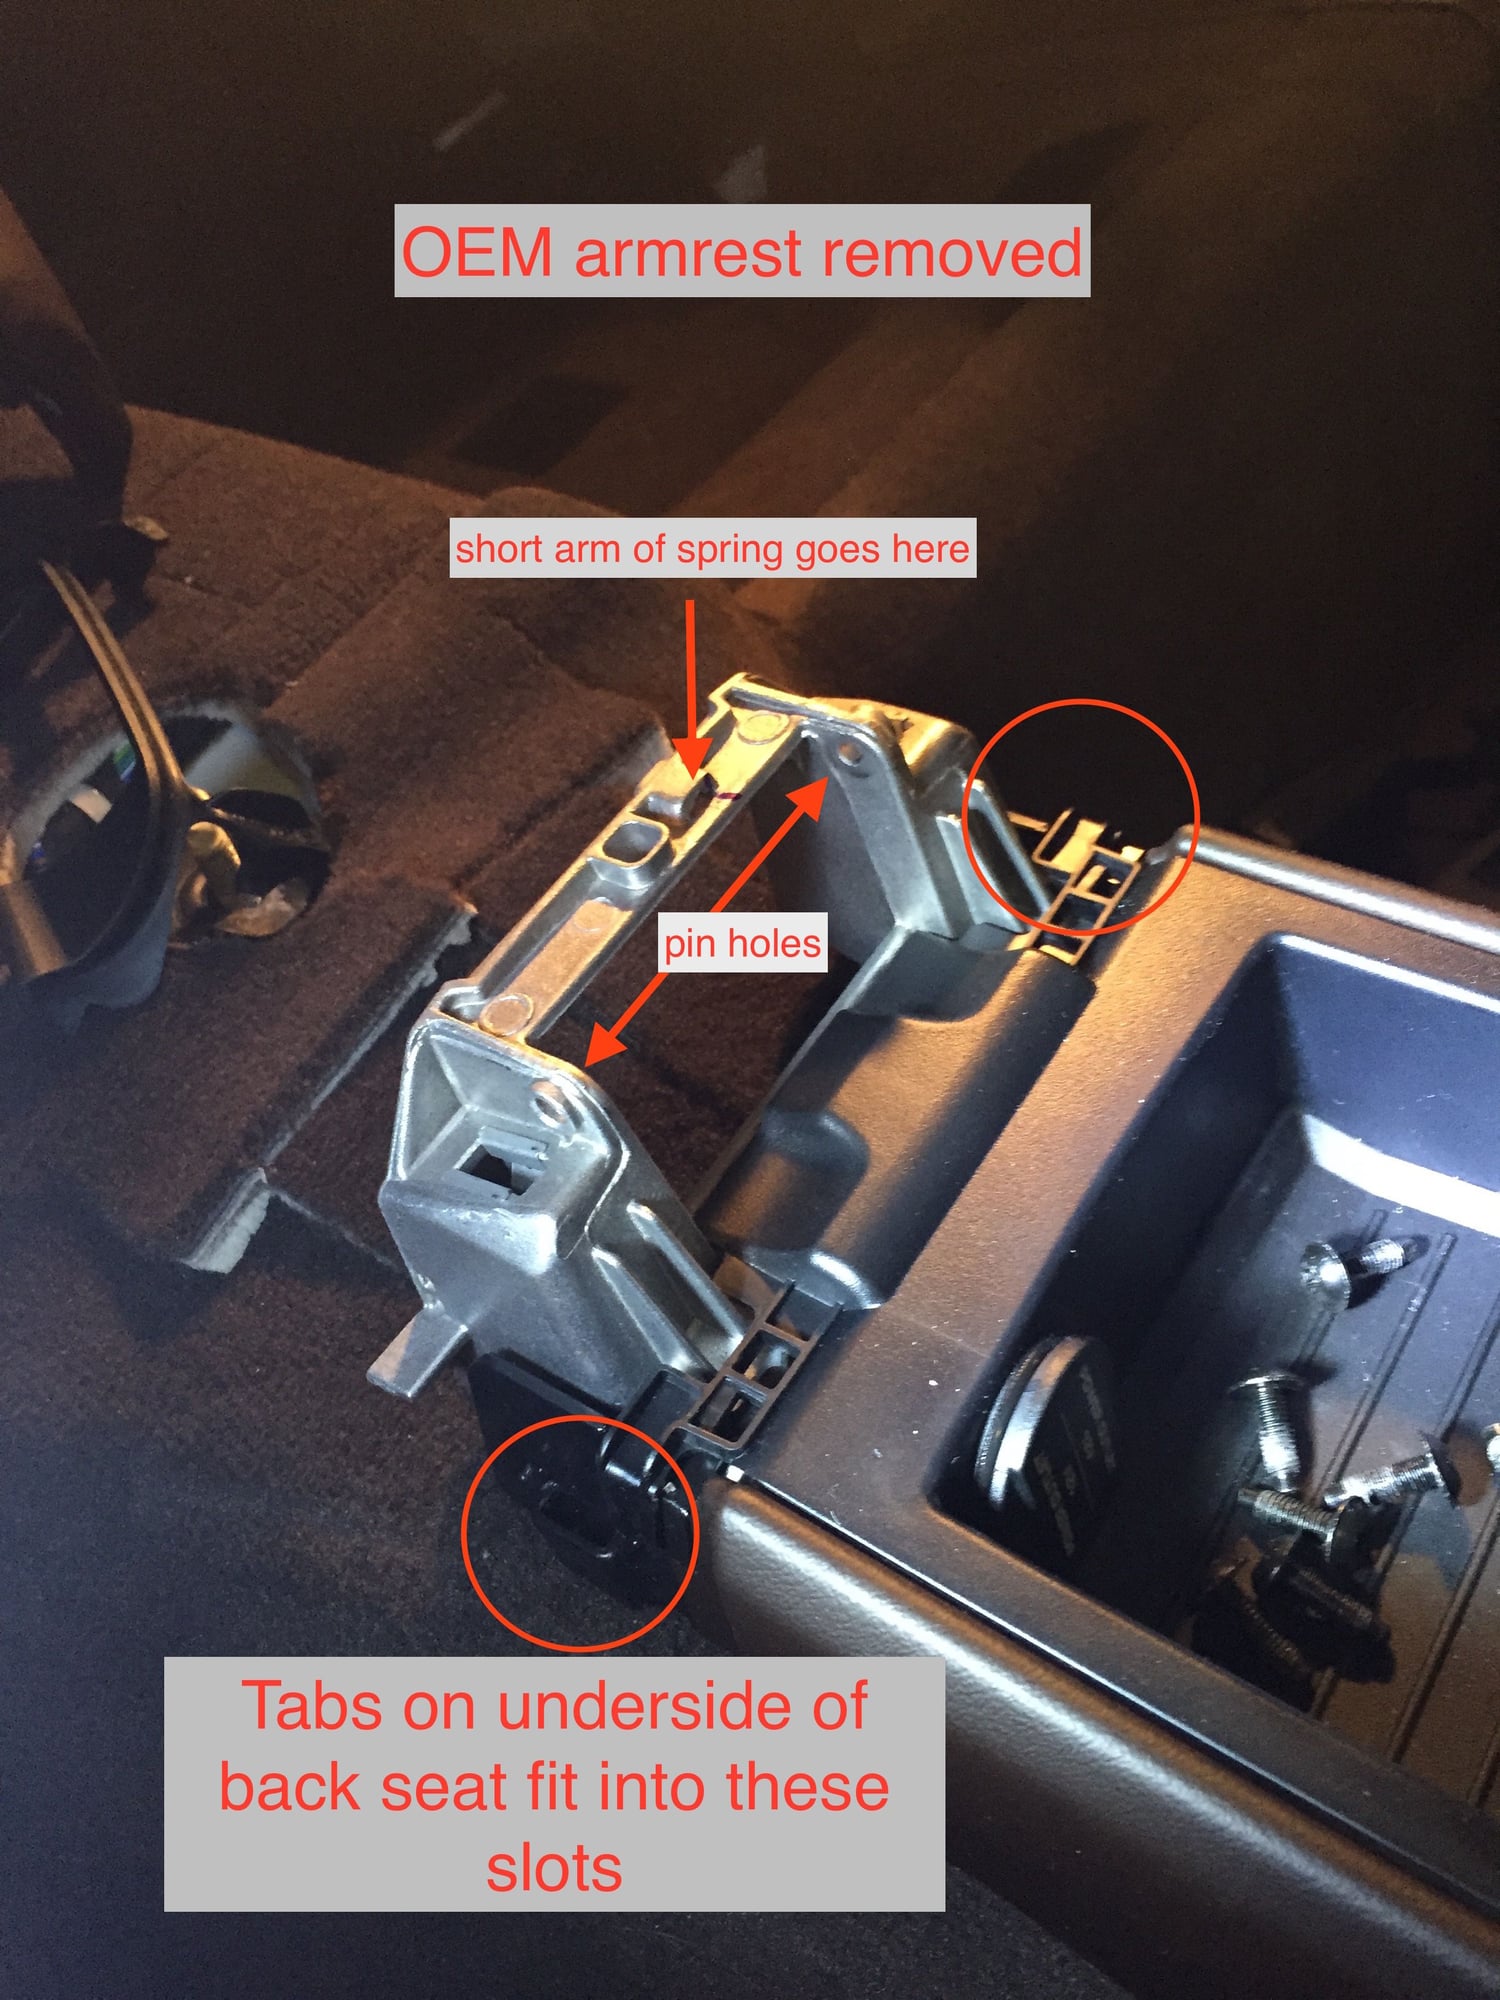
Install new extended height lid, use the new spring that comes with the lid. I installed the short arm of the pin in the console swivel base (see OEM spring pic), inserted the pin thru the new lid and spring and then raised the new lid to the open position, apply some tension to clip the long arm of the spring into the new lid (see OEM spring pic)
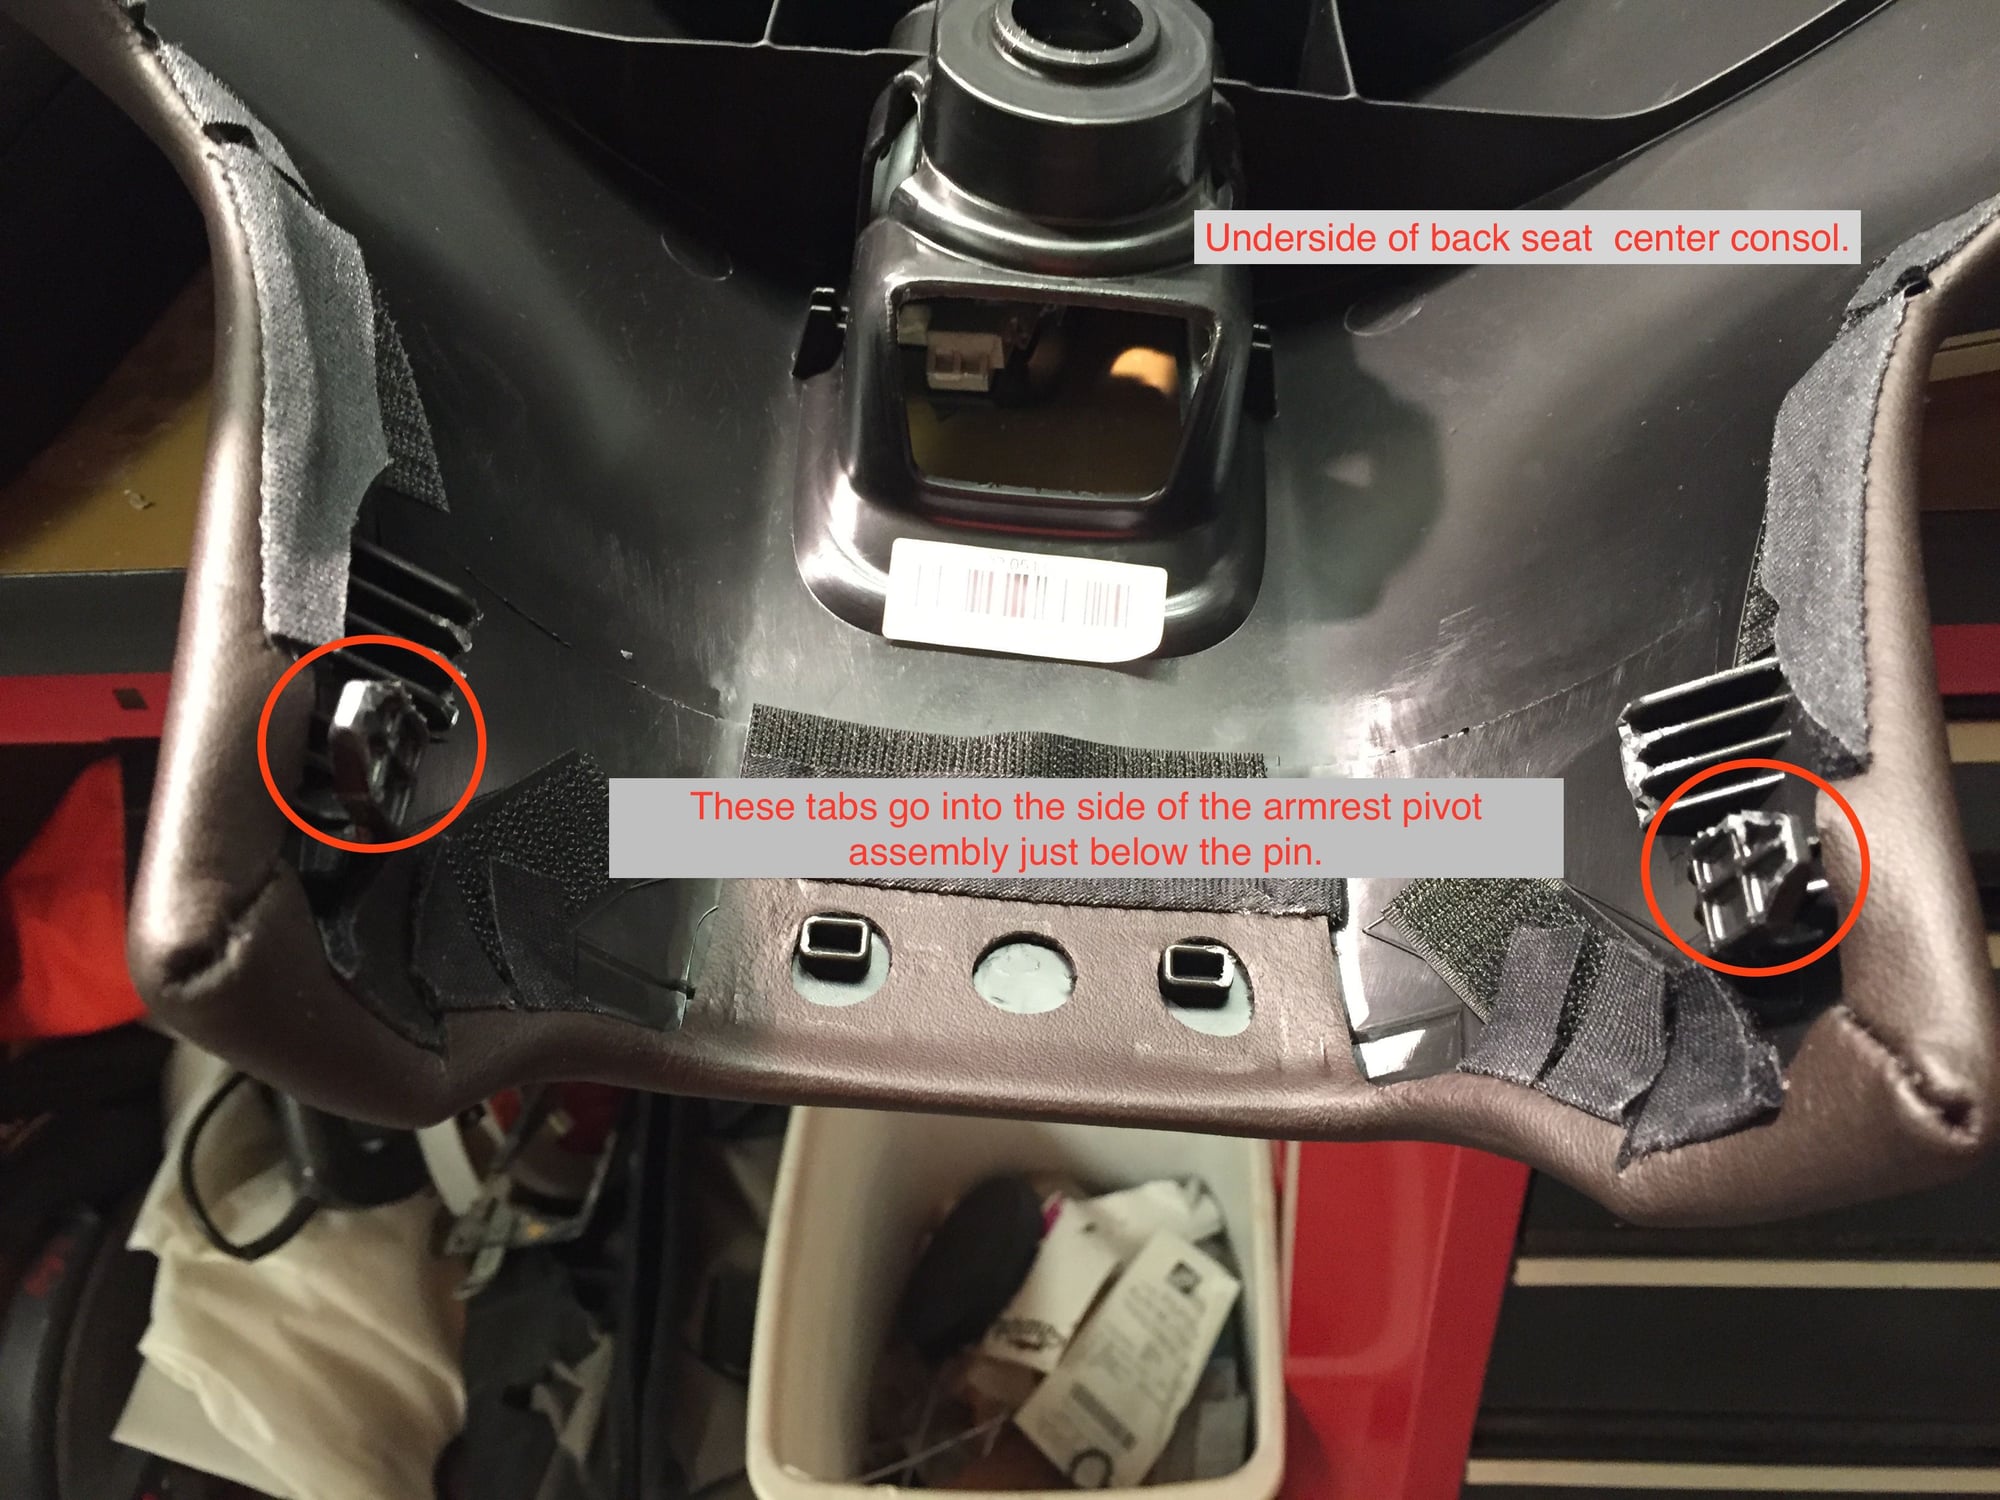
Reverse your un-install procedure. Pay attention to the two tabs on the underside of the rear seat console where it attaches to the base of the arm swivel just below the pin.
The quality of the armrest is excellent, color match is perfect, stitching is a bonus over OEM.
Great job! Thanks. I saw those on the Suncoast website and thought it would look hideous. I was thinking it was super tall or something. But it looks great. Got me thinking!
Gents:
Thanks for the kind words, this is not as complicated as it seems, the hardest part is contorting yourself into the back seat. It's a 6 step approach:
1. Remove back seat - 10 min. max
2. Remove OEM armrest from OEM lid - 5 min. max
3. Pull pin and remove OEM lid. - 2 min max.
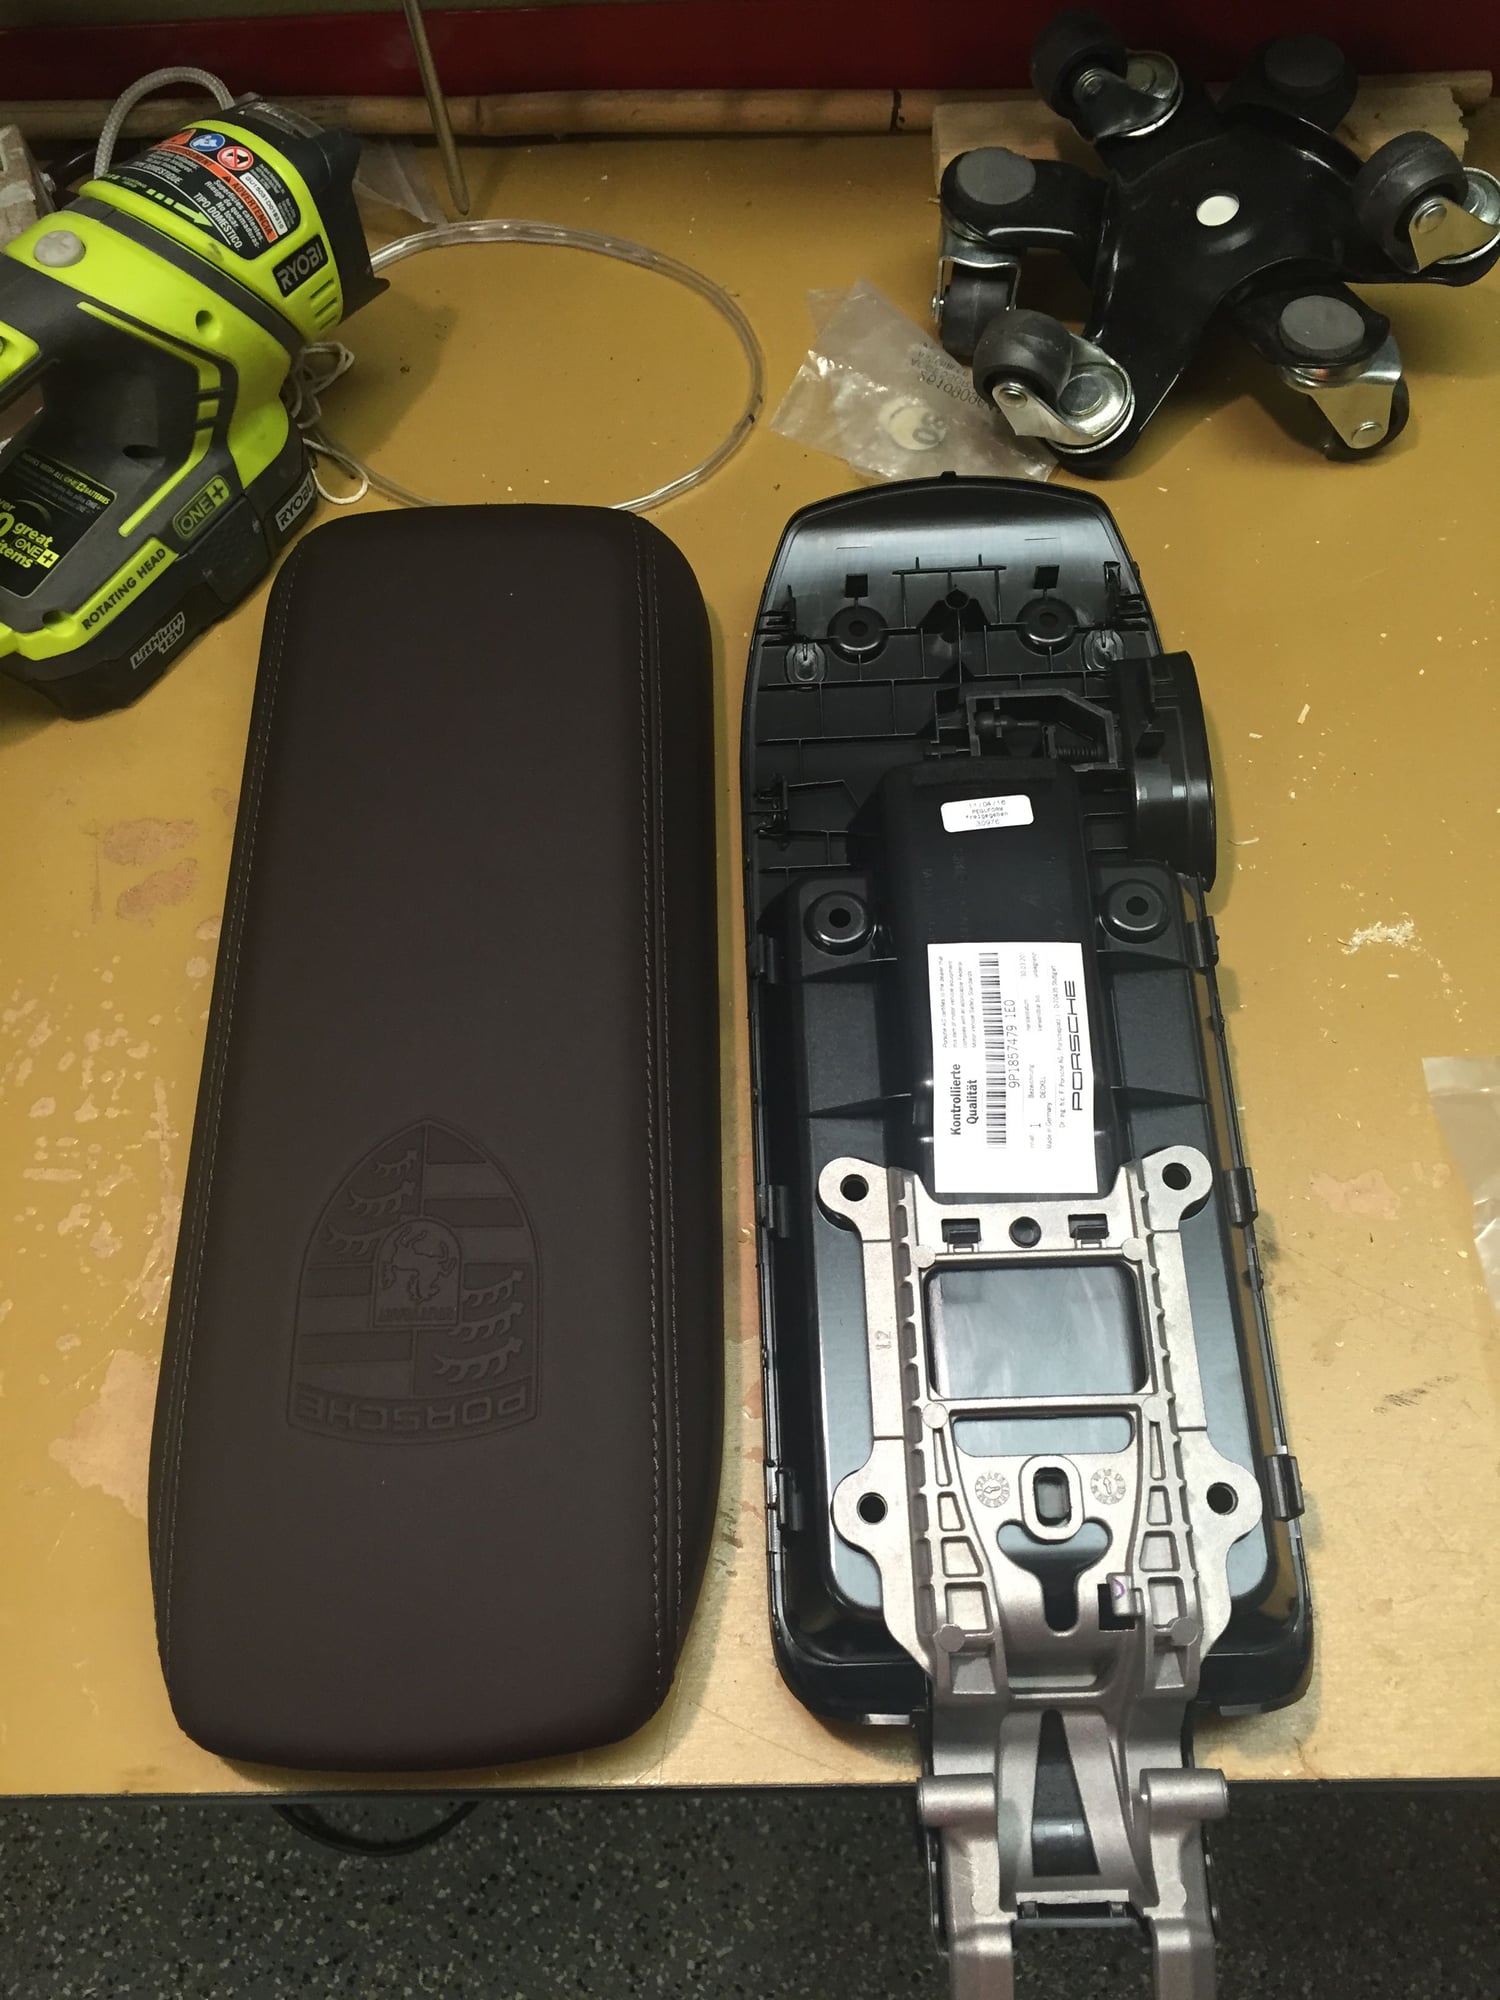
4. Insert new extended height lid - 5 min max
5. Attach extended height armrest to new lid - 5 min max
6. Replace seat - 5 min max.
Very professional write up and labels on pics. Your second set of pics made it crystal clear. Going to order armrest and do it when I'm back home. Thanks.
May still try it....looks easy enough other than the initial removal of the seats part...seems like that part would/will be clearer once you get into the installation tho.
Just did mine. Piece of cake. Only thing I'd note is that the plastic tabs that cover the pins are very fragile. Mine broke off. Didn't affect installation and new extended console looks great. Crest is a nice touch also. Ordering was easy. You will get there parts. Extended cover, new extended lid (inside) and hinge assembly, and new extended lid spring.
Agree w/others contorting oneself to fit in the back seat was the worst part of the install. Took 30-40 mins tops with breaks.


 05-18-2016, 02:26 AM