When you click on links to various merchants on this site and make a purchase, this can result in this site earning a commission. Affiliate programs and affiliations include, but are not limited to, the eBay Partner Network.
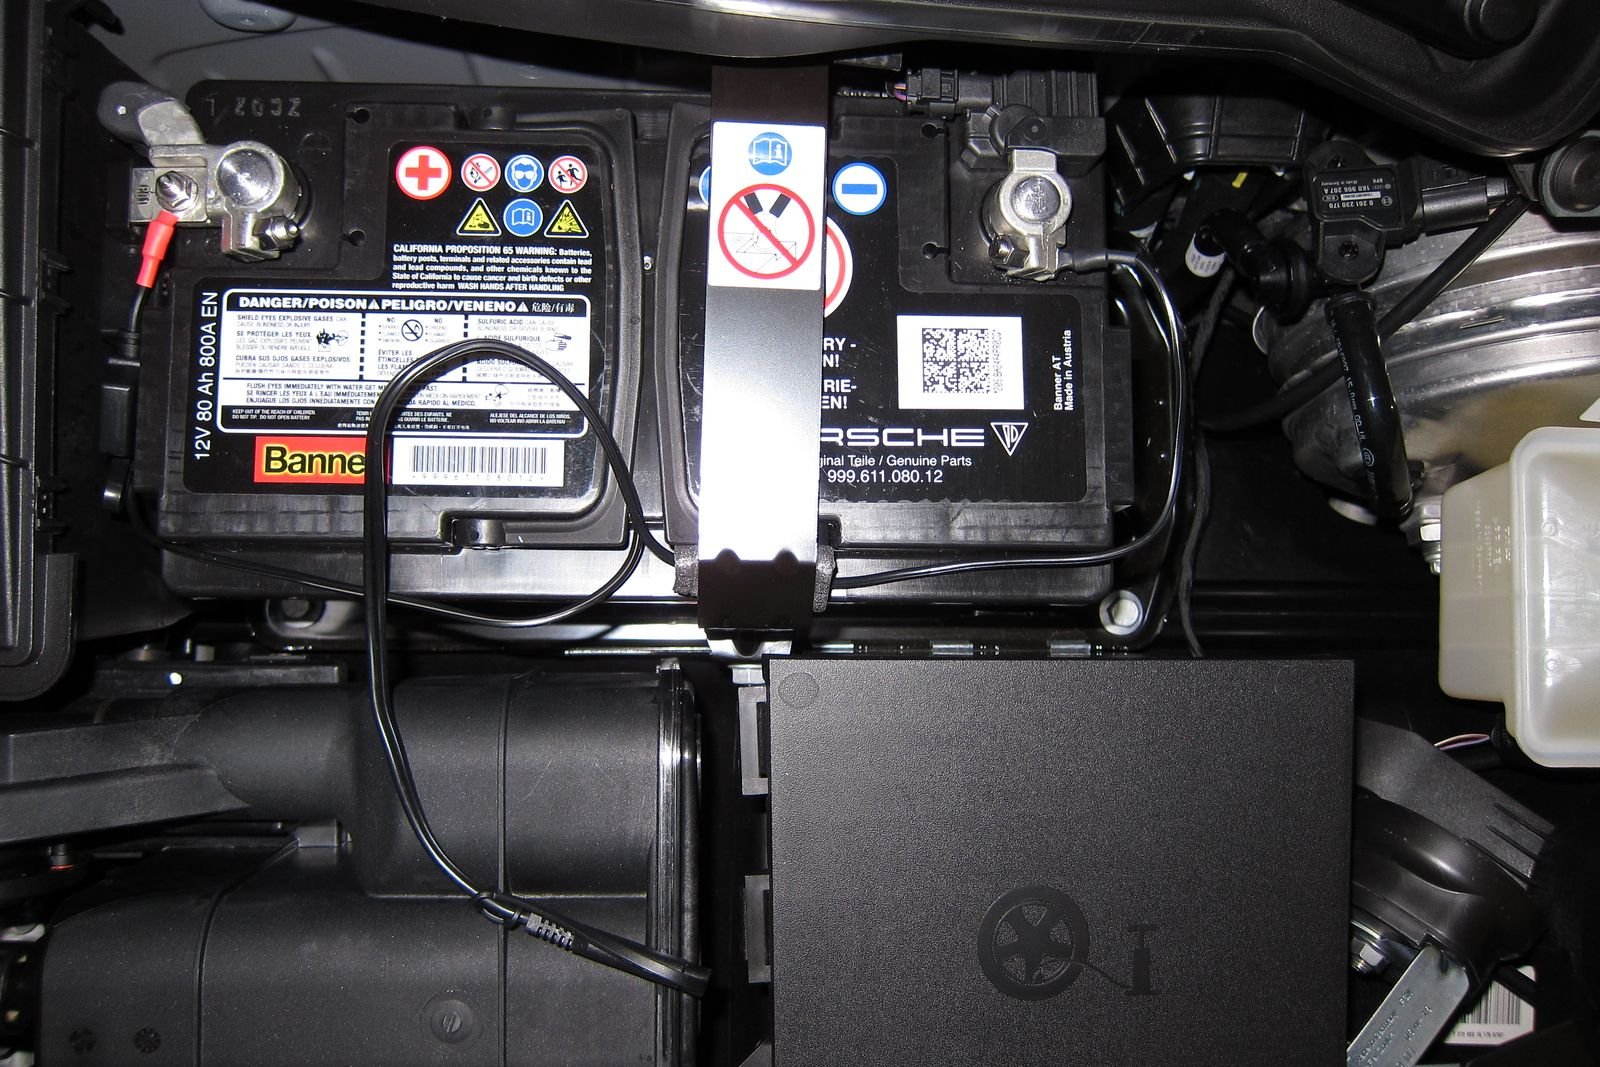
Put mine on the stud attached to the positive post (as per sensei_tts picture)and onto the negative battery terminal connector. I did not need to undo the negative connector on the battery/remove it as there was sufficient thread on the end to put the Ctek connector and add an M6 nut (same as the one I used on the positive post), so no need to enlarge the Ctek fitting. All working fine (Ctek Lithium XS charger on Lithium Battery) and I have the MagCode connector with cover fitted up the front of the car so that I can easily connect/disconnect without any problems (see post by clooloss). In fact I have fitted these to all the cars and they work perfectly without issue.
2017 C2S... I use the "optional" smoking package cigarette lighter receptacle near the rear of the center console. When the car is in my home garage, I use the Porsche [CTEK] maintenance charger which works well except if you have a power supply outage to the charger, it doesn't automatically resume its work; it has to be manually reset each time.
When my car is in an offsite storage garage, I use a different CTEK charger MXS 5.0 [Model 1090 on the side panel] which externally is the same size and overall shape as the Porsche branded item, but this one "remembers" the settings that you last chose and does automatically reset when there's an interruption in the power supply grid, which is a very common occurrence in my area [NE Ohio].
I like the idea of having the charger cord enter the driver's door and being connected to the cigarette lighter receptacle because it makes it obvious that you need to disconnect the charger before driving the car.
Last edited by DR911s; 09-19-2023 at 12:49 PM.
Reason: add text
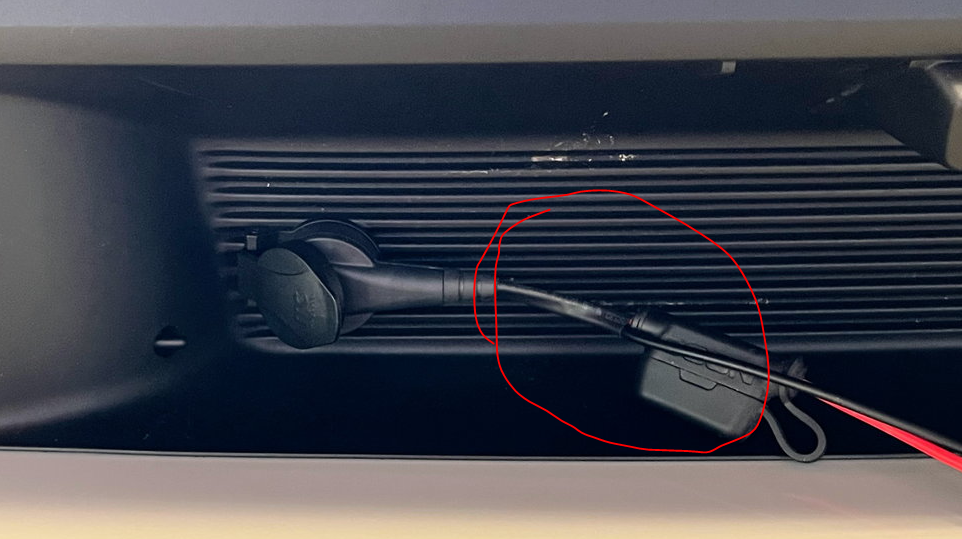
I saw this from another user on this forum and decided to copy it. It works like a charm, takes 3 seconds to hook up, doesn't scratch the paint, and will simply disconnect if I ever drive off with it accidentally attached. Have it hooked up to a Noco charger.
Tell me more about this setup I have a noco genius 5
Tell me more about this setup I have a noco genius 5
Its a very easy fit. There are loads of suppliers out there and the prices vary, but here is a link that gives some information: https://www.rosenberger.com/product/magcode/ In essense there are two versions, one that twists about 1/3 of a turn (pro version I think) which is rated higher - I have one of these fitted to one of the cars, and there is the standard version rated at 15a. Basically they are coded to magnetically make a connection when the two parts are brought together. I have added hard wiring (fused at the battery positive terminal) from the battery to the car charger port (on my Turbo S I put that under the number plate area to the right [facing the car] in the vent grill) - so its mounted horizontally (similar to the rosenberger top picture). As I have several Ctek kits, I chopped the crocodile clips off one set and wired it to the power clip (again very easy to do, just make sure to observe the +/- poles).
Then coupling/uncoupling the charger is a simple matter of turning it off/on and removing or attaching the magnetic connector. In the event you pull away having forgotten it, the magnetic parts separate with no damage. I also fit the cover on mine to protect them from road grime. A slight disadvantage of the pro is that it does not separate as readily if you drive off with it connected (guess how I know!).
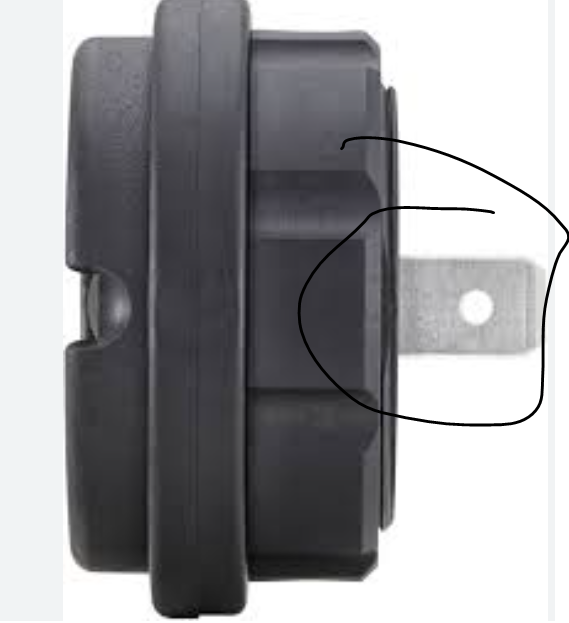
So you connected a couple leads to these ends here:
With crimps I assume? From those leads to the battery using eyelits at the other end.
How did you connect this to the batter charger? Is there some sort of simple connection (screw type) that you connected then applied shrink wrap to?
That last photo was from my setup. I crimped and shrink-wrapped. I did this on the 'hard-wire' connector on my NOCO. I have another connector for alligator clips so I can use the charger on other vehicles.
So you connected a couple leads to these ends here:
With crimps I assume? From those leads to the battery using eyelits at the other end.
How did you connect this to the batter charger? Is there some sort of simple connection (screw type) that you connected then applied shrink wrap to?
I think there are basically 2 types, I know there are several listed, but there are 12 and 24volt versions. I have one of M2S103-3XX which is the one that twist through about 30 degrees, and the rest are as per your illustration - M2K211-1AE. I actually bought them from a different supplier and as a matched unit along with the covers. And yes, an earch and live to those two terminals with spade connectors, plus some waterproofing goo to help stop corrosion.
Quick question. Going to put the eyelits on today. Any precautions I need to take? Ie any risk as I unscrew the nuts, place the eyelits on and screw the nuts back on or specific order (start with positive terminal as you would when jump starting a car for instance)?
Quick question. Going to put the eyelits on today. Any precautions I need to take? Ie any risk as I unscrew the nuts, place the eyelits on and screw the nuts back on or specific order (start with positive terminal as you would when jump starting a car for instance)?
Take a pair of small wire snips/cutters and turn the round eyelids into C.’s and that way you don’t have to take off the nut (since I believe the nuts are difficult to get off because the threads are buggered up on the ends on purpose).
I did the same as I wasn�t going to try to force the nuts off.
No need to force anything because that usually screws things up and you end up with buggered threads. I like using the ring terminals instead of spade terminals, so I slowly filed the end of the "staked" threaded fastener so that the nut comes off easily. More work, but its done right.


 09-18-2023 | 09:20 AM