

Spring install..


Thread Starter
7th Gear
Joined: Mar 2013
Posts: 7
Likes: 0
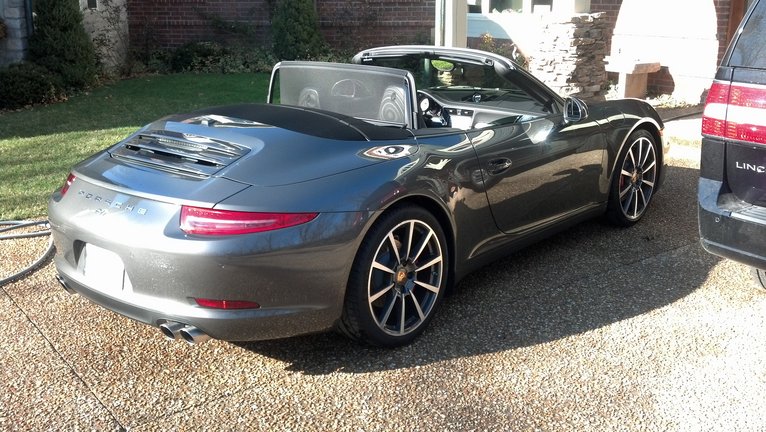
Im new here and should introduce myself, My name is Ryan and I recently purchased a c2s cab. Love the car and was not pleased with the 4x4 look. So I decided to change springs.
I have been working on cars since I was 12, so whether or not you tackle this, you should be honest with yourself about your skills. You will need more than a cheap chinese tool set to do this.
I looked everywhere and could not find info on how to do this- so hopefully this helps some of you grease monkeys out there.
Rear- Prepare to be challenged by small spaces!
On the cab it is especially difficult due to the top being right over the spring perch-awesome
1.) Remove trim to access spring perch.
2.) place top in half open position.
3.) remove chassis brace over bolts
4). Remove bolts.
NOTE- if you drop something at this point you will be VERY sorry so be careful,, I recommend holding a magnetic wand next to what you are working on so that when it falls it will stick to the magnet.
5.) Now under the car- compress spring.
6.) loosen sway bar mounts
7.) remove Lower control arm where it mounts to carrier.
8.) remove lower shock mount
9.) Disconnect middle upper control arm at carrier to make room for shock to come out.
10) Replace spring and reassemble in same order.
Now for the front-
NOTE- you will want to study the strut mount nut- you will need a special socket to remove it, and also an impact wrench.
1.) compress spring
2.) Loosen strut mount bolt after disconnecting pasm
3.) Disconnect lower sway bar mount.
4.) lower strut assembly away from spring perch
5.) remove spring perch.
6.) Decompress and "unscrew" spring through spring perch hole
7.) Reassemble in same order.
NOTE- the front can be done in about 15 minutes with this method, you do not need to mess with the ball joints and steering etc. as all the other methods suggest.
Next- replace wheels- wash and drink a few brewskies
I have been working on cars since I was 12, so whether or not you tackle this, you should be honest with yourself about your skills.
You will need more than a cheap chinese tool set to do this.I looked everywhere and could not find info on how to do this- so hopefully this helps some of you grease monkeys out there.
Rear- Prepare to be challenged by small spaces!
On the cab it is especially difficult due to the top being right over the spring perch-awesome
1.) Remove trim to access spring perch.
2.) place top in half open position.
3.) remove chassis brace over bolts
4). Remove bolts.
NOTE- if you drop something at this point you will be VERY sorry so be careful,, I recommend holding a magnetic wand next to what you are working on so that when it falls it will stick to the magnet.
5.) Now under the car- compress spring.
6.) loosen sway bar mounts
7.) remove Lower control arm where it mounts to carrier.
8.) remove lower shock mount
9.) Disconnect middle upper control arm at carrier to make room for shock to come out.
10) Replace spring and reassemble in same order.
Now for the front-
NOTE- you will want to study the strut mount nut- you will need a special socket to remove it, and also an impact wrench.
1.) compress spring
2.) Loosen strut mount bolt after disconnecting pasm
3.) Disconnect lower sway bar mount.
4.) lower strut assembly away from spring perch
5.) remove spring perch.
6.) Decompress and "unscrew" spring through spring perch hole
7.) Reassemble in same order.
NOTE- the front can be done in about 15 minutes with this method, you do not need to mess with the ball joints and steering etc. as all the other methods suggest.
Next- replace wheels- wash and drink a few brewskies

Burning Brakes

Joined: Mar 2011
Posts: 809
Likes: 1
I guess great minds think a like. A Buddy and I (ok, he did 93% of it) installed the H&R springs on my 991 cab yesterday. Agree with OP on PITA factor for the rear shocks on a cab. We took teh long road on the front and removed the upright and then reassembled the suspension. While the rear was easier once you get to the upper bolts, getting those 3 uppers was a HUGE effort. Remove, carpet, remove rain gutter thingy, remove brace, work around bundles of wires, and make sure to not drop any of the nuts once removed 
See the pics below.
Lowered the front by 1.25" and rear by 1.0" so far. I'll get better "after" pics when it stops raining here.

See the pics below.
Lowered the front by 1.25" and rear by 1.0" so far. I'll get better "after" pics when it stops raining here.
Thread Starter
7th Gear
Joined: Mar 2013
Posts: 7
Likes: 0
Before
photobucket-34574-1364674245767_zpsbafec04c.jpg
After
photobucket-6165-1364674127619_zps94cd5e9c.jpg
Im still waiting on spacers...
photobucket-34574-1364674245767_zpsbafec04c.jpg
After
photobucket-6165-1364674127619_zps94cd5e9c.jpg
Im still waiting on spacers...
Last edited by rrobert22; Mar 30, 2013 at 09:23 PM.
Pro
Joined: Dec 2006
Posts: 555
Likes: 15
From: NorCal
So let me ask this... for the rear on a COUPE how hard do you think this would be. I have read and am being quoted 6 hours to do this job... but that was taking the arms / hub off to clear. Sounds like you compressed the springs in place first which allowed you to remove the shocks without taking the rest of the suspension out?
David
David