When you click on links to various merchants on this site and make a purchase, this can result in this site earning a commission. Affiliate programs and affiliations include, but are not limited to, the eBay Partner Network.
My Porsche project for the weekend was a create a Porsche Office Chair.
The project started a couple of weeks ago in finding a seat from a wrecked 2007 911 turbo that had the airbag blown. From there I spent time researching and buying the hardware to create the base. Today was when it all came together.
Here's the parts list:
2007 Porsche 911 Turbo Seat (airbag activated and removed)
Heavy Duty Base (
)
MySit 2.2" Stroke Office Chair Gas Lift Cylinder - this one is important, as if you get a longer stroke, or bigger cylinder it will make the chair sit too high and will not go down low enough to fit under some desks. (
)
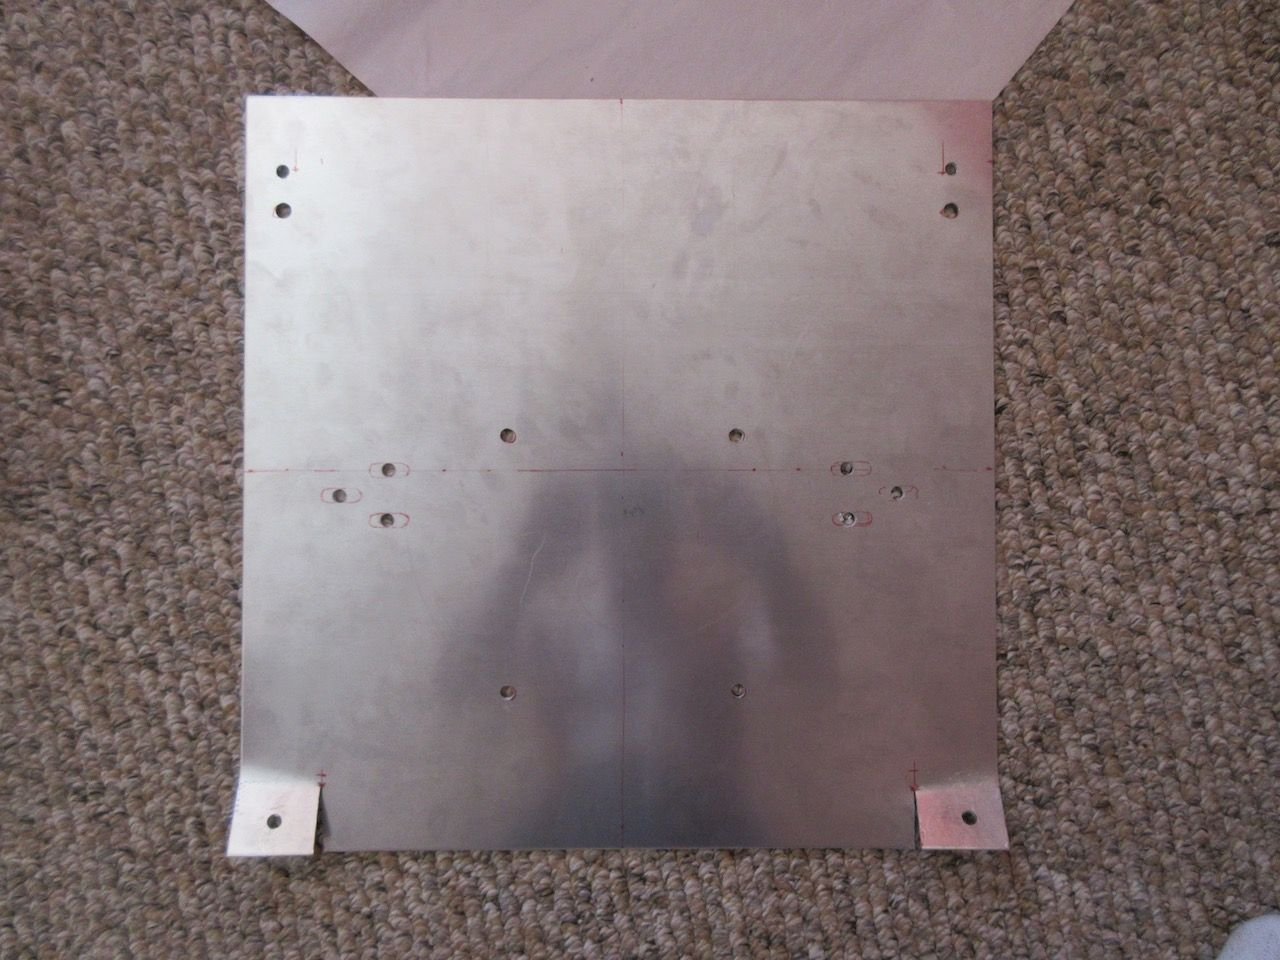
.125" Aluminum Sheet Plate. 18 X 18 1/8 Aluminum Flat stock available from eBay. 18"x18" is a perfect fit for the OEM seat rails and needs no work other than drilling holes for securing the hardware and making two short cuts to create foldable tabs.
I used 3/4" long, 1/4" diameter bolts with locking washers. You will need 2 wider washers for the front attachment points to secure the base to the seat, as the holes are wider.
First step is to cut an 18"x18" piece of cardboard to use as your base template. First mark all the holes that you need to drill in order to secure the aluminum sheet to your seat rails. The swivel mechanism should be mounted such that the gas cylinder sits in the center of the base. The arms should be mounted just forward of center (see the position of the mounting holes, relative to the center line). Cut two tabs that will fold and attach to the angled connection point at the front. Then mark the holes that you need to secure your base hardware.
Once you are happy with the placement of all your items, then transfer your cardboard template on top of the aluminum to cut and drill.
Assemble your swivel mechanism and arms onto the base, then secure it to the seat rails. Once complete, mate up to the assembled base and gas cylinder.
I was going to mount a better and energize the chair motors, but found that the swivel mechanism I bought provides all the range of movement I need. I didn't see the point in the extra work to energize the electronics in order to tilt the backrest and adjust the lumbar support. After all, typically you set these and leave them, so it seemed a little pointless.
The entire project took maybe 2 hours - the rate limiting step was finding and buying all the hardware. A very easy project. Instead of spending $7k for the same chair from Porsche I think I spent ~$700 for everything.
I guess you used a battery or something to adjust chair where needed before starting ?
Actually, no. I guess I got lucky enough that the last driving position was where I needed it to be. I was expecting to have to energize the electronics to adjust, but in the end didn't see a need to, as the normal driving position was just right. I've got a 12V battery and connectors sitting on my office floor, ready to go. I'll use the chair for a week or so and judge it for comfort before I make the final decision as to whether I go to the trouble of powering the seat.
Great job after your other thread basically got shot down! Perseverance!
Now get it powered and looking somewhat pretty and everyone on Rennlist will pay you top dollar to do it for them.
Thanks!
I don't think I need to do anything else to it. I've been sitting in it for most of the day and don't think I need to get it powered. The base adjustment appears to have everything that I need. It's a really comfortable office chair.
This is a really easy DIY. Shipping them would be really expensive, as they're heavy chairs - solid, but heavy.


 11-19-2022 | 04:34 PM