When you click on links to various merchants on this site and make a purchase, this can result in this site earning a commission. Affiliate programs and affiliations include, but are not limited to, the eBay Partner Network.
As I was playing with the Porsche configurator, I was looking at a couple of options that got my attention. First was the extended door panel at $690. It seems interesting to pay that much for a panel that most of the time is not visible, until you open the door from the outside. The other option was the Fuse Box covers for $390. I don't think I would pay for them, although they definitely look cool.
So, I thought, how hard could it be to do it myself???
The hardest part, of course, was sourcing a leather that was a very close match to the current leather in my car. Although I had visited Tandy leather many times before, I had never been able to find a close match. To my surprise, this Saturday I was able to find one piece that was an almost perfect match to my interior. I bought it on the spot and decided to do a little project over the weekend.
I started with the fuse box covers, as they seemed easier to do. Turns out that was a little deceiving.
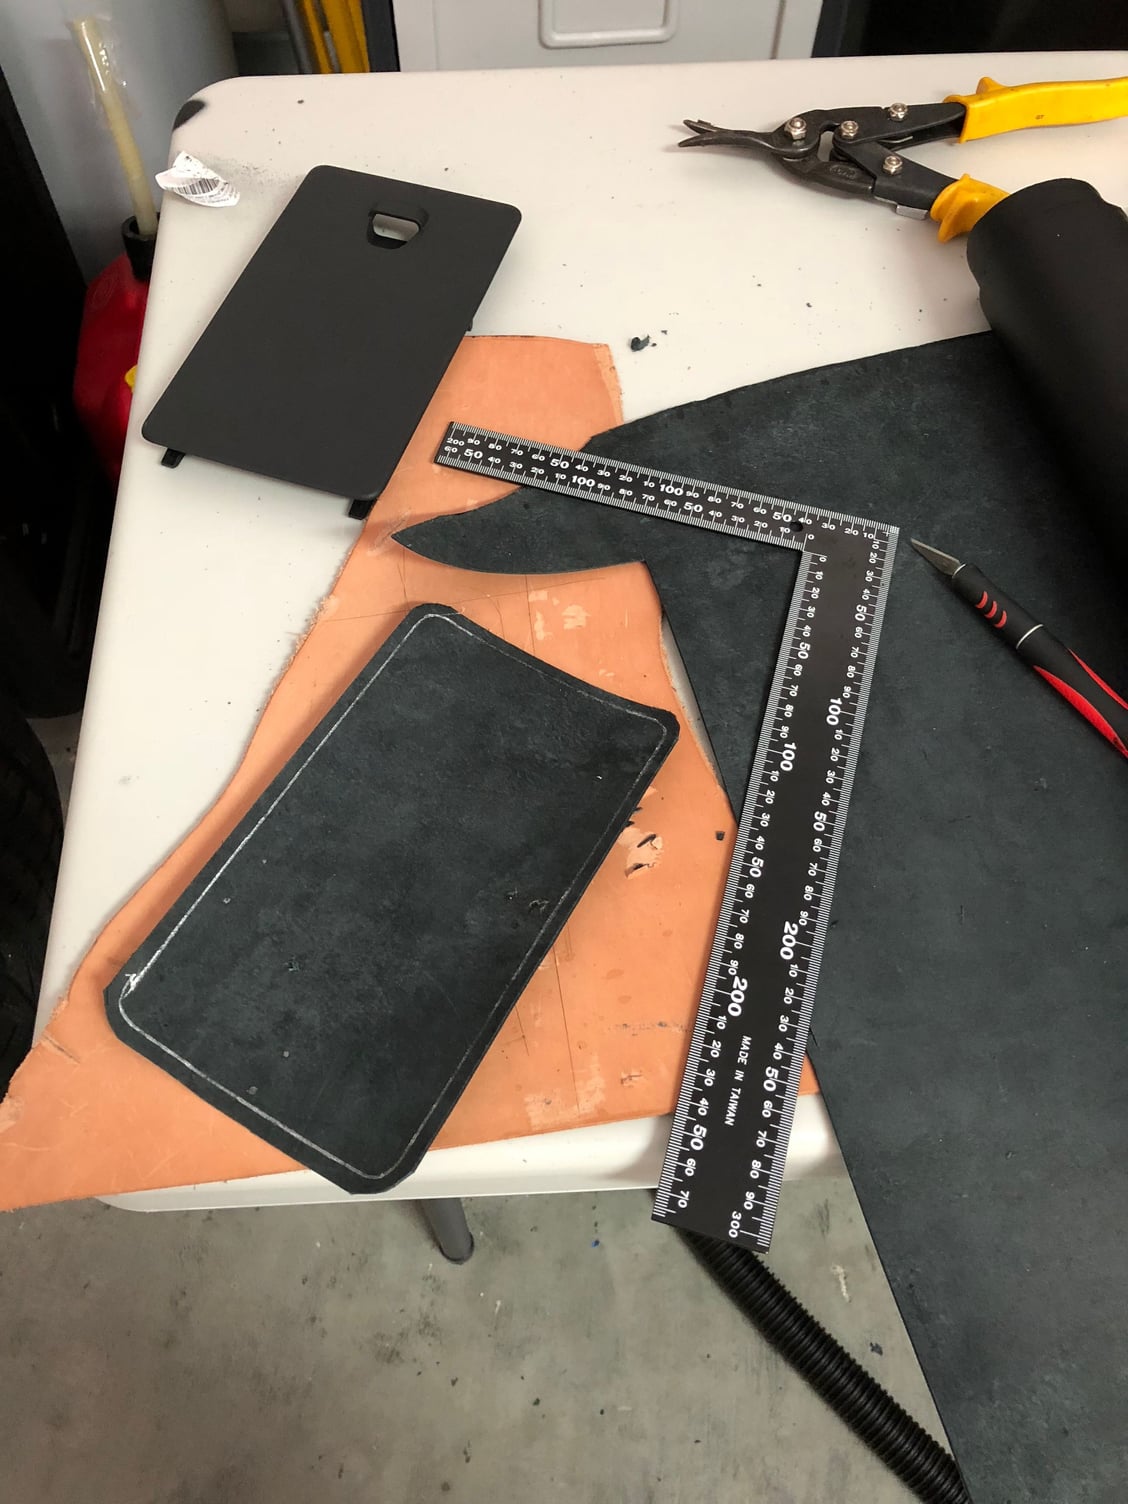
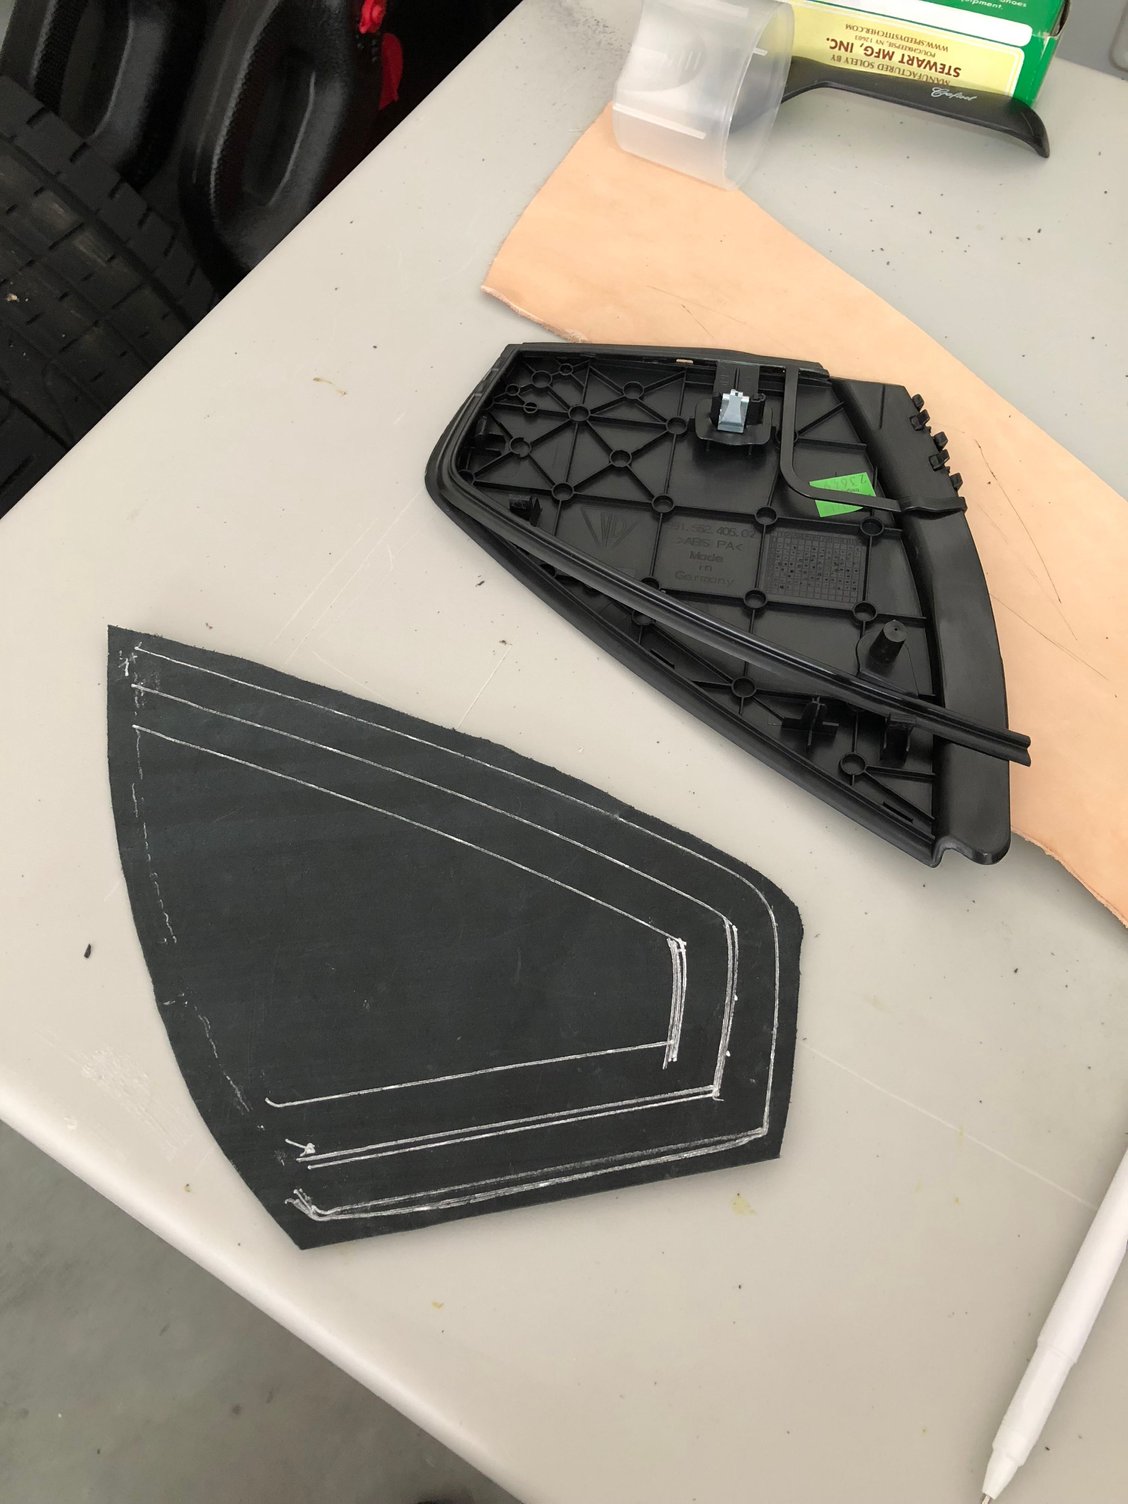
Getting the tools out and cutting the leather to size:
This was the easiest part, as I used the plastic fuse box cover as a template for the leather.
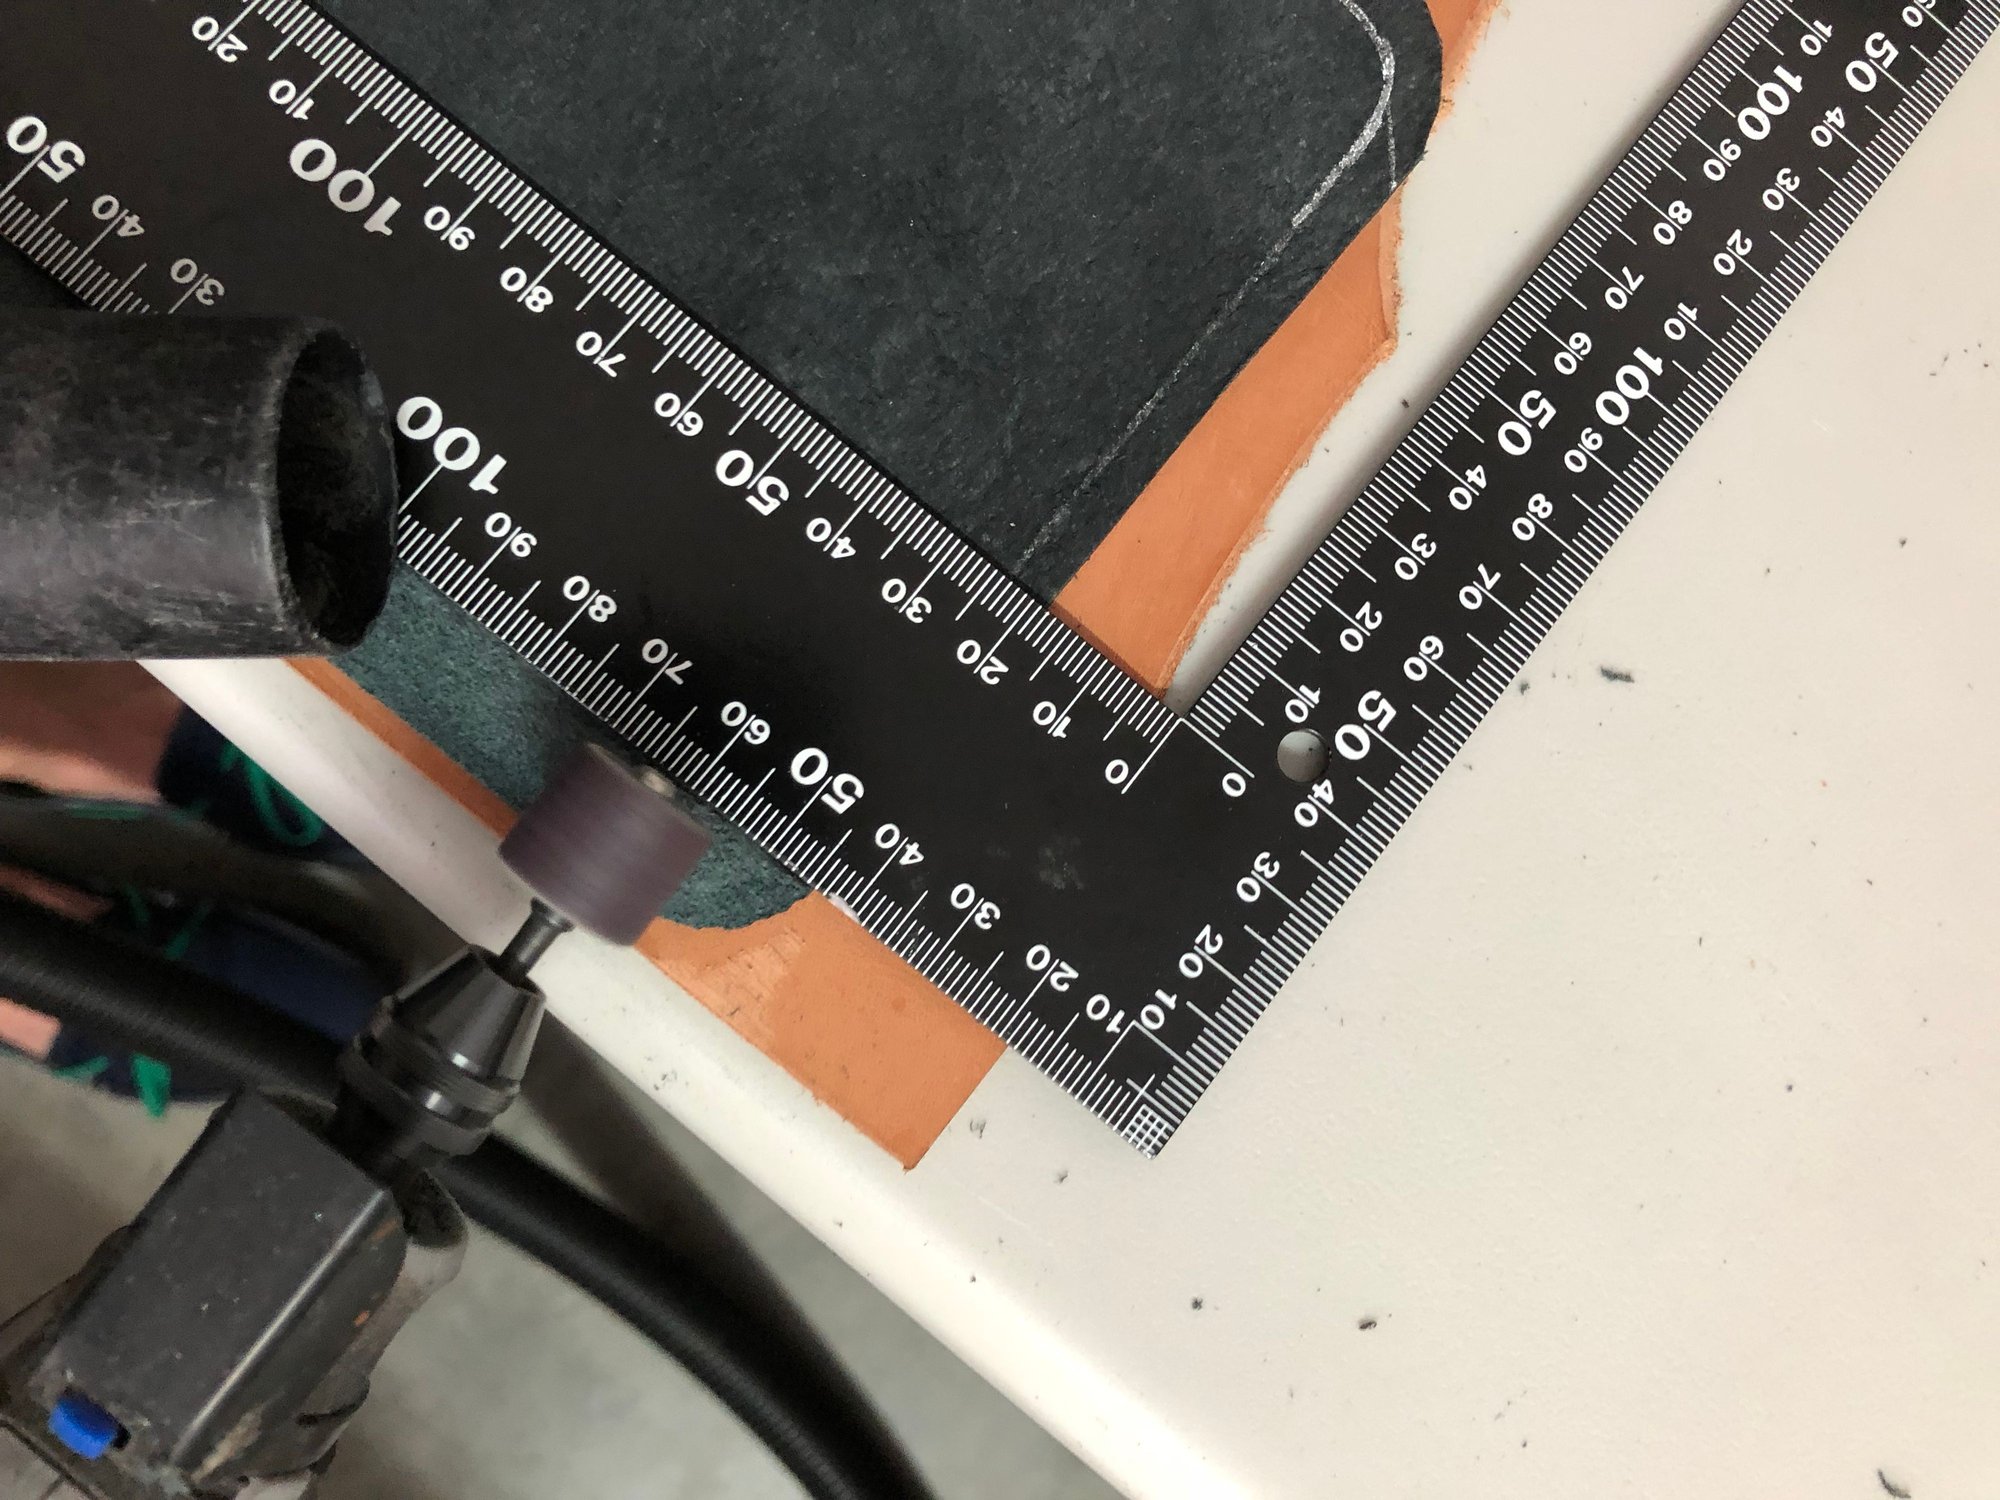
But since I needed to turn the edges over for a nice finish, I had to thin down the leather to avoid the fold-over part being too thick. I used a Dremel for this step, and a vacuum to avoid being covered in leather dust:
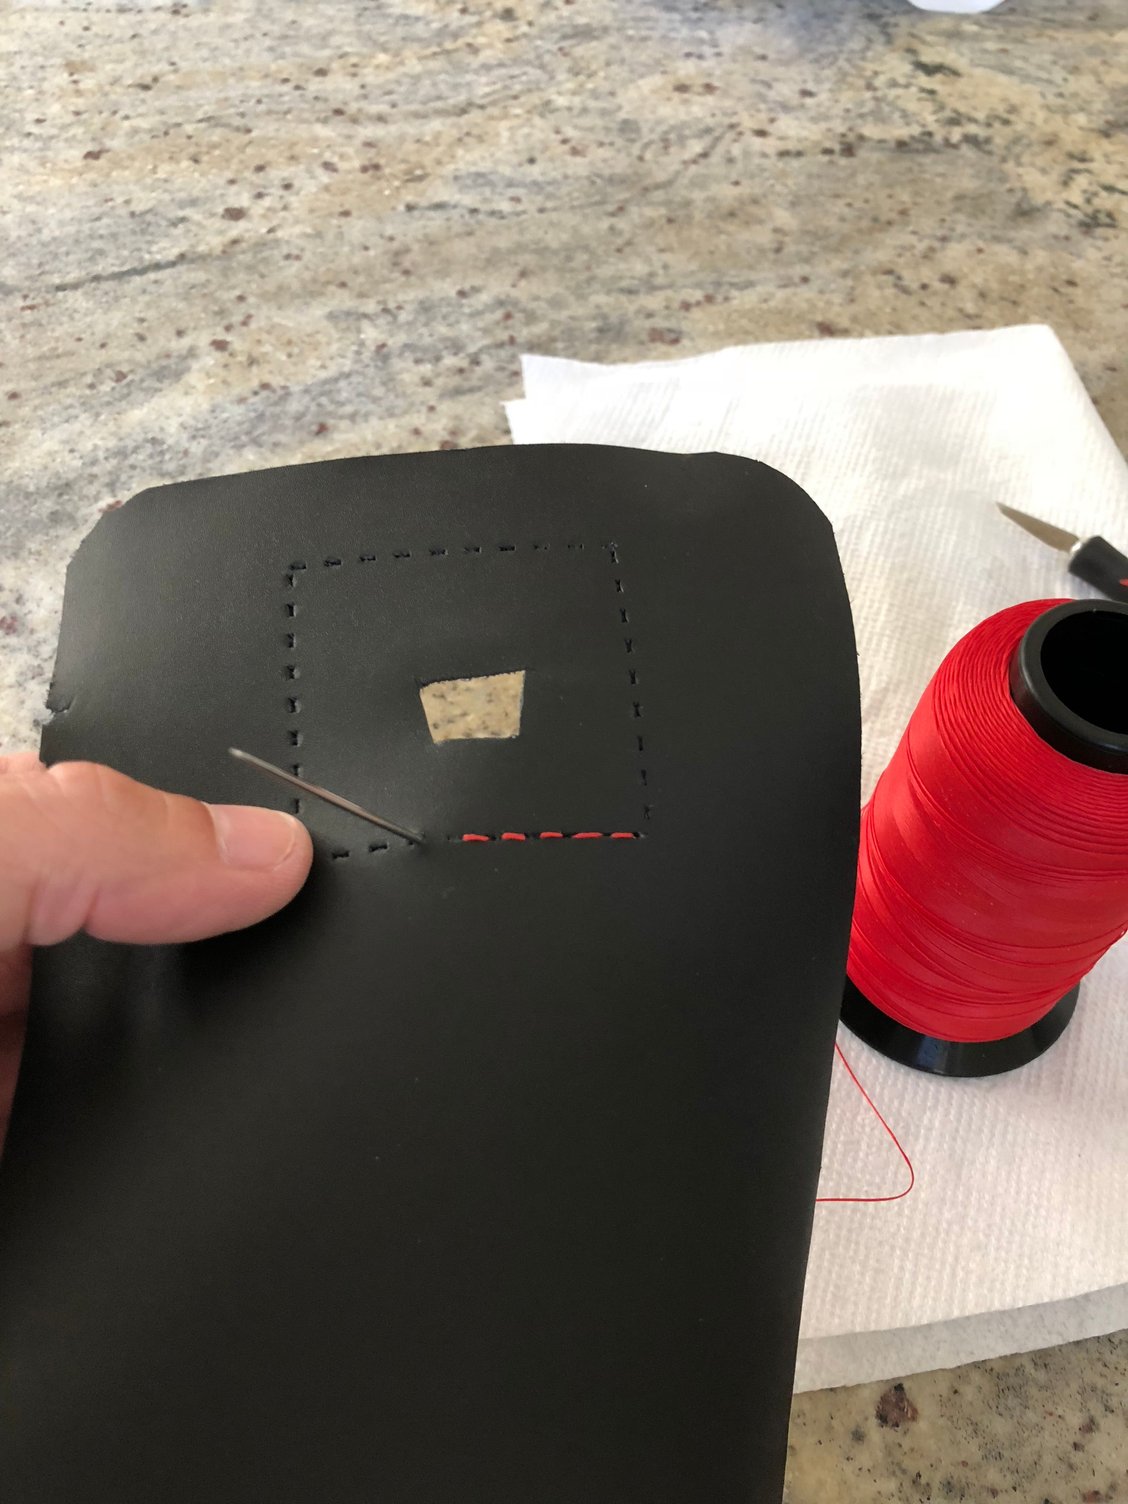
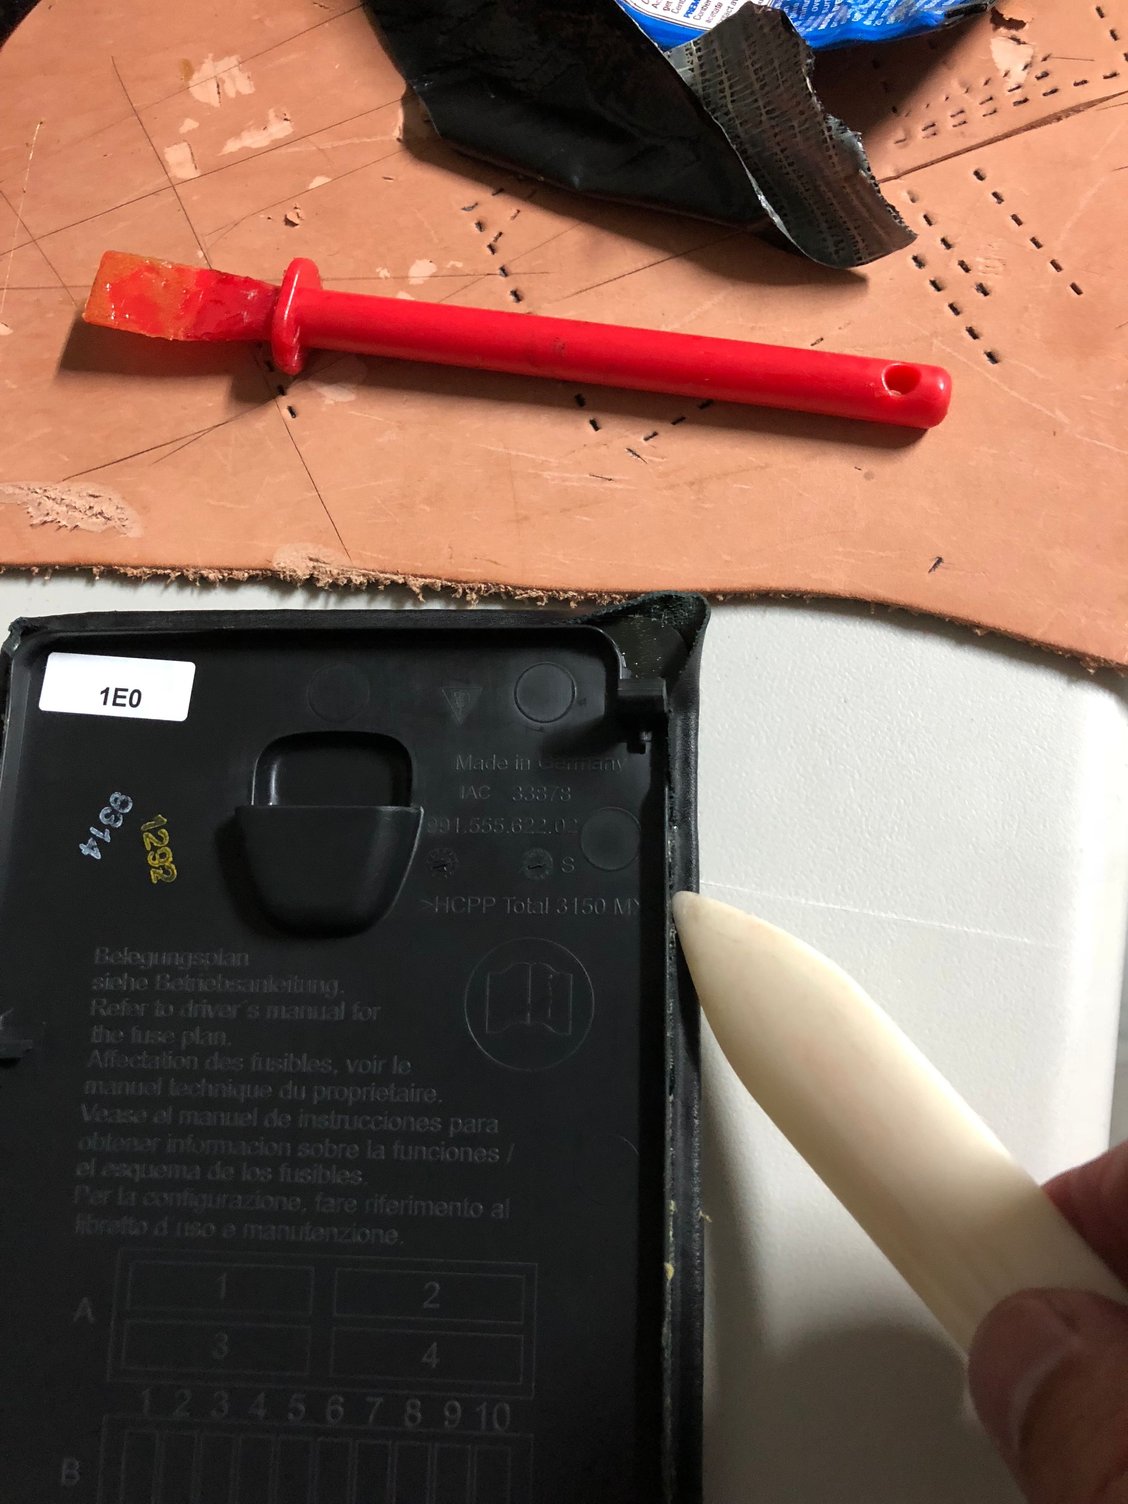
After cutting the part for the door opening, and marking the holes with a chisel, it was time to do the deviated stitching. The original part had a round decoration, but I thought it looked better being a square, and also was easier to make:
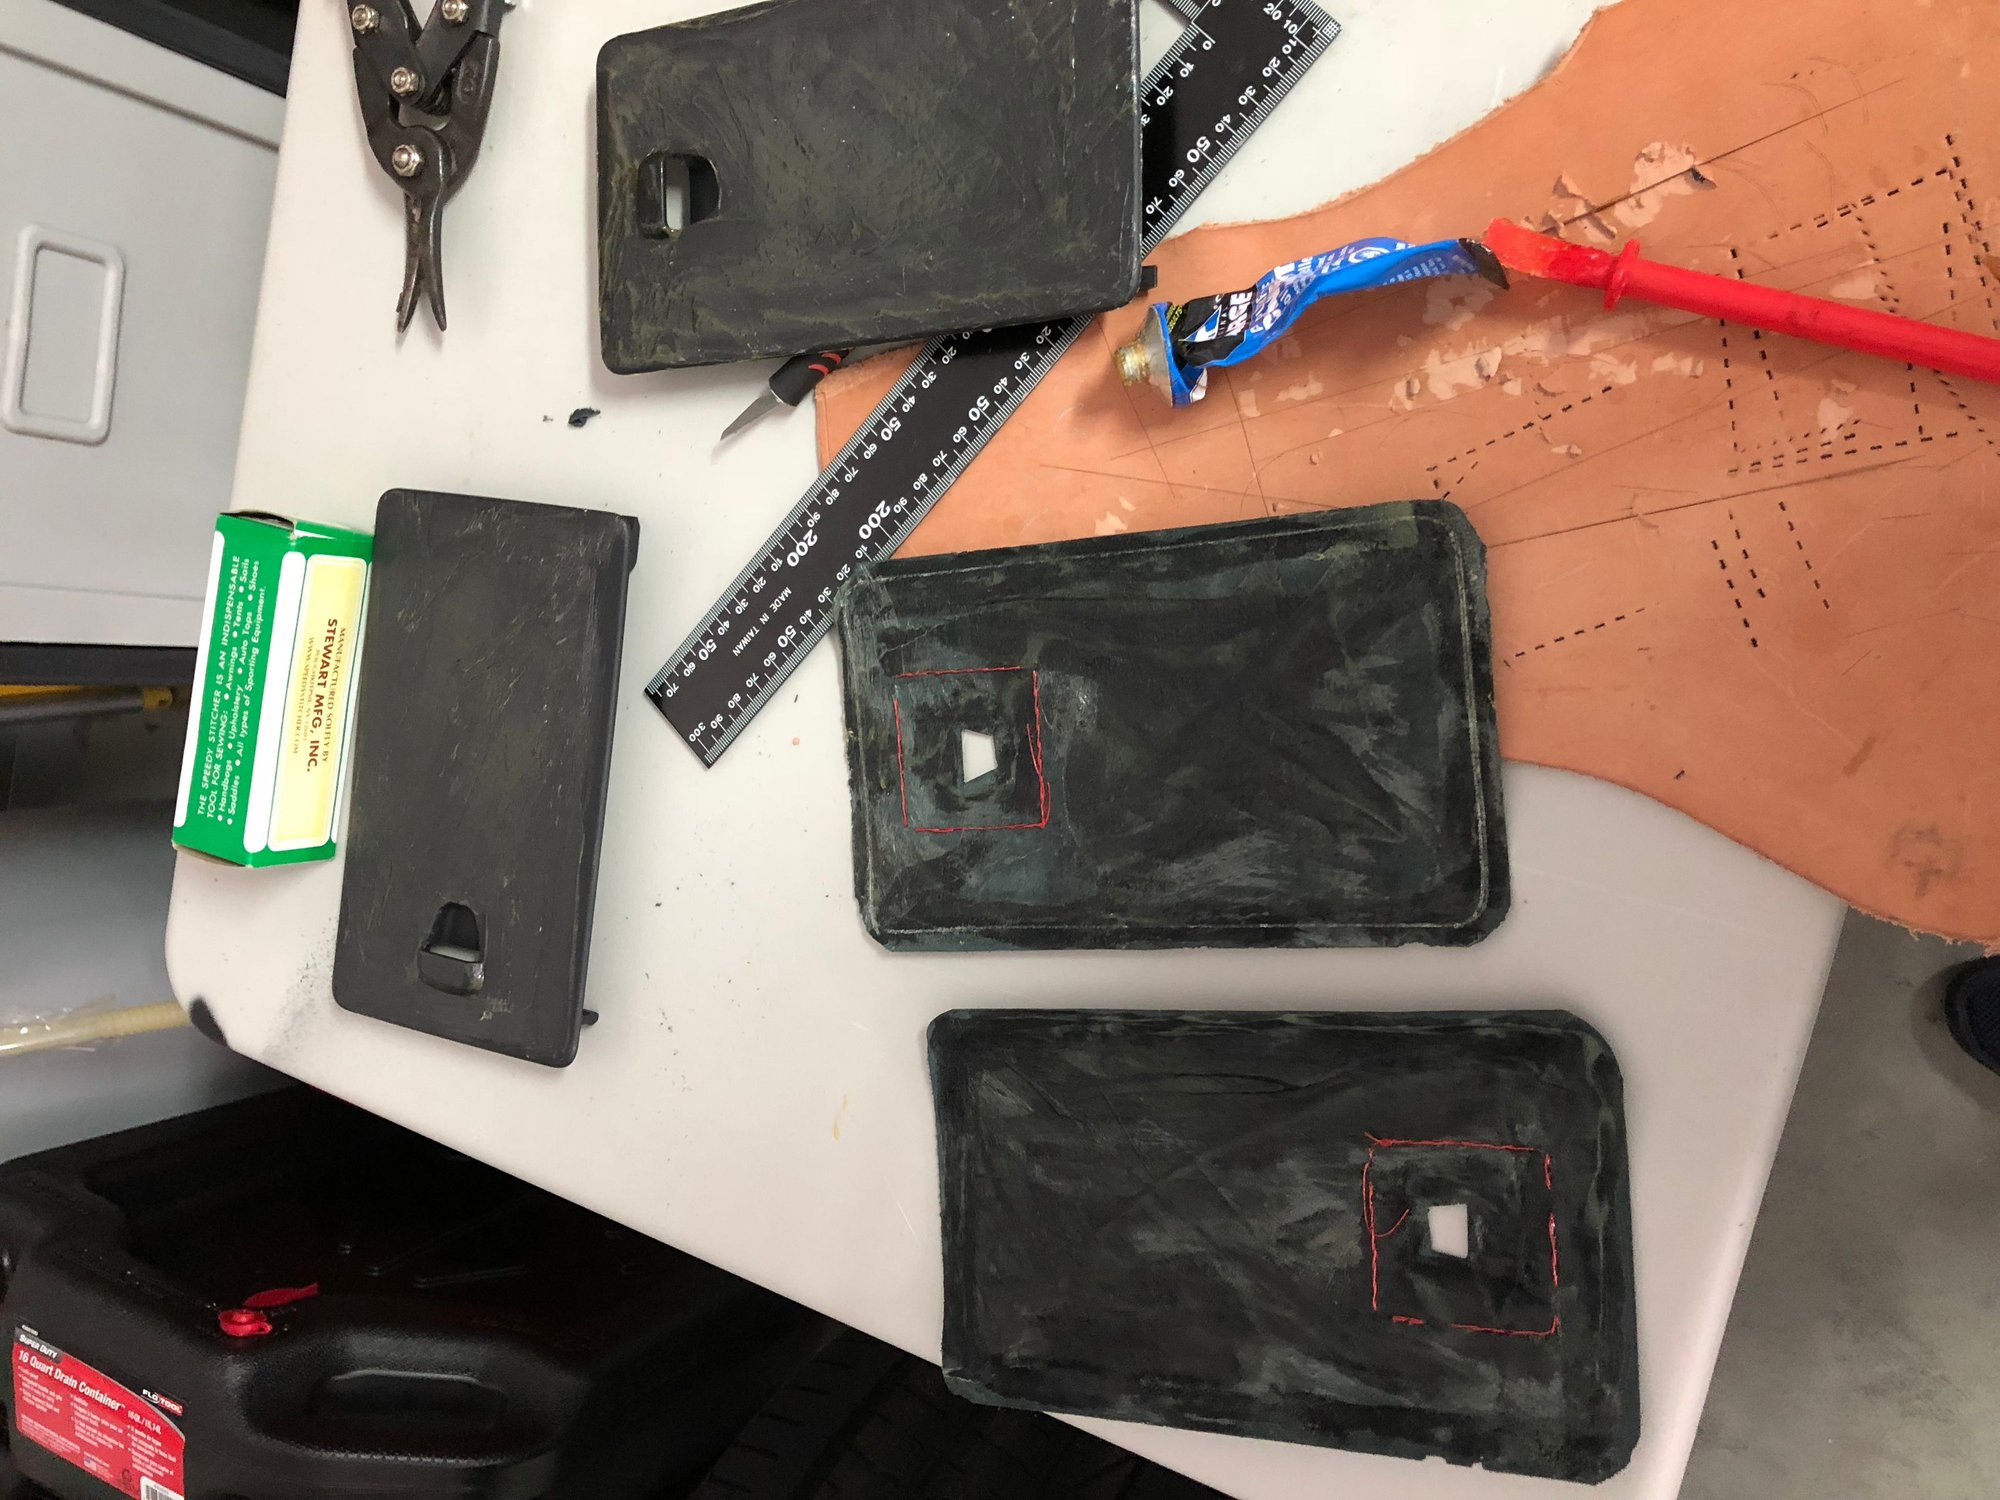
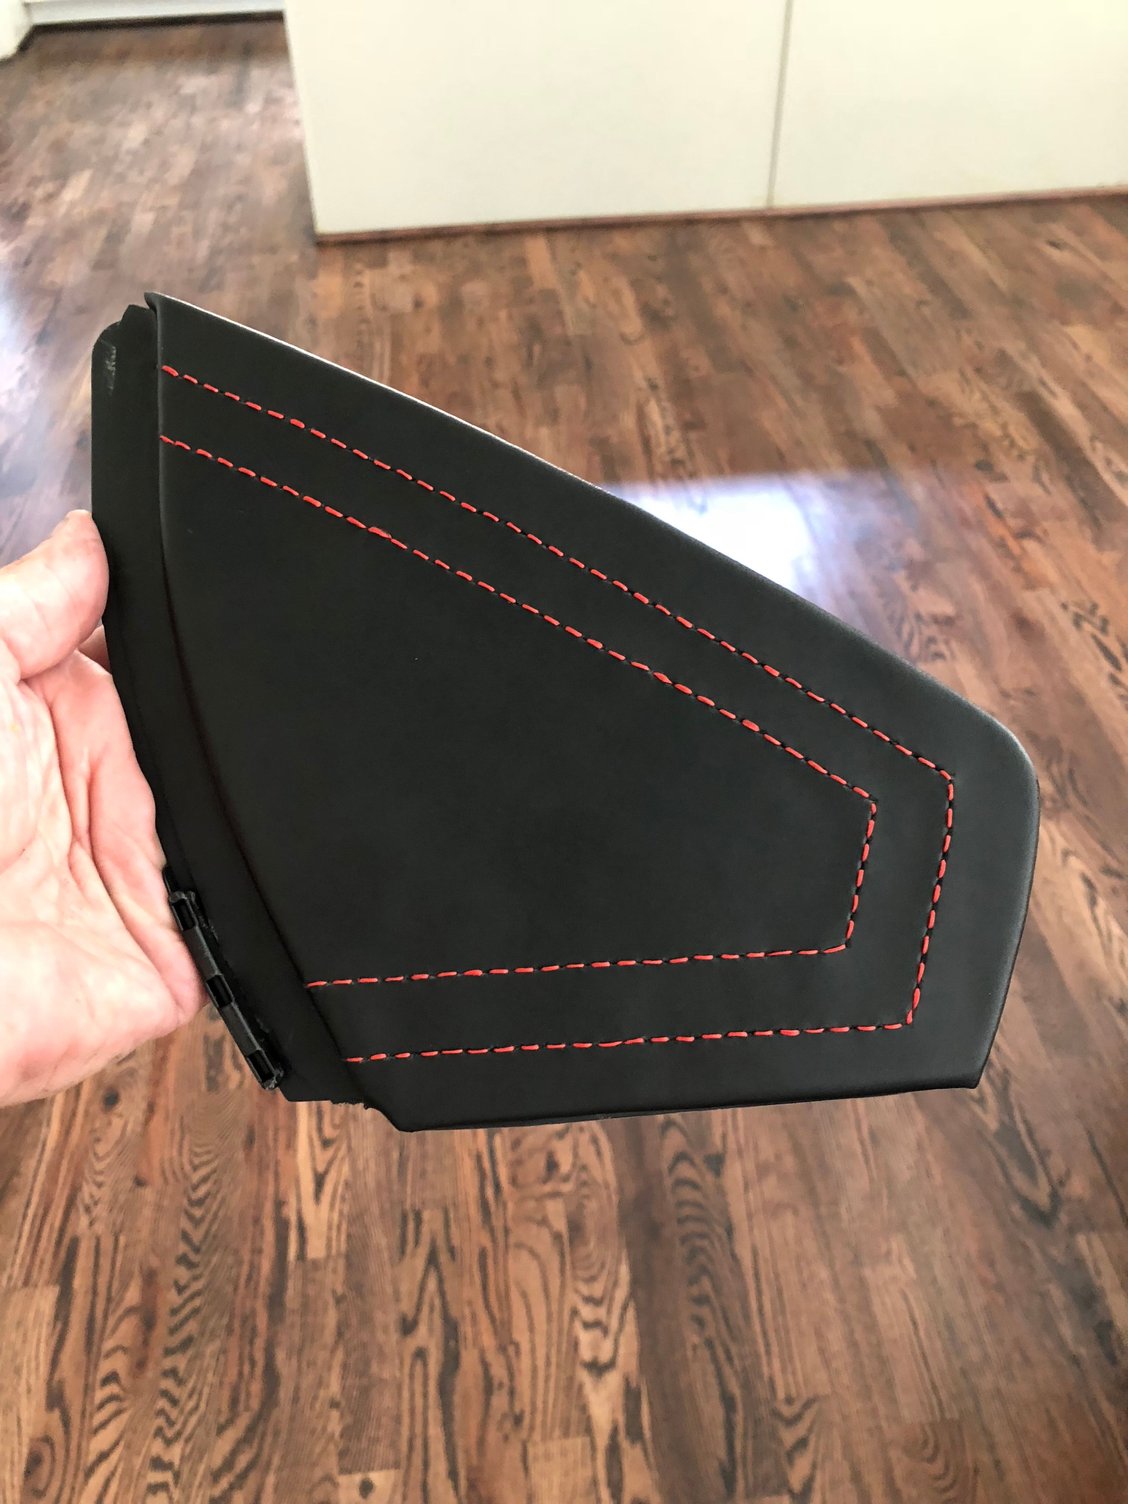
Applied contact cement to both the leather and the plastic cover and let it dry. This was the point of no return, as the plastic cover would have to be replaced if this failed!
After carefully attaching both pieces, just had to set the edges and contours with a bone knife:
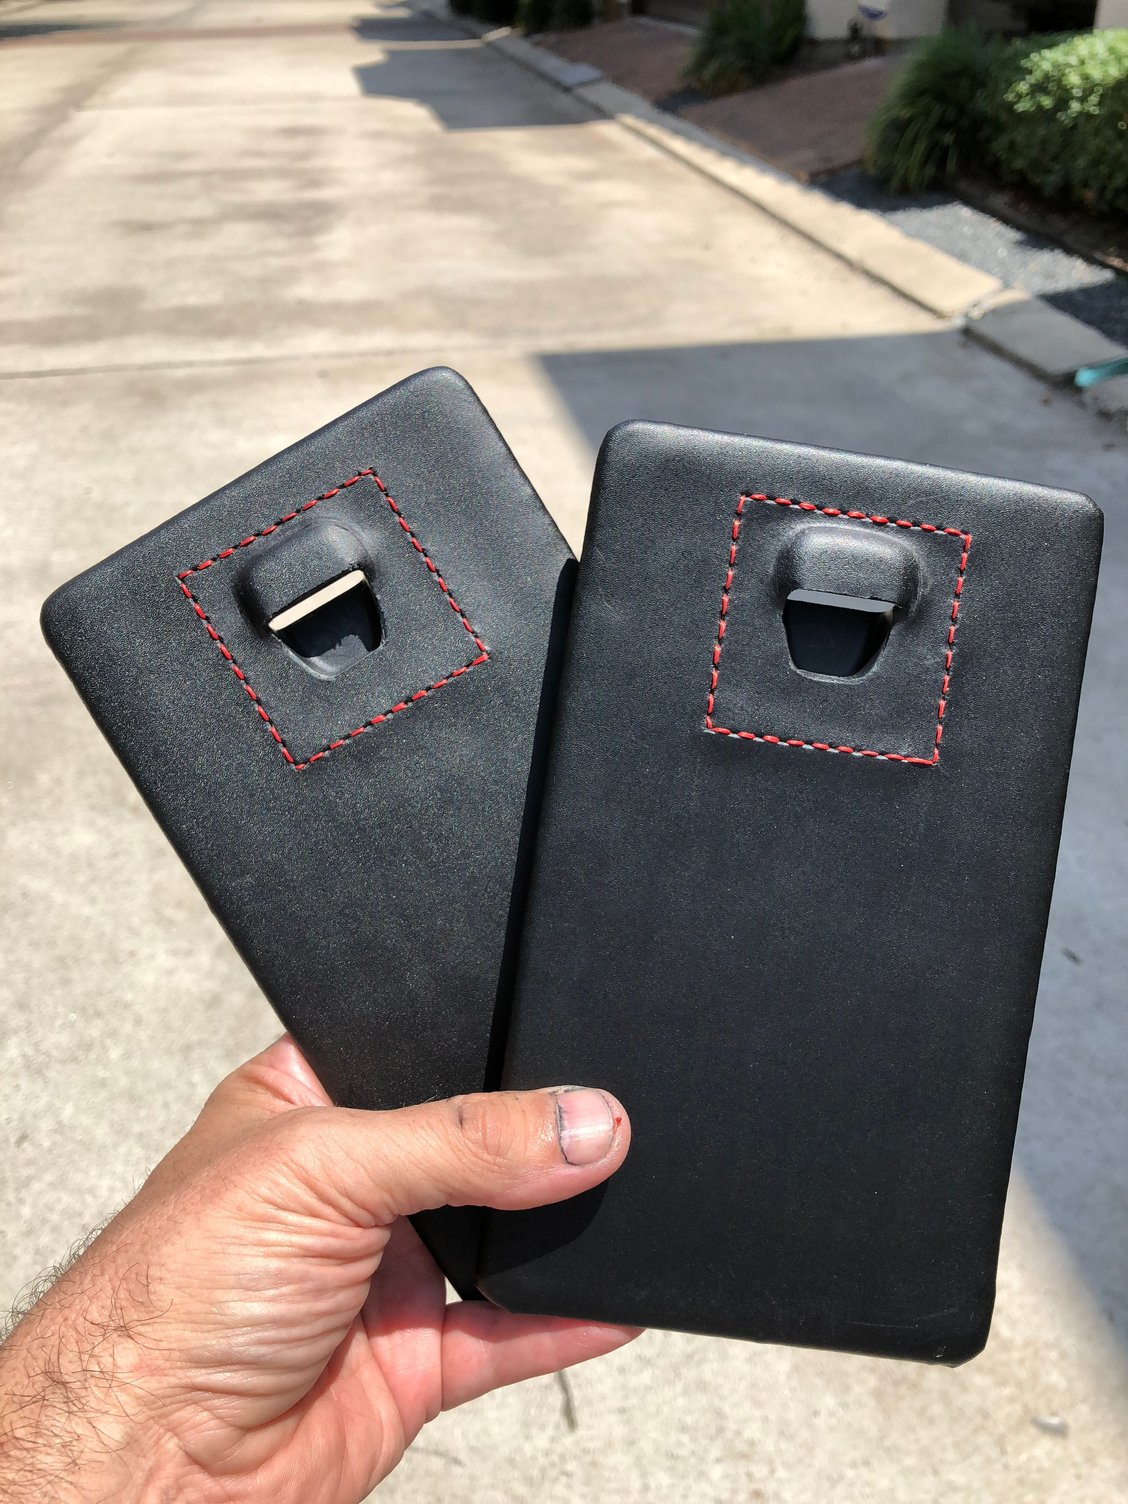
And this is what they look once finished:
Here you can see that the leather and thread are a near perfect match to my Carrera T's interior:
The finished installed fuse covers:
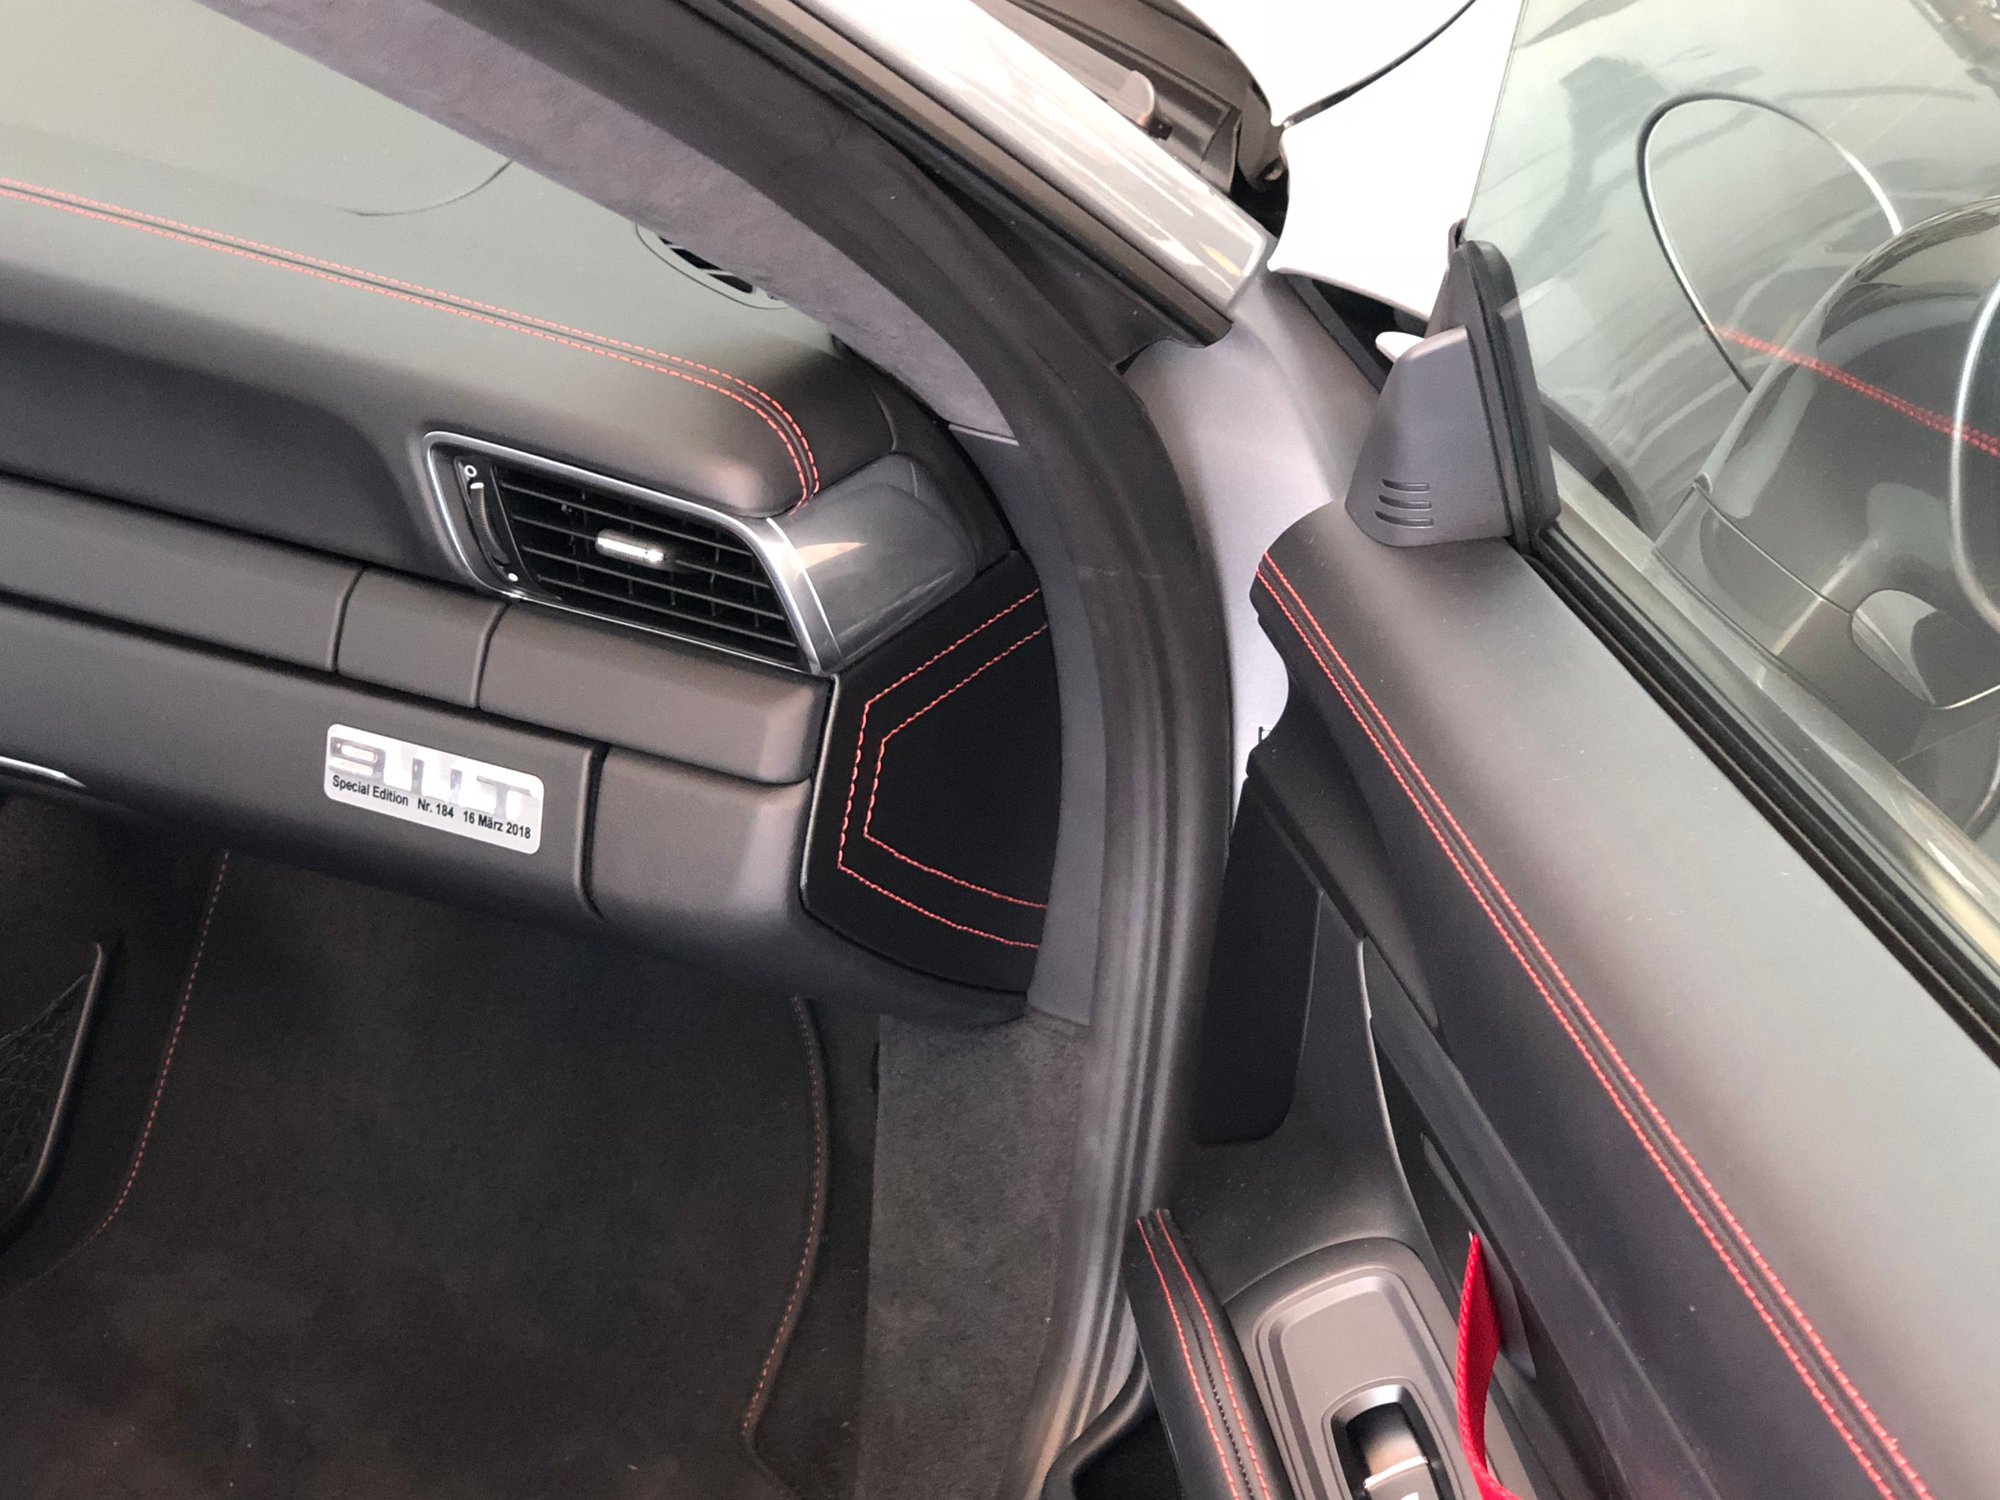
But then, looking at how much leather I had left over, I couldn't stop thinking about those door panels...
So, I removed them from the car, used them as a stencil to cut the leather and marked where I wanted the stitching to be:
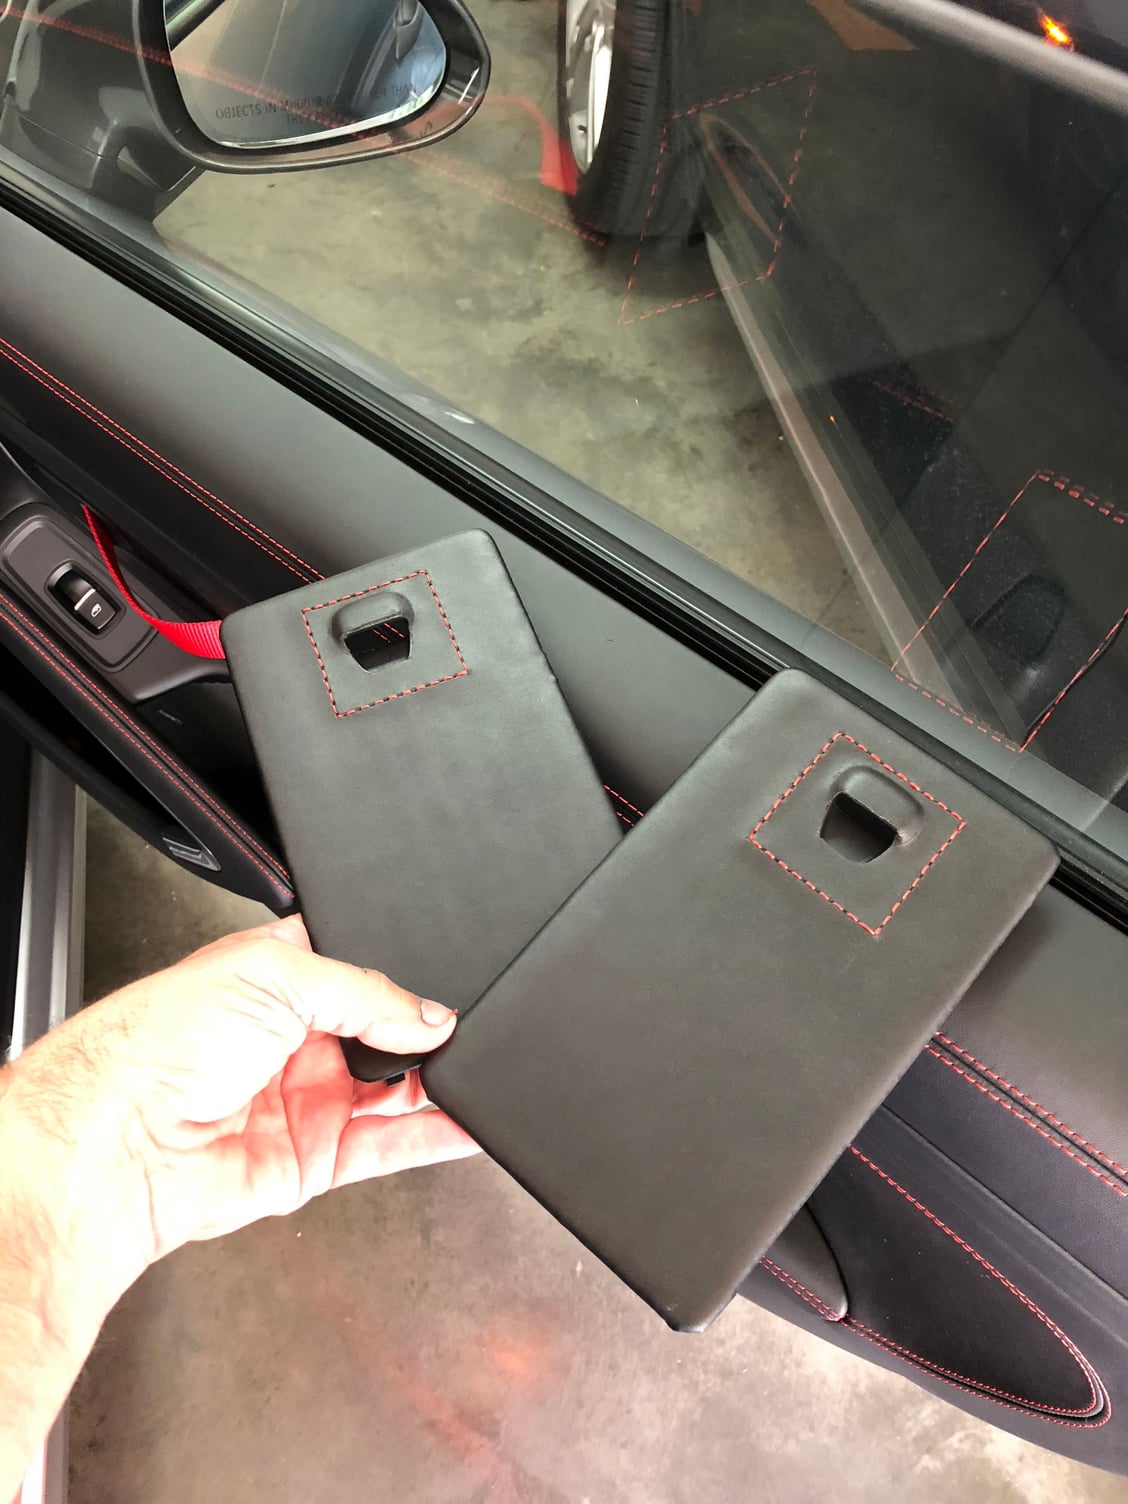
I followed the same thinning process with the Dremel, punched the holes, and did the gazillion stitches. Glued the leather to the plastic cover, and here is the result:
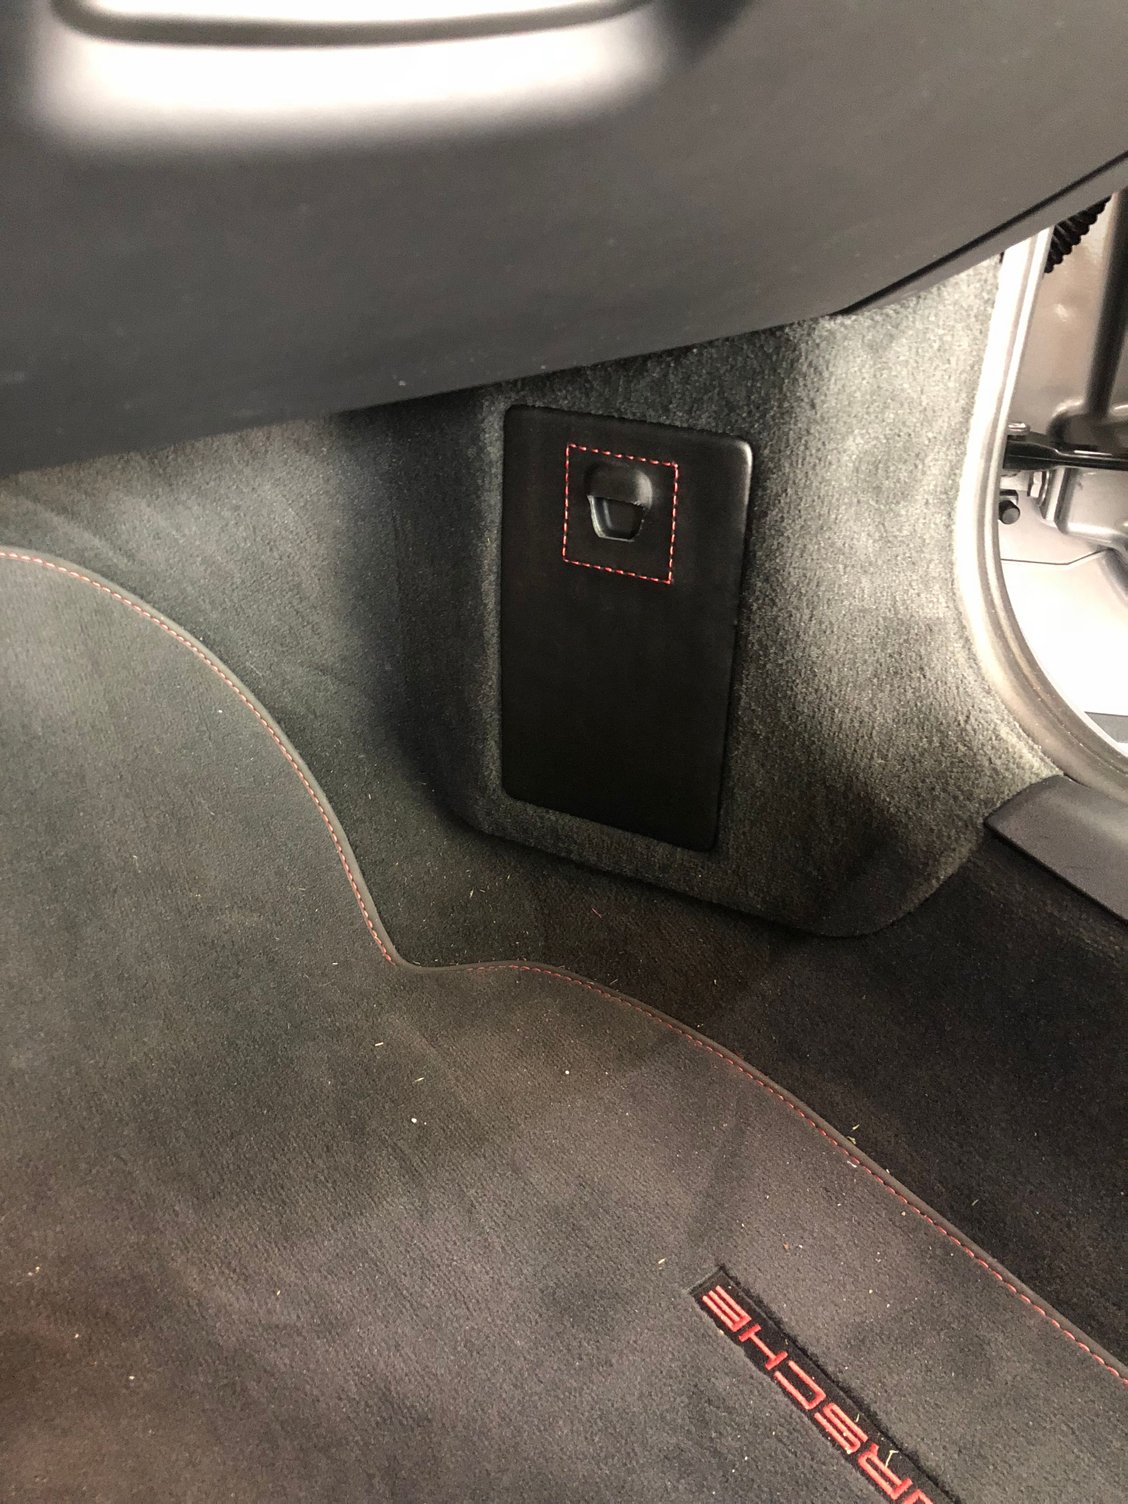
And now it is installed in the car.
While it may not be 100% perfect, I think it looks more interesting than the plain plastic piece, and had some fun doing it, all while saving over $1,200 for a couple of hours of work and under $50 in supplies.
Hope you enjoyed the thread! (Pun definitely intended)
Pretty impressive work. In addition to saving some $ and making it look nice, you've also truly personalized the car by integrating something you made yourself. Makes it extra special.
Sharing with fellow enthusiasts at Rennlist makes this hobby even more fun, thanks!
By the way, the remnants of the black paint in my hands and fingernails was due to an un-expected bursting of a can of Flex Seal while I was trying to salvage the nozzle to be used with a can of spray adhesive. When I tried to re-attach the nozzle on the Flex Seal the darn thing just went off like a geyser spewing black stuff all over the place until the can was empty! I'm glad that I was far away from the car while fiddling with the can, otherwise I would have ended up with a 911 Carrera Dalma-T-an
Originally Posted by Dewinator
That’s awesome. Having made a sloppy leather halloween costume before I know that I could never achieve results like that.
Now, that really made me laugh, imagining doing a halloween costume. I don't think I am that brave!
Nice work, Alex. Many years ago, I got obsessed about having a leather fuse box cover in my 987S. Was able to buy some dealership showroom leather samples, and had the covers done by a local high-end interior shop.
As I was playing with the Porsche configurator, I was looking at a couple of options that got my attention. First was the extended door panel at $690. It seems interesting to pay that much for a panel that most of the time is not visible, until you open the door from the outside. The other option was the Fuse Box covers for $390. I don't think I would pay for them, although they definitely look cool.
So, I thought, how hard could it be to do it myself???
The hardest part, of course, was sourcing a leather that was a very close match to the current leather in my car. Although I had visited Tandy leather many times before, I had never been able to find a close match. To my surprise, this Saturday I was able to find one piece that was an almost perfect match to my interior. I bought it on the spot and decided to do a little project over the weekend.
I started with the fuse box covers, as they seemed easier to do. Turns out that was a little deceiving.
Getting the tools out and cutting the leather to size:
This was the easiest part, as I used the plastic fuse box cover as a template for the leather.
But since I needed to turn the edges over for a nice finish, I had to thin down the leather to avoid the fold-over part being too thick. I used a Dremel for this step, and a vacuum to avoid being covered in leather dust:
After cutting the part for the door opening, and marking the holes with a chisel, it was time to do the deviated stitching. The original part had a round decoration, but I thought it looked better being a square, and also was easier to make:
Applied contact cement to both the leather and the plastic cover and let it dry. This was the point of no return, as the plastic cover would have to be replaced if this failed!
After carefully attaching both pieces, just had to set the edges and contours with a bone knife:
And this is what they look once finished:
Here you can see that the leather and thread are a near perfect match to my Carrera T's interior:
The finished installed fuse covers:
But then, looking at how much leather I had left over, I couldn't stop thinking about those door panels...
So, I removed them from the car, used them as a stencil to cut the leather and marked where I wanted the stitching to be:
I followed the same thinning process with the Dremel, punched the holes, and did the gazillion stitches. Glued the leather to the plastic cover, and here is the result:
And now it is installed in the car.
While it may not be 100% perfect, I think it looks more interesting than the plain plastic piece, and had some fun doing it, all while saving over $1,200 for a couple of hours of work and under $50 in supplies.
Hope you enjoyed the thread! (Pun definitely intended)
Those look really good. Where did you ultimately source the leather (Tandy?), and did you use a removeable piece of trim to take into the store to match? The only piece I can come up with for that is one of the halves of my steering column cover. Anyway, super work!
Nice work, Alex. Many years ago, I got obsessed about having a leather fuse box cover in my 987S. Was able to buy some dealership showroom leather samples, and had the covers done by a local high-end interior shop.
Thank you! That is a very good idea. The little sample pieces may be indeed large enough for this part.
Originally Posted by Nino
I admire your dedication
Thanks!
Originally Posted by flickroll
Those look really good. Where did you ultimately source the leather (Tandy?), and did you use a removeable piece of trim to take into the store to match? The only piece I can come up with for that is one of the halves of my steering column cover. Anyway, super work!
Thanks! Yes, I got it at Tandy. At first I tried to see what leather piece to take to the store, and then I realized I could just park in front of it, show them my car, and just take a bunch of leathers outside to see which one matched better. That was the easy part.
That was a very professional looking Job. It seems you have some stitching background. How did you get the holes laid out to stitch? Did people at Tandy show how to do this and provide all supplies and hole punch?


 06-03-2018, 07:19 PM