

991.1S X51 Build/Modification Journal
 05-13-2018, 12:46 PM
#1
Hello,
I have been a Rennlist member for a while. Back in 2008-2010 I owned a Guards Red 997S Aero that I regret selling. Traditionally I am a BMW guy, I still own an E92 M3 and a Dinan S2 E31 840.
My old 997S Aero on Bilstein Damptronics, BBS E88s, with a Cup front lip. I should have left it like this and never sold it. It needed more tire.
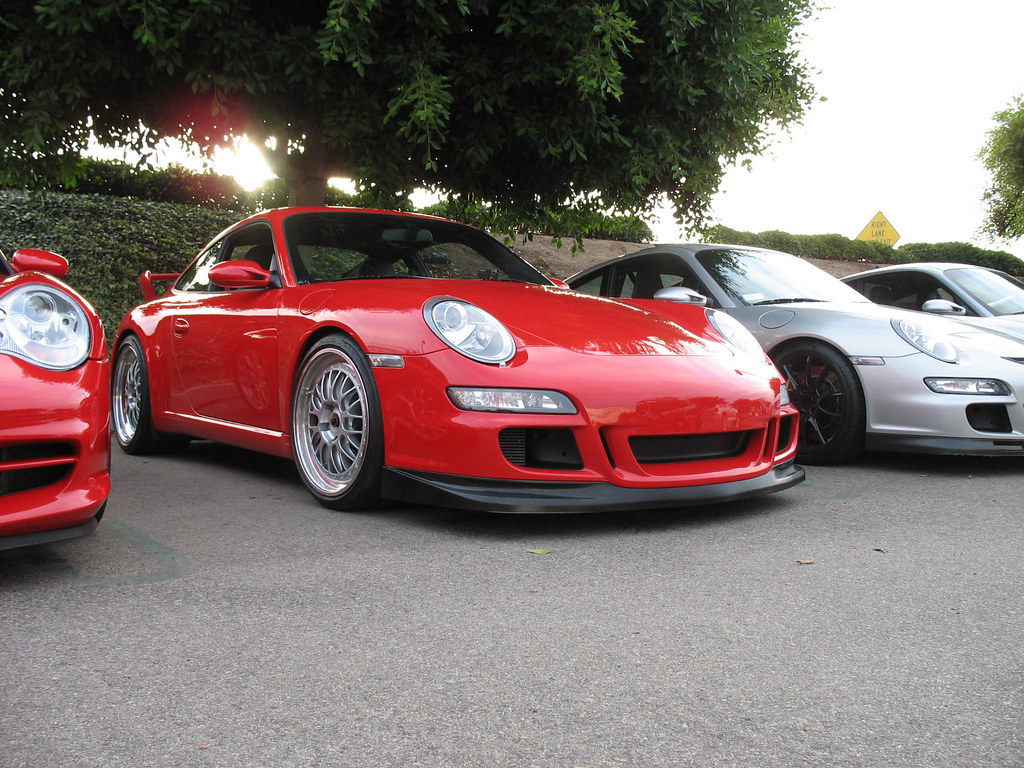
After deciding to get back into a Porsche, I spent a long time looking for the "right" car. I am one of those guys that originally thought the 991 aero-kit was ugly. But, its grown on me over time and its unique. For reference, while searching for my 991, I wanted a white or red 991.1S with PDK, steel brakes, SPASM, Aero-Kit, PSE, sport seats, sport design steering wheel, and no sunroof. Sunroof delete cars proved to be extremely rare and I settled for a car that had the standard sunroof. The car has every other option, or lack of options, I wanted and a few bonuses like the Porsche Power Kit. Options Below.
911 Carrera S 991 120 Price
BASE 911 Carrera S 96,400.00
0Q White 0.00
0Q White 0.00
AJ Black leather front seats 0.00
ZAB Ornamental Porsche Crest 0.00
658 Power Steering Plus 270.00
840 SportDesign steering wheel 490.00
XAA Aerokit Cup 5,990.00
XSC Porsche Crest on headrests 285.00
031 PDCC w/ PASM sport suspension 4,050.00
CAS Model designation on doors in 300.00
CNL Wing mirror (lower part) paint 605.00
XUB Headlamp cleaner exterior clr 295.00
24891 Dev. stitch seat front & rear 1,100.00
651 Electric sunroof 1,490.00
636 ParkAssist (front and rear) 990.00
CGJ Sport Chrono Carrara White 500.00
XFJ Instrument dials in White 860.00
250 Porsche Doppelkupplung (PDK) 4,080.00
XDA Wheels painted Black 1,635.00
X51 Carrera S Powerkit 18,320.00
XDM Dashboard trim strip painted 510.00
XYG Center console trim painted 290.00
XRT 20-inch SportTechno wheel 1,355.00
P07 Adaptive Sport Seats Plus 0.00
323 Adaptive Sport seats Plus (lef 0.00
324 Adaptive Sport seats Plus (rig 0.00
P3C Prem Pkg Plus w 18-way seats 6,155.00
276 Automatically dimming mirrors 0.00
342 Seat heating (front) 0.00
541 Seat ventilation (front) 0.00
603 Bi-Xenon(TM)hdlghts incl.PDLS 0.00
625 Porsche Entry & Drive 0.00
630 Int Light Pkg for Rear Compart 0.00
P37 BOSE� Audio Package 2,420.00
680 BOSE� Surround Sound-System 0.00
690 SiriusXM(R) & HD Radio(R) rcvr 0.00
693 6 disc CD/DVD changer 0.00
While researching the car I was able to locate the original owner on this forum. Below are delivery pics of the car.
I like the below pics as a starting off point since the car hasn't changed much since then. A little older and a blemish or two, but thats it.

[[img]https://farm1.staticflickr.com/908/28209032648_f83f5aa9f7_b.jpg


I knew, as I searched for a 991S, that I was going to be modifying it. During my 997S ownership, I "over modified" that car, to the point where it was very uncomfortable to drive on the street (full Moton, solid link suspension). I decided modifications for my 991 would stick to a simple formula. Such as, conservative suspension modifications that retain PASM, BBS E88s, lots of tire, and a lounder exhaust. Everything I do outside of that formula will be simple cosmetic or functional changes.
My 991 is already quite low on SPASM/PDCC so aftermarket springs would not do much and I knew I wanted adjustable. There are two relatively affordable coilover options that reatain PASM functionality, Bilstein Damptronics and the Elephant Racing coilover conversion kit.
I decided on the Elephant Racing coilover conversion due to the fact that it is half the price of Damptronics. I somewhat regret this decision.
I wouldn't call this journal a DIY but I will post some of the things I learned from my modification process.
Jacking and placing a 991 on four traditional jack stands.
Jack pads and jack pad stands make this a little easier but they are height limited and expensive if you already own traditional jack stands.
I started by jacking from the rear. The front will lift off the ground. Jack high enough to place the front jack stands. I use hockey pucks to protect the jack points.


The hockey pucks may crack but that is the point. They are deforming to protect the jack point, vice the other way around.

Repeat on both sides. NOTE: lower the rear onto ramps after placing the jack stands in front.
Once complete with the front, and the rear tires resting on jack stands, jack the car from the rear main subframe. This is the load bearing portion of the subframe and should be the beefiest portion of the rear unibody.

Wheels and coilover conversion ready for installation.

NOTE: The front and rear sleeves look identical at first, but they are not the same. Make sure you double check which sleeve goes on front/rear.
The Elephant Racing coilover conversion is somewhat well thought out and the instructions they provide, as well as the tech articles on their website, are thorough. However, some experience with coilovers/coilover installation is required, in my opinion, in order to get this installation done right. I have installed numerous coilers on my previous cars but this is my first "sleeve" kit.
I had always planned on removing the rear seats, since they are worthless, and maximizing the storage area. So I had a lot of the rear torn apart already. Making access to the rear strut mounts fairly easy.

Removal of all the pieces above is not required. A 991R/Carrera T rear seat delete is part of my modification plan so you are seeing that in process at the same time.

Rear strut/spring unit ready for the conversion.

The rears are very easy compared to the fronts, as I will explain later. I converted the rear in accordance with the ER instructions and website.

I have been a Rennlist member for a while. Back in 2008-2010 I owned a Guards Red 997S Aero that I regret selling. Traditionally I am a BMW guy, I still own an E92 M3 and a Dinan S2 E31 840.
My old 997S Aero on Bilstein Damptronics, BBS E88s, with a Cup front lip. I should have left it like this and never sold it. It needed more tire.
After deciding to get back into a Porsche, I spent a long time looking for the "right" car. I am one of those guys that originally thought the 991 aero-kit was ugly. But, its grown on me over time and its unique. For reference, while searching for my 991, I wanted a white or red 991.1S with PDK, steel brakes, SPASM, Aero-Kit, PSE, sport seats, sport design steering wheel, and no sunroof. Sunroof delete cars proved to be extremely rare and I settled for a car that had the standard sunroof. The car has every other option, or lack of options, I wanted and a few bonuses like the Porsche Power Kit. Options Below.
911 Carrera S 991 120 Price
BASE 911 Carrera S 96,400.00
0Q White 0.00
0Q White 0.00
AJ Black leather front seats 0.00
ZAB Ornamental Porsche Crest 0.00
658 Power Steering Plus 270.00
840 SportDesign steering wheel 490.00
XAA Aerokit Cup 5,990.00
XSC Porsche Crest on headrests 285.00
031 PDCC w/ PASM sport suspension 4,050.00
CAS Model designation on doors in 300.00
CNL Wing mirror (lower part) paint 605.00
XUB Headlamp cleaner exterior clr 295.00
24891 Dev. stitch seat front & rear 1,100.00
651 Electric sunroof 1,490.00
636 ParkAssist (front and rear) 990.00
CGJ Sport Chrono Carrara White 500.00
XFJ Instrument dials in White 860.00
250 Porsche Doppelkupplung (PDK) 4,080.00
XDA Wheels painted Black 1,635.00
X51 Carrera S Powerkit 18,320.00
XDM Dashboard trim strip painted 510.00
XYG Center console trim painted 290.00
XRT 20-inch SportTechno wheel 1,355.00
P07 Adaptive Sport Seats Plus 0.00
323 Adaptive Sport seats Plus (lef 0.00
324 Adaptive Sport seats Plus (rig 0.00
P3C Prem Pkg Plus w 18-way seats 6,155.00
276 Automatically dimming mirrors 0.00
342 Seat heating (front) 0.00
541 Seat ventilation (front) 0.00
603 Bi-Xenon(TM)hdlghts incl.PDLS 0.00
625 Porsche Entry & Drive 0.00
630 Int Light Pkg for Rear Compart 0.00
P37 BOSE� Audio Package 2,420.00
680 BOSE� Surround Sound-System 0.00
690 SiriusXM(R) & HD Radio(R) rcvr 0.00
693 6 disc CD/DVD changer 0.00
While researching the car I was able to locate the original owner on this forum. Below are delivery pics of the car.
I like the below pics as a starting off point since the car hasn't changed much since then. A little older and a blemish or two, but thats it.
[[img]https://farm1.staticflickr.com/908/28209032648_f83f5aa9f7_b.jpg
I knew, as I searched for a 991S, that I was going to be modifying it. During my 997S ownership, I "over modified" that car, to the point where it was very uncomfortable to drive on the street (full Moton, solid link suspension). I decided modifications for my 991 would stick to a simple formula. Such as, conservative suspension modifications that retain PASM, BBS E88s, lots of tire, and a lounder exhaust. Everything I do outside of that formula will be simple cosmetic or functional changes.
My 991 is already quite low on SPASM/PDCC so aftermarket springs would not do much and I knew I wanted adjustable. There are two relatively affordable coilover options that reatain PASM functionality, Bilstein Damptronics and the Elephant Racing coilover conversion kit.
I decided on the Elephant Racing coilover conversion due to the fact that it is half the price of Damptronics. I somewhat regret this decision.
I wouldn't call this journal a DIY but I will post some of the things I learned from my modification process.
Jacking and placing a 991 on four traditional jack stands.
Jack pads and jack pad stands make this a little easier but they are height limited and expensive if you already own traditional jack stands.
I started by jacking from the rear. The front will lift off the ground. Jack high enough to place the front jack stands. I use hockey pucks to protect the jack points.
The hockey pucks may crack but that is the point. They are deforming to protect the jack point, vice the other way around.
Repeat on both sides. NOTE: lower the rear onto ramps after placing the jack stands in front.
Once complete with the front, and the rear tires resting on jack stands, jack the car from the rear main subframe. This is the load bearing portion of the subframe and should be the beefiest portion of the rear unibody.
Wheels and coilover conversion ready for installation.
NOTE: The front and rear sleeves look identical at first, but they are not the same. Make sure you double check which sleeve goes on front/rear.
The Elephant Racing coilover conversion is somewhat well thought out and the instructions they provide, as well as the tech articles on their website, are thorough. However, some experience with coilovers/coilover installation is required, in my opinion, in order to get this installation done right. I have installed numerous coilers on my previous cars but this is my first "sleeve" kit.
I had always planned on removing the rear seats, since they are worthless, and maximizing the storage area. So I had a lot of the rear torn apart already. Making access to the rear strut mounts fairly easy.
Removal of all the pieces above is not required. A 991R/Carrera T rear seat delete is part of my modification plan so you are seeing that in process at the same time.
Rear strut/spring unit ready for the conversion.
The rears are very easy compared to the fronts, as I will explain later. I converted the rear in accordance with the ER instructions and website.

 05-13-2018, 01:31 PM
#3
RL Community Team
Rennlist Member
Rennlist Member
Wow, what an original build. Beautiful car and should be amazing with some mods. Good luck!
Disagree that rear rear seats are useless. I use mine all the time with my kids.
Disagree that rear rear seats are useless. I use mine all the time with my kids.
05-13-2018, 01:47 PM
#4
The front suspension was not easy, was not intuitive, and will require some suspension experience (or a lot of time on the phone with ER) if you plan to DIY.
Below are pics from the ER site of the completed front conversion

Some notes about this picture, all learned after my first attempt. ER modified the strut hats in order to accept thrust washers at the top of the assembly. OE, no modified strut hats, will not work this way with the kit I was provided. The pic shows a "prototype" conversion so the actual parts provided look different. Additionally, this strut is off of a PDCC car, like mine, take note of the PDCC link and its positioning on the strut.
Note: ER shows a picture of someone cutting off the front strut spring mount. YOU DONT HAVE TO CUT. It slides off with some motivation. I used a screwdriver and rubber hammer to get it going and it slid off.

In the below pic you can see the masking tape used to keep the sleeve snug on the strut. You can also see the lower perch that rests on top of the PDCC link. On non PDCC cars it rests on the wheel carrier. Note: The front strut has a little centering bump on it. For some reason ERs lower perch is not tall enough to completely cover the bump, the sleeve is not wide enough at the bottom to fit over the bump. This is a problem.

After some consideration, I realized that the PDCC link can be moved up and down on the strut. I also noticed in pics, on the ER site, it appears they also moved their PDCC link in order to better accommodate the bump.
The pic below shows the install strut from the ER tech article. You can clearly see, via arrow, where the PDCC link has been moved up slightly, probably about 3mm. I ended up having to do the same thing in order to clear the bump on the strut. Not a big deal, but not covered in any instructions.

The only issue with shifting the PDCC link up slightly is that it raising the car slightly, since the spring rests on the link. For the coilover conversion, you are effectively removing 3mm of adjustability.
I wanted to adjust the PDCC link as little as possible so I slightly modified the sleeve so that it fit over the very top of the bump.

Below is a pic of the installed front conversion. I found that the setup had to be assembled inside the wheel well. I taped the helper spring close to aid in ease of installation. Then removed the tape after the fact. Its not as easy as it sounds since the helper spring is actually quite robust for this setup.

As stated earlier, the OE strut mount does not accommodate the thrust washer at the top without modification. So, ERs instructions hav you install the thrust washer/bearing between the main and helper springs. Keep in mind the OE strut bearing is removed because it does not accommodate the small diameter ER spring.

After installation I planned on taking the car out for a test drive but realized there was a problem. Note: I have had enough coilover suspensions to know that occasionally, and at random, they can make some noise. Occasional, random, and slight noise, I am okay with. But not significant spring binding.
Below are pics from the ER site of the completed front conversion
Some notes about this picture, all learned after my first attempt. ER modified the strut hats in order to accept thrust washers at the top of the assembly. OE, no modified strut hats, will not work this way with the kit I was provided. The pic shows a "prototype" conversion so the actual parts provided look different. Additionally, this strut is off of a PDCC car, like mine, take note of the PDCC link and its positioning on the strut.
Note: ER shows a picture of someone cutting off the front strut spring mount. YOU DONT HAVE TO CUT. It slides off with some motivation. I used a screwdriver and rubber hammer to get it going and it slid off.
In the below pic you can see the masking tape used to keep the sleeve snug on the strut. You can also see the lower perch that rests on top of the PDCC link. On non PDCC cars it rests on the wheel carrier. Note: The front strut has a little centering bump on it. For some reason ERs lower perch is not tall enough to completely cover the bump, the sleeve is not wide enough at the bottom to fit over the bump. This is a problem.
After some consideration, I realized that the PDCC link can be moved up and down on the strut. I also noticed in pics, on the ER site, it appears they also moved their PDCC link in order to better accommodate the bump.
The pic below shows the install strut from the ER tech article. You can clearly see, via arrow, where the PDCC link has been moved up slightly, probably about 3mm. I ended up having to do the same thing in order to clear the bump on the strut. Not a big deal, but not covered in any instructions.
The only issue with shifting the PDCC link up slightly is that it raising the car slightly, since the spring rests on the link. For the coilover conversion, you are effectively removing 3mm of adjustability.
I wanted to adjust the PDCC link as little as possible so I slightly modified the sleeve so that it fit over the very top of the bump.
Below is a pic of the installed front conversion. I found that the setup had to be assembled inside the wheel well. I taped the helper spring close to aid in ease of installation. Then removed the tape after the fact. Its not as easy as it sounds since the helper spring is actually quite robust for this setup.
As stated earlier, the OE strut mount does not accommodate the thrust washer at the top without modification. So, ERs instructions hav you install the thrust washer/bearing between the main and helper springs. Keep in mind the OE strut bearing is removed because it does not accommodate the small diameter ER spring.
After installation I planned on taking the car out for a test drive but realized there was a problem. Note: I have had enough coilover suspensions to know that occasionally, and at random, they can make some noise. Occasional, random, and slight noise, I am okay with. But not significant spring binding.
Last edited by JEllis; 05-13-2018 at 02:32 PM.
05-13-2018, 02:49 PM
#5
I sent a video of the binding to ER and after discussion they sent me a thrust bushing kit that will fit at the top of the spring below the strut mount, where should be. Unfortunately, the added parts and some thrust sheets I decided to install, further increased the total height of the package.
New bearing package from ER. Despite the kits shortcomings, ERs customer service was first class and they were quick to send me the fix.

The issue with the OE mount is that it is not uniformly flat on the bottom. It can be shaved flat or you can use a big washer to provide a flat service for the bearing.

Swift thrust sheets added as well.

I included some bearing grease and this solved all the issues. This was about a month long process but it works. Although everything works, and ER was supportive, I wish I had just installed Damptronics.
New bearing package from ER. Despite the kits shortcomings, ERs customer service was first class and they were quick to send me the fix.
The issue with the OE mount is that it is not uniformly flat on the bottom. It can be shaved flat or you can use a big washer to provide a flat service for the bearing.
Swift thrust sheets added as well.
I included some bearing grease and this solved all the issues. This was about a month long process but it works. Although everything works, and ER was supportive, I wish I had just installed Damptronics.
05-13-2018, 05:23 PM
#6
05-13-2018, 10:22 PM
#7
Trending Topics
05-14-2018, 08:11 AM
#8
With the suspension figured and working as advertised, I moved onto the wheels.
I worked with BBS America and MRF Engineering to get the widest set of E88s that could fit with 265/325 tires. 19x9.5 and 19x11.5 is what I purchased.


I worked with BBS America and MRF Engineering to get the widest set of E88s that could fit with 265/325 tires. 19x9.5 and 19x11.5 is what I purchased.
05-14-2018, 08:39 AM
#9
Other than the sleeve kit, they do not. They have the KW V3 that has modules that cancel out PASM and they have their own DDC kit with uses their own in house ECU. KW does not have their plug and play kit available for Porsche like they do for BMW (due to the fact they are an OEM for BMW). If I am wrong, post a link, I am a big KW fan, I have their club sports on my E92.
 05-14-2018, 10:12 AM
#10
Yeah, I can see how the verbiage can be confusing. The V3 is a manually adjustable coilover that includes modules that disable PASM without prompting warning lights. The KW DDC coilover is active but requires the use of their own ECU. The only real solution to maintain PASM functionality is a sleeve kit which re-uses the OE shocks/struts or Bilstein Damptronics (Bilstein is the OEM). DDC makes a compatible coilover but its cost prohibitive.
05-16-2018, 07:57 AM
#12
My car came with DIY grill screens installed and an integrated Escort Passport system. I really disliked the hacked together grill screens and I am a Valentine 1 guy.
Below is a pic of the DIY grill screens from the PO.
 [/url]
The integrated Escort Passport wiring and sensors coming out.

New plastics ready to go in
 [/url]
New Rennline grills, Porsche OE rivets

The Rennline grills use a combination of the OE clips, screws, and bolts. Below is a pic of my pilot holes drilled.

Fitment is perfect.


I especially liked the third radiator grill which is curved to match the duct and fits perfect.


The below pic shows how the Rennline grills use the OE clip as pressure points to hold the grills.

Grills installed

Below is a pic of the DIY grill screens from the PO.
[/url]The integrated Escort Passport wiring and sensors coming out.
New plastics ready to go in
[/url]New Rennline grills, Porsche OE rivets
The Rennline grills use a combination of the OE clips, screws, and bolts. Below is a pic of my pilot holes drilled.
Fitment is perfect.
I especially liked the third radiator grill which is curved to match the duct and fits perfect.
The below pic shows how the Rennline grills use the OE clip as pressure points to hold the grills.
Grills installed
09-10-2018, 09:53 PM
#13
very nice post.
Thank you
Thank you
09-10-2018, 10:11 PM
#14
I am pretty much done with this build and thus the car is for sale as I look for another project.
To finish things off. I removed the rear seats and installed a 911R rear seat delete panel as well as GT3 close outs.

I was a little upset when I learned that the 991 does not have PORSCHE etched into the rear window like my previous 997.1 did. So I added it myself.

One of my favorite modifications... disregard the green marker, it was used for mounting.

White plate holder

Last modification was an AWE Switchpath Exhaust. There are lots of write-ups on installing an exhaust on this car but I will say its far easier to do with the rear bumper removed and the heat shielding removed.


To finish things off. I removed the rear seats and installed a 911R rear seat delete panel as well as GT3 close outs.
I was a little upset when I learned that the 991 does not have PORSCHE etched into the rear window like my previous 997.1 did. So I added it myself.
One of my favorite modifications... disregard the green marker, it was used for mounting.
White plate holder
Last modification was an AWE Switchpath Exhaust. There are lots of write-ups on installing an exhaust on this car but I will say its far easier to do with the rear bumper removed and the heat shielding removed.