When you click on links to various merchants on this site and make a purchase, this can result in this site earning a commission. Affiliate programs and affiliations include, but are not limited to, the eBay Partner Network.
Recap: Picked up a CPO 991.1 C2S about a week ago. Drove the car home with the Uniden R1 suction cupped to the base of the windshield which was less than ideal and jiggly. I knew I wanted to mount it up high. I don't care for the location and look of the mounts attached to the rearview mirror so I ordered a mount off ebay that uses 3M adhesive. It's small and can be mounted anywhere on the windshield.
Some of these steps are documented elsewhere in different threads. I thought it was worth documenting what worked for me in one place with as much detail as possible.
I've seen threads that involve taking apart the mirror covers. I found a thread that showed dropping down the cover that houses the map lights. 2 pushes with a credit card and it was open. No fuss.
Here you can see the two clips. As you push forward with the card pull down with a finger until that side is free then do the same on the other side.
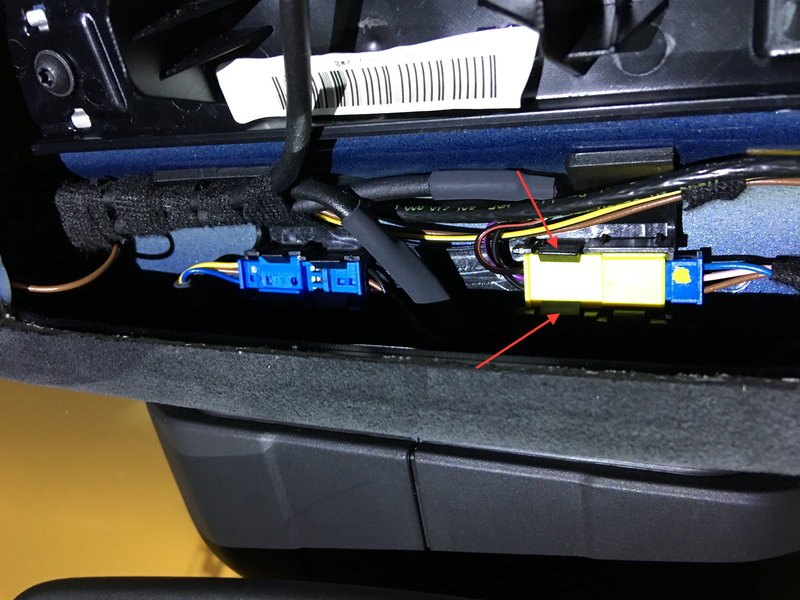
Once the cover is out of the way (I looped it behind the rearview mirror) you can can see inside. On the right is the plug (yellow female and blue male) that will provide switched power. The arrows show the 2 clips that are holding the yellow in place. I used my finger to lift the top clip up enough so I could begin to pull the yellow plug out. Once it was started I was able to pop it out with no problem.
While there are cheaper options I read nothing but good things about the MirrorTap MTX. I went with the 15" because that is what many recommended. For my install I probably could have gotten by with the 10" but the 15" works fine. The extra is tucked inside.
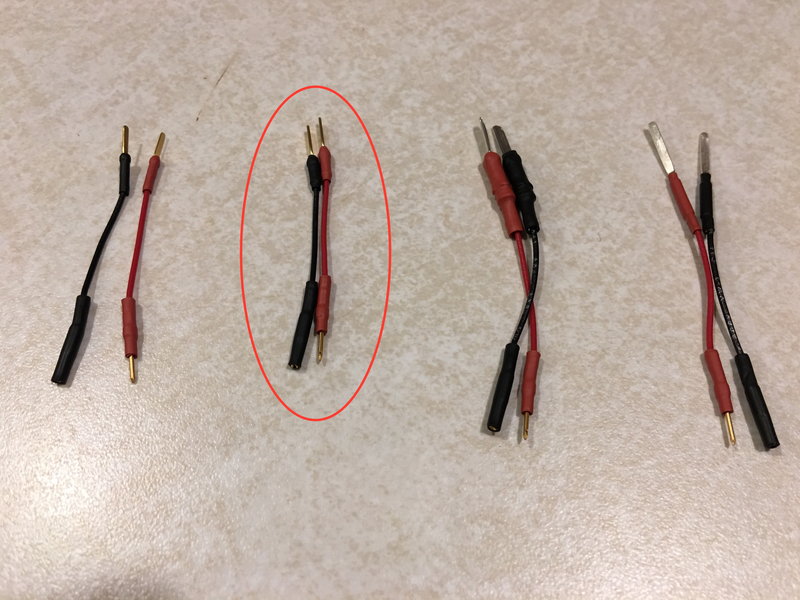
The kit gives you 4 different sizes of taps I arranged them from smallest to largest. The circled taps I believe are the .045 size and were the ones that fit best. A good snug fit that went into the blue plug fully leaving nothing exposed.
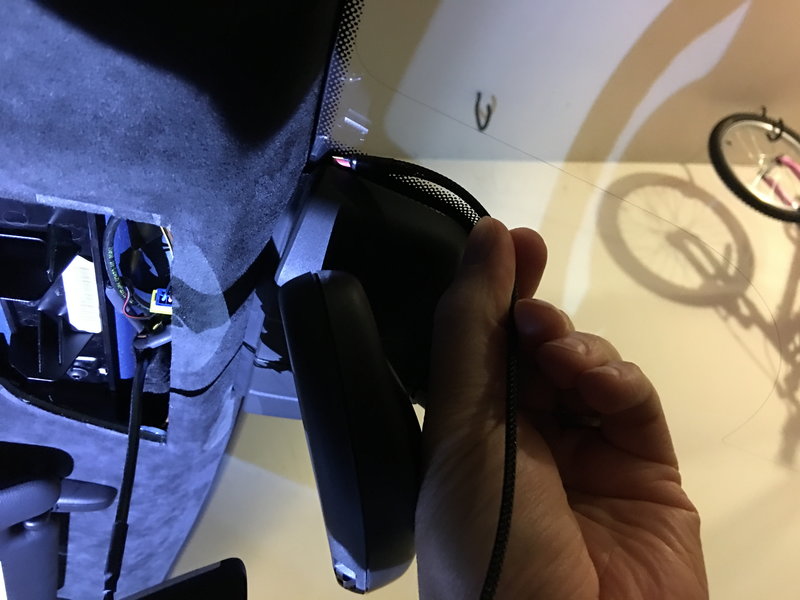
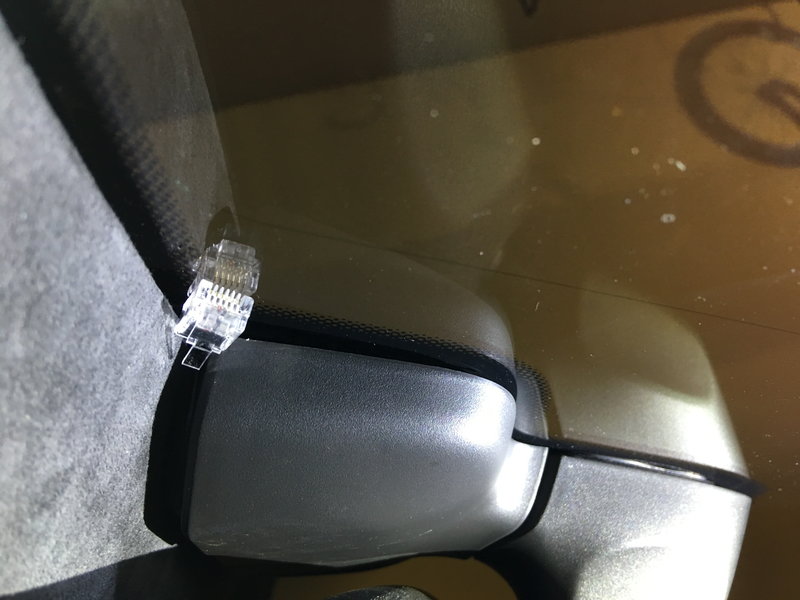
I read that there could be challenges trying to force the RJ-11 connector through the headliner so I did it in reverse. Feeding in the wire end through just to the right of the mirror. There is actually a bit of a gap between the headliner and the glass so it went thru with no problems.
Showing it fed thru.
The red '+' tap connects to the blue wire (switched power) and the black '-' tap connects to the brown wire (ground). It might be hard to see but the arrows are showing how the taps fit in best for me. With the yellow plug oriented this way, the taps went in best above the corresponding wire to make a nice snug fit. For the other 3 sides of each wire (front, back, bottom) the tap either wouldn't go in or didn't fit well.
Once the taps were installed I completed the connection to the rest of the MirrorTap wiring making sure to fully seat the taps. I then heated the supplied heat-shrink tubing to make as secure connection as possible. After cooling, the yellow/blue plug is seated back into its holding clip.
It lives!
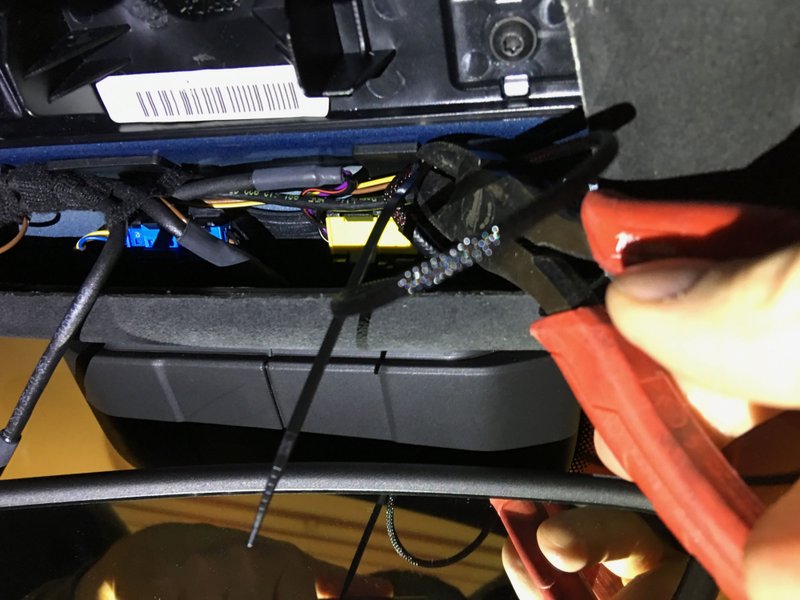
I only ended up using one zip tie to secure the wiring so the taps couldn't be pulled out. It's hard to see in this picture but there is a little tab above the yellow plug where another wire is taped in place to secure it. I wrapped the zip tie around this tab and pulled it tight.
After messing around with various placements, I cleaned the inside of the windshield with alcohol and mounted the clip for the radar detector.
It uses a permanent 3M adhesive so I expect it to have a strong bond.
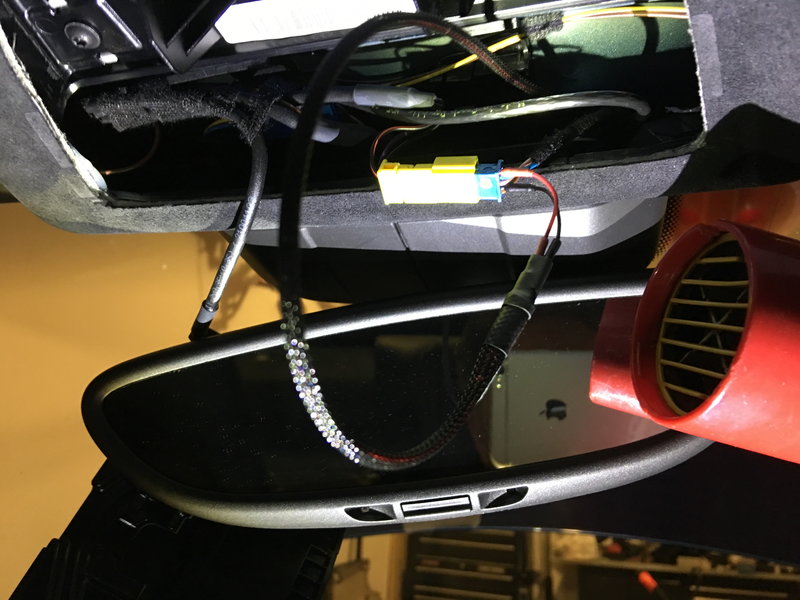
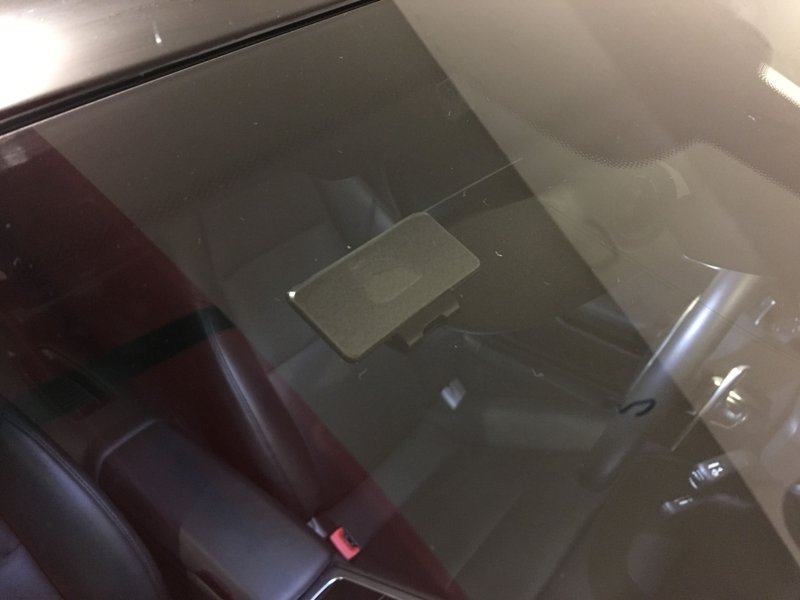
Location shown from inside the car.
Fully installed. The sun visor will hit the detector if it's rotated fully forward but I felt this was a fair tradeoff for my preferred high mounting location.
This last picture shows the power cord in its stowed location. When not in use it can be fed back in so only the connector is visible. It can't be seen from inside the car and you have to really look for it from the outside to spot it. Did you spot it in the previous picture showing the radar detector mounting clip from the outside? The RJ-11 power connector can be seen if you look for it!
All in all this was an fairly easy install. I spent more time setting up to take pictures than what it actually took to do the install. I estimate this would have taken less than 30 minutes.
Excellent write-up. Thank you. This is perfect timing for me as I’m expecting delivery of my first P-car, 991.1 this week and already ordered the Uniden R3.
AWESOME!!!!! This was perfect. I just used it to set up my 991.2. The only thing I found different was that I needed to use the smallest plug. But, I dropped the next to smallest one (never to be found again). The only other was no matter how hard I tried I couldn't get the blue connector back into the clip. Neither made any difference. I was happy it worked. Took me about 20 minutes. I can't thank you enough, for the great write-up and photos.
My MirrorTap arrived today and I was excited to use these directions, but unfortunately it seems like they sent me the wrong kit. I specified my car and they sent me a kit with the ends already attached and they�re too big / don�t fit into the plug. It�s weird bc your kit has four different options. I just hope I didn�t screw something up by trying to force it in there.
It appears I ordered the wrong product. Kudos to the company though, they replied to my email within minutes and are charging me the $10 difference and sending me the new kit today, along with a stamped envelope to return the old kit.
One more question: in your picture your yellow/blue plug hang down quite a bit, allowing you to access the wires in the back. The wires connecting to the blue plug on mine are way shorter so I can barely pull the plug down and it makes getting an angle to the wires difficult. Was yours loose to begin with, or did you somehow get some extra slack?
Great write up! I have a blendmount on my GT4 but love your idea of the high windshield mount. I�ll be looking to do this on my next car. Would you mind posting the links to the mirror tap and the windshield mount you used? Thanks!
One more question: in your picture your yellow/blue plug hang down quite a bit, allowing you to access the wires in the back. The wires connecting to the blue plug on mine are way shorter so I can barely pull the plug down and it makes getting an angle to the wires difficult. Was yours loose to begin with, or did you somehow get some extra slack?
Once the yellow plug is unclipped from its mount there was plenty of slack in the wires for the yellow and blue plugs to pull it out enough for access.

 03-24-2018, 12:48 AM