When you click on links to various merchants on this site and make a purchase, this can result in this site earning a commission. Affiliate programs and affiliations include, but are not limited to, the eBay Partner Network.
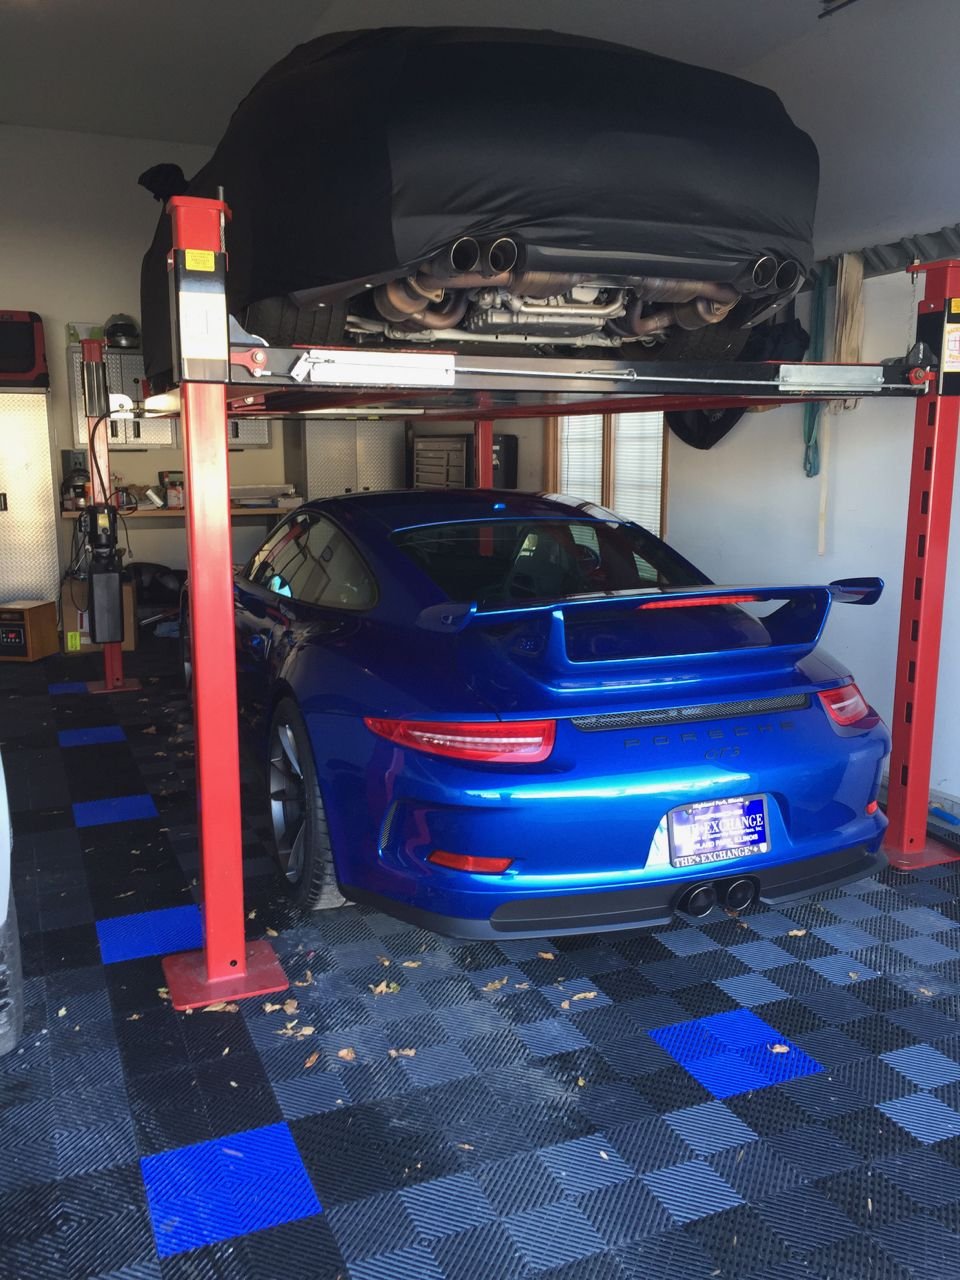
Building a new house and looking for recommendations for a garage vehicle storage lift. Trying to minimize space requirements (how much do I need, since I'm building the house?) and cost, but ease of installation and use also important. Need to have drip pans because my '73 MGB will be the most common "upstairs occupant" and don't want it dripping on my 991, or whatever else is below. Thanks.
I did a ton of research and ended up going with Backyard Buddy for a number of reasons...
Although they do not submit for certification, they are 100% USA steel/american made and can deliver and setup w/ out hiring a third party.
I could have spent half but I 100% believe you get what you pay for and don't mind paying a little more for USA made.
By the way, they are delivering and setting my unit up today. Just in time for winter.
I went with standard size, extended lift. It provides minimal footprint, high lift for my 11 ft ceilings.
+1 for the backyardbuddy. I've had mine for 15 years and it's been great. You can also get drip pans for the entire length of it which can be removed easily for service. I also have an old British car that leaks a bit of oil.
I don't have a lift recommendation (haven't bought one yet), but here's some new construction garage tips:
Make it wider and deeper than normal unless your lot is super-tight and won't allow for it. It's really inexpensive (in the grand scheme of things) to change from a 20 x 20 to a 25 x 25 2-car garage since it's just adding a few more rafters to the ceiling design and a little more concrete. Every single one of my neighbors with a 2-car garage (3-4 year old subdivision with same builder) are envious of my 25 x 25 versus their 20 x 20 and are shocked at how little of an increase in cost it was. And I don't have to worry about my 991 or X5 getting door dings from my kids and I have plenty of room to walk around each vehicle as well as a full wall of cabinets/shelves.
INSULATE YOUR GARAGE! This helps in both hot climates and cold climates. Even if you don't add any type of HVAC (I recommend mini-split....which you can have installed later if price is a factor now), having the garage insulated helps keep extreme temps in check. Much easier and cheaper to insulate during new construction, than realizing you wish you had done it and installing insulation after the fact (figure about $800 to insulate a 25 x 25 garage during new construction).
Double the number of outlets your builder probably put in the design. Again, super cheap to do during initial construction. Also, get a 240v outlet(s) installed for a large air compressor or your lift.
Lighting, lighting, lighting. Double or triple what your builder has in their design if you do any wrenching in your garage. Again, cheaper to do now as opposed to later. Even if you're not turning it into a "garagemahal" having double the standard fluorescent fixtures is awesome from a working garage perspective (and surprisingly super cheap to do....as in a couple hundred bucks at most).
Add height to your ceilings. Probably the #1 regret any gear-head has when they decide to install a lift, and it's easy to do during initial design/construction.....not easy afterwards.
Consider having a separate 110v outlet from the rest of the garage's GFI power for a fridge. If the GFI pops, your fridge will still be on. Also consider a fridge water-line. I LOVE having a fridge with ice/water in my garage to stay hydrated when working in the garage or outside. It's also handy to have a second icemaker in our household. Fridge fits easily if you go with a 25 x 25 garage.
My laundry room is the first thing inside from my garage so I didn't install a sink in my garage, but if your setup isn't going to be like that get a sink installed in the garage (or at least the plumbing for one if you're trying to keep costs down, then put one in yourself....it's easy). You'll thank me (and your wife will too) later....lol
+1 for the insulation and mini split, great to be able to work on the car in summer and winter. No need for me and my wife to warm up our cars anymore in the winter, always 70 when we leave for work.
Eric
I have a Bendpak HD9 and couldn't be more pleased.
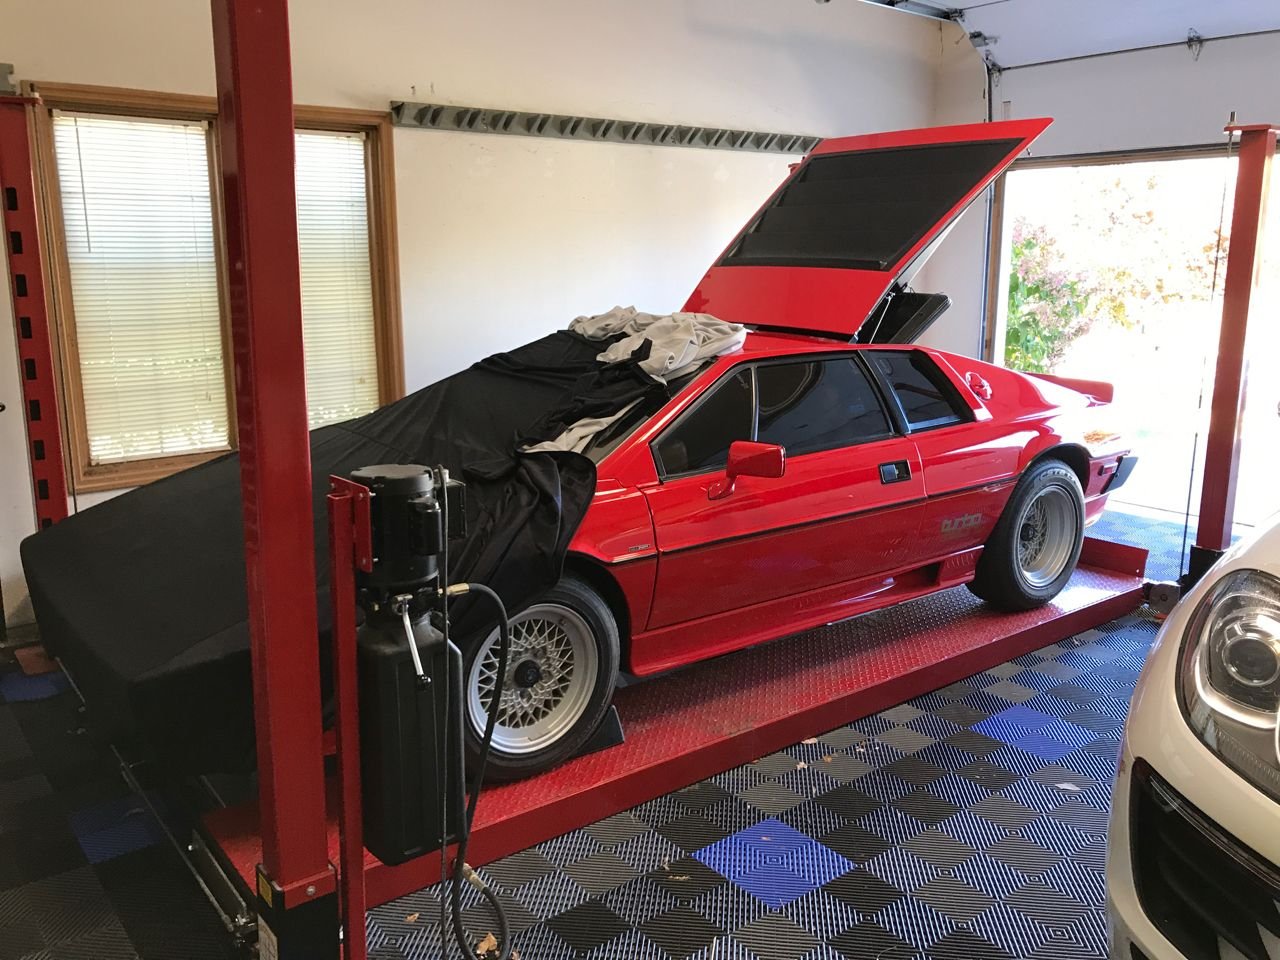
One consideration is what is the distance across between the wheels on the MGB? Make sure whatever you get has ramps that will work for that. My Cobra is a small car but has some wide tires. Even with that I have only about 1" from the inside edge of the tire to the inside edge of each ramp. If the ramps were much wider apart it would not work. With that being said the ramps had two width options I could have mounted them on and I am on the wider one.(changing the ramp position would be a major chore but could be done) I have an Audi, Mercedes SUV, the Cobra, F150 and soon to be C2S. They all fit with the ramps at the wider option. Had I used the narrower option the truck would not have worked. Just something for you to think about.
Another tip I used for the Cobra since I don't have much margin of error when pulling on the ramps was to mount mirrors on the front wall of the garage in front of the two ramps. I can see my tires in relation to the edge of the ramps when I am pulling on. Helps tremendously since I am dealing with +/- 1" margin of error. That would probably help with the MGB. I do have drip pans and they work great.
Oh and a tip for your construction. Get a high lift garage door opener that mounts to the front wall of the garage. You don't want a normal door opener hanging down in the middle of the garage getting in the way.
Anybody know of a lift that will work with 9'6 ceilings? I actually have 9'11 but with the Garage door up I lose 5 inches or so.....Sucks cause I had this garage built but had no intention of having a lift one day, might have to move....
Anybody know of a lift that will work with 9'6 ceilings? I actually have 9'11 but with the Garage door up I lose 5 inches or so.....Sucks cause I had this garage built but had no intention of having a lift one day, might have to move....
I have the same question. I am not sure exactly how high my ceilings are but they are about the same as yours. My garage is 86 years old - before they started making garages for car guys. I don't want to move. I love my old home. 18" of stone 360 degrees and oak rafters that can hold a heavy slate roof but tiny rooms and tiny closets and the garage doesn't quite work for my needs.
I was thinking that I may have to modify the garage door opening or mechanism to give me some more head room.
Learn from my boneheaded mistake. Ensure your garage ceiling is high enough where you wish to install the lift! I had to have them relocate the electrical for my future lift after realizing the sweet, segregated single bay on my 3 car garage had a dropped ceiling near the garage door.
I have 12' of height everywhere else, such a shame as I even had the builder do a nice dividing wall between the single bay and the double bay.
There aren't many people who happened to test or buy several brands of the same lift, so you will read a lot of "Buy this one - no, this one"... In truth I doubt there is much variation...
I've had several of whichever brand had a special going on, across several homes, and they have ALL been great...
As other said, plan where the outlet is vs. the lift motor, or weld the bracket for the motor elsewhere (which I had to do).
Be ready to move thing 2-3 times before you get the right location ;-)
Plan for more LED lights in your garage, a stacker lift KILLS space and light. Turns a bright garage into a cave...
Plan for a "high lift" garage door track and an extra garage door panel or 2... that' s a few more hundred $$$ but well worth not having to worry your garage door will hit your car !
Train yourself not to bang your head on it... (I never managed that bit)
Yeah, drip trays are plastic in between the rails, cost peanuts... Total cost for me installed and delivered and filled with oil was about $3000, best $ I ever spent !
Wish I could have one again but my ceiling is too low at th enew house. I'd say 10Ft is bare minimum unless you have 2 lowered 914s -)
It's an easy calculation, factor both cars height + the ramp thickness plus about 2" extra to unlock the lift (goes up to unlock before it goes down), plus another few inches of "comfort" because it's hard to judge from below when to stop raising the car... (old tennis ball trick works) Don't fudge too much unless you want a 911 shapes hole in your ceiling ;-)
Anybody know of a lift that will work with 9'6 ceilings? I actually have 9'11 but with the Garage door up I lose 5 inches or so.....Sucks cause I had this garage built but had no intention of having a lift one day, might have to move....
With that being said you need to figure how tall your car is and the total height of the lift is above the level of the ramp.
For example. I have the HD9-XW - it list the height as 100" - That is the height to the top of the 4 corner posts. The bolt that holds the cables sticks up beyond that approximately 1.5" for a total height of 101.5". The ramps are below the top of the corner posts in their highest position. When the lift is at its highest position the surface of the ramp the car sits on is 85" above the ground. In that case to figure the total height you would need you would need 85" + the height of whatever car you are putting up top.
Of course you can stop the lift at numerous positions on the way up. I think my lift has about 14 positions on the way up I could park it on. In my case I have the extra tall and extra wide one because my ceilings are 14' and I park my F150 under it. To have a margin or error for a total height you need you could just measure the height of the car on the bottom, add the height of the car on the top to that and then add say 12-16" If the height of the ceiling is above that you would be good to go. That accounts for both cars and enough room (the 12-16") to account for the thickness of the ramps and how high above the bottom car the ramps will be positioned when you stop it on the way up. From the roof of my truck to the top of the ramp the car sits directly on it is 12" in my case.
One other thing to keep in mind. The way the secondary up locks work on the bendpak you need to raise the lift 1-2" off of the stops it rests on to release the secondary lock before you can lower it. Whatever final total height you come up with when the lift is parked you cant be within an 1-2" of the ceiling because you need to allow for that raising temporarily prior to lowering.


 12-06-2017, 03:50 AM