sport design mirror retro-fit; my experience
#1
I am posting this for those who may find the information useful. If this has been discussed prior, I could not find it, and I would like to compare experiences.
I recently completed this retrofit from a kit purchased from a dealer on my 2014 C2S. Here are the high lights, heads up, and suggestions:
remove the door panels: it is quick and easy, and there is no way route the new wiring and seat the grommet in the door frame without doing this. It may not be impossible to do this with out removing the panel, but if it is, it will take much, much more time.
The non SD wiring is too short, it will work, but the defroster wires will be difficult to connect, and there is more risk of breaking the tabs off.
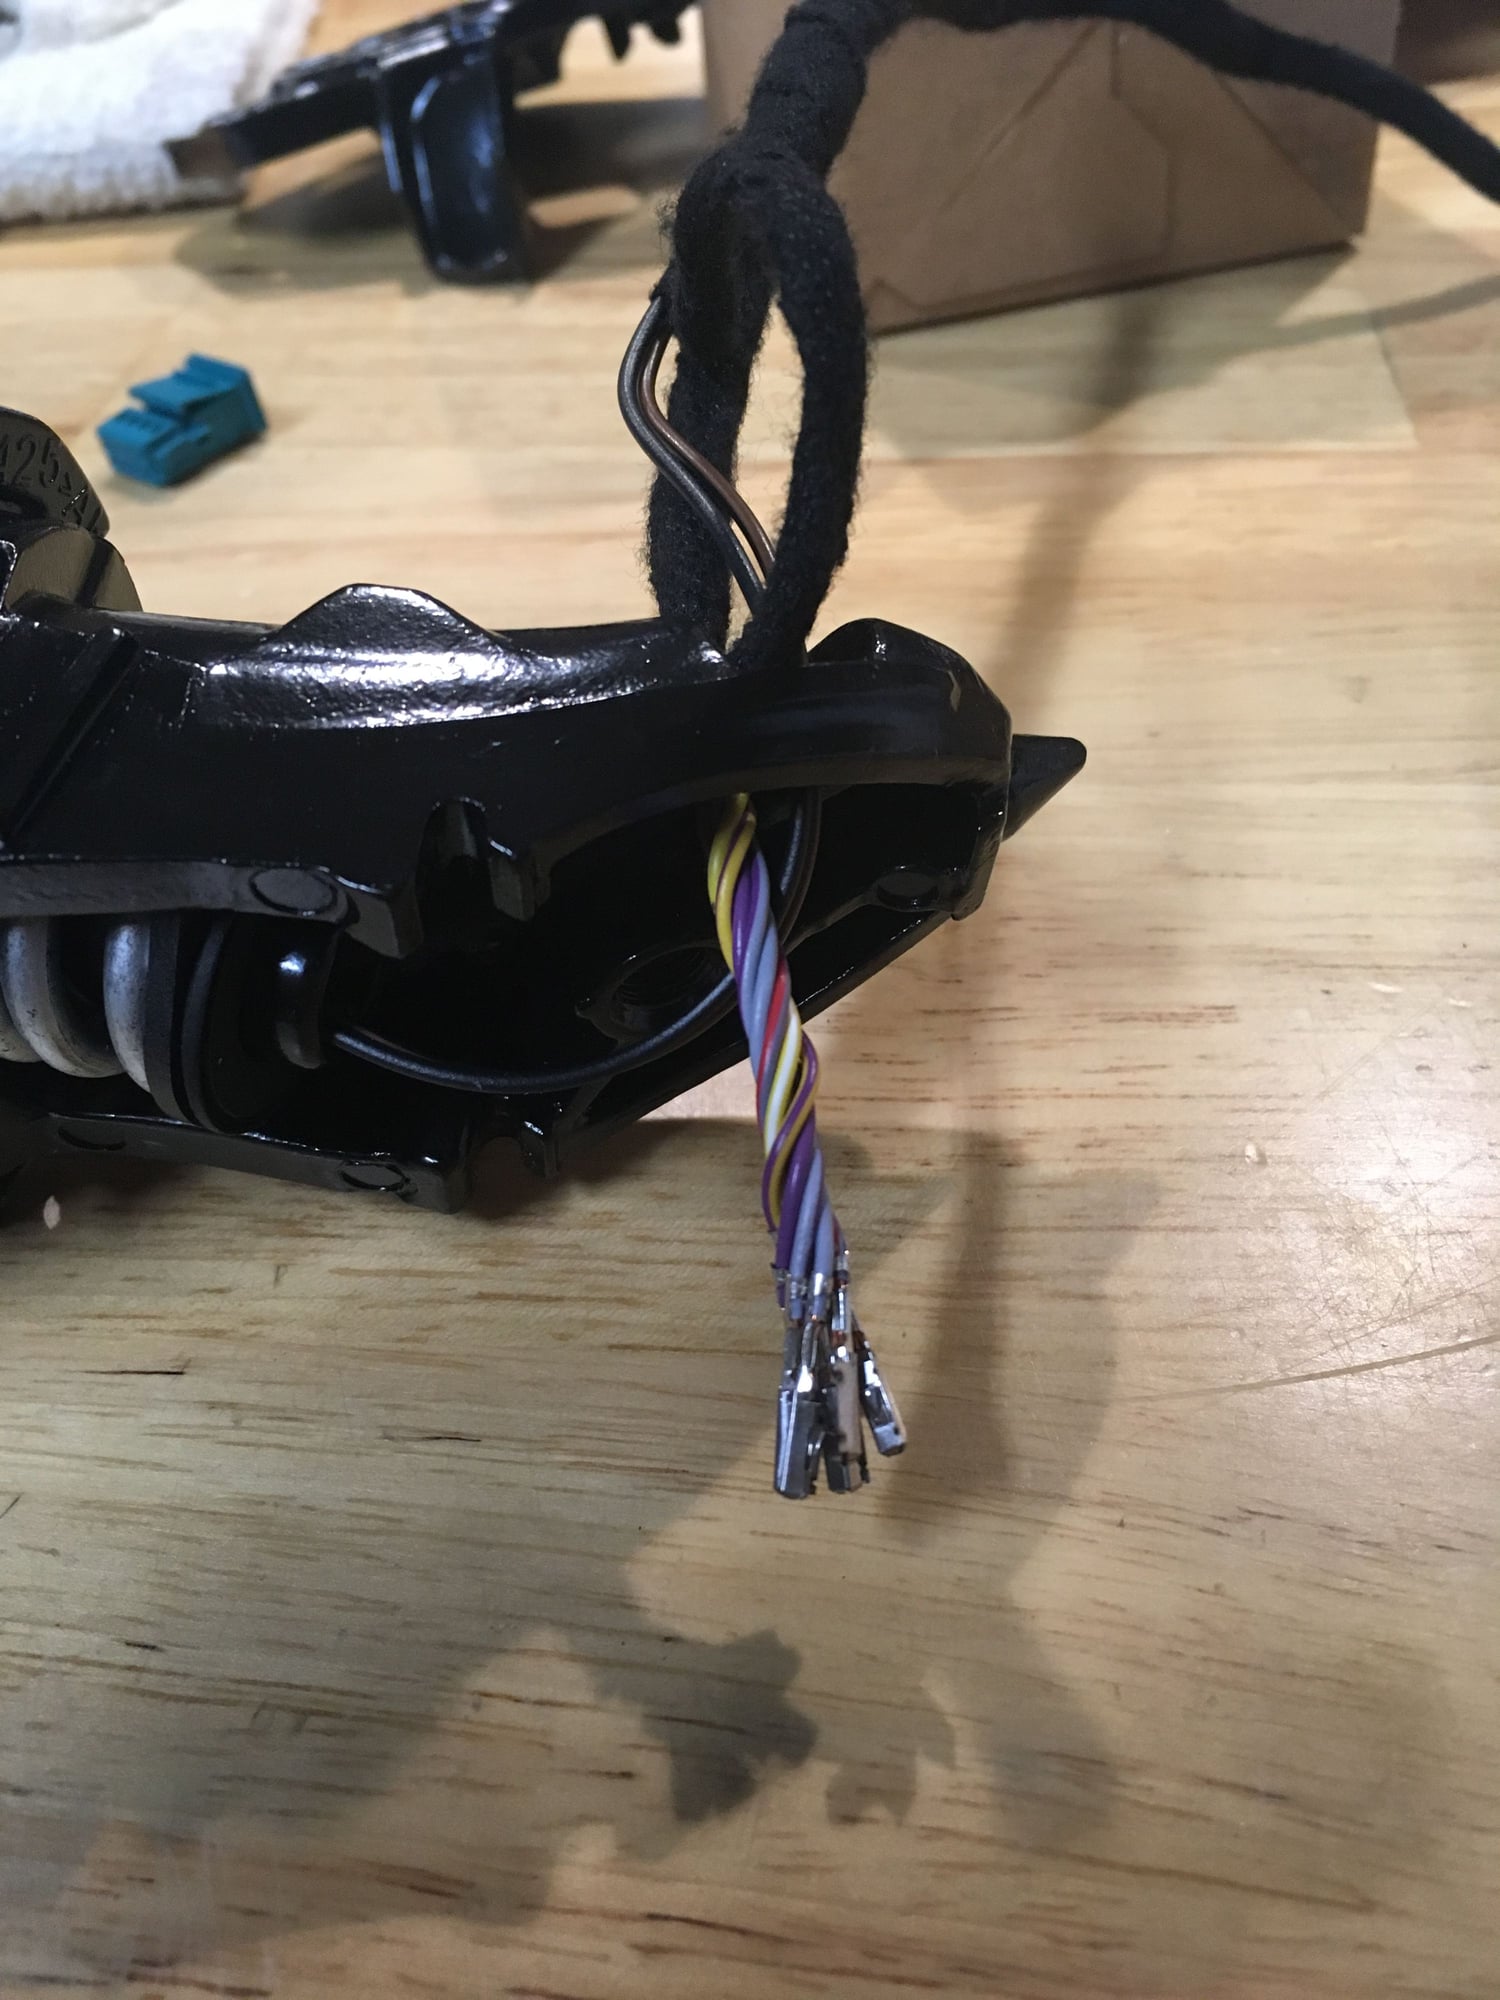
Whether or not you use the wiring in the "kit", or the existing wiring harness, you will need to disconnect the 7 wires (for memory motors, non memory is different) by carefully releasing each wire from the connector. This is necessary because all of the wires (defroster, motor, and "anti-dazzle") must pass through the center of the metal base; there is no other way to do this. Passing the seven wires with delicate terminals is not easy. The connector for the anti-dazzle goes first, then the defroster wires. Next, twist the motor wires tightly and carefully pass them into the proximal hole, retract the anti-dazzle connector so you can just grab it, and feed the motor wires as you with draw the anti dazzle connector. Once the motor wires are free, placing them back into the connector is very easy.
I have not read anywhere that to do this, you must remove the motor wiring connector. The base should have come with the wiring in place. Otherwise, this is not a difficult DIY.
Credit to the video of the carbon replacement housing on a turbo S, the sequence and machine thread vs course thread screw location was very helpful; thanks to the author!!
#2
forgot to mention; to feed the wiring (from the mirror), the speaker must be removed and the window up. this leaves plenty of room to reach up and guide the wiring and connector/grommet and properly secure it in place. I can try to post some pics if there is interest to those that are thinking about a relatively inexpensive, very cool option upgrade. this is my payback for all of the info here that helped me DIY sport exhaust upgrade, and info on sport mirrors��
#5
Rennlist Member
Thanks for sharing . Curious: You say inexpensive, but you had to buy and paint them too, right? Would love to do this but by my math cost is too high.
$750 in parts
$400 to paint
Several hours install @ 150 per (non-DIY)
Worth 1600 is the question...
$750 in parts
$400 to paint
Several hours install @ 150 per (non-DIY)
Worth 1600 is the question...
#6
It should not be difficult to find a skilled painter to do it for 100 or less, ball park. The housings come primed, there is no prep work other than chemical preparation (so I was told, I did not paint them). Your labor is free. 900 in kit and paint costs or less is realistic, I think.
For me the cost was worth it, I love the look. I agree, if you had a shop do it, it would be expensive, but as a DIY that is not difficult (except for the connector issue), I would regard it as relatively inexpensive. I am open to questions or comments.
For me the cost was worth it, I love the look. I agree, if you had a shop do it, it would be expensive, but as a DIY that is not difficult (except for the connector issue), I would regard it as relatively inexpensive. I am open to questions or comments.


