When you click on links to various merchants on this site and make a purchase, this can result in this site earning a commission. Affiliate programs and affiliations include, but are not limited to, the eBay Partner Network.
Below is Competition Motorsport's how-to for installing, washing, or checking the intake air filters on the 991 GT3 and GT3RS. It involves removing the rear bumper, so you can file it away for any other job that requires doing that first (exhaust is a lot easier with the bumper off). As you'll see, it isn't difficult or particularly time consuming. Read through the instructions first, then tackle the job.
TIME REQUIRED: 45-75 min TOOLS NEEDED: T20, T25 & T30 torx drivers
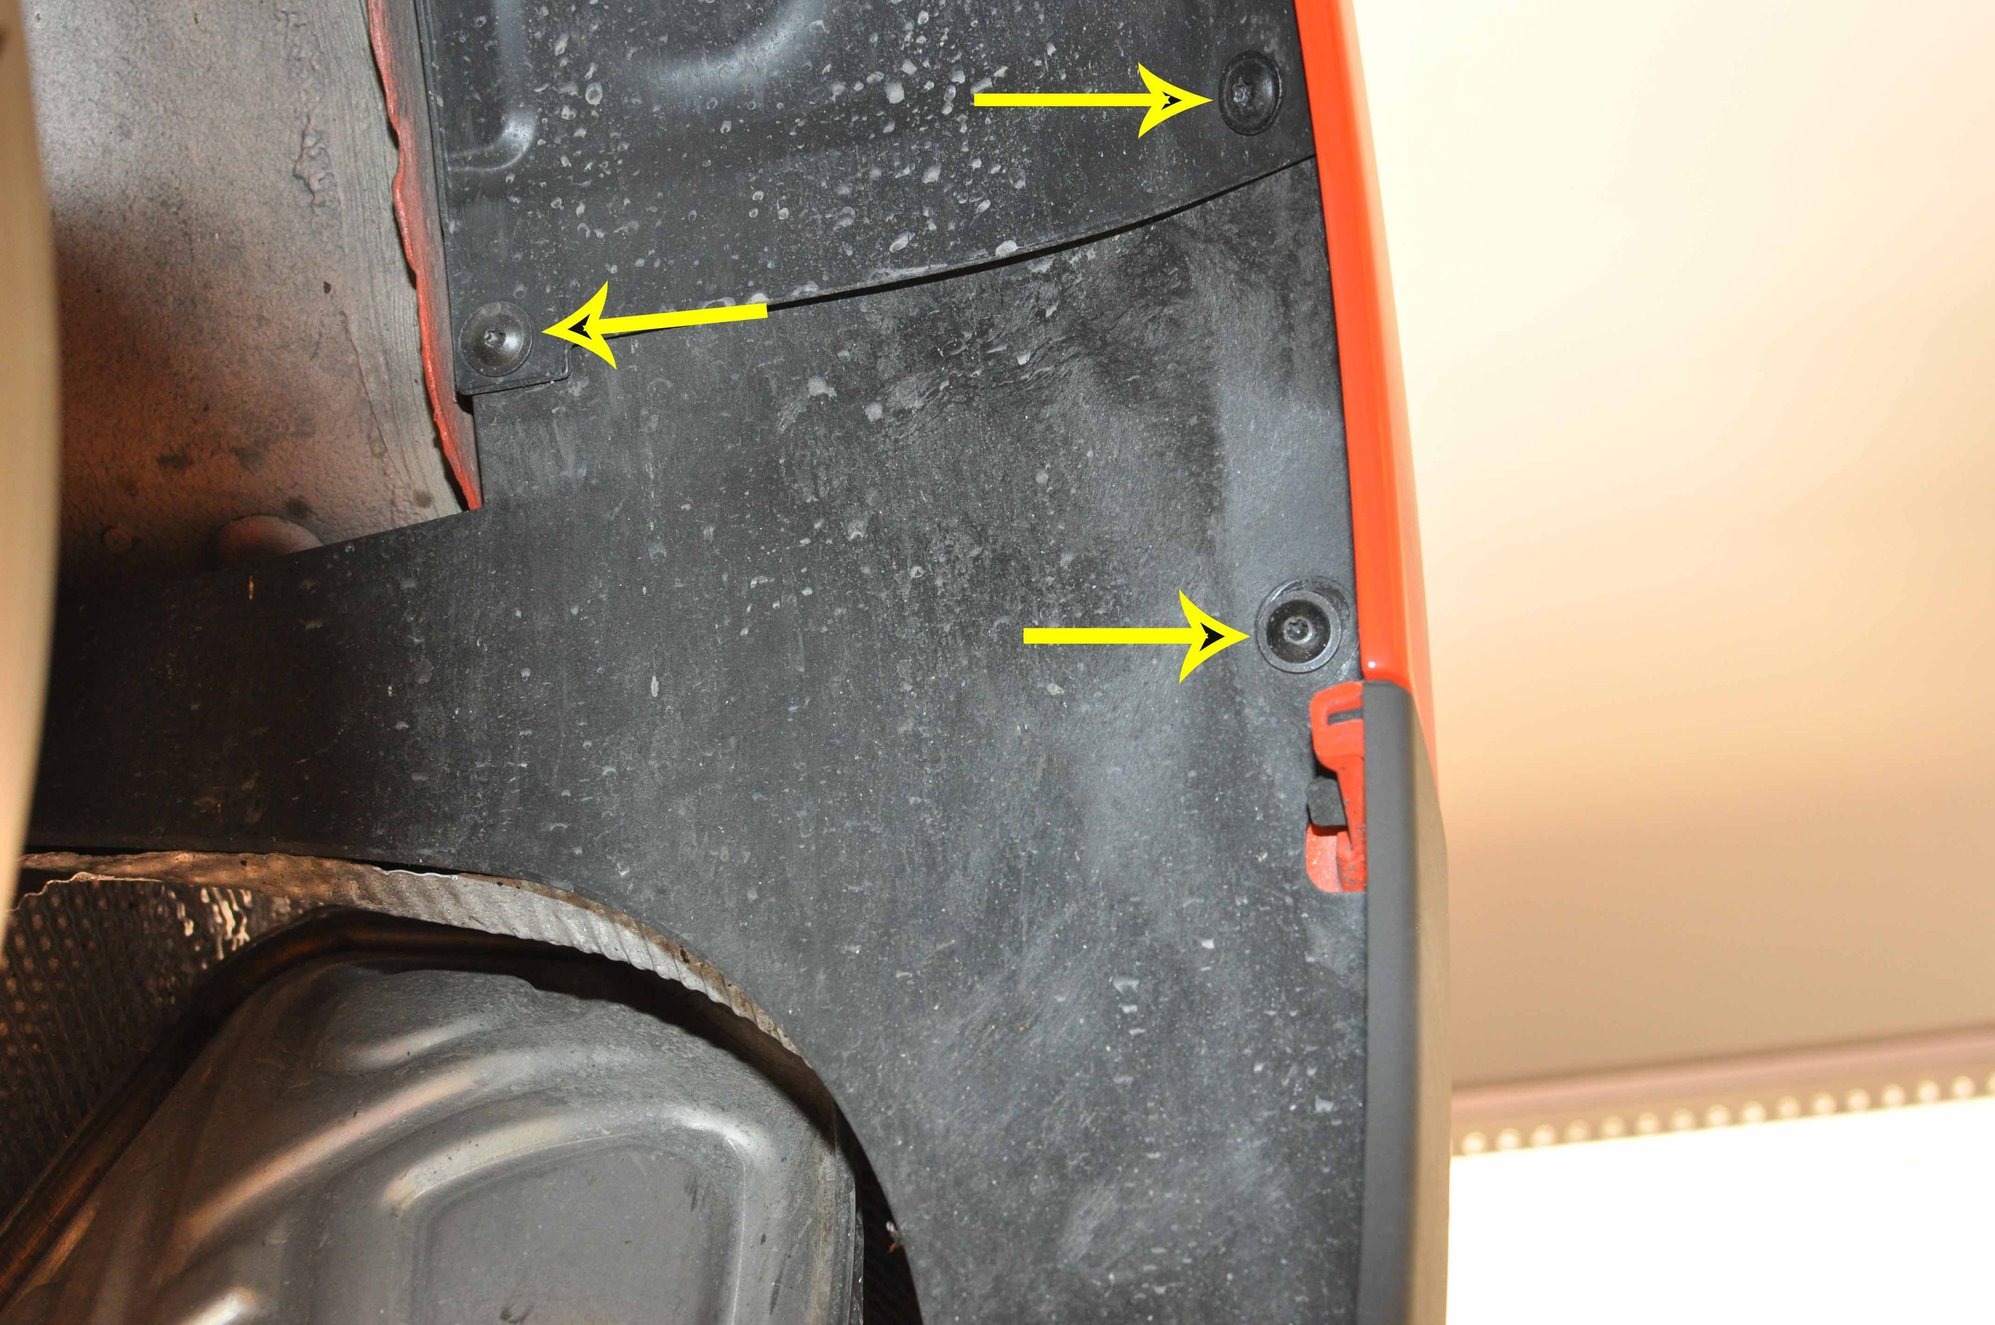
STEP ONE: REMOVE SCREWS IN WHEEL ARCHES
There are five Torx screws within each wheel well, four as pictured below plus a fifth hidden beneath the black plastic wheel well liner (you can see it once the other five are removed). The top two (in the first photo below) are T25, the rest are T30.
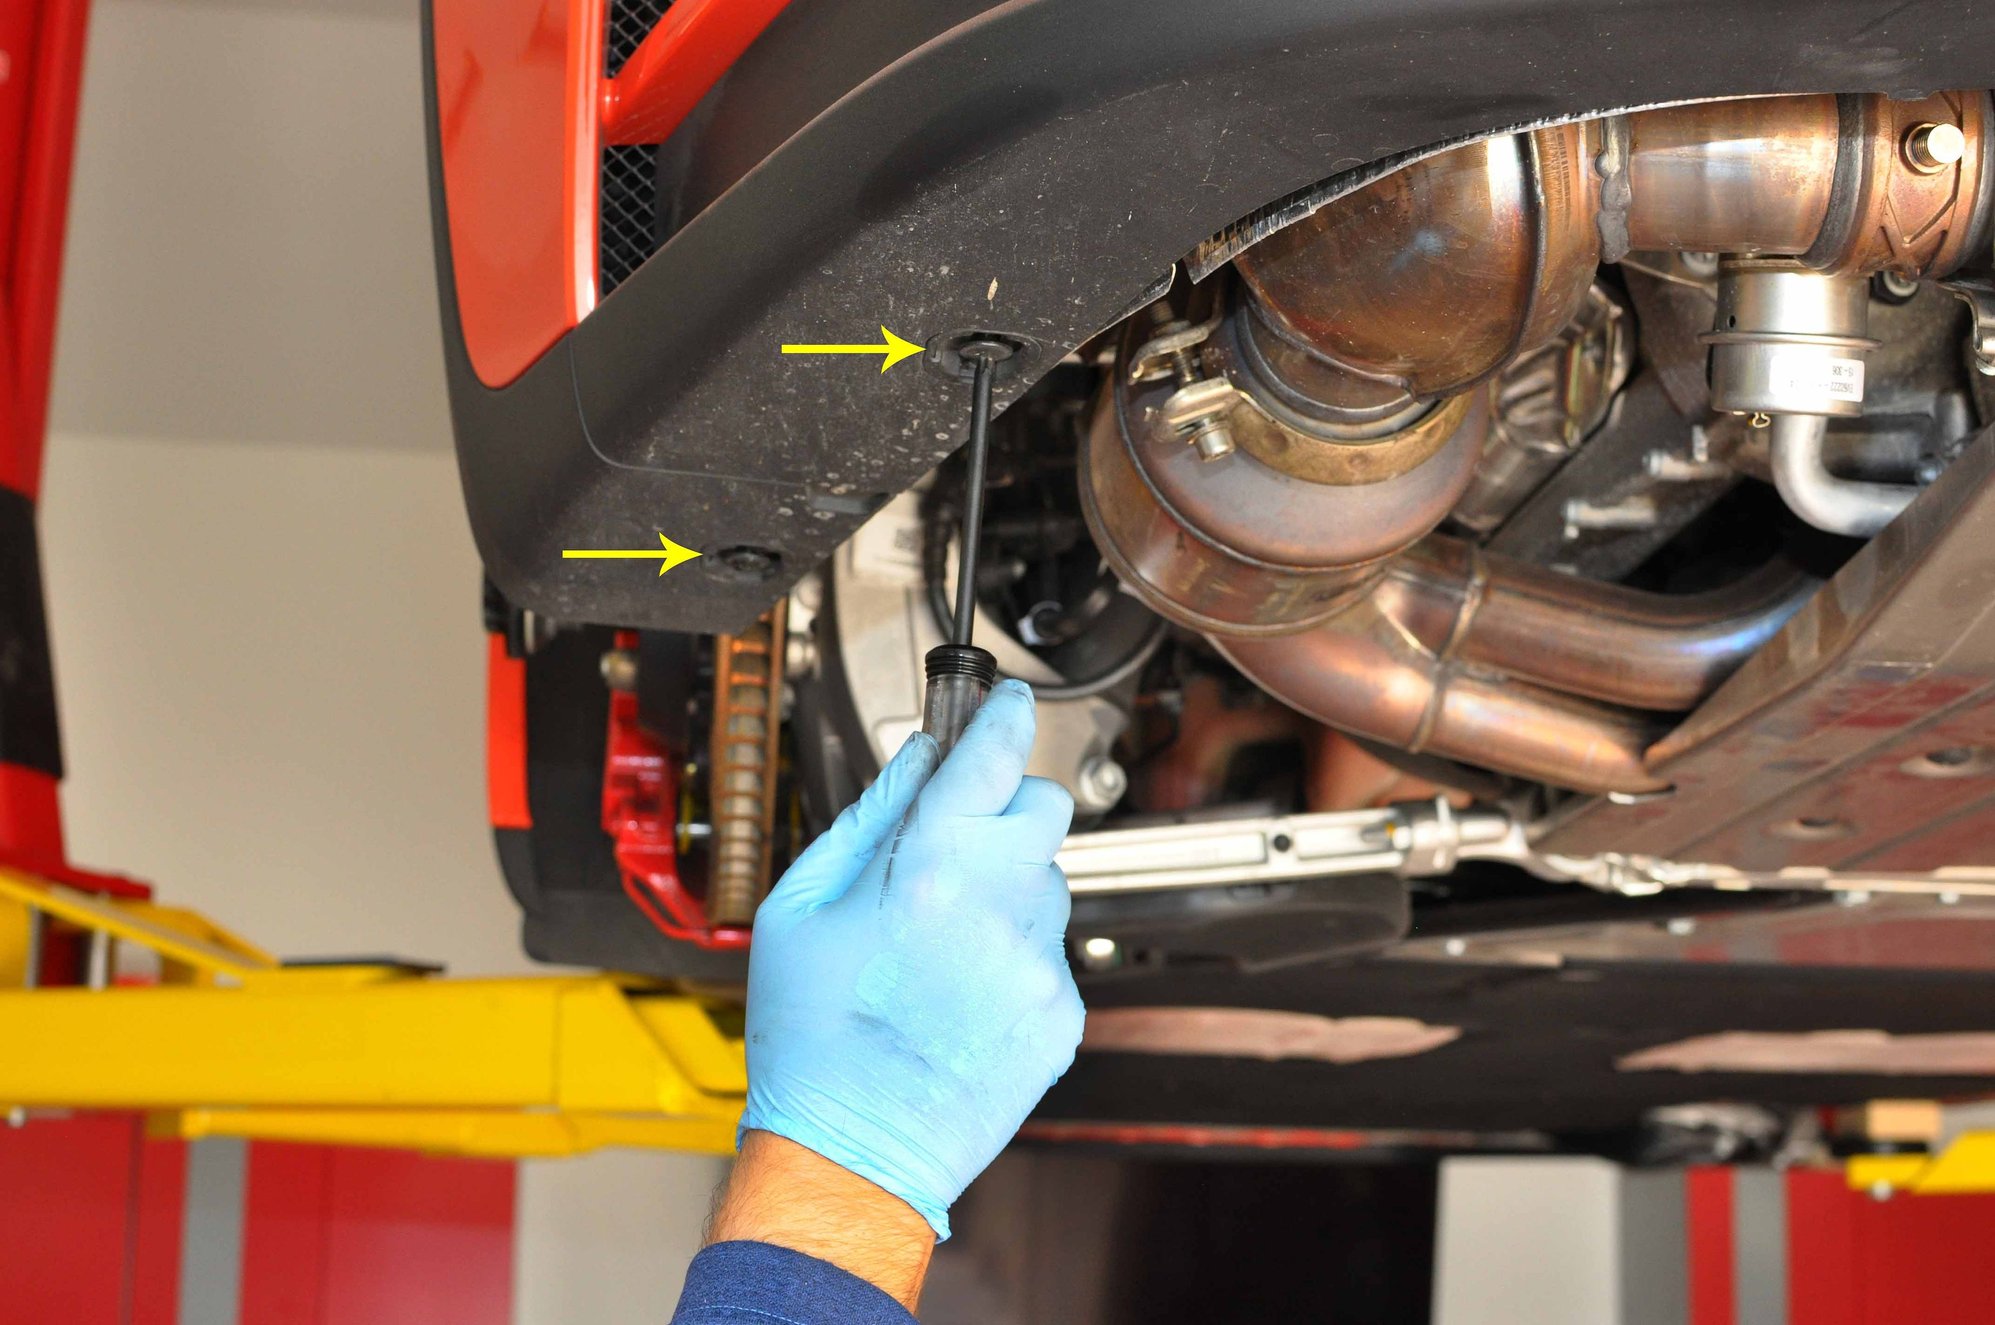
Remove the six T30 screws (two on each side of the bumper, two on either side of the exhaust outlet) on the bottom of the bumper.
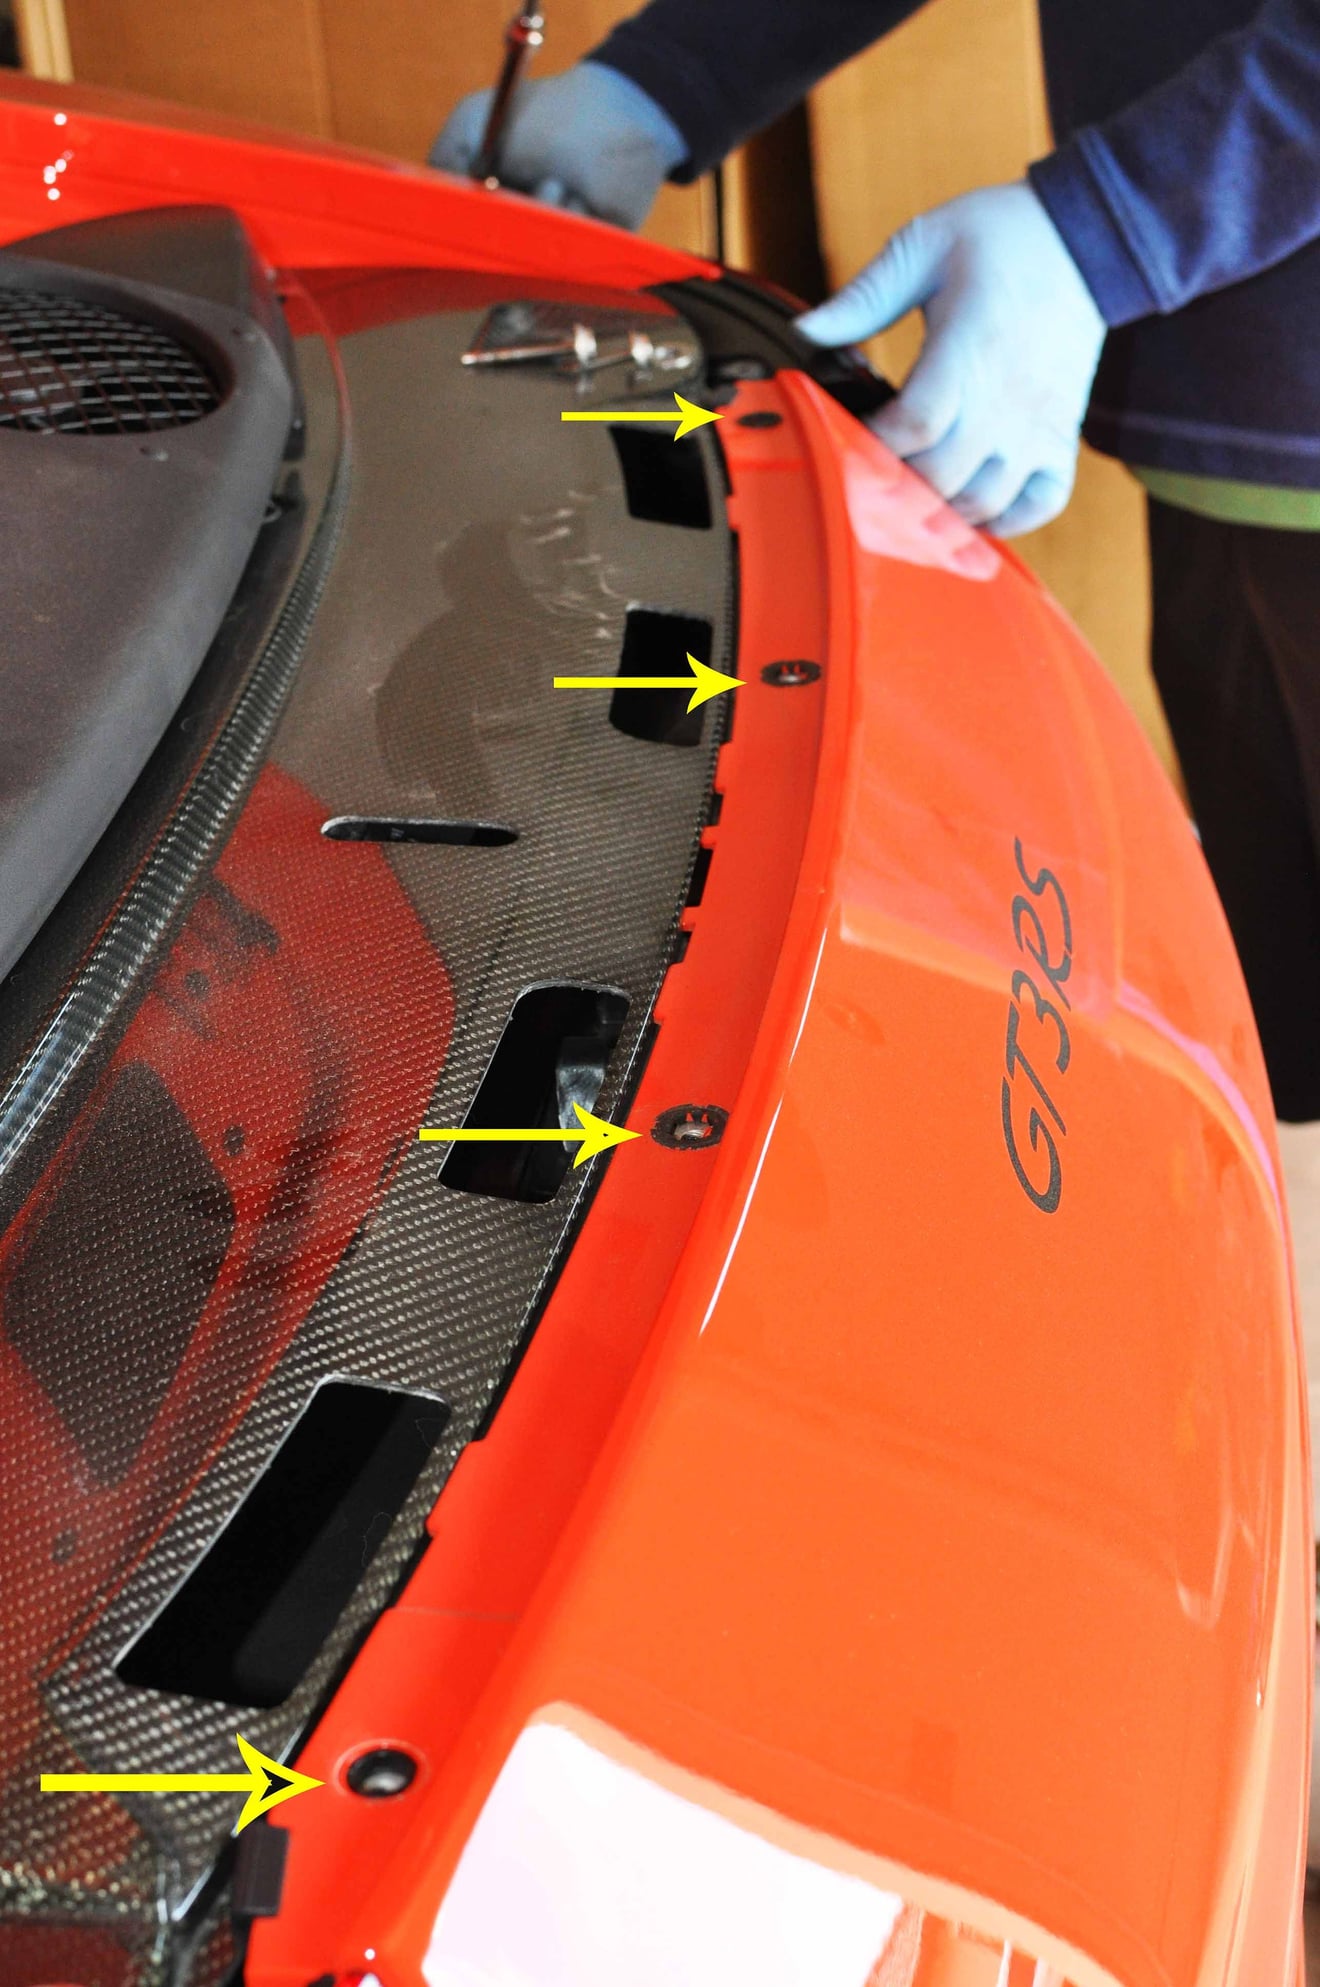
STEP THREE: REMOVE SCREWS ON BUMPER TOP AND BRAKE LIGHTS
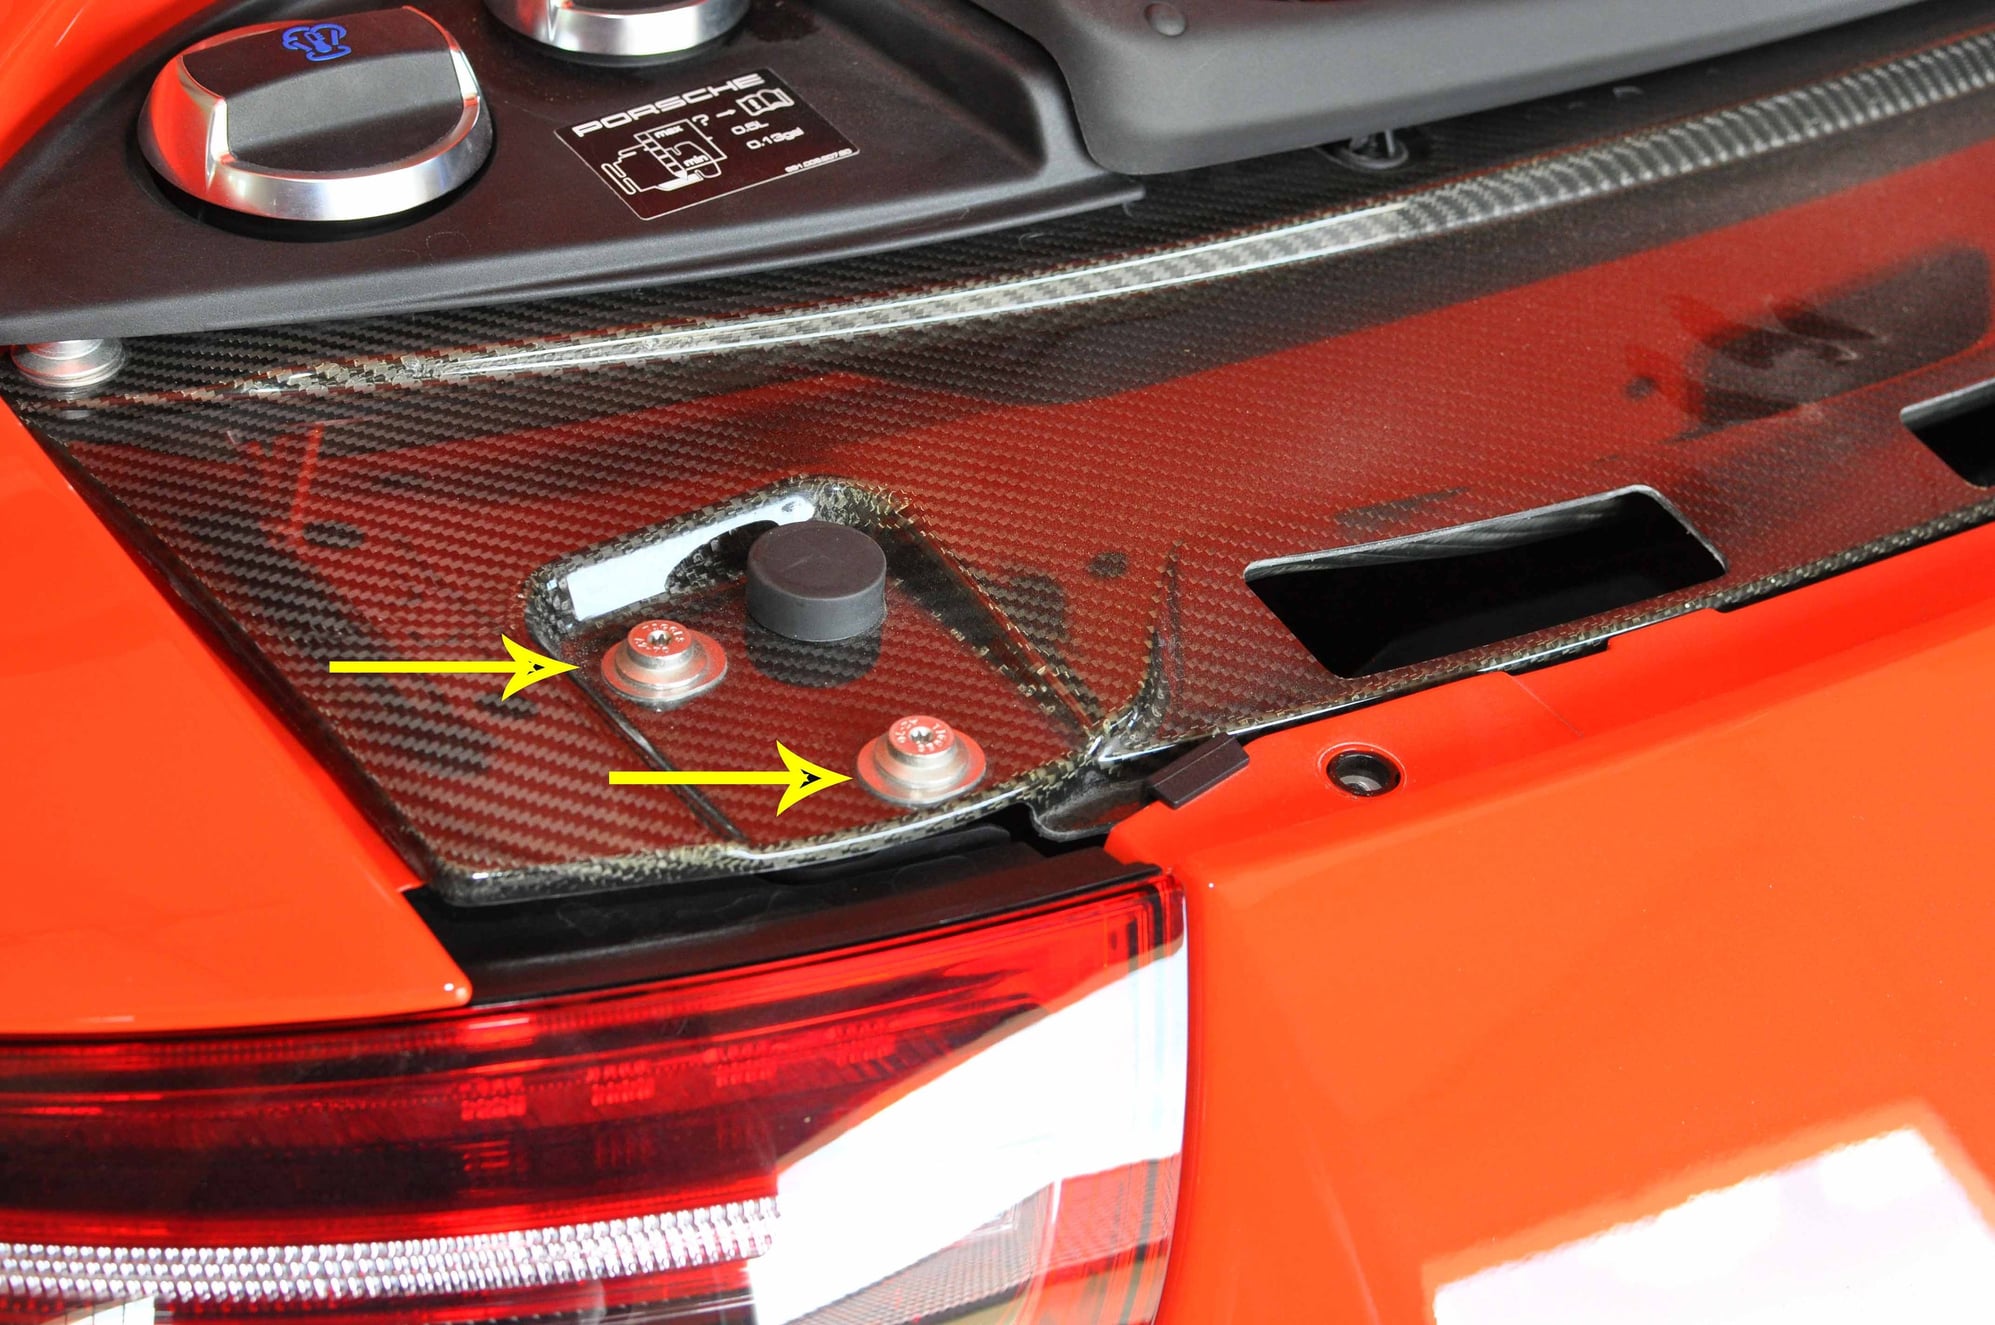
Open the engine cover, and you'll see four black T30 screws across the top of the bumper. Remove all four.
Then remove the four silver T25 screws, two on each side, above the brake lights -- these hold the brake lights on. Once removed (they are long), the brake lights will just pull out. Be careful, though, as they're connected to wiring. Unplug the wiring connector on each light and set the lights aside.
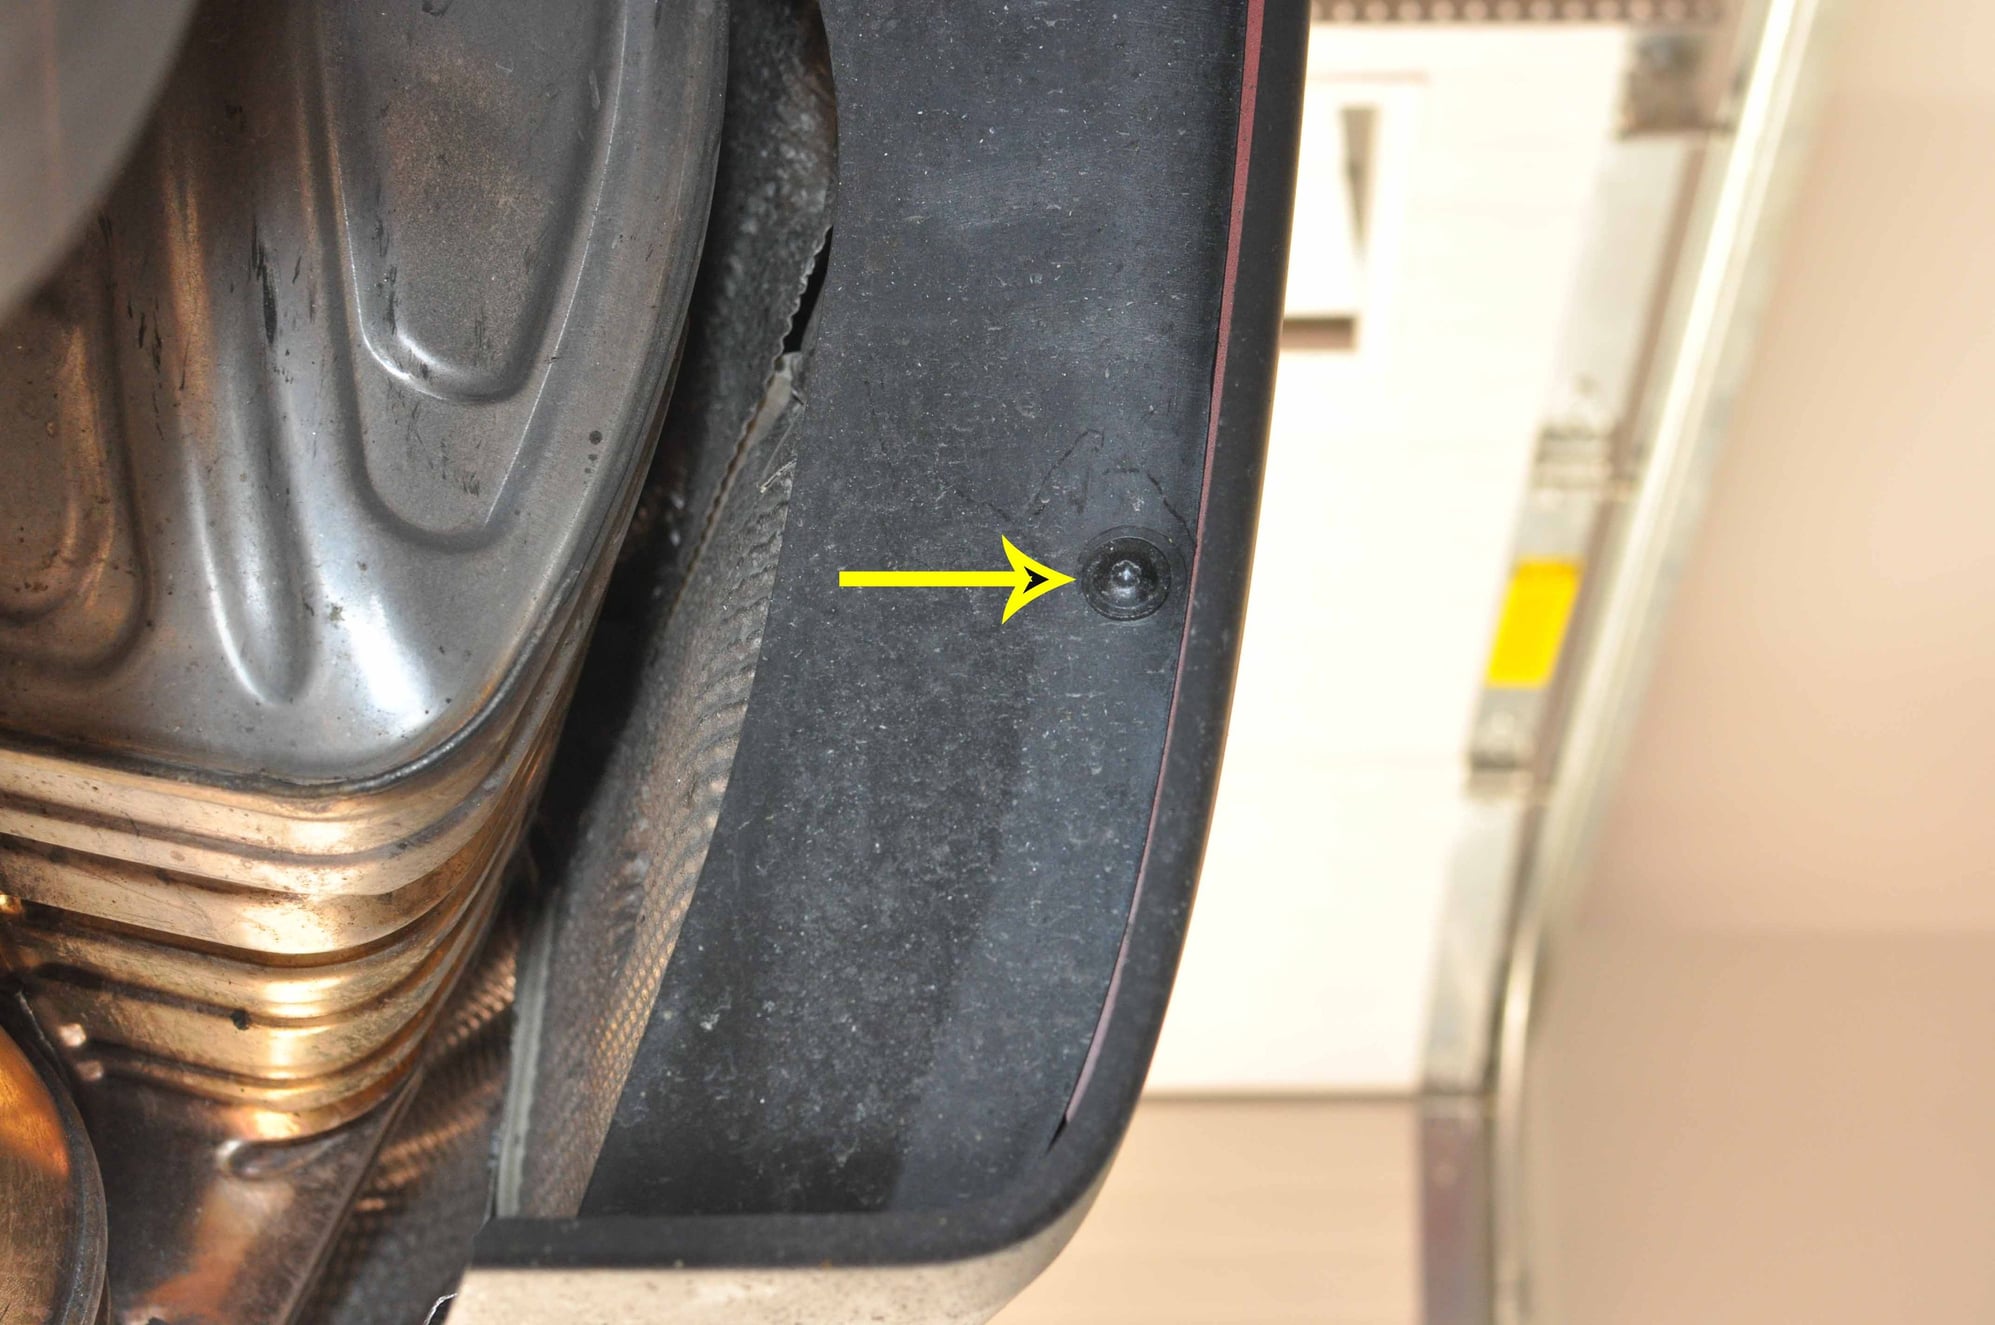
Remove the single silver T30 screw that was hidden by the tail light on each side of the car. (Sorry, no picture of it but you can't miss it.)
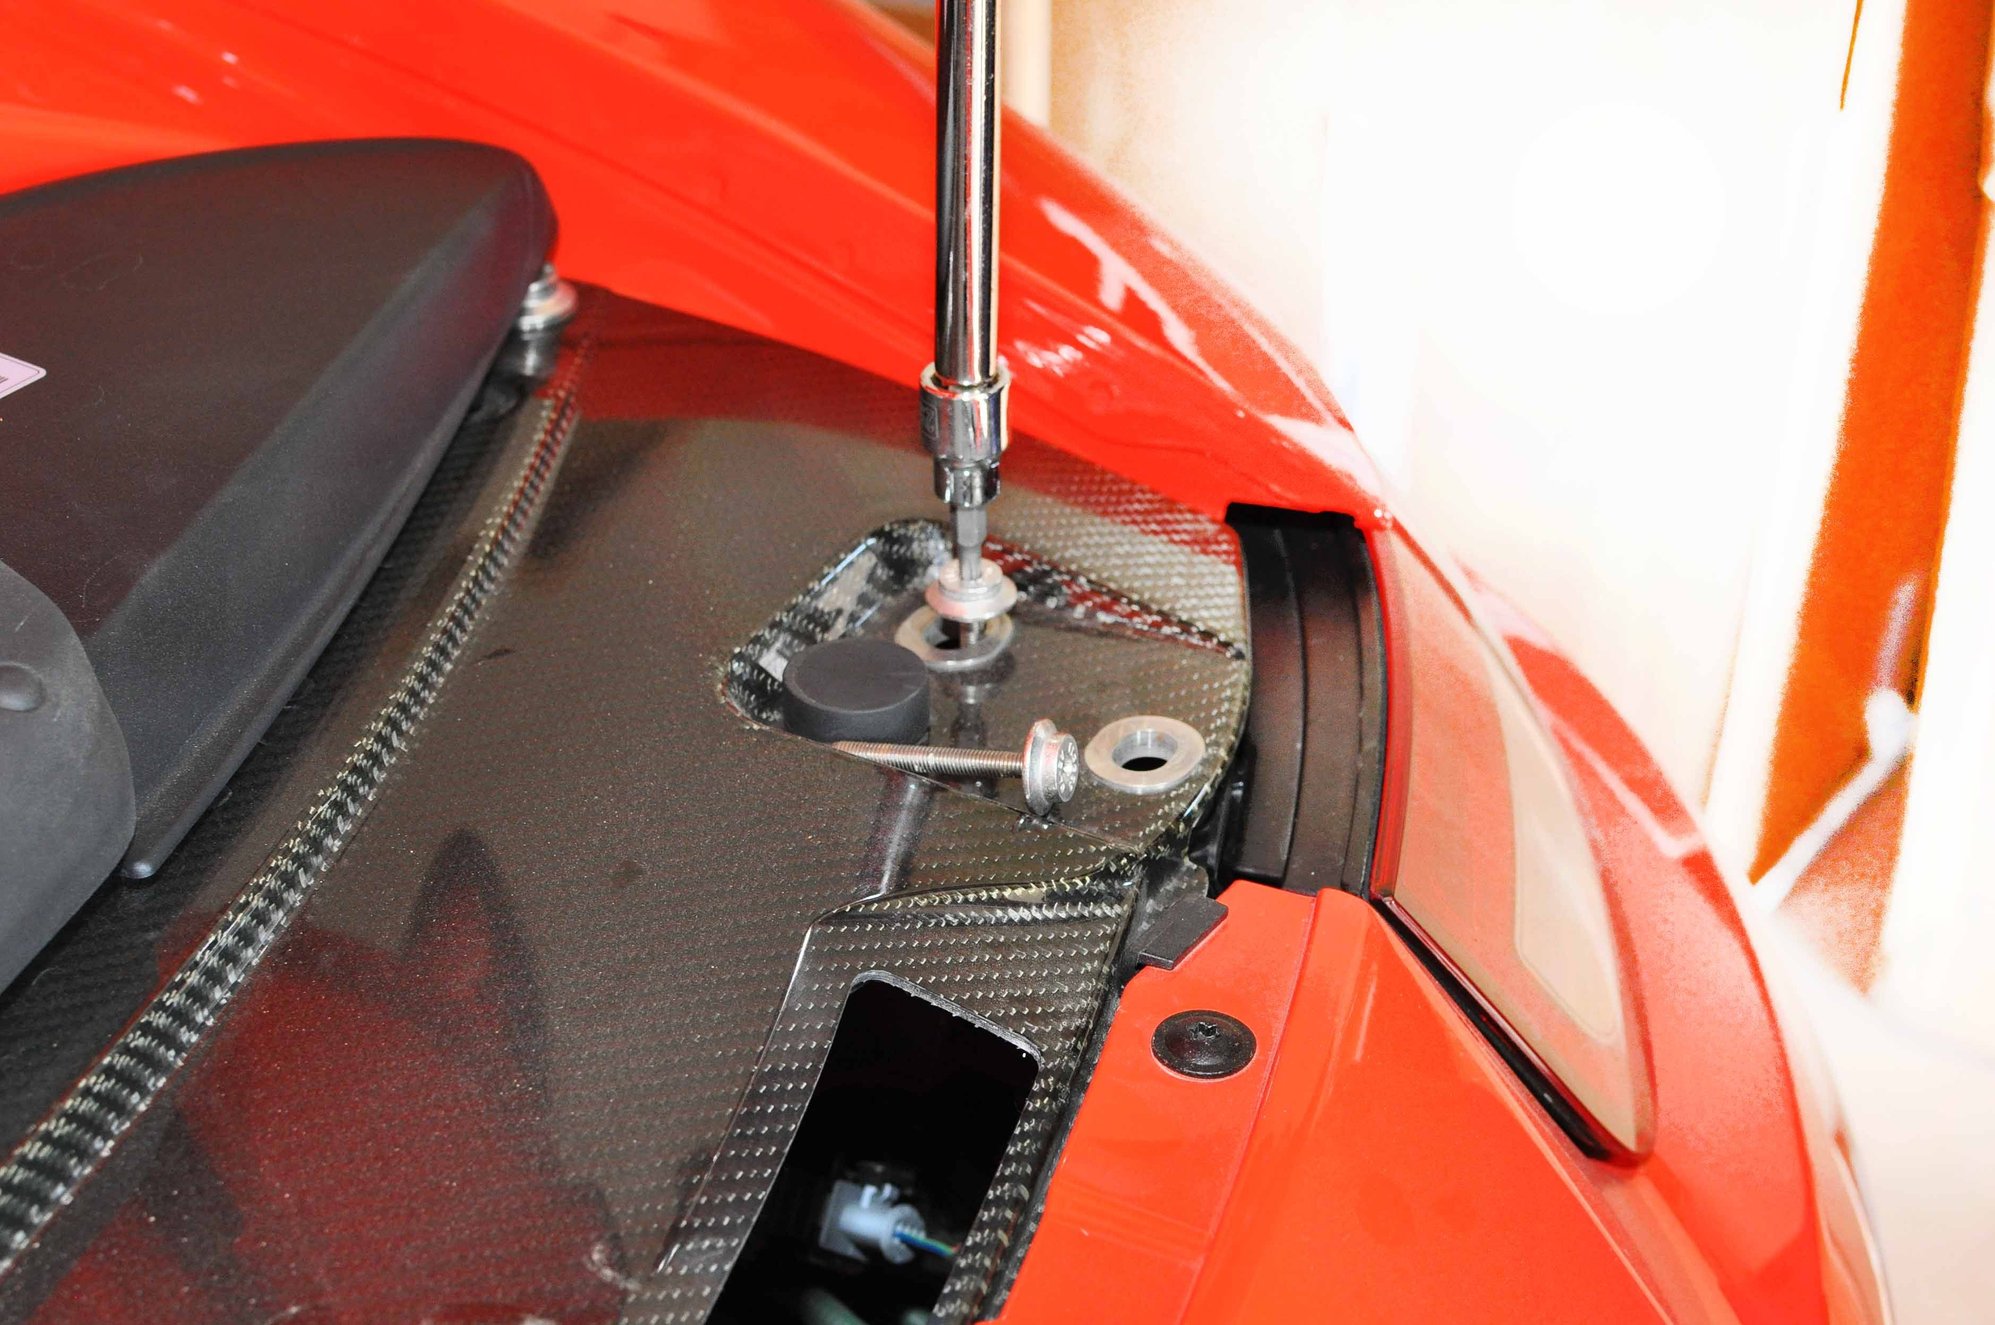
STEP SEVEN: UNPLUG LICENSE PLATE LAMP WIRE AND REMOVE BUMPER
Carefully pull the whole bumper rearward just enough to expose the wire plug that feeds the license plate lamps. (The plug is attached to the inside top of the bumper on the left rear.) Pull in the direction of the orange arrow in the photo.
Now get ahold of the bumper with both hands (or all four if you are lucky and have a buddy helping you) and gently pull it rearward. It should come off fairly easily; if it doesn't, something may still be connected or a screw missed. Set it somewhere safe so it doesn't get scratched or kicked over.
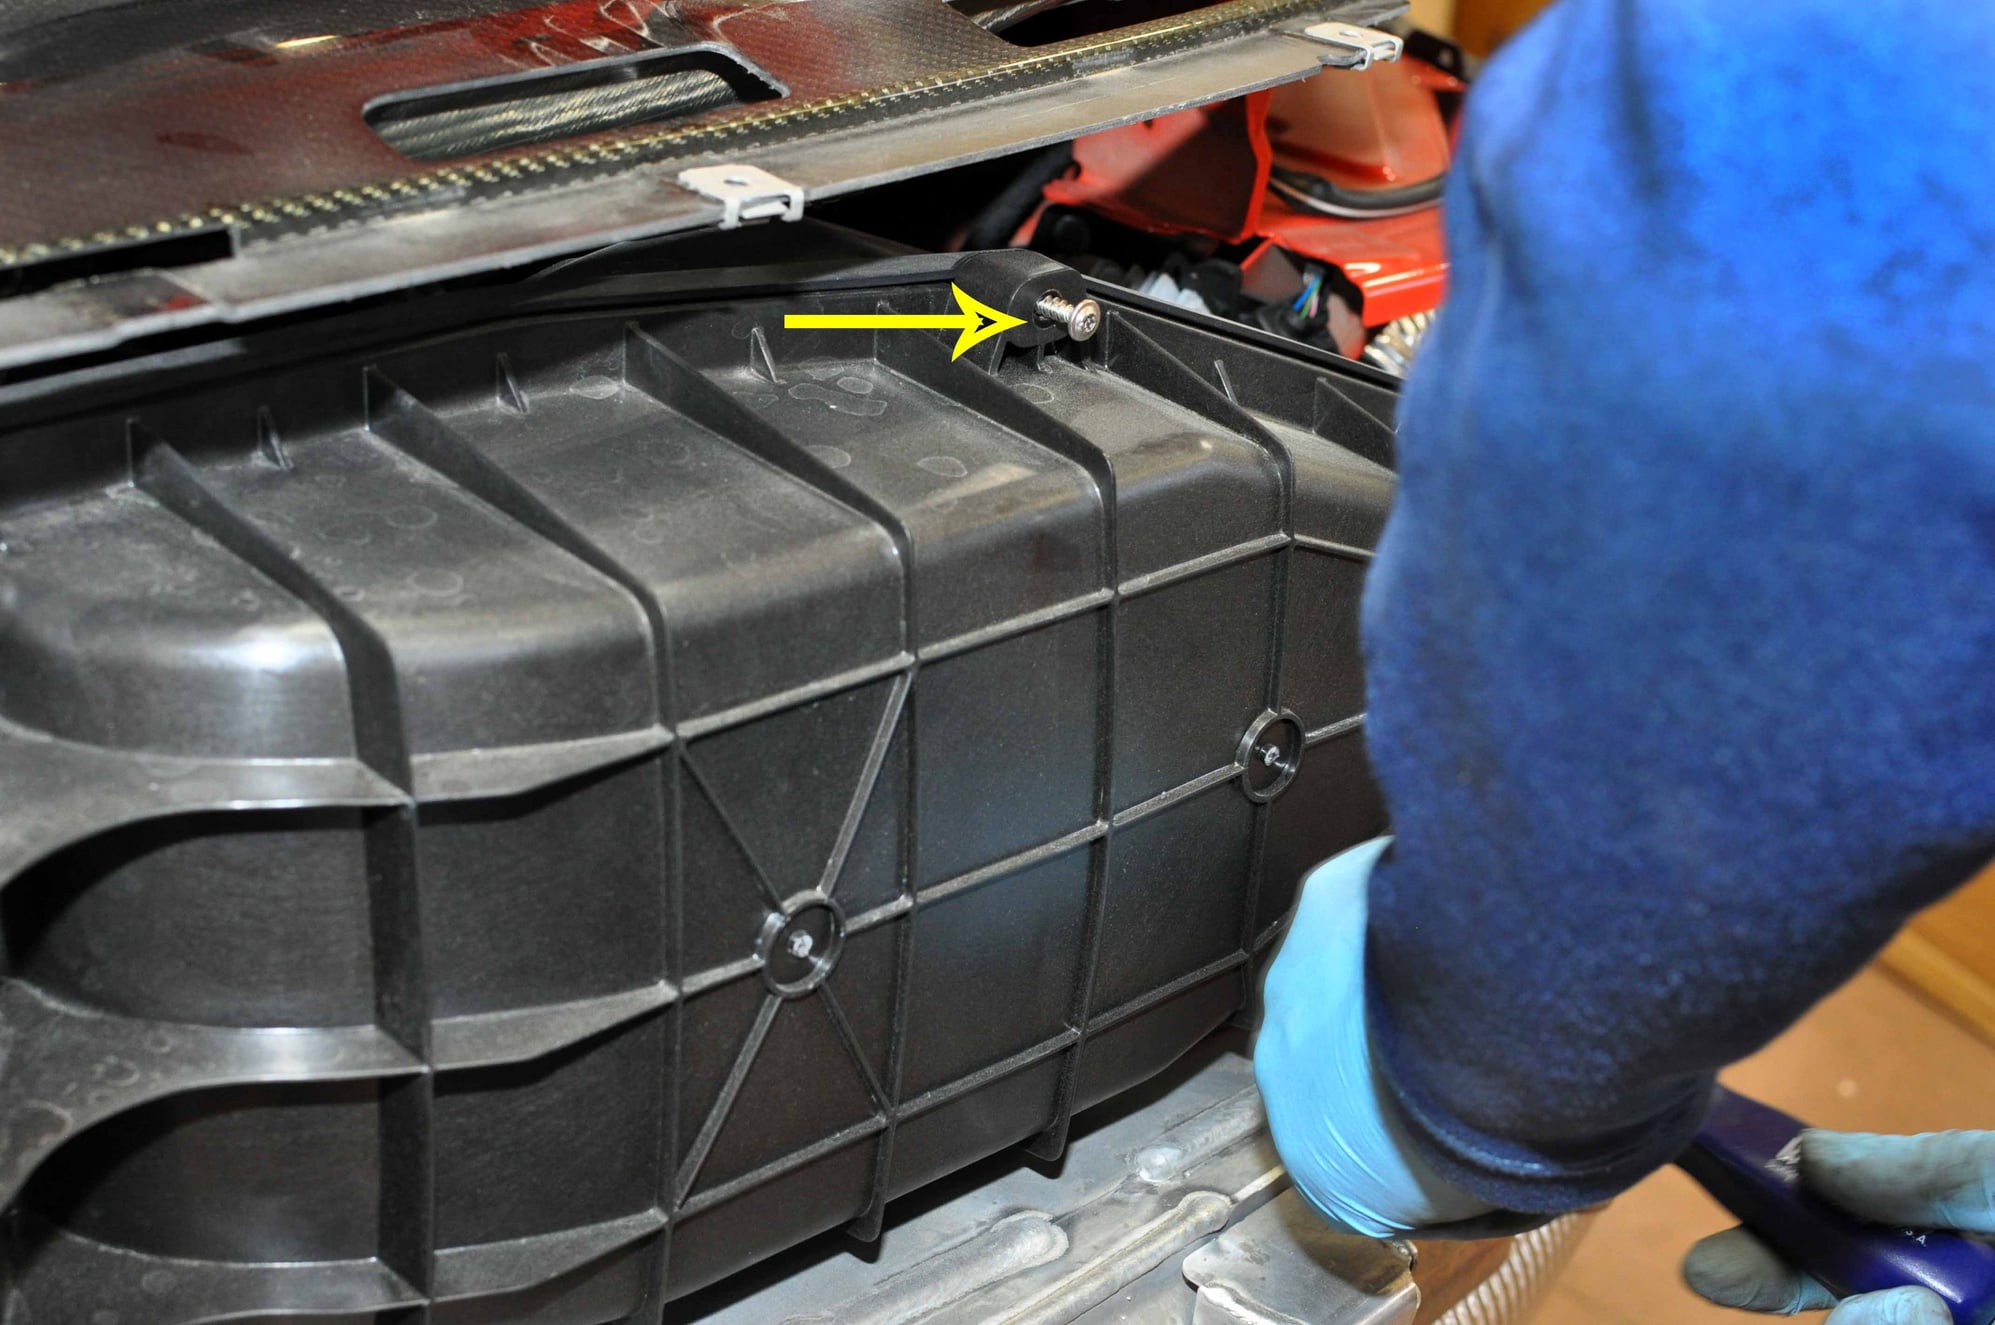
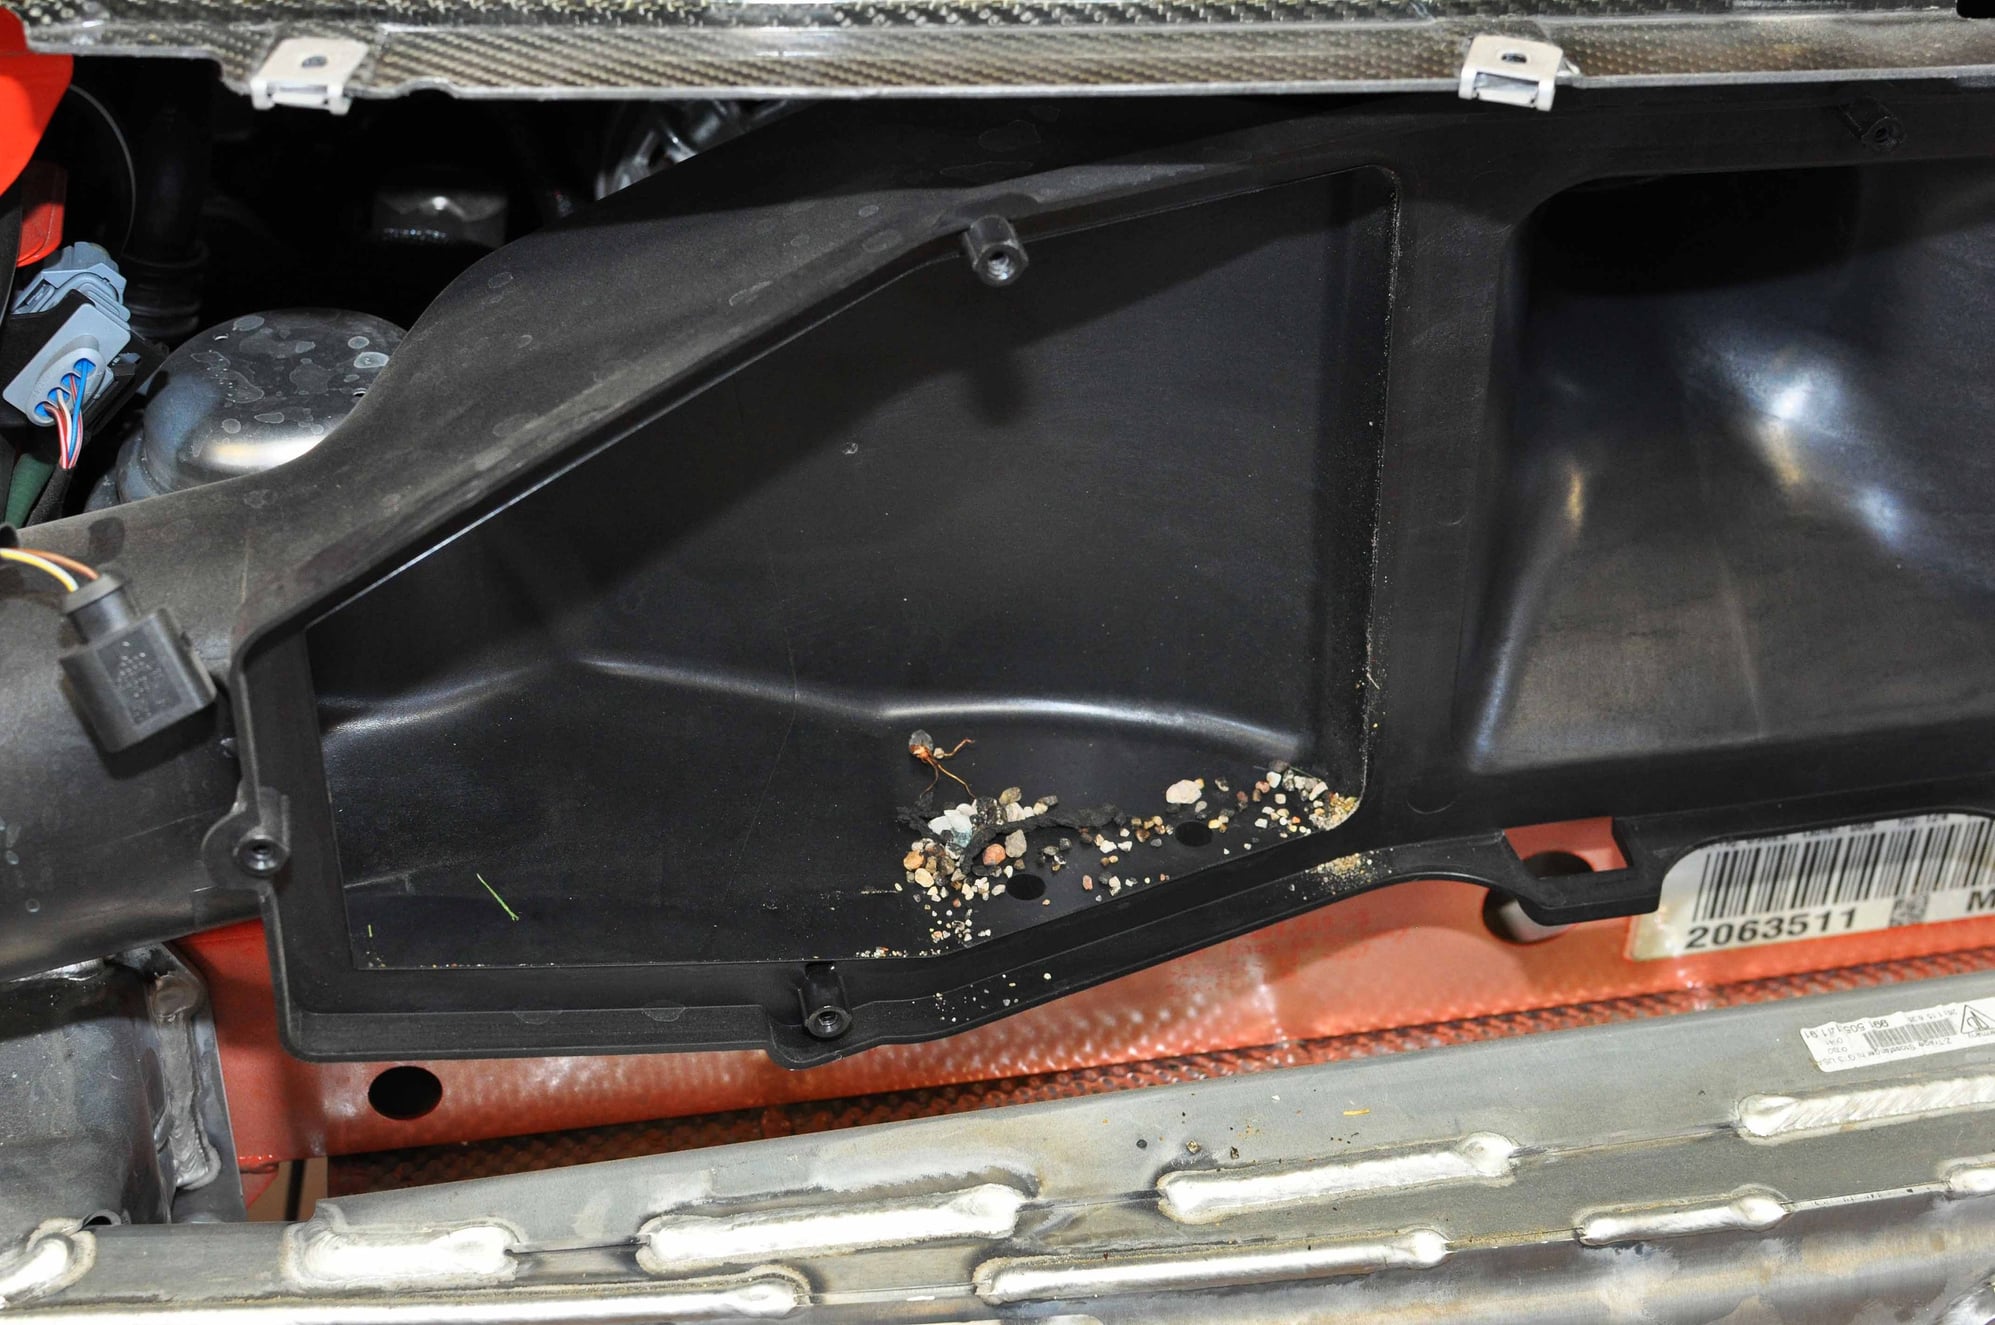
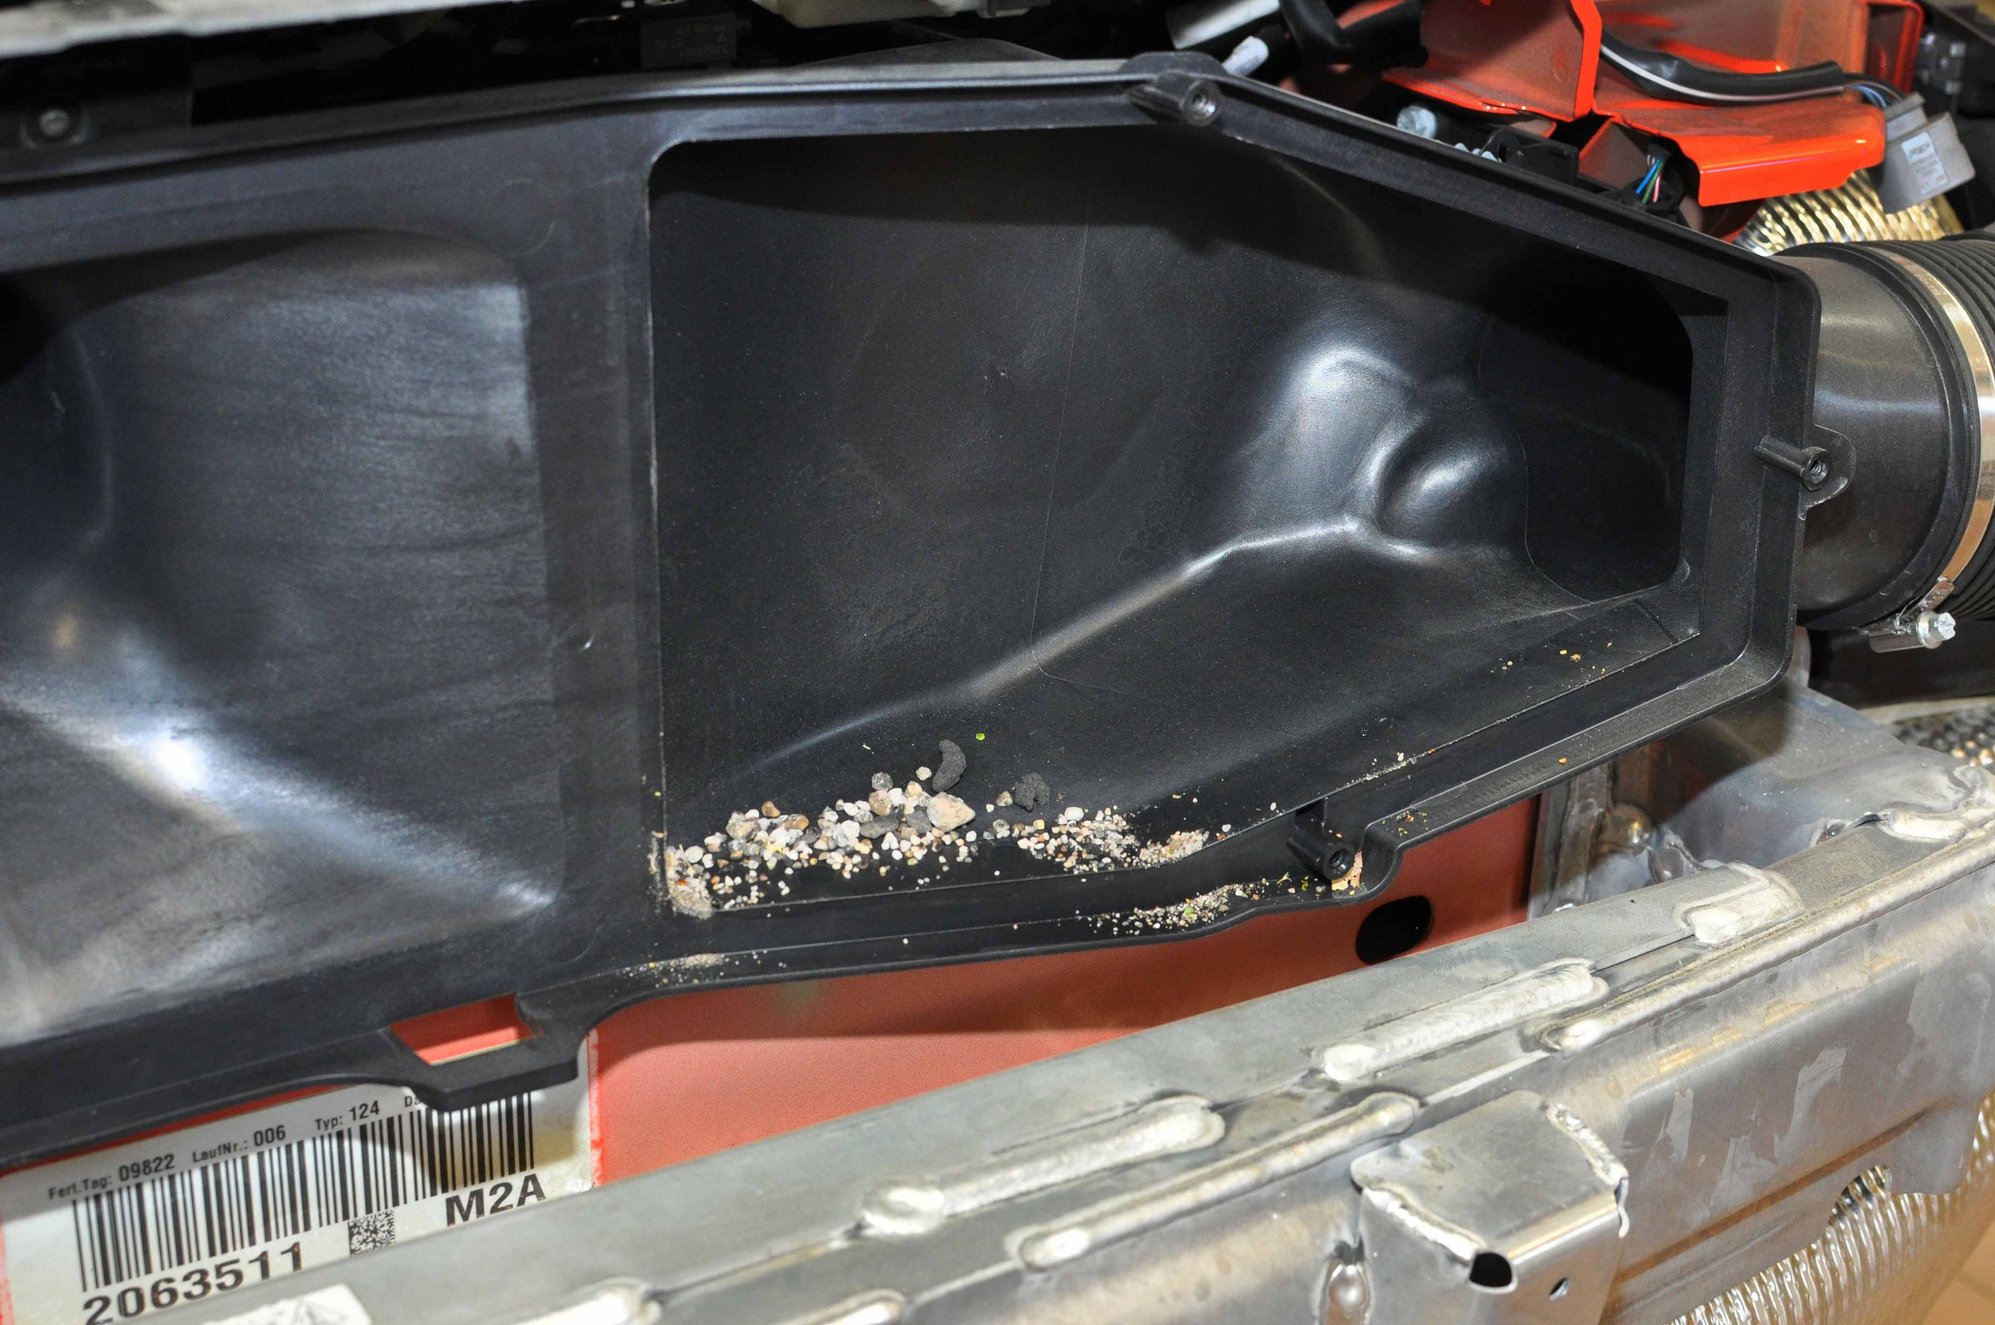
Unscrew the T20 screws that hold the air filter housing to the air intakes. There are fewer screws on the bottom than the top; the bottom has two tabs that fit into the two slots you see in the photos below. Once the screws are all out, hinge the housing backwards from the top and then pull up to remove it, revealing the air filters.
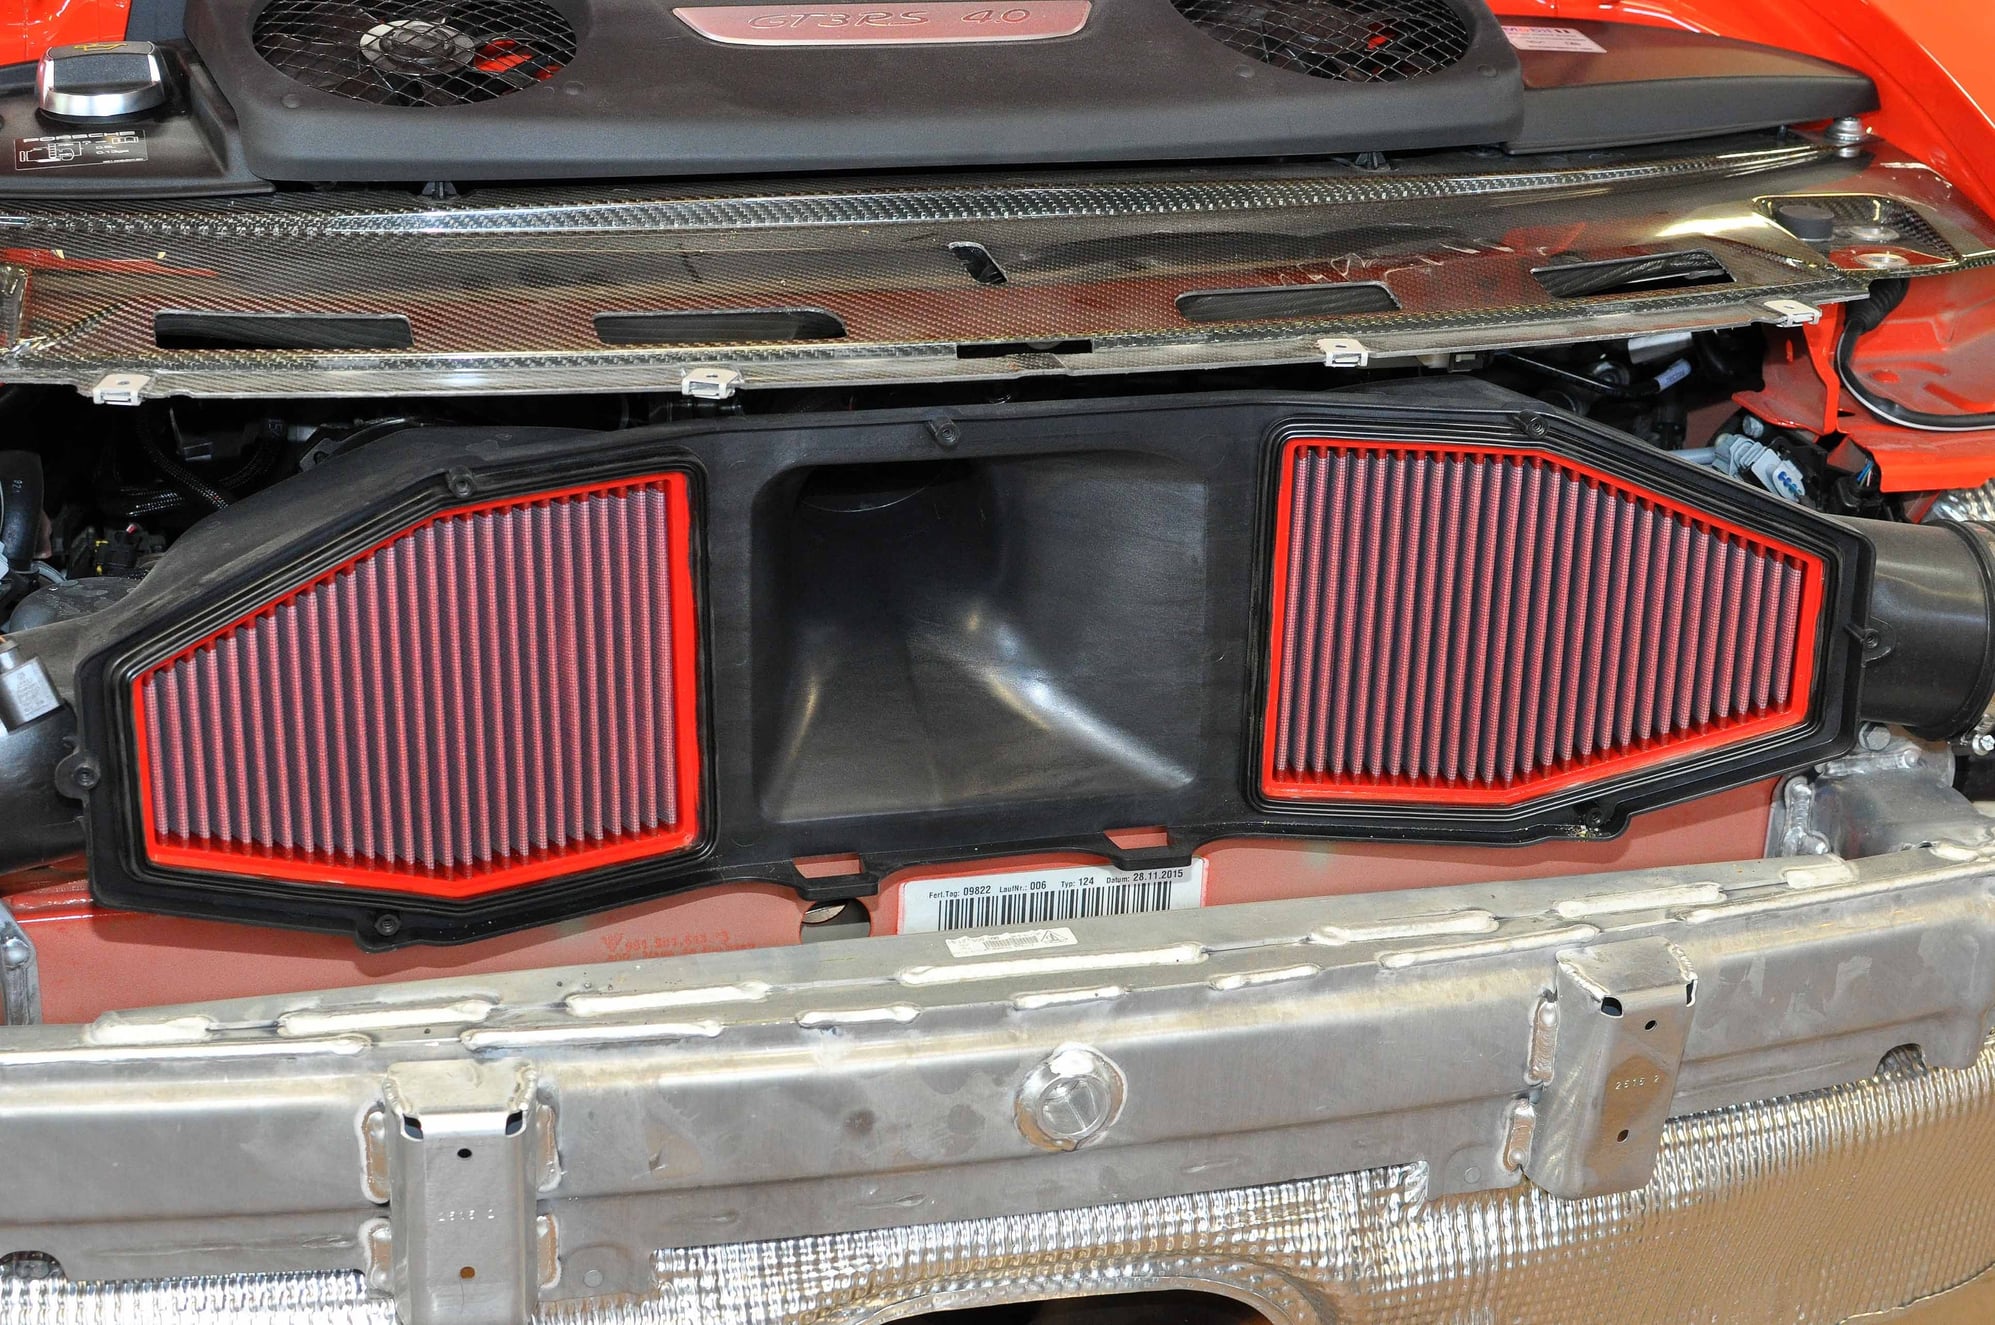
If you have a GT3RS, you already have BMC intake air filters (pictured). You may want to clean them or sweep out the debris that collects on the dirty side of the filter inside the housing. (This debris accumulated after only 900 miles, including only one limited track-day! And there was more in the filters!)
If you have a GT3 you don't have BMC filters, but you should! They sound cooler and flow better than the OEM paper filters. And they're washable so you never have to buy another set of over-priced Porsche filters for your car. Feel free to give us a call or drop us a PM for special Rennlist pricing on them!
INSTALLATION IS THE REVERSE OF REMOVAL. TWO TIPS: DON'T OVERTIGHTEN TORX SCREWS, AND DON'T FORGET TO PLUG THE LICENSE LAMP BACK IN.
THANKS FOR VIEWING, IF YOU HAVE QUESTIONS OR NEED HELP WITH ANYTHING MOTORSPORT-RELATED, FEEL FREE TO CALL, EMAIL, OR PM US ANYTIME!
We remove them. You could probably wiggle your arm in there to get the required screws out but you would have to do it by feel and it would require a lot of time.
 05-27-2016, 08:03 PM