Detailing an Underberg Green GT2RS
 08-26-2019, 04:50 PM
#1
Basic Sponsor
Rennlist
Site Sponsor
Rennlist
Site Sponsor
Thread Starter
Underberg Green Porsche GT2RS Paint Correction and Paint Protection Film Wrap

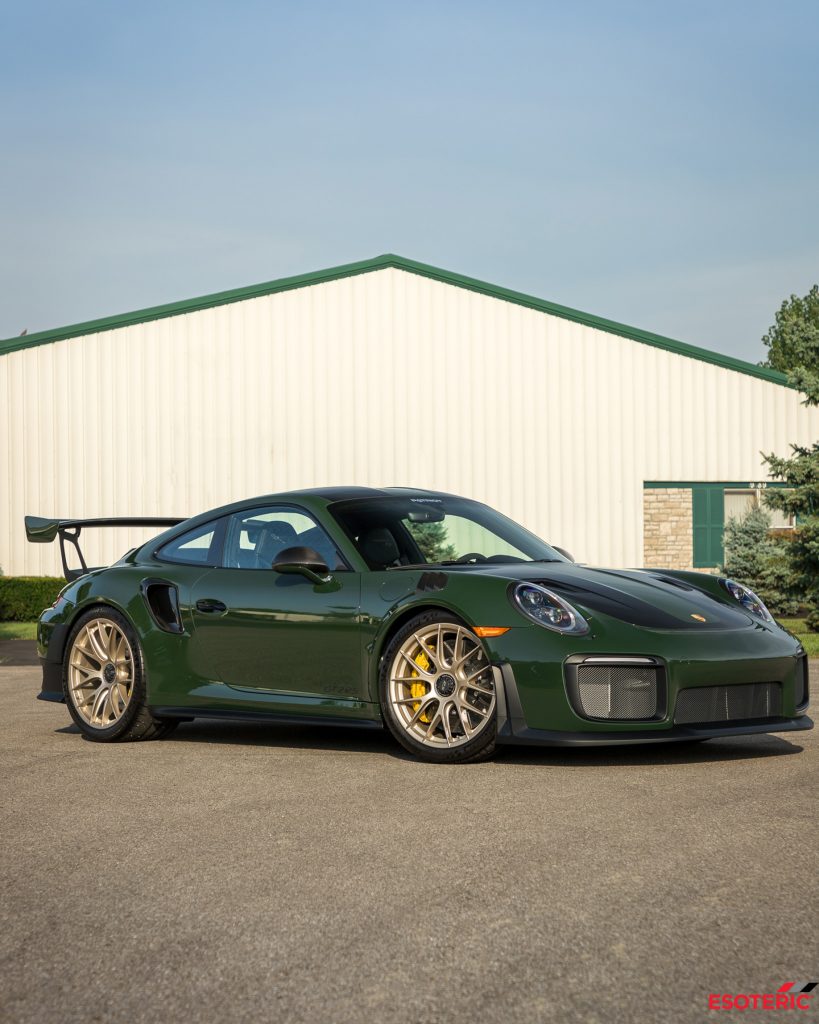
This Is No Ordinary 700 Horsepower, Twin-turbocharged Porsche GT2RS.
This specific car is painted in Underberg Green (underberggr�n; non-metallic; P6G) and was the only GT2RS built in February of 2019. Until the fortunate sinking and reproduction of 4 GT2RS models in March, this was the very last 991 GT2RS produced. This vehicle is special on many levels.
Stage 1 : Paint Correction
New Cars Have Defects Too!
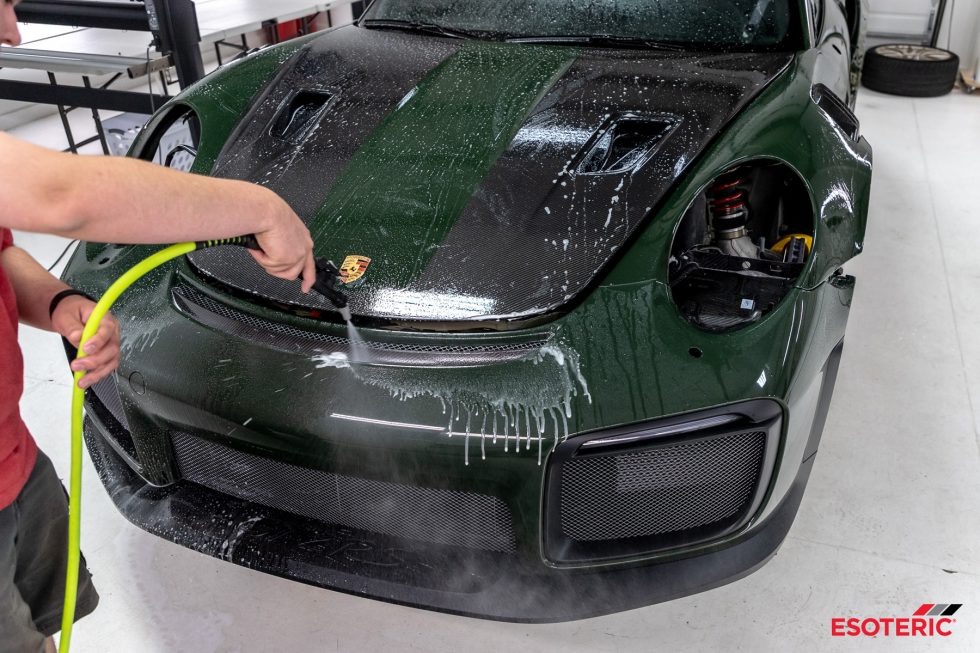
Our project started with a thorough wash, decontamination, and cleaning prior to any paint correction. After washing, we began by inspecting the paint and talking over the options for correcting the areas with defects with the owner. We developed a custom plan so that the haziness, holograms, and swirls can be removed.
�But wait� you may ask, �the car was produced in February, and only has 34 miles on it. How can there be defects?�
Although the car is basically brand new, there was still a large presence of defects. Contrary to what you may think, new cars come from the factory with non-perfect paint. Between production lines, quality control, shipping your car, and the dealership, there are literally hundreds of hands that have touched your paint. All those hands created scratches, swirls, and holograms that we seek to remove. Check out how this brand new car looked when it arrived to us.

We had to remove the factory PPF located in front of the rear fenders. This PPF is of poor quality and will be replaced with a much higher quality film.

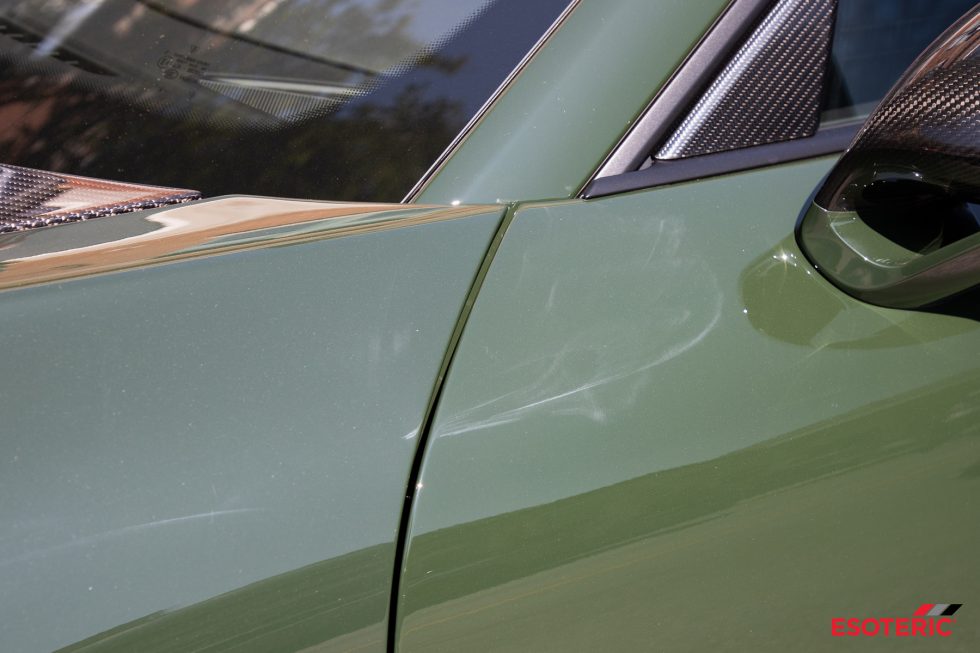
For this car, we did a single-stage correction using a RUPES Yellow Pad and SONAX Perfect Finish. Check out the before and after we got on just the fender.


In some areas, we had to break out the RUPES iBrid Nano, with the same RUPES Yellow Pad and SONAX Perfect Finish combo, to properly polish the hard to reach areas. These areas include the carbon fiber front fender vents and the rear carbon intakes.

Stage 2 : Disassembly
Taking Apart A Brand New Car.
After paint correction, it�s time to prepare the car for STEK Paint Protection Film. (More on why we use STEK later.) For now, let�s talk about why we�re taking apart a brand new car. We take apart cars in order to hide any visible edges. In our other paint protection film (clear bra) services, we tuck edges to hide them to the best of our ability. However, when you take over 15 pieces off the car it allows you more access to truly hide the edge of the film. The first piece to be removed was the rear wing. This is an easy piece to remove as only 3 bolts per side hold it on.

The next pieces to go were the side marker lights. After those were removed, we started the process of removing the headlights. Compared to previous Porsche models this process is a little more labor-intensive. In order to remove the headlights, we first start by removing the front wheels and then removing the inner fender wells. You can see this piece in the photo below.

After both inner fender wells were removed, we can disconnect a few connections and begin to slide the front bumper forward. On the RS models, the front bumper �pops� forward and allows access to 2 small bolts that hold the headlights in place. Once you have access to the bolts, headlight removal is actually pretty easy. The challenging part is getting to the bolts!


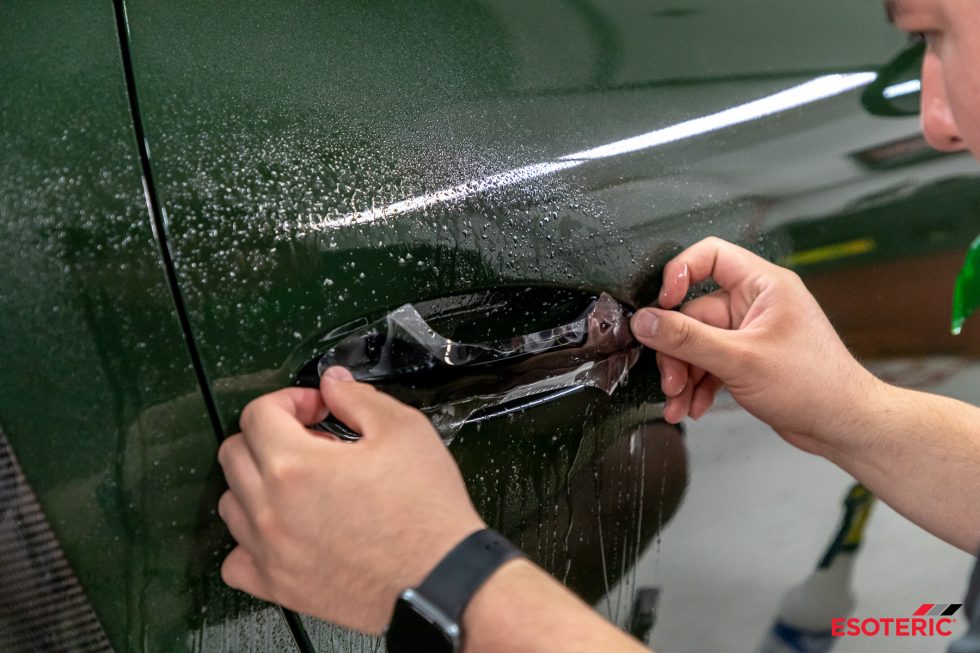
Above you can see how the front bumper �pops� forward allowing access to the headlight. Next in line for disassembly was the door handles and mirrors. In order to remove these, we first have to take apart the door. After a few small trim pieces, the main door panel can be removed in 1 piece.


Only a few electrical connections are connected to the door panel. Once the main panel is removed we can begin popping the dozen or so tabs that hold the inner panel in place. Removing these two panels makes removing the mirrors and door handles much easier.


Another one of the pieces that is removed are the rear windows. You�ll also notice that the window trim got removed. This is to allow access to remove the windows.

As you can see, there is a lot of preparation that goes into ensuring there are no visible edges. We take hiding and tucking edges very seriously! Once these pieces are removed, we can now begin installing the STEK paint protection film.
Stage 3 : Bespoke Film Installation
Patterns Or Custom Pieces?
Many paint protection film shops around the country use patterns. These off-the-shelf designs are pre-cut to leave gaps around emblems, fender vents, headlights, door handles, and many other spots. For example, on a Porsche 911 rear bumper, some installers won�t remove the �Porsche� badging and will use a pre-cut pattern that leaves square holes in the film about a 1/8th of an inch around each letter. To us, this comes across unsightly and of poor quality. At ESOTERIC, we prefer to use our own custom patterns or bulk pieces that we hand cut to fit your specific vehicle. Regardless of if you are wrapping just your front bumper or you�re doing a full wrap, we use custom patterns. For this specific car, there were only 3 panels that were custom patterns. Every other painted or carbon fiber piece was bespoke (bulk) pieces.
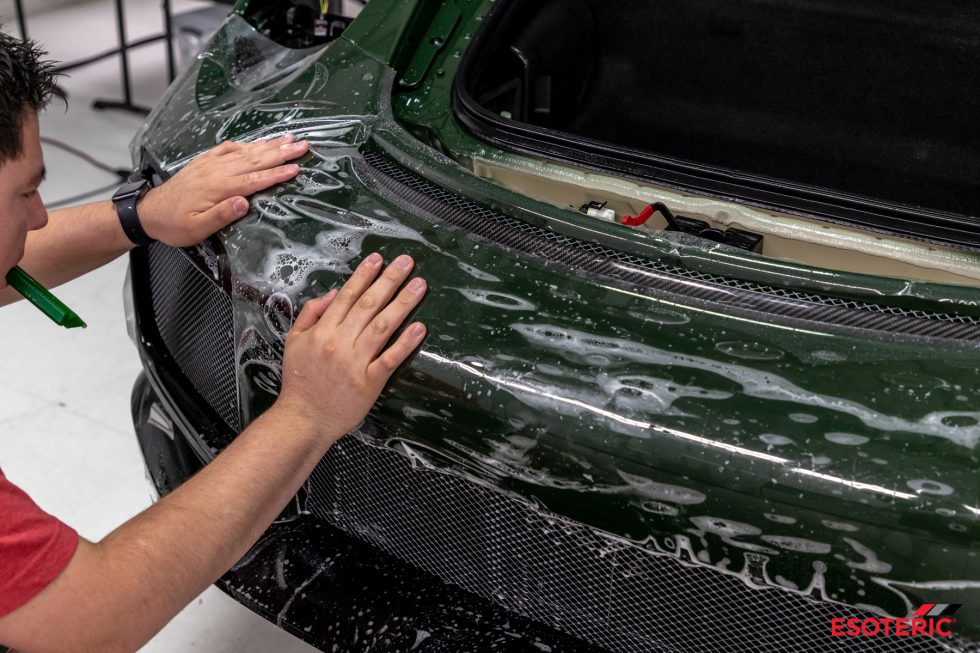
To begin the installation of STEK film, we first begin by thoroughly wetting the surface with a slip solution. This solution allows us to work with the film and position it for a perfect fit. Once the film is in position, we�ll use an alcohol solution to secure the film in place.
We�ve mentioned that we use STEK a few times now and we�ll often get asked why we use them versus other films. We have tested many other films and, objectively, STEK film was the clearest, highest performing film. We love it for its clarity, ease of installation, and semi-self healing abilities.

A great example of one of our custom patterns is on the front bumper. Notice how there are no pre-made cut-outs for the headlights, headlight washers, or the tow hook cover. We�ll trim these pieces down later tucking and hiding the film around the edge of each panel. For the tow hook, we have already trimmed it down in this photo.

After the bumper is wrapped, we�ll move onto the hood. This piece is a bulk piece, meaning that it isn�t pre-cut to fit the hood. Notice the amount of excess around the edges of the hood. This may come across as excess, but compared to a pattern, having this much excess allows to perfectly contour the flat piece of film to every slight curvature on the surface.


Once the hood is completed we can begin working on the front fenders, doors, and roof.


When any panel that cannot be removed, like the roof, we use crevice tools to secure the film down so that the paint protection film is unnoticeable. Sure, this takes more time than leaving a visible edge but we strive to install film where the edges are unnoticeable when you walk around the car or show it off at a car show.

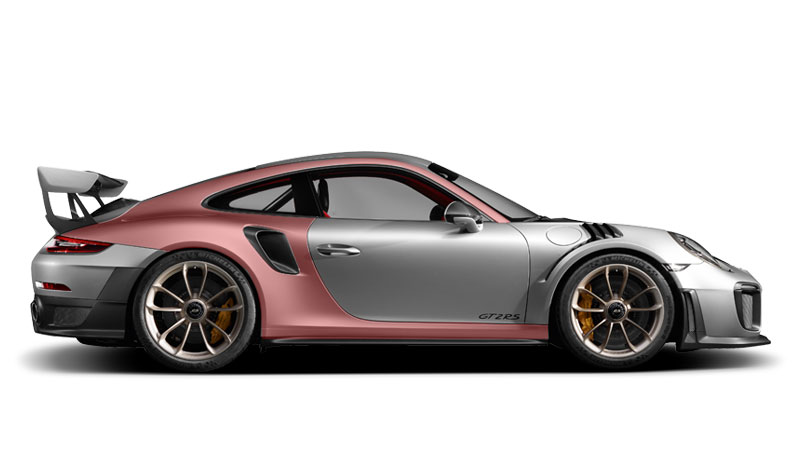
Now that the roof, front bumper, fenders, and doors are done we keep moving towards the back of the car to the rear quarter panels. These two pieces are the largest bespoke pieces on the whole car because we do a single piece running from the base of the A-pillar, around the windows, to the taillights, around the side scoop then under the door. Here�s a visualization. The red-colored part below is all one single bespoke piece of film. A challenge to install, but the reward is that it is undetectable.
Because these are bespoke pieces, we trim each piece leaving just enough film to work into the edges. This work requires a steady, surgical-like hand to cut neatly and to not cut into the paint.


After both quarter panels are completed we move to the rear wing, deck lid, and bumper. We went ahead and reinstalled the wing after wrapping the deck lid as it is vastly easier to wrap the wing when it is secured to the car. The endplates were not forgotten and wrapped as well.


After all these pieces of film were installed we began reassembling the car piece by piece. Headlights, taillights, door handles, gas caps, side markers, and more all get put back on the car. The dozens of bolts and pieces we removed are put back like the car rolled off the factory (again). Once the pieces are put back we put the finishing touches on the installation of the paint protection film. These last few touches include installing the door handles, fuel filler cap, and tow hook cover.


At this stage, our installation is complete and we�re ready for quality control.
Stage 4 : Final Details
Install Once, Check It Twice.
After PPF installation is complete, a thorough inspection is done and final tweaks are performed.


Stage 5 : The Finale
The Glamour Shots
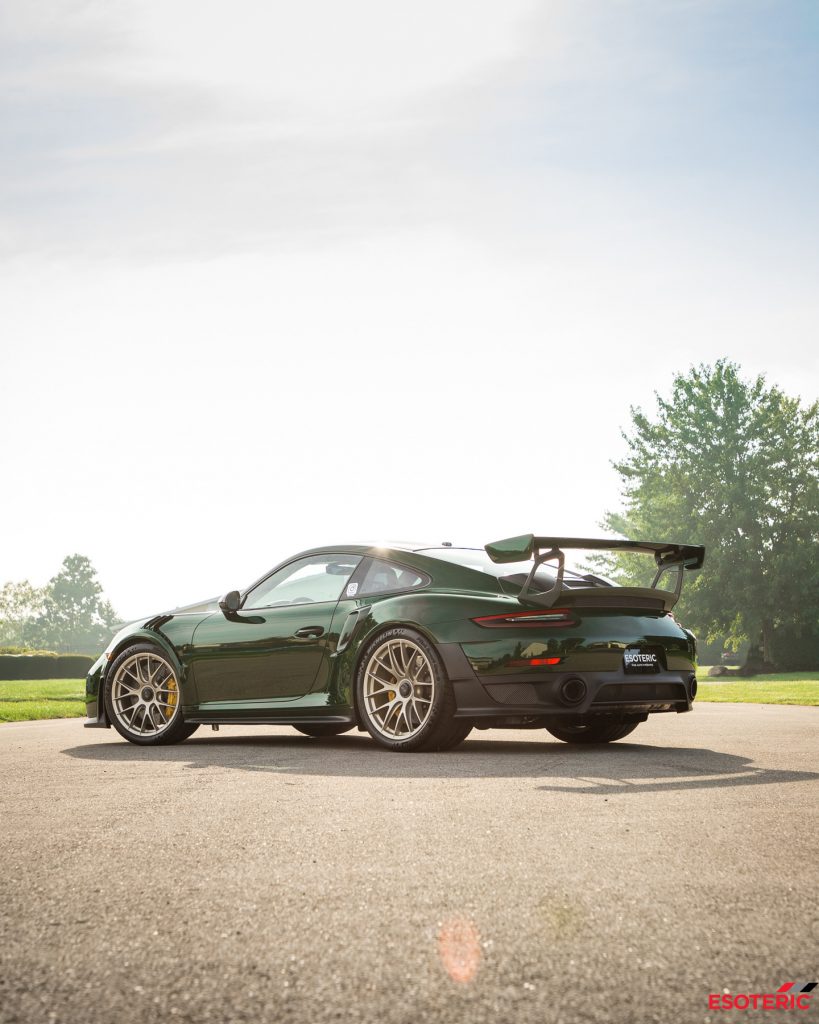
We are excited to see this project officially wrapped up. This was an incredible project and certainly one to remember. While this car may not be driven regularly, the owner of this car can be assured that his 1 of 2 Porsche GT2RS is perfected for today, protected for tomorrow, and can be maintained easily when he decides to go for a spirited drive.
Interested in having your car protected? Contact us and we can work out a custom plan to fit your needs (or your wants!).
For now, enjoy these glamour shots.


ESOTERIC
New Albany, Ohio
614-855-6855
Follow the owner on Instagram, @jpsstogie.
This Is No Ordinary 700 Horsepower, Twin-turbocharged Porsche GT2RS.
This specific car is painted in Underberg Green (underberggr�n; non-metallic; P6G) and was the only GT2RS built in February of 2019. Until the fortunate sinking and reproduction of 4 GT2RS models in March, this was the very last 991 GT2RS produced. This vehicle is special on many levels.
Stage 1 : Paint Correction
New Cars Have Defects Too!
Our project started with a thorough wash, decontamination, and cleaning prior to any paint correction. After washing, we began by inspecting the paint and talking over the options for correcting the areas with defects with the owner. We developed a custom plan so that the haziness, holograms, and swirls can be removed.
�But wait� you may ask, �the car was produced in February, and only has 34 miles on it. How can there be defects?�
Although the car is basically brand new, there was still a large presence of defects. Contrary to what you may think, new cars come from the factory with non-perfect paint. Between production lines, quality control, shipping your car, and the dealership, there are literally hundreds of hands that have touched your paint. All those hands created scratches, swirls, and holograms that we seek to remove. Check out how this brand new car looked when it arrived to us.
We had to remove the factory PPF located in front of the rear fenders. This PPF is of poor quality and will be replaced with a much higher quality film.
For this car, we did a single-stage correction using a RUPES Yellow Pad and SONAX Perfect Finish. Check out the before and after we got on just the fender.
In some areas, we had to break out the RUPES iBrid Nano, with the same RUPES Yellow Pad and SONAX Perfect Finish combo, to properly polish the hard to reach areas. These areas include the carbon fiber front fender vents and the rear carbon intakes.
Stage 2 : Disassembly
Taking Apart A Brand New Car.
After paint correction, it�s time to prepare the car for STEK Paint Protection Film. (More on why we use STEK later.) For now, let�s talk about why we�re taking apart a brand new car. We take apart cars in order to hide any visible edges. In our other paint protection film (clear bra) services, we tuck edges to hide them to the best of our ability. However, when you take over 15 pieces off the car it allows you more access to truly hide the edge of the film. The first piece to be removed was the rear wing. This is an easy piece to remove as only 3 bolts per side hold it on.
The next pieces to go were the side marker lights. After those were removed, we started the process of removing the headlights. Compared to previous Porsche models this process is a little more labor-intensive. In order to remove the headlights, we first start by removing the front wheels and then removing the inner fender wells. You can see this piece in the photo below.
After both inner fender wells were removed, we can disconnect a few connections and begin to slide the front bumper forward. On the RS models, the front bumper �pops� forward and allows access to 2 small bolts that hold the headlights in place. Once you have access to the bolts, headlight removal is actually pretty easy. The challenging part is getting to the bolts!
Above you can see how the front bumper �pops� forward allowing access to the headlight. Next in line for disassembly was the door handles and mirrors. In order to remove these, we first have to take apart the door. After a few small trim pieces, the main door panel can be removed in 1 piece.
Only a few electrical connections are connected to the door panel. Once the main panel is removed we can begin popping the dozen or so tabs that hold the inner panel in place. Removing these two panels makes removing the mirrors and door handles much easier.
Another one of the pieces that is removed are the rear windows. You�ll also notice that the window trim got removed. This is to allow access to remove the windows.
As you can see, there is a lot of preparation that goes into ensuring there are no visible edges. We take hiding and tucking edges very seriously! Once these pieces are removed, we can now begin installing the STEK paint protection film.
Stage 3 : Bespoke Film Installation
Patterns Or Custom Pieces?
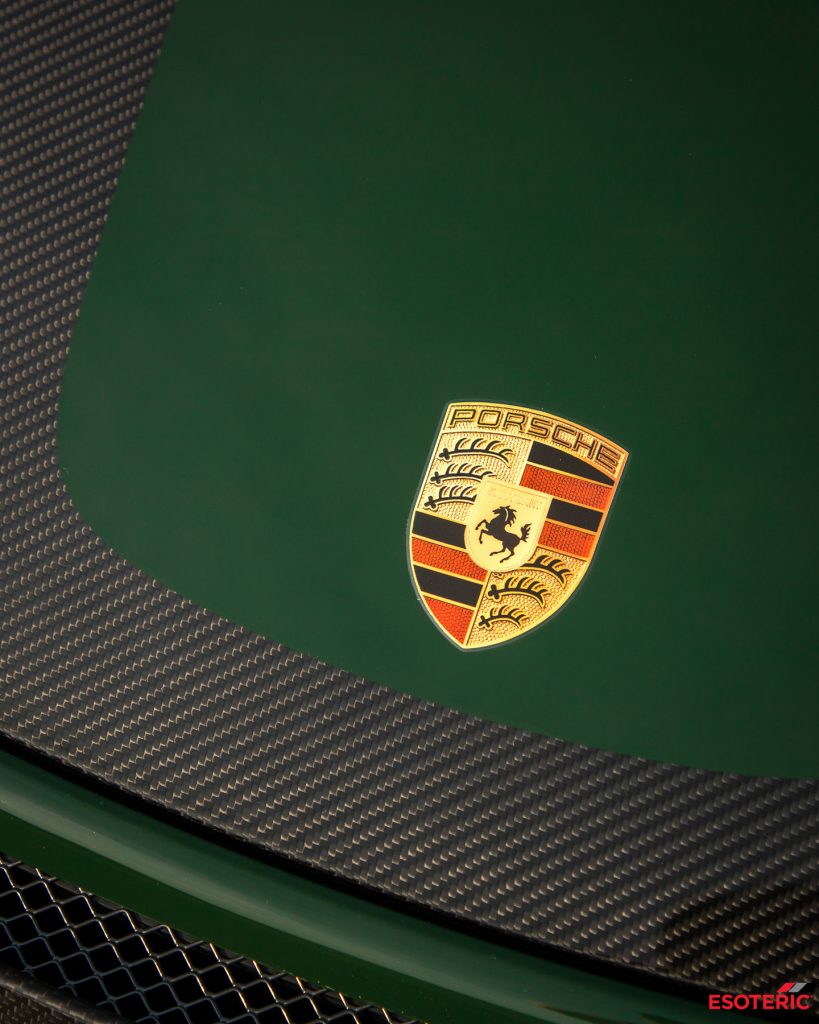
Many paint protection film shops around the country use patterns. These off-the-shelf designs are pre-cut to leave gaps around emblems, fender vents, headlights, door handles, and many other spots. For example, on a Porsche 911 rear bumper, some installers won�t remove the �Porsche� badging and will use a pre-cut pattern that leaves square holes in the film about a 1/8th of an inch around each letter. To us, this comes across unsightly and of poor quality. At ESOTERIC, we prefer to use our own custom patterns or bulk pieces that we hand cut to fit your specific vehicle. Regardless of if you are wrapping just your front bumper or you�re doing a full wrap, we use custom patterns. For this specific car, there were only 3 panels that were custom patterns. Every other painted or carbon fiber piece was bespoke (bulk) pieces.
To begin the installation of STEK film, we first begin by thoroughly wetting the surface with a slip solution. This solution allows us to work with the film and position it for a perfect fit. Once the film is in position, we�ll use an alcohol solution to secure the film in place.
We�ve mentioned that we use STEK a few times now and we�ll often get asked why we use them versus other films. We have tested many other films and, objectively, STEK film was the clearest, highest performing film. We love it for its clarity, ease of installation, and semi-self healing abilities.
A great example of one of our custom patterns is on the front bumper. Notice how there are no pre-made cut-outs for the headlights, headlight washers, or the tow hook cover. We�ll trim these pieces down later tucking and hiding the film around the edge of each panel. For the tow hook, we have already trimmed it down in this photo.
After the bumper is wrapped, we�ll move onto the hood. This piece is a bulk piece, meaning that it isn�t pre-cut to fit the hood. Notice the amount of excess around the edges of the hood. This may come across as excess, but compared to a pattern, having this much excess allows to perfectly contour the flat piece of film to every slight curvature on the surface.
Once the hood is completed we can begin working on the front fenders, doors, and roof.
When any panel that cannot be removed, like the roof, we use crevice tools to secure the film down so that the paint protection film is unnoticeable. Sure, this takes more time than leaving a visible edge but we strive to install film where the edges are unnoticeable when you walk around the car or show it off at a car show.
Now that the roof, front bumper, fenders, and doors are done we keep moving towards the back of the car to the rear quarter panels. These two pieces are the largest bespoke pieces on the whole car because we do a single piece running from the base of the A-pillar, around the windows, to the taillights, around the side scoop then under the door. Here�s a visualization. The red-colored part below is all one single bespoke piece of film. A challenge to install, but the reward is that it is undetectable.
Because these are bespoke pieces, we trim each piece leaving just enough film to work into the edges. This work requires a steady, surgical-like hand to cut neatly and to not cut into the paint.
After both quarter panels are completed we move to the rear wing, deck lid, and bumper. We went ahead and reinstalled the wing after wrapping the deck lid as it is vastly easier to wrap the wing when it is secured to the car. The endplates were not forgotten and wrapped as well.
After all these pieces of film were installed we began reassembling the car piece by piece. Headlights, taillights, door handles, gas caps, side markers, and more all get put back on the car. The dozens of bolts and pieces we removed are put back like the car rolled off the factory (again). Once the pieces are put back we put the finishing touches on the installation of the paint protection film. These last few touches include installing the door handles, fuel filler cap, and tow hook cover.
At this stage, our installation is complete and we�re ready for quality control.
Stage 4 : Final Details
Install Once, Check It Twice.
After PPF installation is complete, a thorough inspection is done and final tweaks are performed.
Stage 5 : The Finale
The Glamour Shots
We are excited to see this project officially wrapped up. This was an incredible project and certainly one to remember. While this car may not be driven regularly, the owner of this car can be assured that his 1 of 2 Porsche GT2RS is perfected for today, protected for tomorrow, and can be maintained easily when he decides to go for a spirited drive.
Interested in having your car protected? Contact us and we can work out a custom plan to fit your needs (or your wants!).
For now, enjoy these glamour shots.
ESOTERIC
New Albany, Ohio
614-855-6855
Follow the owner on Instagram, @jpsstogie.
__________________
__________________________________________________________
ESOTERIC Fine Auto Finishing - America's Premier Exotic Detailer
Detailing . Paint Protection Film . Window Tint. Ceramic Coatings . Car Care Products . Training
HRE Wheels . Vossen Wheels . BBS Wheels . Akrapovic Exhaust . Fabspeed Exhaust . KW Suspension
9801 Karmar Ct. New Albany, Ohio 43054
(614) 855-6855
Contact@EsotericDetail.com
EsotericDetail.com
EsotericCarCare.com
ESOTERIC on YouTube

The following 4 users liked this post by Esoteric_Detail:

The following users liked this post:
Esoteric_Detail (08-27-2019)
08-27-2019, 03:27 AM
#3
Burning Brakes
Fantastic work! How many man hours are required for this process (excluding the glamour shots)?
The following users liked this post:
Esoteric_Detail (08-27-2019)
The following users liked this post:
Esoteric_Detail (08-27-2019)
The following users liked this post:
Esoteric_Detail (08-27-2019)
08-27-2019, 01:14 PM
#6
That color is stunning...great work!
The following users liked this post:
Esoteric_Detail (08-27-2019)
08-27-2019, 02:49 PM
#7
Basic Sponsor
Rennlist
Site Sponsor
Rennlist
Site Sponsor
Thread Starter