
Instructions on swapping to Cayman spoiler
 10-31-2010, 12:26 AM
#1
Racer
Thread Starter
For anyone interested, here is the instruction to swap the Boxster spoiler assembly for the Cayman one. Ideally, the bumper should be replaced with the Cayman unit for a more complete look, though it's not necessary. Enjoy!
This is direction to swap your 987.1 Boxster spoiler to 987.1 Cayman spoiler. The swap is relatively straight forward. It took me about 30 minutes (with pictures) and can be easily done with a small drill bit, a torx bit and 13mm socket.
Parts needed:
� Cayman spoiler (lower): 987 504 623 00
� Cayman spoiler (upper): 987 504 619 00
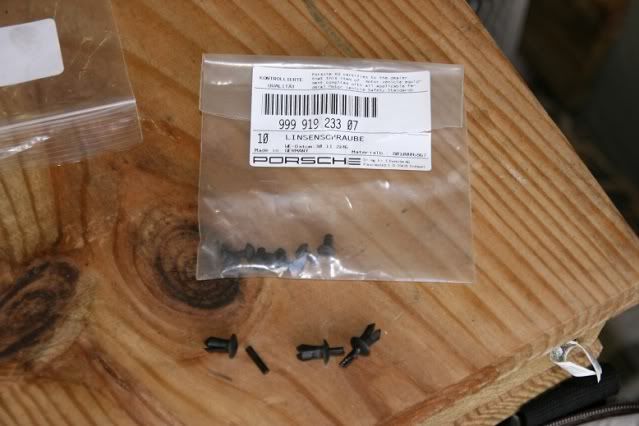
� Oval HD screw (Qty: 7): 999 919 233 07
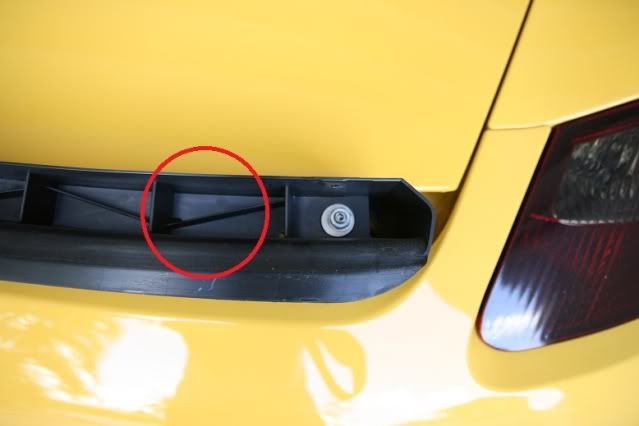
Once the original spoiler is raised/extend, you�ll find 3 plastic, expanding rivets on the front side of the spoiler. Take a small pointy tool, a 5/16 should do the trick, to push in and through the center pin of the plastic rivet (don�t worry about the center pin, you�ll find & collect them later). Now, use your finger nail to �pop� the rivet off the spoiler
Here is what the picture of the plastic rivets pulled part, and the bag of oval HD screws.
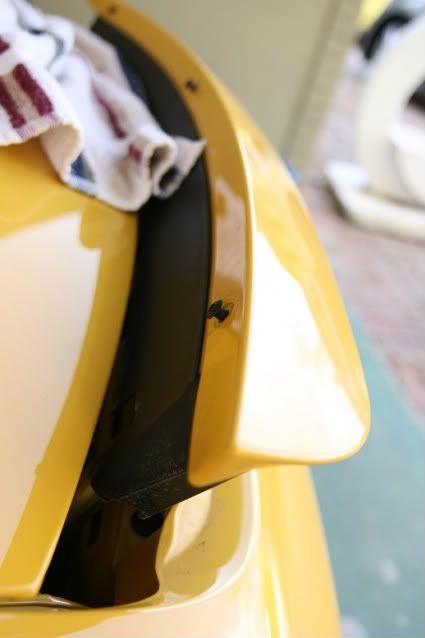
Once the plastic rivets are out, slowly pull up on the front side of the painted spoiler cover to expose the 13mm nut holding the spoiler base to the metal posts. This is also when you can recover the plastic pin from the plastic rivets (circled).
Now, assemble the Cayman spoiler base on the post. You�ll notice the base can wiggle/move around a bit. This is normal. Don�t tighten the 13mm nut too much as you�ll want to align the base before tightening the nuts.
Next, lower the spoiler, close the trunk lid and align the spoiler base with the trunk lid. Once everything looks right, tighten down the nuts.

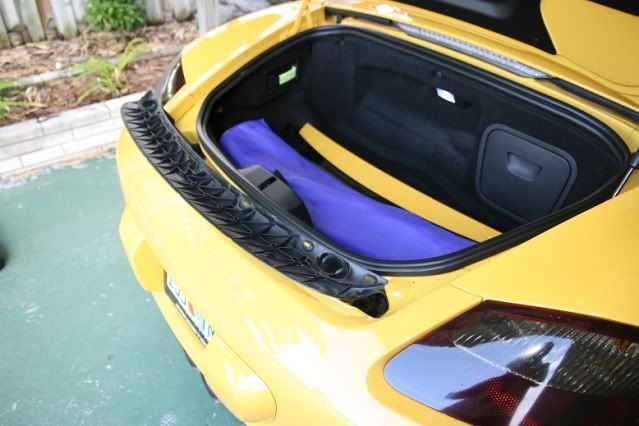
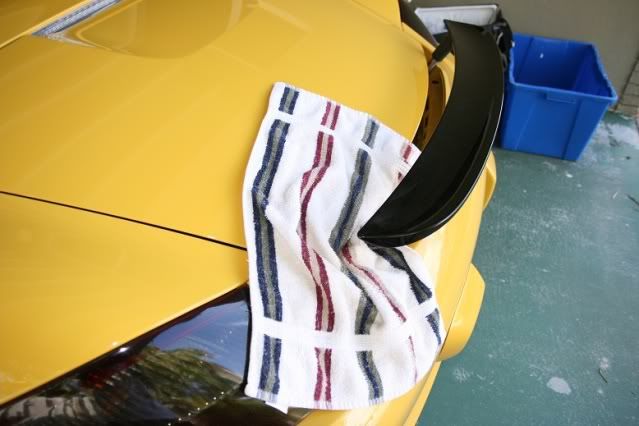
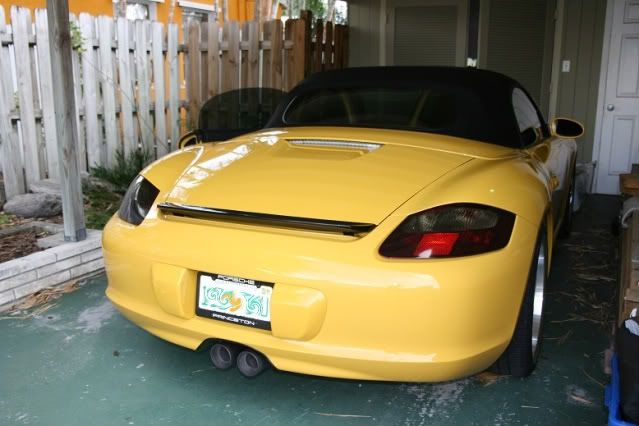
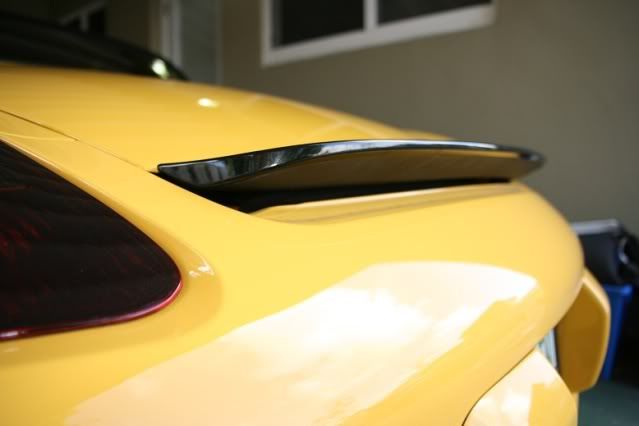
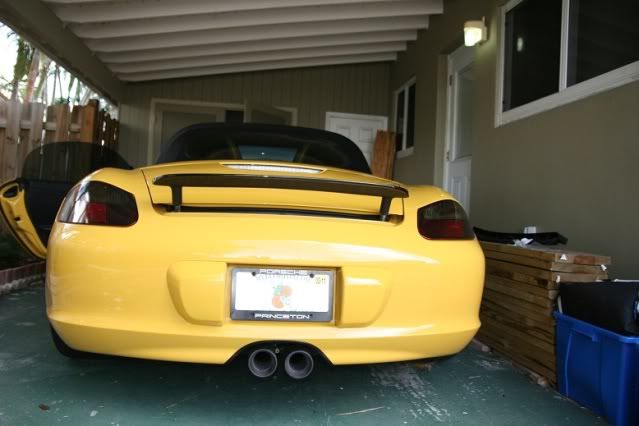
Take the 7 screws and tighten the upper spoiler to lower part. I used a towel in case I accidentally drop the screw into the bumper. And when it�s all done, it looks like this:
This is direction to swap your 987.1 Boxster spoiler to 987.1 Cayman spoiler. The swap is relatively straight forward. It took me about 30 minutes (with pictures) and can be easily done with a small drill bit, a torx bit and 13mm socket.
Parts needed:
� Cayman spoiler (lower): 987 504 623 00
� Cayman spoiler (upper): 987 504 619 00
� Oval HD screw (Qty: 7): 999 919 233 07
Once the original spoiler is raised/extend, you�ll find 3 plastic, expanding rivets on the front side of the spoiler. Take a small pointy tool, a 5/16 should do the trick, to push in and through the center pin of the plastic rivet (don�t worry about the center pin, you�ll find & collect them later). Now, use your finger nail to �pop� the rivet off the spoiler
Here is what the picture of the plastic rivets pulled part, and the bag of oval HD screws.
Once the plastic rivets are out, slowly pull up on the front side of the painted spoiler cover to expose the 13mm nut holding the spoiler base to the metal posts. This is also when you can recover the plastic pin from the plastic rivets (circled).
Now, assemble the Cayman spoiler base on the post. You�ll notice the base can wiggle/move around a bit. This is normal. Don�t tighten the 13mm nut too much as you�ll want to align the base before tightening the nuts.
Next, lower the spoiler, close the trunk lid and align the spoiler base with the trunk lid. Once everything looks right, tighten down the nuts.
Take the 7 screws and tighten the upper spoiler to lower part. I used a towel in case I accidentally drop the screw into the bumper. And when it�s all done, it looks like this:
 11-01-2010, 12:54 PM
#2
Intermediate

Join Date: May 2010
Location: Twin Cities
Posts: 41
Likes: 0
Received 0 Likes
on
0 Posts
Thanks for sharing. I'm just curious, do you think this has any "measurable" performance difference vs the stock spoiler? This is much more like a wing, whereas the stock piece is a true spoiler. I wonder if one is +/- drag or +/- downforce (lift reduction) vs the other.
Jim
Jim