When you click on links to various merchants on this site and make a purchase, this can result in this site earning a commission. Affiliate programs and affiliations include, but are not limited to, the eBay Partner Network.
As a new owner of a 987.1 Cayman S, I wanted to share this guide in case it proves useful to anyone dealing with similar issues.
Symptom:
While driving with the AC on, I noticed a strong fuel odor. It was so intense during my first few weeks of ownership that I avoided using the AC and kept the windows down. During the PPI, a local indy shop identified that the smell wasn�t coming from the fuel sender unit area, where fractures along the locking ring are a common issue. Instead, further investigation revealed that the culprit was the Charcoal (Evaporative) Canister (Part Number: 99720122104). It had become so clogged with fuel that the charcoal was fully saturated.
The Good:
The problem was identified, and I initially thought it would be an easy fix.
The Bad:
Unfortunately, part number 99720122104 is no longer available from Porsche and hasn�t been superseded by a replacement. I had to source the part myself through FB Marketplace, eBay, and Craigslist, hoping to find a salvaged car. Ultimately, I found one at Montoya�s Auto Wrecking in Chula Vista, CA, which had a 2006 987 Boxster Base. I purchased the canister assembly for just under $300.
The Guide:
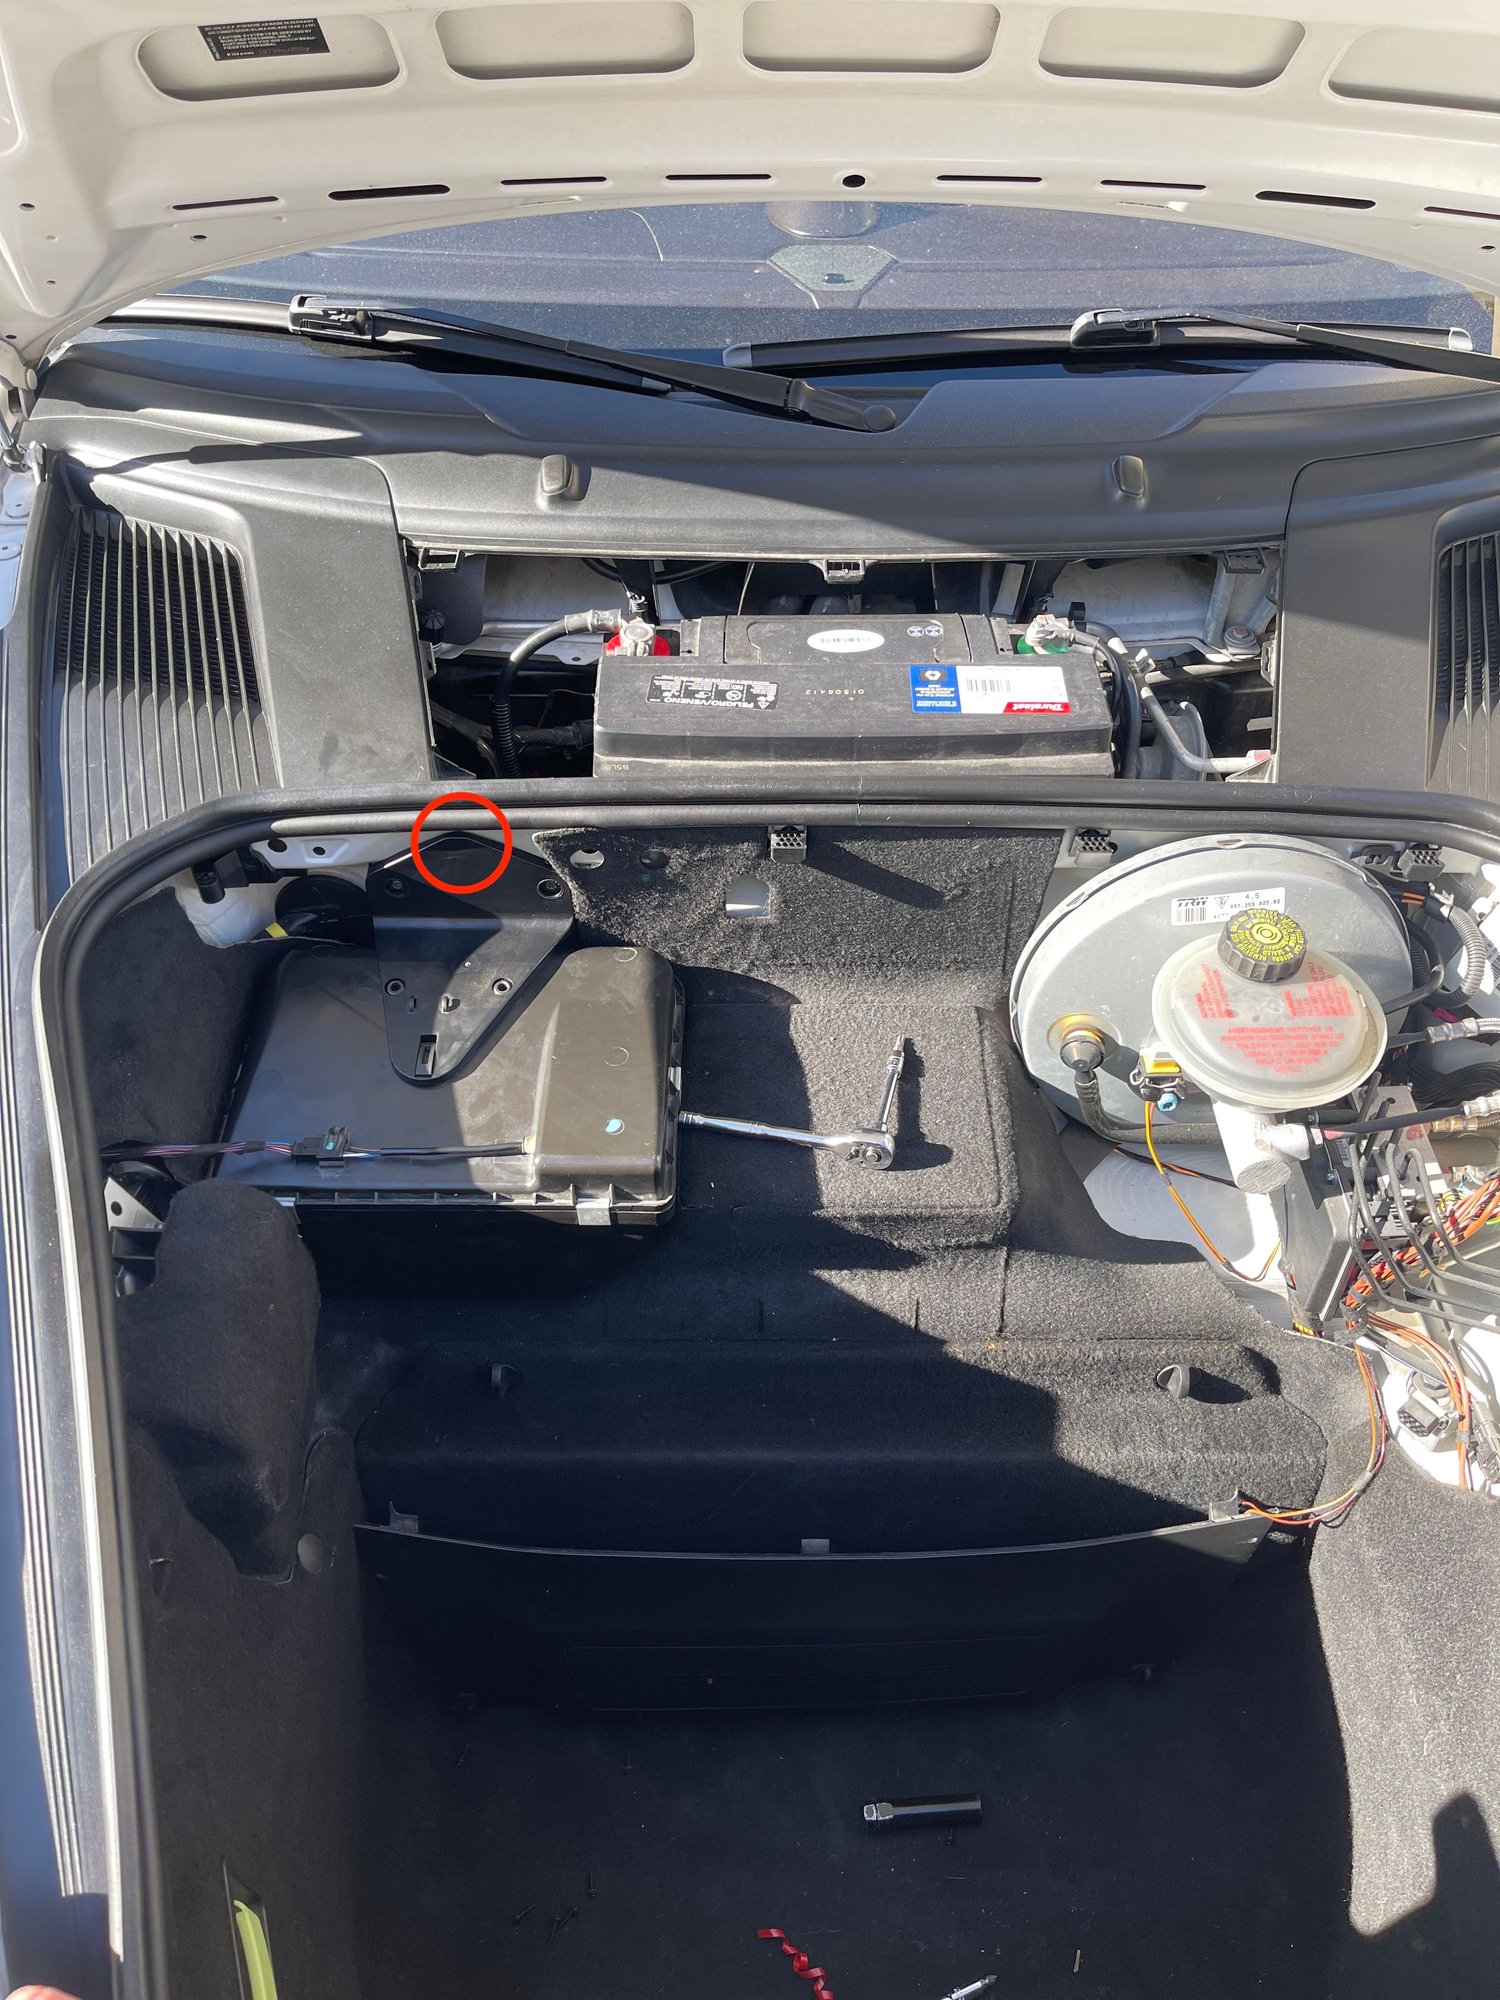
1. Accessing the Charcoal Canister
Remove the plastic front housing held in place by a few Phillips screws. This step is straightforward.
With the housing removed, look towards the passenger side (US models), where you�ll see a black box�that�s the canister.
2. Removing the Retaining Triangle
Unscrew the two T30 screws securing the black triangular piece that locks the canister in place.
Use a plastic pry tool to wedge between the metal tub and the top of the triangle (highlighted in red in the attached image) and pry towards you. This is a snap-fit connection.
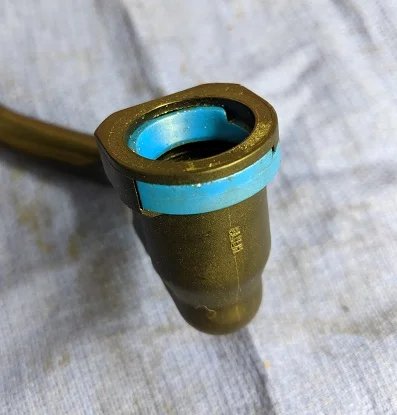
3. Disconnecting the Fuel Lines
This step is tricky due to limited space. Two SAE EFI Quick Connects attach to the canister: one has a two-sided release mechanism, while the other has a single-sided release.
For the two-sided connector, press both tabs and pull down. For the single-sided connector, press the one tab and pull down.
Working in this tight space (less than 6 inches) requires tools. Hands alone won�t suffice, even for those with smaller hands.
Start by removing the smaller grey dual-sided connector, then move to the larger blue single-sided one. Removing the smaller connector first gives you slightly more room.
Here�s what the fuel lines look like after removal:
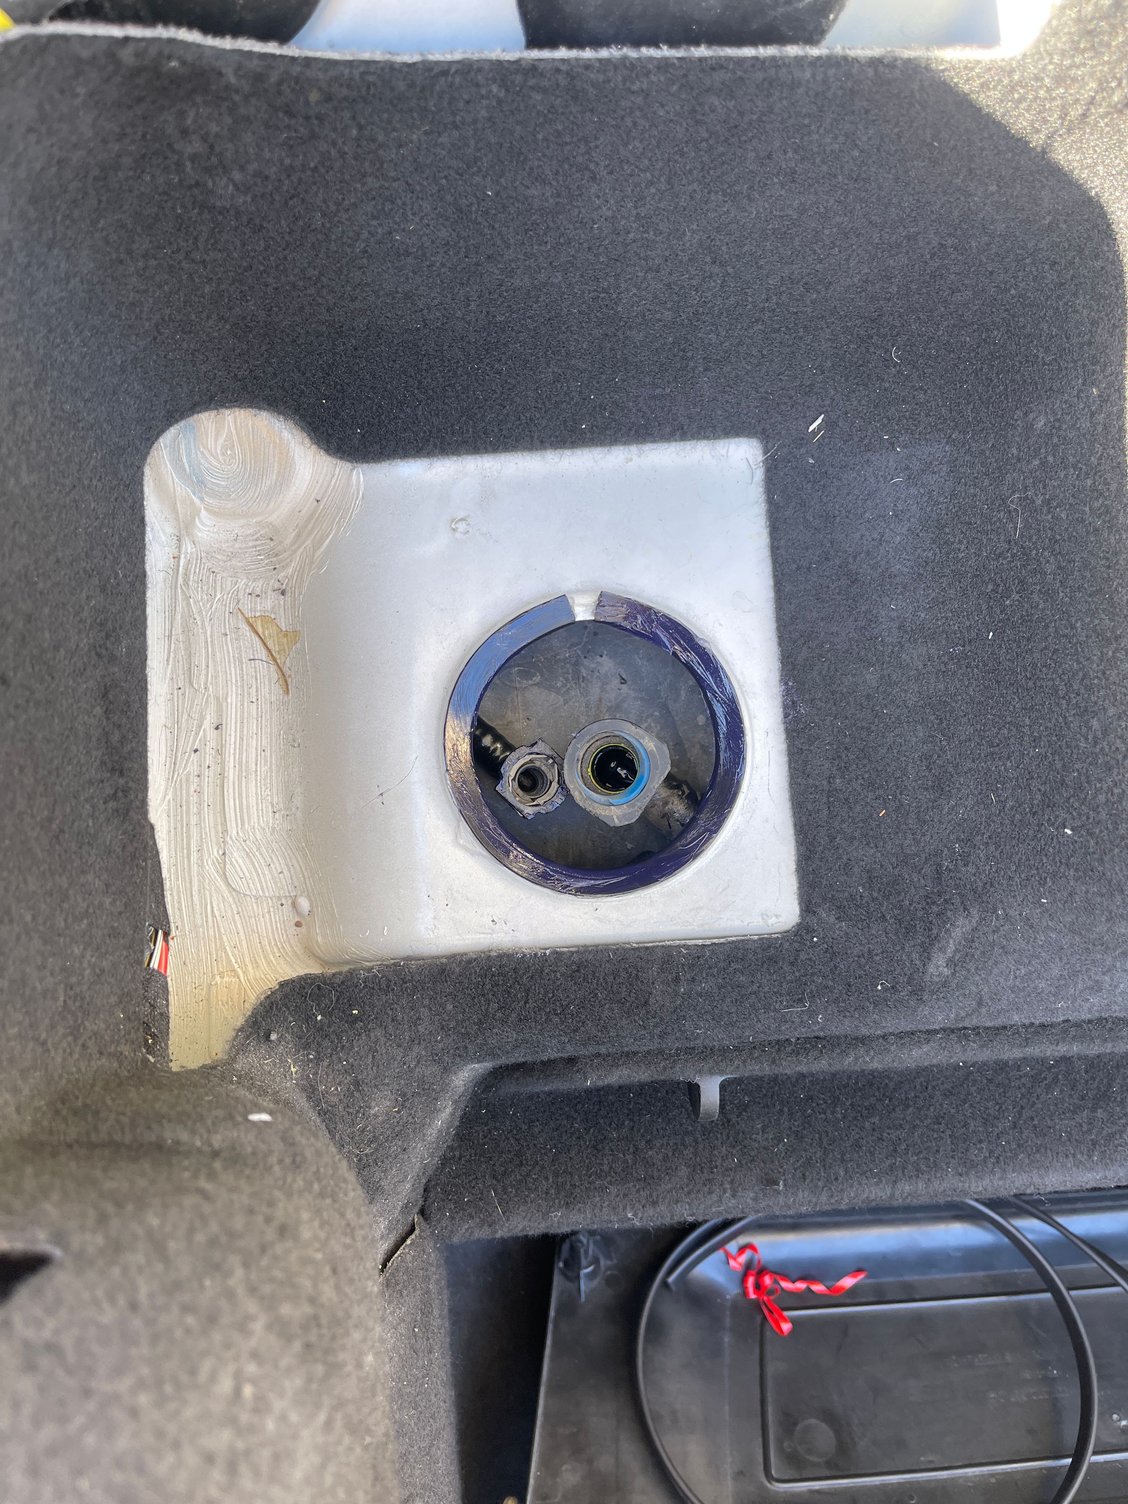
4. Removing and Replacing the Canister
Remove the canister from the metal tub. Be aware of the rubber gasket between the canister and the tub. The fit is tight, so take care when removing it.
) to the gasket and tub opening to make reinstallation easier. This step is optional but recommended.
Reinstall the new (used) canister, ensuring the gasket and metal tub are properly aligned. Listen for an audible click as the canister seats into place.
5. Reattaching the Quick Connectors
Reconnect the blue single-sided connector first, then the grey dual-sided one. Perform this step in a quiet environment to hear the click that confirms proper engagement.
6. Final Steps
Reattach the triangular plastic piece by hooking it onto the top of the canister, snapping it into the metal tub, and reinstalling the two T30 screws (hand tight).
Reassemble the front plastic housing with the Phillips screws.
After completing these steps, I took the car for a test drive, and the fuel smell with the AC on high was completely gone.