When you click on links to various merchants on this site and make a purchase, this can result in this site earning a commission. Affiliate programs and affiliations include, but are not limited to, the eBay Partner Network.
DIY starter Replacement in case someone is going through it now
Just replaced the starter yesterday and shoot a quick vid Mine was working ok, but occasionally making piggly scream noise. After I replaced it obviously the noise was gone. But I noticed how much easier/faster it was turning the engine! Like I put a brand new battery.
Wow. I literally just tackled this last week on my 10CS, and what a massive difference in access. Can't believe how quickly you got that out and back together. Nice work on the DIY!
Do you have any pictures for 10CS starter location? How different is the process?
It's mostly the same, just different and for me, was way more complicated. I was just back in there fixing a hose I missed during reassembly, so I'll post up a pic or two and the steps and tools needed later today.
Just to add into this thread, here's what I needed to do for a 2010 CS starter replacement.
I disconnected the negative battery cable before starting this procedure. Whether it's needed or not I do not know, but simple insurance.
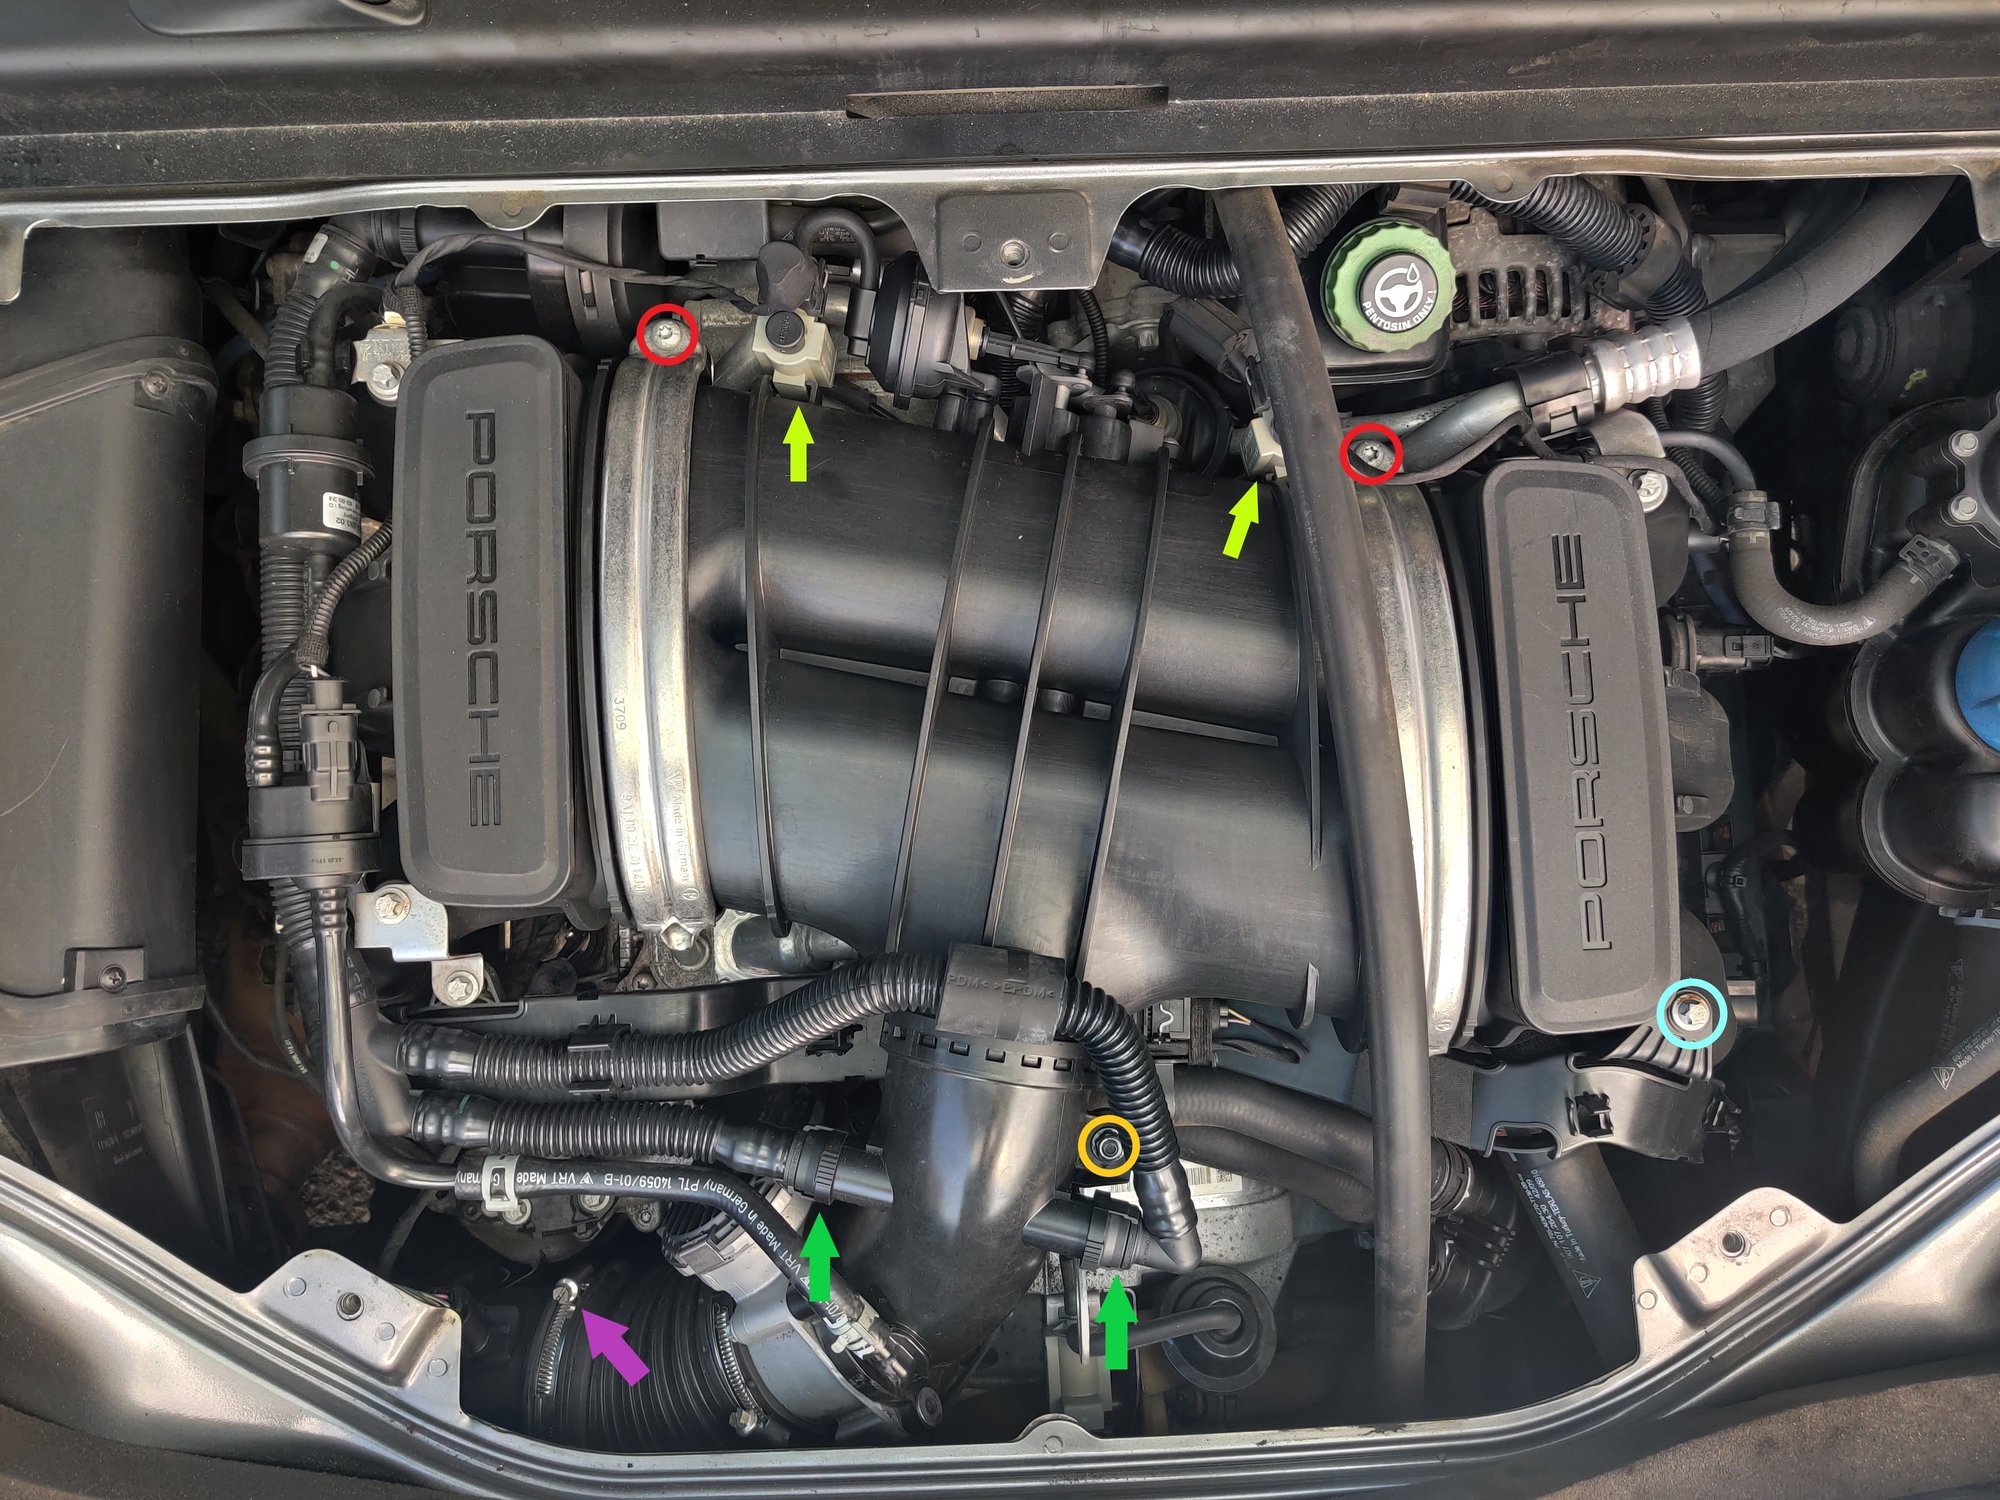
Remove both T30 Plenum clamp screws (Red Circles) and lift off top clamps.
Reach under and unclip the two change-over valves to free up some movement of the plenum. (Yellow Arrows)
Disconnect both vent line tubes from the plenum. (Green Arrows)
Loosen one of the clamps below the throttle body and disconnect flexible hose. (Purple Arrow)
Remove 10mm nut securing plenum. (Yellow Circle)
At this point, take a pick or flat screwdriver and carefully break the seal securing the plenum to the intake runners. Lift and push them away from the plenum on each side should allow you to lift it upwards. Make sure you also lift where the 10mm nut was as it needs to clear that stud.
Once free, pull plenum towards rear of car to move out of the way. Be careful of the vacuum unit getting stuck on the center engine cover support as it's very tight. Also be aware of the vacuum lines that are attached to the bottom of the plenum as well as the change-over valves. The only goal here is to create enough movement to set the plenum aside. Do not remove any of the vacuum lines or vacuum hardware as it's unnecessary.
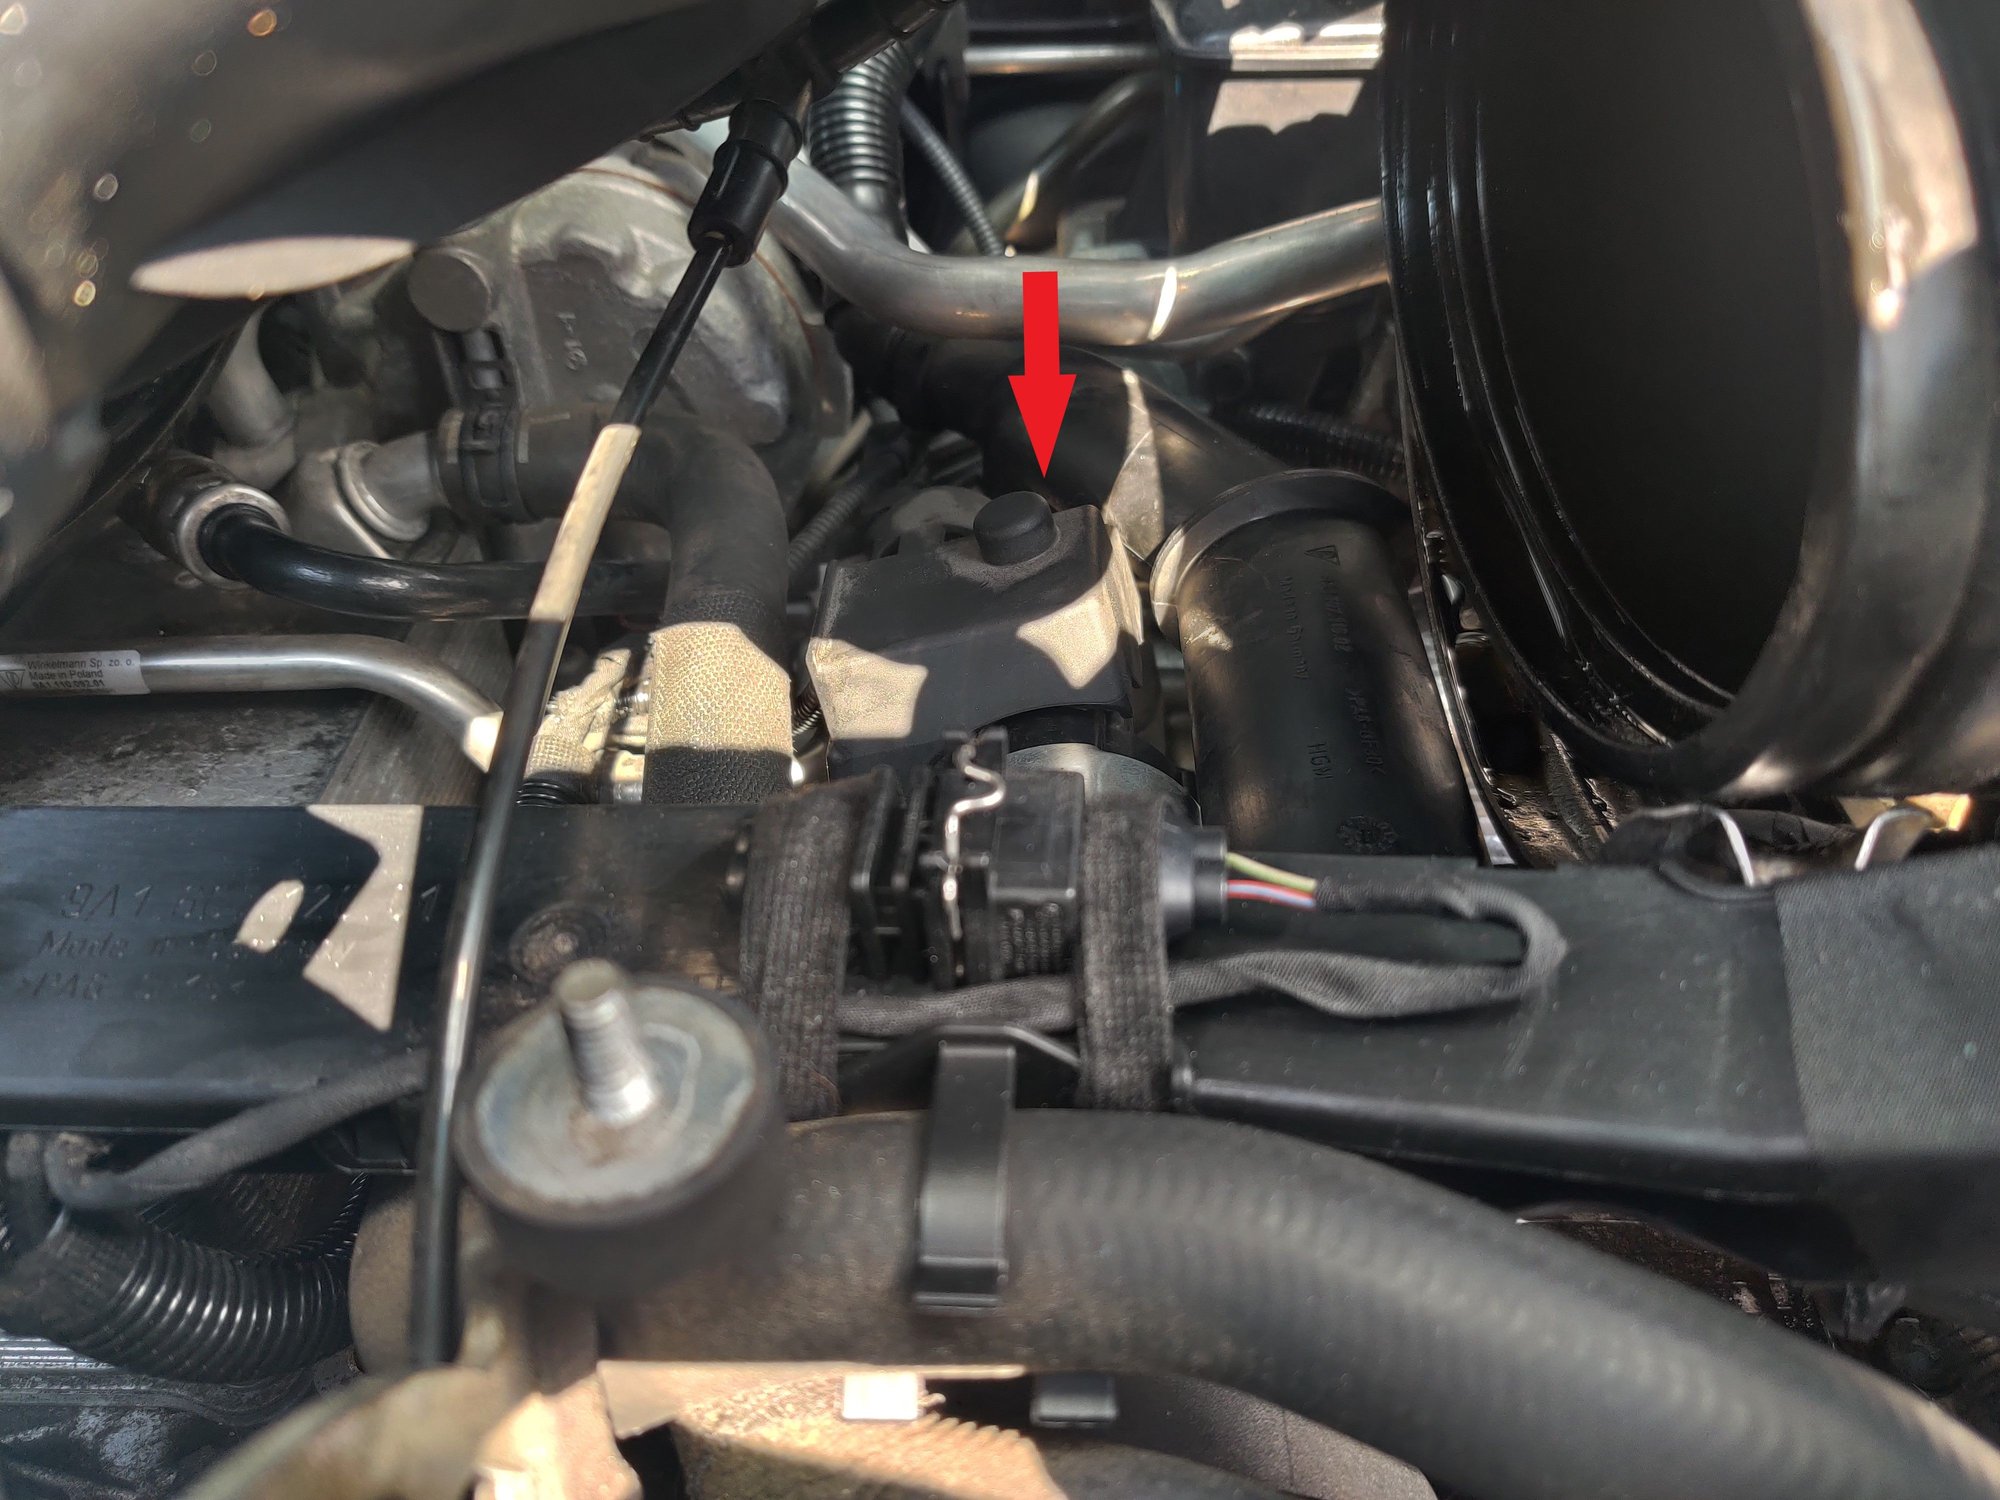
You should now see the starter. Yay!
Remove black plastic cover to expose the two starter connections.
Use a 10mm socket to remove the small screw on top.
Use a 13mm wrench to remove the nut on the back.
Using an E14 (external torx) socket, short extension and swivel, remove the upper starter bolt. A flexible extension magnet might make bolt removal easier here, I don't recall.
This is where it all goes downhill. The bottom bolt.
Option 1: Porsche instructions say to use tape to protect the painted edge from the center engine cover support to the passenger seat far side. Then use a long extension attached to a swivel, which then attaches to a short extension and finally the E14 socket. Think hockey stick. At an angle, insert this down behind the aluminum tube which crosses the path, and feed it onto the bottom starter bolt. I tried countless combinations of extensions and swivels and couldn't get close to making this work. I'm sure it does, I just couldn't figure it out.
Option 2: Accessing via the alternator. This is what I ended up doing and will detail below. I tried every path I could find to avoid this, but nothing else worked for me.
Use a 30mm wrench (or plumbers wrench if you don't have a 30mm on hand) and compress the tensioner to remove the belt from the alternator.
Using an E14 socket, remove both alternator bolts.
Reach behind the alternator and remove the 13mm nut holding the positive battery feed cable and remove cable. Definitely disconnect battery before doing this if you haven't already.
I could barely reach back here, so I did not unplug the second connection, if it's accessible to you, it will most likely help you create some room.
My alternator did not want to budge, so some spray lubricant, a hammer and a small piece of wood was needed to "tap" it free.
Slide alternator to the left to create an opening large enough to fit your extension. You'll need at least an 18 inch extension going this route. I could only just fit the extension, so had to connect the E14 and swivel to the extension in the engine bay.
Feed through and remove bottom starter bolt.
Once both bolts are removed, it took a few light taps to free the starter. There's just enough space to lift it out of there, back end first.
Reinstallation is just the opposite.
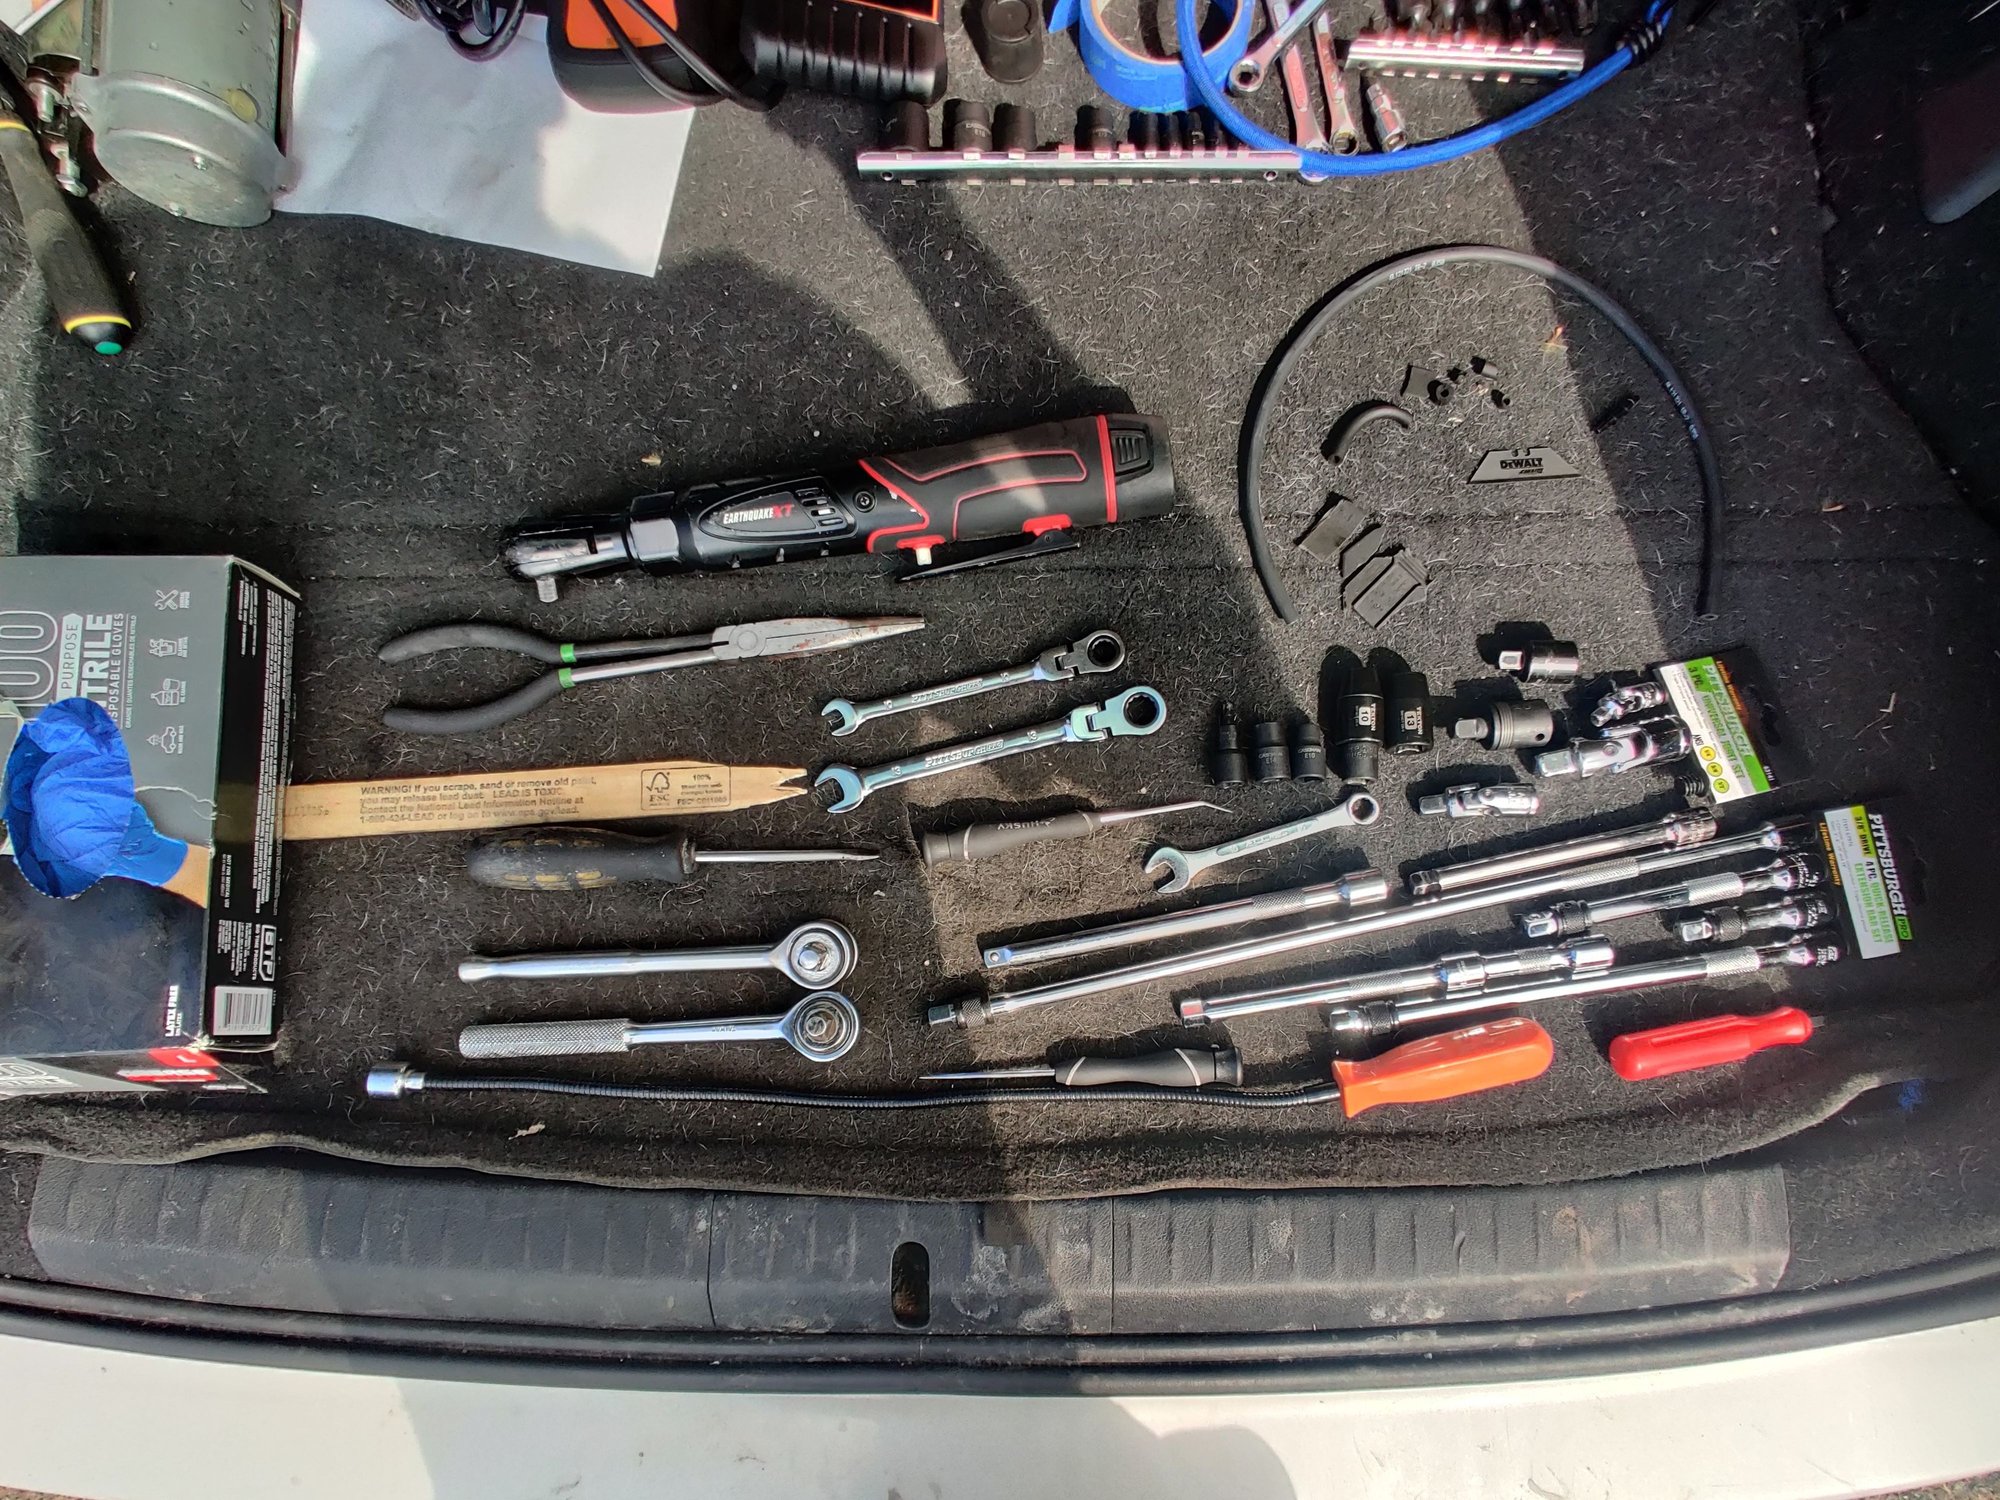
I could not get that bottom bolt into the hole during reassembly, so I installed the top bolt first to hold it in place, then used the flexible magnet to feed the bolt in to the hole. I then used a paint stick with a notch in it to hold the bolt in the hole while I removed the magnet and fed the socket onto the bolt head. Was a massive pita, but it's done! I was going to video it as well, but I'm glad I didn't as it would just have been a few hours of some random guy cursing. Anyway, hope that helps any .2 owners. I wasn't able to grab and good pics of the starter, but here's a photo showing what was removed in getting to it and the tools I used.
I am 63 and have been working on cars for years, especially classics. Also a F308 GTS QV from 1984 that is really not built for working on it. However, by replacing the starter motor on my Cayman 2.9 from 2011 I am sure Porsche won the most pita job trophy with flying colors. Whoever comes up with this deserves to do this job for the rest of their life.
I am 63 and have been working on cars for years, especially classics. Also a F308 GTS QV from 1984 that is really not built for working on it. However, by replacing the starter motor on my Cayman 2.9 from 2011 I am sure Porsche won the most pita job trophy with flying colors. Whoever comes up with this deserves to do this job for the rest of their life.
Reagrds, Bart
Love this! Yeah, I bailed and let the shop do it, along with new serpentine belt and all rollers. Looked like a one-way ticket to me imbedding tools in the wall of my garage.

 05-21-2022, 10:21 AM


 Anyway, hope that helps any .2 owners. I wasn't able to grab and good pics of the starter, but here's a photo showing what was removed in getting to it and the tools I used.