When you click on links to various merchants on this site and make a purchase, this can result in this site earning a commission. Affiliate programs and affiliations include, but are not limited to, the eBay Partner Network.
Breather line Crankcase housing hose sweating/oily!?
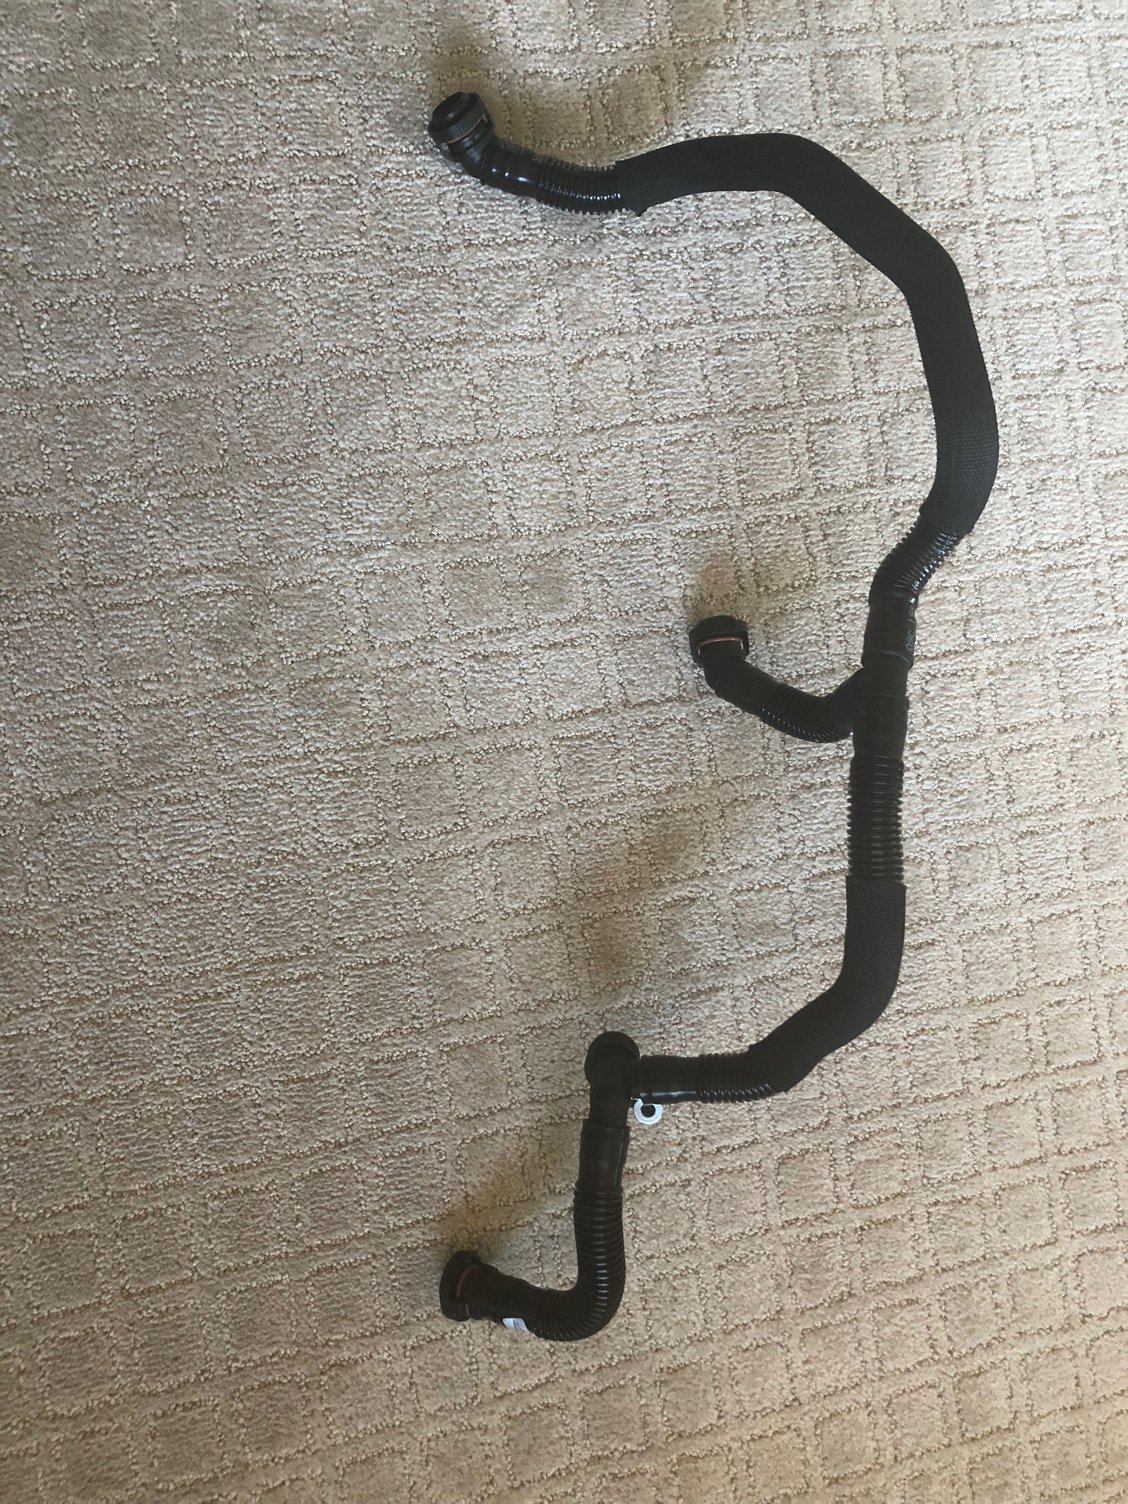
I already posted this question on a different thread about the serpentine belt, but thought I will start a separate thread to see if there are any thoughts on this. I opened yesterday the engine cover to replace the serpentine belt on my 981 boxster and noticed that this hose (Breather line Crankcase housing: 9A1.107.515.01) is at one end sweating and oily (see pictures). Any ideas what it could be? Is it normal/ok or do i need to replace the hose. I just ordered it at my local dealership just in case I have to do it but the parts guy told me that this is a super long hose and it is more than the part we see in the picture. In the picture it looks like a simple short hose which needs to be replaced. I am also wondering where the oil is coming from, there should not be any oil!? Any Ideas/Experiences would be highly appreciated.
I just looked closer on both ends of the hose and realized there are small cracks all around both ends. That must be the reason why I have from time to time the very small evap leak. I am going to replace the hose. Any thought or experience how to swap this hose? I tried it with the cold engine but it was impossible to pull the hose and I didn't put too much force. Once I have the replecment part I will try it with a warm engine, maybe it will work better. Any thoughts/experiences with this?
I was gonna say, the general area is so clean the hose itself is suspect.
I'm not going to be a bit surprised if mine has the same problem.
Wonder if its a warranty item? Hmmmm.
Thank you CaymanCrush!
From what I can see and judge, it is the hose. It is not really leaking, it is just sweating in that area seen on the picture. The issue I have found out: You can not just replace the piece of hose we see in the picture. The hose is connected to several other hoses and builds a unit, so you have to replace the entire unit!! I am even not sure how to access the other areas without taking out the entire engine. I am out of warranty so have either to give it to my Indy or just live with it. I will have my indy definitely look at it but I think this is something you can just live with it. There is no real impact on the performance of the engine and is not going to damage anything. I am sure there are many people having the same issue without even knowing that.
My part arrived and as anticipated it is pretty big. Good news is, it seem that once you have both engine covers open, you should be able to access all the areas to disconnect the old unit and hook up the new unit. No engine take down necessary at all. There is actually no bad news I looked up the instruction in the service manual everything is straight forward except one point. To access all areas necessary for this job, there are 3 steps: 1. remove the engine cover behind the seats 2. remove the engine cover under the convertible top. These 2 steps are clear but I don't know what this is: 3. Disconnect B+ socket on holder for air-conditioning compressor. And for assembling everything back after the new hose is on, they say:
1.Fit B+ socket on holder for air-conditioning compressor.
1. 1.1. Fit M6 collar nuts and tighten to Tightening Torque 10 Nm (7.5 ft. lbs.)
Anyone an idea what parts they are exactly talking about? There is no image in the manual about this step.
Independent if I find out what they are talking about here, most probably I am going to let my indy do this job. While at the first sight it looks simple, I think there are small details I might miss and it is important that the professional completes it and in the same time he can look in and around to see if there is anything else missing/wrong. I will keep you posted.
I’m curious if everyone else with the 9A1 doesn’t have the same issue? I’ll have to take my interior engine cover off at some point to see how my hoses and serpentine belt look.
I�m curious if everyone else with the 9A1 doesn�t have the same issue? I�ll have to take my interior engine cover off at some point to see how my hoses and serpentine belt look.
I have around 57k miles. This entire adventure started as my DIY 60k project. First I replaced the rear brakes and than the serpentine belt. Replacing the belt was really not necessary, the old belt looked almost brand new, I am even wondering if the former owner had it replaced at the 40k miles service. I just did it because everything was open and I had already bought the belt. This hose seem to have a crappy quality and I am pretty sure there are more cars out there with this issue, some might develop it earlier, some later. Below I have a zoomed in picture of the area where the arrow points toward. There are lots of mini cracks all around the area. There are the same cracks on the other (lower right) end of the hose. Anyway, I have the appointment in 2 weeks to get this replaced, will see what my indy says and report back. Again, I probably could do the job myself but just want to be on the safe side and have him to look over everything.
Thank you for the additional pictures, that is very helpful.
It’s certainly good to stay on top of maintenance, especially when we are running our cars hard. Let us know what your Indy says and thanks again for the info.
So my Indy replaced the part and charged me 3 hours labor which makes 360 dollars. He checked everything else and told me that the other hoses were ok. The entire adventure cost me including part and labor around 480 dollars. Did I had to spend the money? maybe not at this point but sooner or later I would have had to do that and I want to have a peace of mind so therefore I just went for it. I would highly recommend everyone who has more than 30k miles to check this part for cracks. When they do the 40k service they have to check the belt so hopefully they check in the same time this hose properly. If you are under warranty I would push the service department to check the hose for these mini cracks.
Now with new serpentine belt, new hose, new brakes, fresh engine oil, fresh brake fluid, new engine and cabin filter hopefully I am done for a while spending money and can go back and enjoy my car
Just to add some more info on these vent lines...I am doing some work on my 2009 Boxster (82k miles) and I'll be replacing both of these vent lines (9A1.107.515.01 and 9A1.107.520.01). I needed to replace a leaking power steering line and decided to replace the AOS in the process. The power steering line runs under the AC compressor so I'm removing everything in the area to see if I can fish the PS line out from under the compressor without removing it (still not sure that will be possible but i'll try). When removing the plenum the top vent line (9A1.107.520.01) the line split as soon as I put any pressure on it, it looks like it had already started splitting. The vent line that goes to the front of the engine (9A1.107.515.01) took a little more abuse while trying to fish it our but ultimately split in multiple places in the process. The "flexible" portion of the lines were very brittle on both hoses and not really flexible anymore. They are not all that difficult to replace, although you you might need to remove the plenum to replace the line at the front of the engine. If you are ever removing the plenum or replacing the AOS, I would recommend replacing these lines as a preventative measure.
I can attest that line can get very brittle. I was moving that line out of the way during an AOS change and it broke.
Three hours is a little heavy. With the covers off, it took me less than an hour. Part cost me ~ $150 at the stealership.

 09-30-2019, 04:48 PM


 I looked up the instruction in the service manual everything is straight forward except one point. To access all areas necessary for this job, there are 3 steps: 1. remove the engine cover behind the seats 2. remove the engine cover under the convertible top. These 2 steps are clear but I don't know what this is: 3. Disconnect B+ socket on holder for air-conditioning compressor. And for assembling everything back after the new hose is on, they say: