When you click on links to various merchants on this site and make a purchase, this can result in this site earning a commission. Affiliate programs and affiliations include, but are not limited to, the eBay Partner Network.
I have been looking for about a year on an option to change my driving lights (DRLs) from round LEDs to bar LEDs on my 2014 Cayman S. Surprising, I have not been able to find any aftermarket options. The only option I have been finding is to do a front bumper swap. It wasn�t something that bothered me enough to spend a couple thousand dollars to do the front-end swap, so I decided I would have to come up with an option on my own.
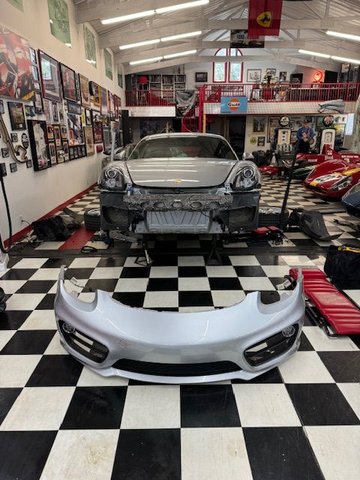
While my car was in winter storage, I decided to remove the front bumper and see if I could come up with some options for the conversion. Upon removal, I discovered that my radiators were pretty beat up from road debris, so adding a wire mesh to protect them was a must. Front bumper removed radiator condition
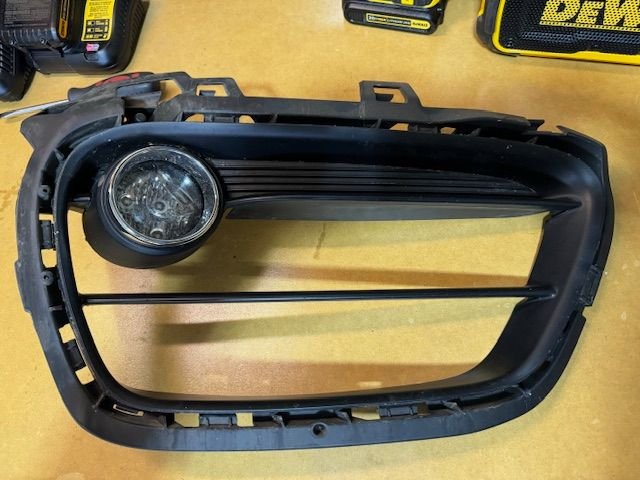
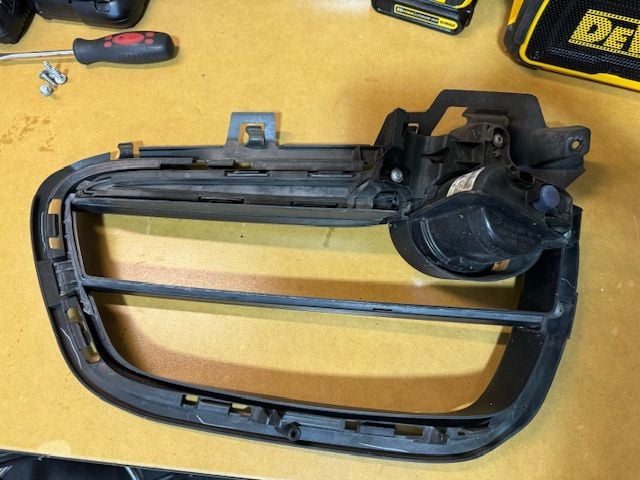
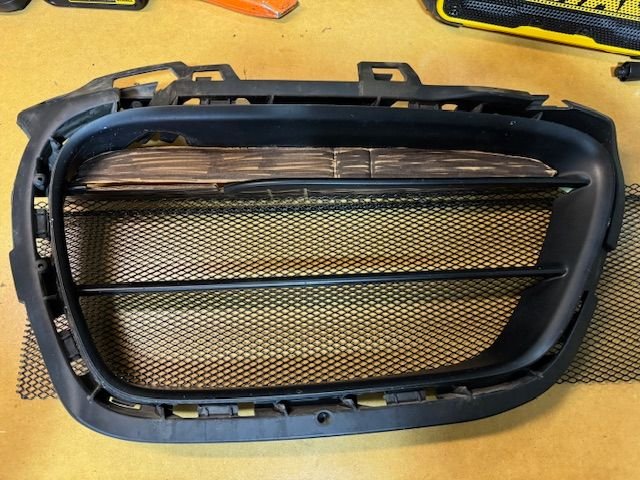
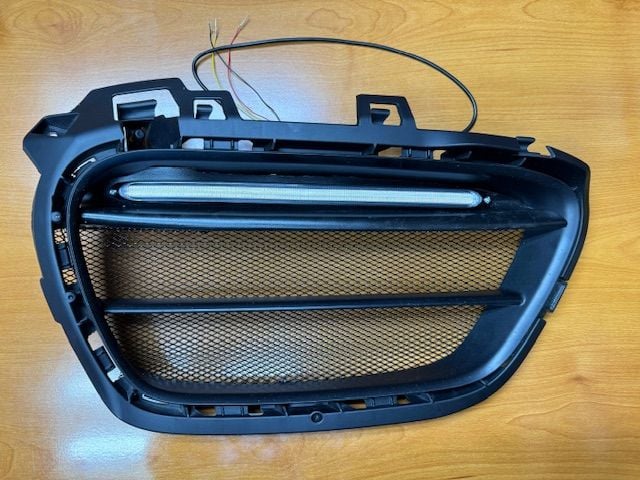
Here is the grill removed from the bumper with the round LEDs. The light is attached with screws on the back side.
front side back side DRL removed
I came up with what I think are 4 doable options.
1. Cut out the horizontal bars and the back plate at the top and attach wire mesh from the rear to protect the radiators. Attache the LED bar directly to the mesh. This would have probably been the easiest option to do. If the notches on the sides where the horizontal bars were bothered me, I could fill them with fiberglass and body filler. I could leave the lower horizontal bar on it if I wanted.
2. Fill in the missing section of the horizontal bar with a brace, epoxy, and body filler. Cover the top section with plastic and blend that in also. Mount the LED to the top section. Add screen to the lower two sections.
3. Same as option #2, but instead of all the filling and sanding, use a black plastic or rubber U-channel that fit over the top of the horizontal bar to make it look complete across.
4. Mold a piece of plastic that would cover the top section and bend over the top horizontal bar. Add screen to the bottom section and add the LED to the top section.
I decided to start with option #4 and if I didn�t like the way it turned out, I could remove it and try another option. I didn�t have to cut out anything from the original grill, so there was no risk with this option. Mockup with cardboard and screen to see how it would look.
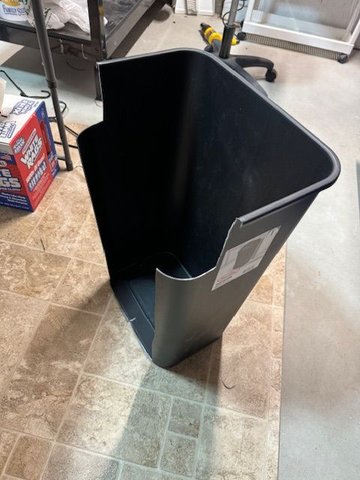
After hunting around town for something to use for the plastic that could be moldable and already black, I settled on a kitchen garbage can from a home improvement store. I bought a large sized one so I could get extra pieces out of it if my first try didn�t succeed.
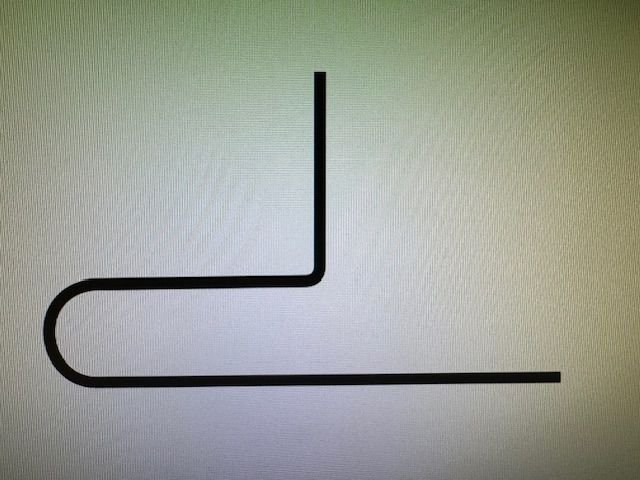
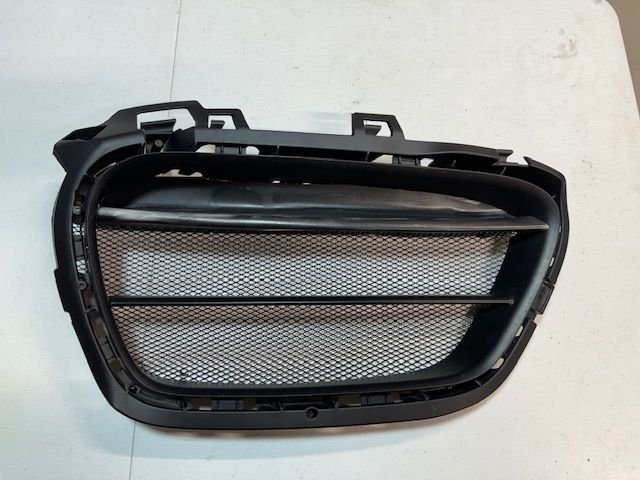
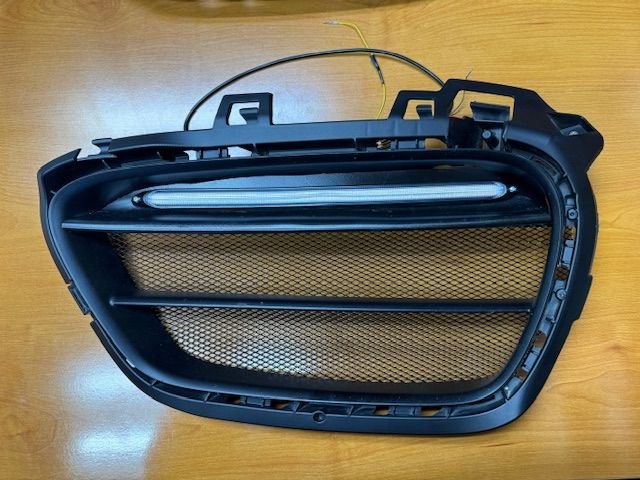
I cut out a couple sections of the garbage can. Using a heat gun, a few straight edges and some gloves, I heated up the plastic and started bending it into the shape that I wanted. I then started trimming down the molded plastic little by little to get it to fit over the top horizontal bar in the top section as cleanly as possible. I then attached it to the grill with two small black screws on the bottom side of the top horizontal bar. The Leds will be bolted through the top section and will hold that in place. I did the same for the other side and was pretty happy with how they turned out. If you wanted to get down on the ground and look them over closely while they are on the car, you will see that they are not perfect, but nobody will notice without looking that close. I painted the molded plastic with a matte black spray paint because the parts that were bent turned a little white. Because I started with a black piece, if the paint gets chipped, it shouldn�t be noticeable. Basic shape of molded plastic to cover top bar and section.
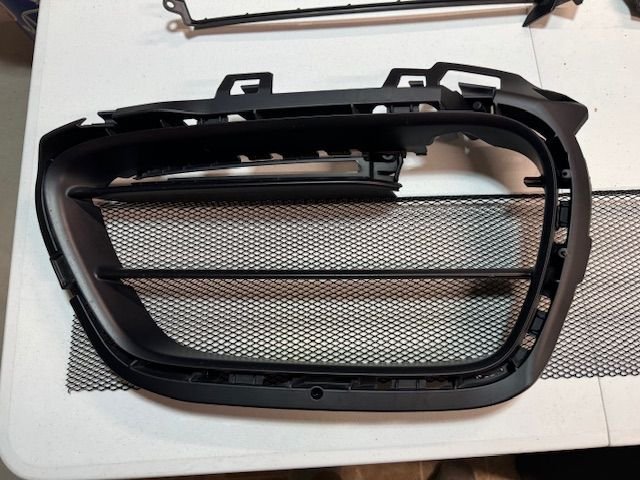
Molded plastic to cover top bar and top section.
I then used a piece of black rain gutter guard that I also bought at the home improvement store for the mesh radiator protectors on the bottom tow section. I just cut it and attached it with screws from the back side. I left one of the 90-degree bends in it and screwed that onto the lower section of the molded plastic that I made. This made the mesh very solid.
I added some 13" LED light bars that I bought on Amazon to the top section. I attached them with machine bolts. On the back side I epoxied the washers and nuts to the plastic so that if I ever had to change the lights in the future, I won�t have to pull the entire bumper off the car again. I will purchase another set of the LED bars so I can replace them if they go bad. The aftermarket LEDs can really be hit or miss on quality. Backside with washers and nuts epoxied in place and mesh screwed on. Front left side. Front right side.
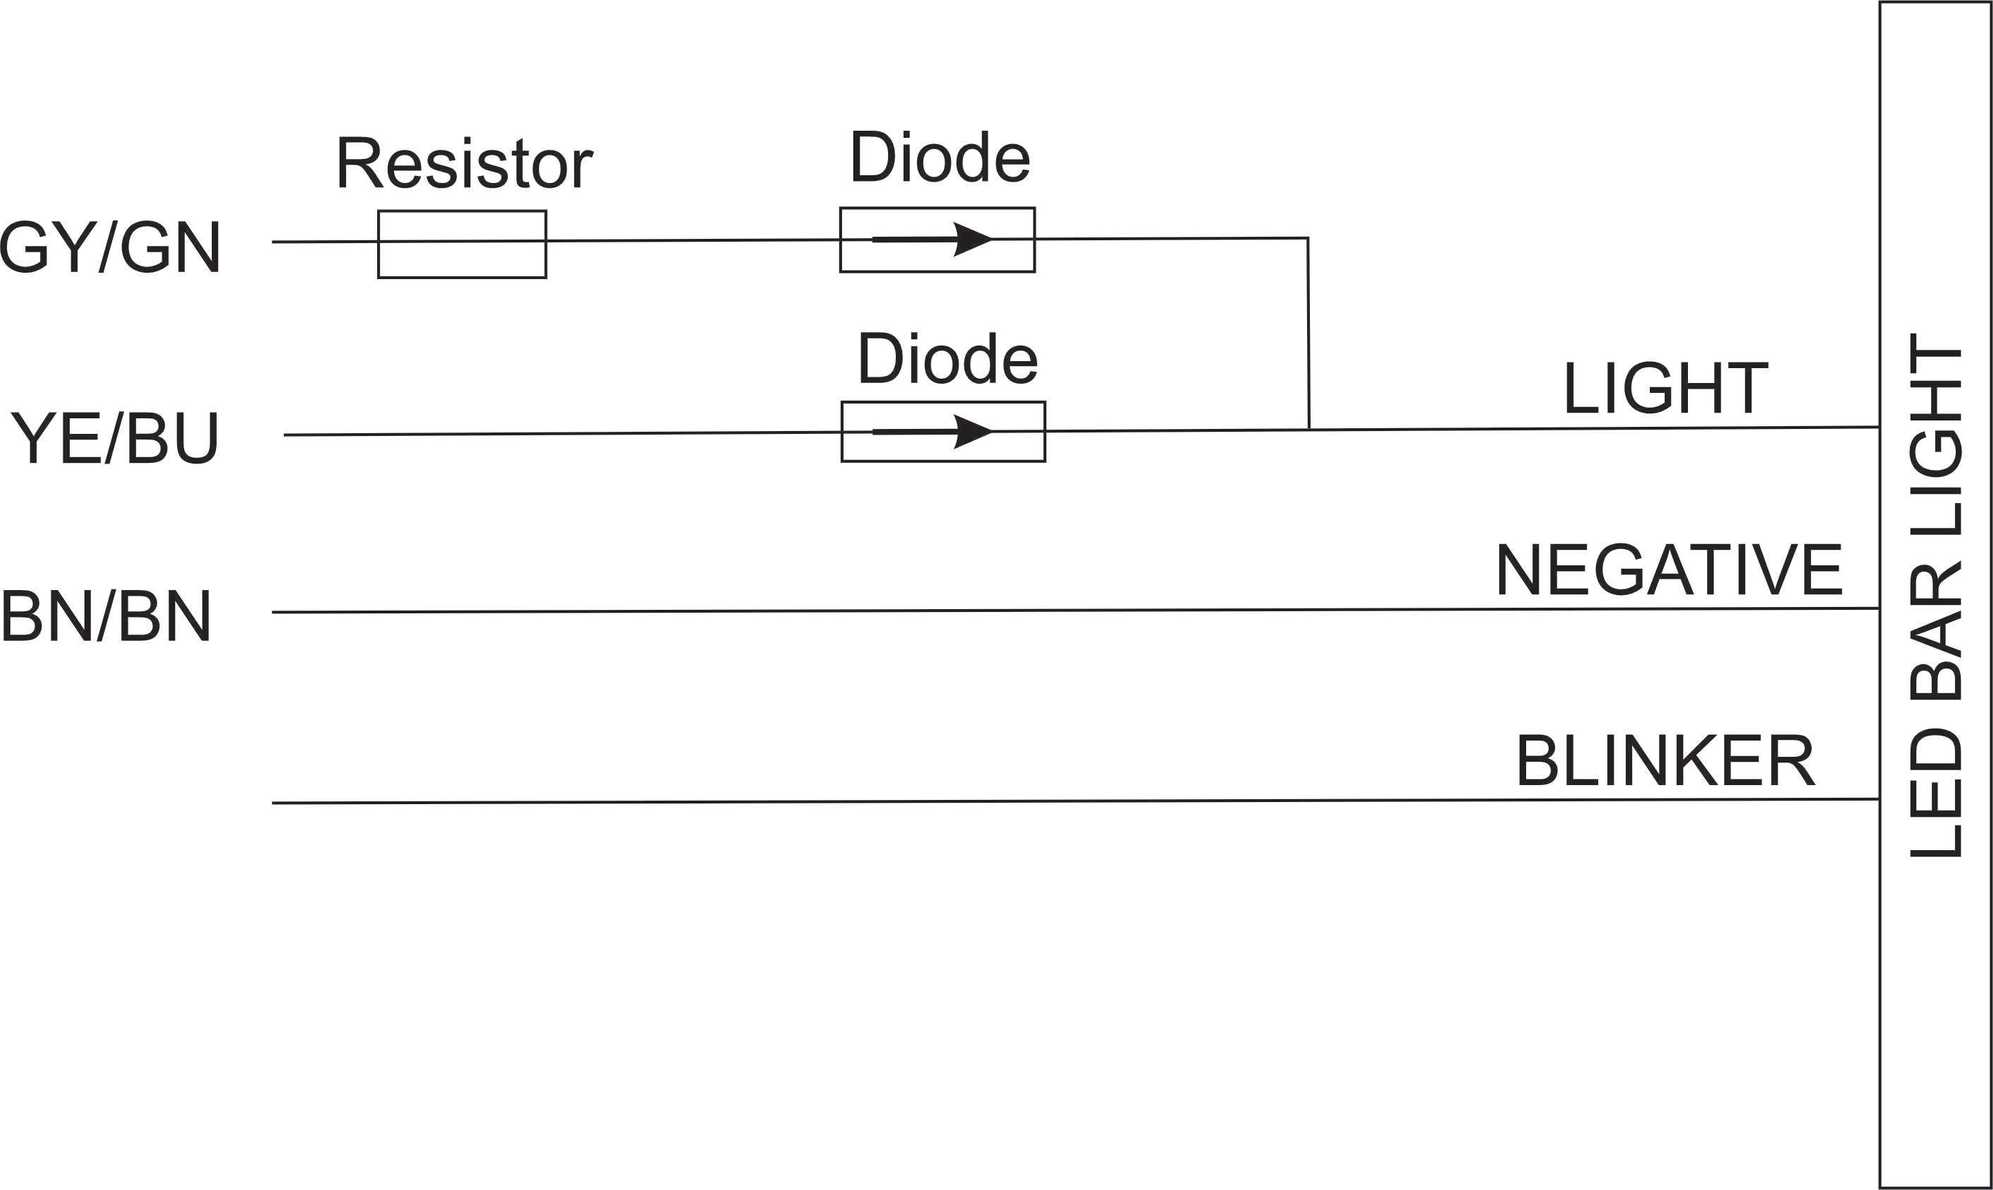
Wiring:
The factory round LEDs have three wires going to them.
Brown is the ground wire.
Yellow/Blue is the DRL power.
Gray/Green is the DRL power when the headlights are on. When this wire is powered, the lights use a lower brightness. This is done so you don�t blind oncoming drivers at night.
Both of the power wires are sending a 12 volt signal. The dimming in the night mode is in the actual light unit so a resistor will need to be used on the Gray/green wire feeding the new LEDs if you want the same effect. I used a 15 ohm, 10 watt resistor.
Since you have to hook both the power wires together to attach to the new light, you will need to use Diodes so the power doesn�t back feed to the wire that is not being used at the time. Diodes allow power to pass one way but not the other.
My new lights also have a blinker option that can be hooked up, so I did that also. I tapped the blinker wires from the back of the headlights.
Gray/yellow is the left blinker.
Gray/black is the right blinker.
I discovered that if you attach the blinker wire, you will get a dash error every time the blinker is used because it turns off the DRL while blinking. The frustrating thing was that the car didn't give an error at first, but the more I drove it, the more frequently the error showed up. After a couple of weeks, it shows the light error every time I use the blinker. I played around with a couple of resistors that I had to see if I could get the error to go away, but even using a 6 ohm resistor from the 12 volt lead to the ground, didn�t leave enough power to feed the lights. So, I had to disconnect the blinkers for now. I will try in the future to use some smaller resistors (1 or 2 ohm) and see if I can make the blinkers work without any errors. I will post that if I can figure it out. Wiring without the blinker hooked up. Wiring with the blinker hooked up.
I had screws, bolts, wire and solder/seals already, so I didn�t have to purchase them.
Conclusion:
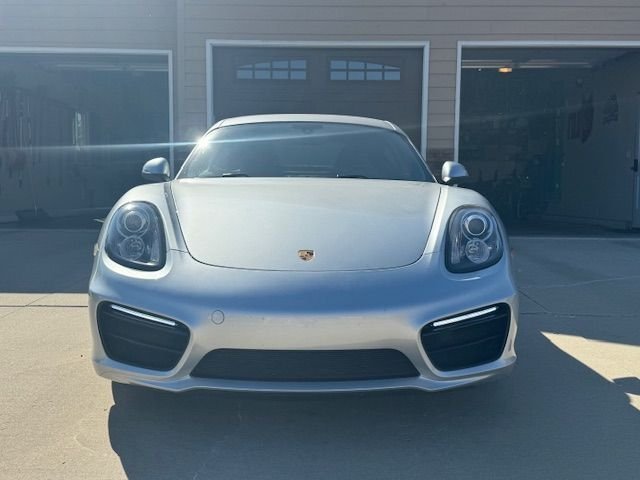
I am really happy with the way this turned out. You can�t tell that they are a DIY project unless you really look closely and know that the Cayman S came with round DRLs. I think that it makes the car look more modern. I know that some people prefer the round lights, but I like the bar lights on this modern of a car.
I didn�t write up anything about taking the bumper off because there are videos online that taught me how, so I figured that didn�t need to be covered here.
Before I put my bumper back on, I spend a lot of time with a small pick straightening out the cooling fins on my radiator. The new grills should help them in the future not get so beat up. I kept hearing about adding the mesh grills to keep the leaves out, but I think the small rocks are just as big of a concern after looking at mine.
This is my first DIY writeup, so if I missed anything or you would like more clarification on anything, please let me know. I really like seeing DIY projects on the forums, so I thought I would try to do my part and add my own to the mix.
Outside with DRLs on. Inside with DRLs on. Close up with DRL off.
This is fantastic work! Wish someone offered a direct replacement that looked similar.
Thanks, I finally had given up on someone coming up with a solution I could purchase. I am surprised someone with a large 3D printer hasn't made a new piece that could be put in place of the factory ones and started selling them. I think there would be enough interest to recoup the cost and time in development.
I just did an 1,800 mile road trip and they held up great. I am sure glad I added the screens! I would clean the larger bugs out by hand daily to make sure it didn't hinder the airflow thru the radiators.
I am 100% for this and delighted that a literal trash can was used to accomplish it. A+.
how big are we talking exactly?
I would think that in order to make one with a 3D printer, you would want to make the entire unit, not just the part that I made with the garbage can. Then people could just take theirs out and put the new one in. The entire unit is about 20" x 14". Most people who would want to buy it, don't want to do too much modifying on their own. They just want plug and play.
If you just wanted to just make the part that I did and take apart the old grill, that would be 16" x 2"
ah yeah, the size is the big issue there. then of course the finish quality -- there would be a significant amount of effort in creating an acceptable finish after the print is complete.
the entire piece is too big for most consumer grade FDM printers. the insert would be doable on any of the larger 350mm cubic printers but it'd have to be oriented in a very wasteful manner. you could also do a multipiece construction, which wouldn't be much more effort in postprocessing given the whole finishing problem in the first place.
tl;dr yeah it makes sense no one's printed one of these yet
In that case, I still have 1/2 of a garbage can if anyone wants it.
Amazing and thank you for this write up. I'm curious, have you considered OEM like the 981 GTS or 718 LED lights instead of the amazon ones? Yes more expensive but may have a better fit and similar dimensions
Amazing and thank you for this write up. I'm curious, have you considered OEM like the 981 GTS or 718 LED lights instead of the amazon ones? Yes more expensive but may have a better fit and similar dimensions
The factory ones on the GTS and 718 looked like they would have taken a lot of modifications to fit in the standard Cayman grills, if they would have even fitted. They are probably a lot more durable but also a lot more expensive. I just bought an extra set in case I have issues with the aftermarket ones in the future I can easily swap the new set in. So far, they have been holding up great. I even went on a long road trip where they endured a heavy rainstorm and lots of bugs and cleanings.
The factory ones on the GTS and 718 looked like they would have taken a lot of modifications to fit in the standard Cayman grills, if they would have even fitted. They are probably a lot more durable but also a lot more expensive. I just bought an extra set in case I have issues with the aftermarket ones in the future I can easily swap the new set in. So far, they have been holding up great. I even went on a long road trip where they endured a heavy rainstorm and lots of bugs and cleanings.
do you mind elaborating when you say 'alot of modications'?
do you mind elaborating when you say 'alot of modications'?
As @Tango30 said, they looked big and bulky. I wasn't going to put down over $350 for a set just to try when it looked like they wouldn't be easy to make fit in the top slot of the grills.
great mod I'm doing the same now was looking for an alternative to the old fashioned round lights and these just work and look factory great write up and thanks for sharing