When you click on links to various merchants on this site and make a purchase, this can result in this site earning a commission. Affiliate programs and affiliations include, but are not limited to, the eBay Partner Network.
My kit did not come with either vacuum coupler mentioned in the instructions. You need one of these:
3-way vacuum coupler for manual cars: 928.573.727.05
4-way vacuum coupler for PDK cars: 928.573.729.05
Tools
Triple-square for seatbelt cheesehead bolt
E-torx (external Torx) for seat bolts and a few others scattered around
Torx, mostly T30, for quite a few bolts
Molex style crimper to crimp the contact on the one end of the wire
Extra zip ties, it comes with a bunch but I needed more to secure the wire along the main harness route
Technically, ear hose clamp pliers for the vacuum line clamp. You could prob rig it with pliers, but I had these pliers which made it very simple
Handy Torque Specs
Exhaust header to engine: 30Nm (22ftlb) (good to check these every so often)
Header to exhaust: 23Nm (17ftlb)
Tailpipe clamp: 55Nm (41ftlb)
Seat belt cheese head bolt: 35Nm (26ftlb)
Seat rail bolts: 50Nm (37ftlb) (use provided new bolts)
Engine cover: 13Nm (9.5ftlb) (this isn't very critical, but I was curious so looked it up)
Driver's side area
Remove seat, four etorx. Careful of the connector under it
Remove door sill trim where the hood/trunk pop buttons are. it just pulls straight up
Undo lower seat belt bolt
Remove trim panels along B pillar/seatbelt area. They all just pull off
The goal is to get the carpet up enough to expose the electrical box in the styrofoam under it. That's where one end of the wire goes
Passenger side area
Remove the top side trim panel where the seat belt goes in. This is so you can remove the aluminum bar that goes across behind the seats
Trunk area
Remove basically all the trim, it all just pulls/pops out
Remove back firewall carpet and the bottom trunk carpet
Remove carpet on top of engine cover
Remove driver's side "package box" which is the storage thing with the sliding door. You take one screw out and then pull the whole thing frontward and it pops out leaving a plastic frame behind
Remove driver's side C pillar trim panel. unplug the light first
Remove the "package box" plastic frame part and then the sound deadening foam under it
Now you can run the damn wire!
NOTE: there is a different connector terminal on each end of the wire, one socket and one pin. They only give you extra square socket terminals and no extra pin terminals. So the square socket end, which goes to the box under the driver's seat, is the end you need to trim to length and put a new terminal on. So start your routing from the back, unlike what I did below.
Under the passenger seat is the plastic box with three connectors, remove the middle connector via the lever. You can then slide the gray portion of the connector out by prying up a little with a screwdriver. Then stick the terminated end of the supplied wire into the second slot, A2. It's next to a preexisting black/yellow wire which I thought was interesting.
Secure the wire with zip ties and button the area back up. thread the wire through the plastic tunnel part near the seat belt and along the path of the existing harness, tip timing it down every so often.
In the trunk remove the DME so you can get behind it and continue threading the wire through to the back right of the trunk to the connector panel.
At this panel, you are inserting the pin contact into the second-to-top black connector that is attached to the frame, not to the mating cable connector. If you unplug the black second-to-top connector, you can see it has a yellow/black wire in the third hole from the right. You're populating the mate to this. So remove the plastic frame with the connectors so you can get behind it, pop out the connector from the frame, press the purple unlock button, then insert the pin connector in to the third slow from the right. Double check the location by checking where its mating blk/yel wire is. Lock the purple lock thing back and reattach the frame to the car.
Remove stock mufflers
Yesterday I attacked the mufflers for a bit. I only had a couple house so I figured I'd just pop the old mufflers off, easy peasy. Nope, PITA. The hose/band type clamps that hold the exhaust to those support brackets were totally rusted and seized. When I used an impact on them it just twisted the whole clamp. No problem, I took an angle grinder to them and cut the clamps off. But then I found I couldn't separate the exhaust at the middle joints between left and right mufflers. I probably got the order of operations wrong here because with the exhaust loose, there' just no way to twist or apply force on the two mufflers to separate. I had cut my clamps so couldn't put them back on. I could get the back coupler clamp loose and to slide over, but the exhaust tip section just wouldn't budget. It seems that with the two halves together its an impossible puzzle to get the exhaust off the car. I finally punted and cut the over-axle tubes off with a sawzall where they meet the muffler which allowed me to drop the two mufflers off as a unit. I then body wrestled that assembly for awhile and finally got it separated and the tail pipes liberated. The lesson here is to PB Blast everything the day before and I suspect not to remove the support clamps before you have the middle section and tail pipes decoupled. Or at least leave one side clamped while you twist/wrestle the other. Also, I just read that I cold have simply removed the four bolts that hold the exhaust bracket/holder to the back of the transmission and dropped it all. Doh.
Vacuum parts
The instructions on this section are quite good and it mostly goes according to plan. I figured out a few tricks, though.
I could not for the life of me get the clip that holds the braided line to the top of the transmission to clip to the rib on the tranny. Finally I got it using a little antisieze on it.
Use windex when mating all the vacuum lines to rubber couplers so it slides in easier. they are TIGHT
I had to slice up and snip the old rubber coupler in order to get the lines out of it so I could put them in the new rubber coupler
The PSE was the first big DIY project that I did on my 2014CS four years ago. The removal of the seat and interior trim and running the wire was the most time consuming part of the installation for me. Running and fastening the vacuum lines was also a challenge and the easiest part was the installation of the mufflers. You have the hard part behind you. There were a couple of old threads on Planet9 with DIY guides that were helpful when I installed mine.
Jim
Did the programming today and it all works. Woot! Pretty pain in the *** install, but well worth it. Impressions:
It isn't THAT loud. I can see why some people just install the mufflers or leave it loud mode all the time. It's livable.
It does drone in 7th gear with the PDK on the highway. PSE on or off has very little iff any effects on the drone. It's not terrible, though, certainly livable. I'll happily do my 7hr trip to WGI every year.
It sounds freaking awesome. I swear the tone even changed a little after programming. The car is alive! And pissed!
*note, this is all with FVD catted headers installed.
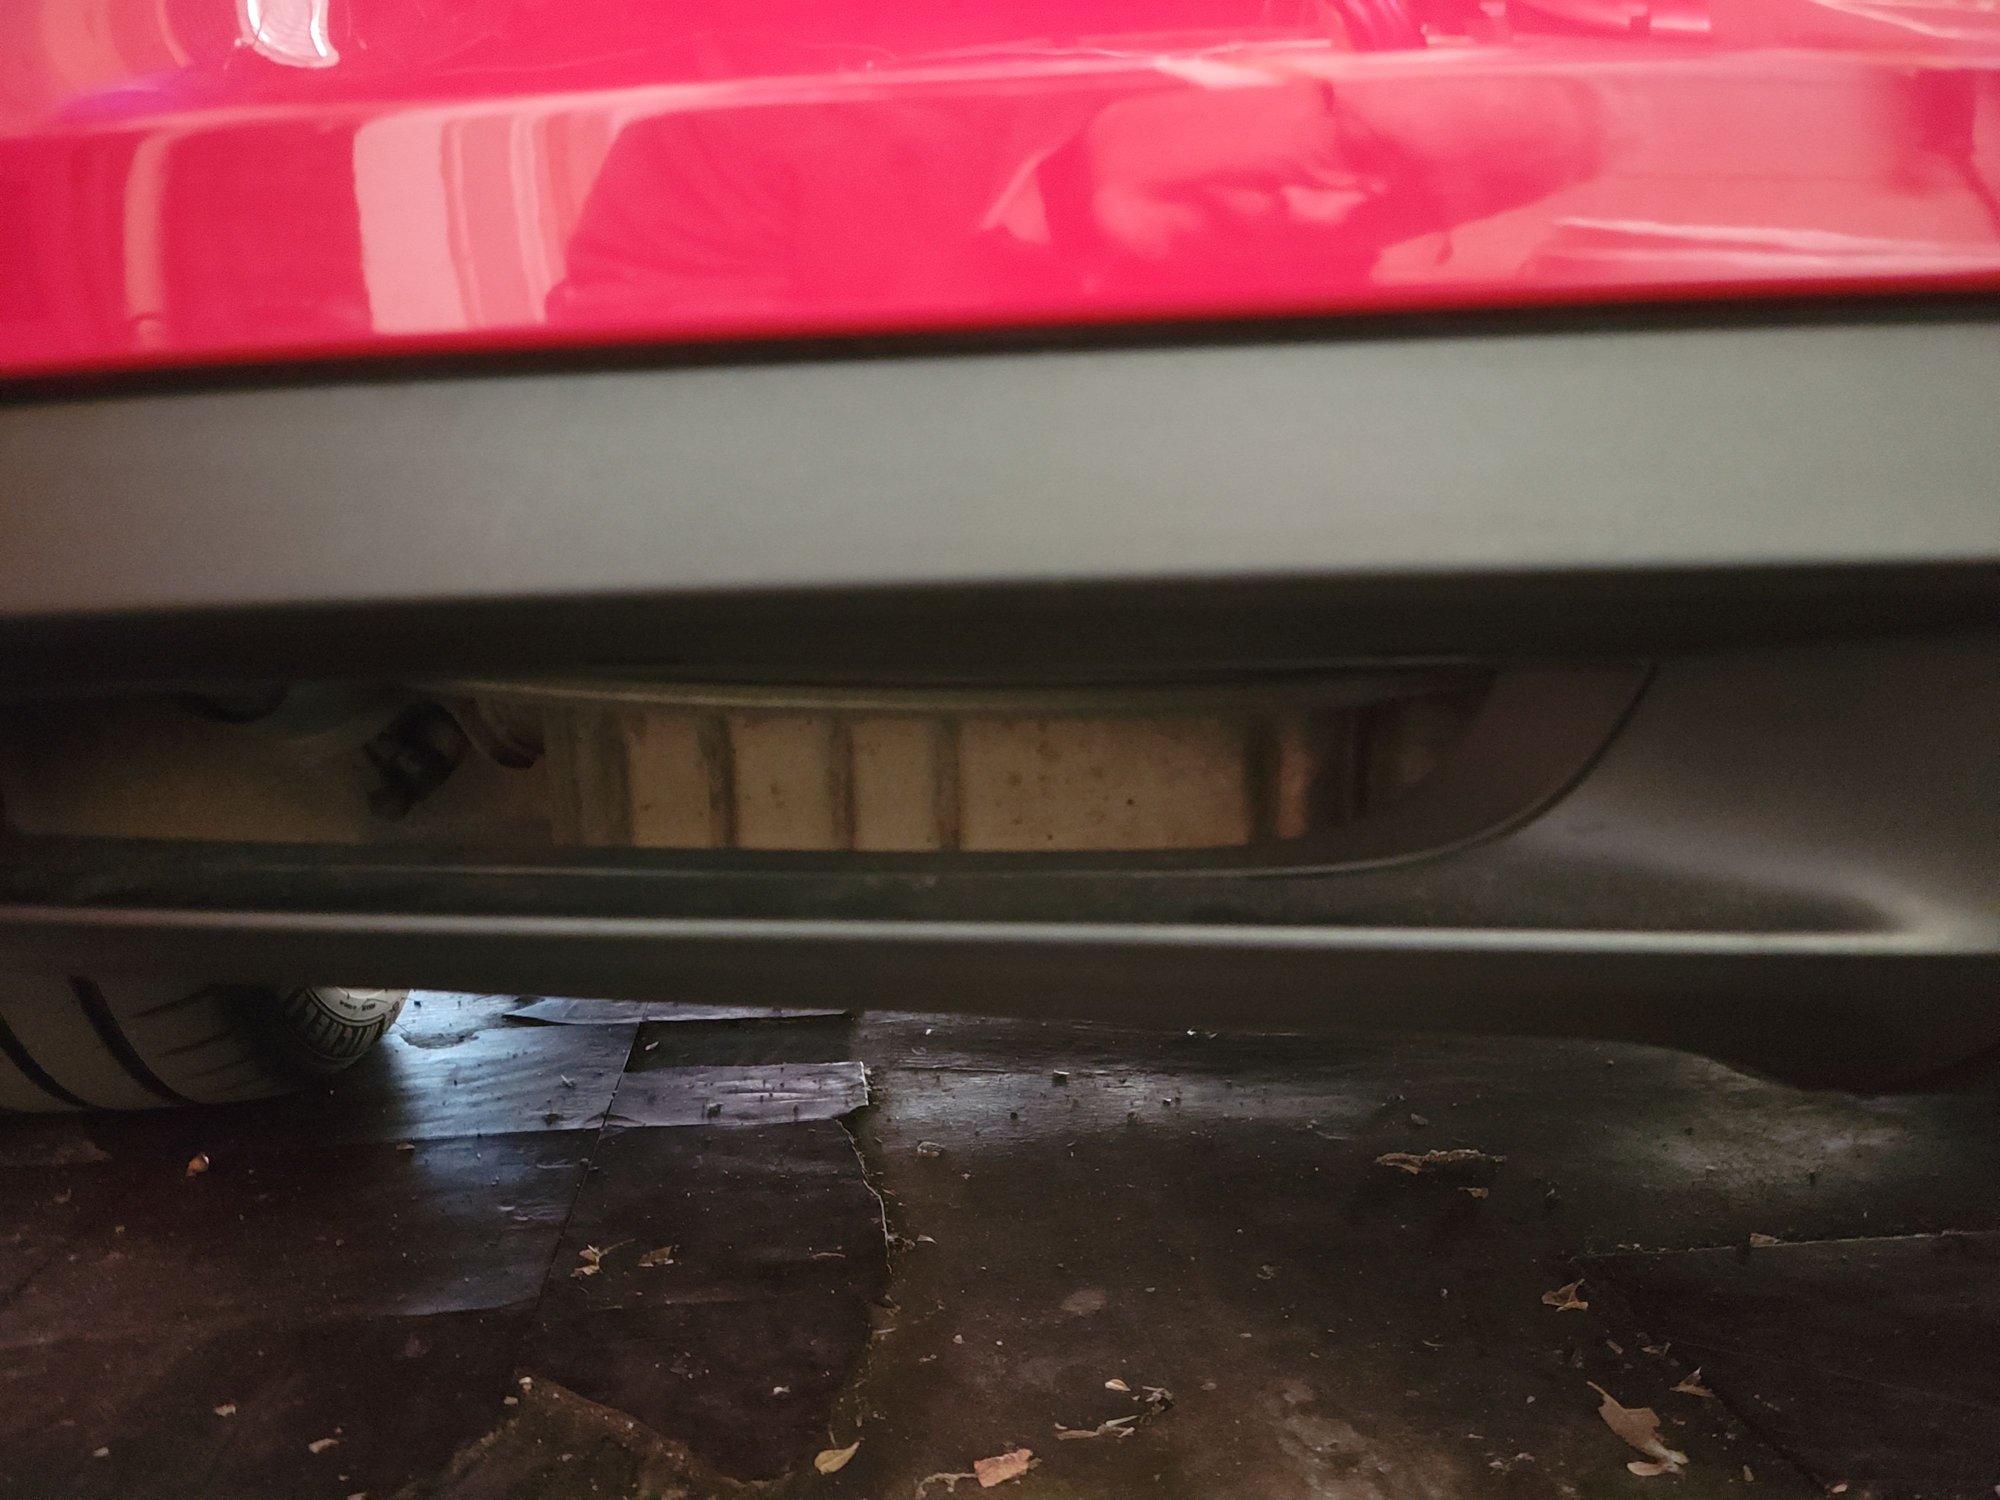
Question: I can see the PSE valve braided hoses in the cutout in the bumper/diffuser. Is that how it should be? I installed the supplied clips properly around the exhaust tip cutout area. I think I'll safety wire them up and out of the way at some point.
Here's a pic taken at ground level of my car that had PSE installed at the factory.. you can see the hose slightly, the other side is a bit less visible.
One would not see it at anything higher than ground level..
E-torx (external Torx) for seat bolts and a few others scattered around
Torx, mostly T30, for quite a few bolts
Molex style crimper to crimp the contact on the one end of the wire
Extra zip ties, it comes with a bunch but I needed more to secure the wire along the main harness route
Technically, ear hose clamp pliers for the vacuum line clamp. You could prob rig it with pliers, but I had these pliers which made it very simple
Handy Torque Specs
Exhaust header to engine: 30Nm (22ftlb) (good to check these every so often)
Header to exhaust: 23Nm (17ftlb)
Tailpipe clamp: 55Nm (41ftlb)
Seat belt cheese head bolt: 35Nm (26ftlb)
Seat rail bolts: 50Nm (37ftlb) (use provided new bolts)
Engine cover: 13Nm (9.5ftlb) (this isn't very critical, but I was curious so looked it up)
Driver's side area
Remove seat, four etorx. Careful of the connector under it
Remove door sill trim where the hood/trunk pop buttons are. it just pulls straight up
Undo lower seat belt bolt
Remove trim panels along B pillar/seatbelt area. They all just pull off
The goal is to get the carpet up enough to expose the electrical box in the styrofoam under it. That's where one end of the wire goes
Passenger side area
Remove the top side trim panel where the seat belt goes in. This is so you can remove the aluminum bar that goes across behind the seats
Trunk area
Remove basically all the trim, it all just pulls/pops out
Remove back firewall carpet and the bottom trunk carpet
Remove carpet on top of engine cover
Remove driver's side "package box" which is the storage thing with the sliding door. You take one screw out and then pull the whole thing frontward and it pops out leaving a plastic frame behind
Remove driver's side C pillar trim panel. unplug the light first
Remove the "package box" plastic frame part and then the sound deadening foam under it
Now you can run the damn wire!
NOTE: there is a different connector terminal on each end of the wire, one socket and one pin. They only give you extra square socket terminals and no extra pin terminals. So the square socket end, which goes to the box under the driver's seat, is the end you need to trim to length and put a new terminal on. So start your routing from the back, unlike what I did below.
Under the passenger seat is the plastic box with three connectors, remove the middle connector via the lever. You can then slide the gray portion of the connector out by prying up a little with a screwdriver. Then stick the terminated end of the supplied wire into the second slot, A2. It's next to a preexisting black/yellow wire which I thought was interesting.
Secure the wire with zip ties and button the area back up. thread the wire through the plastic tunnel part near the seat belt and along the path of the existing harness, tip timing it down every so often.
In the trunk remove the DME so you can get behind it and continue threading the wire through to the back right of the trunk to the connector panel.
At this panel, you are inserting the pin contact into the second-to-top black connector that is attached to the frame, not to the mating cable connector. If you unplug the black second-to-top connector, you can see it has a yellow/black wire in the third hole from the right. You're populating the mate to this. So remove the plastic frame with the connectors so you can get behind it, pop out the connector from the frame, press the purple unlock button, then insert the pin connector in to the third slow from the right. Double check the location by checking where its mating blk/yel wire is. Lock the purple lock thing back and reattach the frame to the car.
Remove stock mufflers
Yesterday I attacked the mufflers for a bit. I only had a couple house so I figured I'd just pop the old mufflers off, easy peasy. Nope, PITA. The hose/band type clamps that hold the exhaust to those support brackets were totally rusted and seized. When I used an impact on them it just twisted the whole clamp. No problem, I took an angle grinder to them and cut the clamps off. But then I found I couldn't separate the exhaust at the middle joints between left and right mufflers. I probably got the order of operations wrong here because with the exhaust loose, there' just no way to twist or apply force on the two mufflers to separate. I had cut my clamps so couldn't put them back on. I could get the back coupler clamp loose and to slide over, but the exhaust tip section just wouldn't budget. It seems that with the two halves together its an impossible puzzle to get the exhaust off the car. I finally punted and cut the over-axle tubes off with a sawzall where they meet the muffler which allowed me to drop the two mufflers off as a unit. I then body wrestled that assembly for awhile and finally got it separated and the tail pipes liberated. The lesson here is to PB Blast everything the day before and I suspect not to remove the support clamps before you have the middle section and tail pipes decoupled. Or at least leave one side clamped while you twist/wrestle the other. Also, I just read that I cold have simply removed the four bolts that hold the exhaust bracket/holder to the back of the transmission and dropped it all. Doh.
Vacuum parts
The instructions on this section are quite good and it mostly goes according to plan. I figured out a few tricks, though.
I could not for the life of me get the clip that holds the braided line to the top of the transmission to clip to the rib on the tranny. Finally I got it using a little antisieze on it.
Use windex when mating all the vacuum lines to rubber couplers so it slides in easier. they are TIGHT
I had to slice up and snip the old rubber coupler in order to get the lines out of it so I could put them in the new rubber coupler
I mentioned in post #2 above about my PSE installation on my 981CS and have a few comments and tips. You mention a connection needed to the box under the passenger seat and I think that only the drivers seat needs to be removed to make the connection to that box and nothing needs to be done under the passenger seat. I also struggled with the clip to secure the vacuum line on top of the PDK.
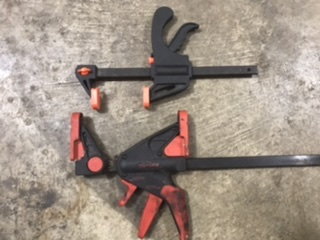
I did use a liberal amount of PB Blaster on the exhaust pipes and bolts a couple of days in advance and used a clamp with a reversed the end to use as a �spreader� to separate the mufflers and exhaust tips and was able to remove the complete exhaust without any cutting. I had previously installed aFe catted headers so the header to exhaust bolts were relatively fresh.
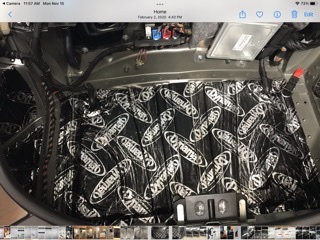
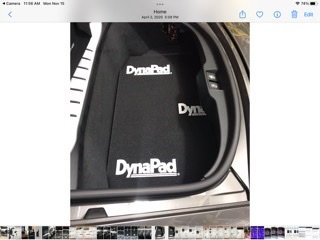
I also had some minor drone in 7th gear at low rpm even with the PSE off so I removed the carpet in the trunk and noticed that there�s vibration by tapping on the truck floor. I applied DynaMat on the floor and DynaPad on top of the carpet with the Porsche mat on top. I didn�t do a sound test but my wife no longer complains about drone😌. Jim Reversed bottom clamp to use as a spreader DynaMat installed on trunk floor and even wheel wells DynaPad lays loose between the carpet and a Porsche rubber mat
 11-06-2021, 03:11 PM