When you click on links to various merchants on this site and make a purchase, this can result in this site earning a commission. Affiliate programs and affiliations include, but are not limited to, the eBay Partner Network.
I have a couple of questions:
1. Am I correct in assuming that I can remove the 6 bolts, 4 on the fuel rail cover and then the 2 for the seal cover and just replace the gasket and o-ring?
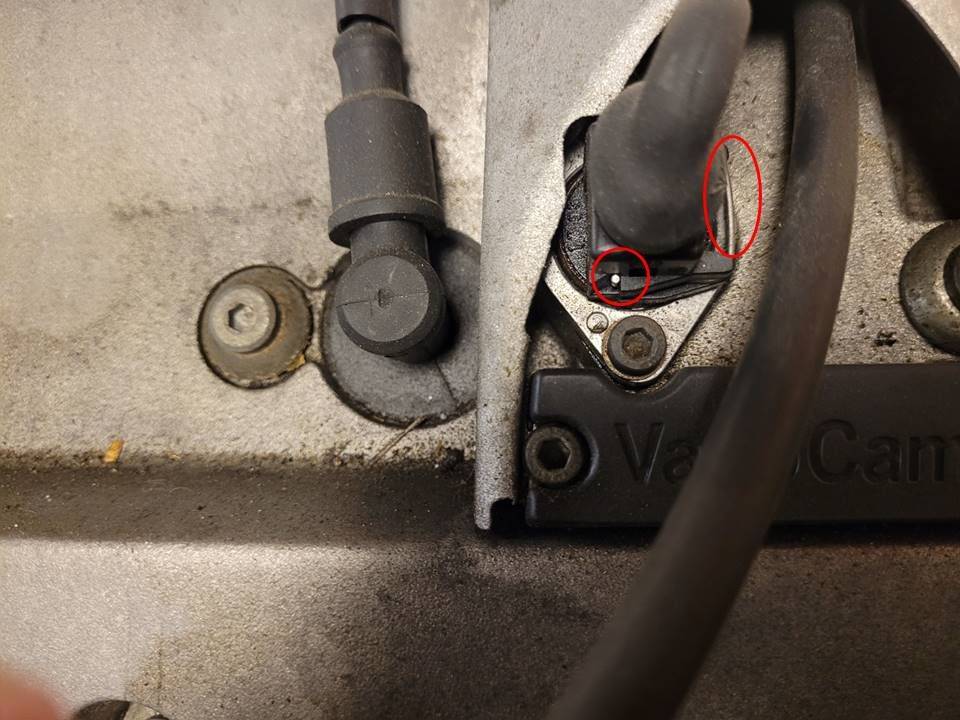
2. How do you loosen the connector to the solenoid circled in red on the photo? It looks like it is a "cotter pin" that wraps around the connector and then bends up. Before I break it, am I missing something? Do I even need to disconnect it to be safe?
With that connector, you don't need to bend anything. Once you get the beauty cover off, that's the one with the lobster fork think that the solenoid sits in, all you have to do is push in the wire "bar" on the right side of the connector. This is circled in the big oval in your picture. That will disengage the locking mechanism for the connector and you should be able to wiggle it off. You'll have to keep it depressed during removal as it's actually part of a spring loaded catch.
ETA: You may not even have to remove the beauty cover to remove the connector but the other work you're talking about may be easier if you do. Take a look at PET and it will tell you what's involved in sealing that connection from leaks.
Cheers
Last edited by Zirconocene; Dec 5, 2024 at 01:01 PM.
With that connector, you don't need to bend anything. Once you get the beauty cover off, that's the one with the lobster fork think that the solenoid sits in, all you have to do is push in the wire "bar" on the right side of the connector. This is circled in the big oval in your picture. That will disengage the locking mechanism for the connector and you should be able to wiggle it off. You'll have to keep it depressed during removal as it's actually part of a spring loaded catch.
ETA: You may not even have to remove the beauty cover to remove the connector but the other work you're talking about may be easier if you do. Take a look at PET and it will tell you what's involved in sealing that connection from leaks.
Cheers
Thanks! That did the trick. The beauty cover came off quite easily, followed by the connector with your advice.
Once I could look at the lid, I think I can say that the seals seemed to be working. The lid, however, has seen better days. How often do the lids crack like that? Anyway, new lid is on order.