When you click on links to various merchants on this site and make a purchase, this can result in this site earning a commission. Affiliate programs and affiliations include, but are not limited to, the eBay Partner Network.
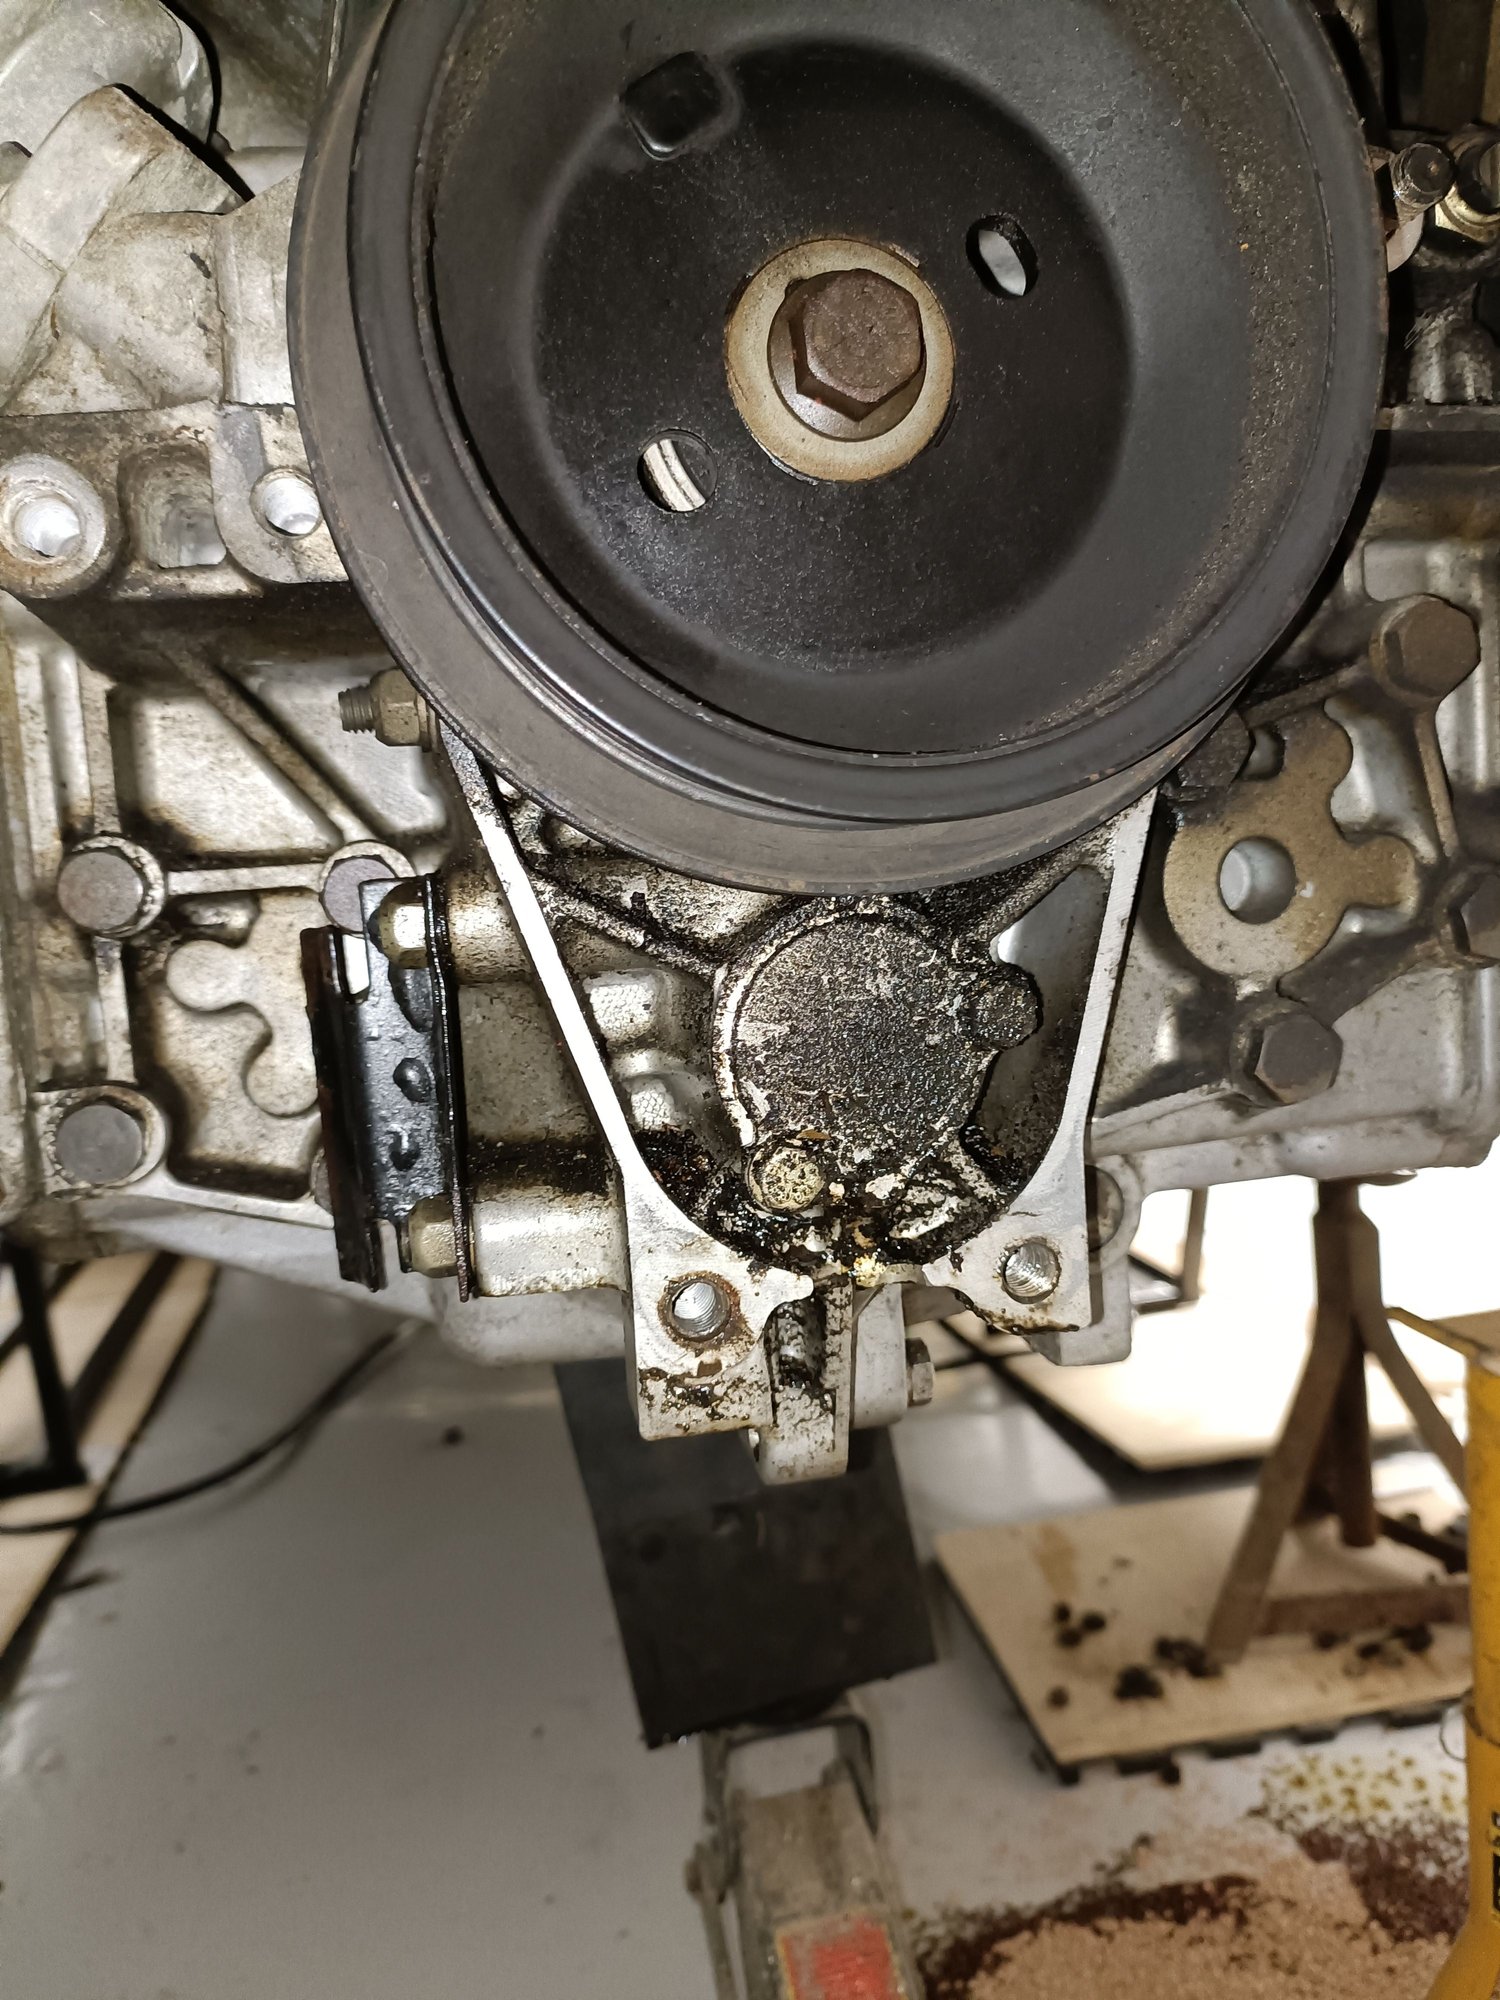
I am about half way through taking parts off the back of the engine to get at the covers and bottom pulley, but I assume from what I see in front of me, and the image of the AC idler above, that the AC compressor needs to be removed in order that the idler and the alloy part it mounts on, to be taken off? It looks as though the cover plates are mounted behind that part, or at least the bolts holding the covers on pass through that big alloy part before securing the cover plates, correct?
Last edited by Megatron-UK; 08-16-2022 at 05:50 PM.
Yes right, the A/C compressor has to be removed and put aside, leaving the lines connected. And the console of the compressor (big alloy part) is bolted together with the support plate of the rear engine suspension to the engine housing. Probably also a part of the rear sheet metal has to be removed to get the bracket out.
@ Black Hat and Metal: You are correct, the pulley I described is only on the 3.6. It is also called a vibration damper in the parts catalog, the one on the 3.3 has a different part number and is called a pulley.
Spent a bit of time undoing most of the mounting bolts around the AC compressor this evening, I have removed the following:
4x nuts on the studs in the base of the compressor, attaching it to the alloy bracket with the AC idler pulley
1x nut attaching a stud on the alloy bracket to a short, vertical stabilising bar in the gap to the right of the fan housing
2x bolts in the base of the alloy bracket into the crankcase, next to the two bolts holding the covers/turbo support bracket.
1x long bolt through top, rear-right of the compressor, attached to a bar running diagonally down onto the right hand cylinder bank.
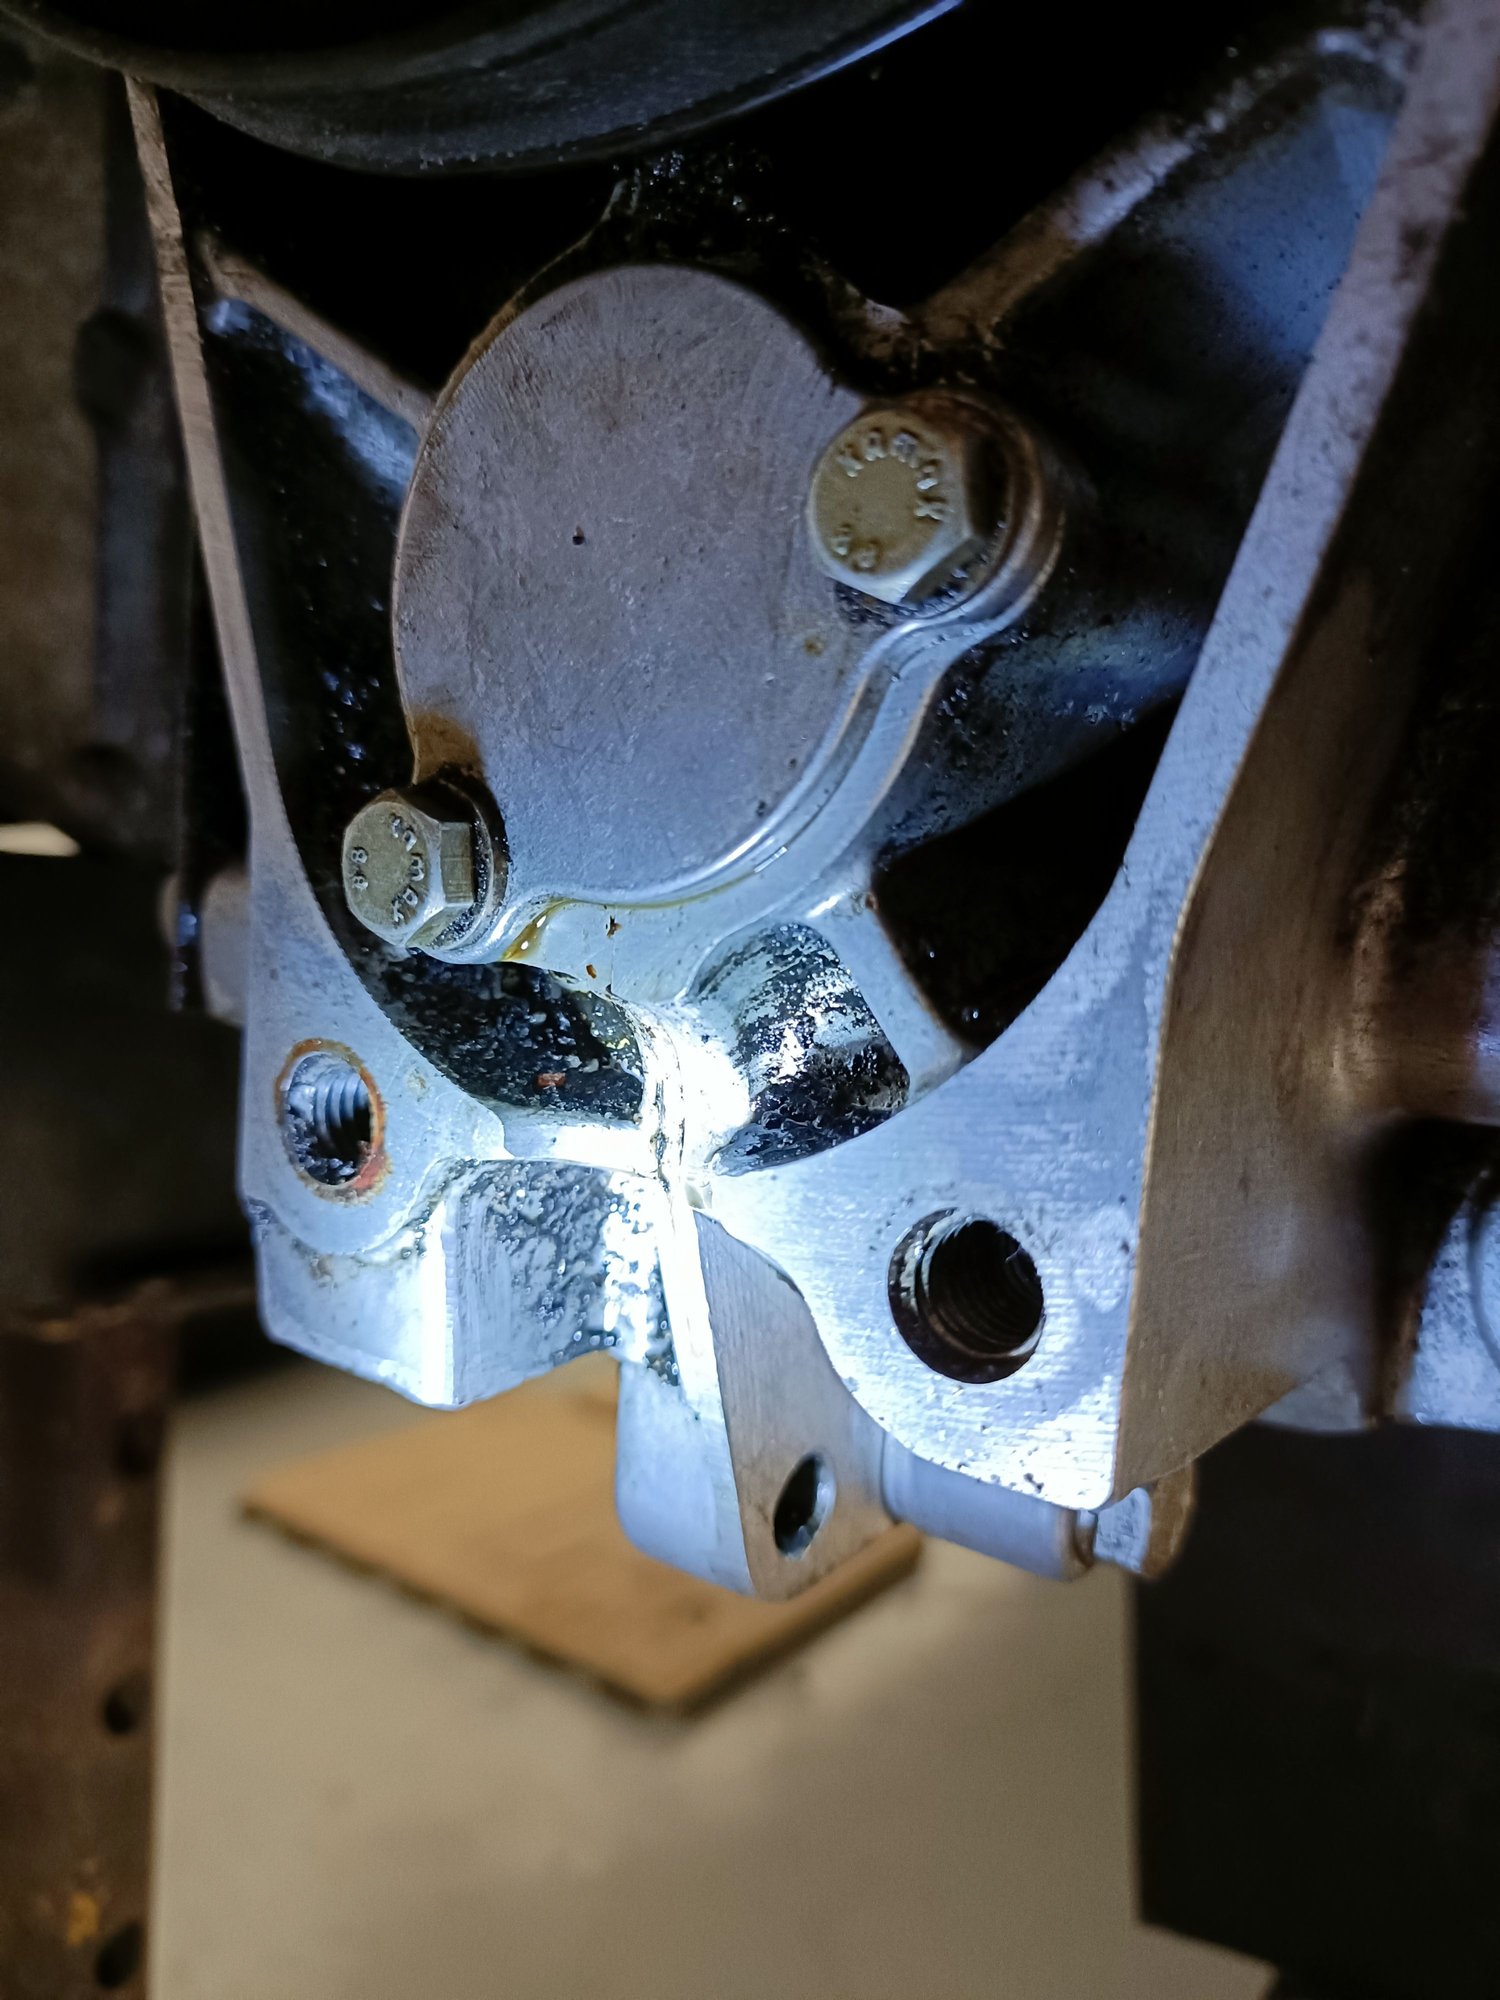
I *think* I just have one nut remaining, which appears to hold the alloy bracket to a pressed steel bracket on the right hand cylinder bank (though this is proving awkward to get a spanner or ratchet on with enough leverage).
Am I missing anything further? The compressor is loose and the AC belt is off - just wondering if there is anything more than that one remaining nut holding the alloy bracket on.
Last edited by Megatron-UK; 08-20-2022 at 03:36 PM.
That sounds complete to me, includes for the mentioned hard-to-reach nut on the strut to the right of the blower. The aluminum console should be loose, but it may be that the rear engine tin has to be loosened to remove the console from the top. You can only remove the engine tin when the console is removed.
The rear engine tin has to be dismantled anyway if the sword is to be removed. Good oportunity to refurbish and stick a heat protection film where the loader and the cat is. This protects the paint from burning again soon.
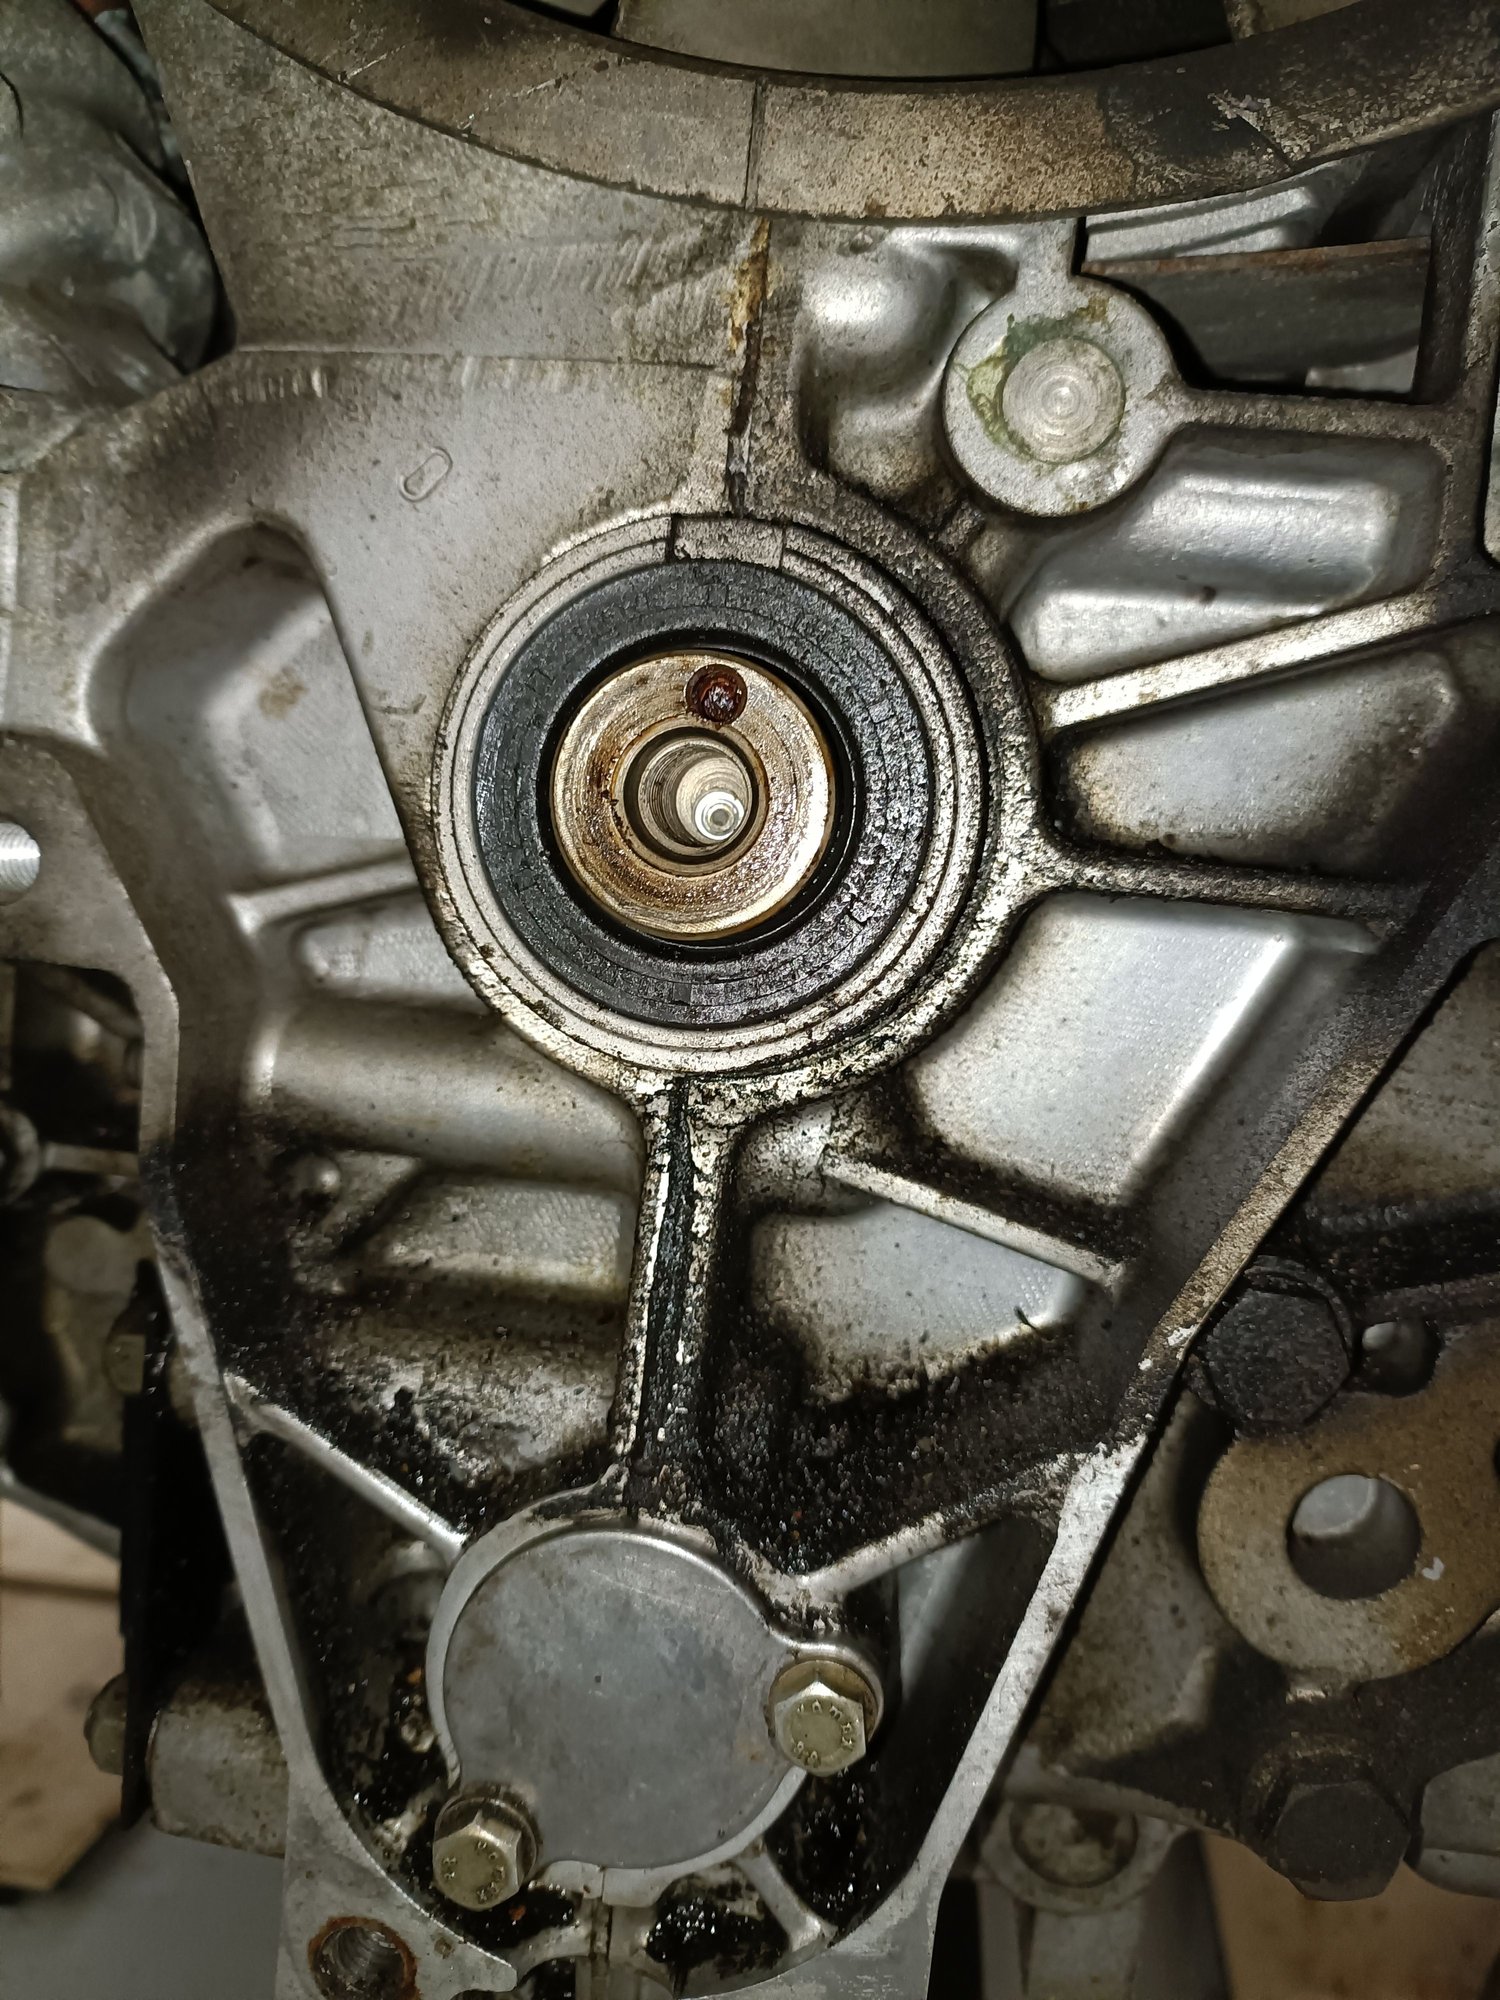
Finally got everything off, bar the bottom pulley, but it is already looking like there has been at least a minor leak for some time. Can't quite tell where it is from until I get the pulley off. It's not pouring out, but there's enough to make a sludgy mess with all the dust around there
good news is that I haven't seen any visible oil anywhere else - side of heads, the chain lube oil lines, etc or indeed anywhere higher up. Fingers crossed it is the intermediate shaft o ring....
Quick clarification - it is only the o-ring that fits around the end of the small cover plate that seals the intermediate shaft, correct? There isn't a seal behind the circlip is there? With the cover plate off, oil runs freely from around the intermediate shaft (my engine is slanted backwards slightly on the stands, so the oil level is slightly above that point).
Well the intermediate shaft o-ring is definitely leaking - after cleaning around just the end plate and re-fitting... An hour later:
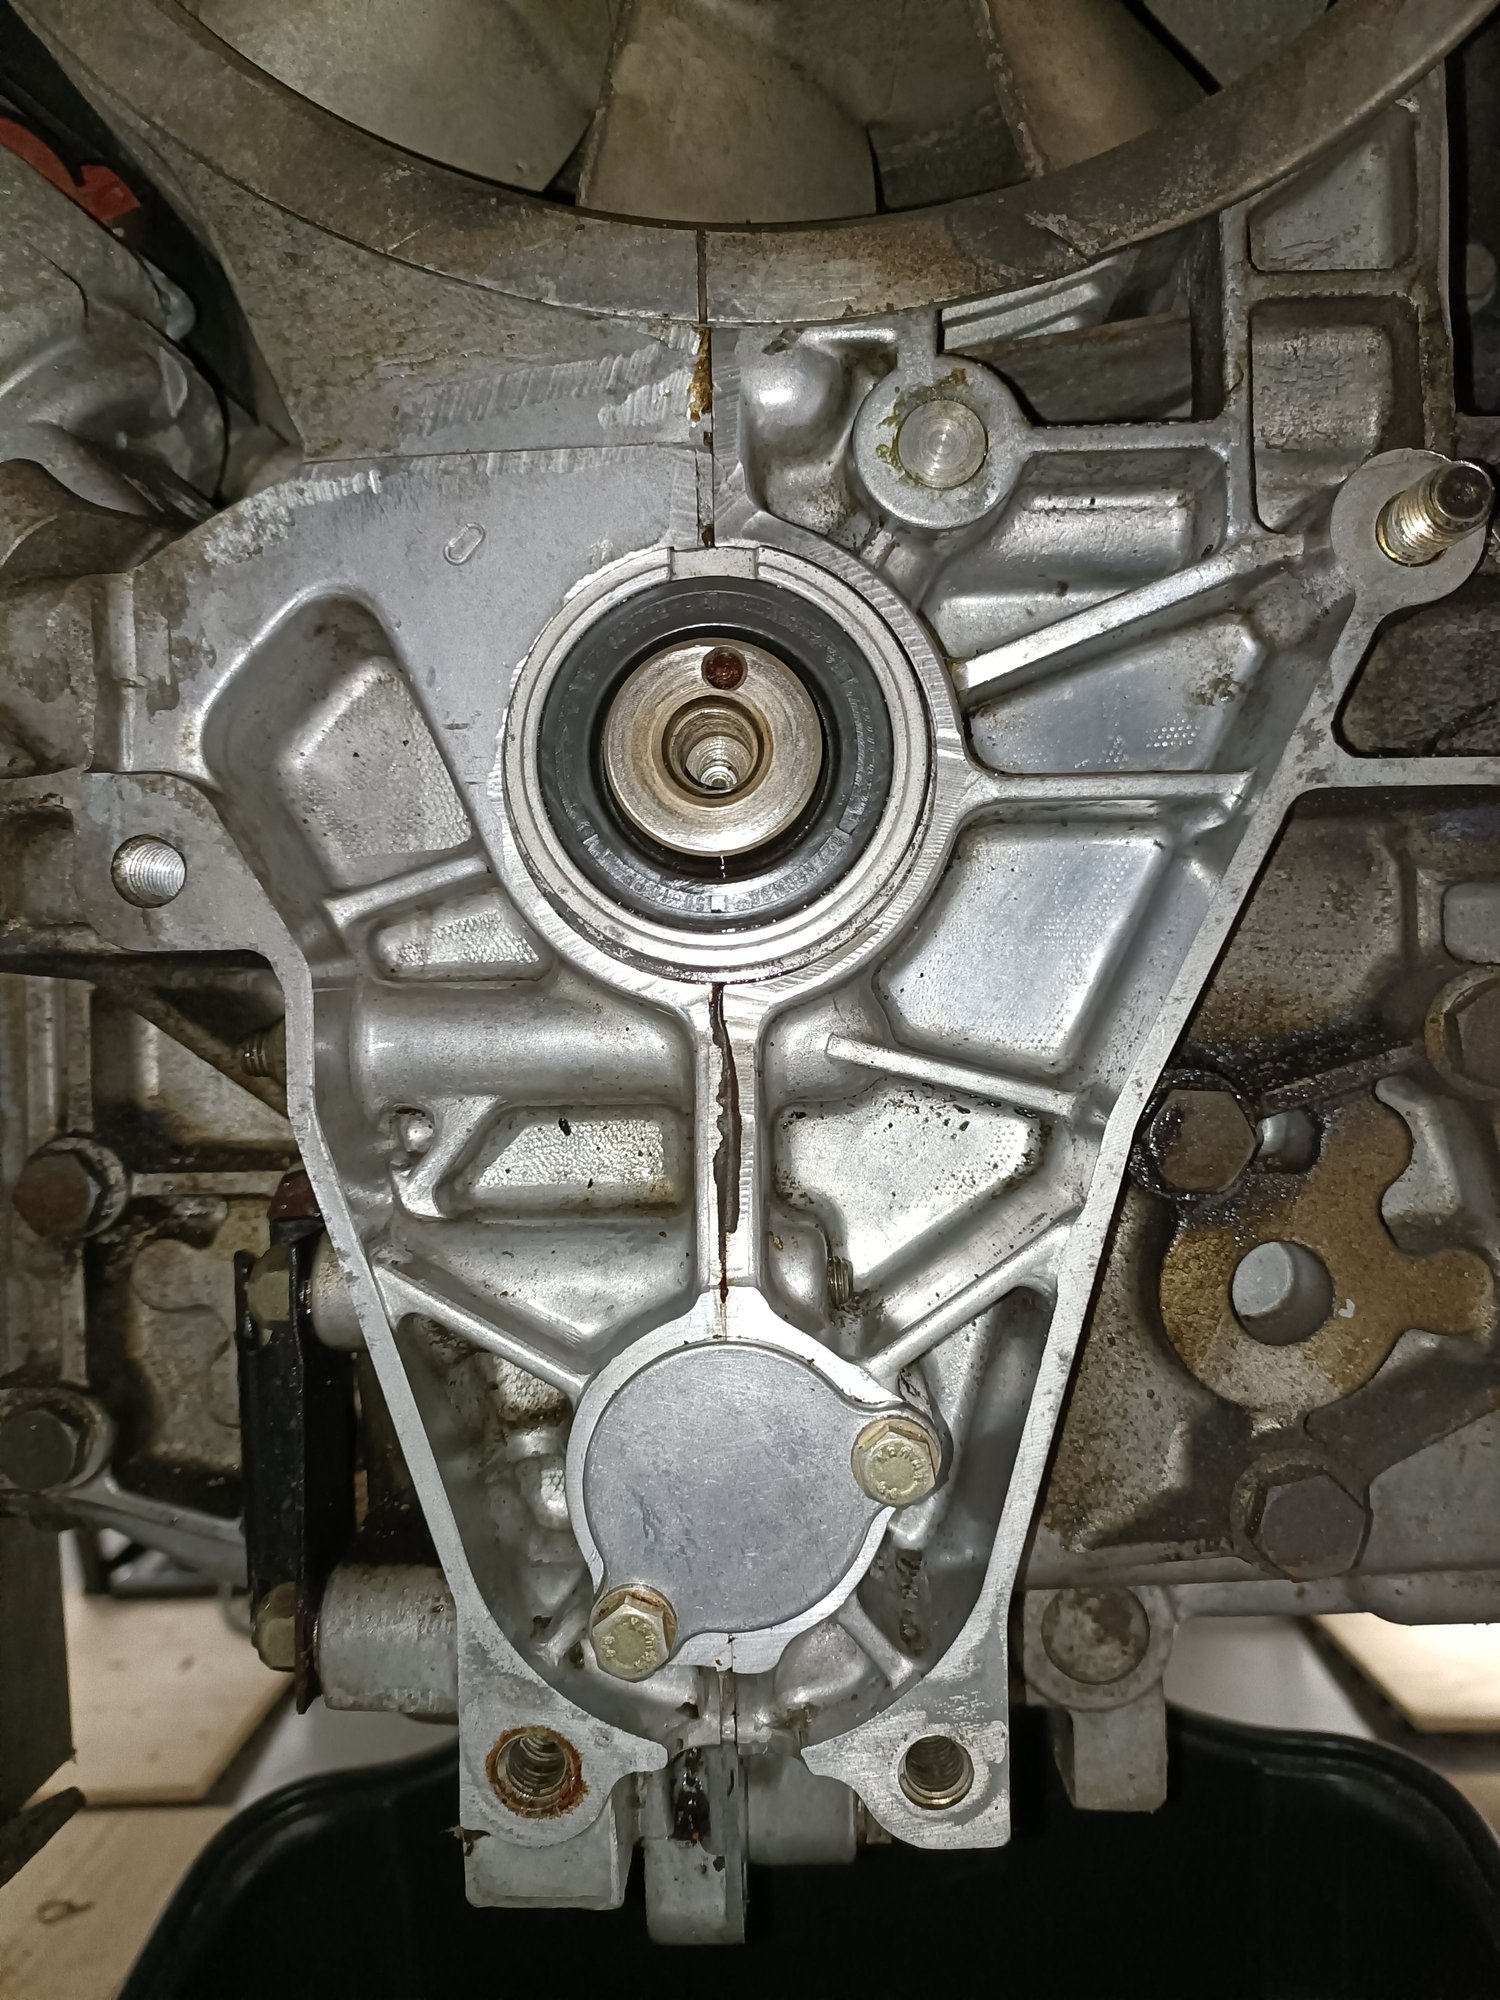
Of course, that's not to say the crank seal isn't also leaking. Have nothing to remove it with right now - hoping, that since it's the dowel-and-peg fit, like other 3.3 owners have noted (and not taper fit?) that an impact driver should loosen it?
Last edited by Megatron-UK; 08-28-2022 at 03:02 PM.
I think I have convinced myself that the source of the leak has been the intermediate shaft cover plate and not the crank seal; there was very little oily gunk behind the pulley, a little, but nowhere near as much as I would have thought, given the sludge at the bottom.
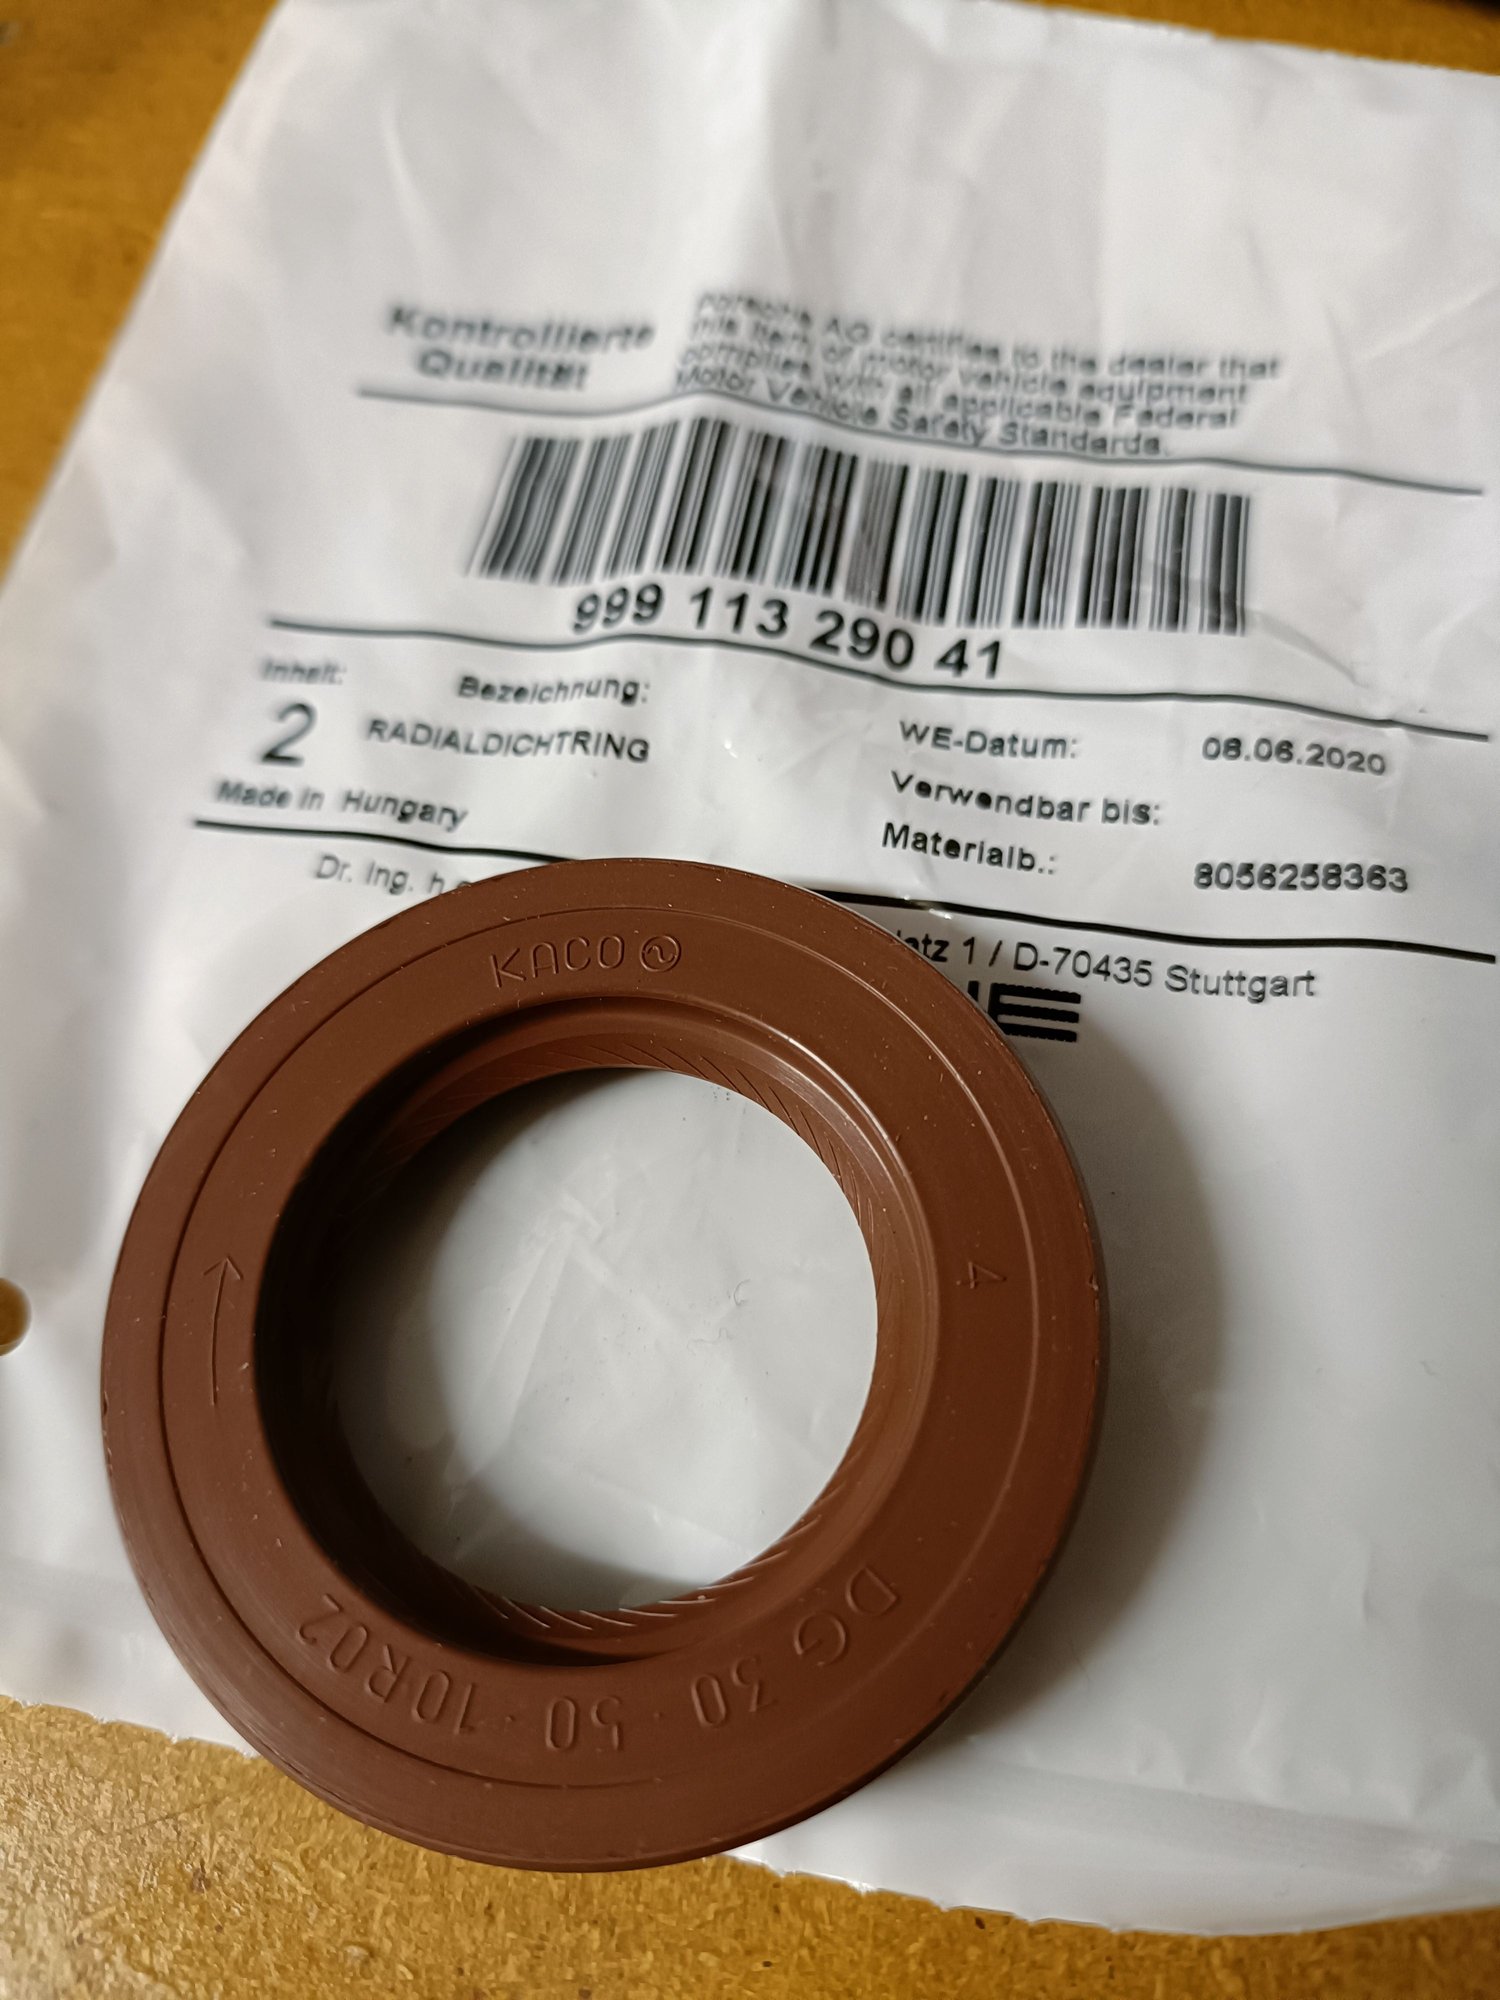
I have degreased it all and am leaving it a day or two to see if I can get an idea of the amount leaking from the cover plate, but I have the o-ring on order anyway:
Is it worth disturbing the crankshaft seal to replace while I am in here, or do new seals have a reputation for leaking? The replacement is one of these:
Also, my tool kit doesn't appear to have anything in that would act as a locking/holding tool for the pulley to re-tighten; I have the towing eye, manual cranking handle, screwdriver and blades, pliers, spanners, spark plug tool and an L-shaped, flat-bladed screwdriver. Nothing that I can identify as usable as a locking tool.
Last edited by Megatron-UK; 08-29-2022 at 07:57 AM.
The seal replacement technique is to remove the old seal with a hook tool (DO NOT use a screwdriver; it's easy to damage the case while using one), lube up the shaft and housing with some motor oil and then carefully install the new seal, using the old seal flipped backwards and tapping on that with a mallet. Just make sure it's going on dead straight.
The front seal is easier to install than a rear main seal. It's a good way to gain some experience.
It went on easy enough - I cleaned the shaft and housing with 99% alcohol and then put a couple of drops of engine oil on the shaft - I didn't put any on the outer surface of the seal or seal housing, as everything I've read for these seems to indicate a dry outer surface. I tapped it on using a big socket, it went on nice and straight and fairly easily once the centre was over the shaft.
My order for the ims o-ring and a few other parts is showing 1st september to come in stock, so I won't be able to replace that probably until next weekend.
I am looking for a replacement A/C belt pulley/tensioner as mine is a little noisy, not bad, but I'd rather change it out now than do a load of work again in another 12 months.
The part is an astronomical �195 in the UK. Not for the entire alloy support and idler... no... just the plastic idler itself. I did manager to track down what I think is the same part that is not Porsche branded; INA 532 0016 10
Well, I ordered the IMA part which is supposedly a match for the Porsche OEM tensioner.... a grand total of �22, including �8 of shipping from Germany. I'll post a comparison when it arrives!
....
.....
I have degreased it all and am leaving it a day or two to see if I can get an idea of the amount leaking from the cover plate, but I have the o-ring on order anyway:
....
....
Keep in mind that the engine case halves would need to be split apart in order to replace the #8 bearing crankshaft o-ring.
I also realize that in the above posts, you were talking mostly about the intermediate shaft (even though some of those pics in your post there, were of the crankshaft seal after you took off the pulley),... but I just wanted to make the point about replacing the o-ring on the #8
 08-16-2022, 05:49 PM