When you click on links to various merchants on this site and make a purchase, this can result in this site earning a commission. Affiliate programs and affiliations include, but are not limited to, the eBay Partner Network.
Another DIY, This has been covered before, but not for a C4 as far as I know. The difference is a big dif in the way!
I wanted to cure the various leaks on the engine and bought a reseal kit for the PAS and cam takeoff, but having read Robt's excellent thread decided to do the electric conversion instead.
This has been a great mod, shifted weight to the front, removed items from the engine bay, saved some weight and removed the leaks. The new pump is perfect, multi-speed, not too much assistance and retains the steering feel.
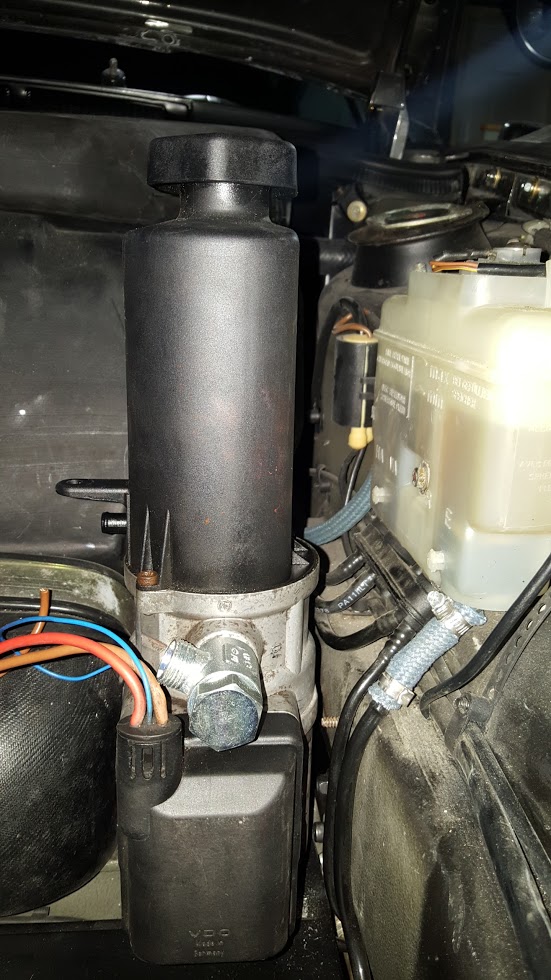
Background; the mechanical pump is difficult to get at, leaks oil and fluid and because the engine is a mile away from the steering rack it results in pas pipe runs the full lengh of the car. This can be replaced by an electro-hydraulic system using a modern compact pump. The pump chosen is the Mercedes A Class pump with integral reservoir.
The mod involves 3 stages, remove the old system, drain the pipes and plug the takeoff hole at the camshaft. Then fit the hydraulic plumbing from rack to the frunk, fit the new pump and wire up.
The old pump can be removed following the method in leak fix diy thread. Then remove and drain all hoses, etc, remove brackets and the short hoses that bolt up to the steering rack. Purchase and fit an aftermarket ally plug to fill the hole left at the end of the camshaft - I used a new genuine seal on the plug. The tinware in front of this plug will need patching to make the engine bay air/watertight.
The new pas fluid lines are high pressure feed AN6 teflon lined braided hose and fittings, and low pressure return AN6 rubber hose and fittings. Various bends and adapters are required, I will add a parts list later.
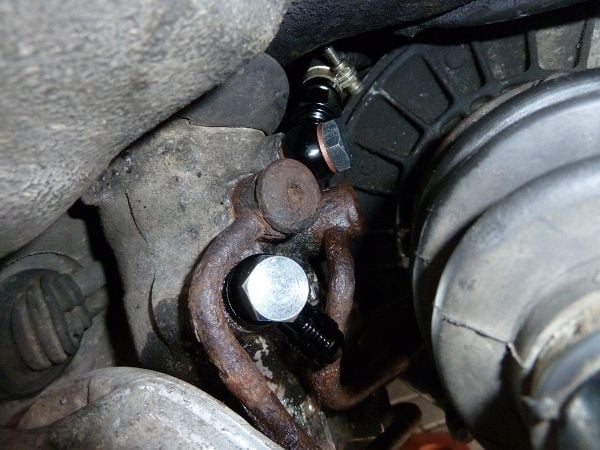
I also purchased 2 new genuine banjo bolts for the rack and 4 copper washers.
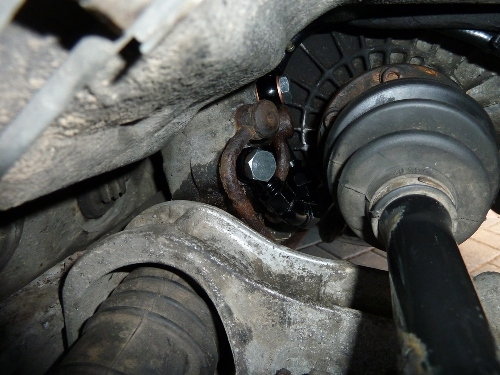
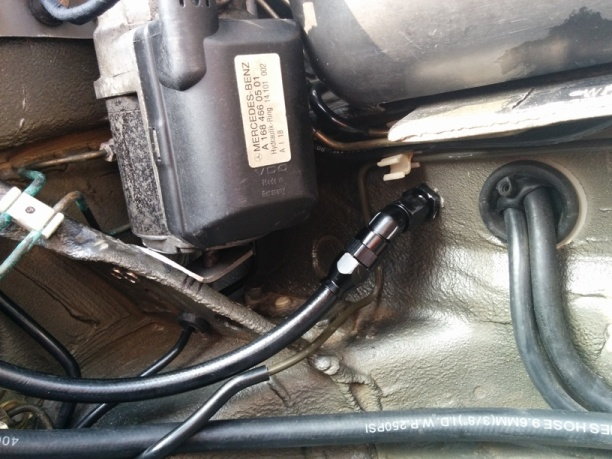
I looked at previous write-ups and decided to use AN6 bulkhead connectors to come through from the rack to the frunk. This gives better positioning, better bends and helps work arround the diff.
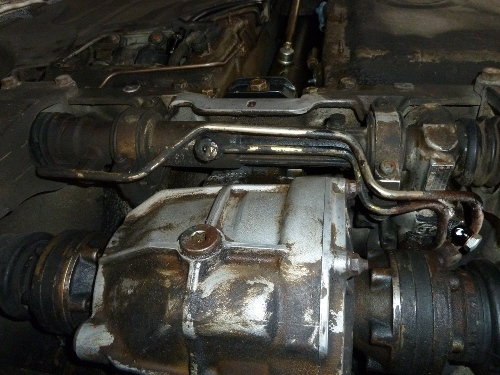
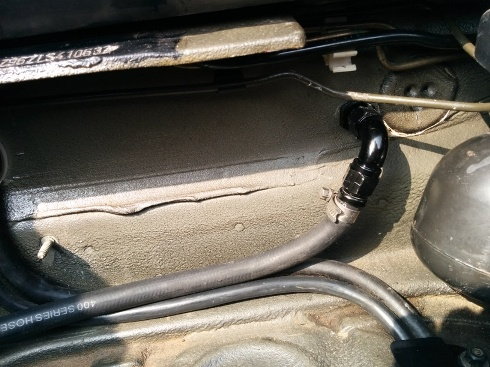
Some pics... rack connections, the hoses have to run up and over the diff and driveshaft. The return hose is the push-on rubber one, this runs over the top of the diff and is protected by plastic spiral bind re-used from the old pas hoses. The high pressure hose is shorter and runs over the driveshaft and through the bulkhead close by.
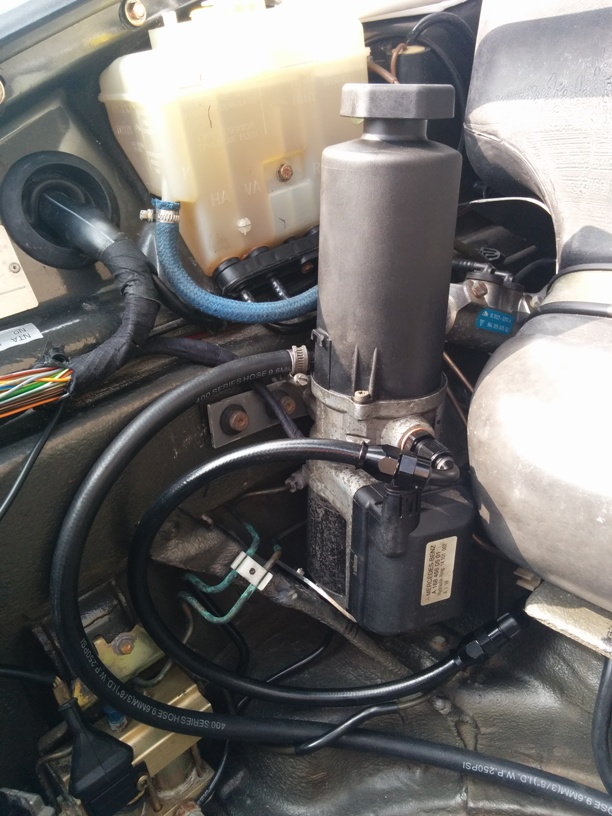
Pump
Bulkhead connectors
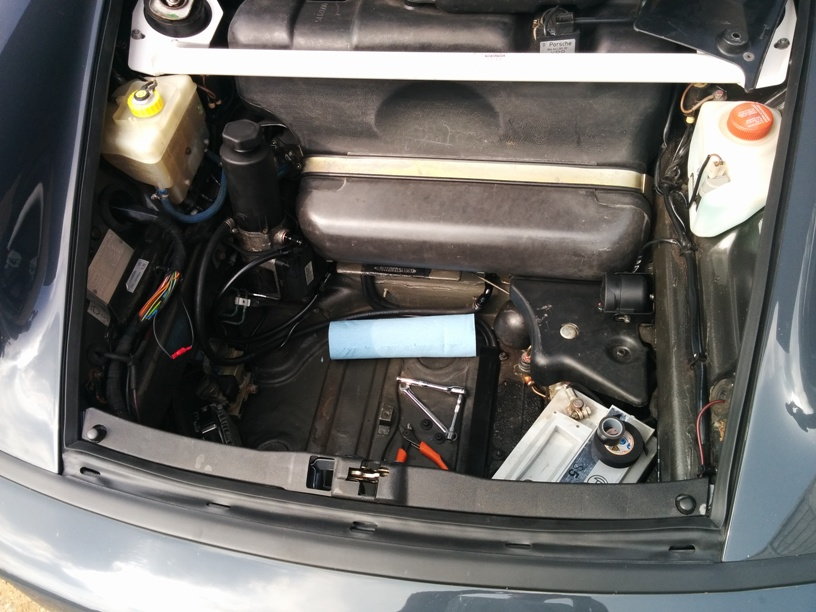
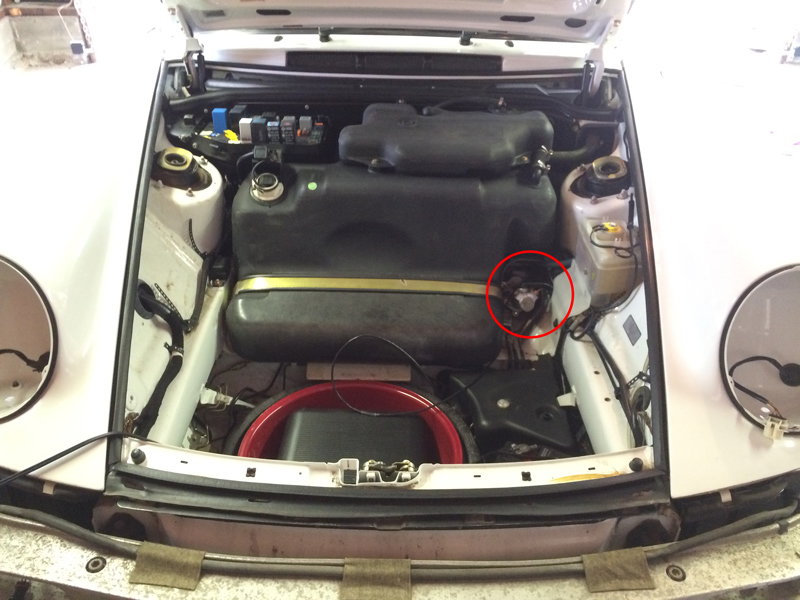
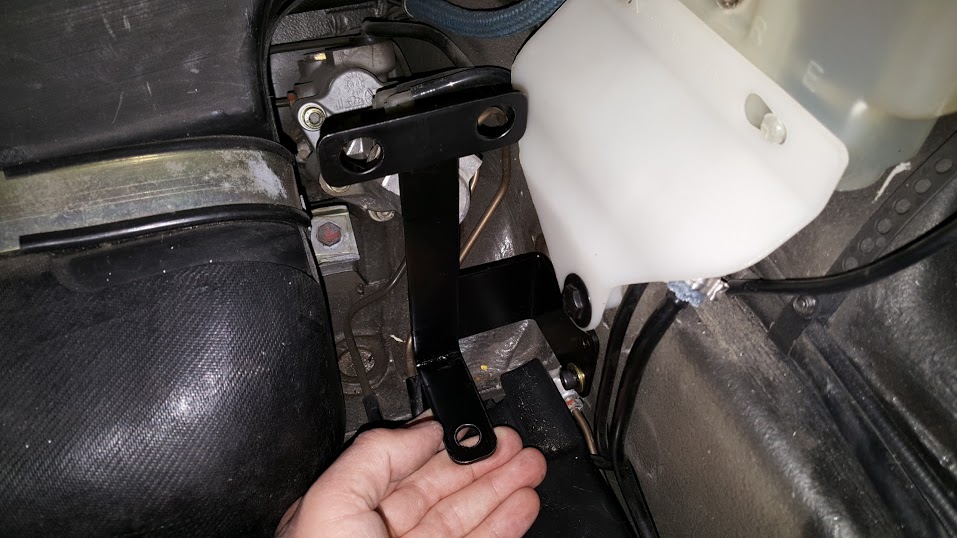
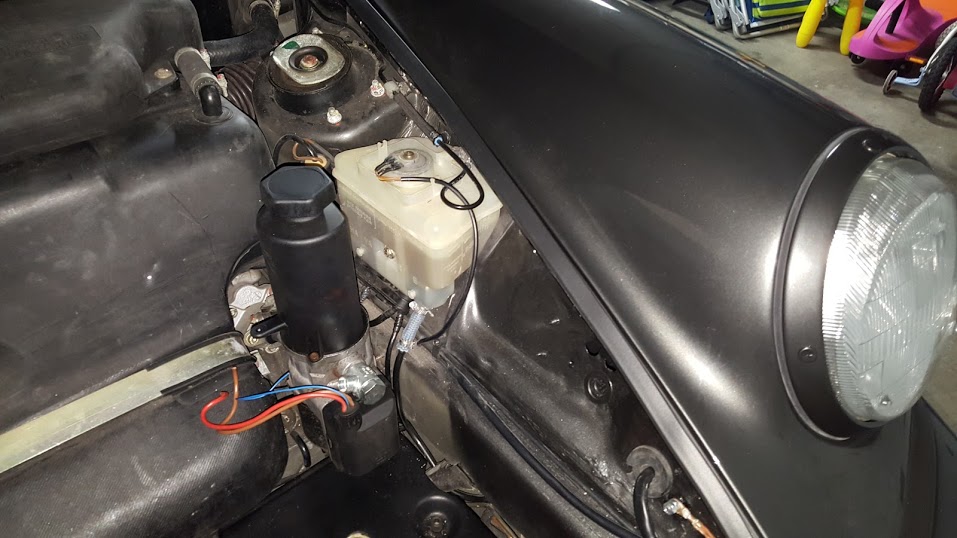
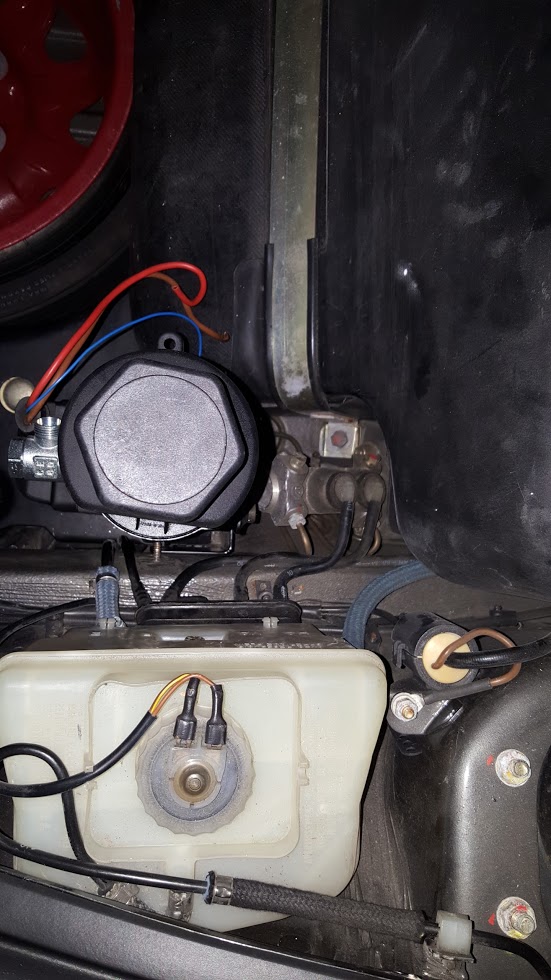
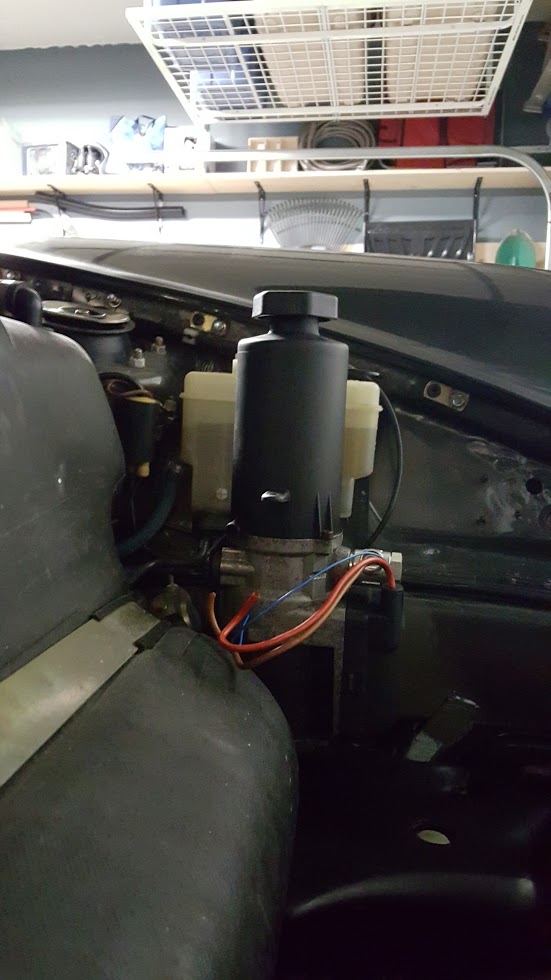
The pump is mounted at its base and on one side with rubber vibration isolation, at the moment on bent ally flat plate but I will sort out better brackets later. As I have a Targa the pump is low and angled back because I want to store the hood in the frunk. To do this I had to bend some of the brake/lock pipes out of the way. If you don't have a targa then the pump can be higher and square.
I bought the pump from ebay for �40, it works fine.
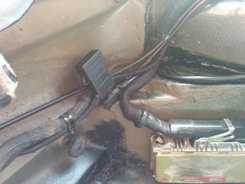
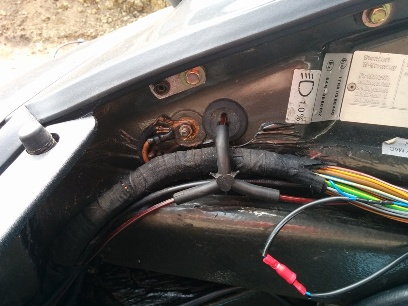
Wiring.. The pump power is from the battery via a 40Amp fuse and the earth is to the nearest earth point. The conrol wire needs to be live when the engine is running, but not cranking. This is the blue wire in the loom above the ABS controller, see pic. I put a connector in there to disable the pump if i need to, the pump has a 3 second delay before startup anyway.
Sorry for the long post, hope this helps someone in the future and to add again, this is a great mod and can be cone on C2, C4 and Targa. I have completed a thousand hard miles and the pump has not overheated under any conditions.
For those of you in the States who have done this mod, could you post some photos of the unit in the frunk? It seems that the big brake booster might get in the way. However, there's a pass-through grommet directly over the steering rack, so theoretically, it should be a straighter shot.
Would it be possible to get a list of the used adaptors and dash-fittings?!
Also a picture, how the small distance between the banjo at the steering rack and the drive-shaft is solved/worked arround!
Would it be possible to get a list of the used adaptors and dash-fittings?!
Also a picture, how the small distance between the banjo at the steering rack and the drive-shaft is solved/worked arround!

 04-26-2015, 06:45 AM