
Oil tank refurb

 01-25-2015, 11:34 AM
#17
Pro
Join Date: Oct 2012
Location: Brockville, On, Canada
Posts: 536
Likes: 0
Received 2 Likes
on
2 Posts
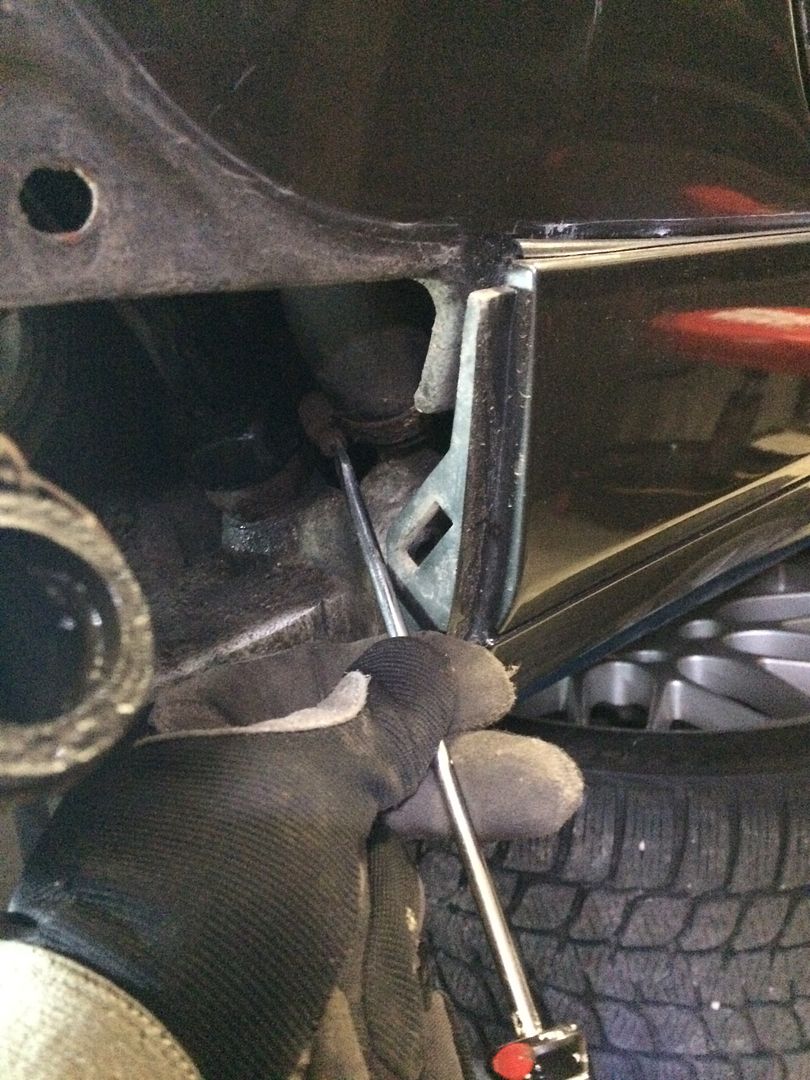
An update, tank removes fairly smoothly with some wiggling as long as you come back, then down. There is a narrowing of the tank at the bottom front that will clear the thermostat. Otherwise, it didn't feel right to pull it back past the brake caliper and wheel studs.
Also, you unplug the sender from inside the engine bay, remove the grommet from within the wheel arch, and pull the wire plug through. The flexible dipstick tube pulls through with the tank if you are like me and not brave enough to undo it at the tank first. BE SURE TO REMOVE THE DIPSTICK FIRST!!
Also, you unplug the sender from inside the engine bay, remove the grommet from within the wheel arch, and pull the wire plug through. The flexible dipstick tube pulls through with the tank if you are like me and not brave enough to undo it at the tank first. BE SURE TO REMOVE THE DIPSTICK FIRST!!
01-31-2015, 04:27 PM
#18
Pro
Join Date: Oct 2012
Location: Brockville, On, Canada
Posts: 536
Likes: 0
Received 2 Likes
on
2 Posts
A photo shoot of my job
This was too hard to disconnect in place
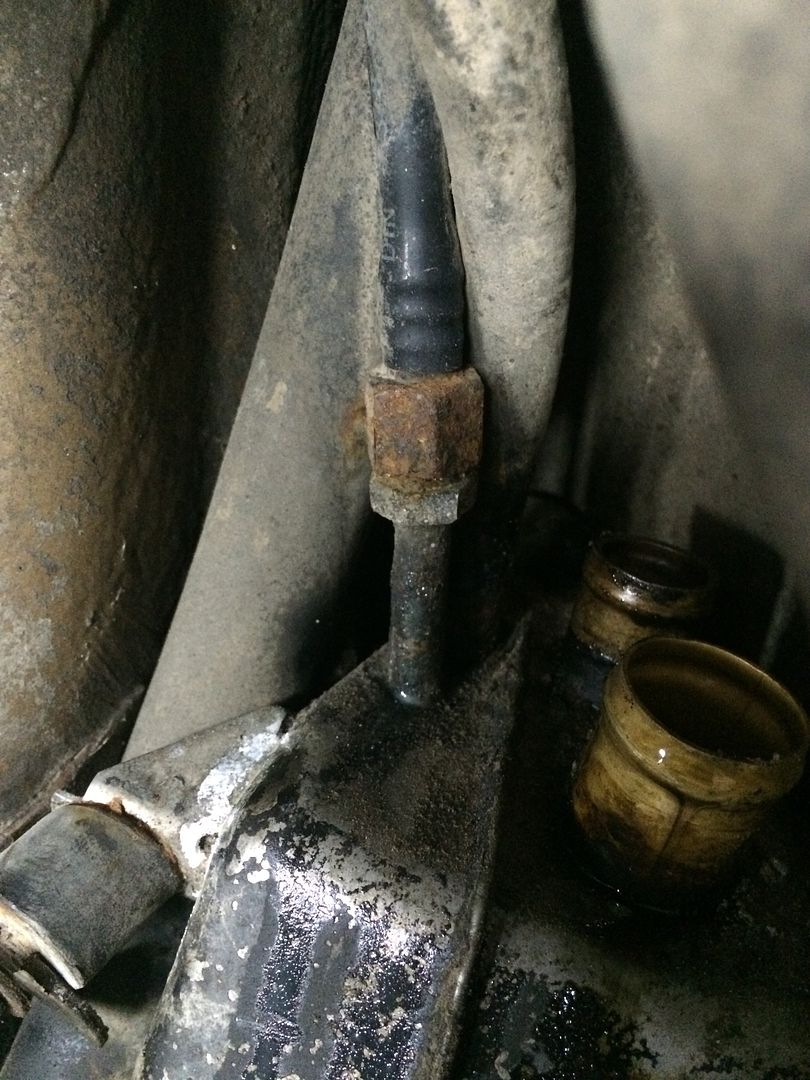
So the dipstick tube had to come with the tank
Disconnect the oil level sender
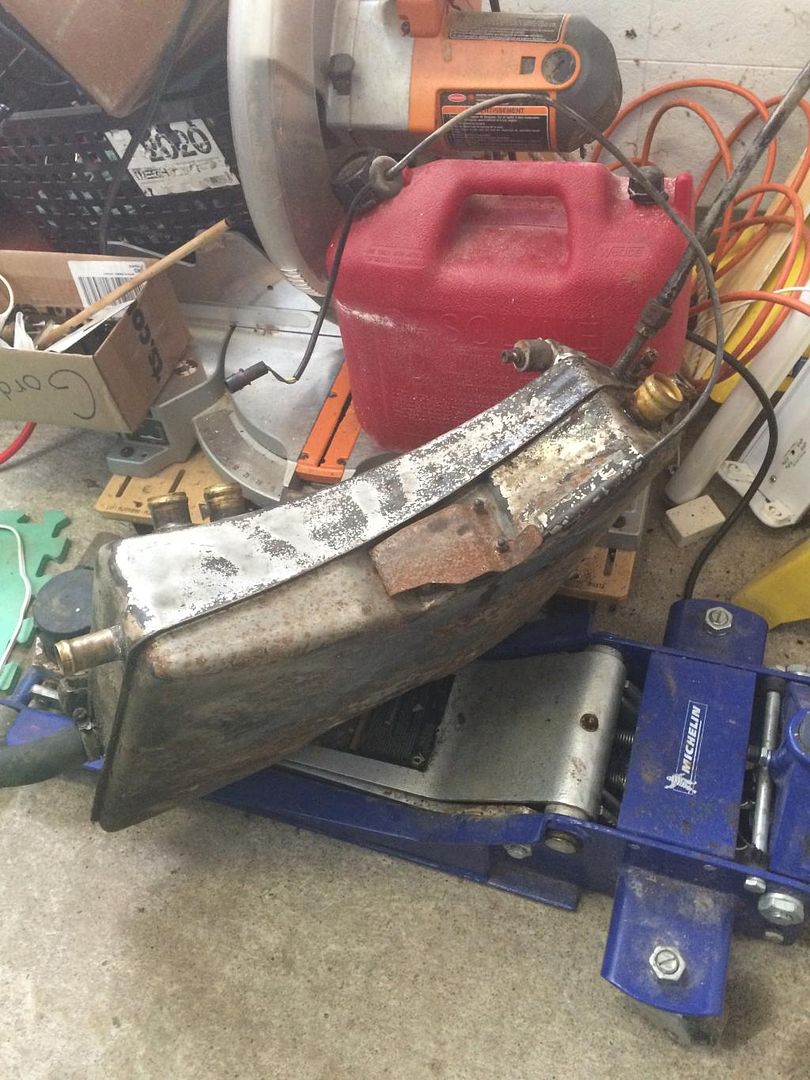
The beast is out
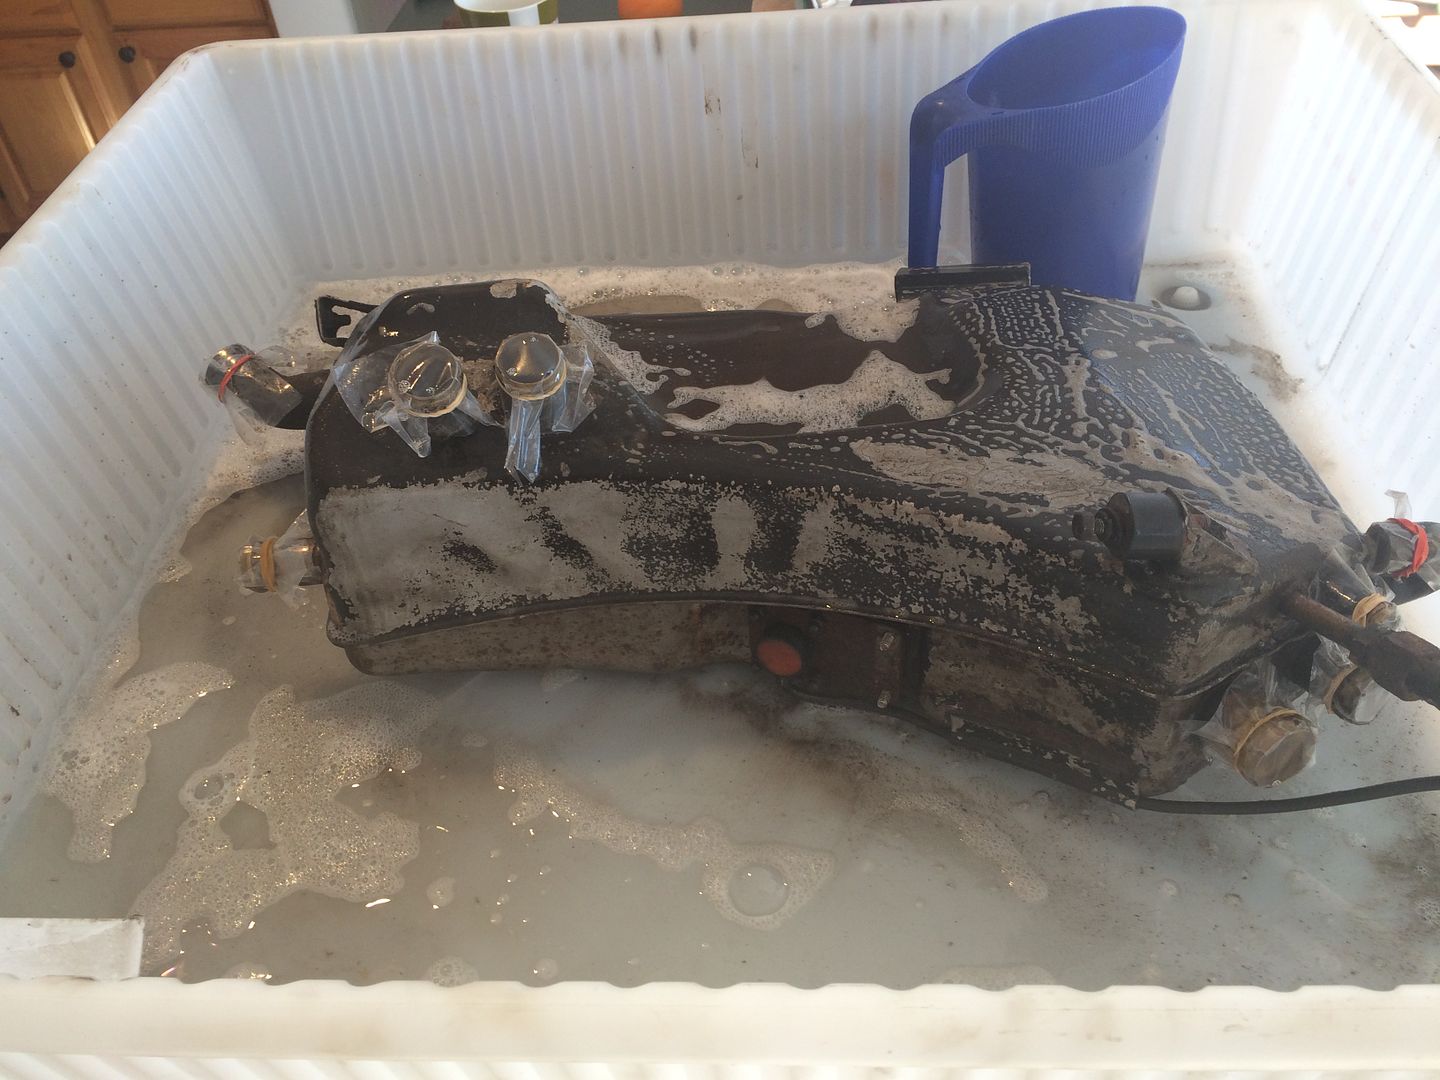
Cleaning the outside begins
Sealed off the openings to prevent water getting in

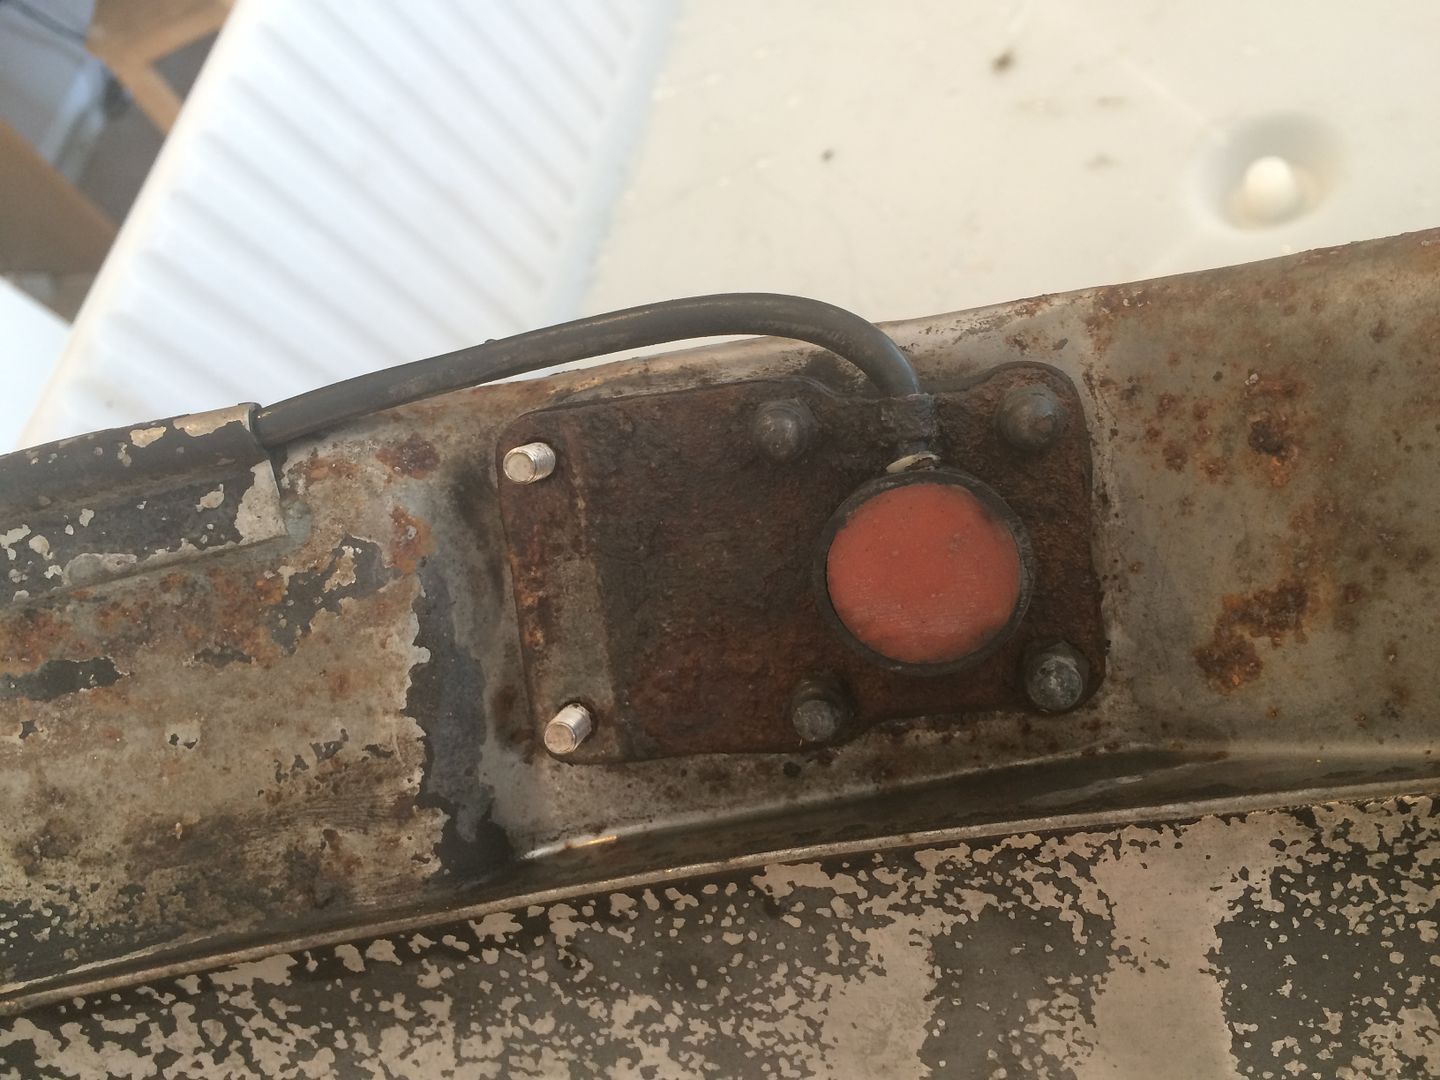
Oil sender needs removing first
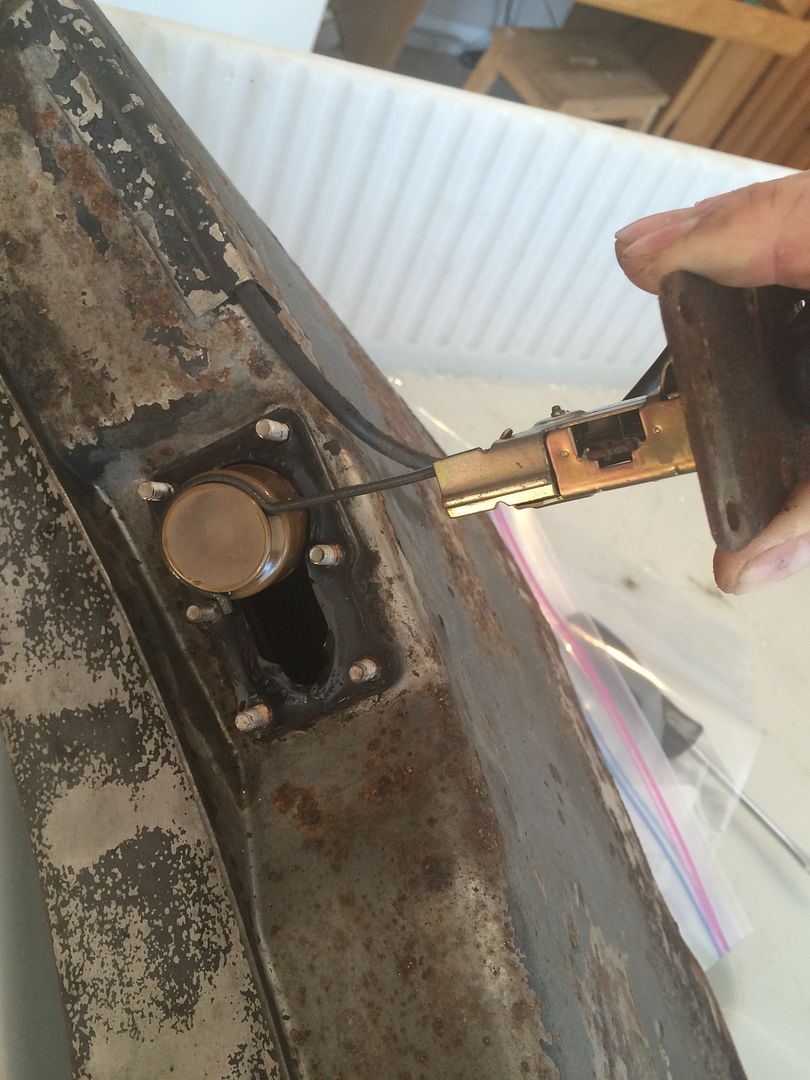
Which required some persuasion before it would let go of the wire

The sender removal
And then some creativity to protect the sender opening, mainly cause I plan to media blast the tank. The green on the top of the studs was to mark the holes location
Ugh

Fast forward past the glass bead blasting, parts washer-ing, flushing, and ultrasonic cleaning, plus the taping and priming and two coats...

Ready for install after my replacement rubber vibration isolator mounts.
Not bad

This was too hard to disconnect in place

So the dipstick tube had to come with the tank

Disconnect the oil level sender

The beast is out

Cleaning the outside begins

Sealed off the openings to prevent water getting in

Oil sender needs removing first

Which required some persuasion before it would let go of the wire

The sender removal

And then some creativity to protect the sender opening, mainly cause I plan to media blast the tank. The green on the top of the studs was to mark the holes location

Ugh

Fast forward past the glass bead blasting, parts washer-ing, flushing, and ultrasonic cleaning, plus the taping and priming and two coats...

Ready for install after my replacement rubber vibration isolator mounts.
Not bad
02-04-2015, 07:12 PM
#20
Pro
Join Date: Oct 2012
Location: Brockville, On, Canada
Posts: 536
Likes: 0
Received 2 Likes
on
2 Posts
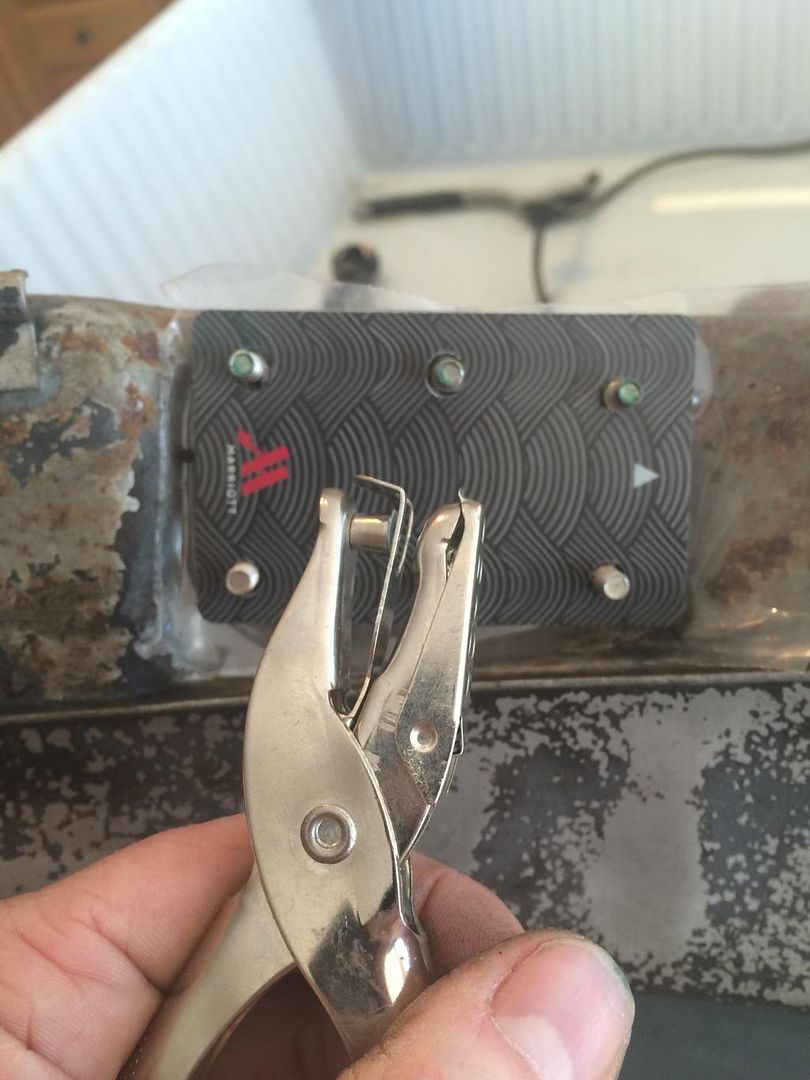
Needing some help. Anyone replace their oil sender recently? I ordered the replacement gasket, and this showed up.
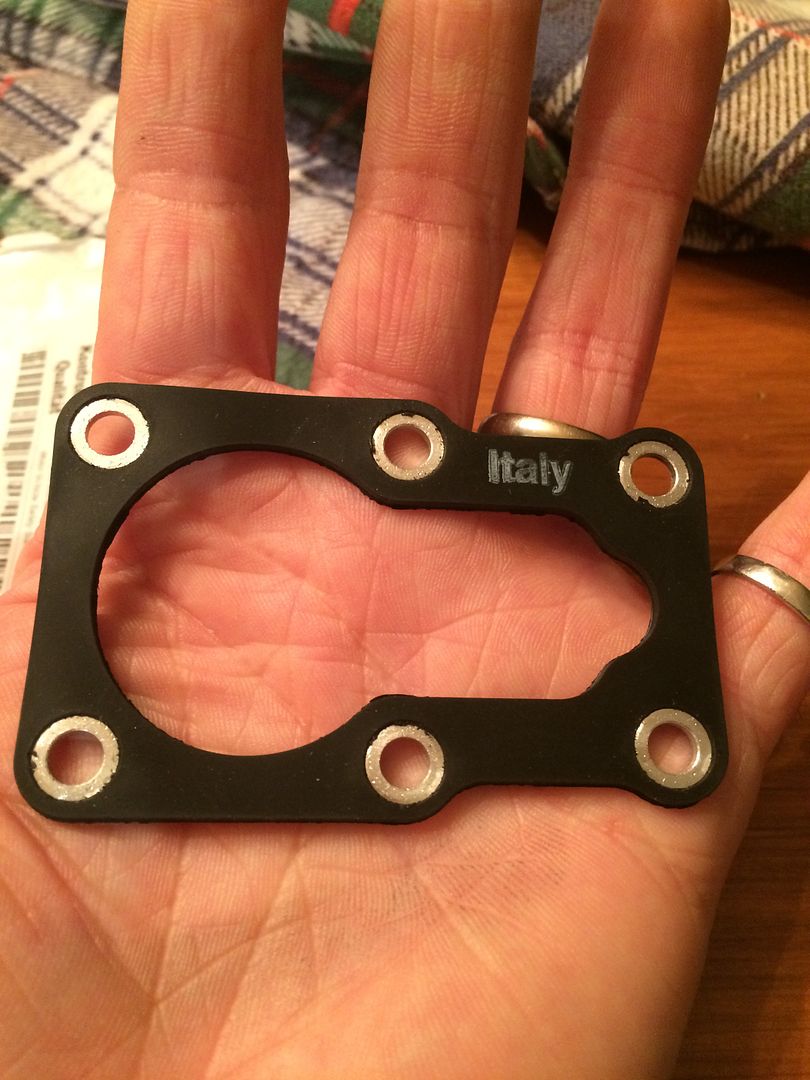
I'm concerned with the aluminum inserts in the holes bottoming out before I get compression on the gasket.

I'm concerned with the aluminum inserts in the holes bottoming out before I get compression on the gasket.
02-05-2015, 09:54 AM
#21
Pro
Join Date: Oct 2012
Location: Brockville, On, Canada
Posts: 536
Likes: 0
Received 2 Likes
on
2 Posts
I think I found t answer:
https://rennlist.com/forums/964-foru...ml#post7719097
Seems like they are there to help prevent over tightening of the gasket so that it doesn't squish out.
https://rennlist.com/forums/964-foru...ml#post7719097
Seems like they are there to help prevent over tightening of the gasket so that it doesn't squish out.
02-05-2015, 11:18 AM
#22
Rennlist Member
while your at it, its not a bad idea to flush out the oil cooler
you won't believe the gunge that comes out, i used solvent and air pressure until the solvent flowed through clean
Lookin good!
you won't believe the gunge that comes out, i used solvent and air pressure until the solvent flowed through clean
Lookin good!
02-05-2015, 11:23 AM
#23
Pro
Join Date: Oct 2012
Location: Brockville, On, Canada
Posts: 536
Likes: 0
Received 2 Likes
on
2 Posts
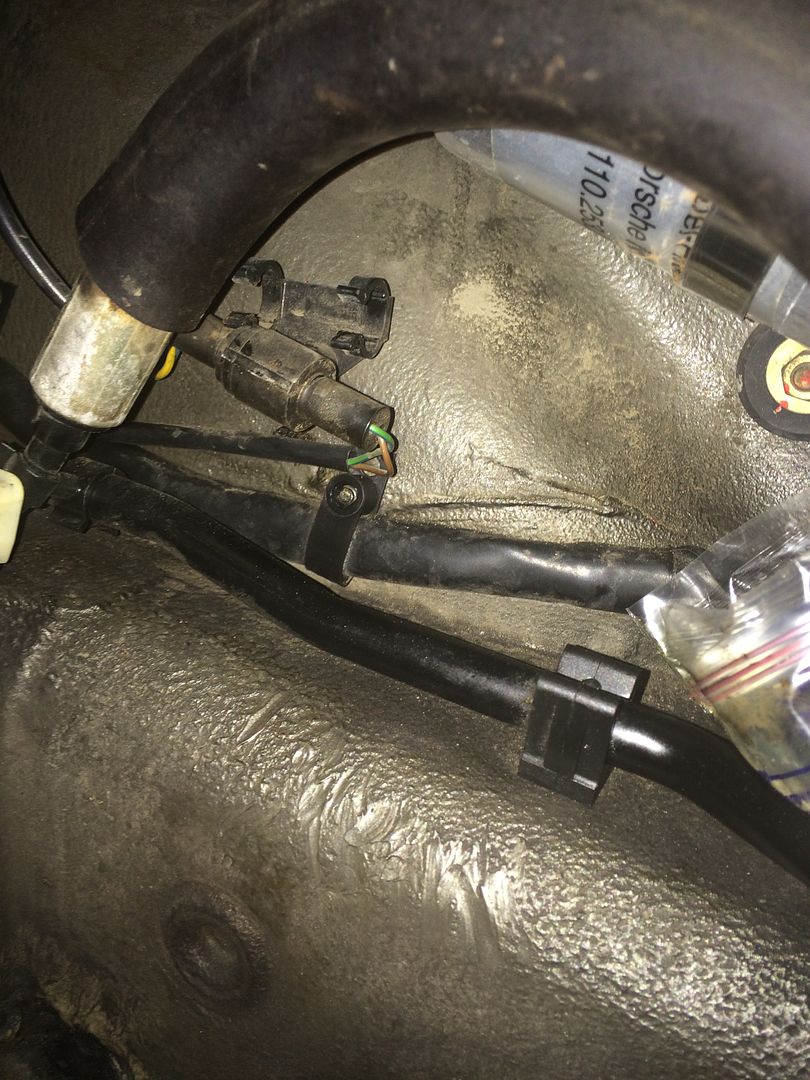
Did an ultrasonic bath for the tank, but worried that the vibration would loosen the thin cooling fins on the cooler, so I merely used the varsol parts washer and gave it a thorough cleaning. I used a thread sealer and reinstalled the cooler last night and the tank (for me) slipped right back into place. I'm hoping for a picture of the hose layout at the top of the tank, as it doesn't feel right to me yet.
02-05-2015, 05:51 PM
#25
02-05-2015, 10:17 PM
#26
Pro
Join Date: Oct 2012
Location: Brockville, On, Canada
Posts: 536
Likes: 0
Received 2 Likes
on
2 Posts
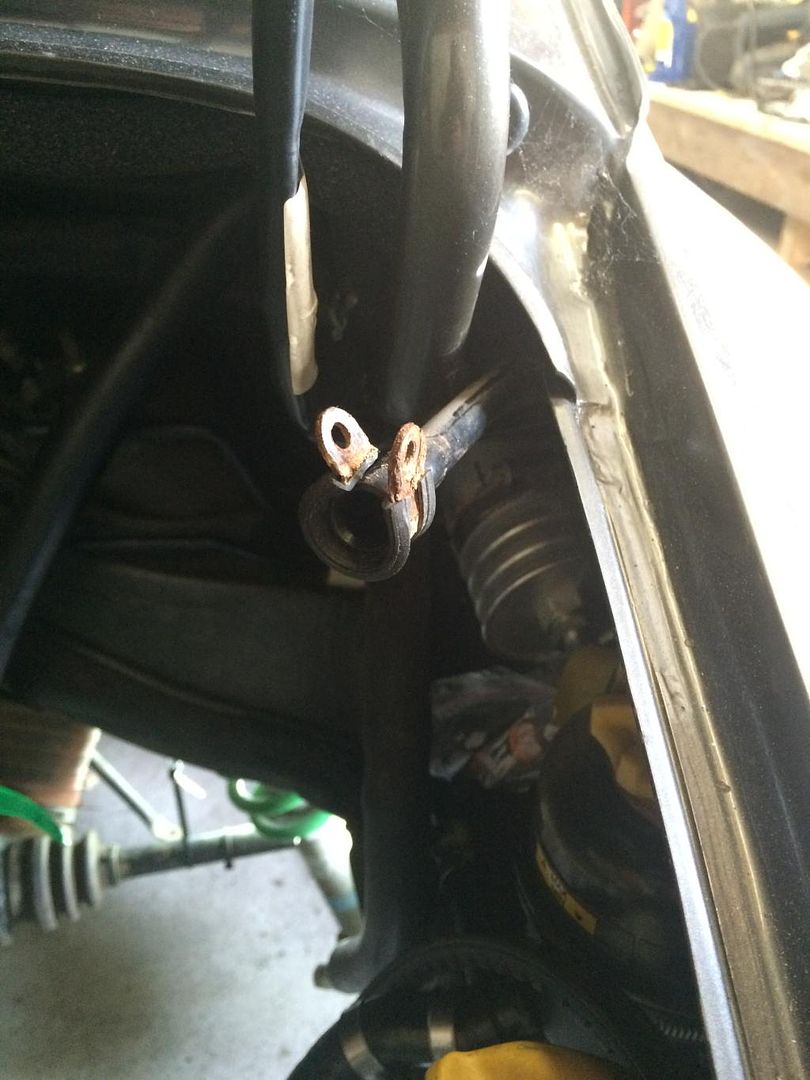
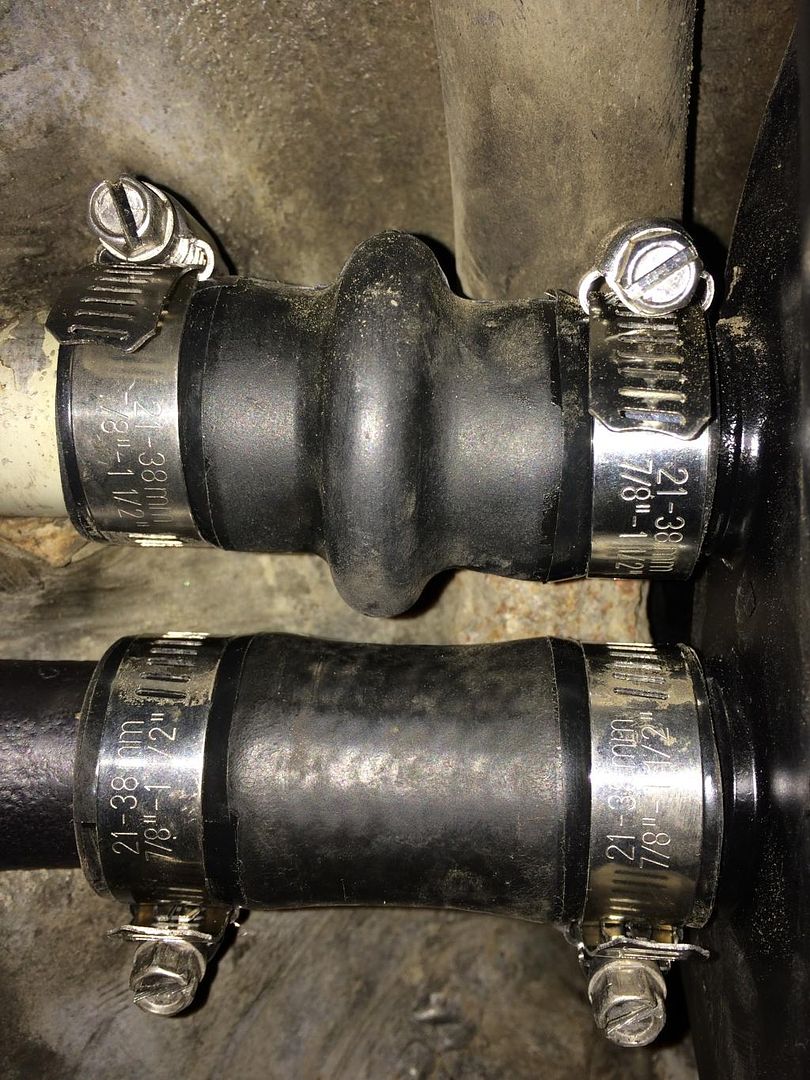
Asked for some help on the line routing, but sorted it out solo. Some pics if others need them.
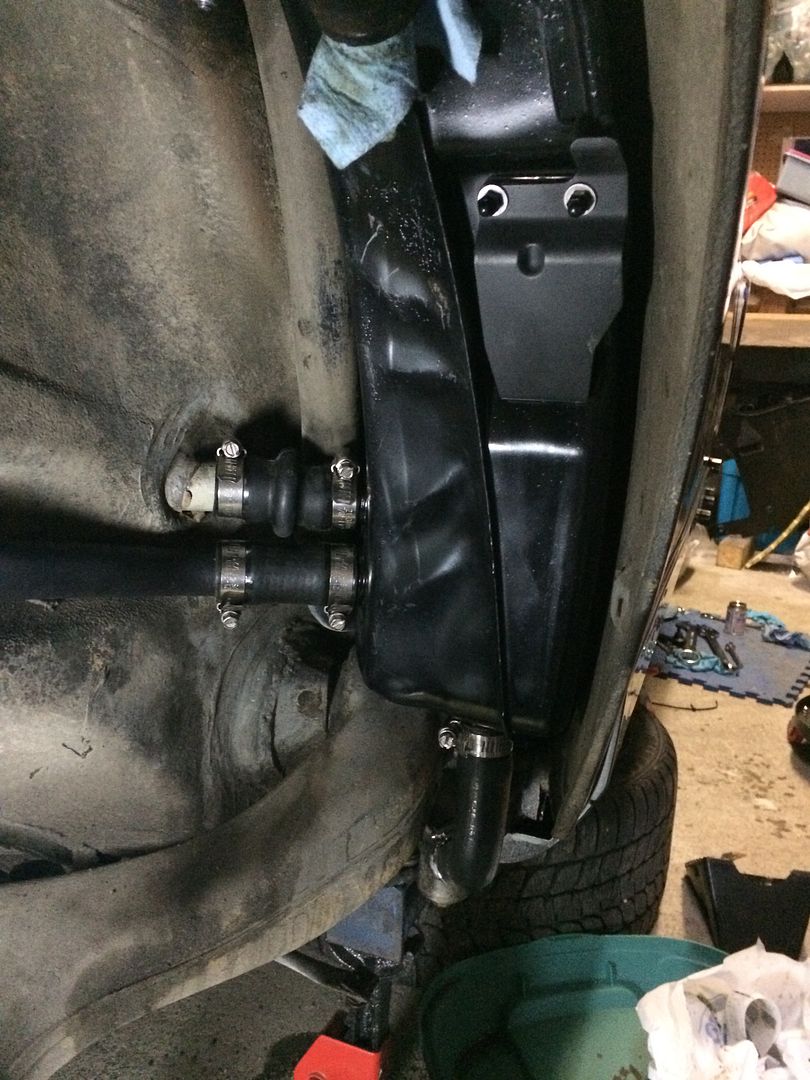
I wrapped the hose with some vinyl electrical tape to protect against the clamp
Where the lines go into the engine bay
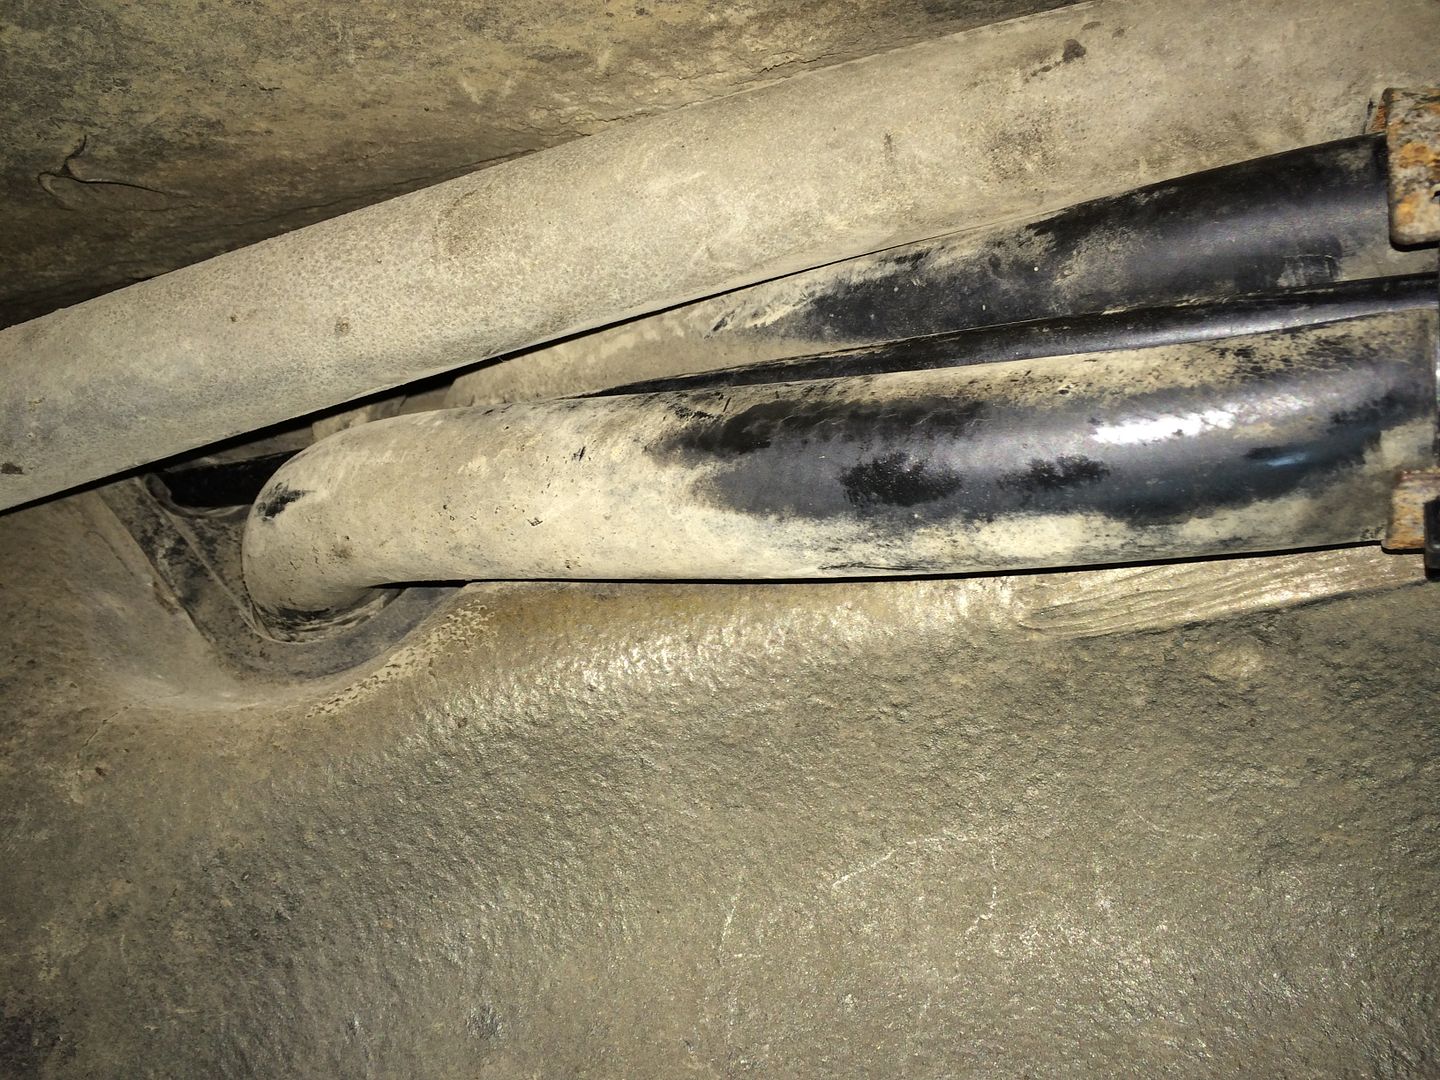
Moving along towards the tank
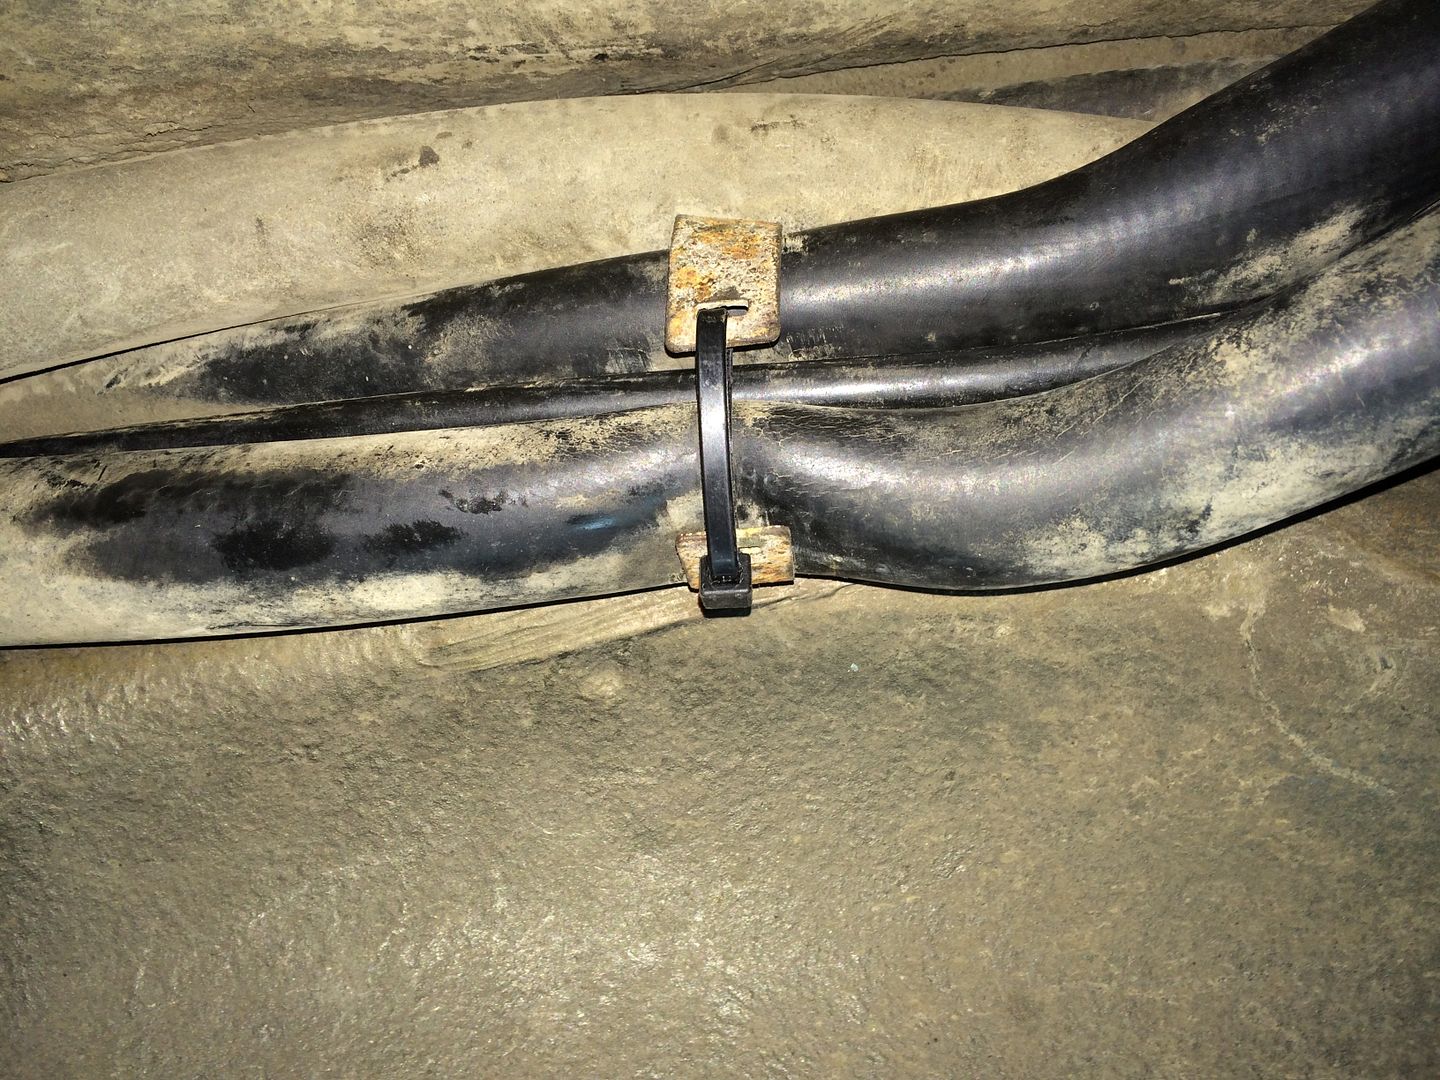
Tank
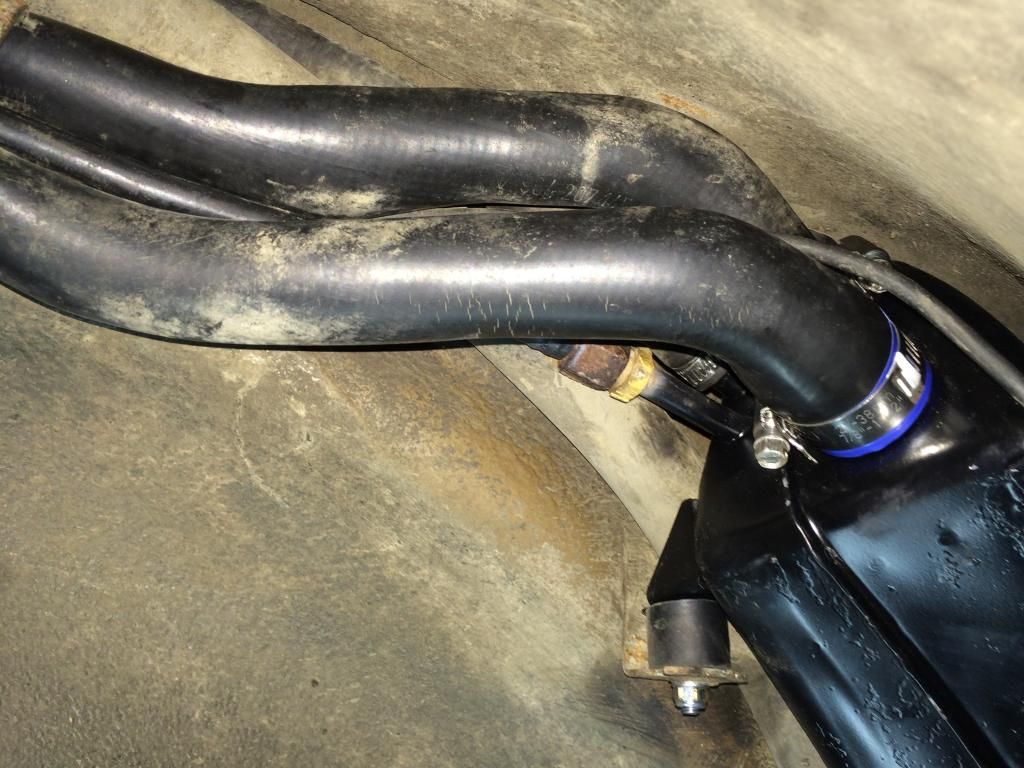
Zoomed out


I wrapped the hose with some vinyl electrical tape to protect against the clamp

Where the lines go into the engine bay

Moving along towards the tank

Tank

Zoomed out
 02-06-2015, 10:58 AM
#28
Man that looks great. I've done this same job on motorcycle gas tanks. Was a bit of work, but paid off. I ended up using POR15 on mine. But, stripped the tank with aircraft stripper and used an angle grinder with a wire brush and sand paper. Hope I don't have to do that anytime soon LOL!
02-07-2015, 11:41 AM
#29
Rennlist Member
Dirt falls into the space and cannot escape. Driving in the rain gets the dirt wet and the dirt holds the moisture against the body and never really dries out. To make matters worse, as the oil tank flexes due to body movement the dirt scours the undercoating off the inner fender. This sets up an accelerated corrosion condition that technically known as entrapment corrosion. Although Porsche does a good job of product engineering, they seem to have missed the boat on possible corrosion conditions like this.
I recommend that everyone remove their oil tanks when working on the oil system to clean the area and inspect the inner fender.
Now would be a good time to overhaul the oil thermostat too. All you need is the viton o-ring for the piston and a cover as you will need to drill a hole in the existing cover (after removing the circlip) and remove it with a slide hammer.
02-09-2015, 03:51 AM
#30
Three Wheelin'
Thread Starter
Hi pi5tolpete, great job on the oil tank refurb. Its a nasty gritty job but well worth the effort to do it  I see you've used stainless hose clamps where the screw track is fully perforated. A word of warning about these. Unless perfectly sized ie no part of the screw track contacts the hose, they will cut into the tube and ultimately cause it to fail. I know this from previous projects. The edges of the perforations bite in and chew-up the hoses. It may be better to source some non perferated alternatives. Purely as an example, something like these: http://www.ebay.co.uk/itm/380752885008?_trksid=p2060778.m1438.l2648&var=650159690171&ssPageName=STRK%3AMEBIDX%3AIT
Edited to add - Ah I see you've put some kind of barrier between the hose and clamp to try and mitigate this
I see you've used stainless hose clamps where the screw track is fully perforated. A word of warning about these. Unless perfectly sized ie no part of the screw track contacts the hose, they will cut into the tube and ultimately cause it to fail. I know this from previous projects. The edges of the perforations bite in and chew-up the hoses. It may be better to source some non perferated alternatives. Purely as an example, something like these: http://www.ebay.co.uk/itm/380752885008?_trksid=p2060778.m1438.l2648&var=650159690171&ssPageName=STRK%3AMEBIDX%3AITEdited to add - Ah I see you've put some kind of barrier between the hose and clamp to try and mitigate this