

Complete 964 Convertible Top Restoration DIY

 11-29-2014, 08:55 PM
#32
Rennlist Member
Join Date: Jul 2003
Location: Peachtree City, Ga
Posts: 1,952
Likes: 0
Received 64 Likes
on
54 Posts
Try www.cabrioworld.com - no affil
They offer wide variety - 964 and 993.
Go my top from them was satisfied with product and finish
They offer wide variety - 964 and 993.
Go my top from them was satisfied with product and finish
11-30-2014, 07:39 AM
#33
Gus, that's perfect! Thanks a lot 
I have three options to choose from- StayFast, Sonnendeck, and German canvas. I suppose logically German canvas is the best? Is Sonnendeck a newer and possibly better material. I will give them a call myself once they open but would be cool to hear opinions from anybody who have had both?
In the meantime I'll do a search here and see what comes up
Last edited by Amroth; 11-30-2014 at 08:11 AM.
11-30-2014, 01:28 PM
#34
Three Wheelin'
I just started looking into this too (don't try to open the top in the winter without unzipping the window!).
German canvas (Haartz Sonnenland) is the one you want, just like the factory original.
Twillfast / Sonnendeck is the US version of the Sonnenland canvas. Supposedly good quality, but not as good as Sonnenland.
Stayfast (made by Haartz?) is thinner than original and will stretch and fade quickly.
Personally, I like the original Carrera/964 style tops better on the early bodystyle cars. They look more like a classic convertible "hood". The 993 version is much more sleek, which fits the 993 bodystyle. The 964 style has a larger rear window too. Good luck, and thanks to Stephen70 for the great thread & photos.
12-20-2014, 01:08 PM
#36
Three Wheelin'
To add to Stephen70's photos. Here is my pictorial horror story. Be brave if you attempt this!
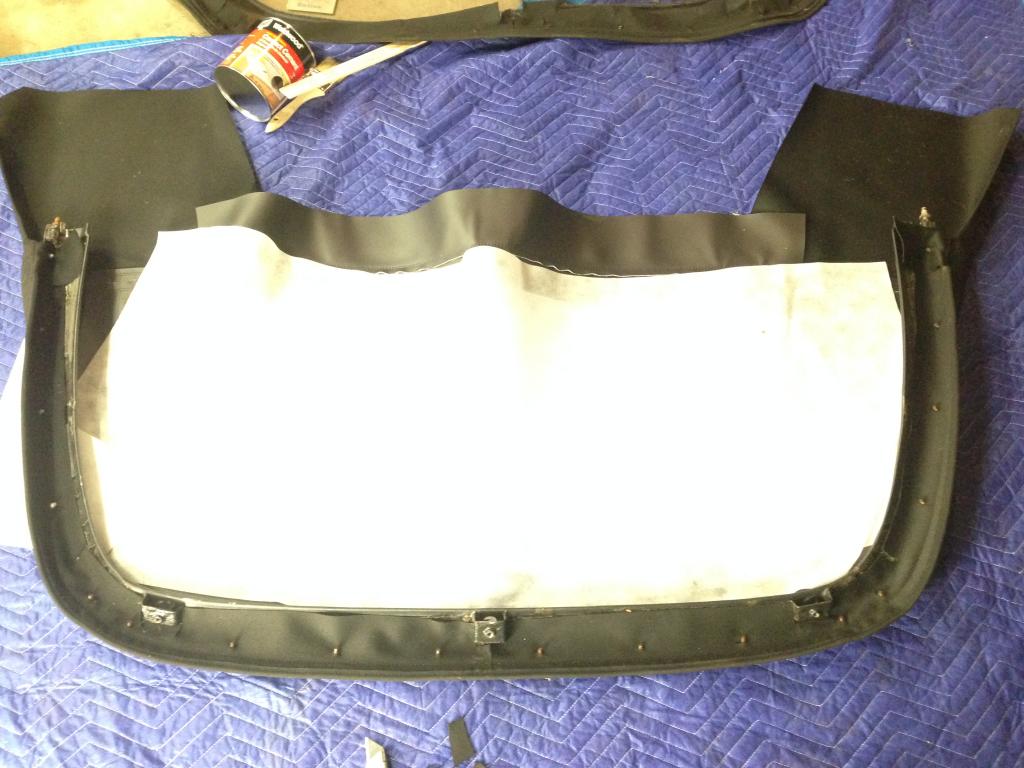
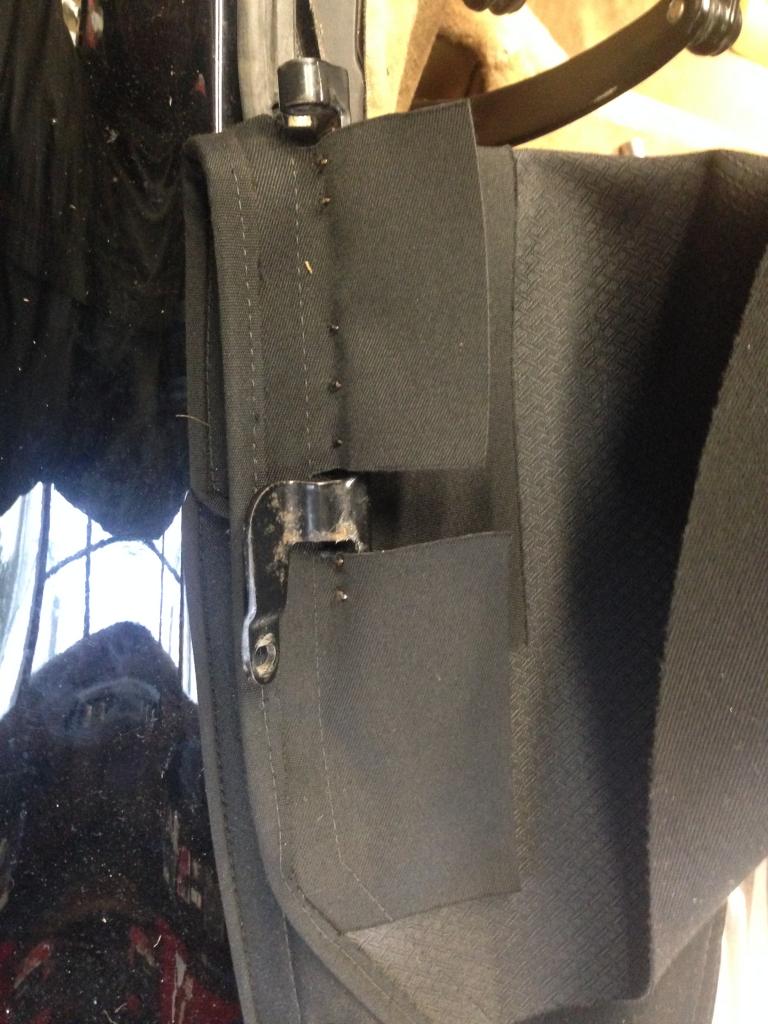
1. THE MOST CRUCIAL STEP. Pull the back window around this retaining bar as tight as humanly possible. Anything less and the rear window will not be evenly tight and will have loose folds. I had to go back and do this again after test fitting the rear.
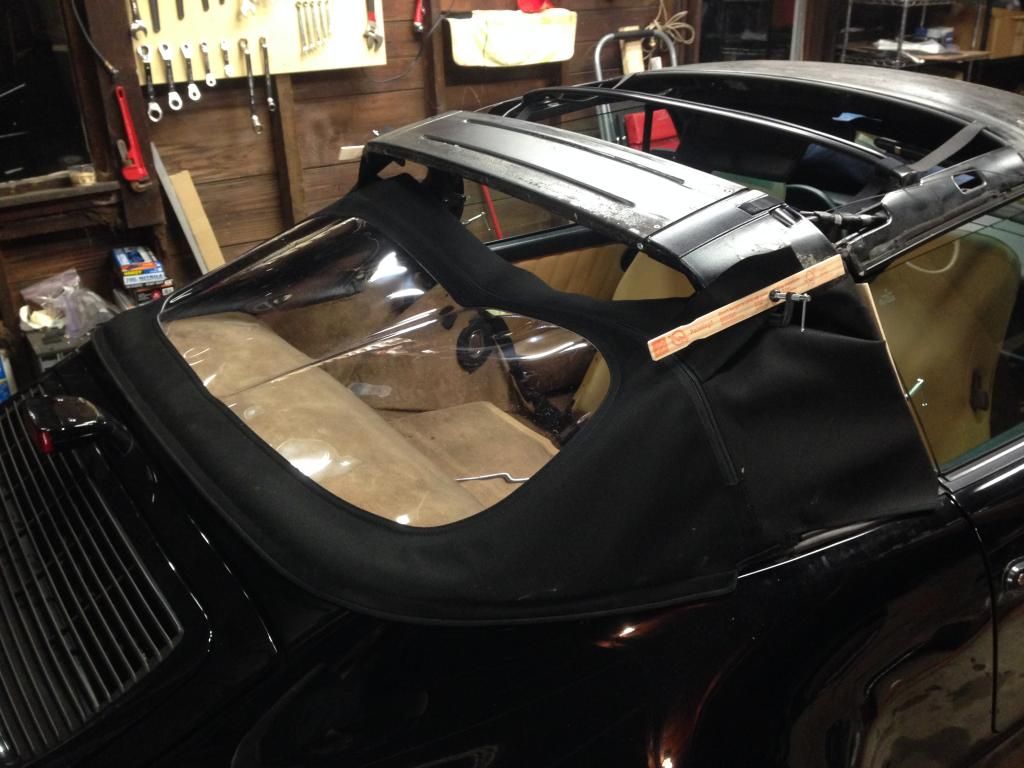
2. Attach the rear window. I tightened the 3 allen bolts around the bottom retaining piece and the two m8 nuts. Then used paint sticks and small clamps to hold up the top of the window.
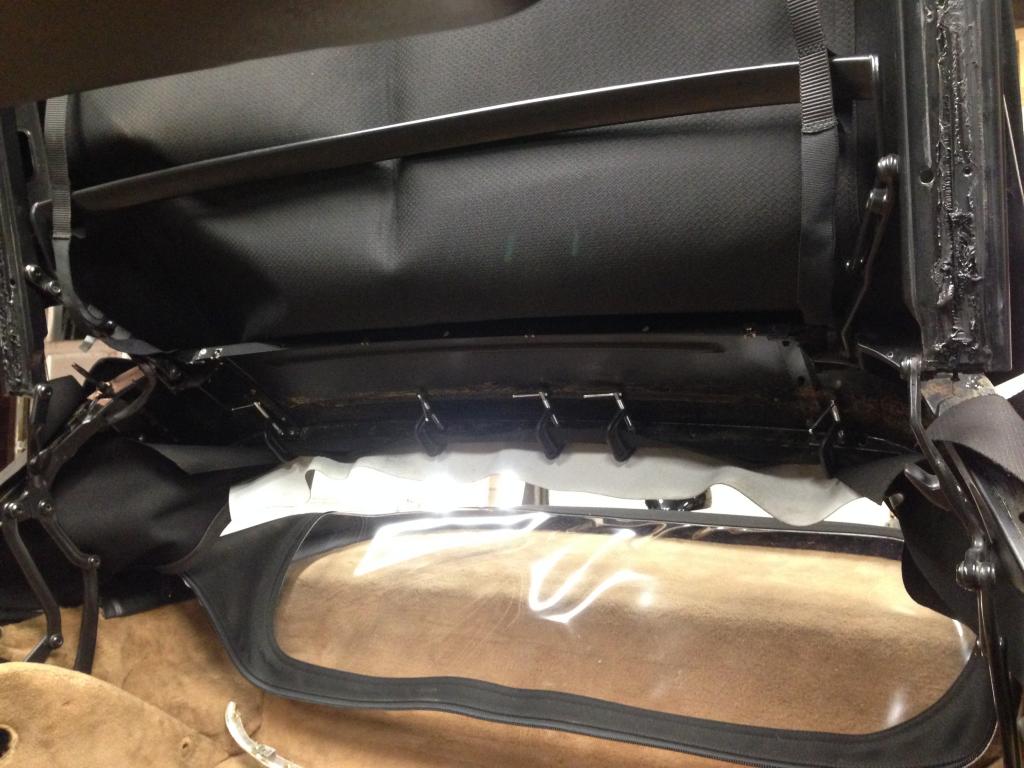
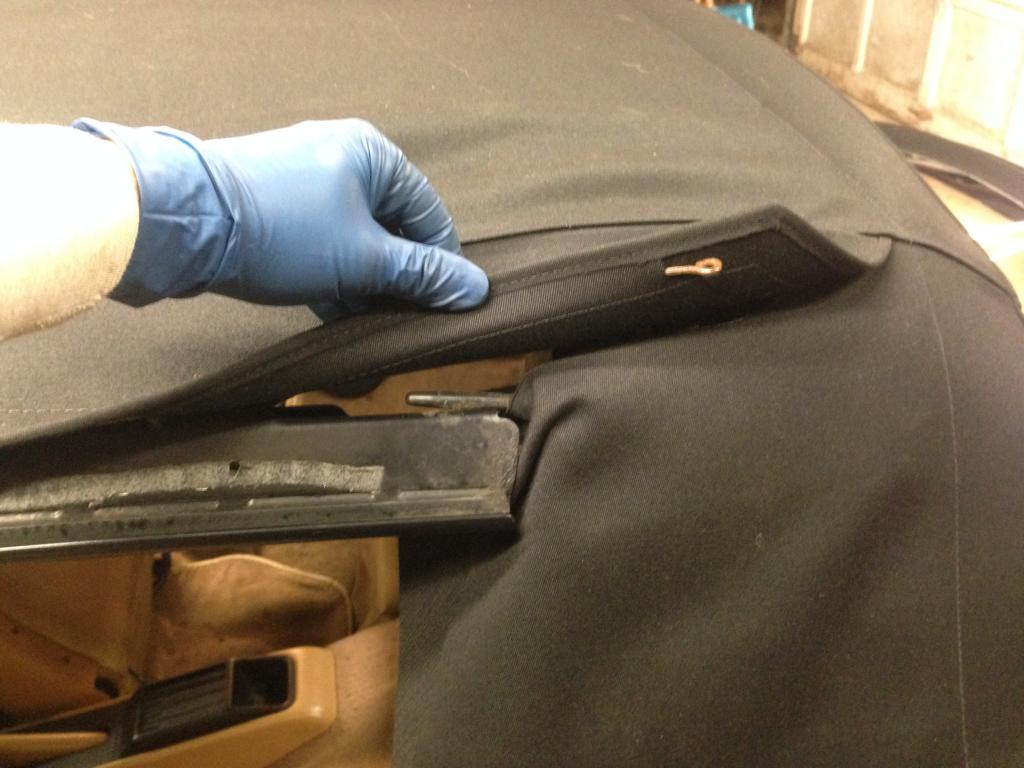
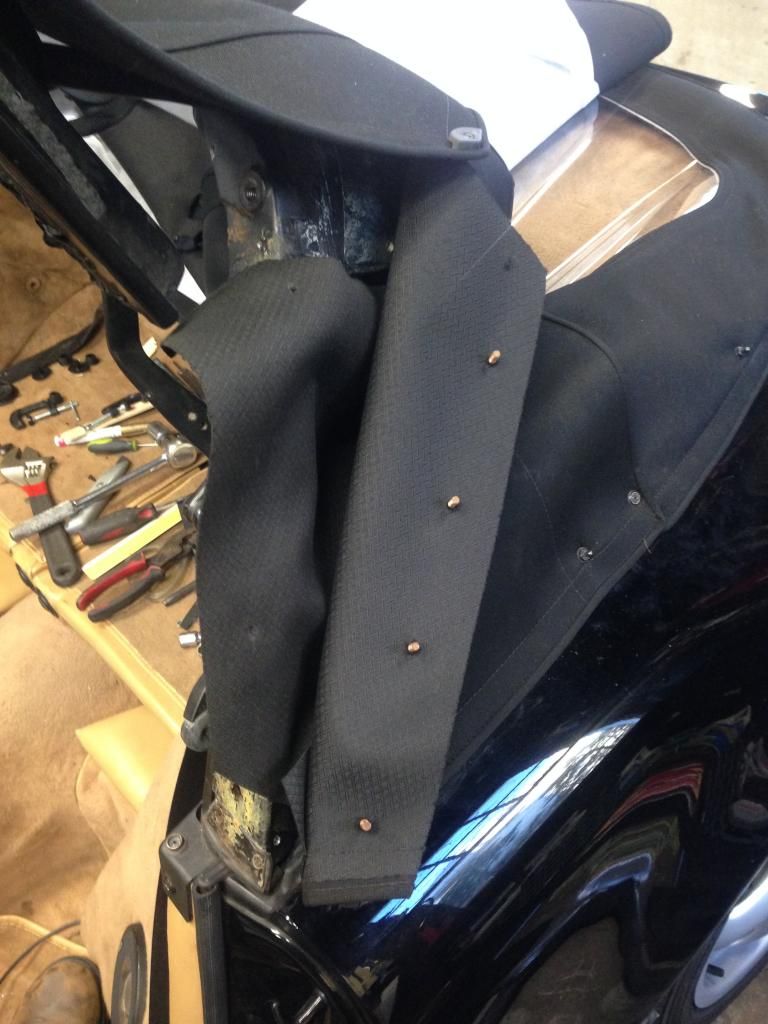
3. The 2nd most crucial step. Attaching both pieces to the center rail. The front canvas is relatively easy. There is a pocket of sorts that lines up the forward/aft position. Just make sure that you correctly center the port/starboard position. Neither is too difficult. The hard part is the rear window and its retaining rail. Trial and error positioning was my method. It wasn't fun.
4. Now things get much easier. Pull the tension wire through the top of the canvas channel.
5. Tighten up the front edge. This is also not so tough. Lift the top up slightly, clamp the front down, and close the top. Repeat until you find the sweet spot making the canvas taut.
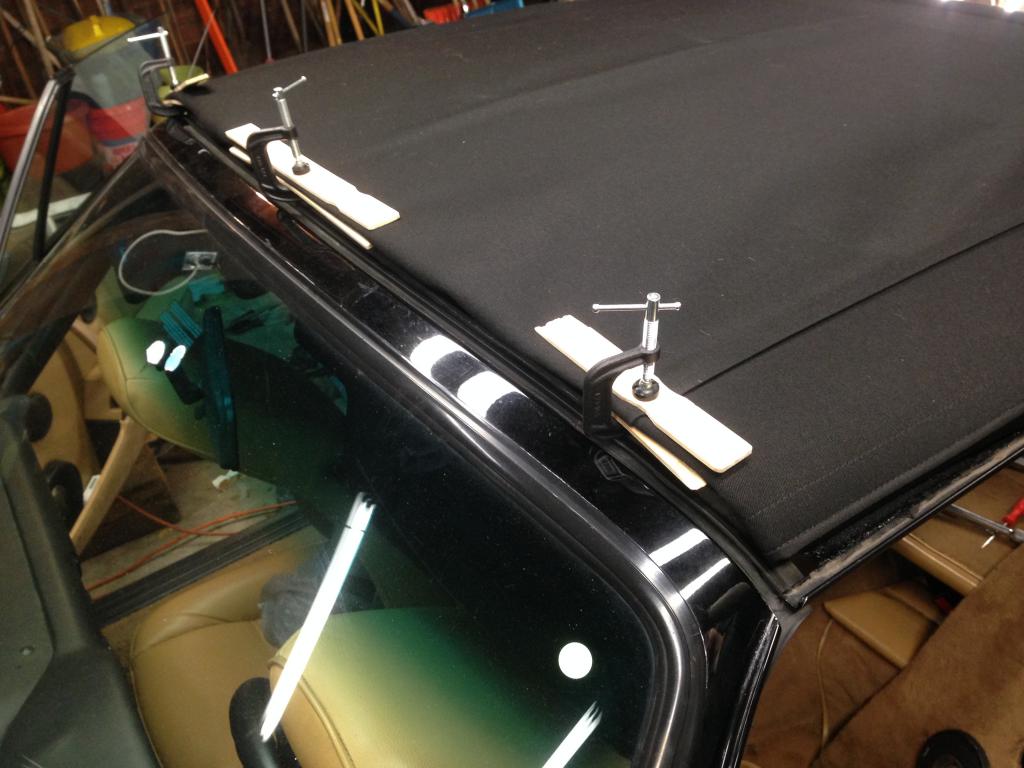
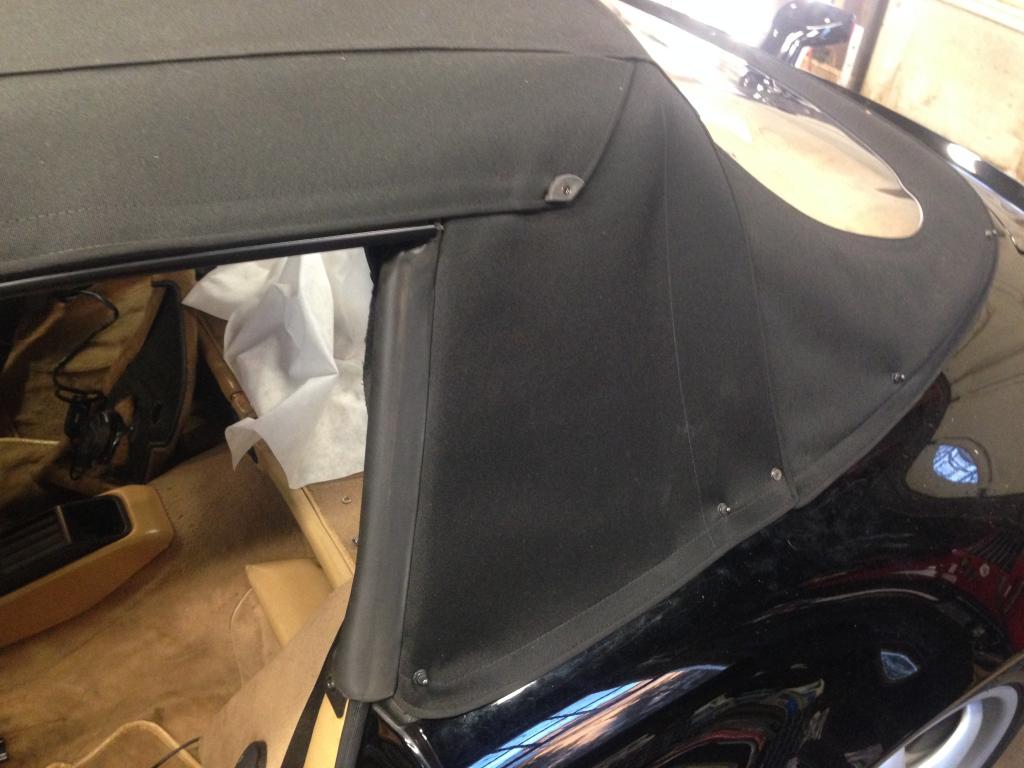
6. Starting to look like a top.
7. Put in the tenax screws. I used a pin to find the screw holes under the canvas. Admittedly, not a great method.
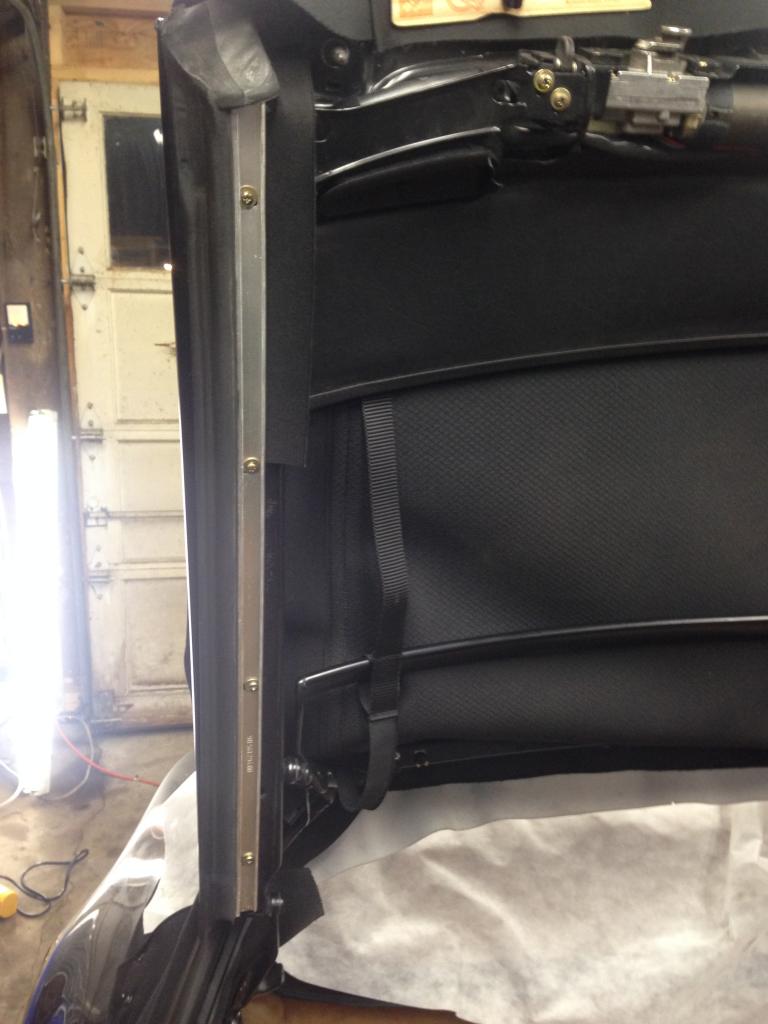
8. Install the side retaining pieces.
9. Install the side weatherstrip.
10. Install the tension wire retainers. This will pull the top very taut across the center.
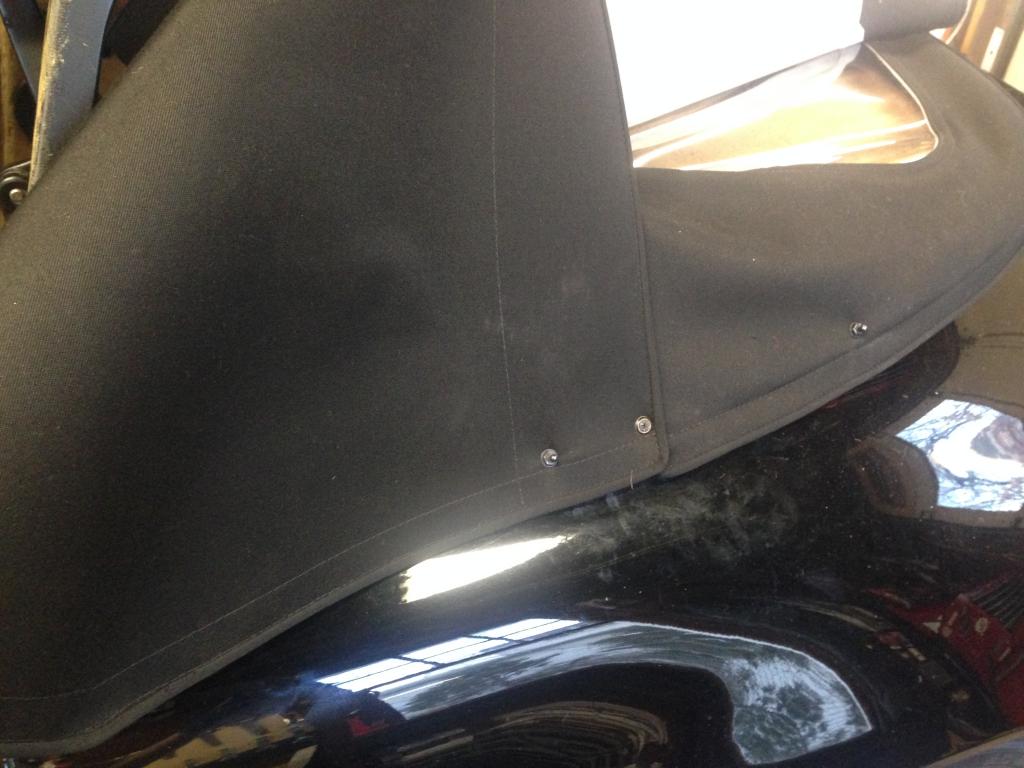
11. Install the pieces at the top of the windows. I drilled out the original rivets when I removed the old top. Replaced with the same.

12. Top window weatherstrip.
13. I don't why I didn't take a photo of the front header rail. It's straightforward.
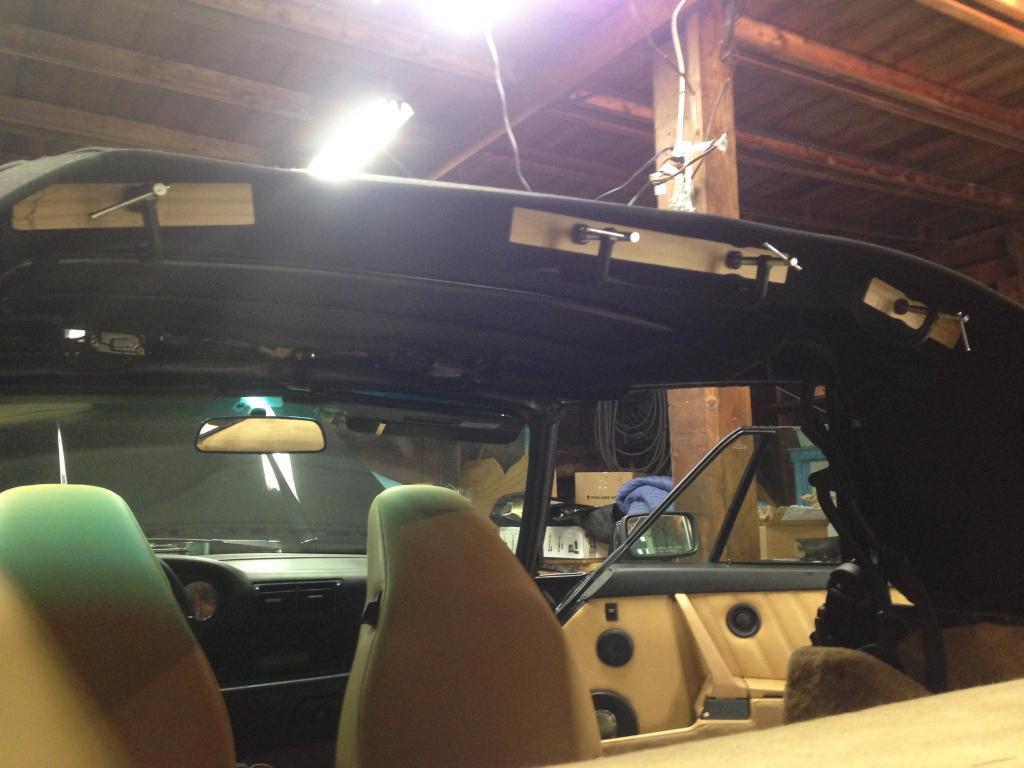
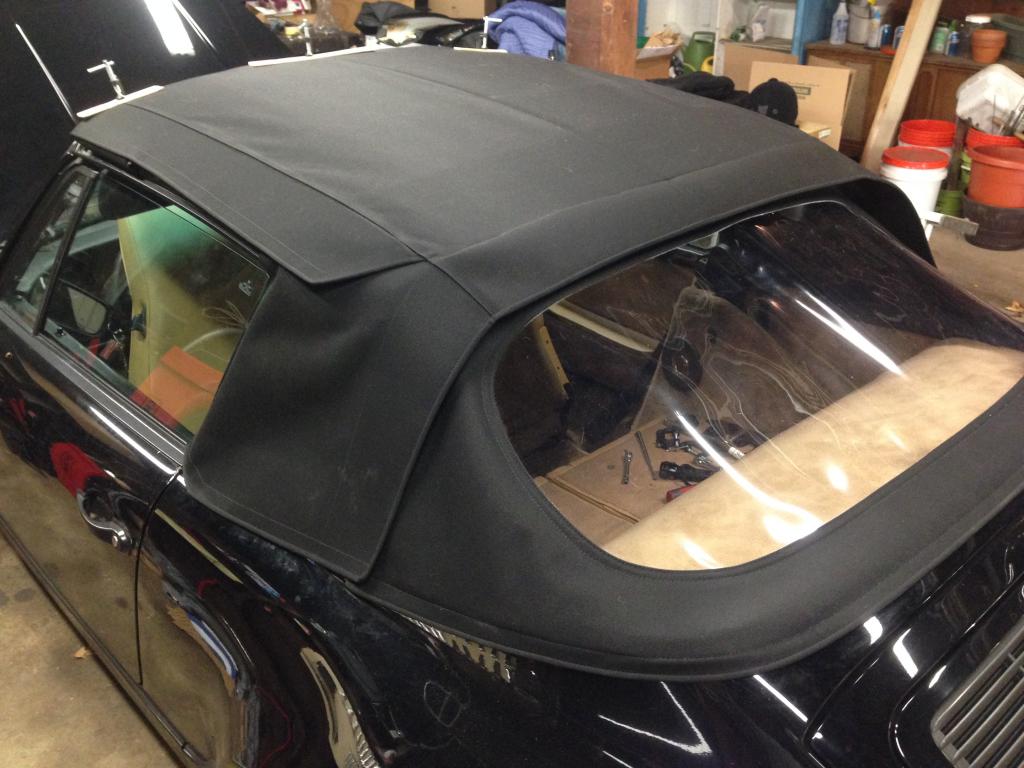
14. Admire your work! It looks like the rear window isn't tight in the pic, but it actually ended up pretty decent.
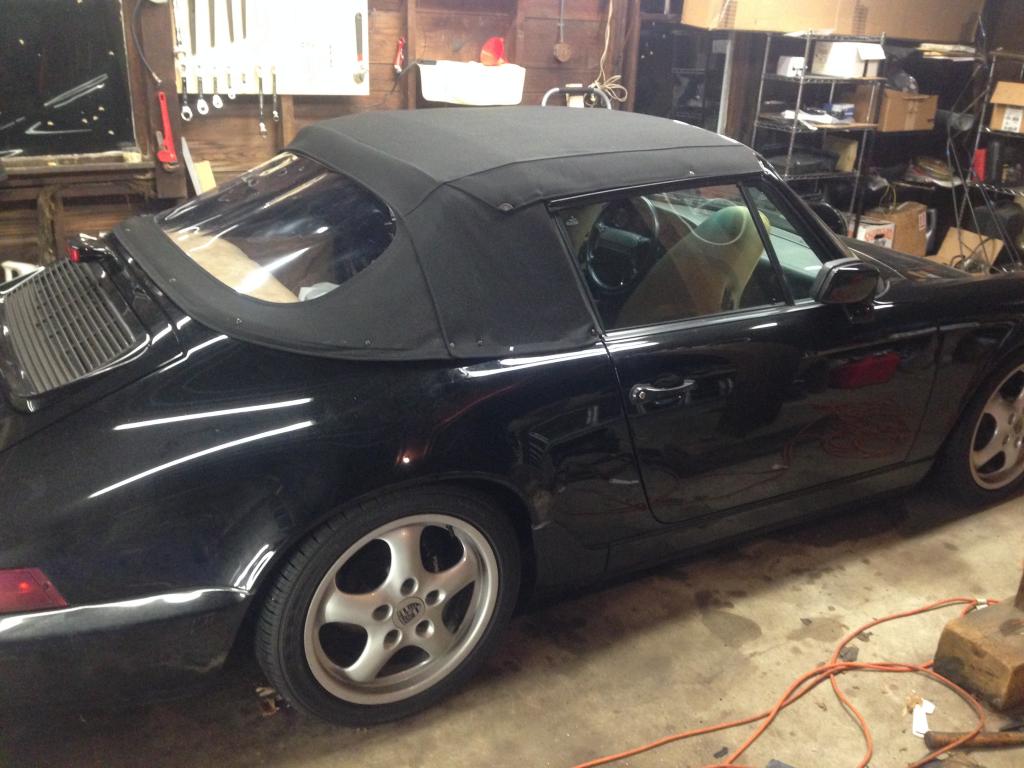
Not mentioned: glue everything and everywhere. Good luck!
1. THE MOST CRUCIAL STEP. Pull the back window around this retaining bar as tight as humanly possible. Anything less and the rear window will not be evenly tight and will have loose folds. I had to go back and do this again after test fitting the rear.

2. Attach the rear window. I tightened the 3 allen bolts around the bottom retaining piece and the two m8 nuts. Then used paint sticks and small clamps to hold up the top of the window.

3. The 2nd most crucial step. Attaching both pieces to the center rail. The front canvas is relatively easy. There is a pocket of sorts that lines up the forward/aft position. Just make sure that you correctly center the port/starboard position. Neither is too difficult. The hard part is the rear window and its retaining rail. Trial and error positioning was my method. It wasn't fun.


4. Now things get much easier. Pull the tension wire through the top of the canvas channel.

5. Tighten up the front edge. This is also not so tough. Lift the top up slightly, clamp the front down, and close the top. Repeat until you find the sweet spot making the canvas taut.

6. Starting to look like a top.

7. Put in the tenax screws. I used a pin to find the screw holes under the canvas. Admittedly, not a great method.

8. Install the side retaining pieces.

9. Install the side weatherstrip.

10. Install the tension wire retainers. This will pull the top very taut across the center.

11. Install the pieces at the top of the windows. I drilled out the original rivets when I removed the old top. Replaced with the same.

12. Top window weatherstrip.

13. I don't why I didn't take a photo of the front header rail. It's straightforward.
14. Admire your work! It looks like the rear window isn't tight in the pic, but it actually ended up pretty decent.

Not mentioned: glue everything and everywhere. Good luck!
07-24-2016, 09:04 PM
#37
Intermediate

Join Date: Mar 2003
Posts: 27
Likes: 0
Received 0 Likes
on
0 Posts
Hi, I'm trying to bolt transmissions to the housings but there seems to be a large hole and the bolt will not attach to it? Was there some kind of nut behind the housing? Did anybody ever run into this problem?
07-25-2016, 05:05 PM
#38
You have parts missing! Each transmission is mounted using 3 bolts through spacers onto nuts welded to the chassis/panels the bolts/spacers are of two different lengths. See PET Pic 811-21 Items 15-19 Your pic above appears to show the nut outline around the hole
07-26-2016, 05:04 AM
#40
The following users liked this post:
Patrik Rens (08-28-2020)
01-13-2017, 11:52 PM
#42
Track Day

Join Date: Nov 2013
Posts: 16
Likes: 0
Received 0 Likes
on
0 Posts
sorry to stick this silly question into this advanced thread. I believe I need a new micro switch on the driver side front. However, I cannot seem to figure out to take that cover off to get at all the mech affraid I am going to break something.
08-26-2017, 06:38 AM
#45
1st Gear

Join Date: Jul 2017
Posts: 1
Likes: 0
Received 0 Likes
on
0 Posts
help - can someone help me identify the part number for this piece- i have the same snapped cab component on the left hand side of my 964. its Stevens photo number 15 on one drive - thanks in advance
https://onedrive.live.com/?cid=E97DD...%21105&o=OneUp
https://onedrive.live.com/?cid=E97DD...%21105&o=OneUp