When you click on links to various merchants on this site and make a purchase, this can result in this site earning a commission. Affiliate programs and affiliations include, but are not limited to, the eBay Partner Network.
Impressive work and attention to detail. Your car looks really clean too, I’m guessing there’s been a bunch of detailing that happens as you dig into various projects.
Something that surprised me is your comment about Japanese cars not being well maintained, is that true? What do you generally see and is it just 964’s or an overall trend?
Thanks! I used a Toranado to spice up the wheel wells. It was recommended to me by @cobalt as he uses something similar to clean his wheels.
If a car is under warrantee I think the factory maintenance is performed. But after that cars are only maintained well enough to pass inspection. While this does include things like oil leakage etc it does not include for example brake fluid flushes etc. Maintenance in general in Japan is performed less than what I was used to in the U.S. Even a car dealers building may look to be in poor condition. That said you don’t see cars running around all basked up like in the states….
But if you were to import a 964 from Japan you would probably be the first to change the transaxle oil in 20 years. In my case the fuel filter itself sprung a leak at the crimped edge just due to internal corrosion. I dont think it had been changed in decades.
Wow Pete- really cool stuff. I'd love to hear more specifics on the mcs three way. You'll have to do a bunch of testing and get yourself a few quick setups so you have a baseline for each setting...otherwise that much adjustability will drive you bonkers!
Your hearing looks a lot like what I'm doing in my g64 regear madness at the moment. (I haven't made a thread- as you stated, updates are painfully tedious)....but we are throwing a set of shorter gears in my extra g64 and that is going in soon...looking forward to that.
Well- I need to have the car on the ground (notice I didn't say road) in a couple of weeks or so because the 914 will be going in for windows out paint and I want to use the lift- maybe pull the engine etc as well.
So yes- tuning will be a challenge for a novice driver like myself. But I have confidence that I can get it right. I'll align the car with my last settings (RS with more neg camber,) leave the sway bars set as before and go from there. One one thing- there has been a bump in the road with the MCS- one has a small leak where the hose attaches. Air leaked into the shock and then the canister as well. Then I used the canister with the front shock by mistake and got some air in that one. Sooooo they are all going back to MCS to get properly paired up and topped off. If I can get them back in time I will go ahead with the install but its likely that I will throw the PSS10's back on for a bit. As much as I'd love to have all the new shiny bits on at once this is actually a better way to go as it will allow me to get familiar with all the other components first- baby steps as it were. It also give me more time to develop and print the intake so I can get rid of the factory airbag to make room for the rear canisters (slippery slope!) The down side of course is having to align the car and bleed the brakes 2 times.
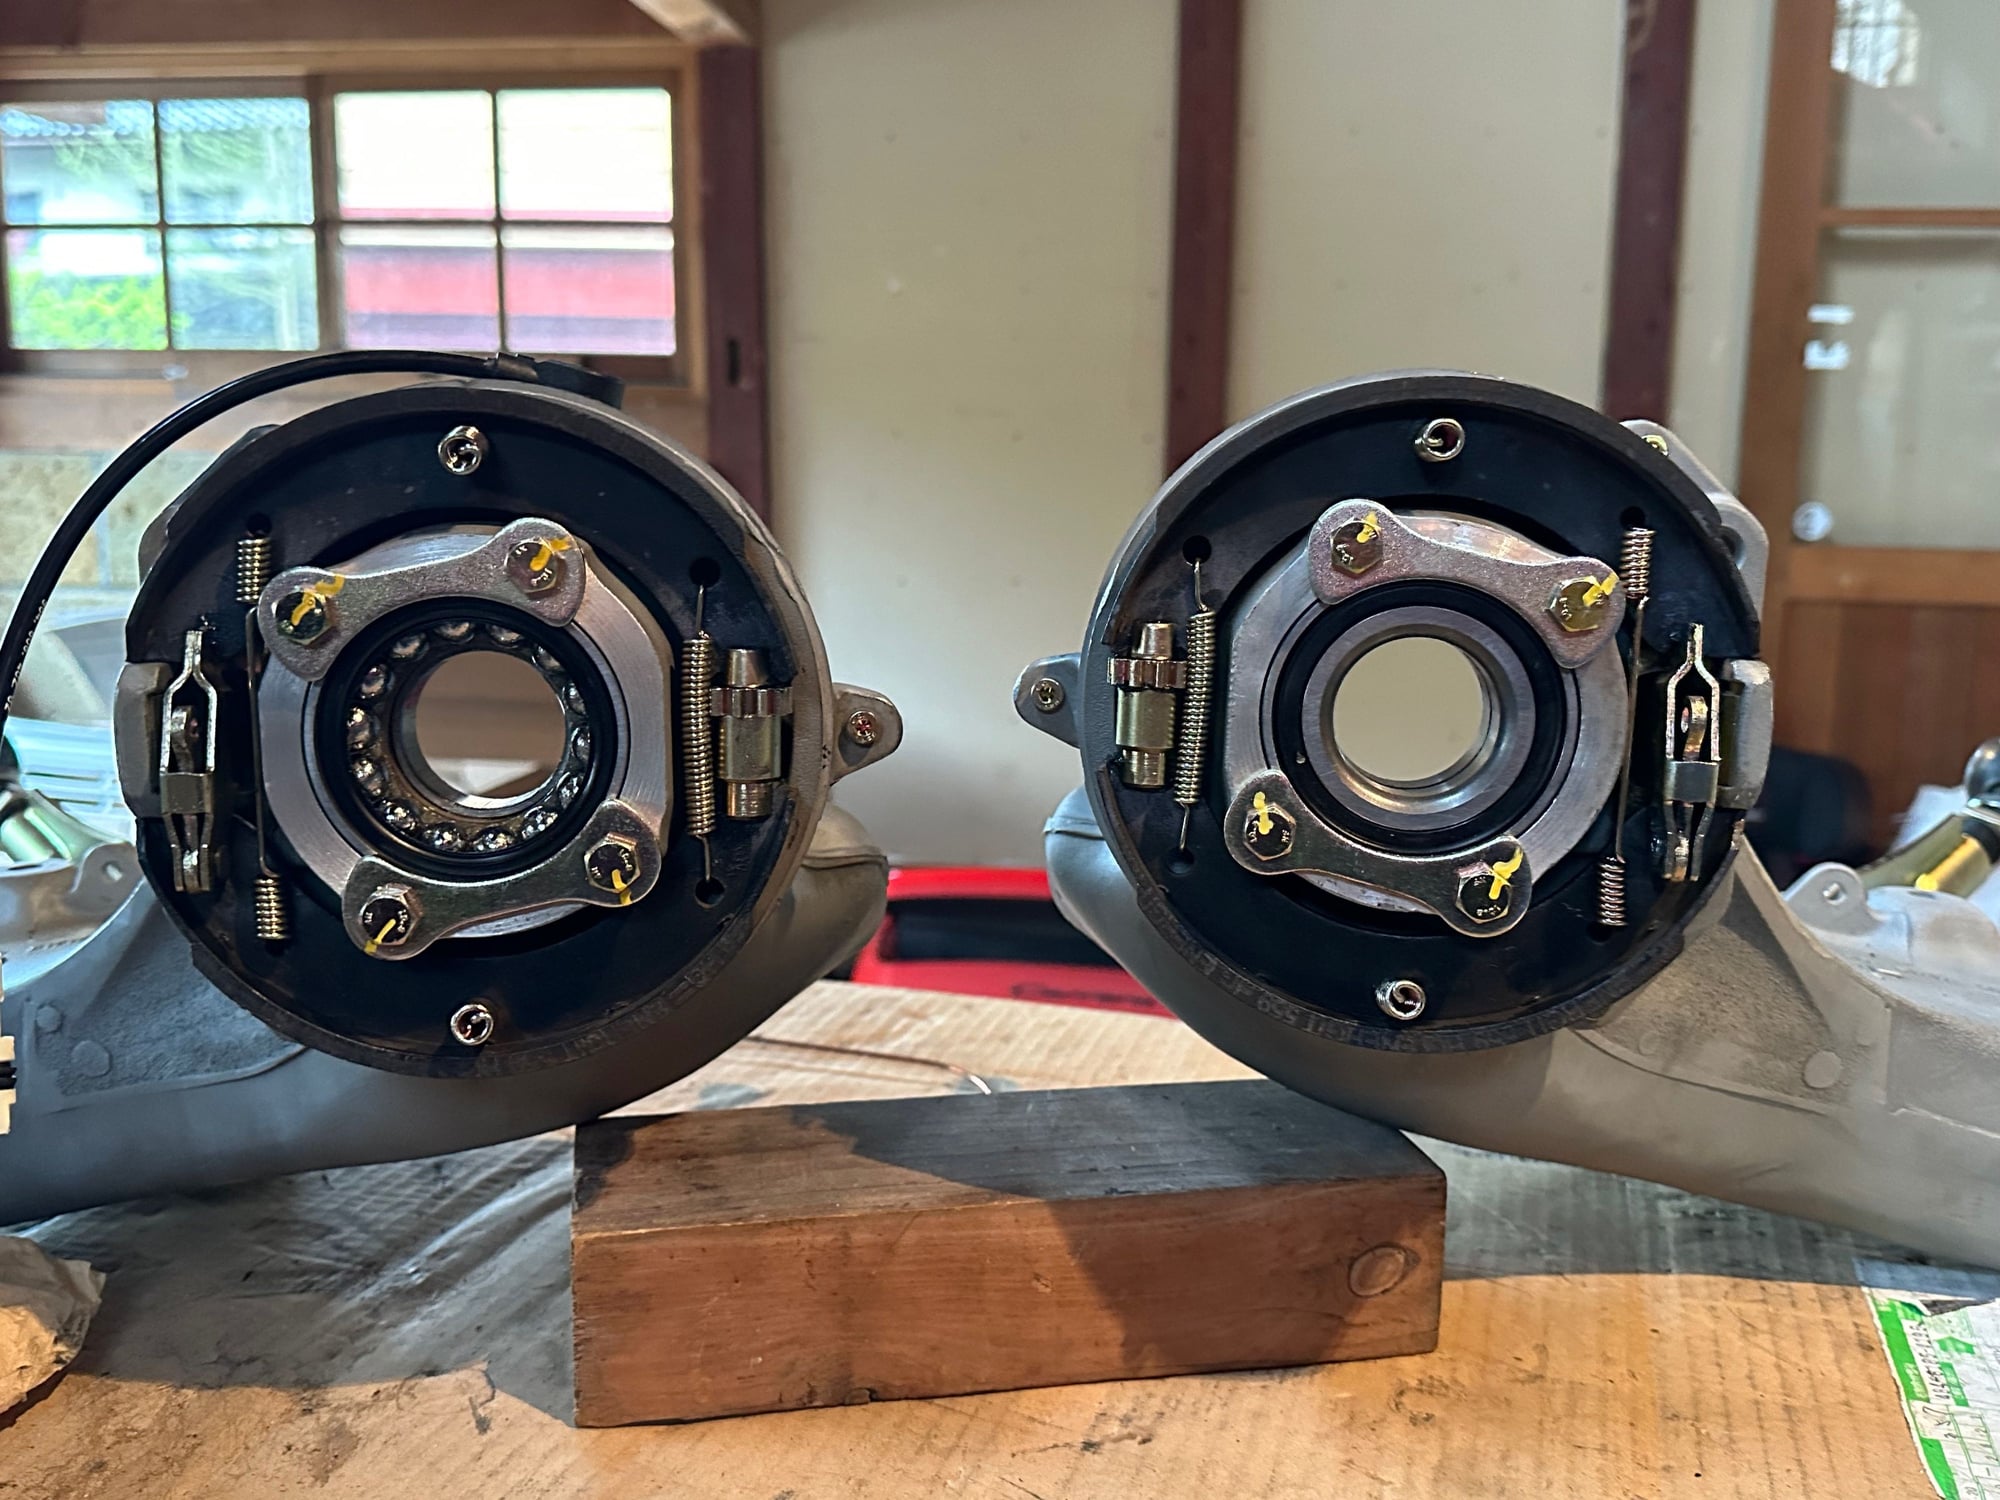
I did manage to make progress today and install the parking brake assembly. That is one of the main advantages of the brembo system is that it does use the rear parking brake.
I'm living my lift table- being taller its great to bring the work to me.
Then this evening was able to test fit the rear brakes to try and clearance the rear shields.
I'll be getting out the rubber mallet tomorrow if I'm not sick..... 4 year old and wife have the stomach flu.... and I have been the cleaner upper so I'l probably get it too.
I actually already had the 993rs units on the car when I discovered them. I hadn’t seen them before and thought it my responsibility to try them out and introduce them to the group.
Pete
I unfortunately found out the hard way when I converted my suspension and added Big Reds and 993 RS uprights.
The shop added 993 Long’s but it pushed out my cup 1’s out about 15mm. It would rub on the corner, and from the exterior it looked off. Wheel stuck out too much from the front fender.
So I converted back to 964 longs with spacers and car sits perfect.
Meanwhile- things have been progressing at 9M on the frunk harness. The idea here is to remove as much of the plumbing between the front and rear as well as some weight. I admit there is also some plain old "looks" reasons- that being that I really want a clean engine bay and that means losing the engine run compressor. At the same time my ABS is shot so adapting the harness to incorporate a 996 abs unit.
So- top to bottom in the pic below is the vacuum pump for the brake booster, A/c compressor, power steering pump, and the ABS. 9M almost had me convinced to go with the hydraulic C4/Turbo/RS setup but the combination of the price and my apprehension about using amore complicated system (K.I.S.S.) I decided to try the electric vacuum pump instead. Also not knowing how the system will feel with the larger rotors providing increased leverage I was concerned about the hydro boost system being over boosted. Ignorance is bliss and the electric pump system will provide more consistent as well as adjustable vacuum boost.
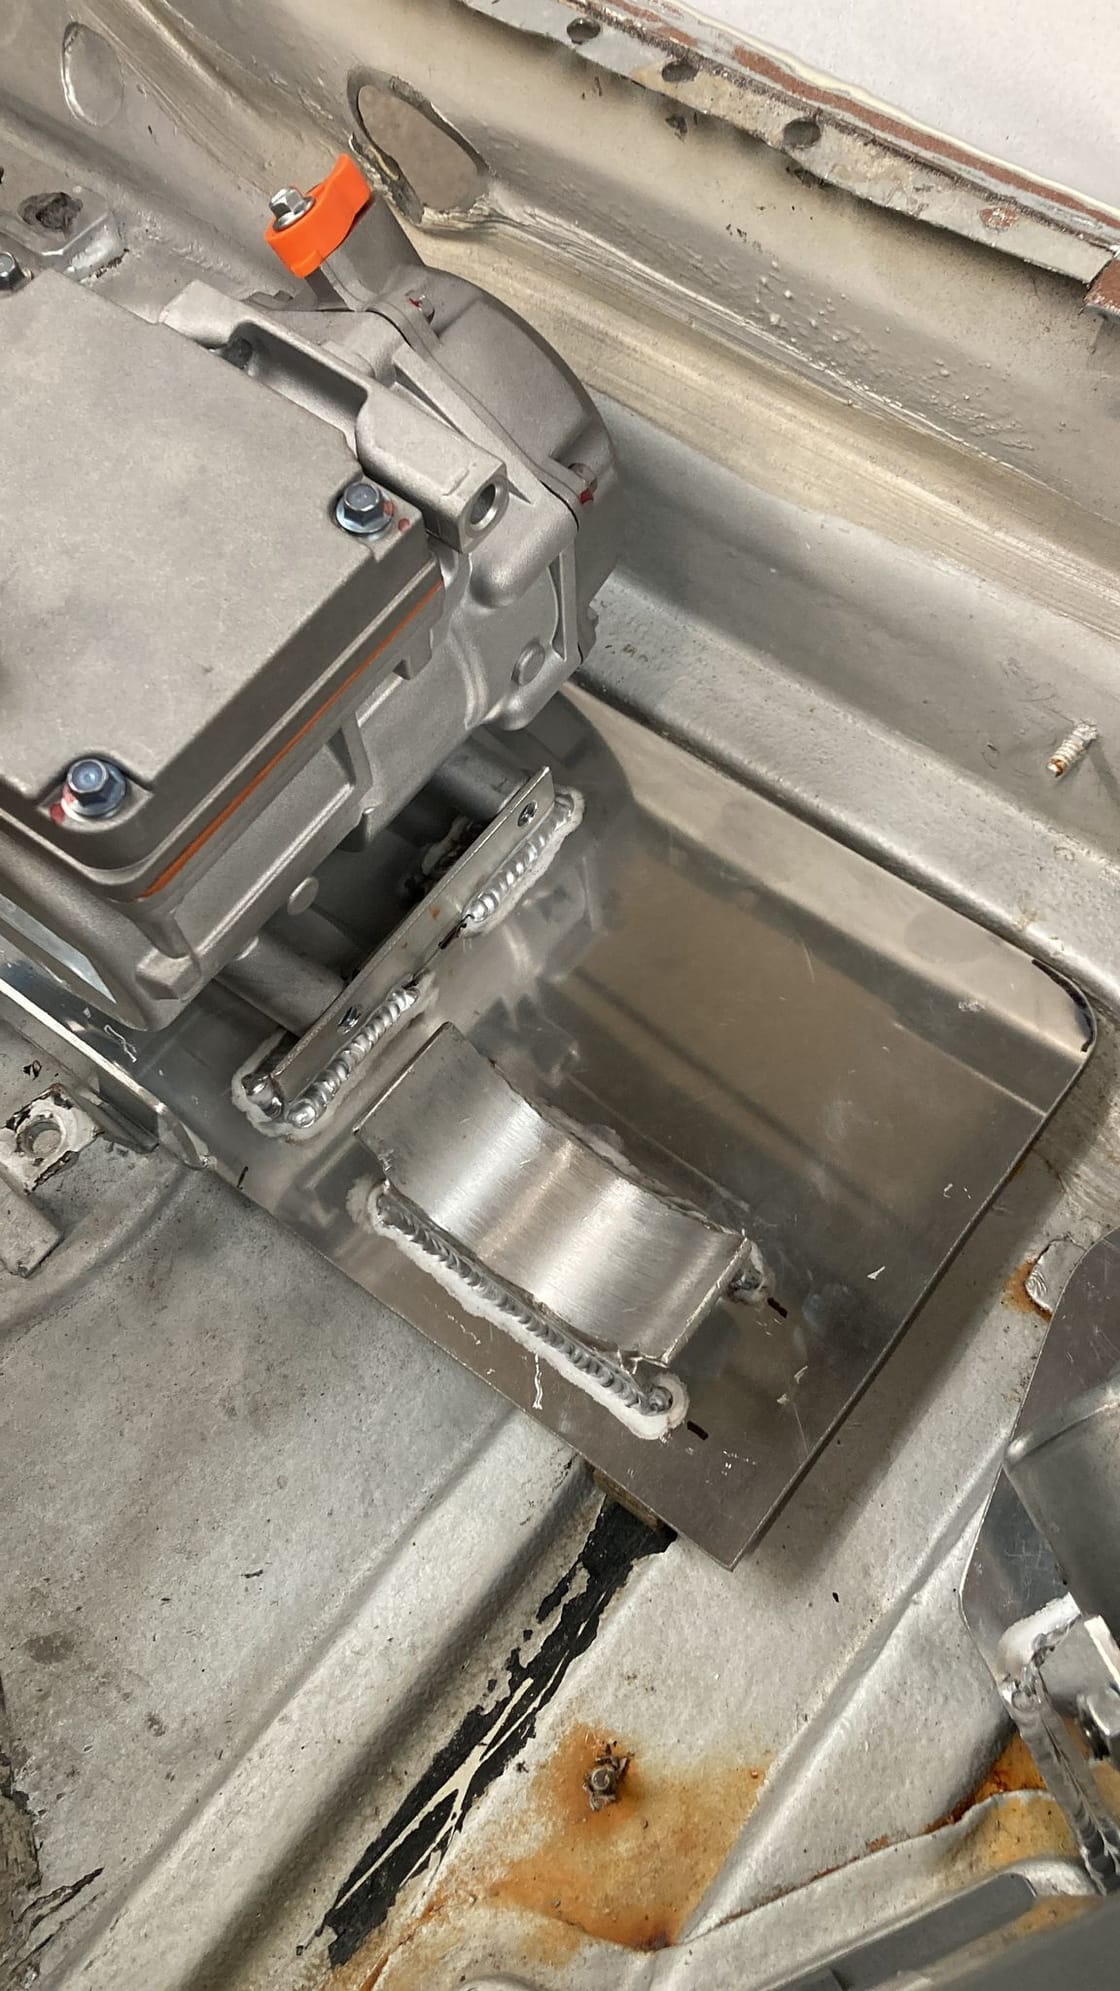
I went with a Citroen Saxo pump because I want to keep a floorboard in the frunk and the commonly used Porsche cup/ vaxhaul pump with the integrated reservoir is too tall.
Planning on using the stock res in this location:
This is all good and well but what I have not decided is whether or not to install it all in this car.....
The reason being is that after all the work is done- mistakes made and rectified, happy with the result etc etc- I was planning tear the car apart for paint. But- I'm not sure I can find a good paint shop here and a window out job is a ton of work and I know that from experience. So the 2nd plan is to take the low miles tiptronic car I have never mentioned that sits in the garage and move all the mods over....
This is a classic approach for me- take 2 (or more in the case of my old 2002Tii) cars and build one the way I want and the other refreshed stock. But I'm haveing some serious reservations this time. First off the Tip has only 45,000kms (28,000 miles) and is in fantastic condition. It has needed some paint- I think it was under a roof but not garaged for all these years and before I pick it up it was painted- but very well done. I'm sitting on this decision for now.... but interested in everyones thoughts on the matter- especially if you have done a windows out full rebuild D.I.Y. aside from the paint itself. Time is the big challenge these days....
I unfortunately found out the hard way when I converted my suspension and added Big Reds and 993 RS uprights.
The shop added 993 Long’s but it pushed out my cup 1’s out about 15mm. It would rub on the corner, and from the exterior it looked off. Wheel stuck out too much from the front fender.
So I converted back to 964 longs with spacers and car sits perfect.
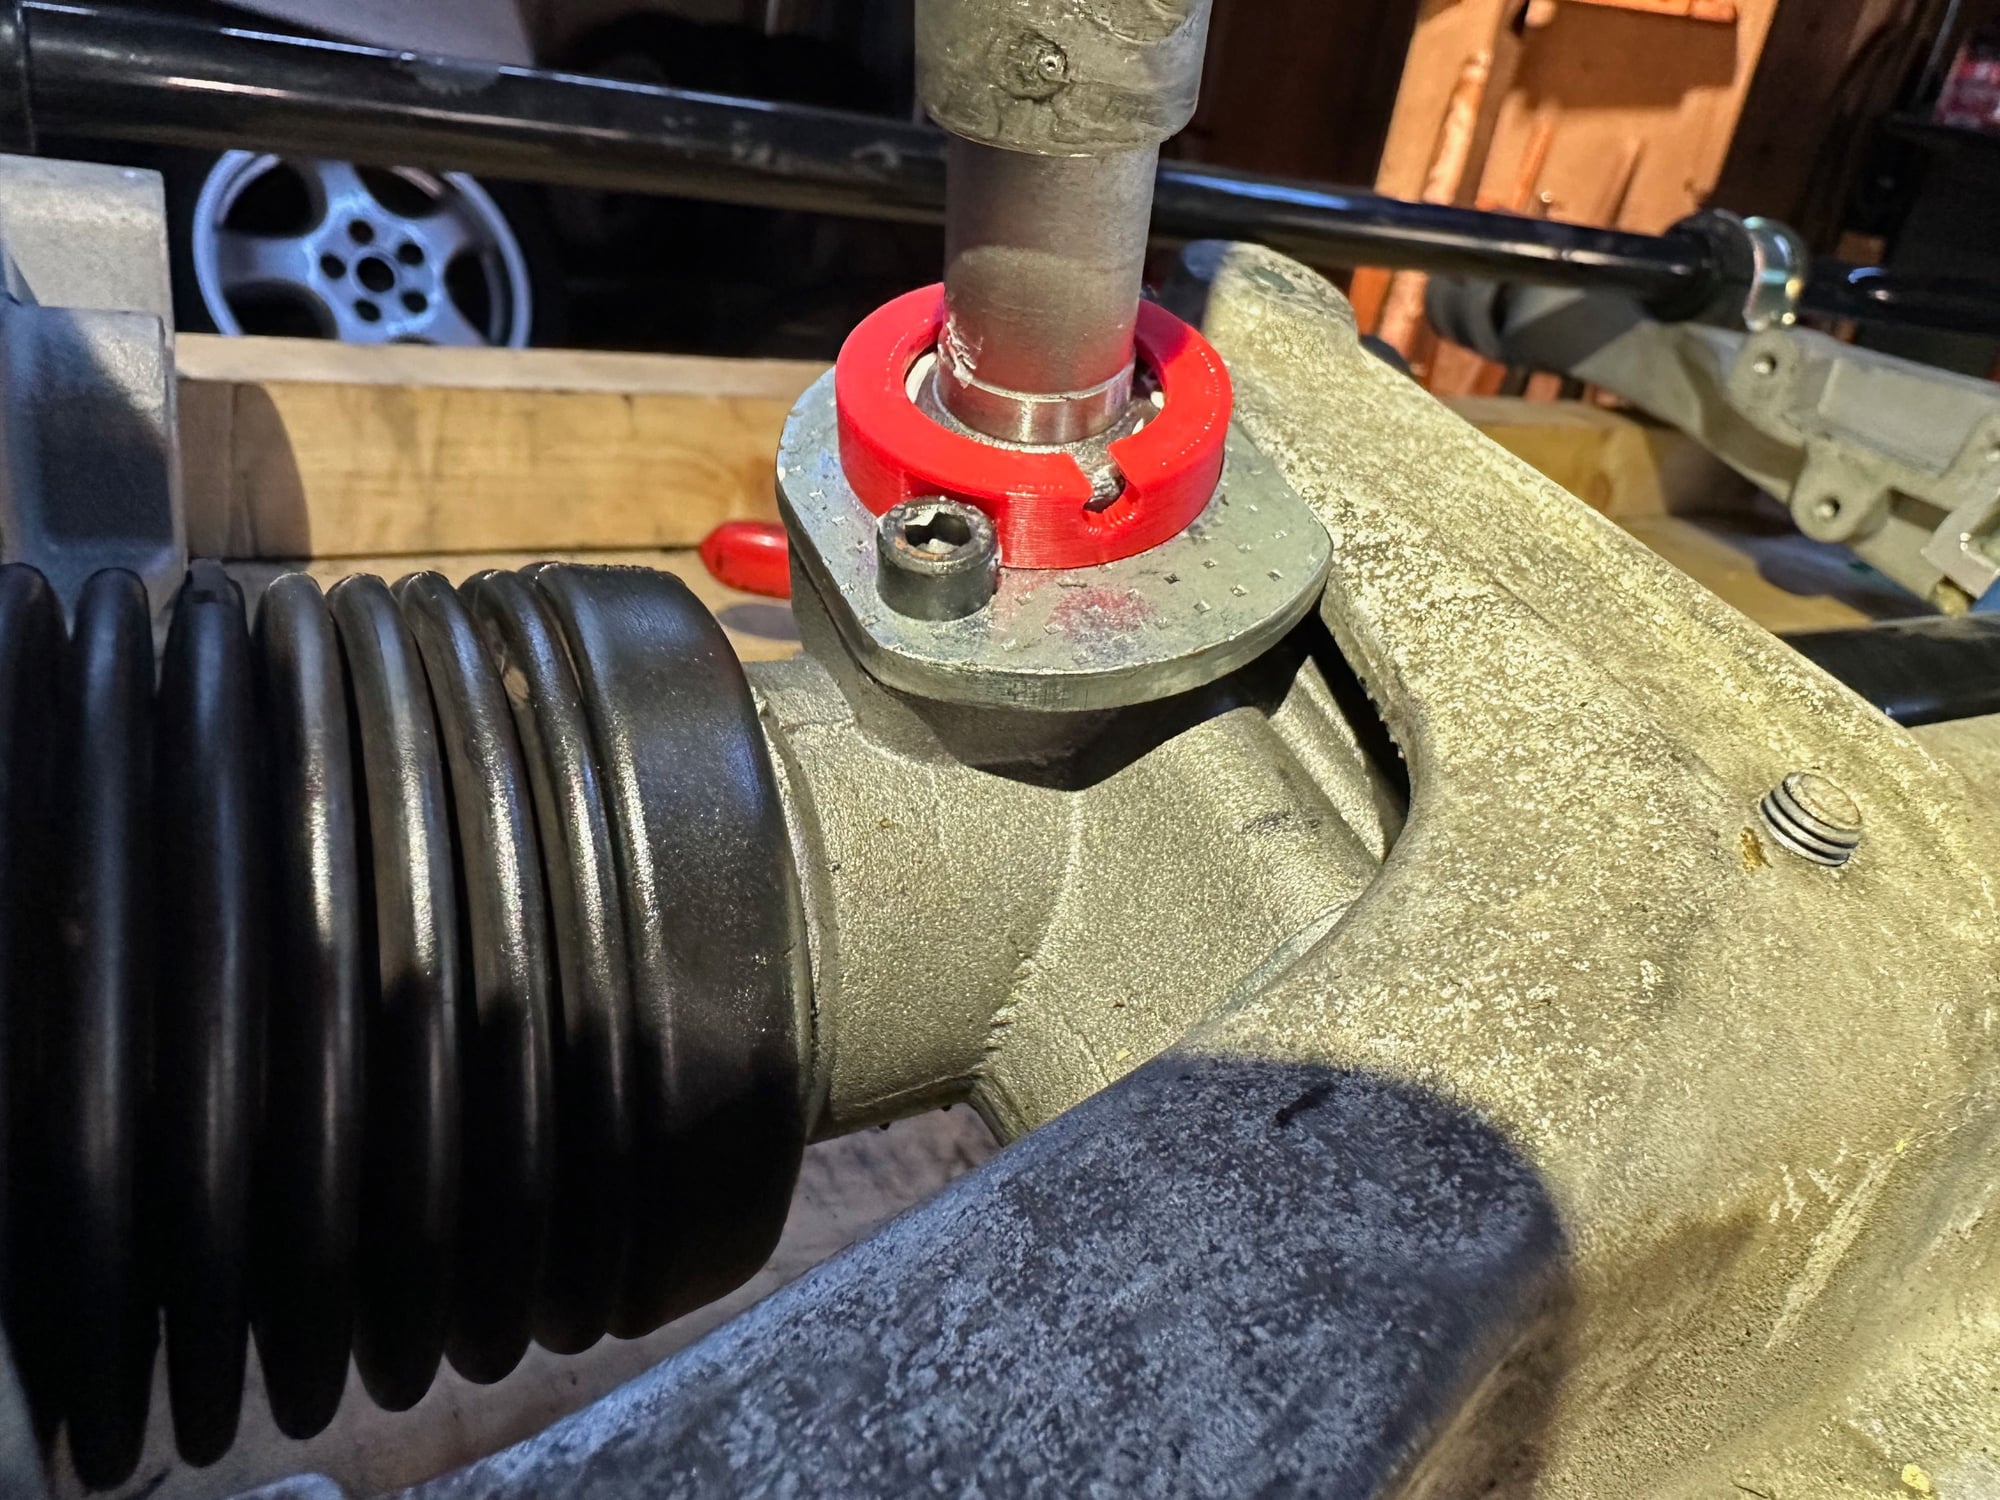
This is good info for me because I want to run Cup1 for my street wheels. I'm thinking if I grind off the tabs on the MCS I can get enough camber with the 964 longs. I already have the 993's snugged into place.....
Edit- these tabs hit the stock nut retainer assembly before the full amount of camber available with the slots is attained:
What kind of camber do you run with your setup and how close is it to being maxed out?
Whoops_ I was wrong about the mileage on the Tip- its 45,000km/28,000 miles. I'll get more pics of it when it gets back from the mechanic. Its the same year and color as my manual car. This is the only pic I have now pn the back of the car carrier:
While I should have spent the 1/2 a day that I had on putting my suspension together..... I actually spent in on fixing stuff that my former mechanic did not do. There were clips not attached, clamps not clamping wires twisted around each other My OCD would not have it. The most fun was changing the upper #6 spark plug wire with the lower #4 as the #4 was too short to fit without being under tension. If you have not changed the plug wires on your car then you are in for treat. Unlike the suspension/ brakes and steering where everything is simple and even major work can be carried out with relative ease the the engine compartment is a cluster.... The plug wires are a major PITA so it kinda felt like a right of passage. No pics cause its not that interesting but it kinda felt like a right of passage. Anyway the engine bay is much better now and it sticks me as funny how much peace of mind comes from just having things cleaned up and in order.
This project has been sidetracked by 3d printing learning curve a few times now. Its been frustrating because the print is much easier to fit with the rear shock and oil hose out- so it needs to be finished first. Tweaking the Adura-X to print well has taken some time but I must say- customer service has been great and with all the suggested tweaks I not have an really good looking and functional print that fits. Needless to say it didn't fit right off the bat:
How many time is could have let well enough alone- but ultimately didn't. Now we have a very nice fitting piece. This material is rated up to 145*c (293F.) I cant imagine that won't be enough.....
And from above:
Now the oil hose and rear suspension can go back in.
II had already fitted the left side trailing arm after replacing the boot for the ERP inner pickup. This was the boot that I received from the supplier:
I did manage to get it on but kinda wonder how long it will last- and its obviously not something I want to have to replace in the near future.
Probably old news to many but found an easy way to fit the rear parking brake cable. Pry up the top shoe and remove the top half of the lever mechanism. Then fit the cable with the lower part in place:
Place the upper part back in place (all the sliding stuff greased of course):
Pry the shoe back up and pop in the top lever- finished.
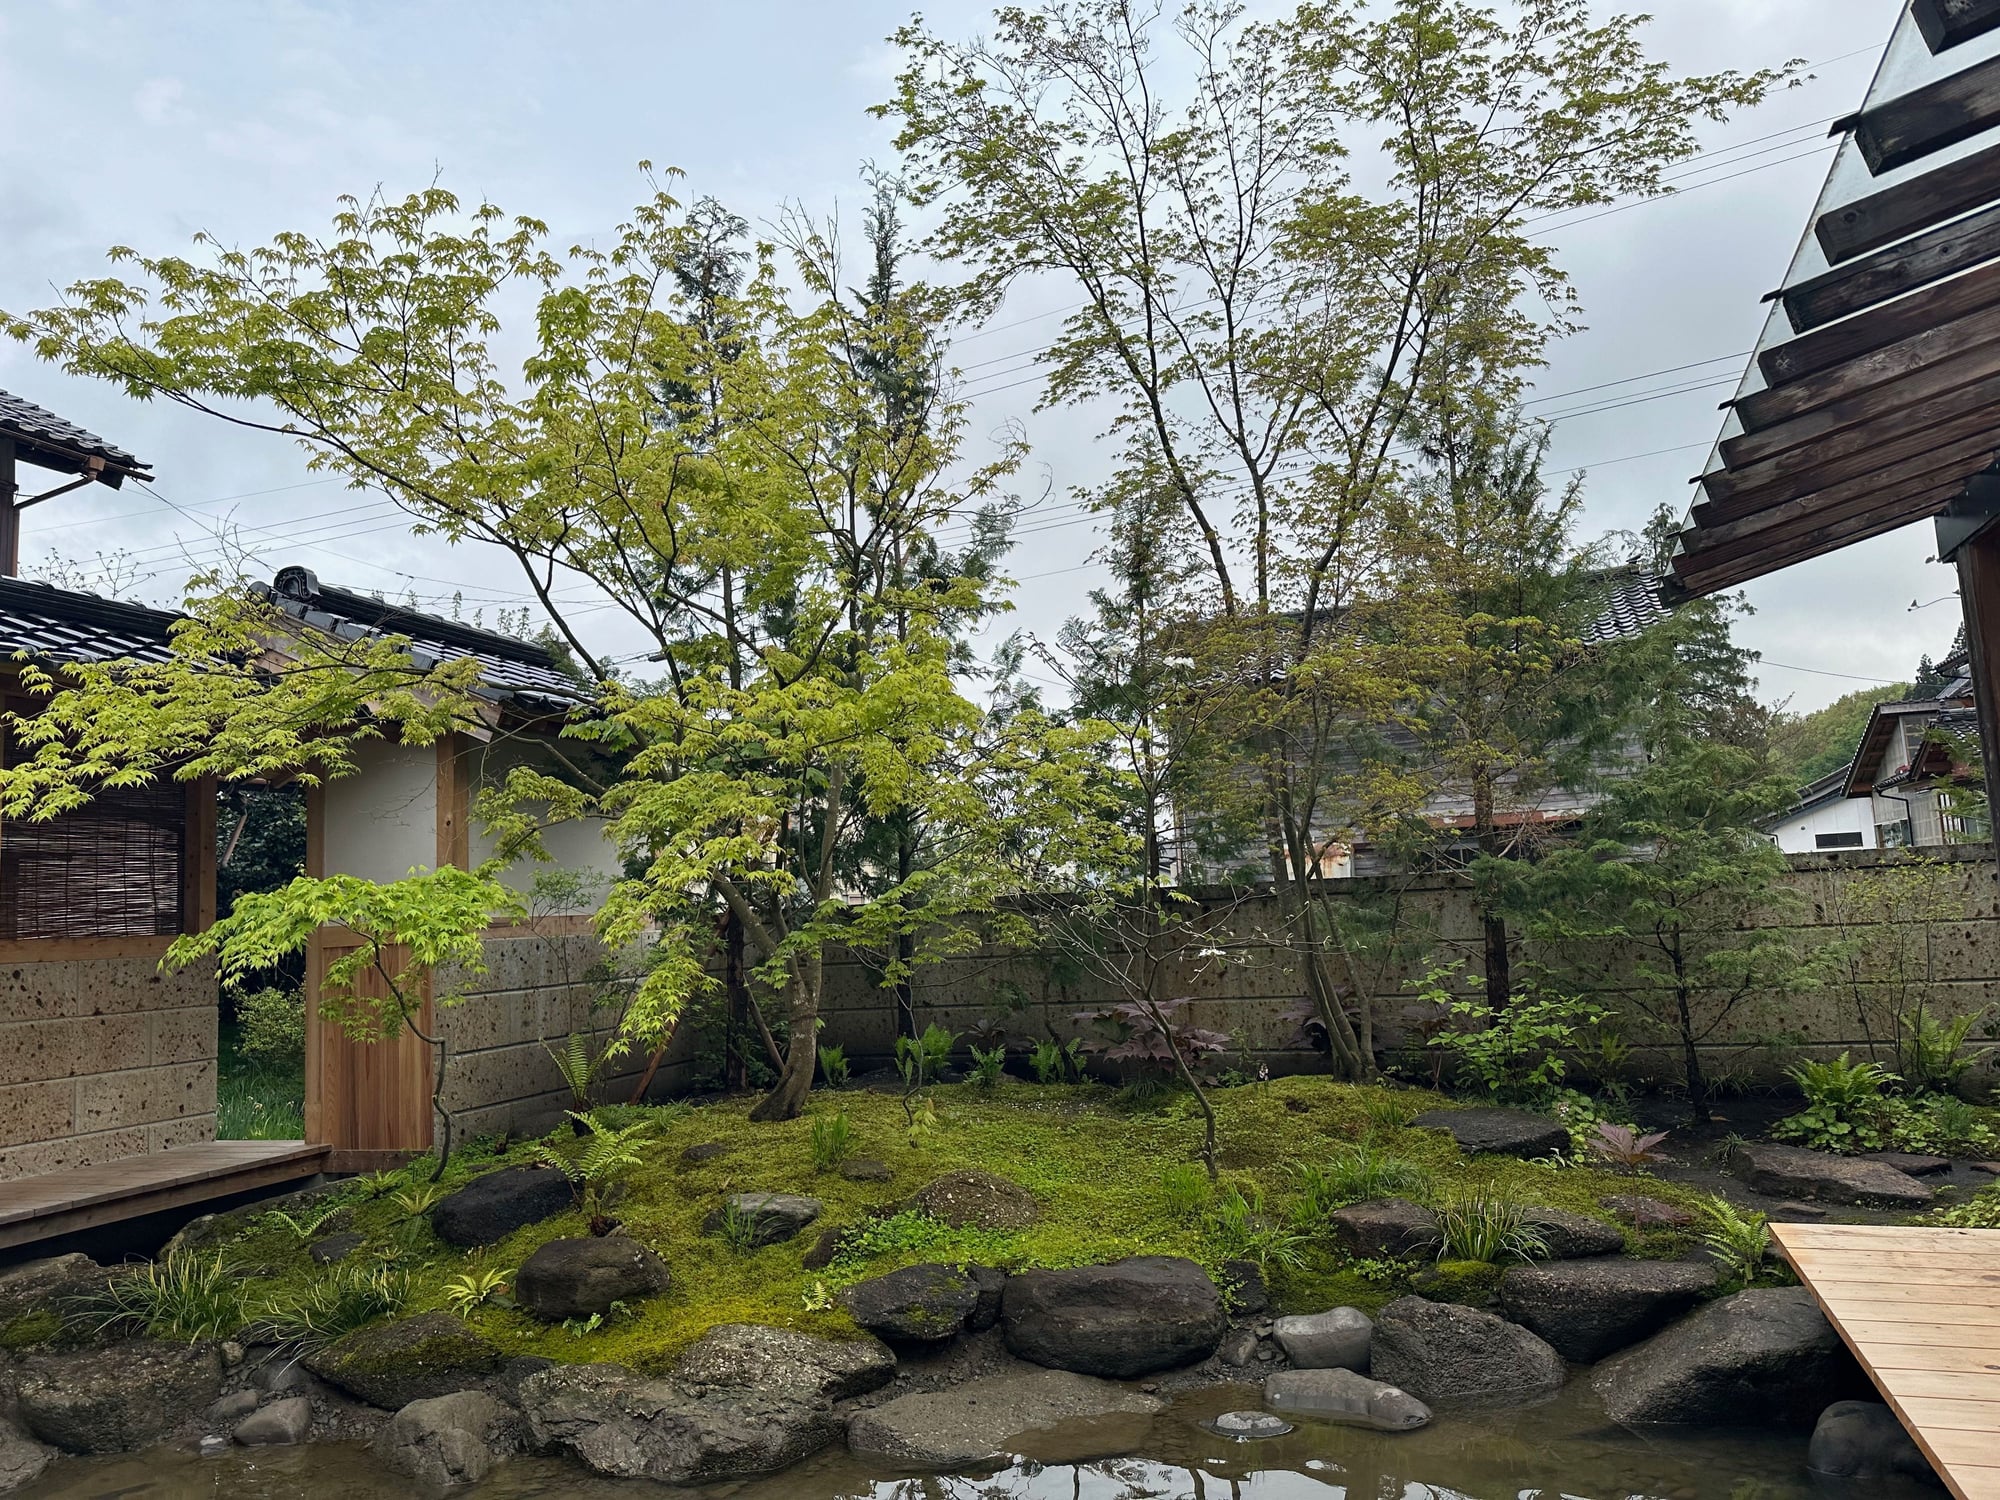
Time for a little break in the garden- which has been another long project as well that is finally almost done. Always nice to see the light of day so to speak.
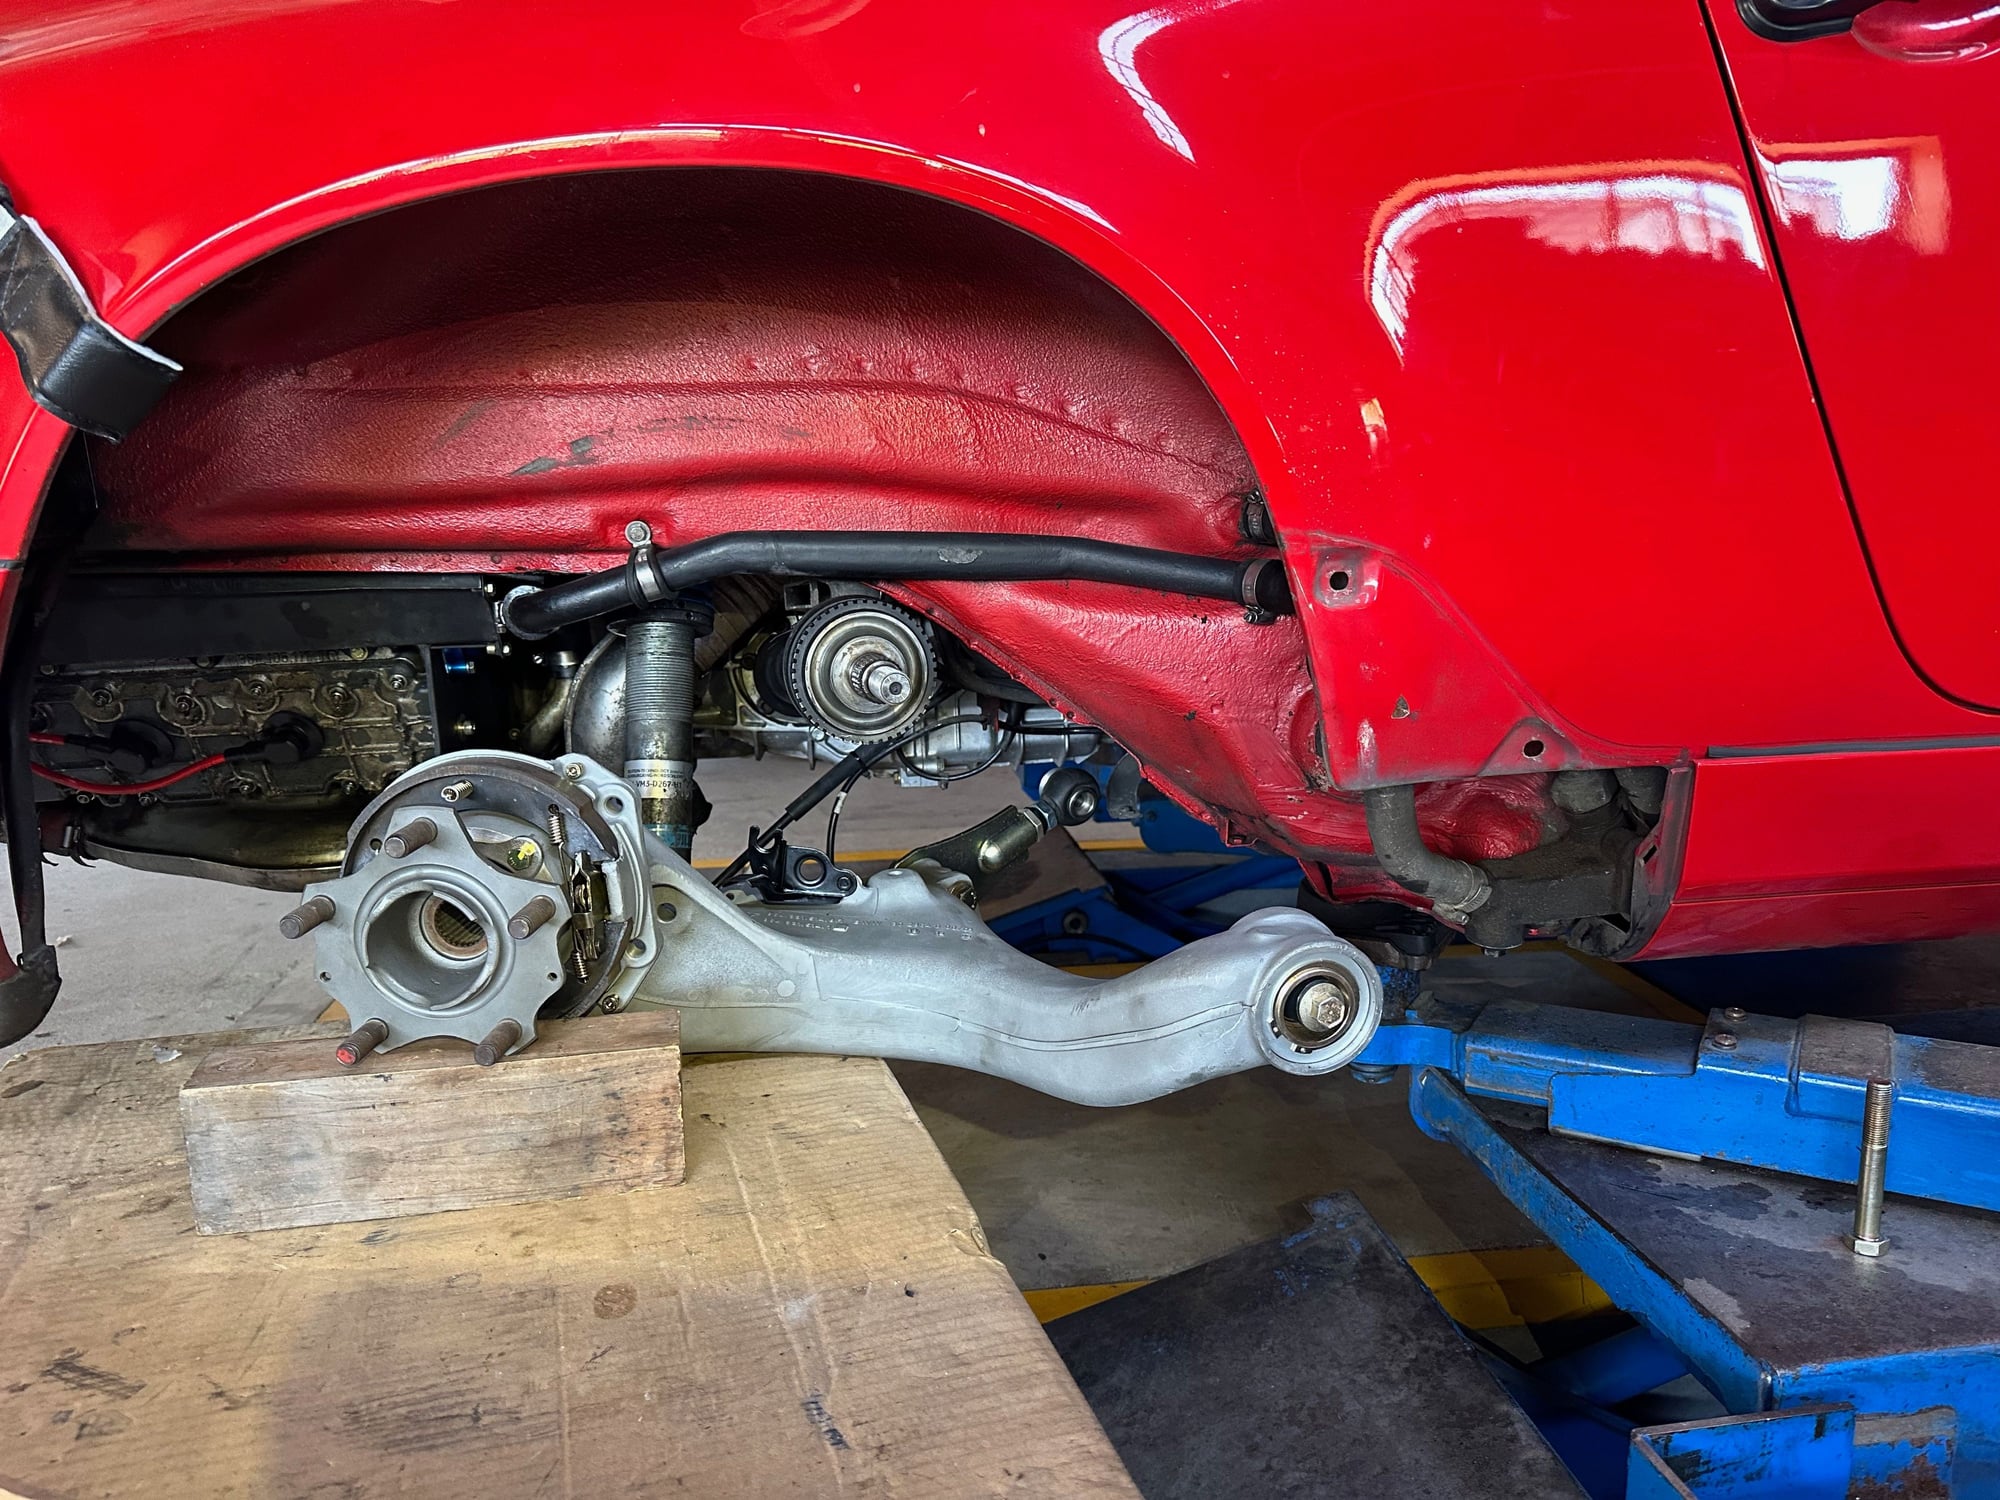
On to the right side now that the engine tin cover is in place. On the left side I just manhandled the trailing arm in place and found myself wrestling with it a bit to get it fitted. So I thought I'd try to be a bit smarter on the right side.
First I hung rear shock and the inner pivot. This socket is the that you need to get to it with the torque wrench:
Arm on the lift table:
Pry up the outer pivot and thread in the bolt:
After that slide the bolt though the lower shock eye and raise the car up. go under and attach the bolts from the rear arm to the inner pivot plate:
Here you can see the clearance with the torque wrench in place:
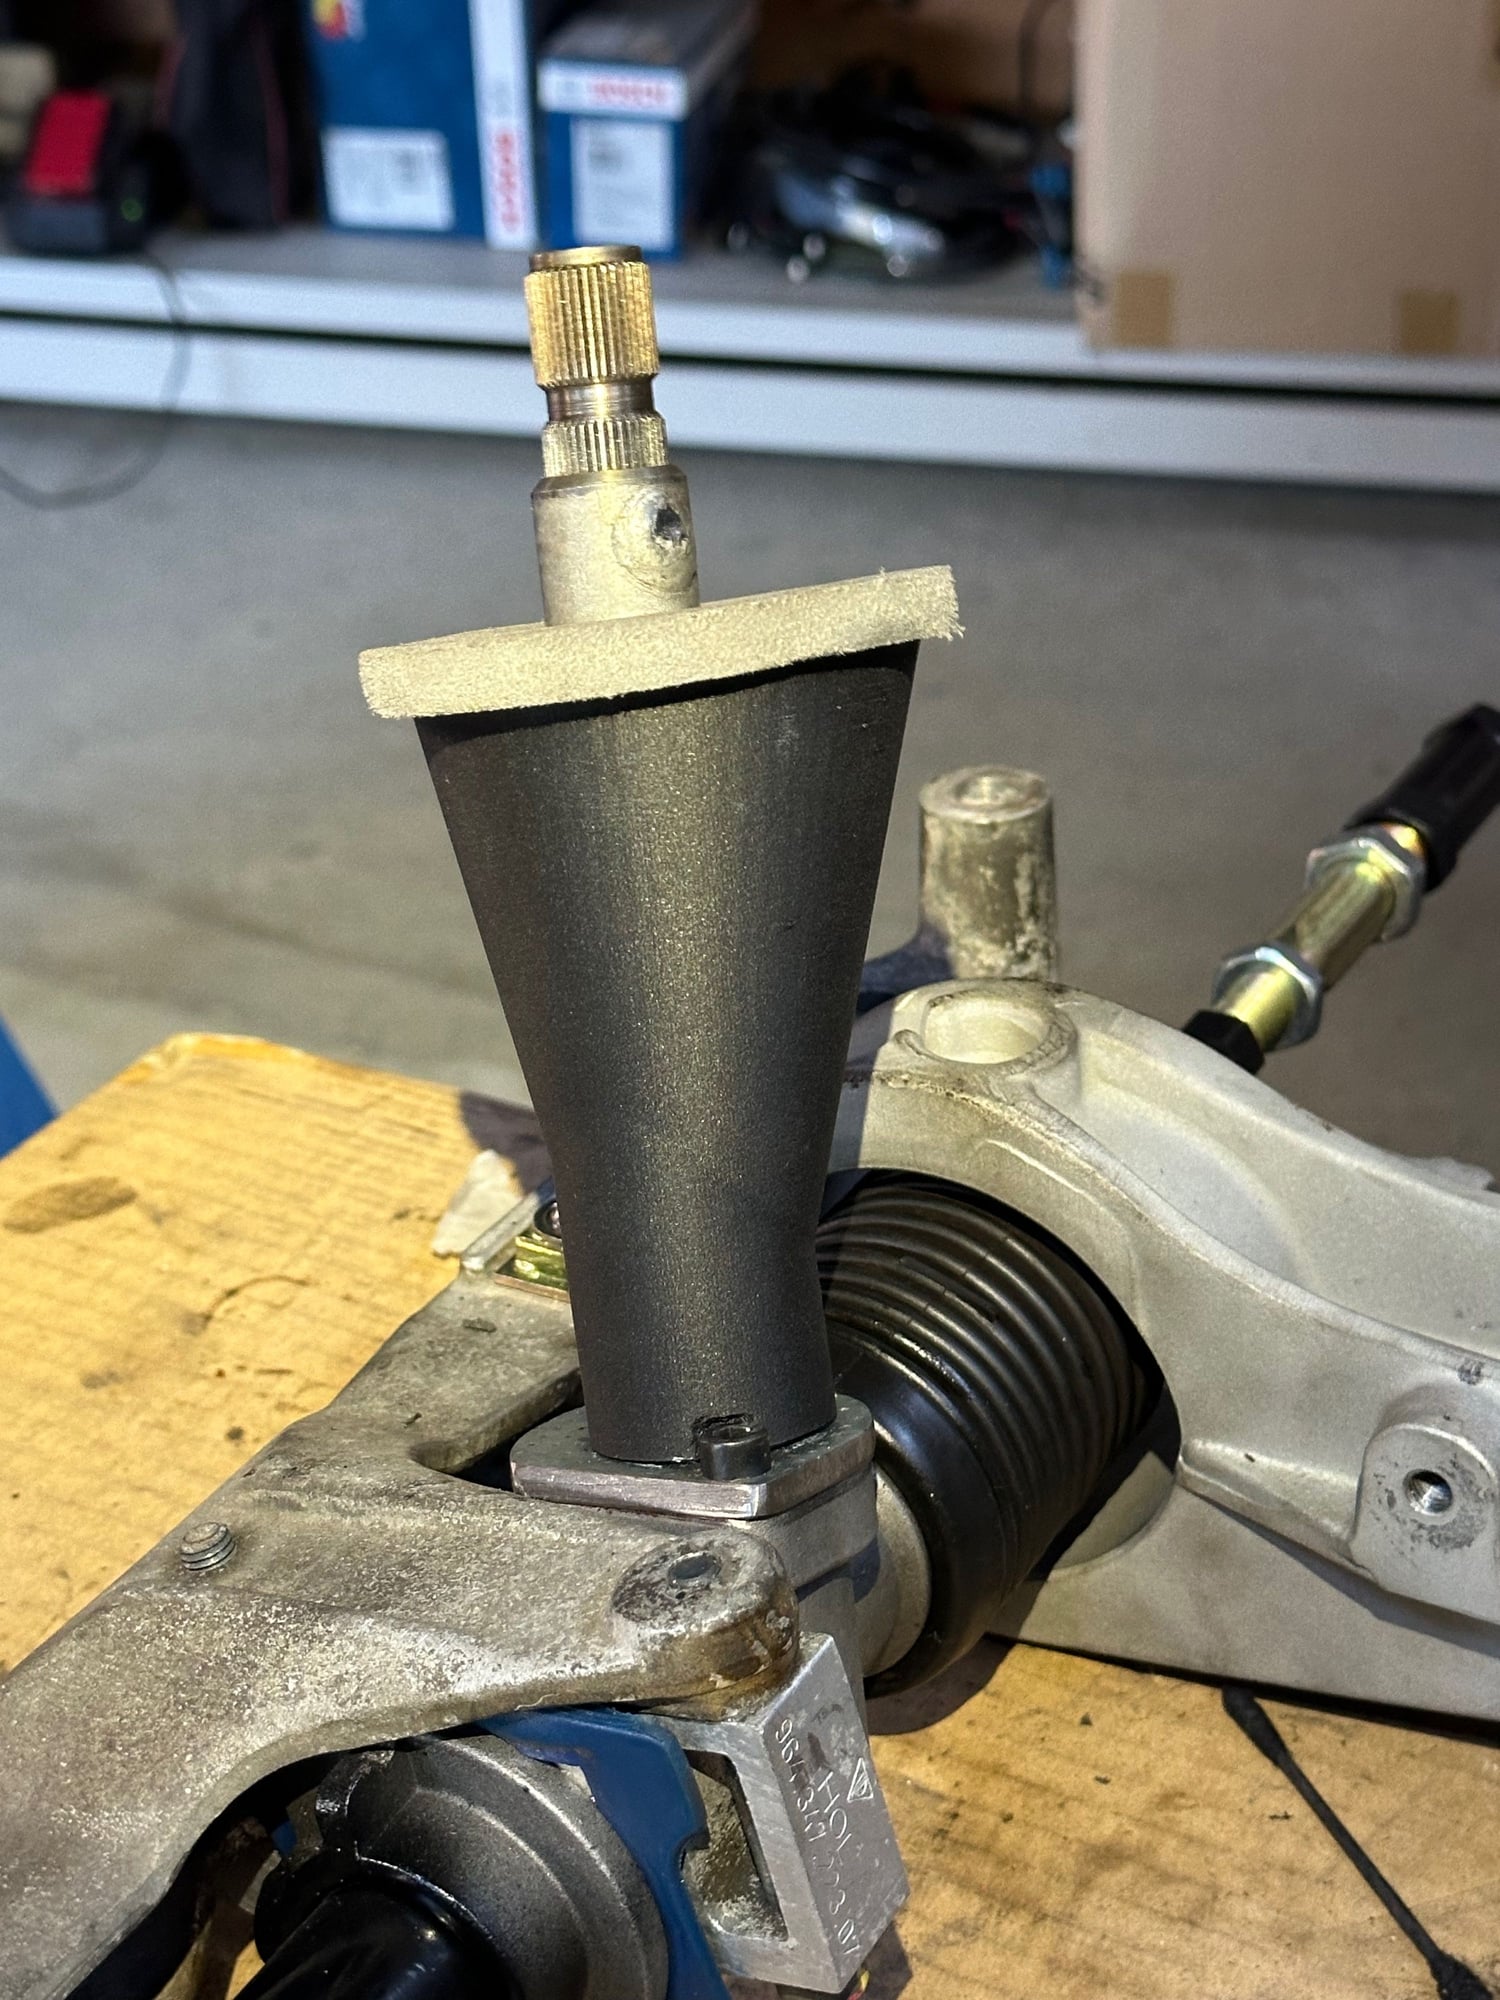
On to the front. Though I had already torqued the front crossmember I decided to drop it to place this steering cover on the rack. I had one in place but it was in PETG. Probably it would have been fine but its max temp is 80C so just in case I printed this one up again in Adura-X. This is for the manual rack from The Machine Shop. I added a small weep hole at the bottom for the off chance that there is a bit of water ingress of condensation on the inside.
The PETG was a little more forgiving than the carbon nylon piece and I found it needed a bit of modification to fit perfectly. The nice thing about the carbon nylon is that you can shave it with a razor quite easily. The i.d. was just a little too tight to fit over the seal so I carved chamfer on it and added a bit of grease to help ease it on. Also the pice hit the top of the allen head bolts so I carved that back a little as well. Then I modified the CAD file accordingly and made this test piece which solved both those issues. I won't need another one but thinking that I might supply these to others so better to get it right now. All good now:
Final instal with the 10mm closed cell urethane disc at the top:
Meanwhile- things have been progressing at 9M on the frunk harness. The idea here is to remove as much of the plumbing between the front and rear as well as some weight. I admit there is also some plain old "looks" reasons- that being that I really want a clean engine bay and that means losing the engine run compressor. At the same time my ABS is shot so adapting the harness to incorporate a 996 abs unit.
So- top to bottom in the pic below is the vacuum pump for the brake booster, A/c compressor, power steering pump, and the ABS. 9M almost had me convinced to go with the hydraulic C4/Turbo/RS setup but the combination of the price and my apprehension about using amore complicated system (K.I.S.S.) I decided to try the electric vacuum pump instead. Also not knowing how the system will feel with the larger rotors providing increased leverage I was concerned about the hydro boost system being over boosted. Ignorance is bliss and the electric pump system will provide more consistent as well as adjustable vacuum boost.
Pete
Can you say more about the ABS system you're installing?
I spoke to 9M a few years ago about upgrading to a 4 channel ABS system and they basically told me that they'd do it if I shipped the car to the UK.
I assume that isn't what you're doing?

 04-20-2024, 12:20 PM