


Replacing Evaporator
Instructor
Joined: Feb 2004
Posts: 191
Likes: 0
From: Lancaster , CA
Originally Posted by Arjan B.
I am VERY interested if the replacement of the expansion valve, the one on top of the evaporator, in a normal way could be done......
Thanks and good luck!
Thanks and good luck!
Arjan,
I am not a very good DIY person, but I did manage to change the Expansion Valve and Dryer and convert from R12 to R134. It was not hard, just a little tight getting the allen head bolts out of expansion valve. Not much room to work with.
Thread Starter
Professor of Pending Projects
Rennlist Member
Rennlist Member

Joined: Nov 2001
Posts: 9,898
Likes: 36
From: Ocala, FL
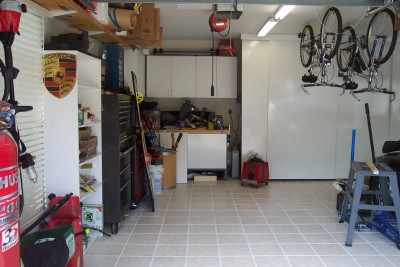
Ok.. started by removing the carpet and disconnecting the battery
then proceeded to remove the A/C compressor (Before doing anything please remember to take it to a A/C service center to empty the system from the old freon...)
Remeber to disconnect the cable/plug to the compressor
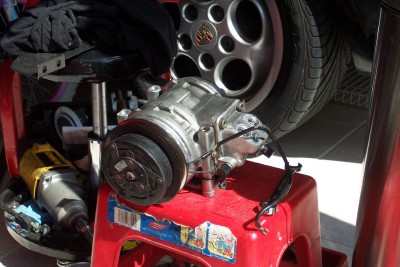
and the hoses. Everything can be done with a long 13mm socket and a 13mm open wrench for the tensioner bolt. The bottom square nuts will fall if you do not hold them so be prepared to search for them with a magnet if you drop them.
Also, once you remove the hoses be careful not to turn the compressor or you will be cleaning oil from the floor.
Remove the A/C belt... in case, like what I did, you want to take the car out for a spin to get rid of as much gas as possible before pulling out the gas tank...
That is all for now... back to the garage to continue with the task.
then proceeded to remove the A/C compressor (Before doing anything please remember to take it to a A/C service center to empty the system from the old freon...)
Remeber to disconnect the cable/plug to the compressor
and the hoses. Everything can be done with a long 13mm socket and a 13mm open wrench for the tensioner bolt. The bottom square nuts will fall if you do not hold them so be prepared to search for them with a magnet if you drop them.
Also, once you remove the hoses be careful not to turn the compressor or you will be cleaning oil from the floor.
Remove the A/C belt... in case, like what I did, you want to take the car out for a spin to get rid of as much gas as possible before pulling out the gas tank...
That is all for now... back to the garage to continue with the task.
Last edited by Wachuko; Mar 16, 2007 at 12:18 AM.
Thread Starter
Professor of Pending Projects
Rennlist Member
Rennlist Member
Joined: Nov 2001
Posts: 9,898
Likes: 36
From: Ocala, FL
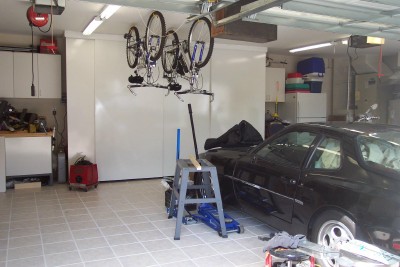
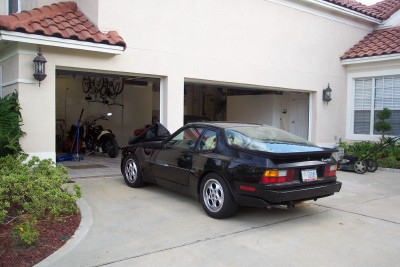
Since I posted the initial work on the garage... here is an updated photo... still a work-in-progress (but not as neat and nice as the one with a GT3 inside...  you know which one I am talking about
  )
)

you know which one I am talking about )
Last edited by Wachuko; Mar 16, 2007 at 12:19 AM.
Addict
Rennlist Member
Rennlist Member
Joined: Nov 2001
Posts: 223
Likes: 0
From: Arizona, USA
I performed this repair in early August. It took two solid days of work (~15 hours).
Unfortunately, I did not have my camera with me to take pictures.
While you're there, replace the expansion valve. Easy to do.
Unfortunately, I did not have my camera with me to take pictures.
While you're there, replace the expansion valve. Easy to do.
Drifting
Joined: Jan 2002
Posts: 2,242
Likes: 2
From: The Netherlands
Yeah, the expansion valve would interest me too, mine is the cause of leak. I loose the gas in about 6 or 7 months each time. With trace fluid I discovered the leak overthere,
You have to clean up your garage defnetely..........
You have to clean up your garage defnetely..........
Thread Starter
Professor of Pending Projects
Rennlist Member
Rennlist Member
Joined: Nov 2001
Posts: 9,898
Likes: 36
From: Ocala, FL
Originally Posted by Rich W
I performed this repair in early August. It took two solid days of work (~15 hours).
Unfortunately, I did not have my camera with me to take pictures.
While you're there, replace the expansion valve. Easy to do.
Unfortunately, I did not have my camera with me to take pictures.
While you're there, replace the expansion valve. Easy to do.
Any suggestions? Any "gotchas"?
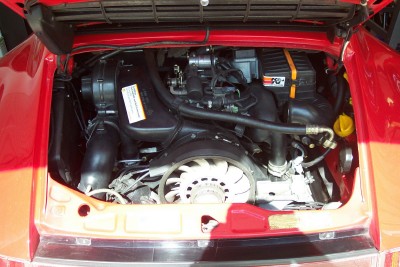
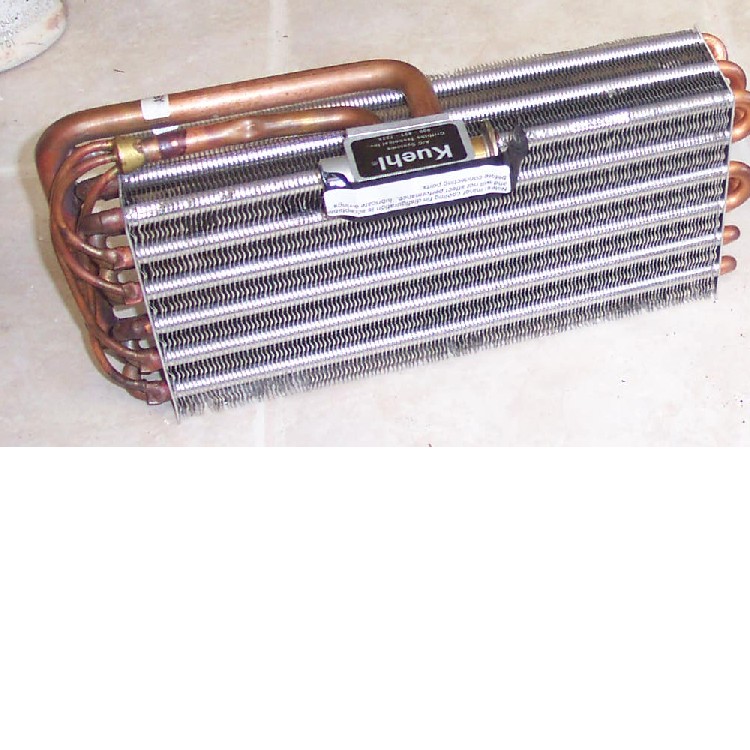
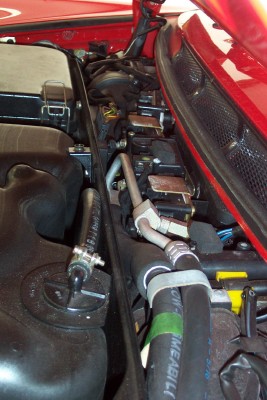
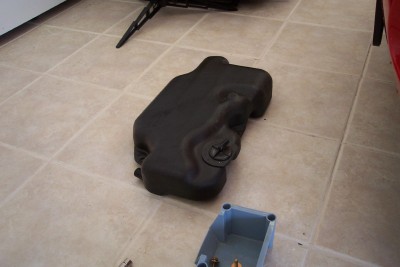
The expansion valve is new (came installed in the evaporator by the folks from Griffith), You can see it installed in the evaporator in this photo... is that small rectangular thing at the end of the two copper pipes.
Last edited by Wachuko; Mar 16, 2007 at 12:22 AM.
Rennlist Stories
The Best Porsche Posts for Porsche Enthusiasts

Stunning Porsche 356A Super GT Speedster Auction Fails to Meet Reserve
Verdad Gallardo
Every Era of 911 Owner Explained in One Sentence
Verdad Gallardo
Thinking of Buying a Porsche? Do These 10 Things First
Joe Kucinski
Pixar Pals Turned Into 1-of-1 Porsches!
Michael S. Palmer
Theon Goes Full Carbon Fiber With Stunning New Build
Verdad Gallardo
Genius Porsche-Themed Gifts That'll Make Any Dad or Grad Smile
Joe Kucinski
10 Used Porsches Are Selling for Way Too Cheap
Joe Kucinski
Tuner Is Converting Porsche 911s Into Shooting Brakes
Verdad Gallardo
This Coachbuilt Creation Is A Modern Take on the Legendary Porsche 917
Verdad Gallardo
Thread Starter
Professor of Pending Projects
Rennlist Member
Rennlist Member
Joined: Nov 2001
Posts: 9,898
Likes: 36
From: Ocala, FL
Originally Posted by Arjan B.
I am VERY interested if the replacement of the expansion valve, the one on top of the evaporator, in a normal way could be done......
Thanks and good luck!
Thanks and good luck!
Arjan, I will make sure to take as many photos of that area as possible. I will get them without taking the tank off so that you can see what is involved in getting to it without tank removal (since I think that can be easily done).
Addict
Rennlist Member
Rennlist Member
Joined: Nov 2001
Posts: 223
Likes: 0
From: Arizona, USA
Tips and suggestions:
You'll need to remove the radio and the climate control unit to get at one of the bolts which holds the airbox in place. It's a real pain to get at, but be patient.
Anytime you can't seem to get something out, look for a hidden bolt or two. When you remove the fuel tank, there are two lines you have to disconnect from underneath the car - if you have a lift, it's not so bad.
When you remove the box, there are several ducts which need to be disconnected before it will come out. Use a large blunt object to gently depress the little tabs and work the ducts off. Be patient here.
Before you reinstall the entire assembly, make sure all the servo arms are connected to the appropriate mechanisms, especially the one underneath the box. It is impossible to touch when everything is back in place.
The heater hoses in the passenger compartment will need to be replaced as well. They're inexpensive and since you'll end up destroying one, if not both, get them now. A real pain to reinstall because you have to compress them by hand. Connect to the box first, then compress it to connect to the heater duct coming up from the floorboard.
Those are the more memorable items. If I think of anything else I'll let you know.


Thread Starter
Professor of Pending Projects
Rennlist Member
Rennlist Member
Joined: Nov 2001
Posts: 9,898
Likes: 36
From: Ocala, FL
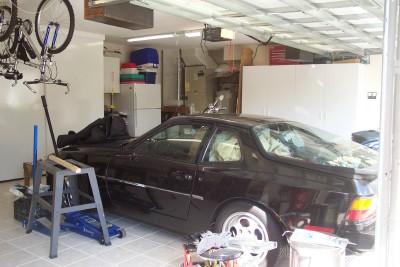
I made some space to have better access to the jacks and stuff...

The 951 sits outside today waiting his turn...
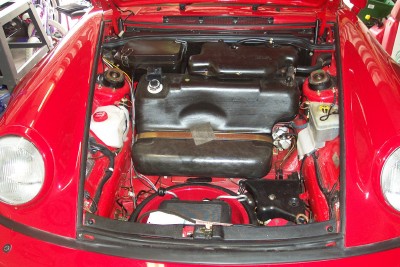
Start by removing the weather strip and the plastic black cover.
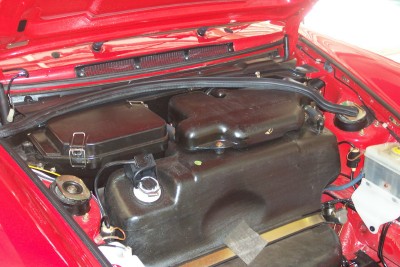
Then remove the overflow tank - Three 10mm bolts and a few hoses to loosen up. It is good to have a socket with a magnet to avoid droping the bolts. Also know that there are three plastic spacers under the overflow tank (with each bolt). Be careful not to loose those.
The 951 sits outside today waiting his turn...
Start by removing the weather strip and the plastic black cover.
Then remove the overflow tank - Three 10mm bolts and a few hoses to loosen up. It is good to have a socket with a magnet to avoid droping the bolts. Also know that there are three plastic spacers under the overflow tank (with each bolt). Be careful not to loose those.
Thread Starter
Professor of Pending Projects
Rennlist Member
Rennlist Member
Joined: Nov 2001
Posts: 9,898
Likes: 36
From: Ocala, FL
Sorry for the delay... the time off I took from work ended up being for honey-do's instead of working in the car 
Anyway... here we go...

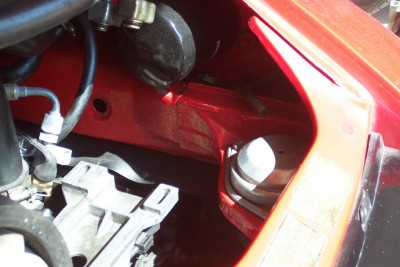
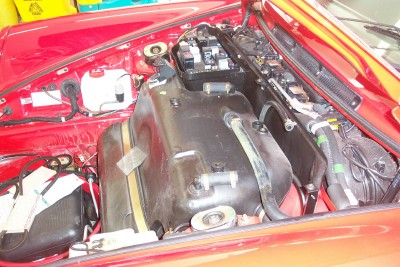
Next you will need to move the fuse block to start removing the bolts inside the fuse box (this is to be able to remove the front firewall...
You will need a few car covers (vinyl, leather, whatever you have/use) to cover the body panels and avoid scratching the paint).
Continue to remove the screws in the fuse box. Two 7mm screws inside the fuse box, three 10mm bolts, and three additional 7mm bolts next to the fuel hoses that go to the filler neck. I disconnected both hoses to the filler neck to make it easier to reach the bottom 7mm bolt.
Once all bolts are out you can safely remove the front firewall. Just be carefull around the fuse block cables.
Anyway... here we go...
Next you will need to move the fuse block to start removing the bolts inside the fuse box (this is to be able to remove the front firewall...
You will need a few car covers (vinyl, leather, whatever you have/use) to cover the body panels and avoid scratching the paint).
Continue to remove the screws in the fuse box. Two 7mm screws inside the fuse box, three 10mm bolts, and three additional 7mm bolts next to the fuel hoses that go to the filler neck. I disconnected both hoses to the filler neck to make it easier to reach the bottom 7mm bolt.
Once all bolts are out you can safely remove the front firewall. Just be carefull around the fuse block cables.
Last edited by Wachuko; Mar 16, 2007 at 12:51 AM.