When you click on links to various merchants on this site and make a purchase, this can result in this site earning a commission. Affiliate programs and affiliations include, but are not limited to, the eBay Partner Network.
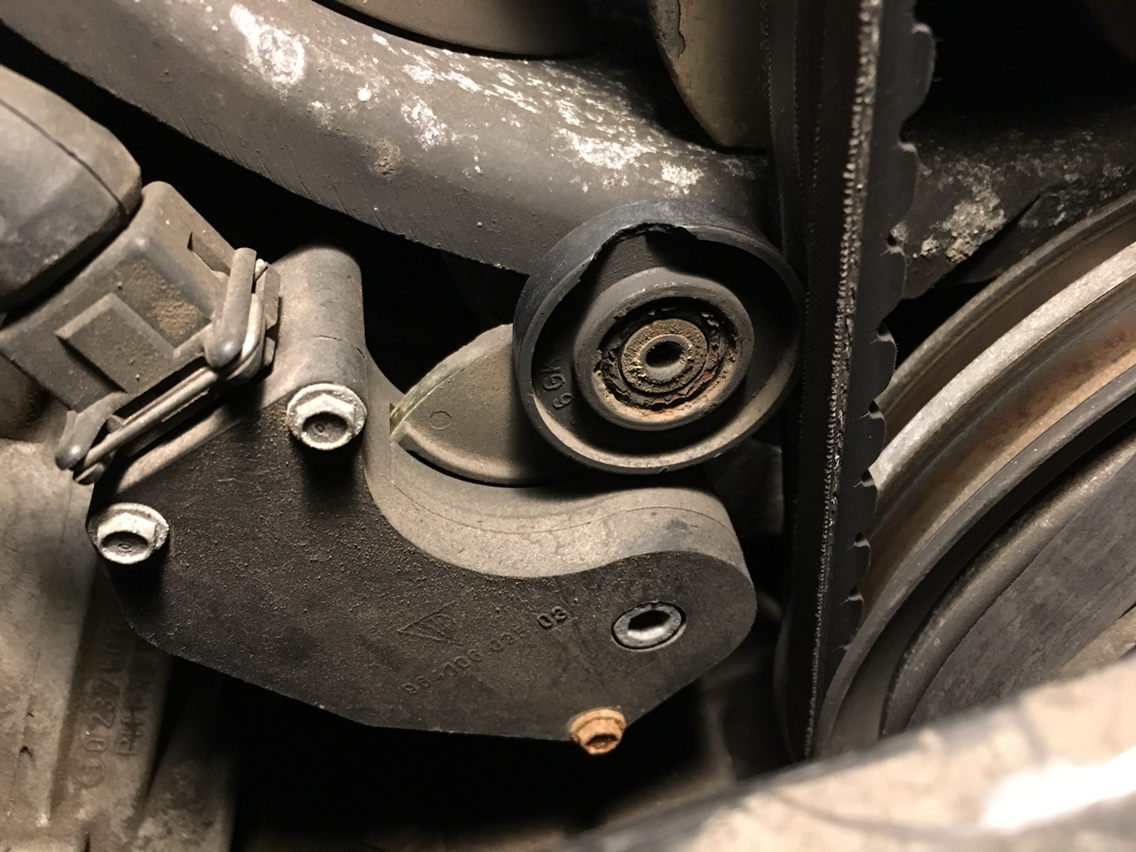
One of our friends here sent me his old belt tension sensor - thanks dusty! - and I'll be writing up a diy on how to install my new idler wheel...but as a first step, since i have a 92 cab in the garage that needs a lot of love...im posting a before and after pic of his early completely shot belt tension sensor with a cracked and partly frozen idler...and the new version after...
Old:
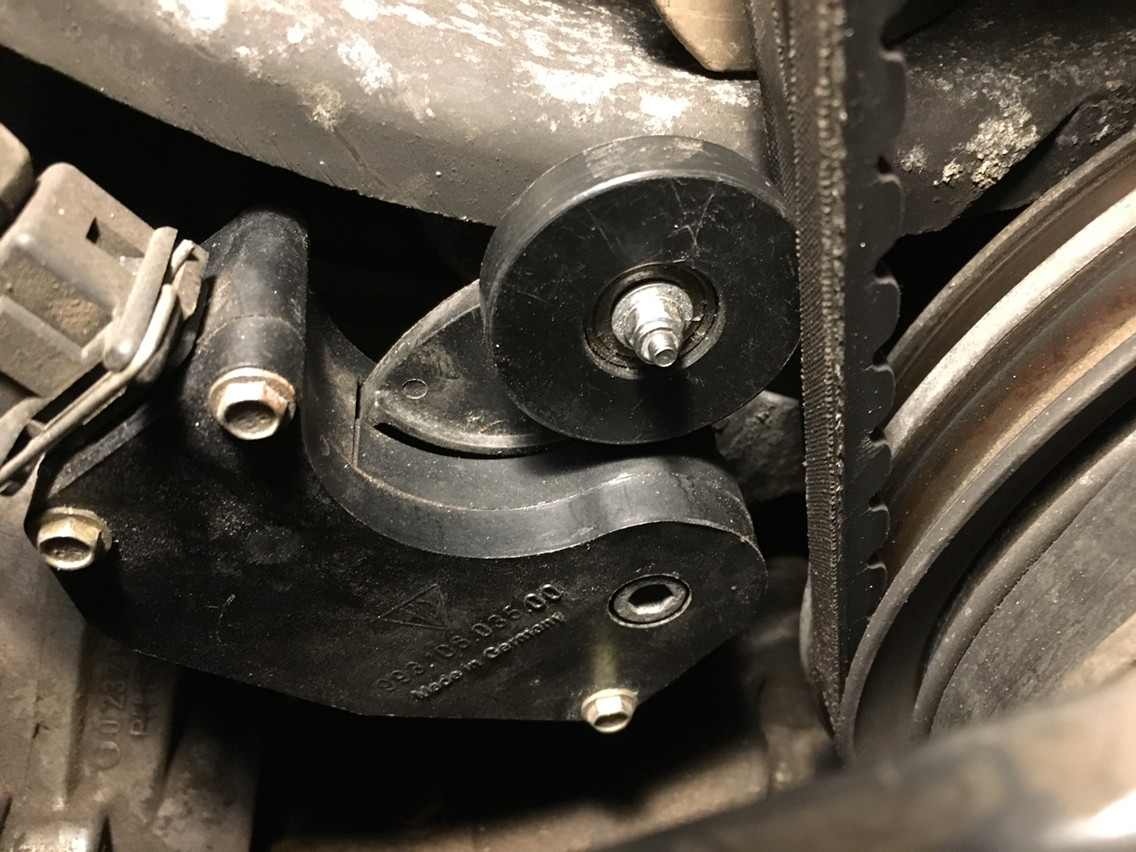
New:
On the new one- the wheel can't come off, so if the bearing ever goes, you just replace the bearing and off you go...
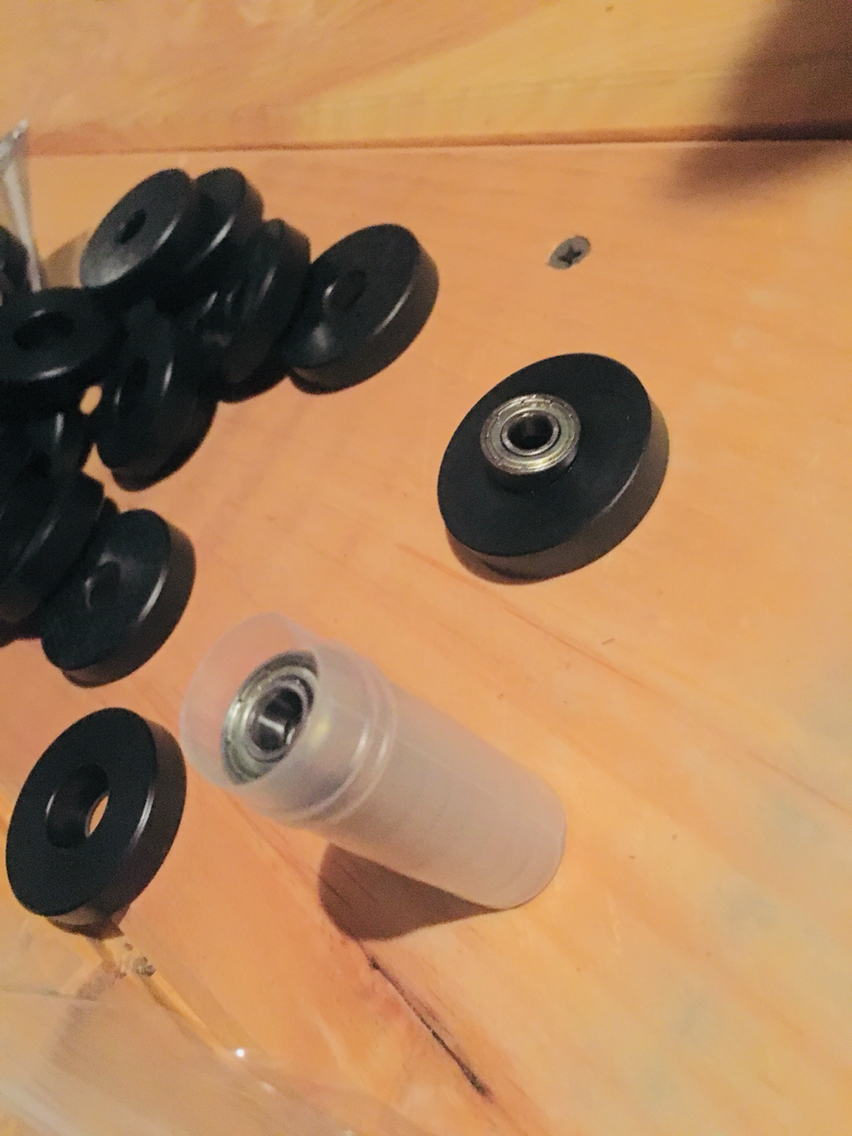
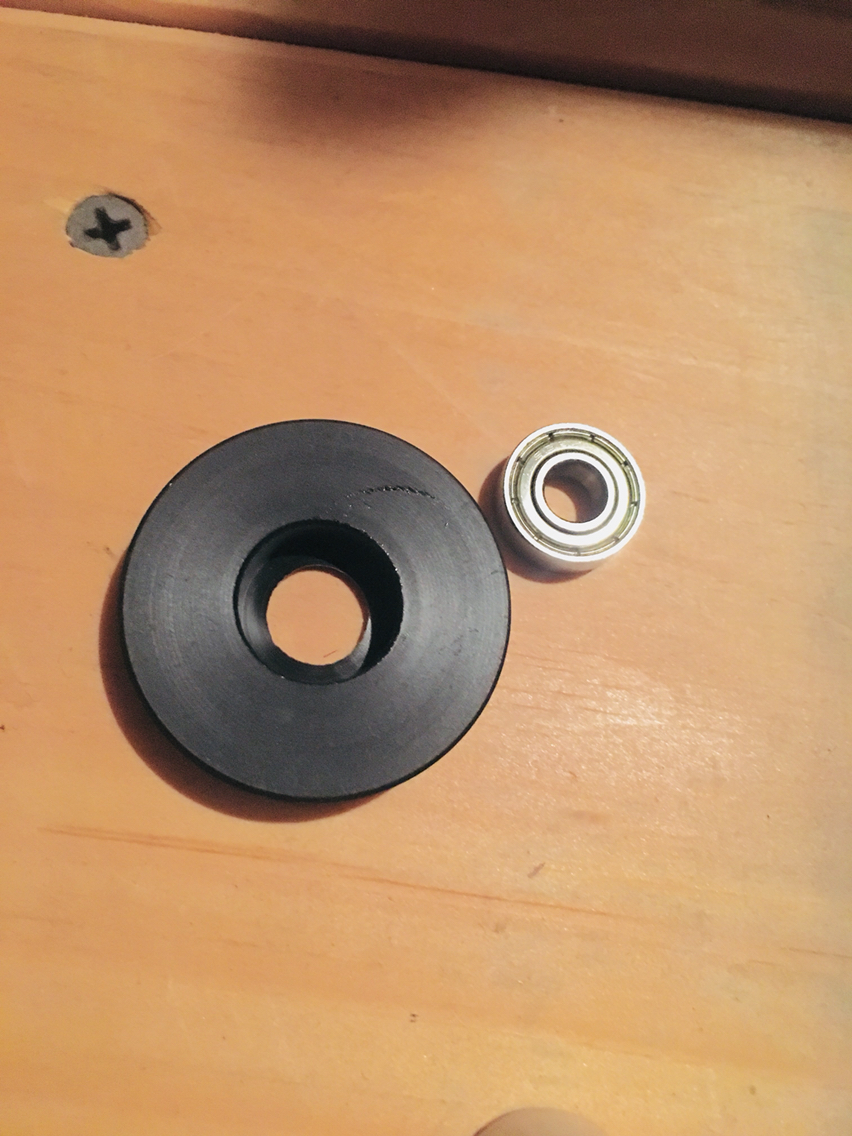
You basically grind off the peened end of the shaft, then pull the bearing off the shaft, slip the new wheel and bearing on, and hold the whole thong together w an m3 buttonhead bolt and fender washers-
It may take a bit to get to the real diy...but I'll get there. In the meantime if anyone is in real need, you can pm me and grab an idler and bearing and I'll walk you through it-
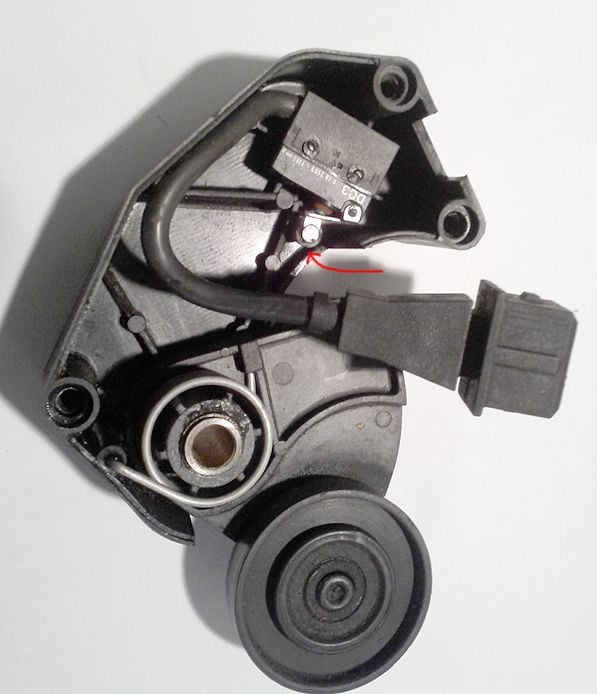
Very handy Rob. As a side note, and worth pointing out on the idler operation itself, I had a flickering belt warning light but I knew the belt and tension to be fine plus the idler bolts all nice and tight. Stripped the unit down and found the culprit; The idler wheel quadrant heel rests on a micro switch roller lever. I found that the tiny tiny roller itself had over the years developed a flat spot small enough that allowed the micro switch lever to move out half a millimeter or less - just enough for the switch circuit to close and produce the flickering belt light. There is no micro switch adjustment as it's fixed. Rotated the tiny roller, but naturally just one movement of the idler wheel allowed the roller to return and settle to its' flat spot position. My only fix (other than replace the whole belt tension sensor) was to glue the roller in place and apply high temp grease to the roller and idler quadrant heel it rests on. That was 3 years ago and no warning light since. Pic as below..
Nice- and now i have to locate the right source for the micro switch! I looked into them, with the rollers, couldn't find the exact one. Dusty sent me a broken belt tension sensor so i could do a writeup - maybe I'll add the microswitch to the writeup so we can all know the right one to buy.
Thanks for pointing that out!
But- this isn't coming anytime soon. The cab in my garage has a list a mile long, and i still have to finish intake madness...so bear with me...
Hi, I had the same problem as LM964 and I applied a thin layer of epoxy to the idler quadrant heel where the small wheel rides. It was 6 months ago and no problems.
Hi, I had the same problem as LM964 and I applied a thin layer of epoxy to the idler quadrant heel where the small wheel rides. It was 6 months ago and no problems.
I did exactly the same and have had no problems for quite sometime now.
Looks like you ended up adding some rotating mass, might effect your lap times........... (-: In all seriousness great job on sourcing a replacement for the roller, and good luck with the microswitch.
Fwiw...i had a machine shop make the idler wheels...i ran off 100 of them- but a long time ago...it's just taken me this long to get around to really needing to move forward w them.
I just like the idea to simply replace the bearing every so often, rather than a way too expensive part that only trips a light in the dash.
Also- the other one that bugs me is the fan hub bearing. Porsche originally made it with a removable clip to replace the bearing, and then changed to the non-removable clip so you have to buy the entire hub assembly. So now that i have removed my non-removable clip and replaced it with the right one...i only every so often have to replace the bearing. Sounds small, but i hate giving away hundreds when i only should be spending small. There is enough big stuff to spend on...gotta save it for that.
Hi, I had the same problem as LM964 and I applied a thin layer of epoxy to the idler quadrant heel where the small wheel rides. It was 6 months ago and no problems.
Interesting - dealt with the issue from the other end. Presumably though, (depending on how much epoxy build-up is applied) the micro switch lever is being pushed back further into the microswitch(?)
Originally Posted by Richard H
I did exactly the same and have had no problems for quite sometime now.
Cool..
Originally Posted by Goughary
Also- the other one that bugs me is the fan hub bearing. Porsche originally made it with a removable clip to replace the bearing, and then changed to the non-removable clip so you have to buy the entire hub assembly. So now that i have removed my non-removable clip and replaced it with the right one...i only every so often have to replace the bearing. Sounds small, but i hate giving away hundreds when i only should be spending small. There is enough big stuff to spend on...gotta save it for that.
Interesting. What MY did the change over occur? How did you reverse engineer to remove the non-removable clip with a removable one?
I don't know what year the change was- my understanding was that it was early on..
That said. 123bearing is the only source i have found for the stupid size that Porsche used on that hub, and unless you are buying many at a time the shipping is crazy expensive. So I've not placed a bearing order yet.
To get the non-removable clip out, drill through the center of it with a small drill bit. And then pry it out once it can bend in the middle. Then press the bearing out and source the c-clip and you are all set to install a new bearing.

 01-25-2019, 10:00 PM