When you click on links to various merchants on this site and make a purchase, this can result in this site earning a commission. Affiliate programs and affiliations include, but are not limited to, the eBay Partner Network.
An introduction, and a journey... JC's 951 "Resoration"
Hello all,
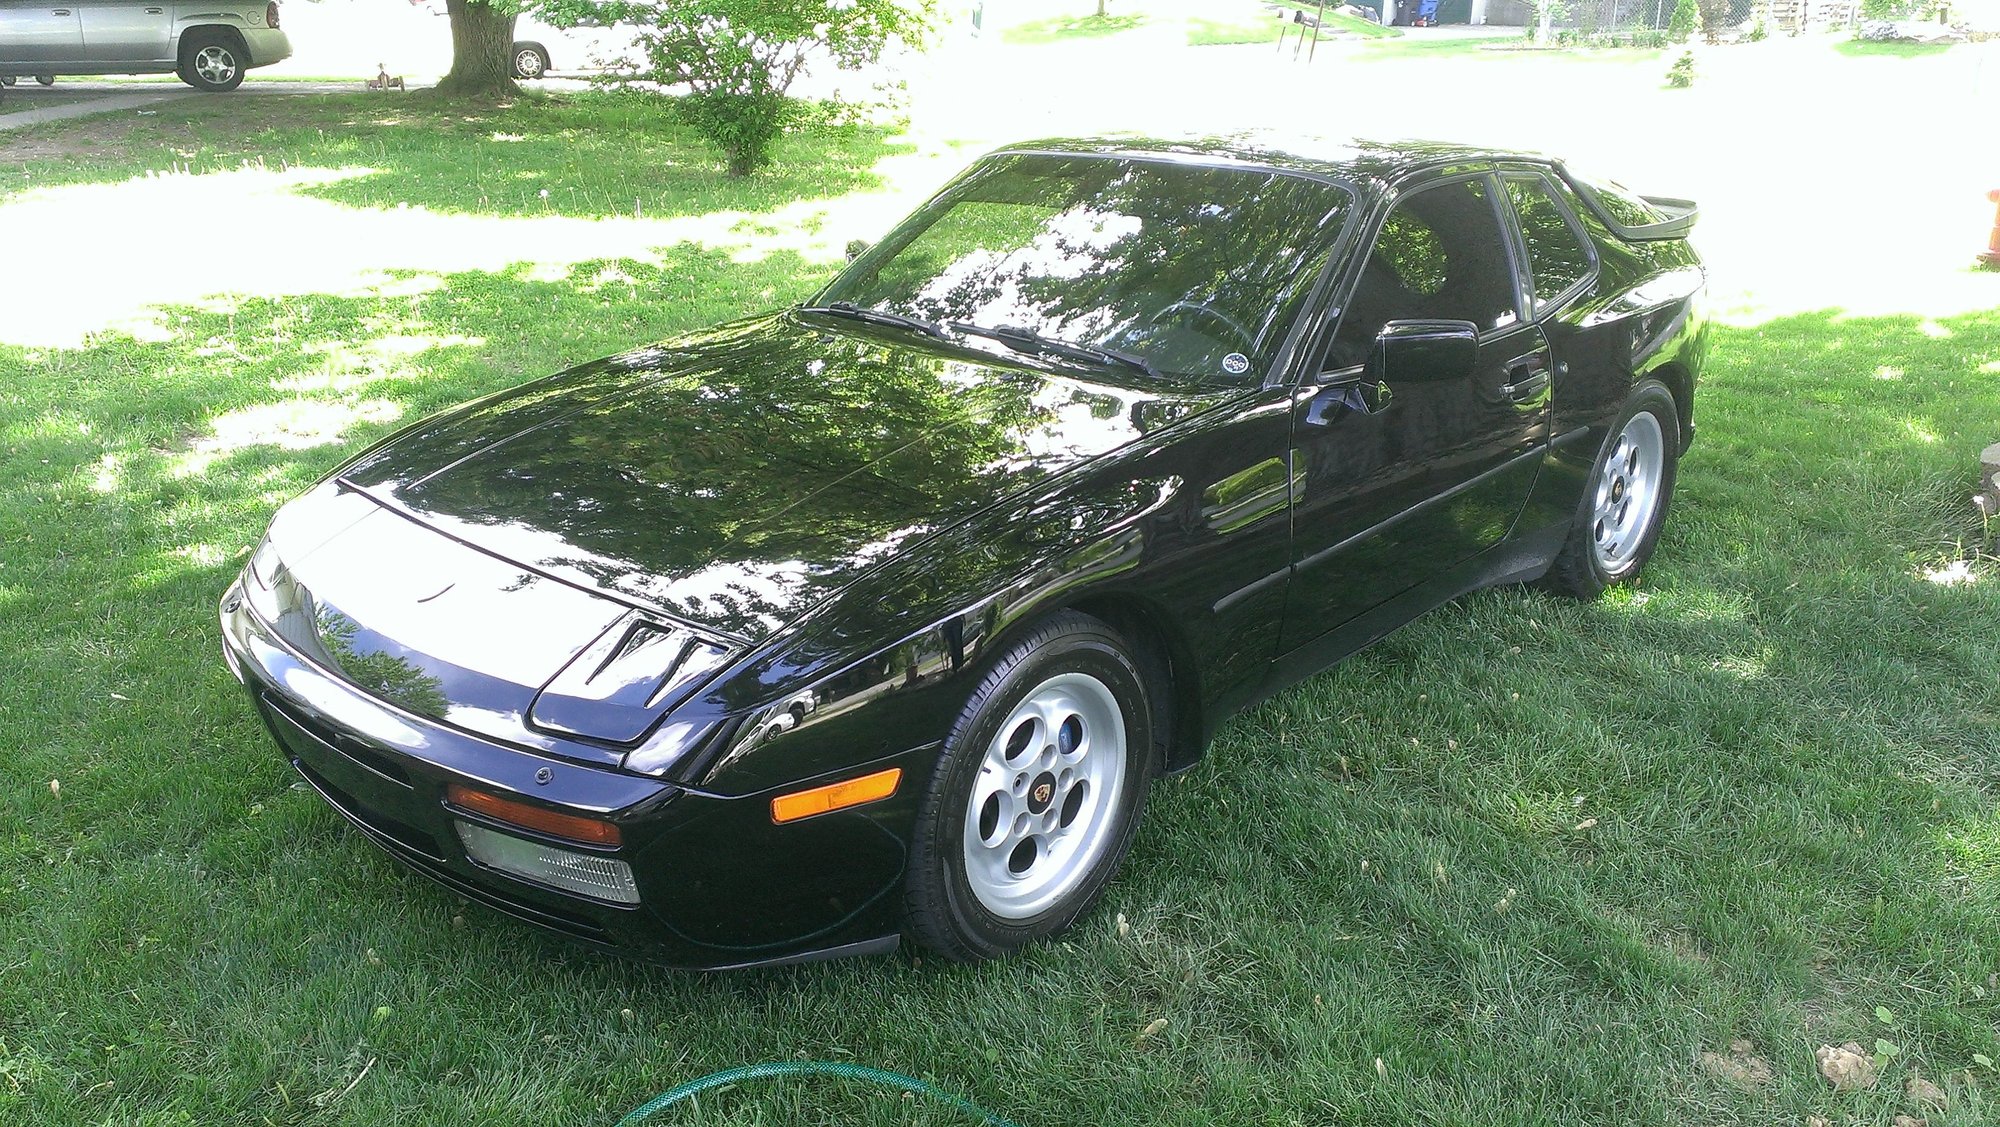
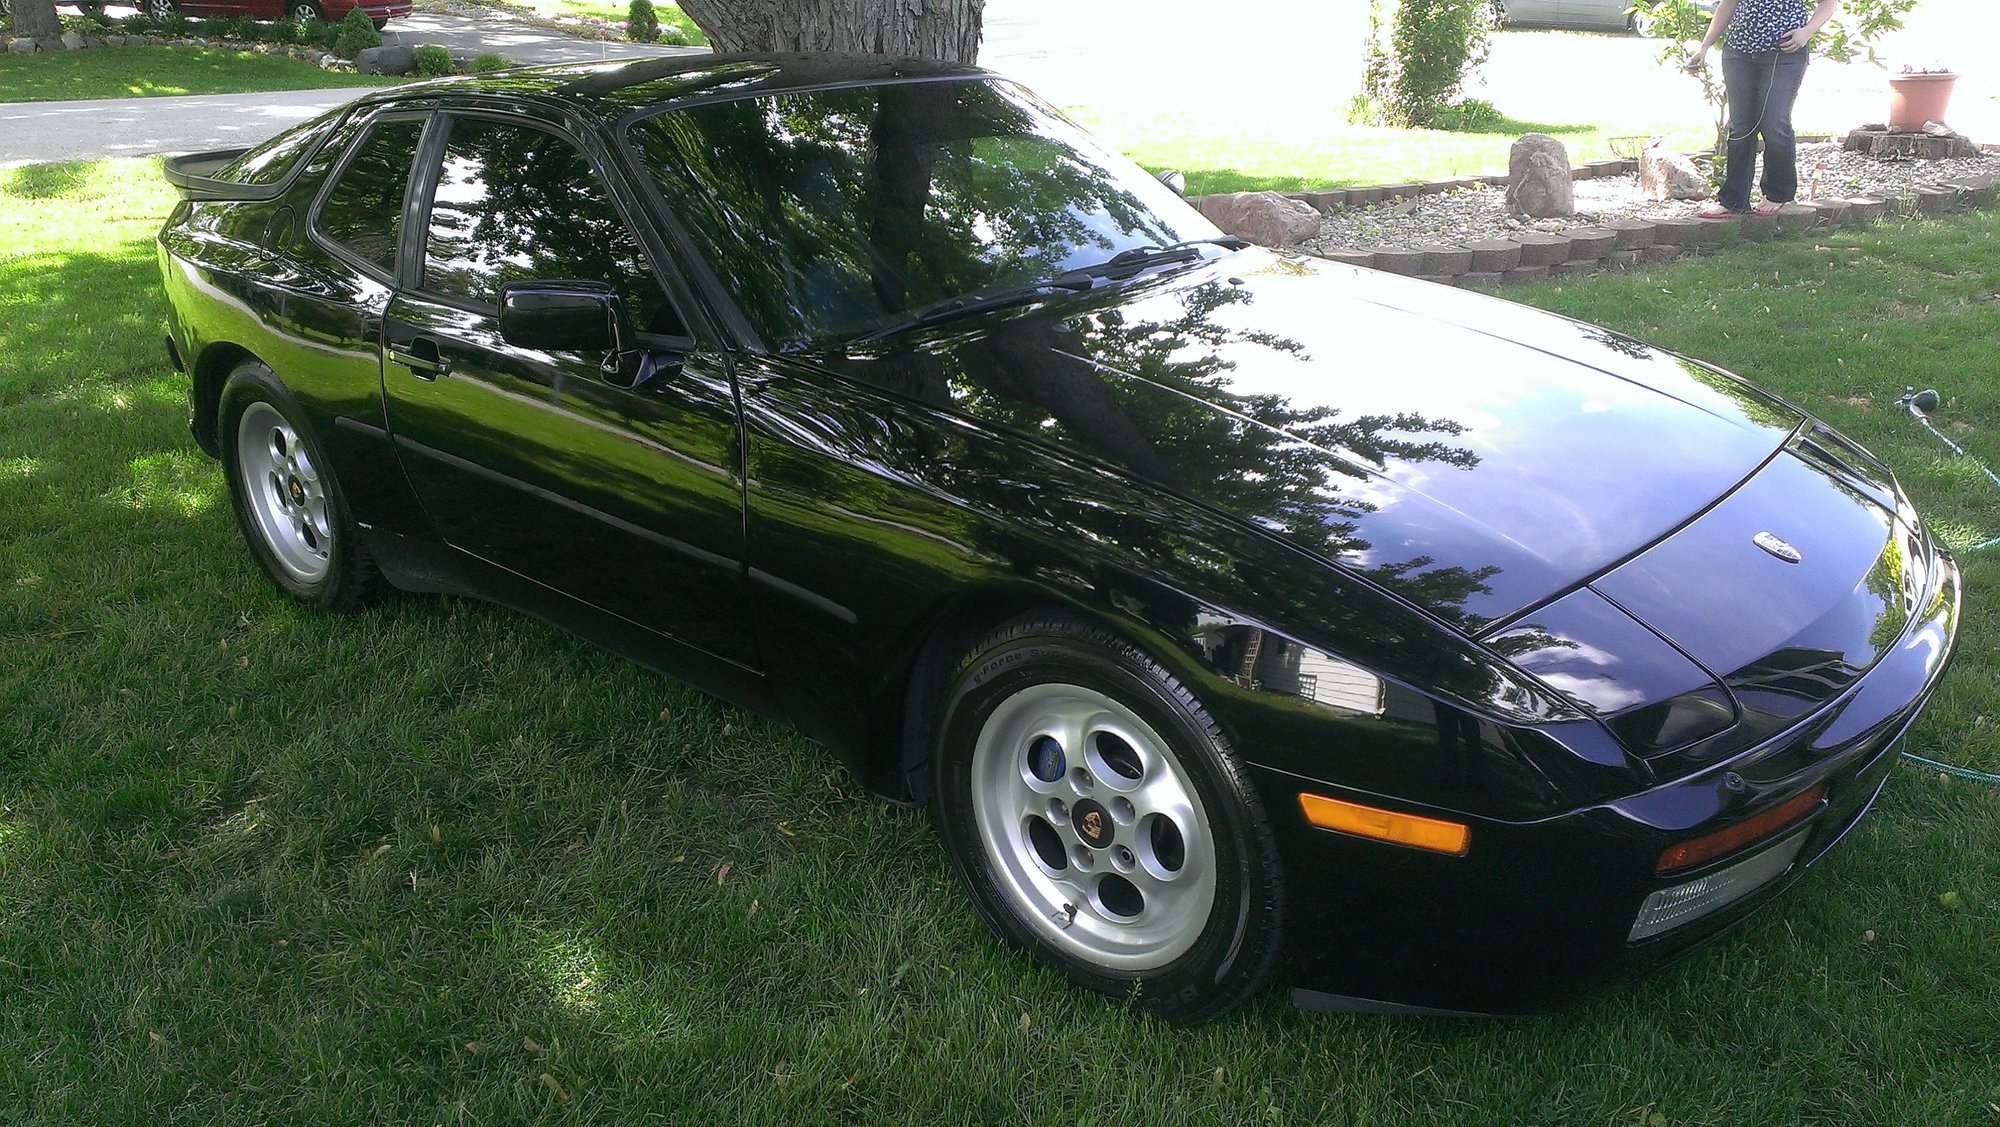
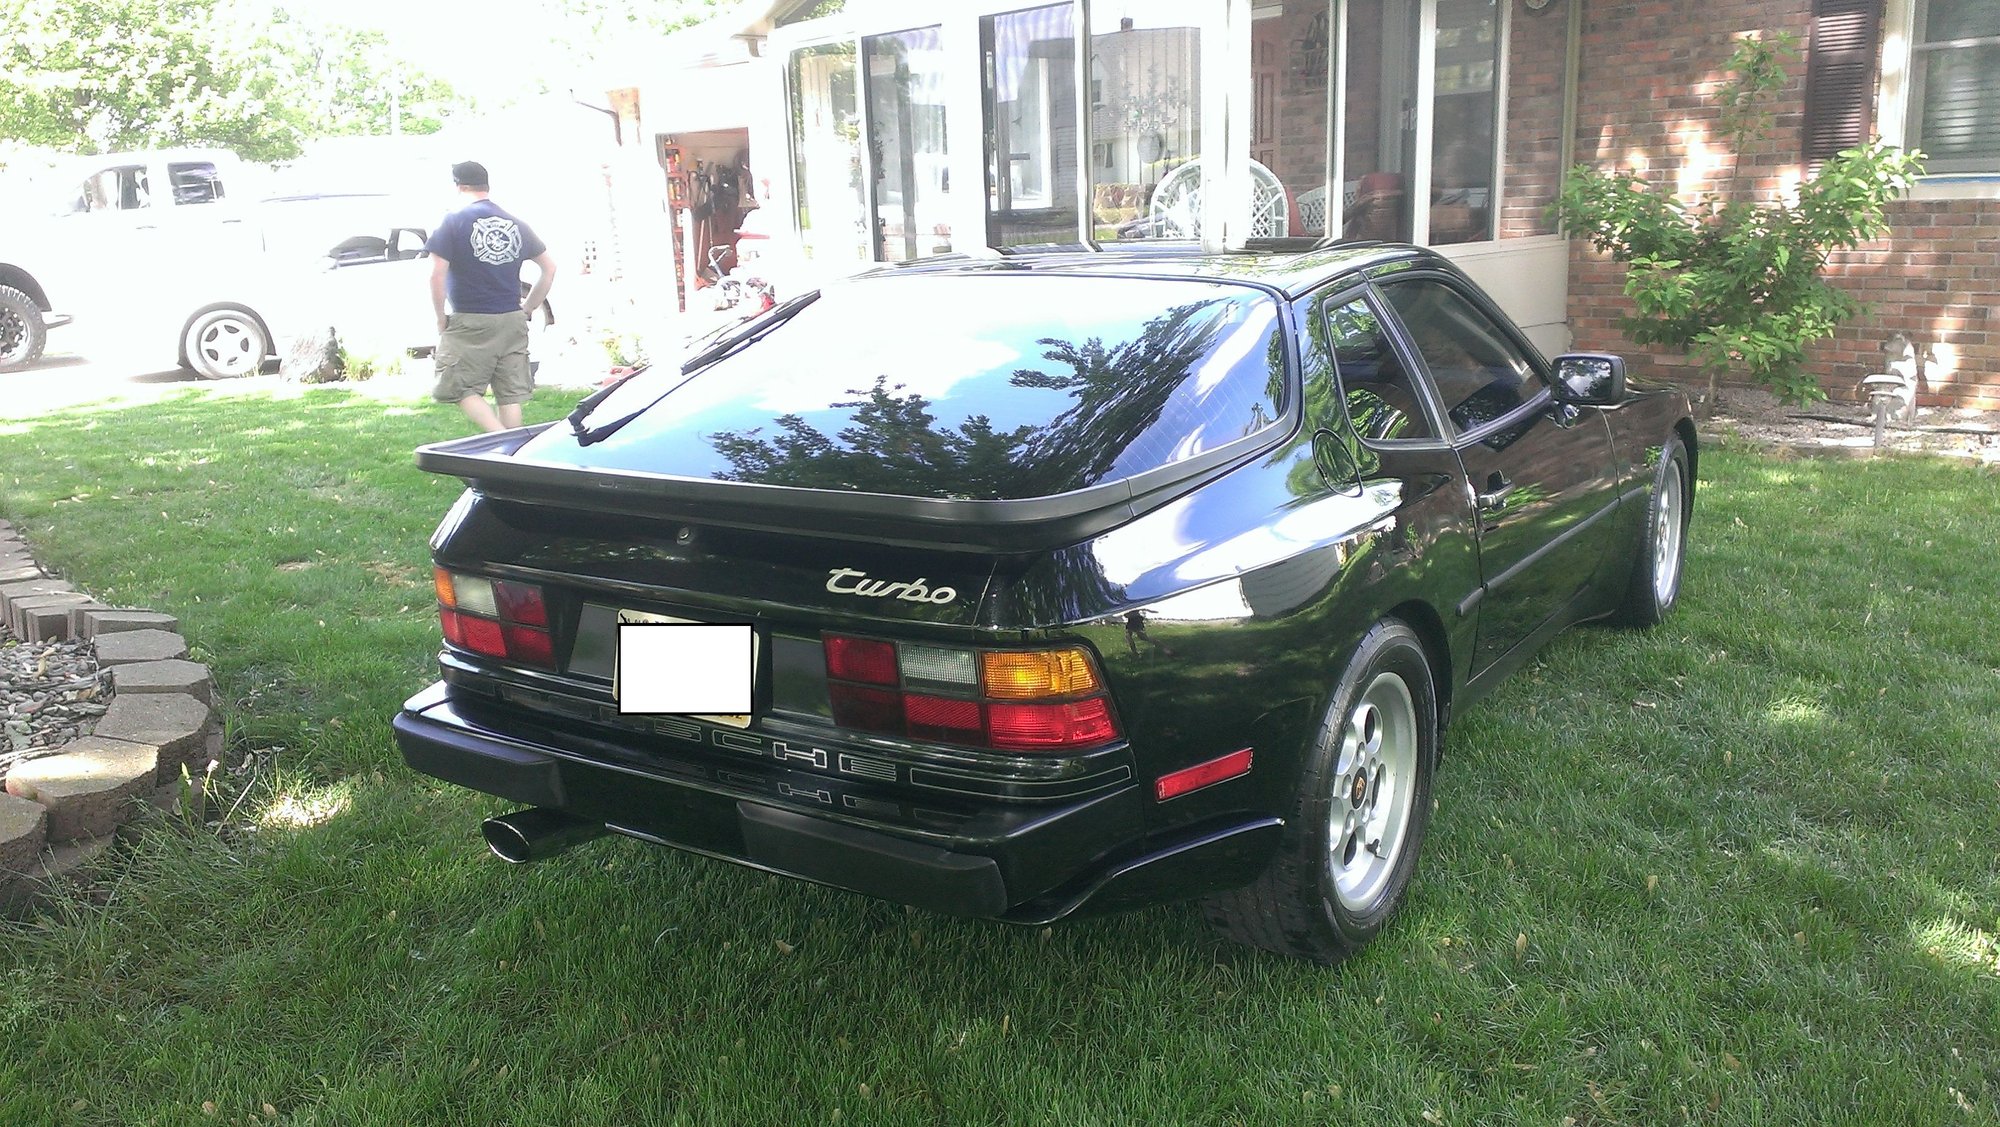
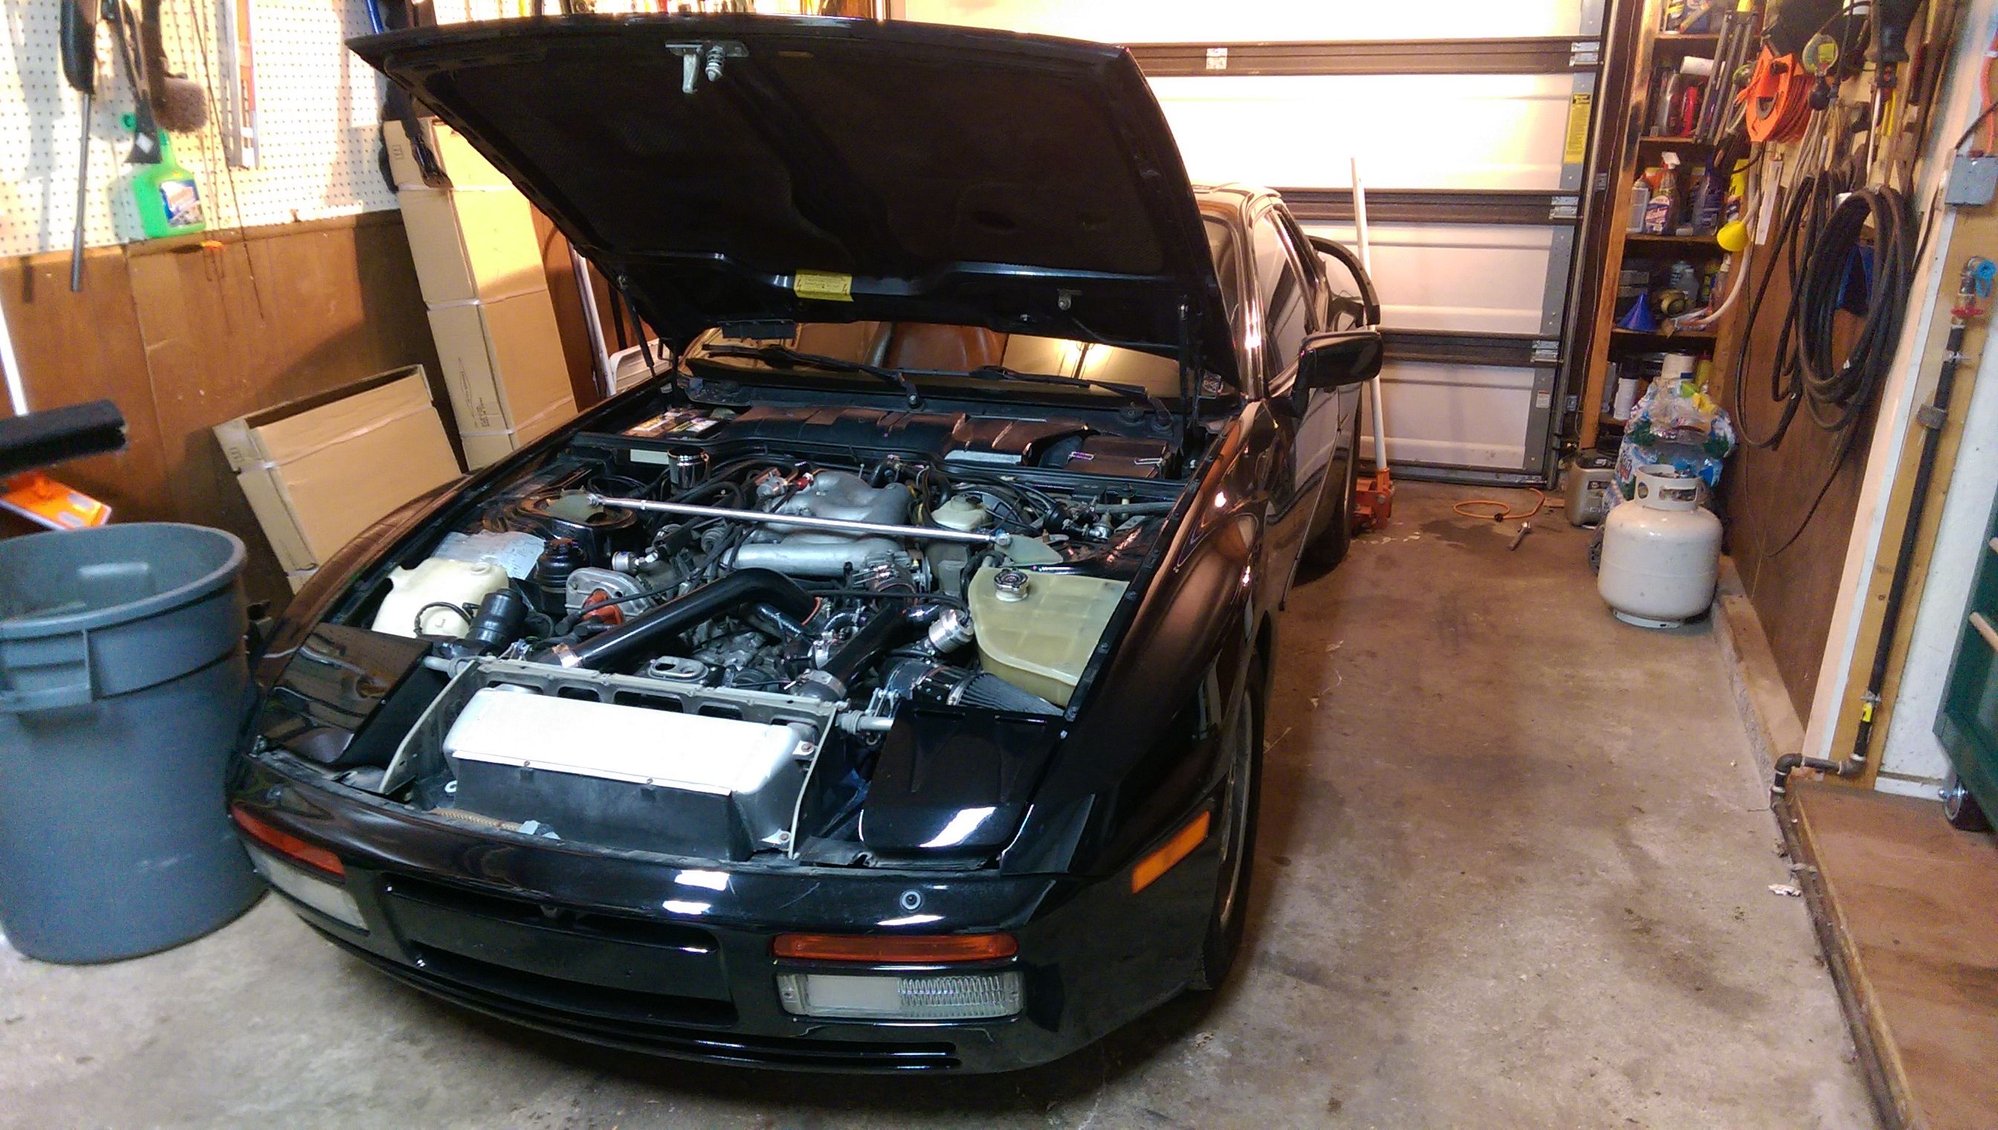
I have been lurking around reading posts etc for a long time, and decided to make a proper introduction along with a project thread! I'm a little delayed on this, as how the project began a couple weeks ago, but anyway, here is the beast at hand,
1986 944 Turbo
2.5L stock internals
Lindsey MAF kit
Super 53 turbo
Lindsey intercooler hard pipe
Lindsey stage 1 intercooler
Big bore throttle body
siemens 55lb injectors
bosch HV fuel pump w/ adjustable FPR
Lindsey valve springs (150#)
Perrin MBC
Tial 38MM DP wastegate
fabspeed full 3" exhaust
Koni yellow suspension w/weltmeister 250lb front springs
Project in next post...
Last edited by Johnboy4444; 05-04-2015 at 01:23 AM.
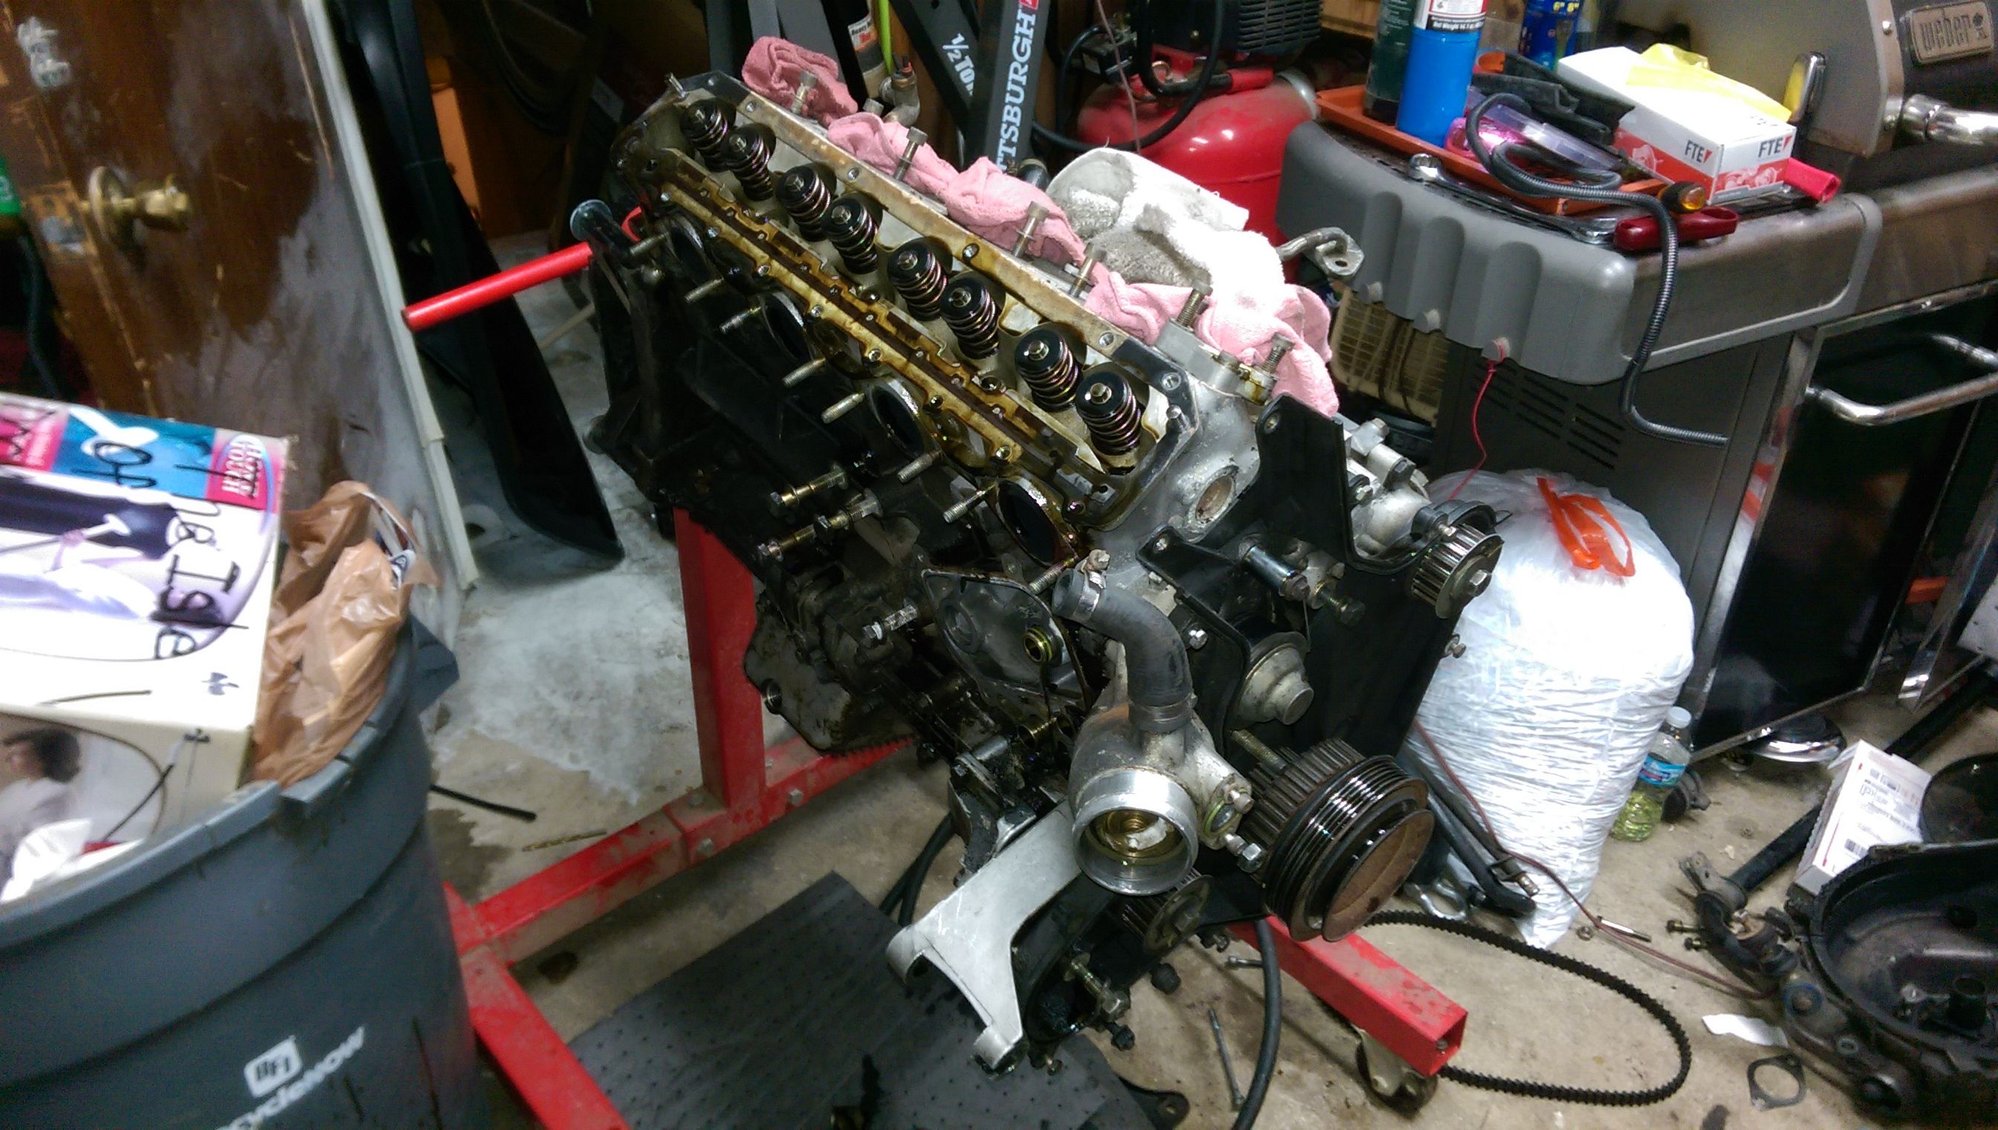
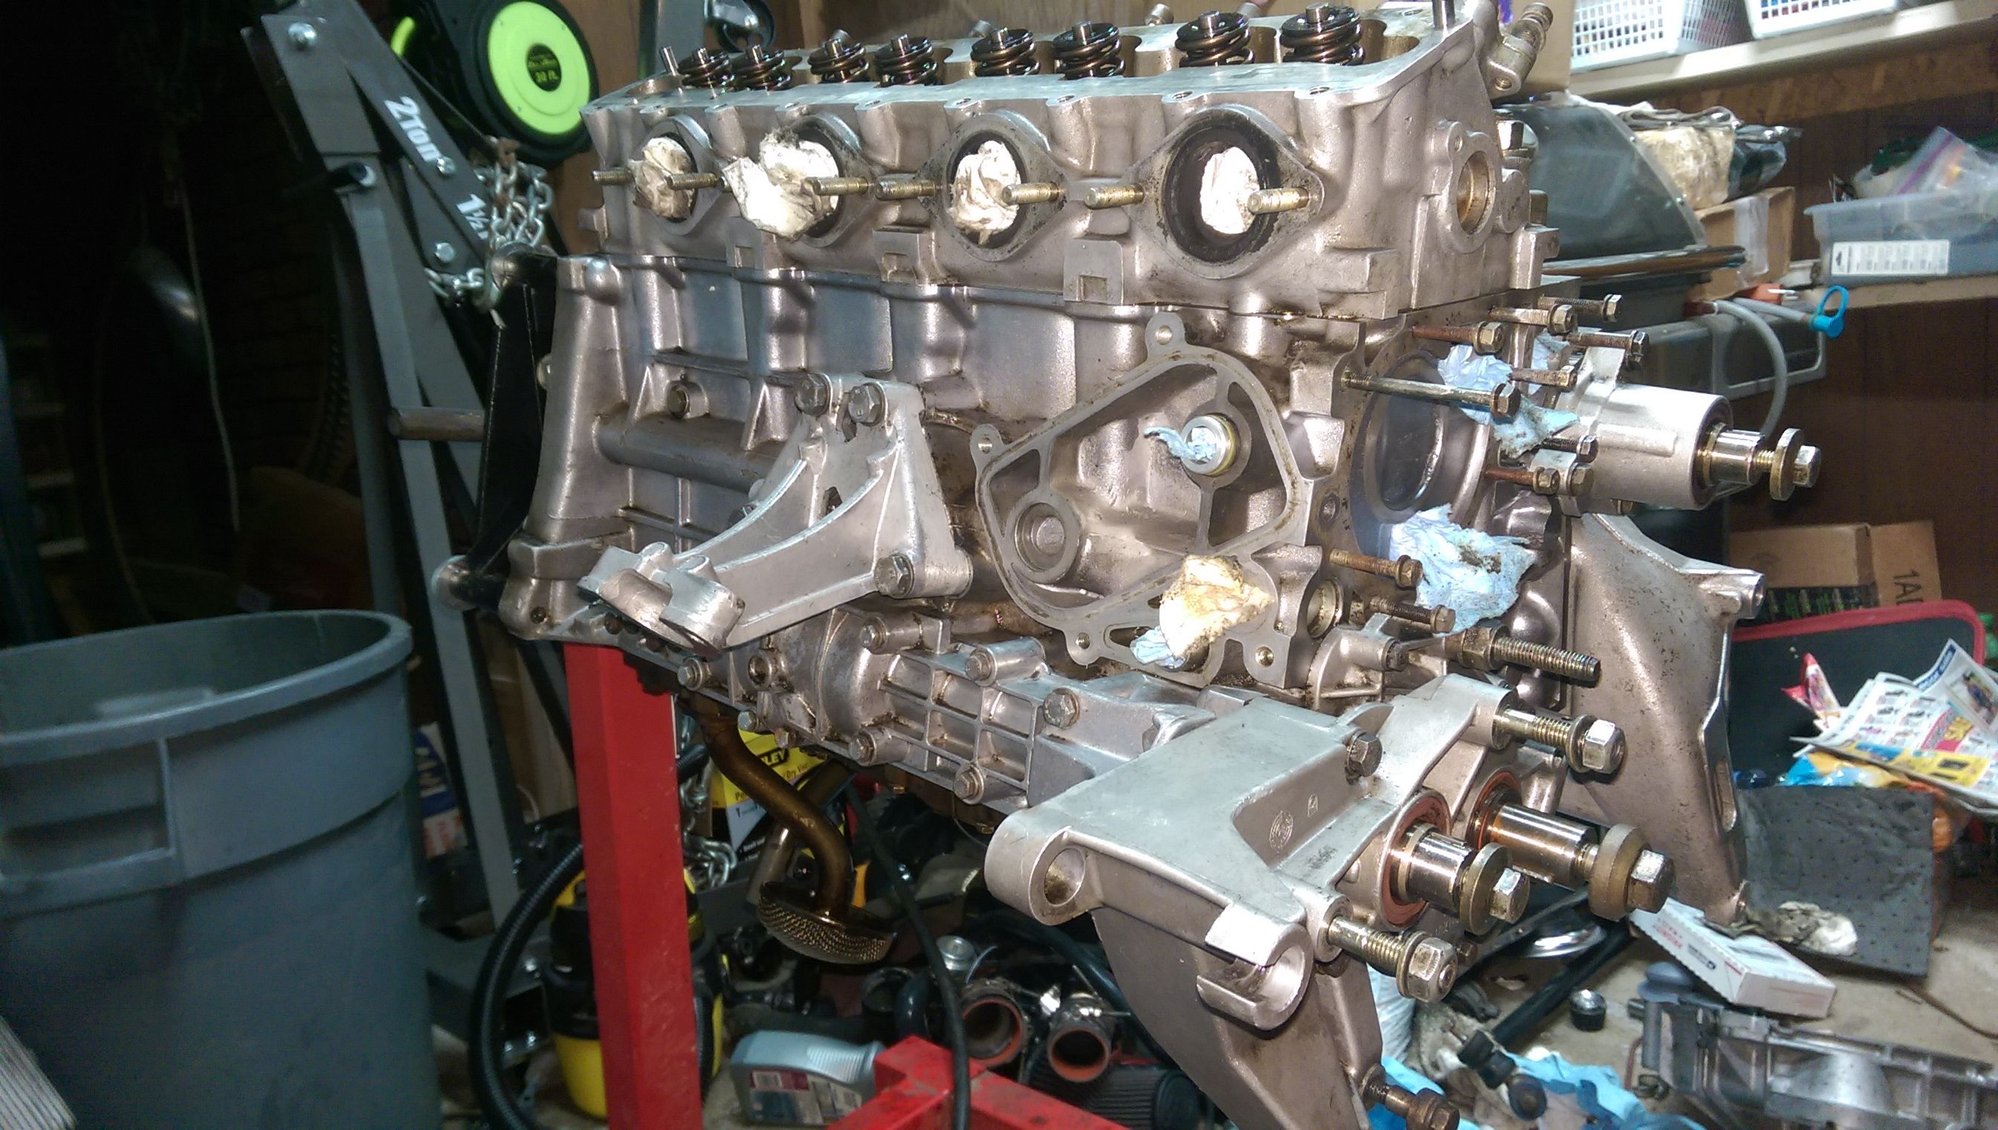
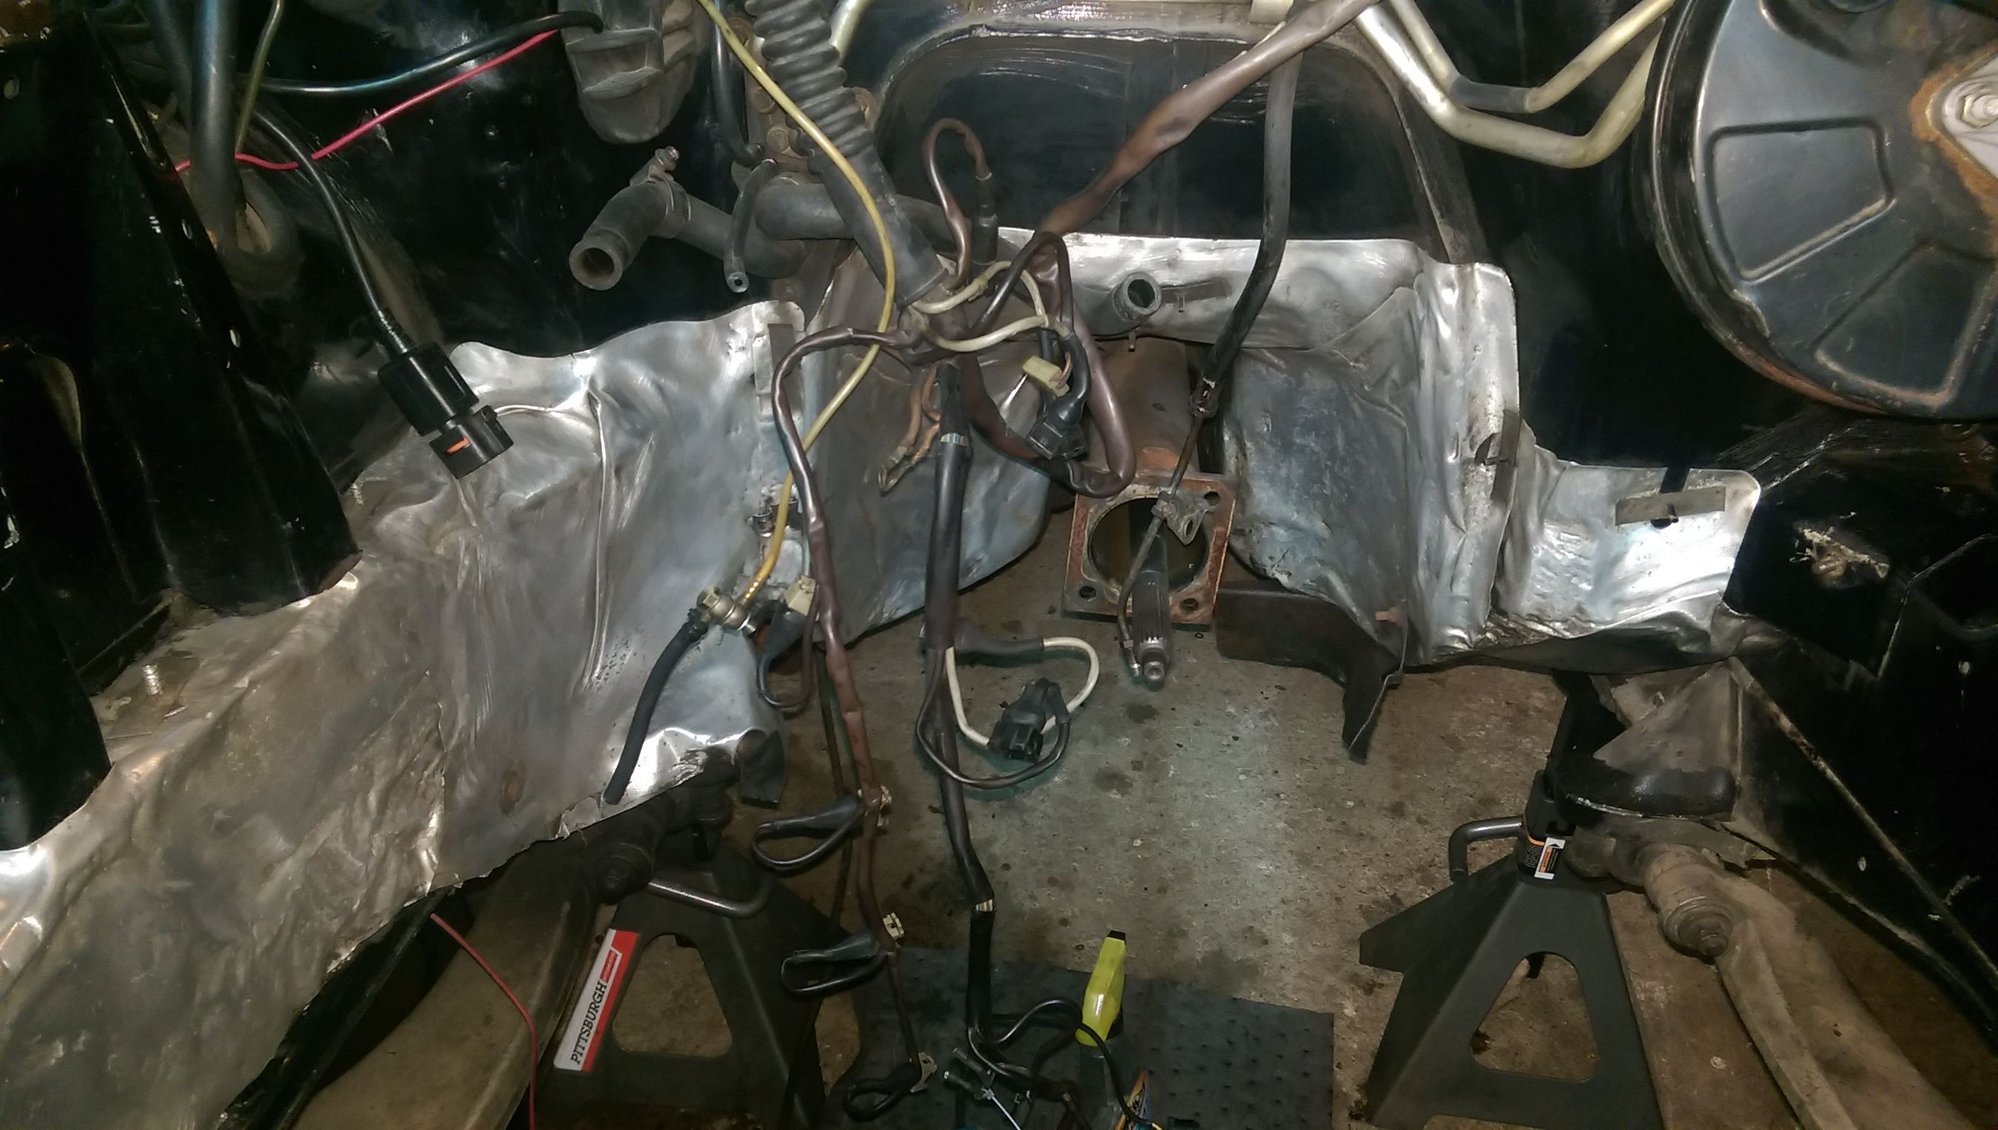
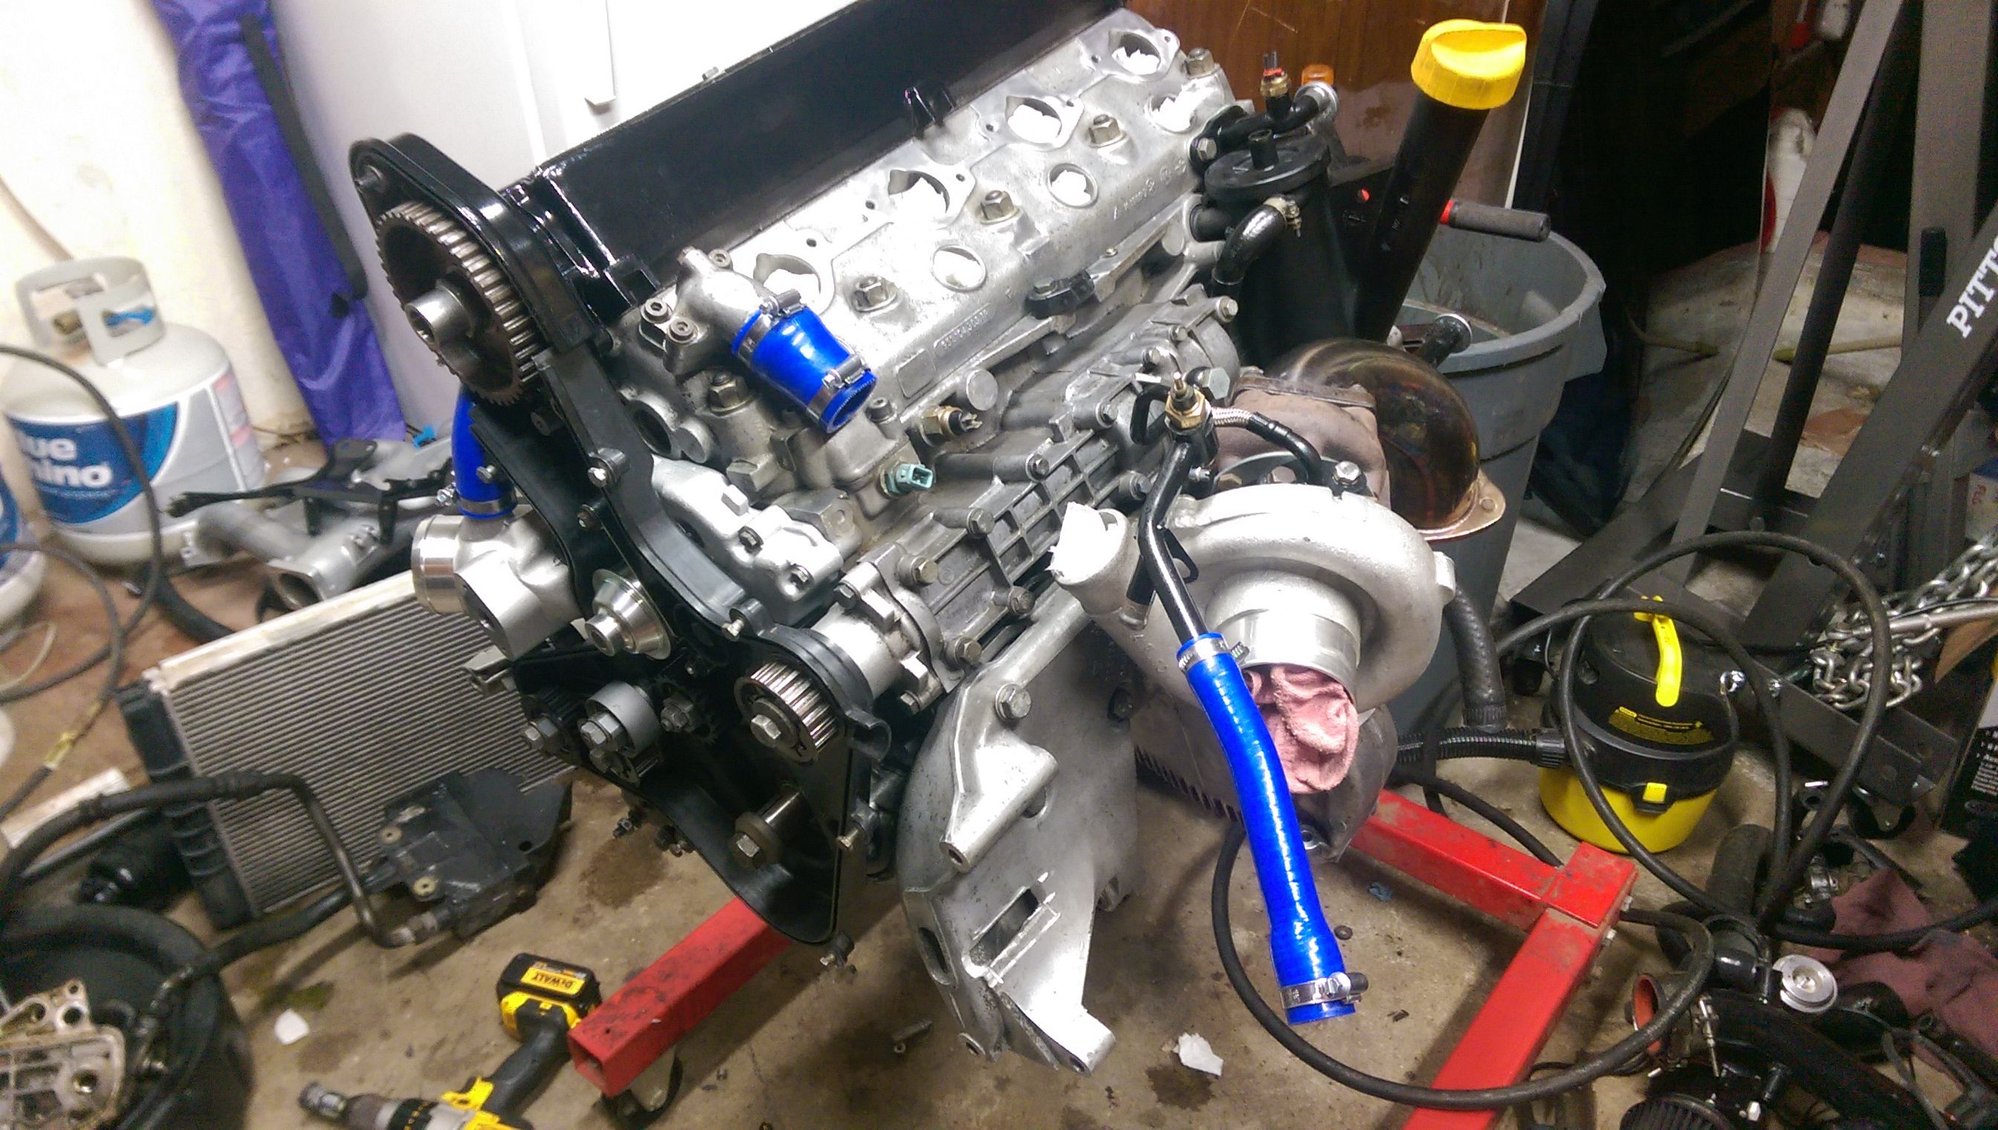
Now for the issues, earlier this past year, I began to have small annoying little oil leaks, anything from a small smell and a puff of smoke to a puddle forming under the car,and general wetness underneath. then, as a "final straw" sort of thing, the clutch gave out. Thus began my patience-shattering, nerve-blasting, journey where I decide its best to pull the engine to fix these little issues.
This project can now be categorized as a clutch replacement with a side serving of engine bay cleanup, decoration of the items under the hood, and a little power improvement along the way...
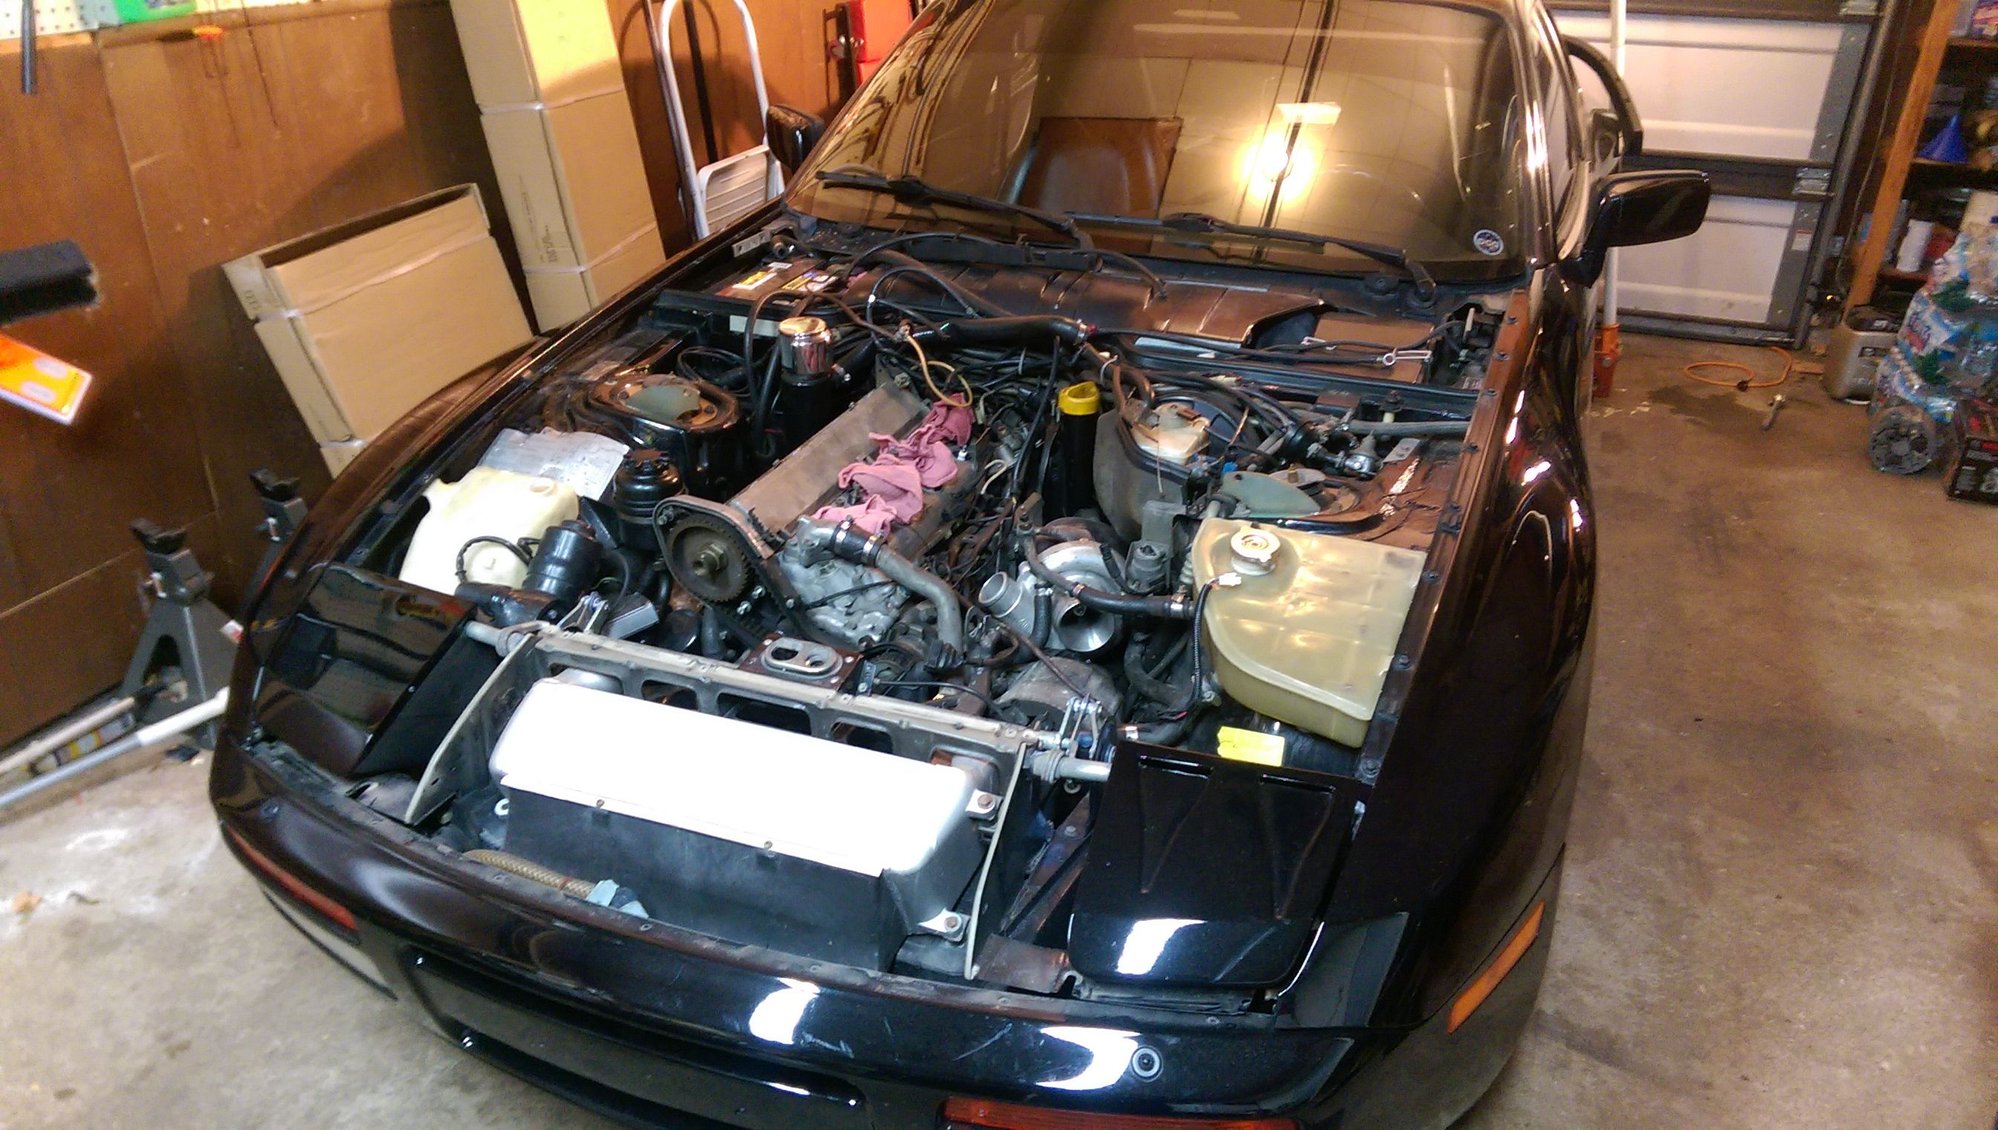
So, as it goes, here is some pictures of the first stage progress.
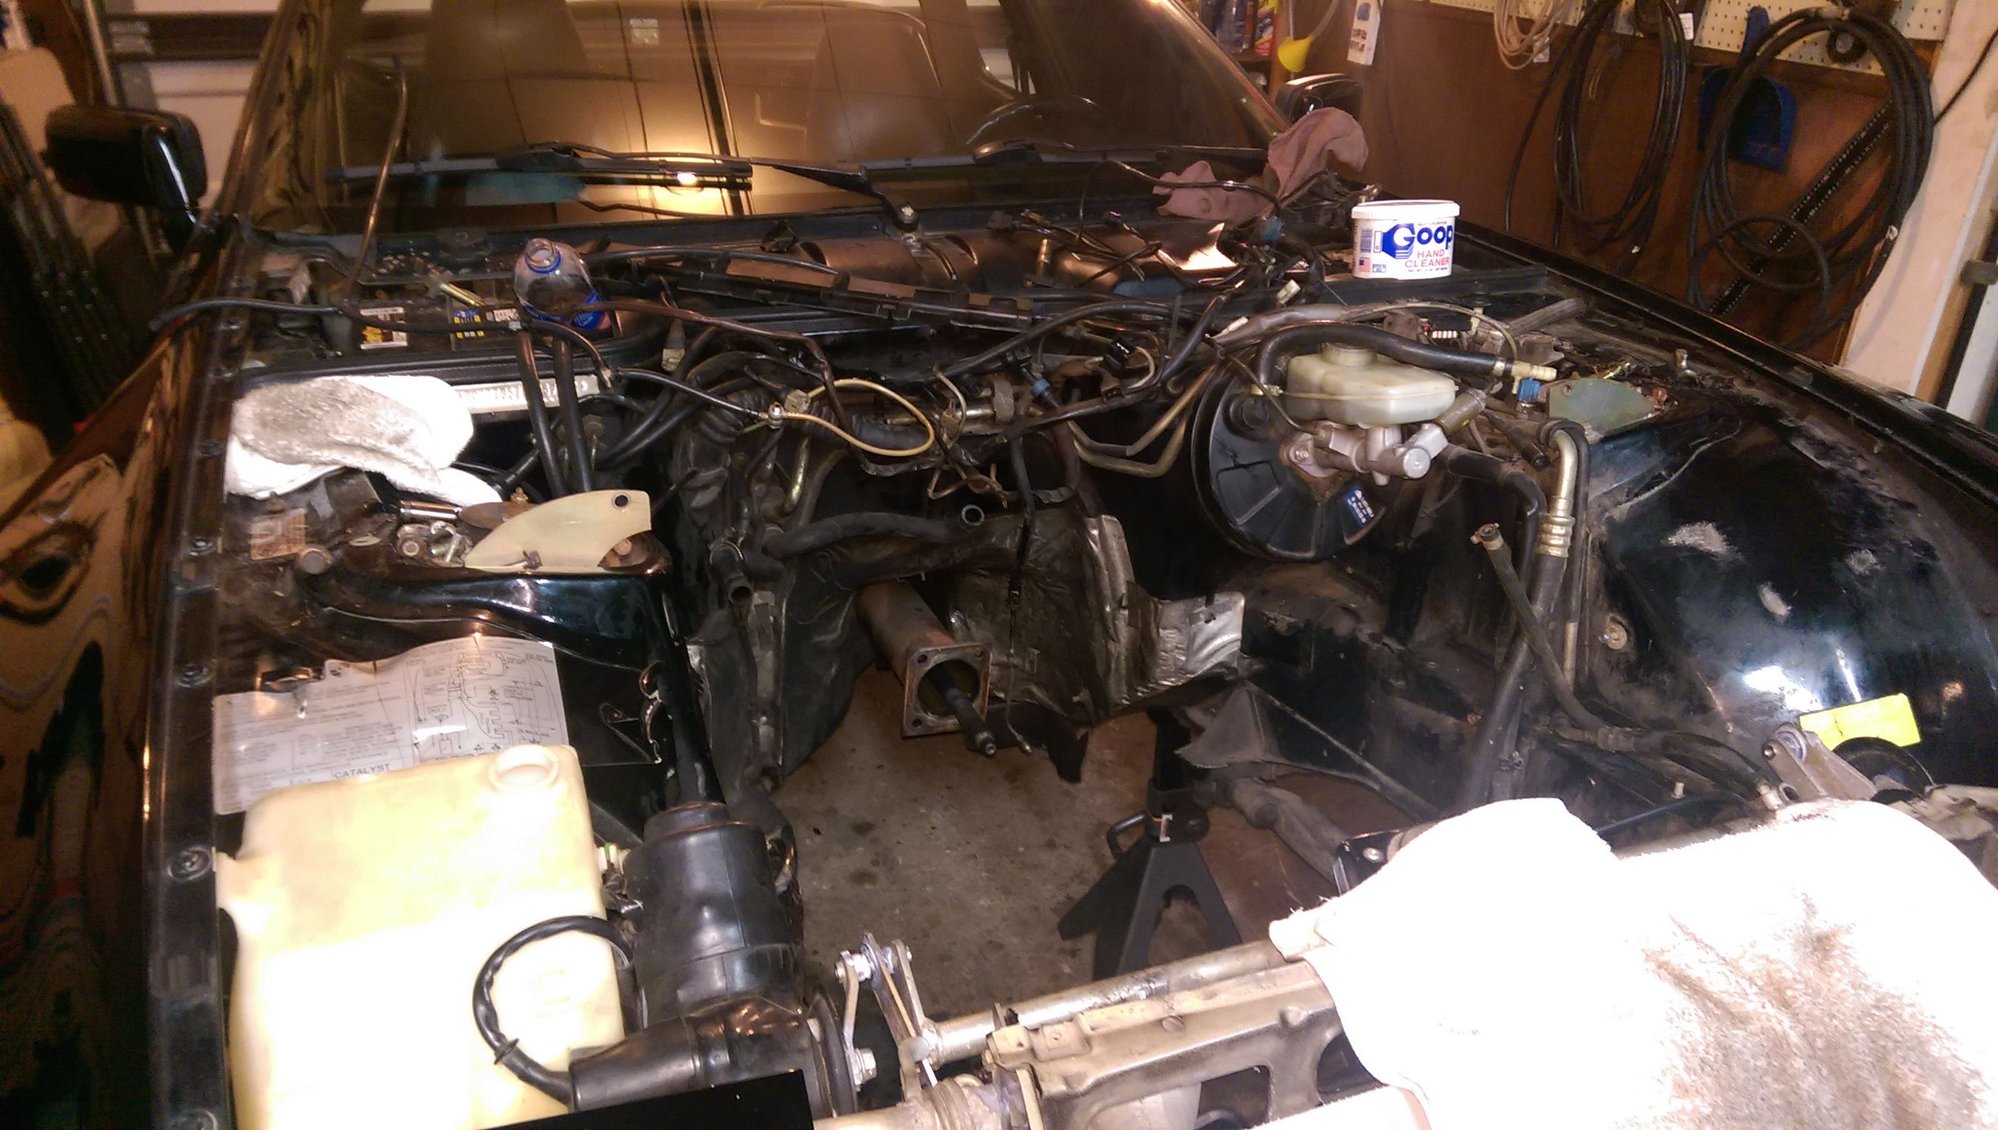
First couple days was the usual, removing accessory devices, exhaust, electricals and vacuum lines.
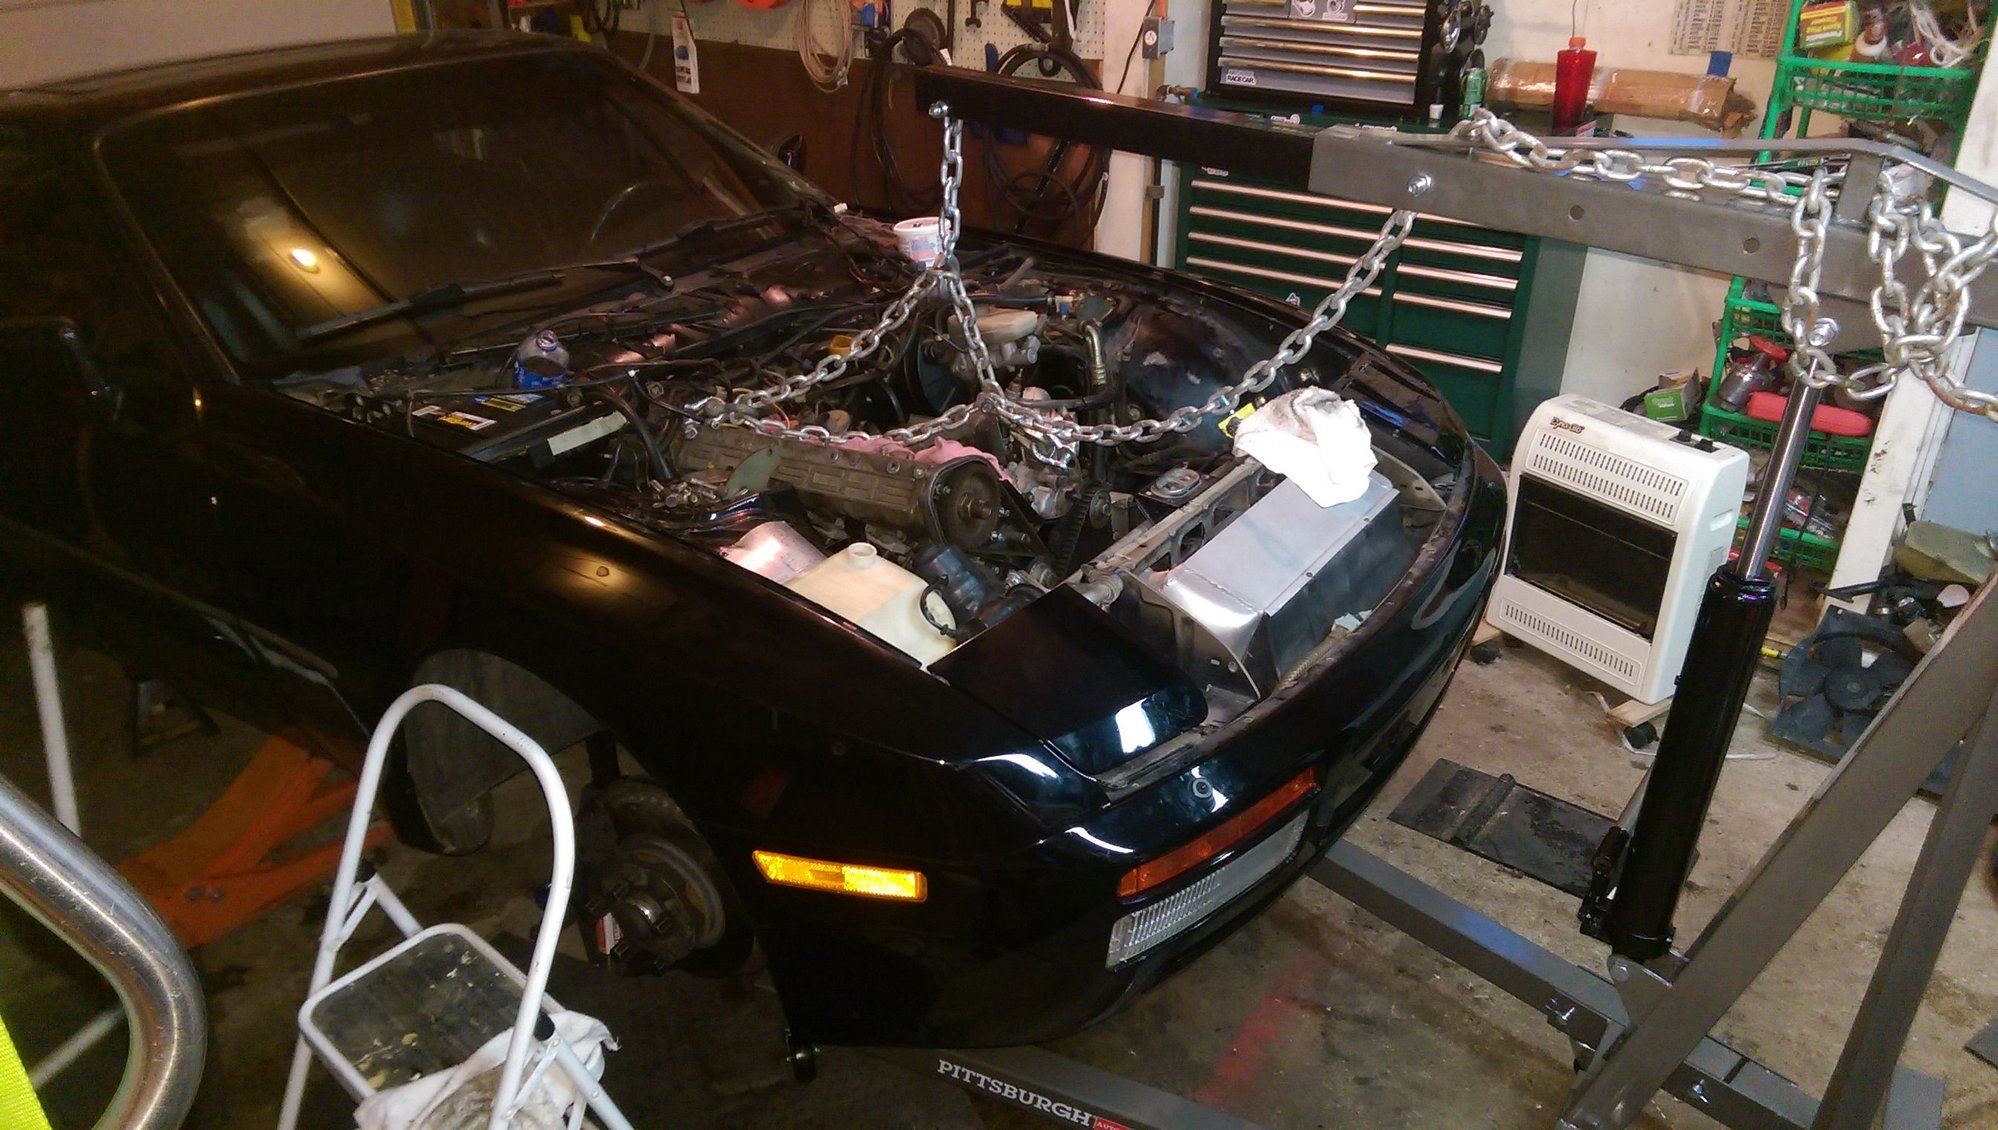
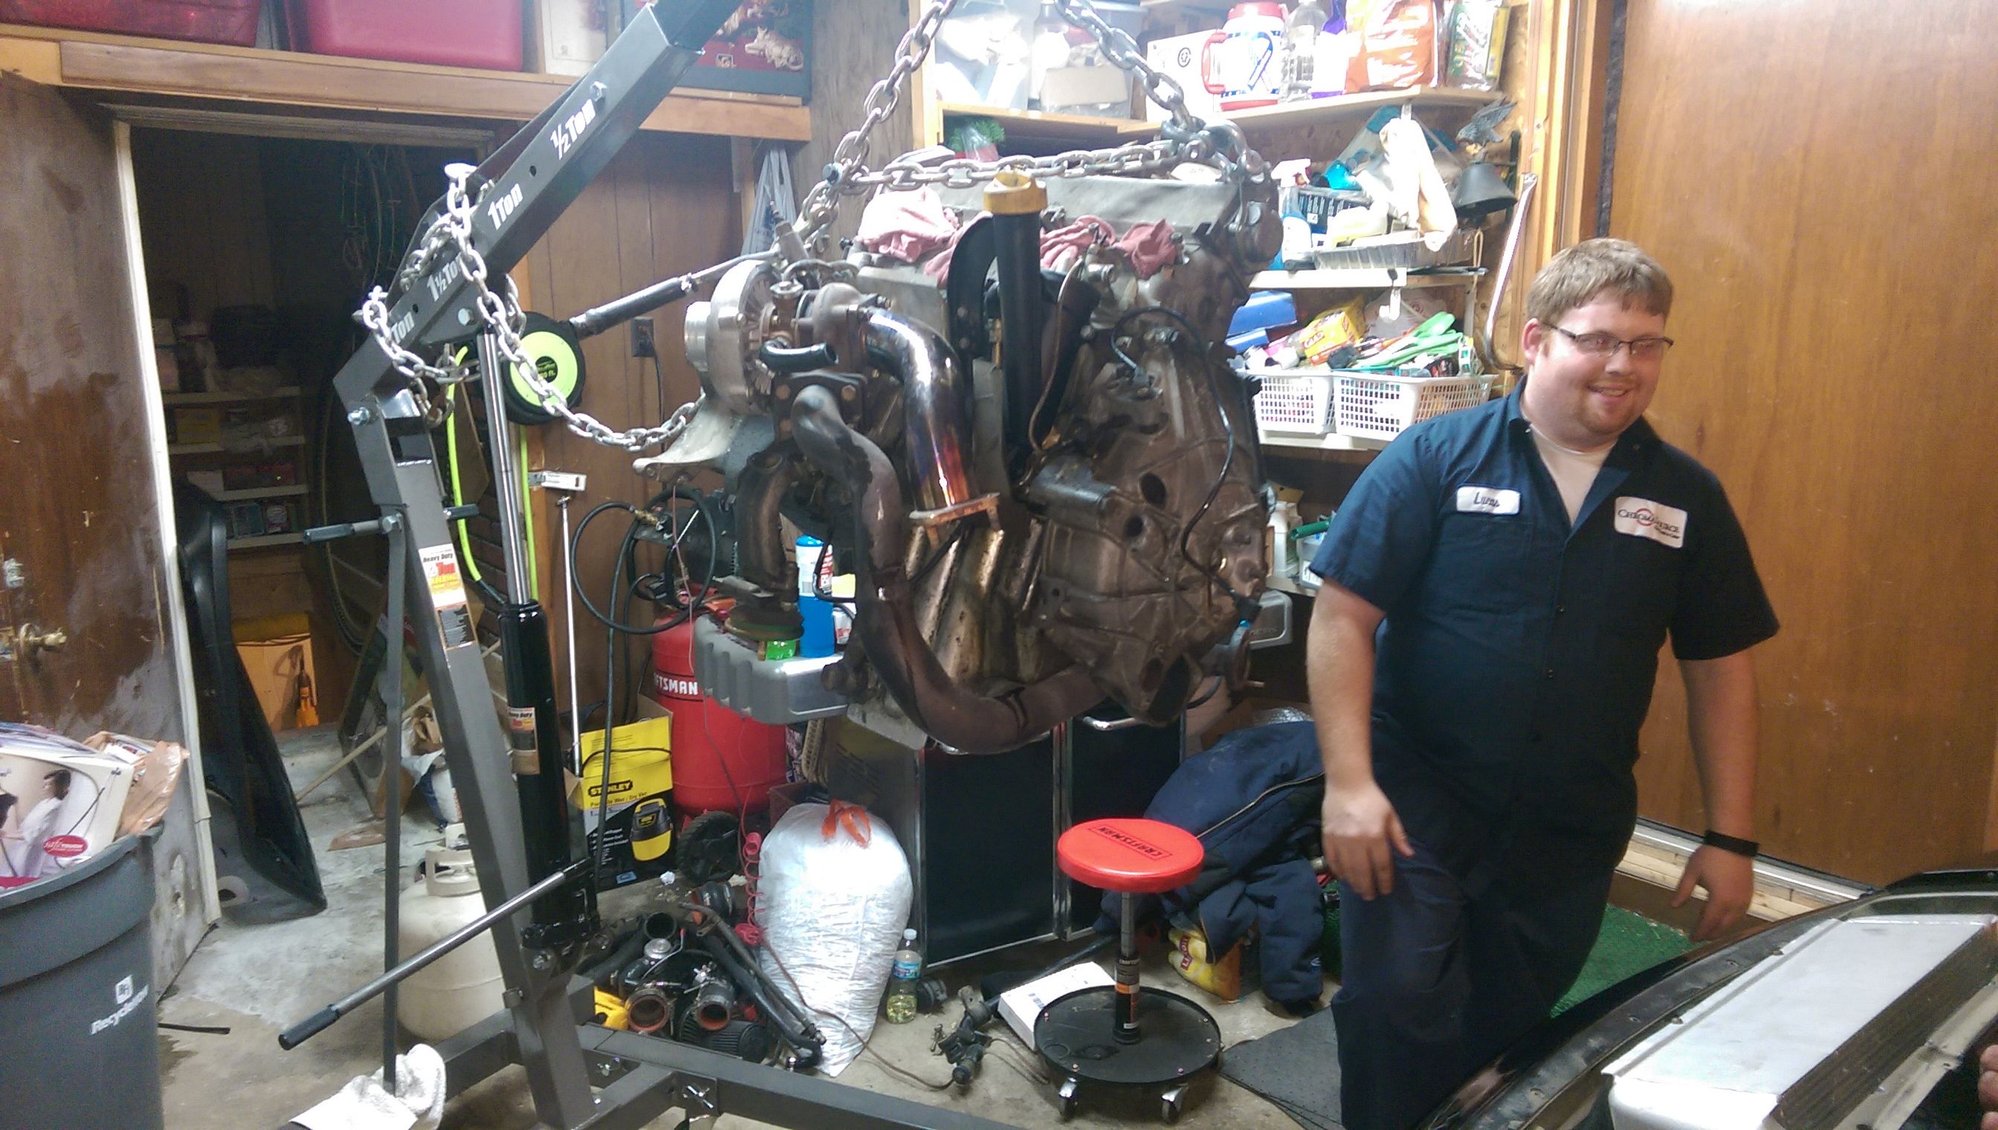
Against most advisions, (as i am a rebel and enjoy tourturing myself) i was determined on going out the top.
Friends are always a plus...
With the engine now out and on the stand, the tear down began,
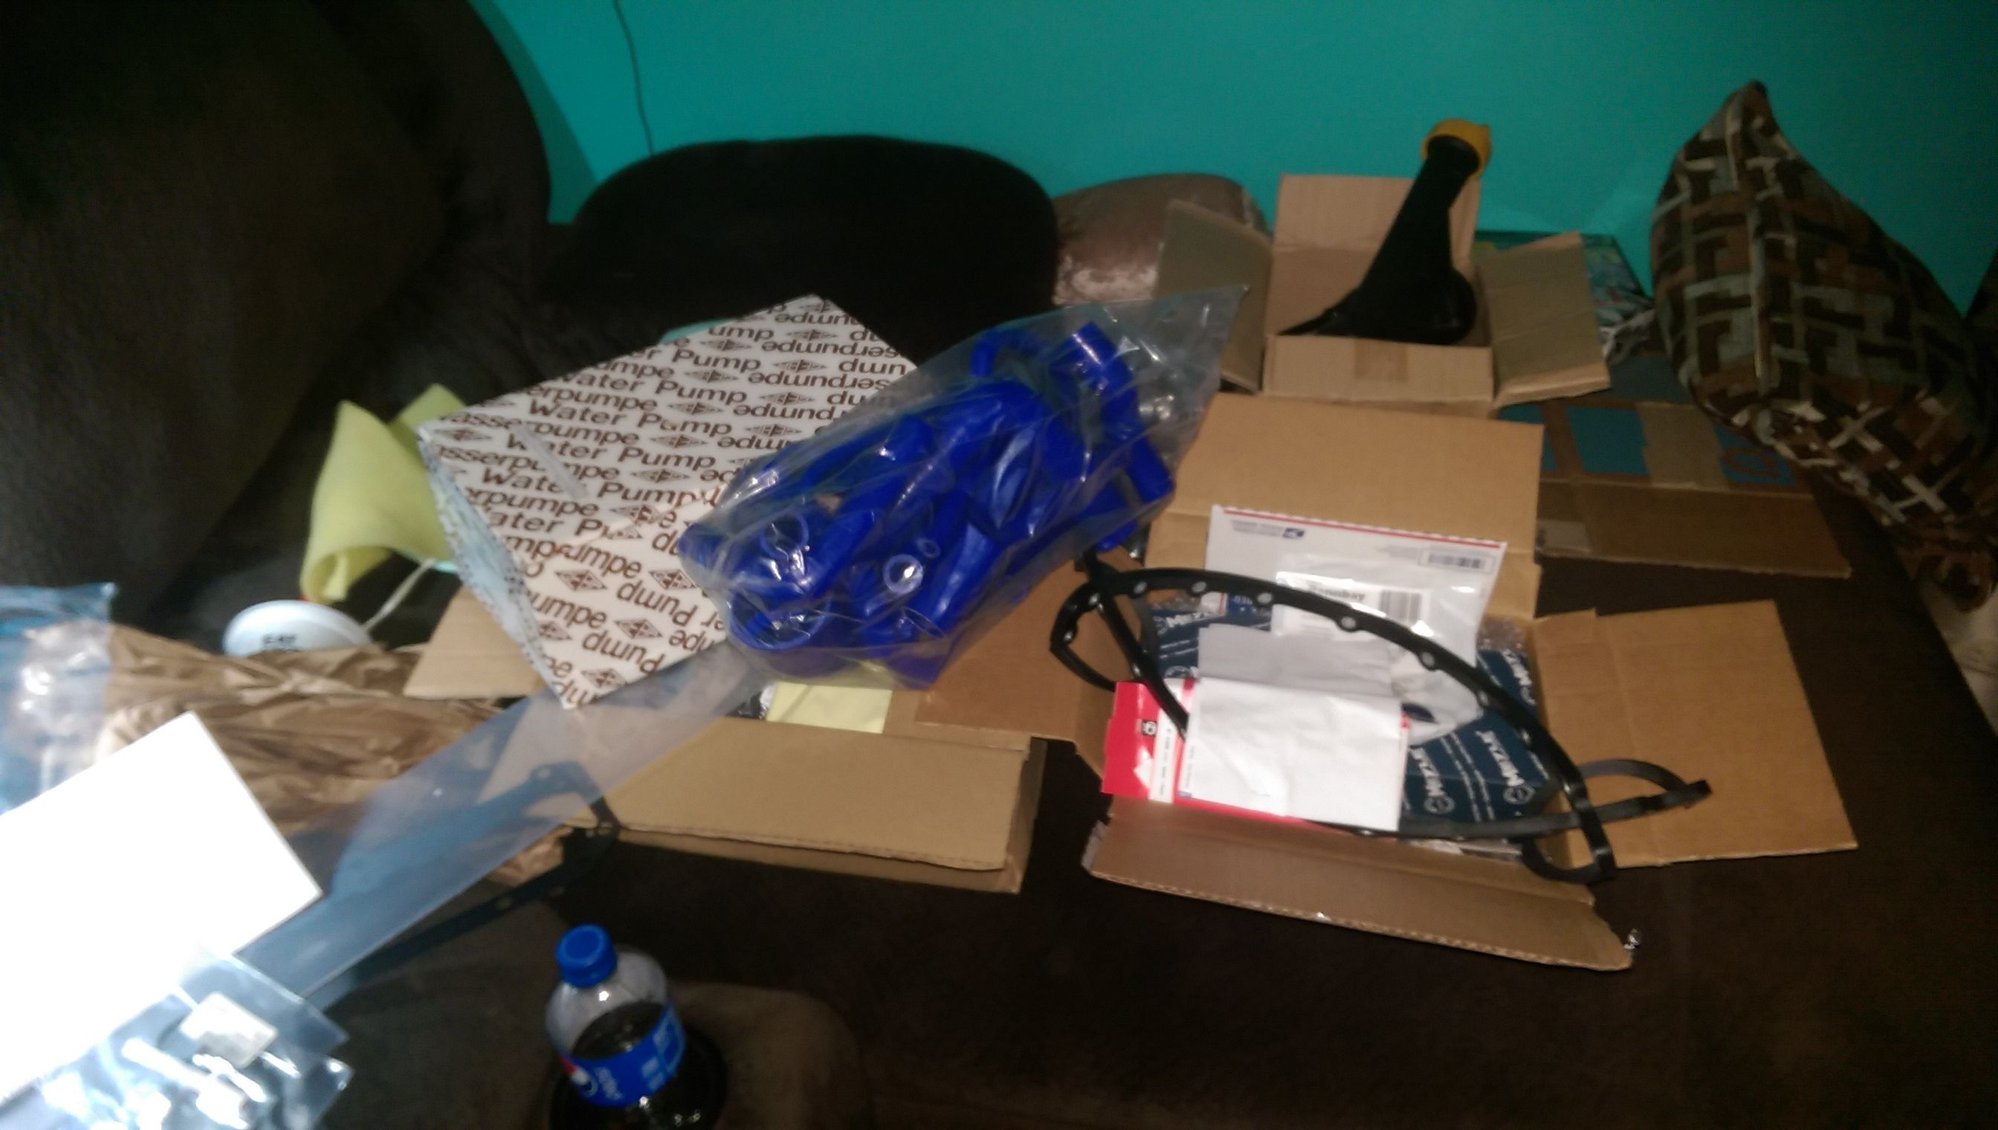
I am currently awaiting receiving most of the parts back from the powder coaters, and a decently long list from all our friends, speaking of,
a quick thanks to all who have endlessly boxed multiple orders for me, including but not limited to, Lart, Ian, Jason, Mike and Dave, my memory may fail me when I place an order but these guys don't. Wonderful parts support in this little community of ours.
Anyhow, that's the current progress of it, I will be updating with pictures and progress as time passes. Thanks for putting up with my bad form, I'm new at forums, and i will learn as time goes on, but any guidance or words of the wise are MUCH appreciated!
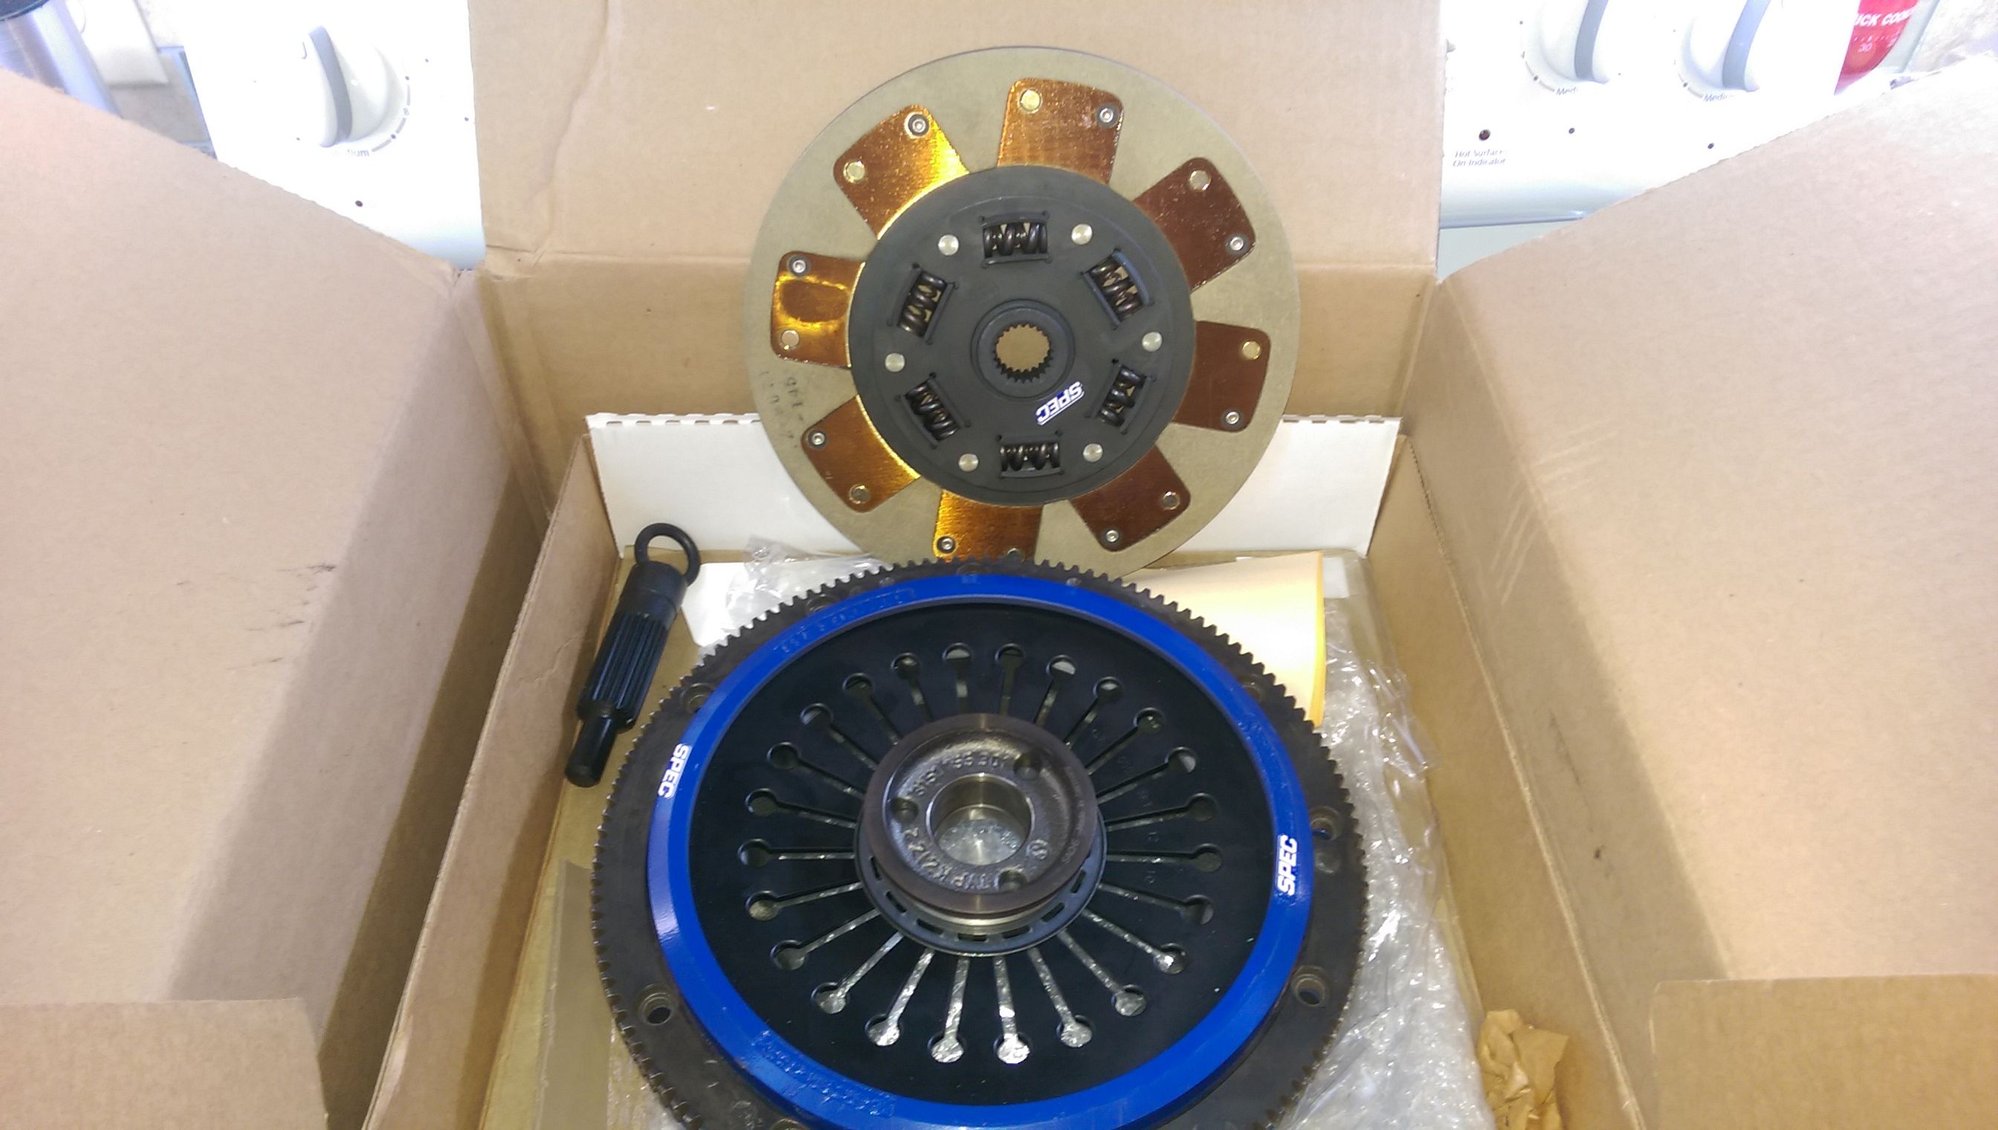
Well, the first of the parts started to come in today. Finally a little progress in the right direction!
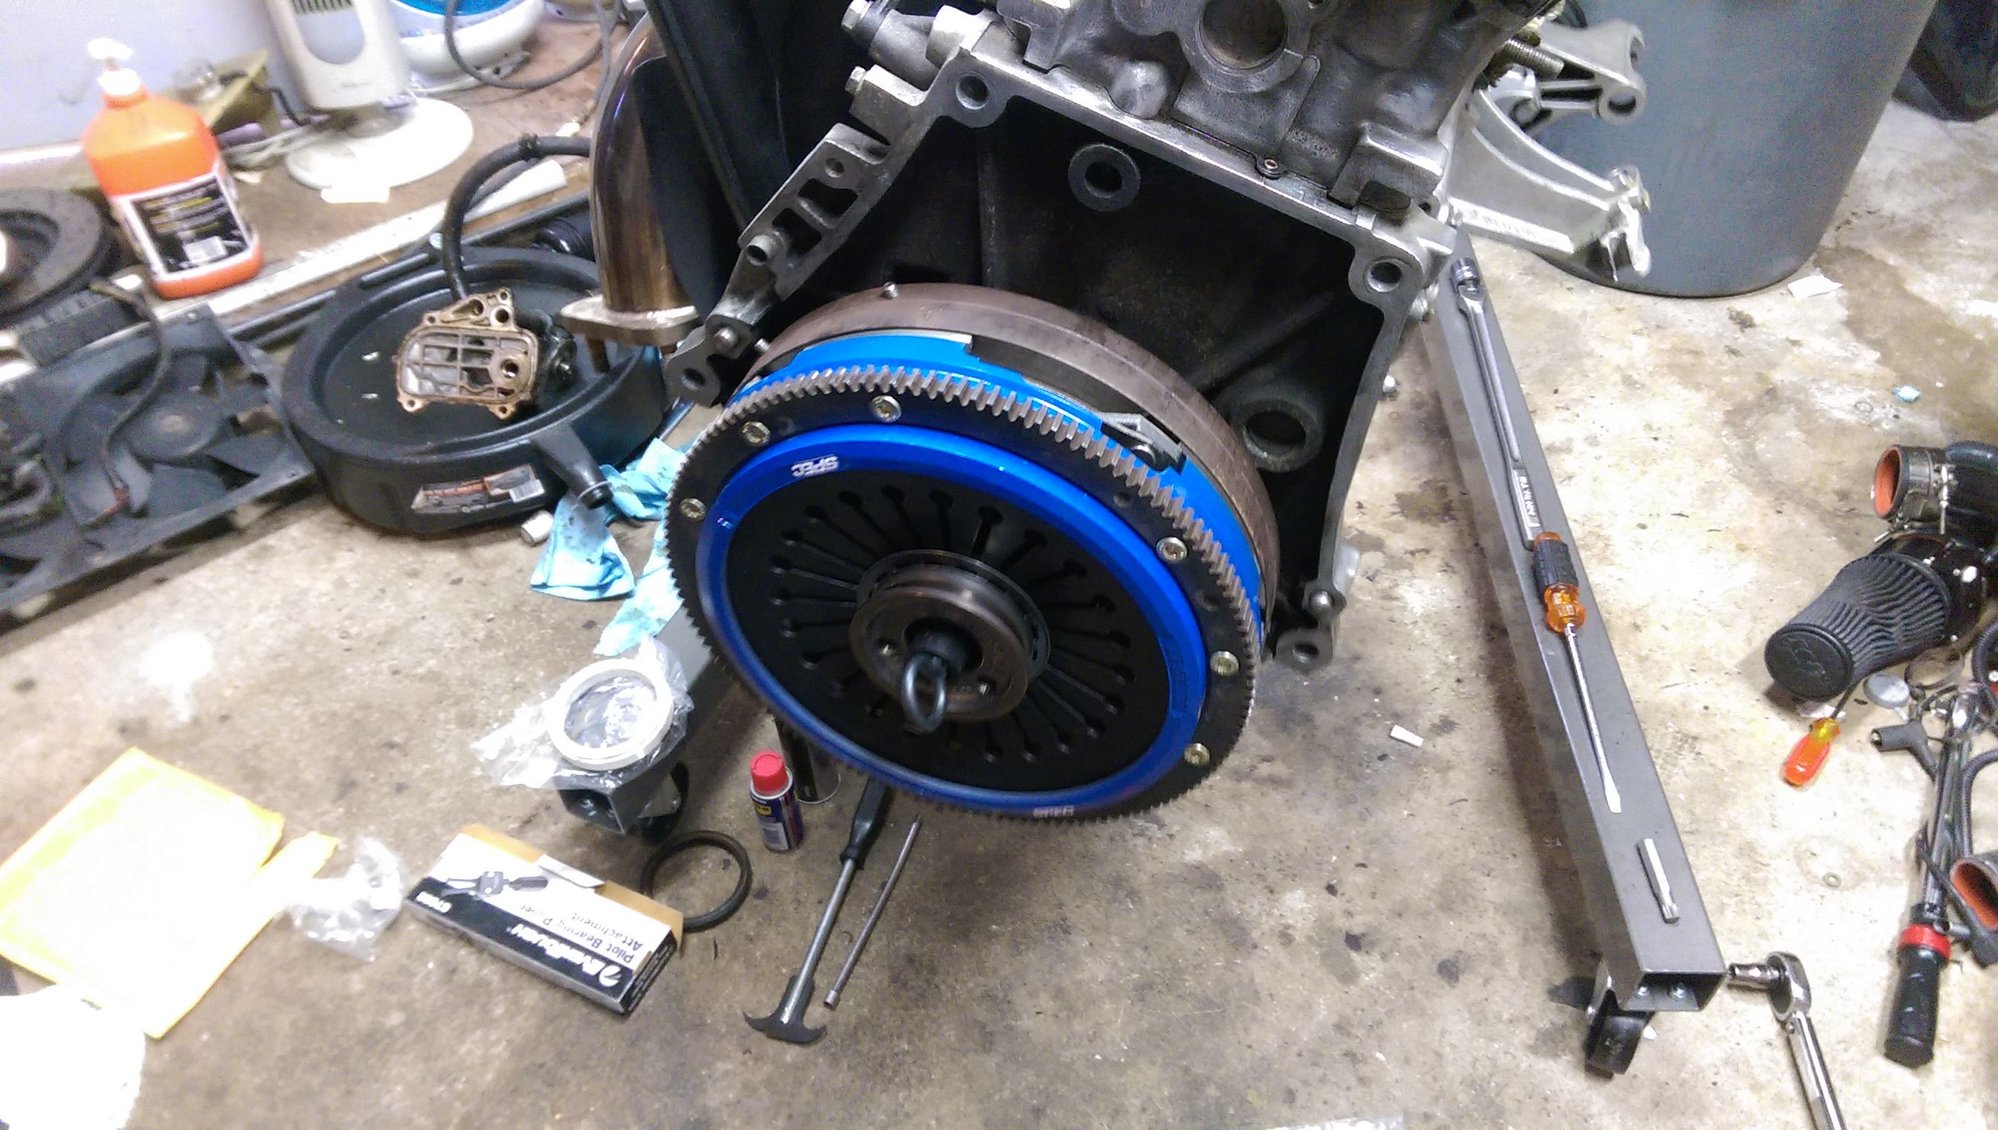
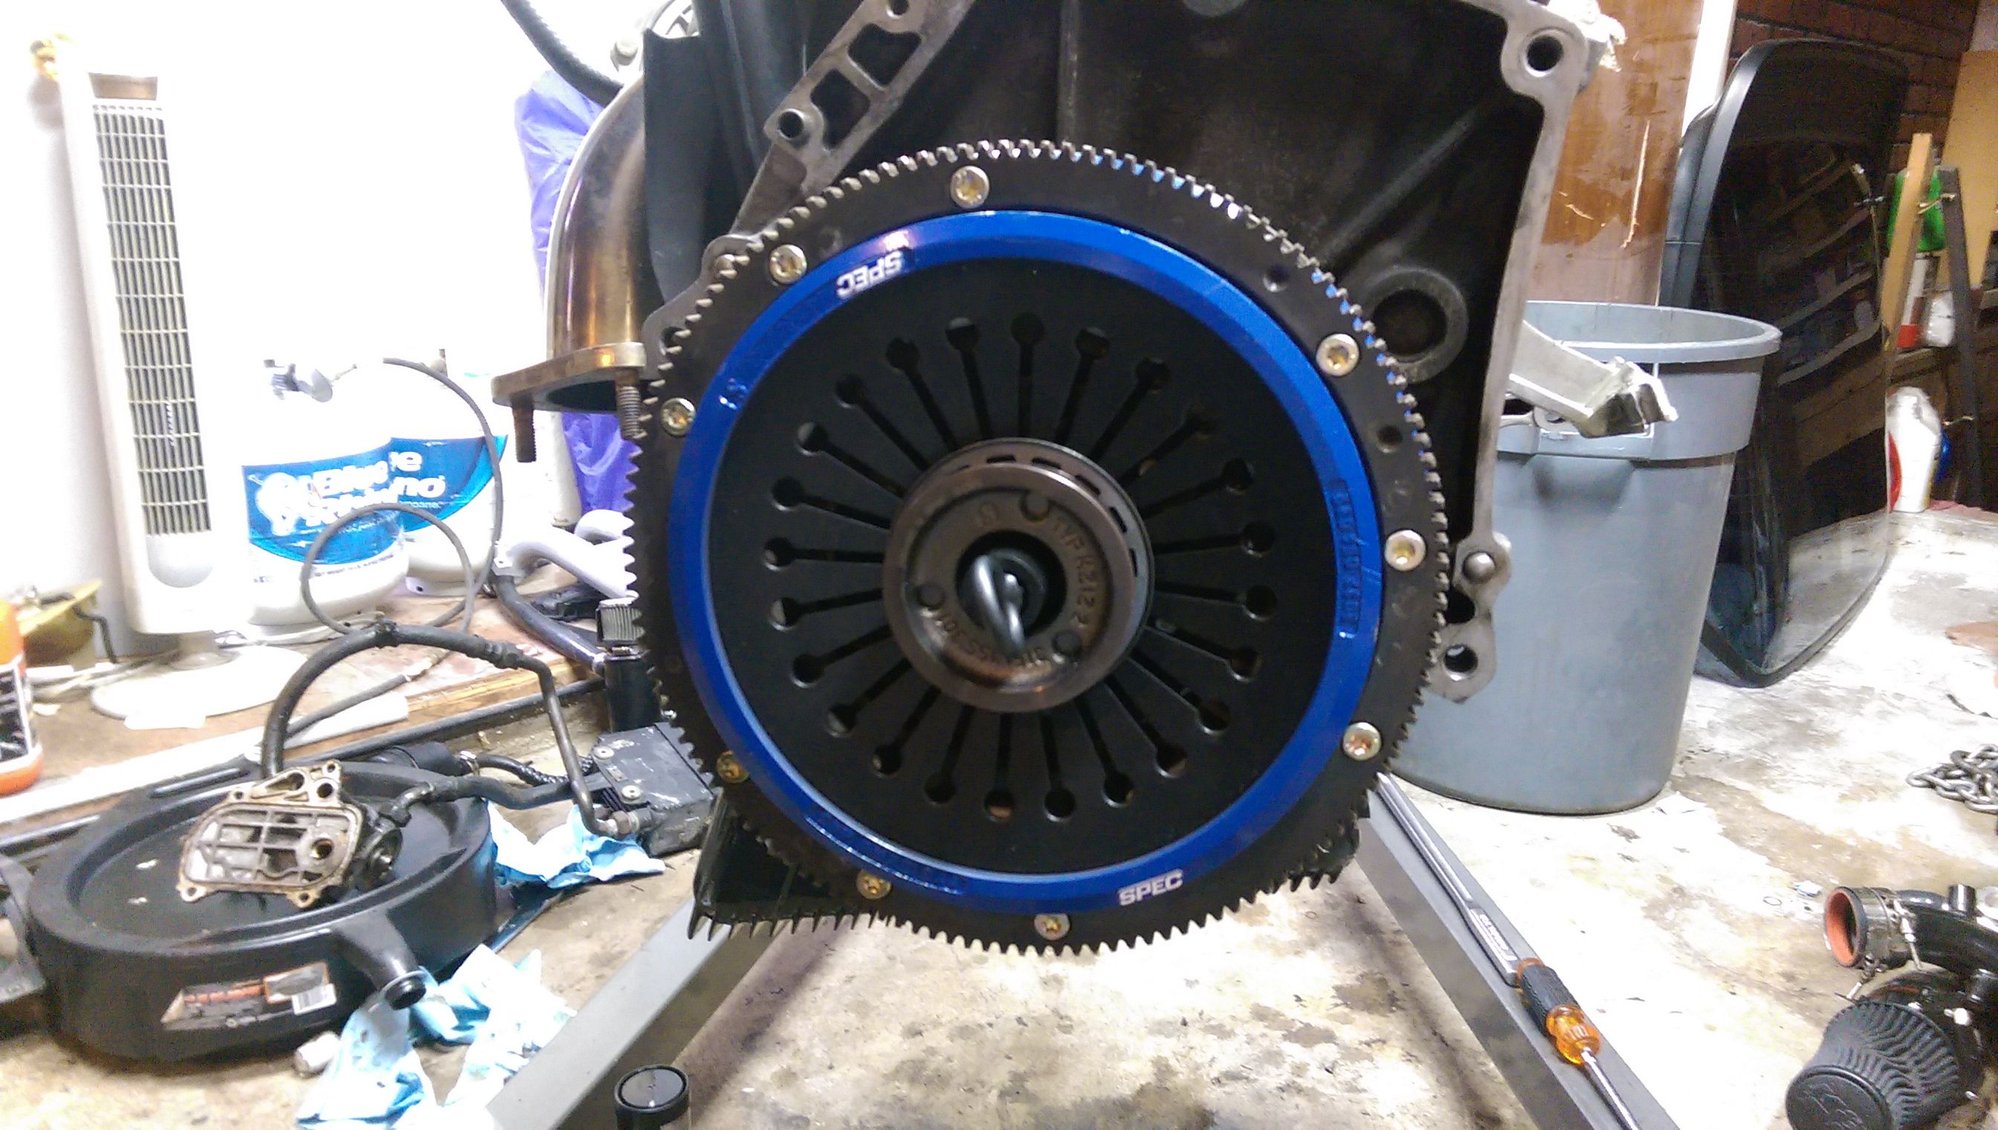
the new clutch assy, Spec stage 2
As evidenced by earlier photos, the engine was completely covered in **** from the multiple oil/fluid leaks it has developed over the years, it had apparently never been cleaned or removed, as the engine mount on the turbo side was an original green bottom mount, and after a discussion with a local tech this is supposedly a factory (or very early) mount. However, due to some very diligent cleaning and scrubbing by a certain someone, (was told if she wasn't mentioned I would come of physical harm) it is finally cleaned up!
More parts to come in this week! I will attempt to curb my enthusiasm and remember to take pictures...
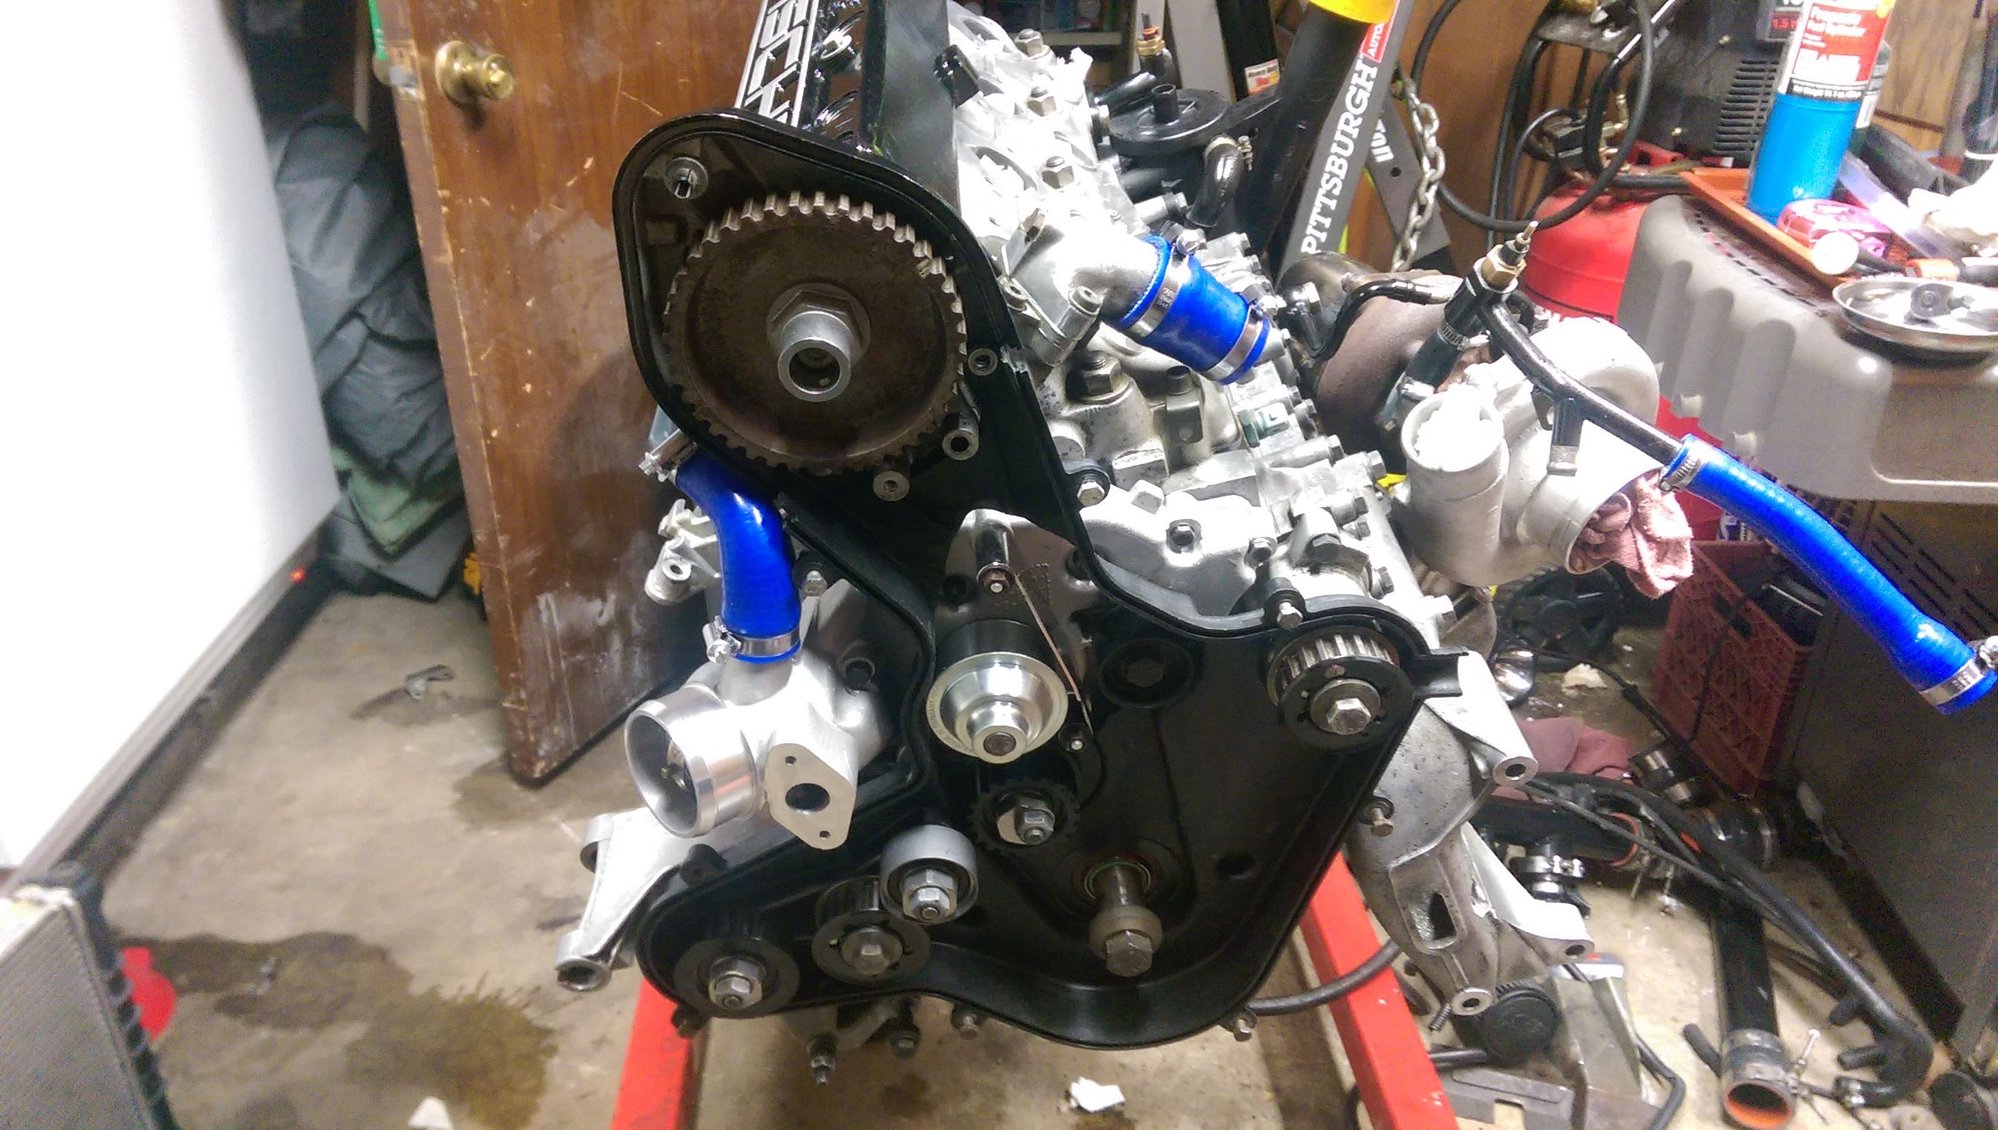
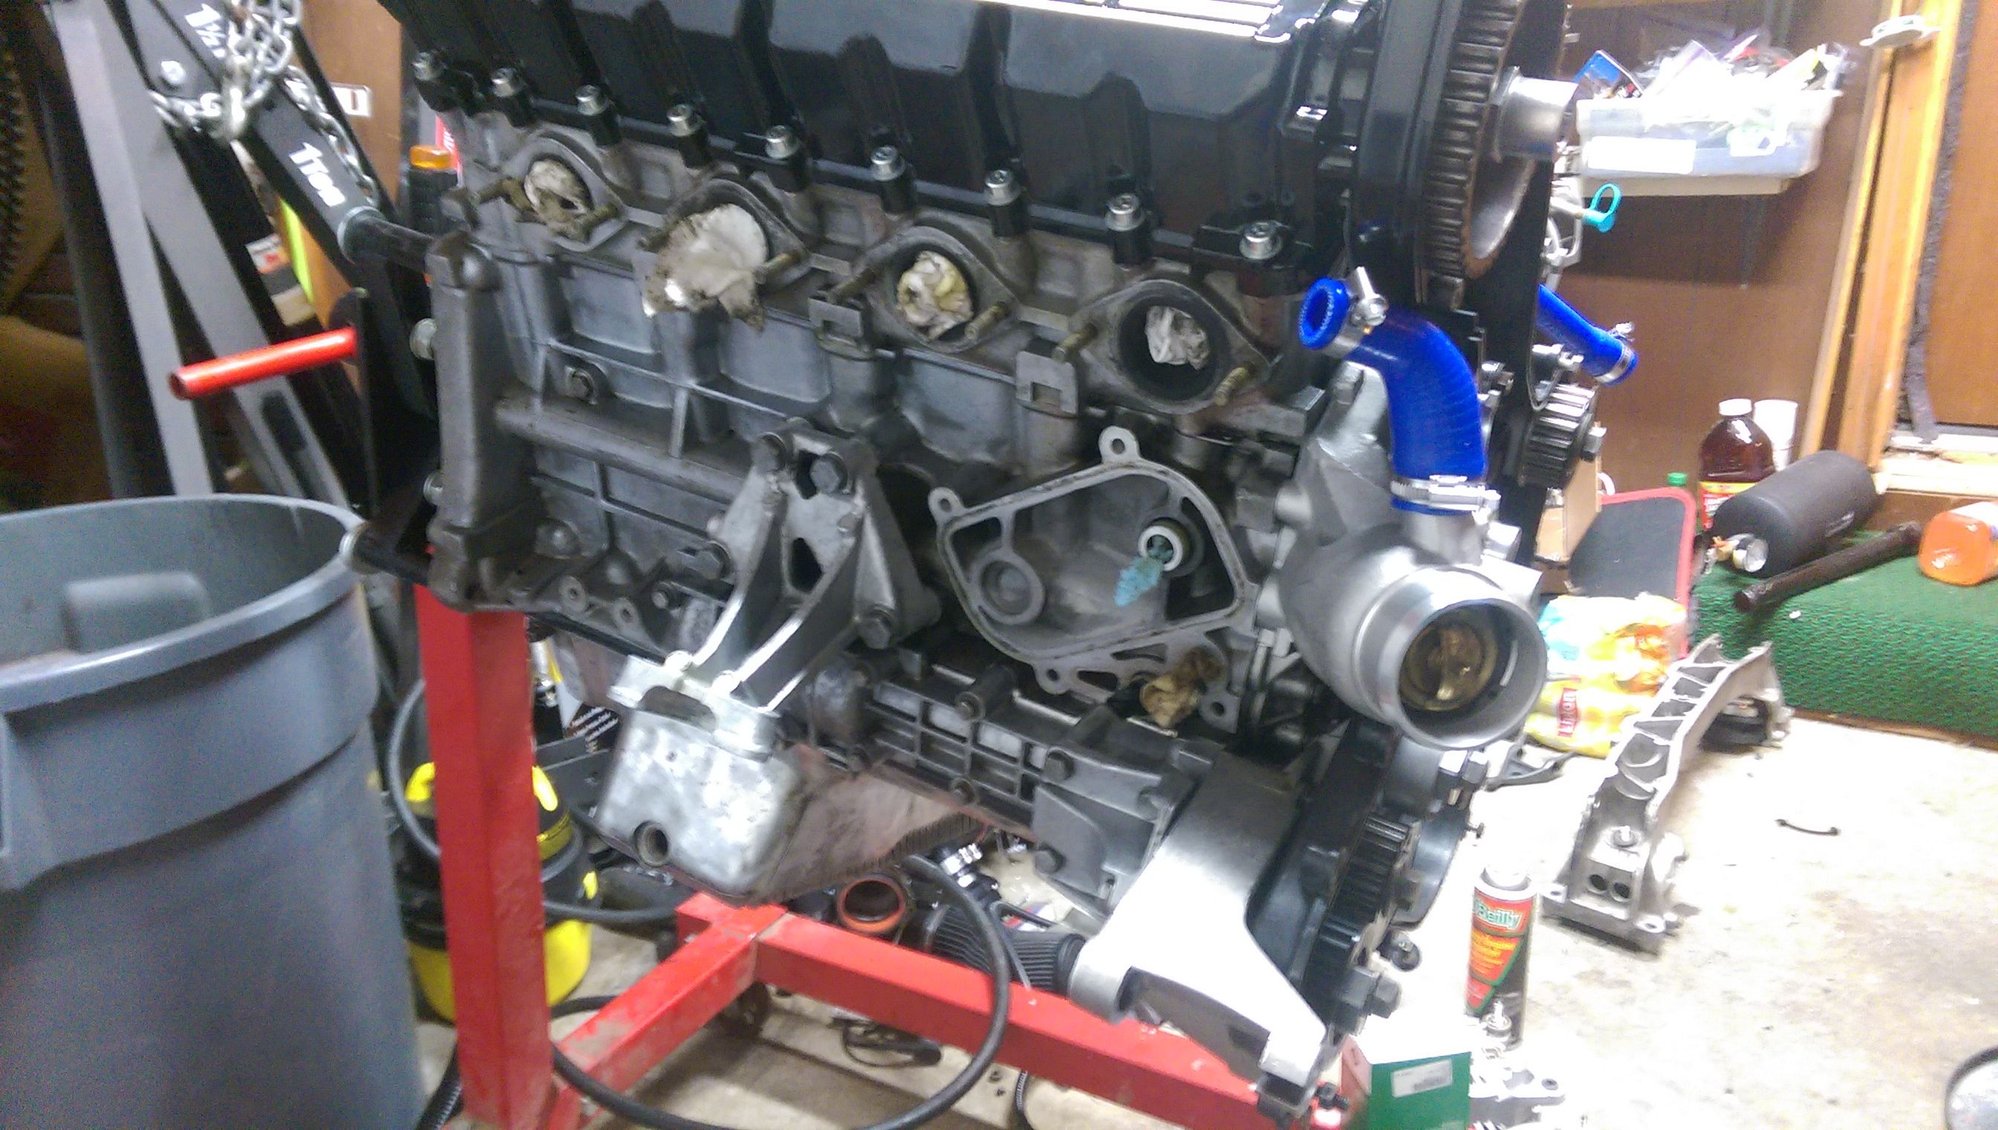
No, when I bought the car three years ago and did the turbo replacement I did a compression/leakdown which passed with flying colors, and at that time due to the boost being turned up I had the 150# valve springs put in, the head decked and valve train cleaned up and rebuilt along with a cometic triple plate gasket. It only has roughly 5000 miles on it. The cam tower was leaking that's why its off, well that and a better cam being put in along with it being powder coated.
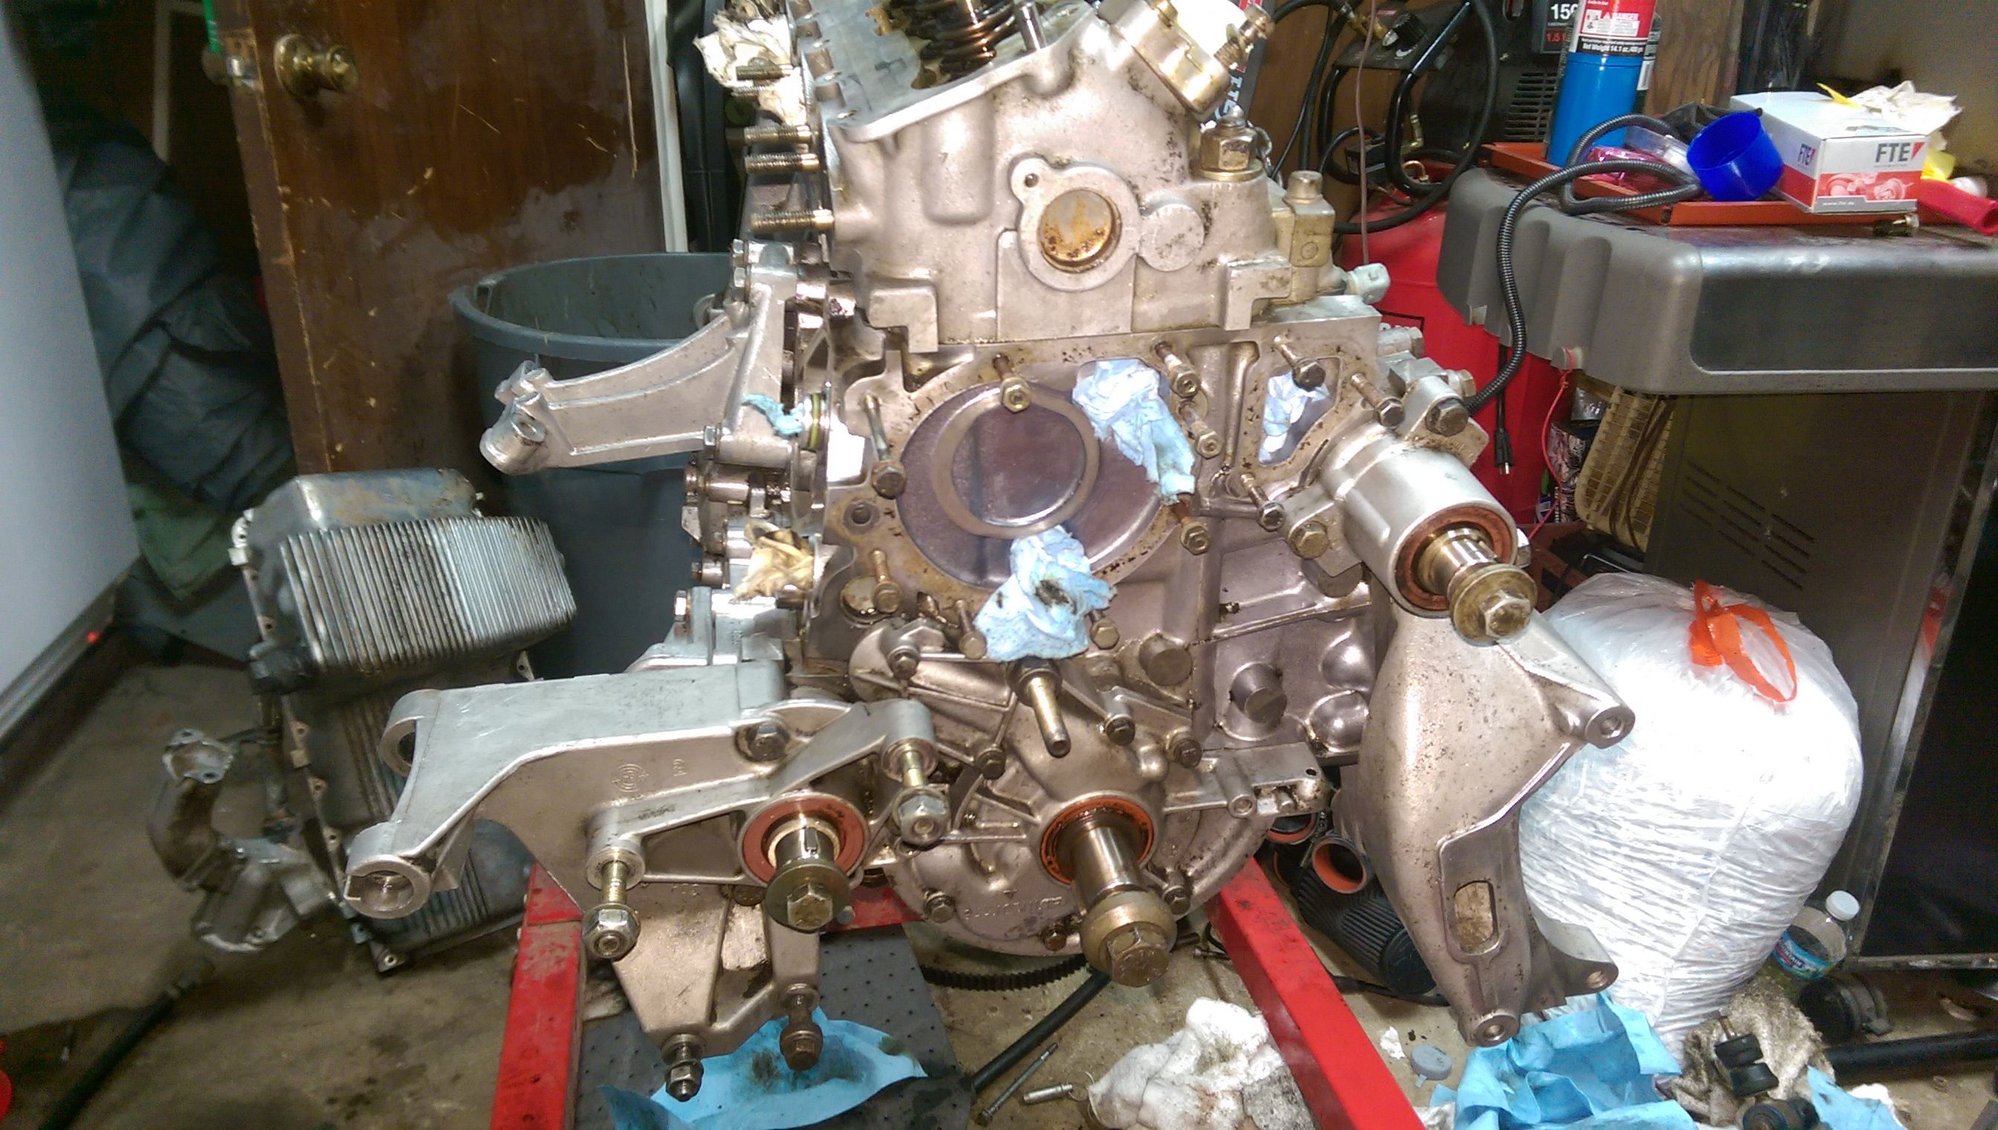
Things are finally progressing! Got most of the parts in now, just holding on my powder coating guy and a couple odds and ends, but for the most part it's advancing now. The water pump and most of the brackets are back on, all new seals on everything. looking better and better, but now for the pictures!
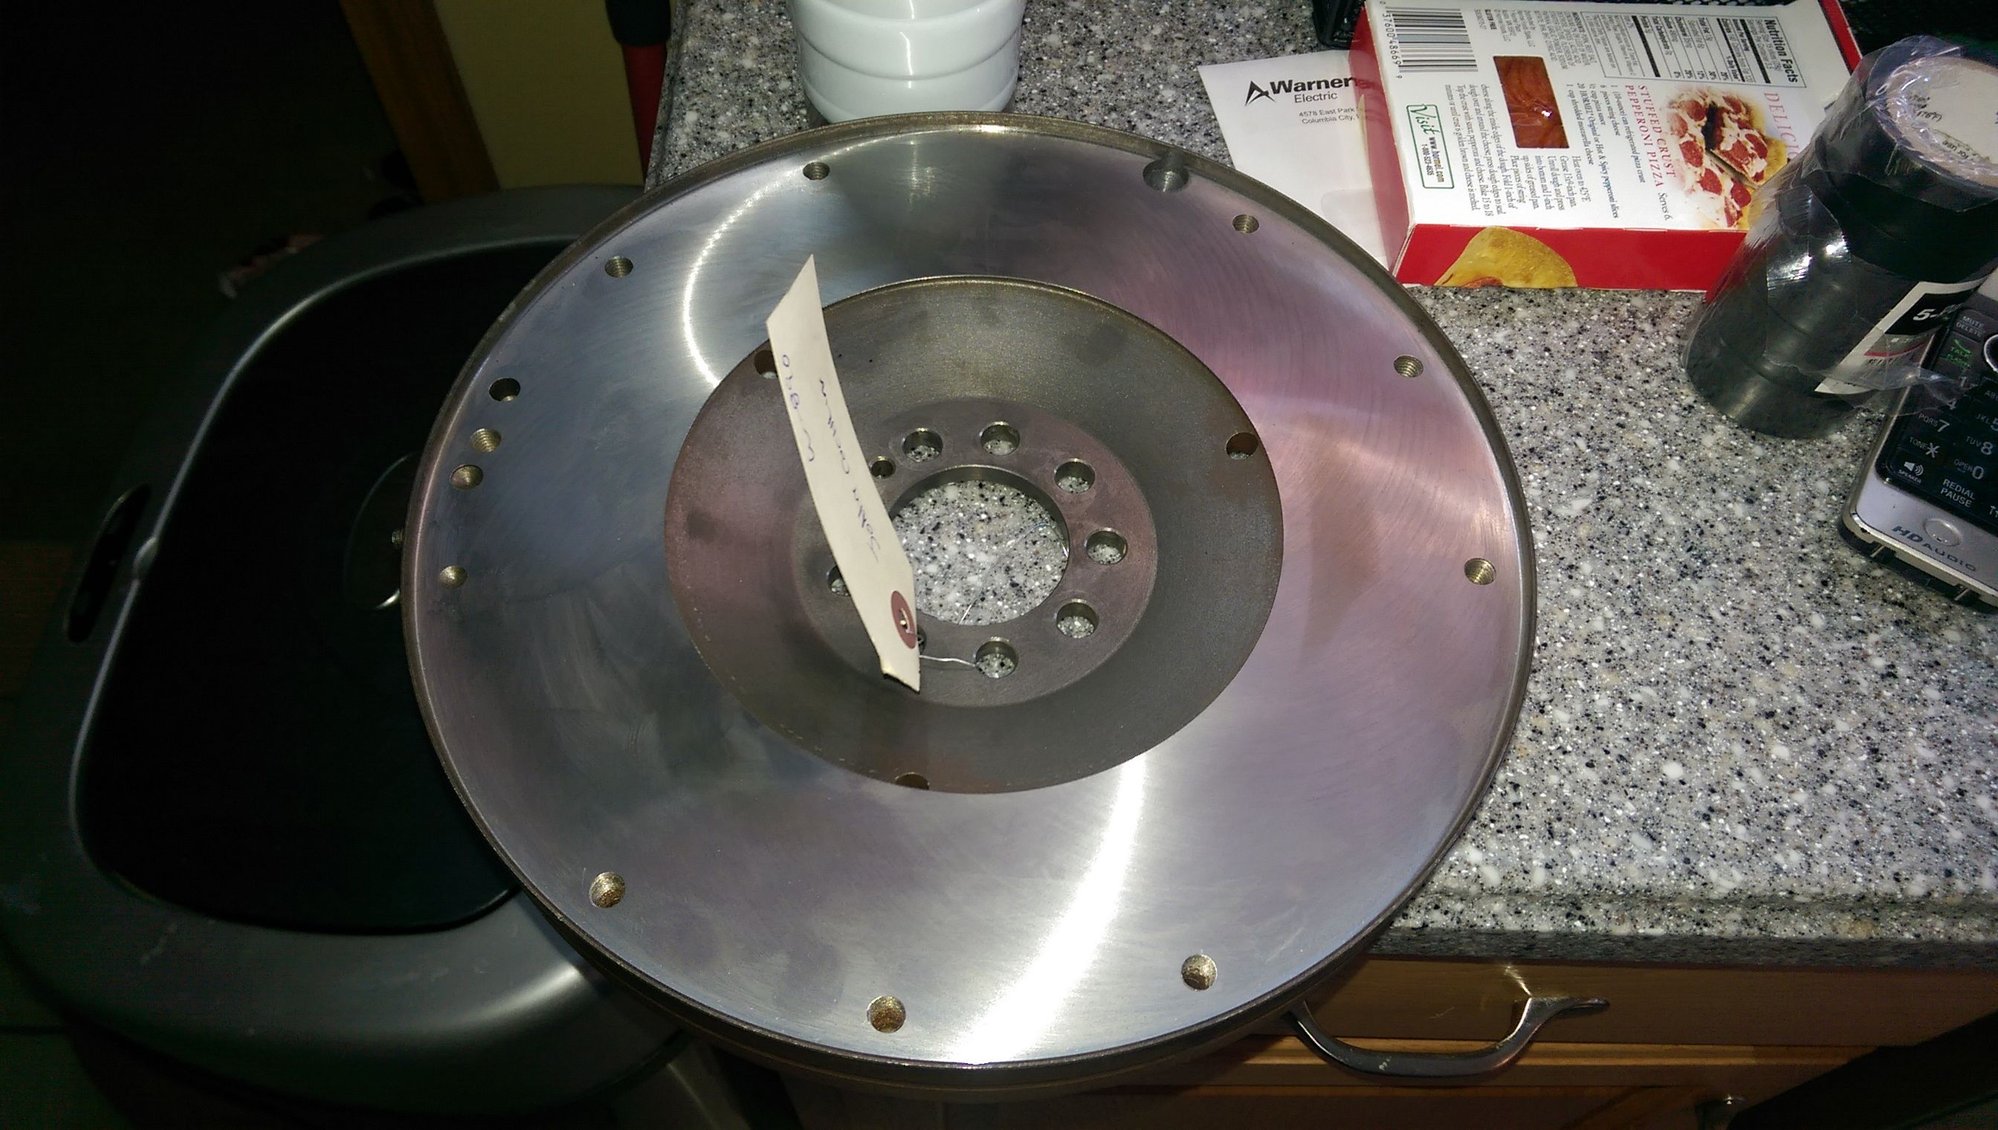
Flywheel finally finished. Was 6 grams off balance after grinding, but all good now! (side note: the guy at the machine shop "couldn't believe a company like Porsche would use something as cheap as set screws for the reference sensor pickups. ")
The total pile now of things to be finished:
And this one is a personal pride for me, three hours on my knees with degreaser, a brush, and some scotch brite, finally got the heat shielding polished up! Heres a before shot:
And after...
This along with some excess wire/vacuum line removal lends itself to things becoming very tidy under the hood.
Now for a quick question as nobody seems to have a really good answer on this one...
What does Porsche mean by 55lb +4 on the rod nut torque? its really pretty baffling... is this a range? it doesn't seem like a two-stage as 4lbs wouldn't be enough to even move the nut again... maybe someone has a little insight,
Thanks ahead of time and thanks for keeping with me!
Been a few days, but here is some light progress. Waiting still to get the cam tower back from the coaters so I had to move on to more low-impact things, or so I thought...
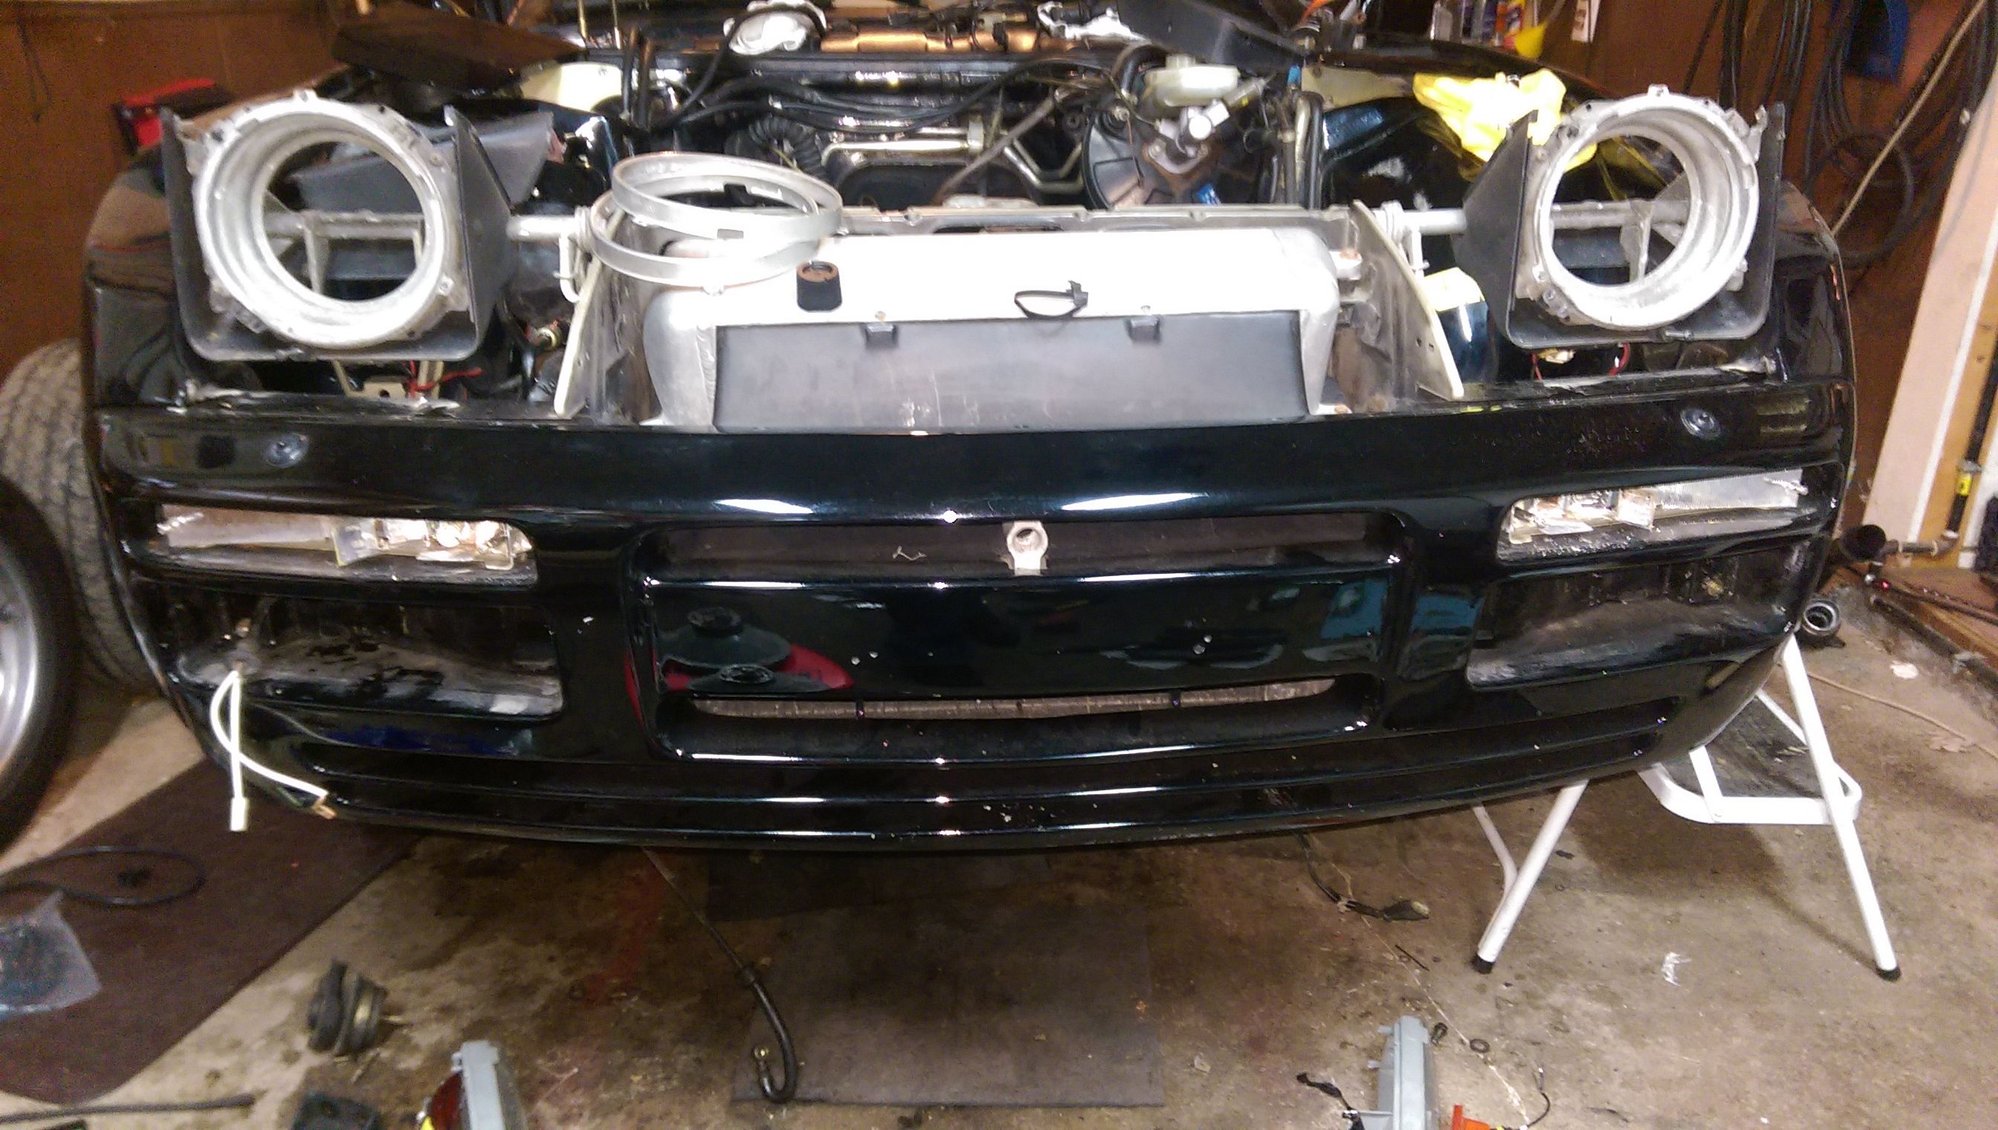
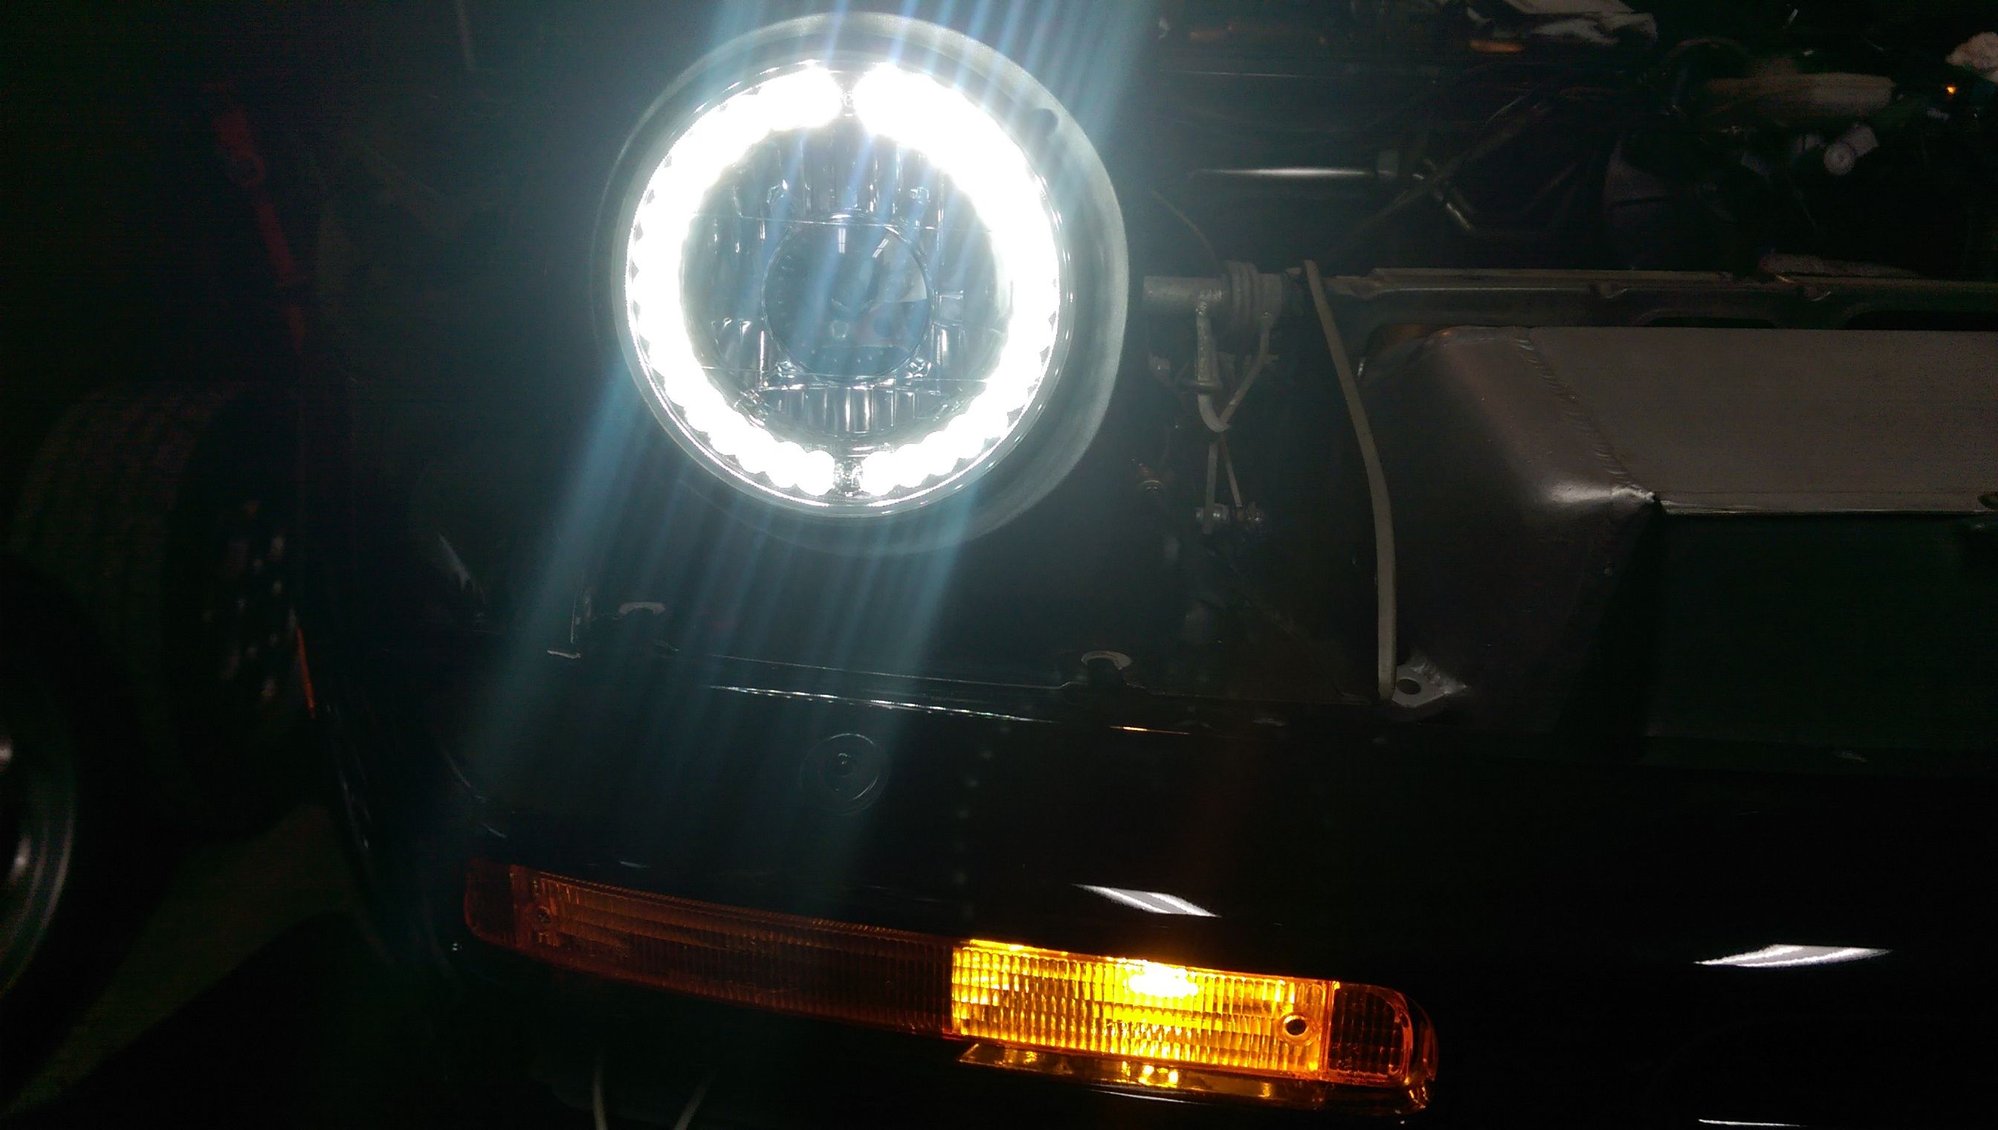
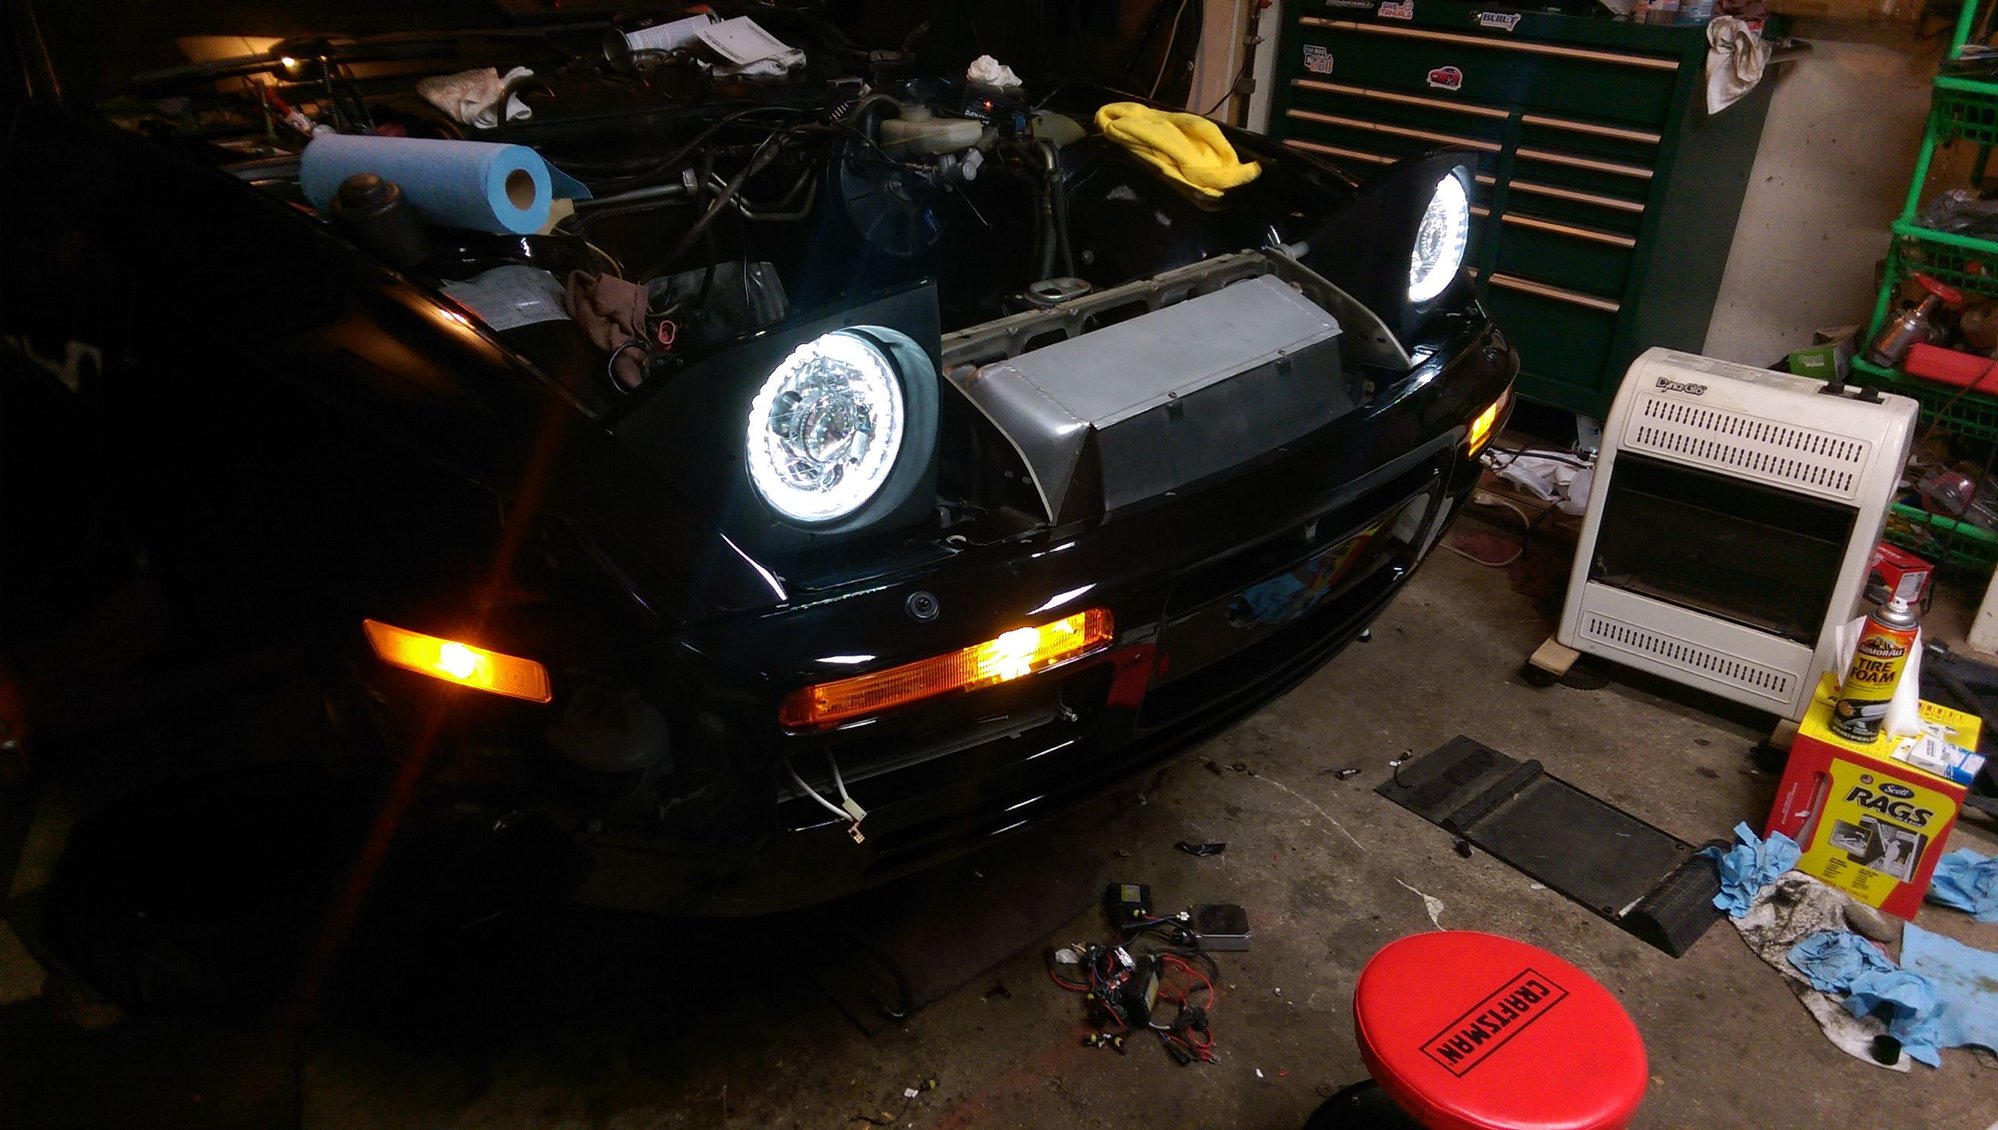
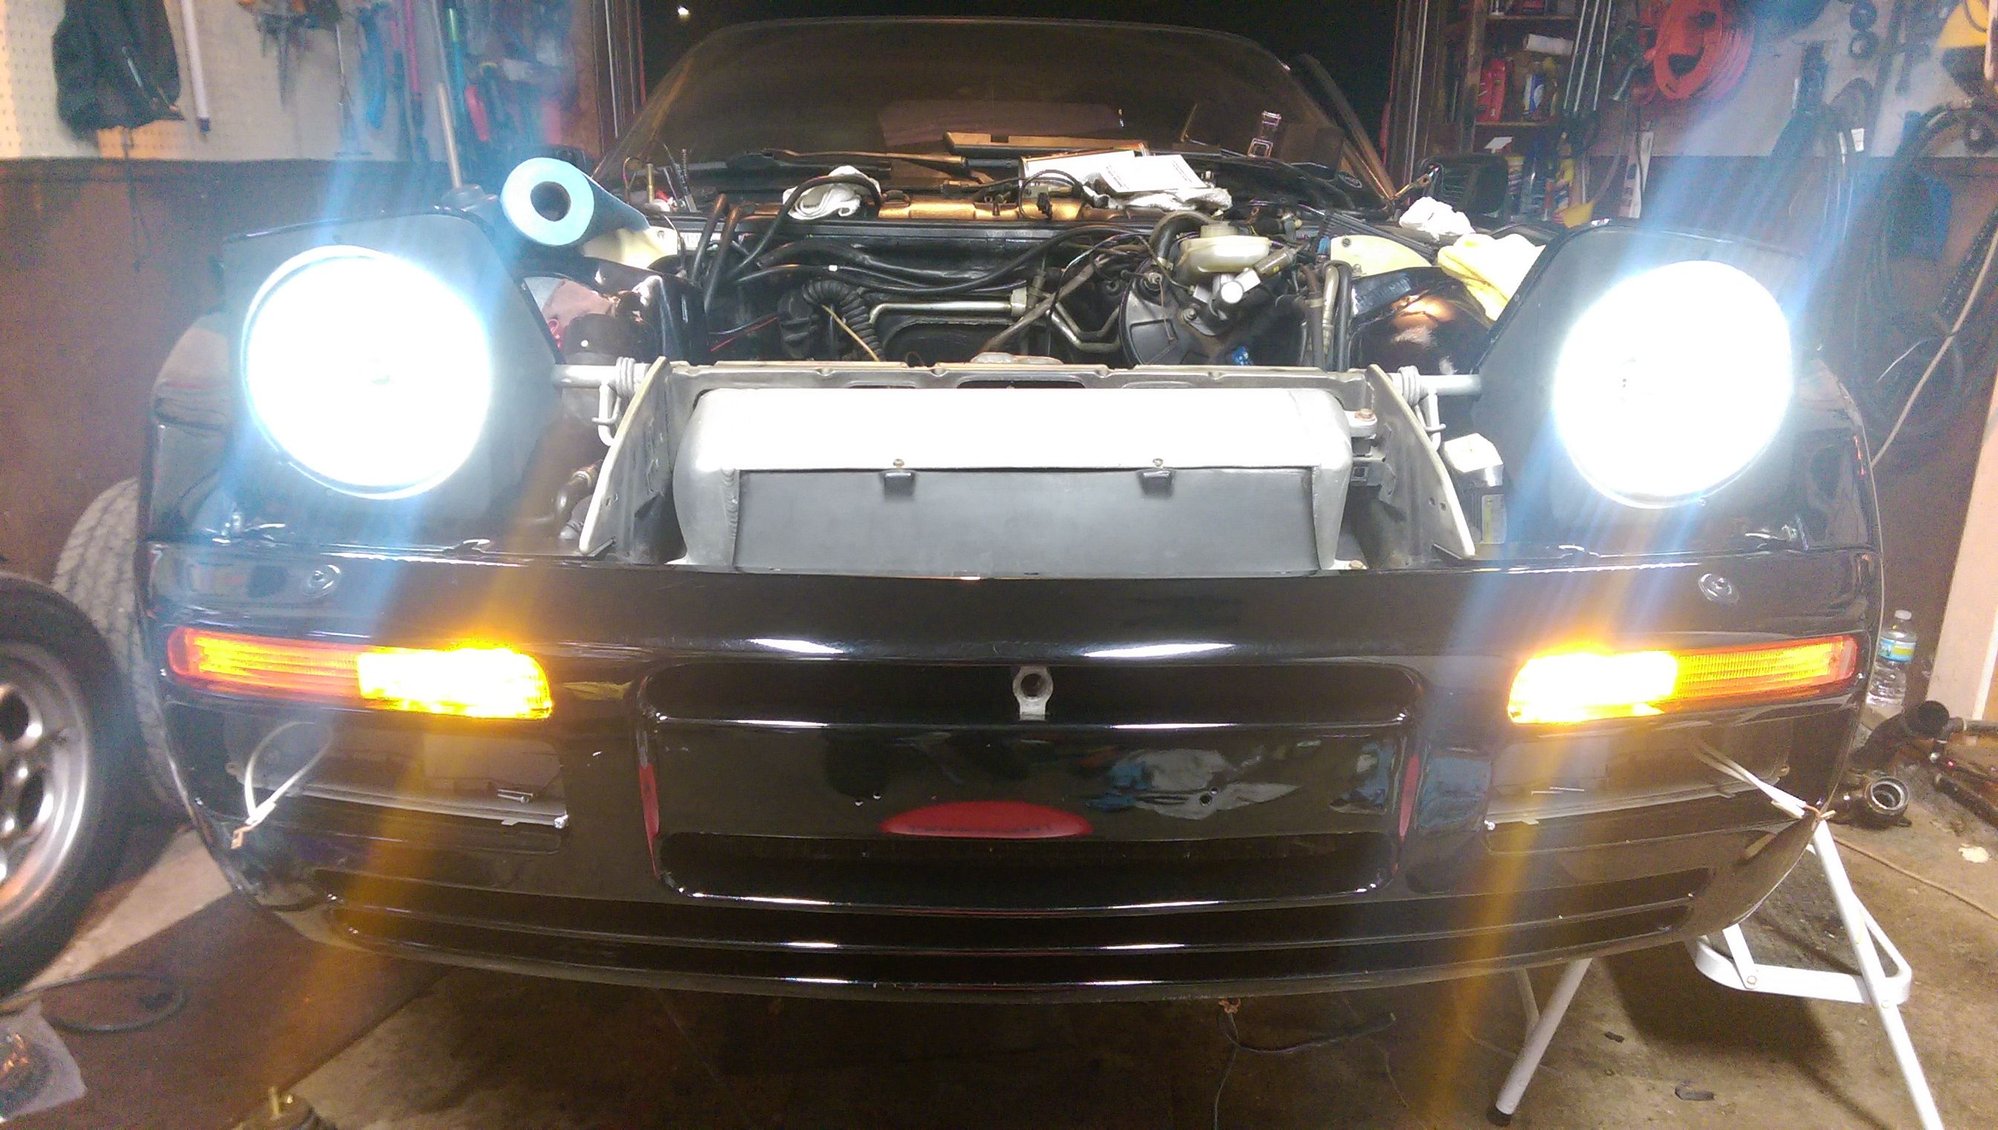
A few years back I had upgraded all my lighting to LEDs for the markers etc, and HID heads with the projector housings as not to blind anyone... but then unfortunately a deer thought my hood a good place to do some riverdance practice, thus many issues with the front lighting arose. So what better time to correct all of this right?!
First started with a full strip down, wiring retrieval and general evaluation of the situation.
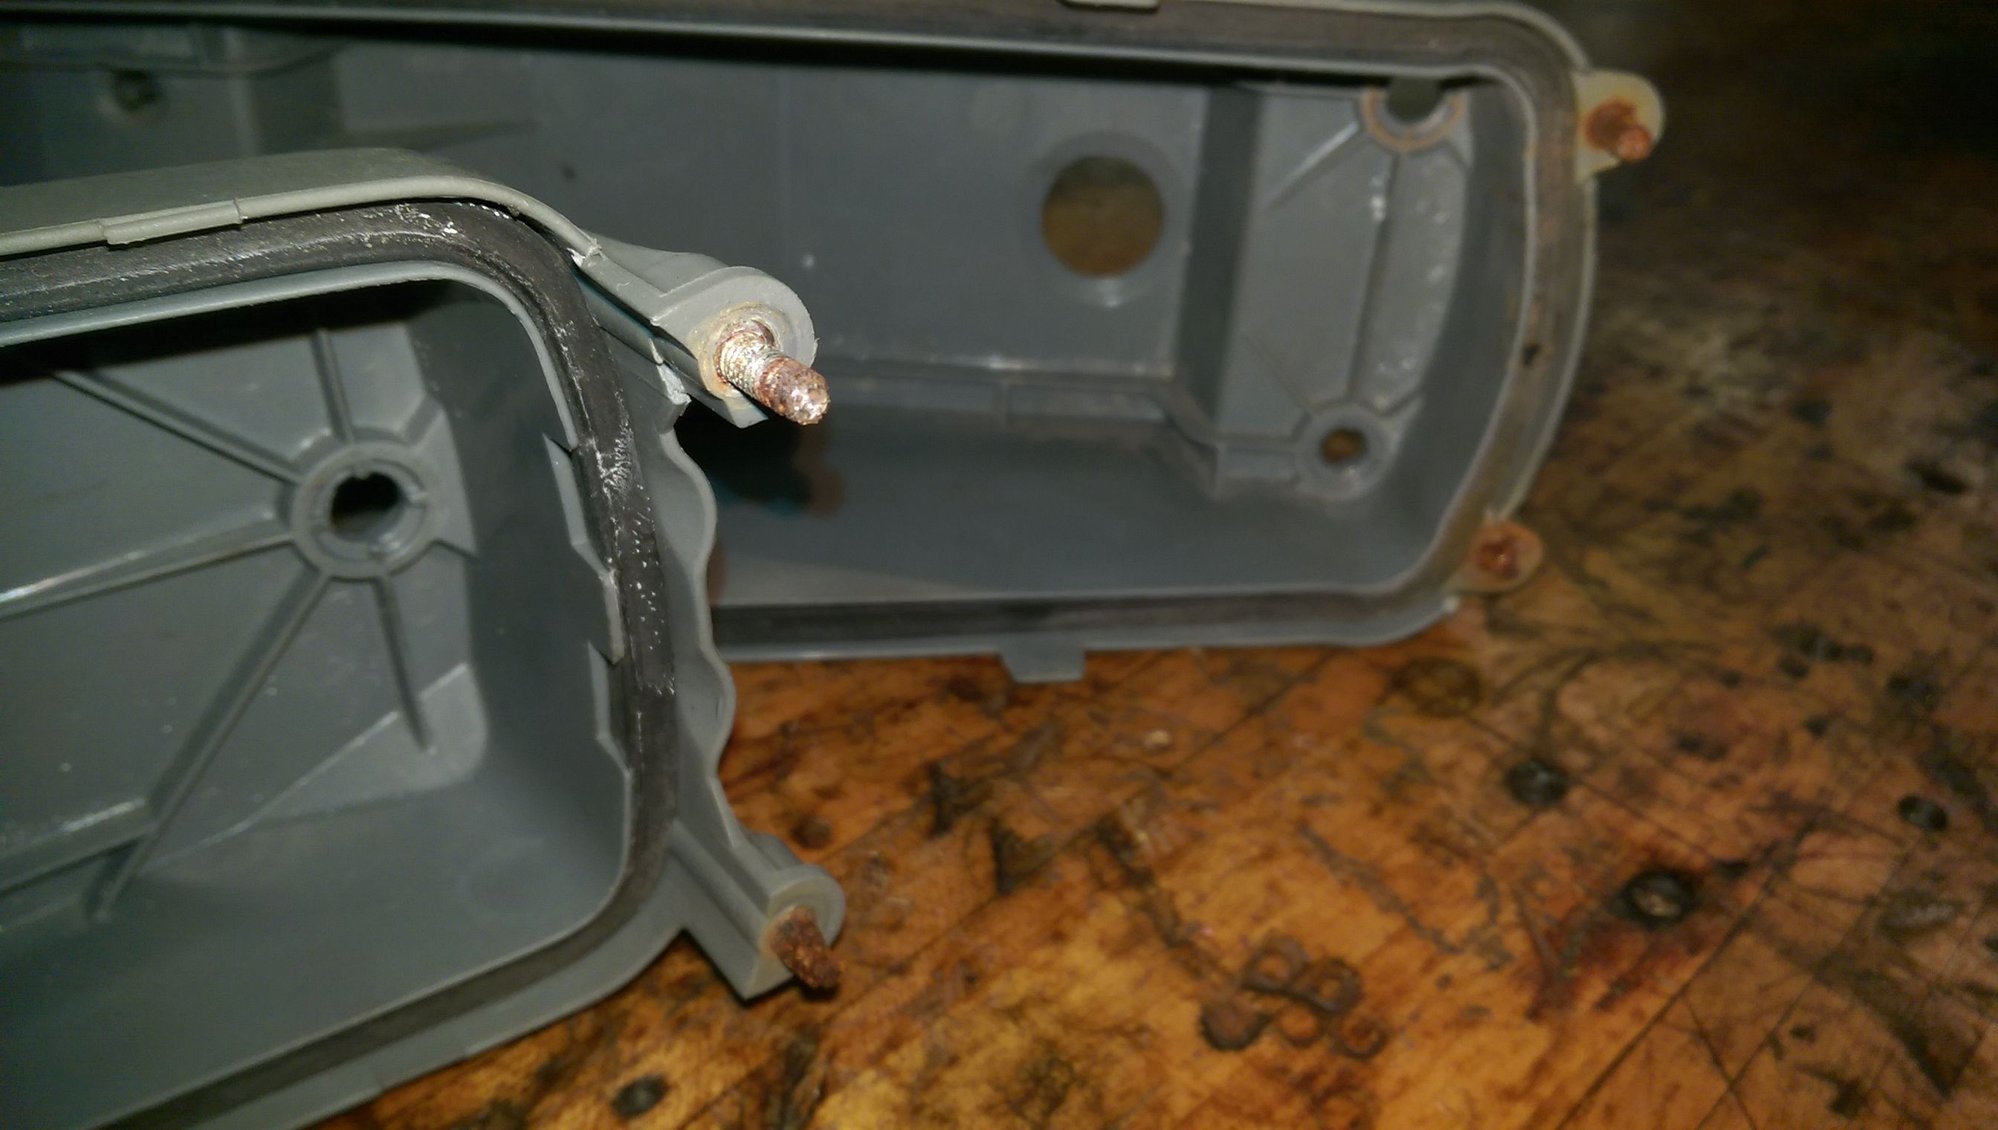
And, as for most of us unfortunately, my foglight buckets had some bad karma and snapped off a screw in every hole but two. And those two just completely broke off. After seeing the ridiculous price of replacements and no suitable used units, (and no way to re-mount my fogs now...) I decided it was time to try some DIY! And to an overall success I may add...
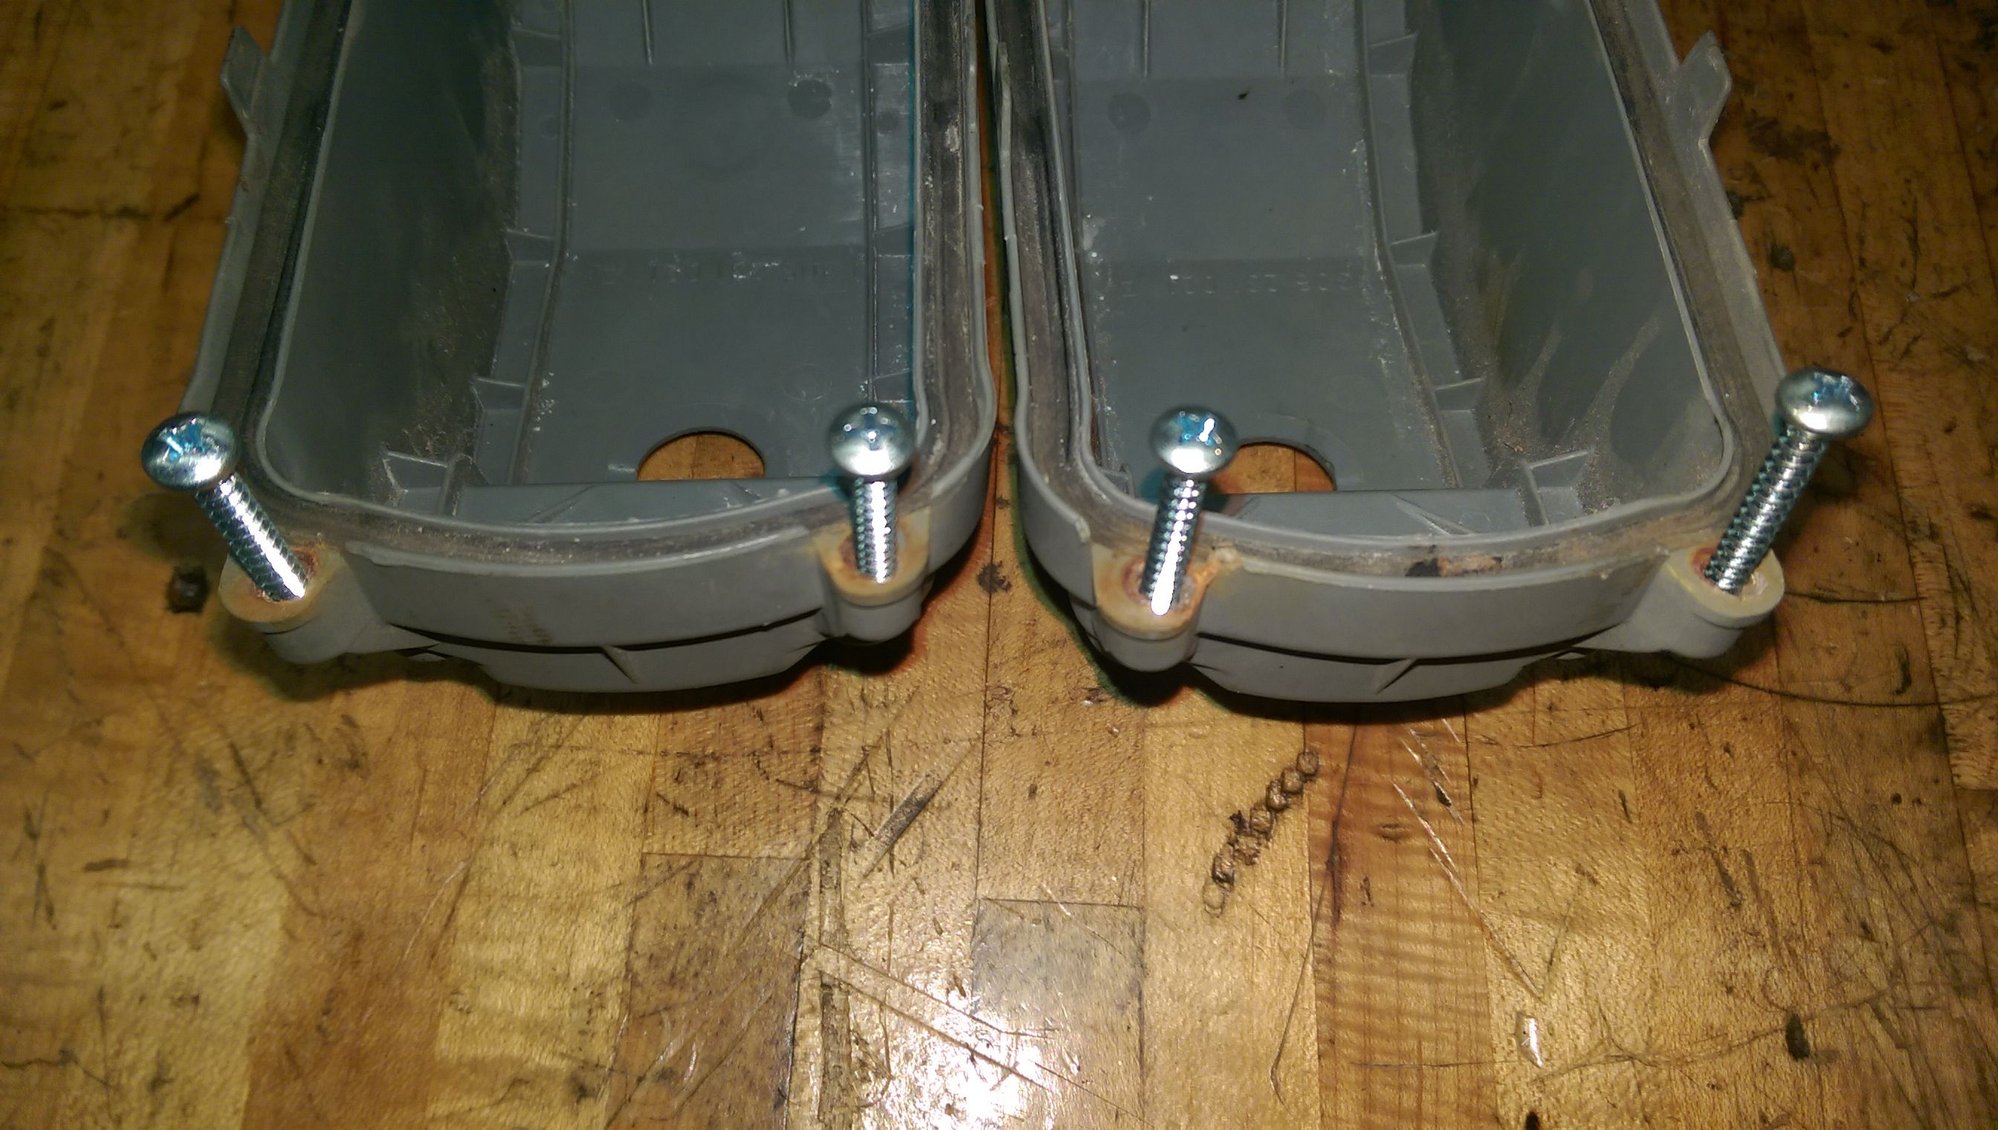
Began with this all too familiar situation, the solution came in the form of a 9/64" drill bit ran at about 750RPM in a drill press, and drilling at a very slight angle beside the little "keyserts" bosch used to secure the screws, it chewed the side of the inserts off, dismissing the frozen studs and revealing fresh plastic and a smooth side of the insert. This was perfect for a Stainless sheet metal screw to chew into to provide a great new mounting point. That and some Epoxy to stop the small cracks from expanding and I think I have a winner!
The lights will be in this week to complete the install, pics to follow. Progress is still progress however!
Just a surface and balancing. After reading up on all the negatives of lightened flywheels on DD cars, I figured I'd stay away from lightening it up to preserve my streetability. It sees some spirited driving and maybe an autocross and a DE in a year, nothing too treacherous.
Finally got enough of my S*** together today and got on the front end wiring. What a nightmare, after the cleanup it was realized the body shop did some "engineering" to try to get the bulbs to all work. well, after a few hours I have most of it sorted. Need to finish foglights tomorrow, just need put in. Didnt have enough battery to fire up the headlights (as I'm using a torched battery nursing along on a charger until the car gets put back together so I can get a fresh one), but had enough to fire up the LEDs and markers, and what a sight! For those interested, the lights are a chinese E-bay special that will be running a high-quality HID set. Cheap out on the housing, not the bulb.
However, for ebay specials these aren't too bad, actually VERY bright and I think will compliment my low beams wonderfully. The wiring on the LEDs is good, sealed up stuff. you do have to seal the silicone boot to the bulb, but hey, it's Ebay.
Hello all!
It has been a LOOONG time since my last update, I apologize, been busy elsewhere (and not to mention a LONG lead time with the powder coating...) but I have finally had some time to spend on the car and have made some progress for those who are watching.
Got all the rod bearings replaced, everything was in spectacular shape, (makes me consider backing the boost off to preserve it a little... or go til she blows and build a 3.0 ) but everything bolted up fantastically and was easy sailing, until I was torquing the oil pan and SNAP! the back corner decided to defect from the rest... ugh. lucky for Lart! Another is on the way and will hopefully be a great solution. I ordered a late pan for mine to get the scraper and windage tray piece.
Question for all those who have done it: how hard is it to hook up the oil level sensor in the late pan to the 86? or even possible? Figured it might be fun...
However the engine bay is polishing up nicely with so much time on my hands waiting for parts I'm getting kind of obsessed with shining s**t.
The bad so far;
Heater control valve shot, leaking on both vac and water side, so a new one is in order,
of course the oil pan ,
the clutch master cylinder reinforcement bracket was a PITA to fit in but its in now and looks great.
I may have more blood in the car than my body... knuckle busting ... never mind.
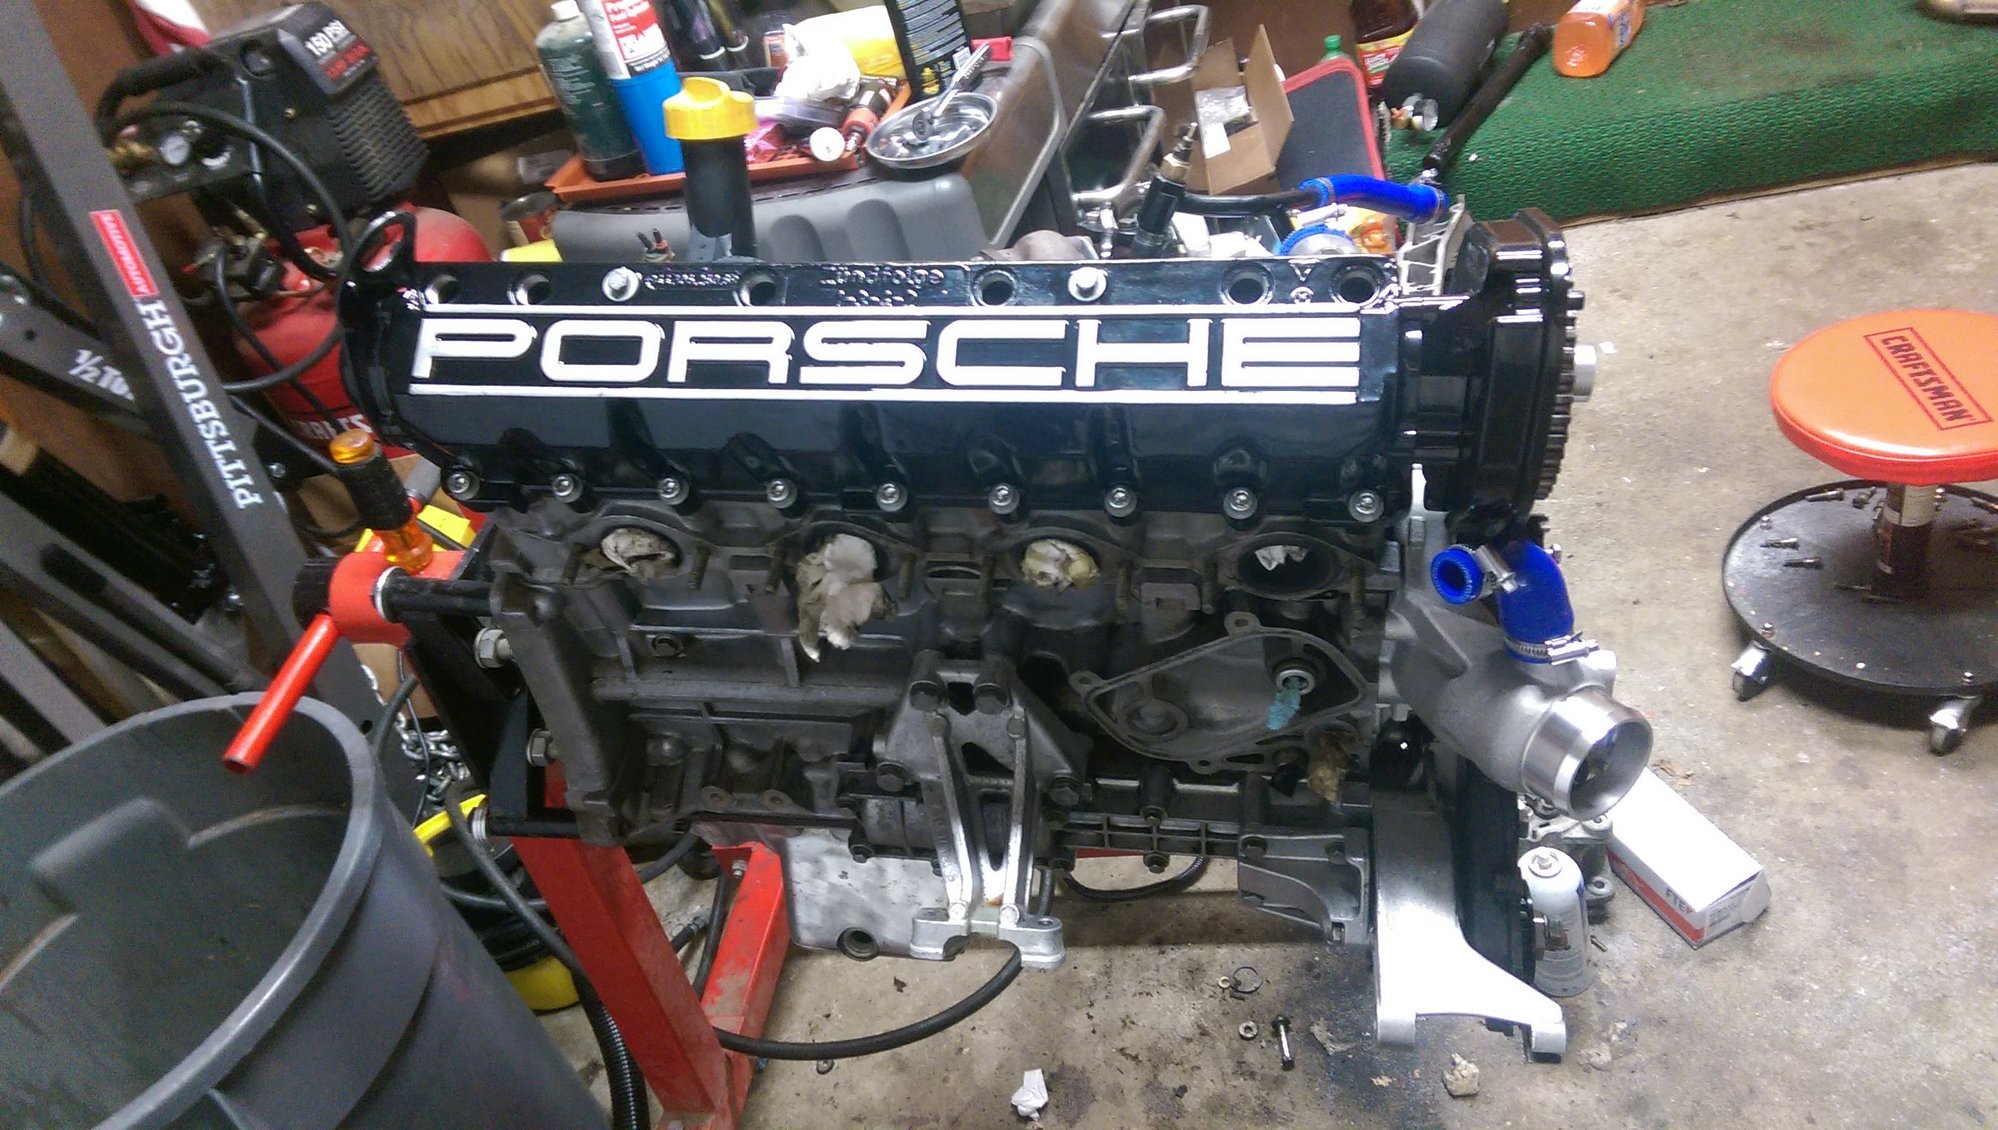
And now for the fun part, Pictures of the ever-better-looking 8V!
I should be a little more diligent about updating here as I will begin to make actual progress on this project finally now that the cam tower is back in.
Time to update again! I need to do this more often for those of you that are hanging on the edge of your seat... (oh, it's just me... )
So, much progress in the last few weeks, so I'm going to do a few "retro-updates"
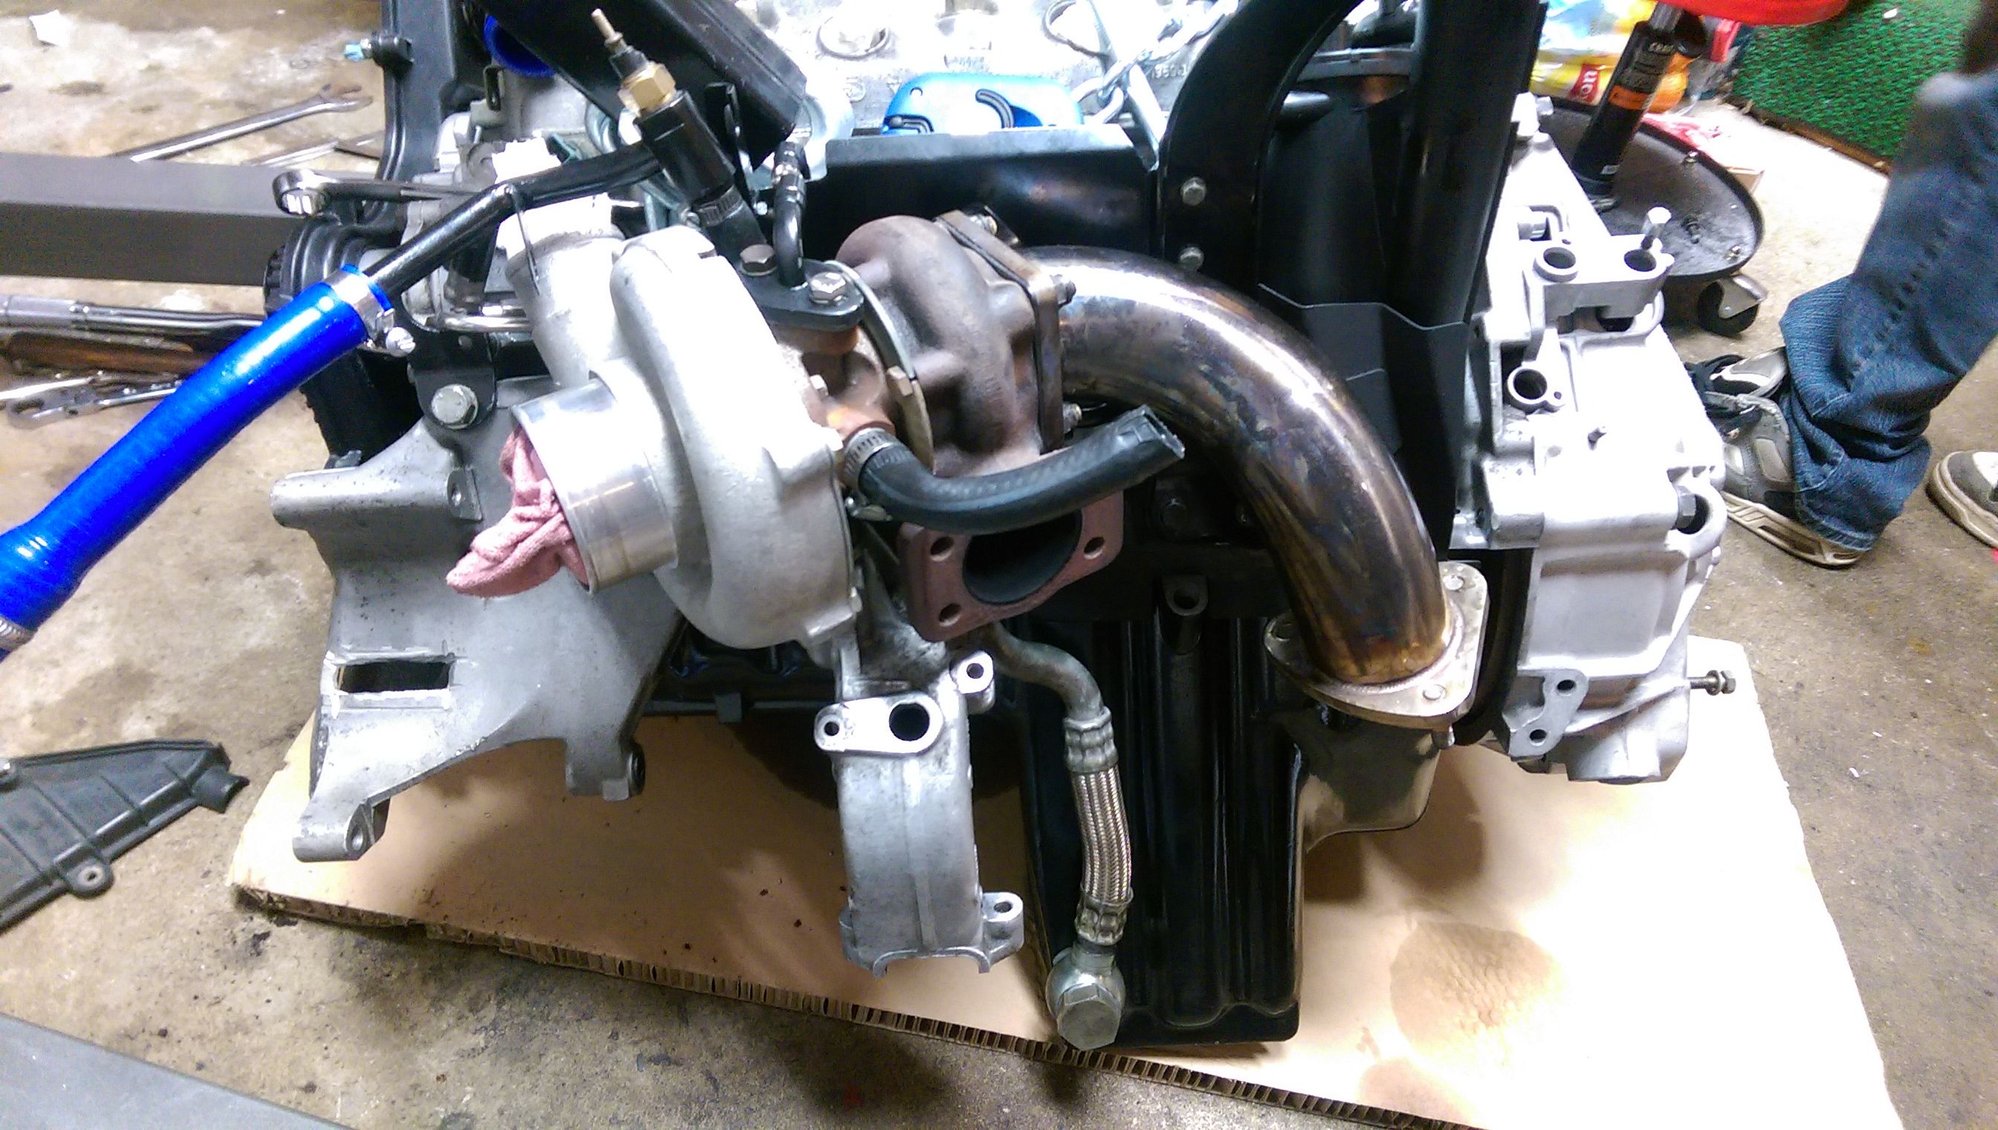
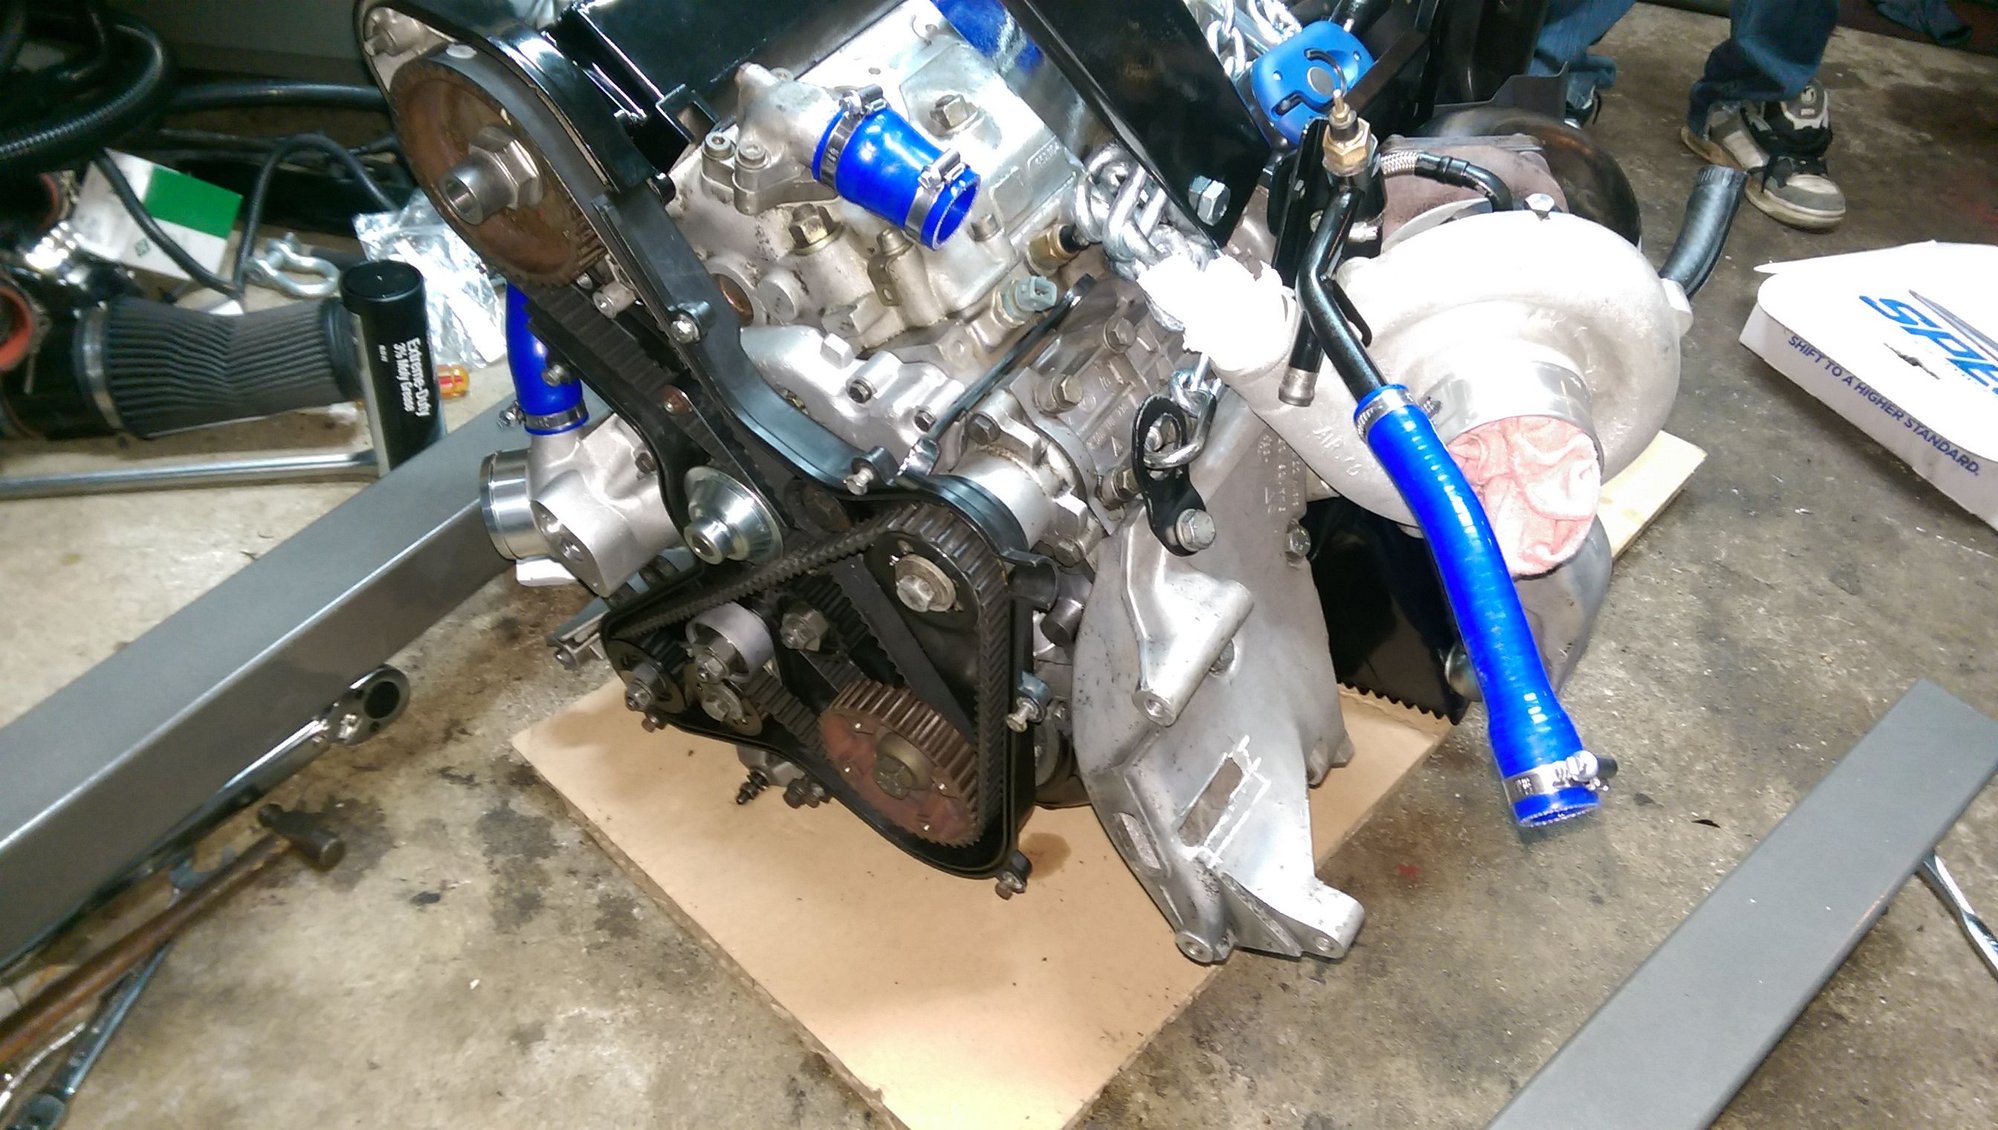
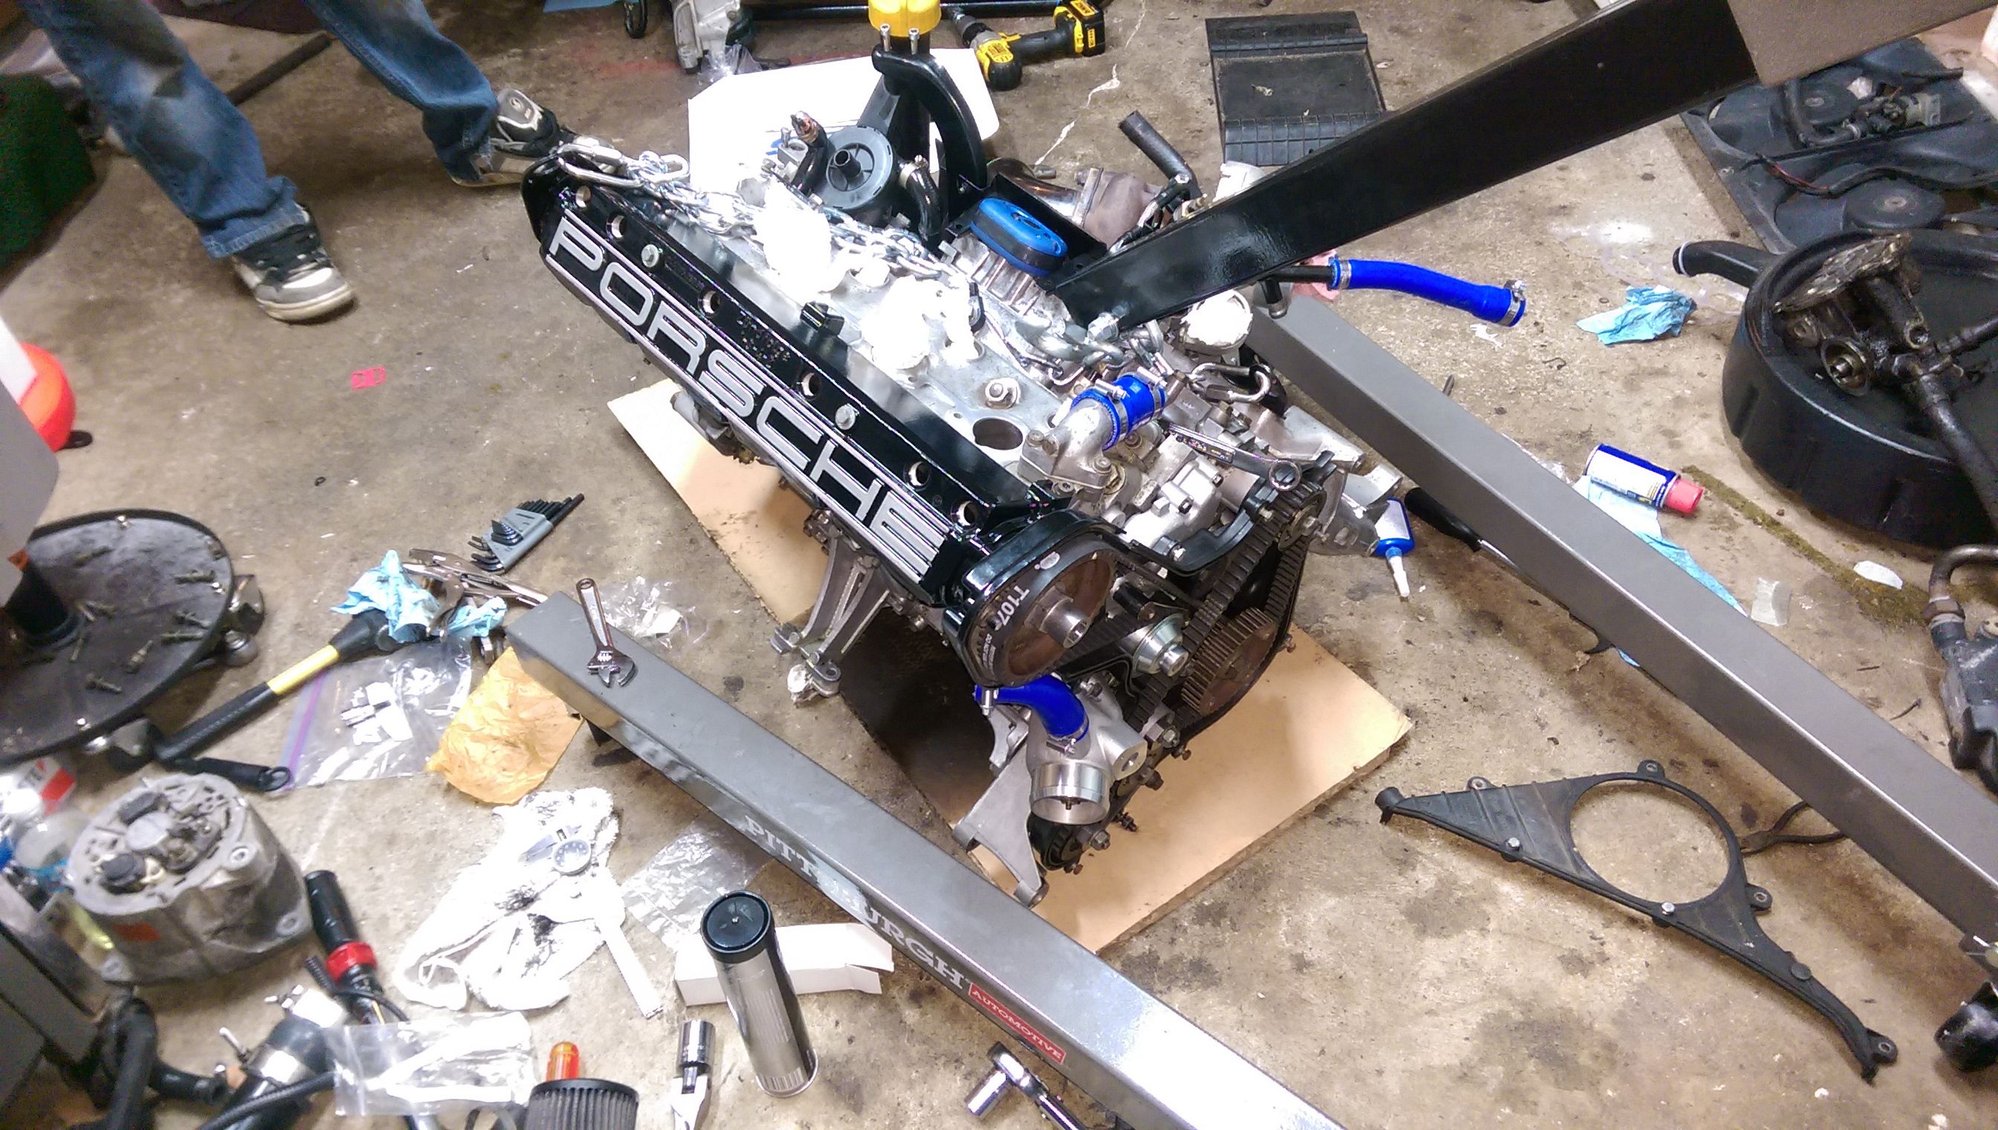
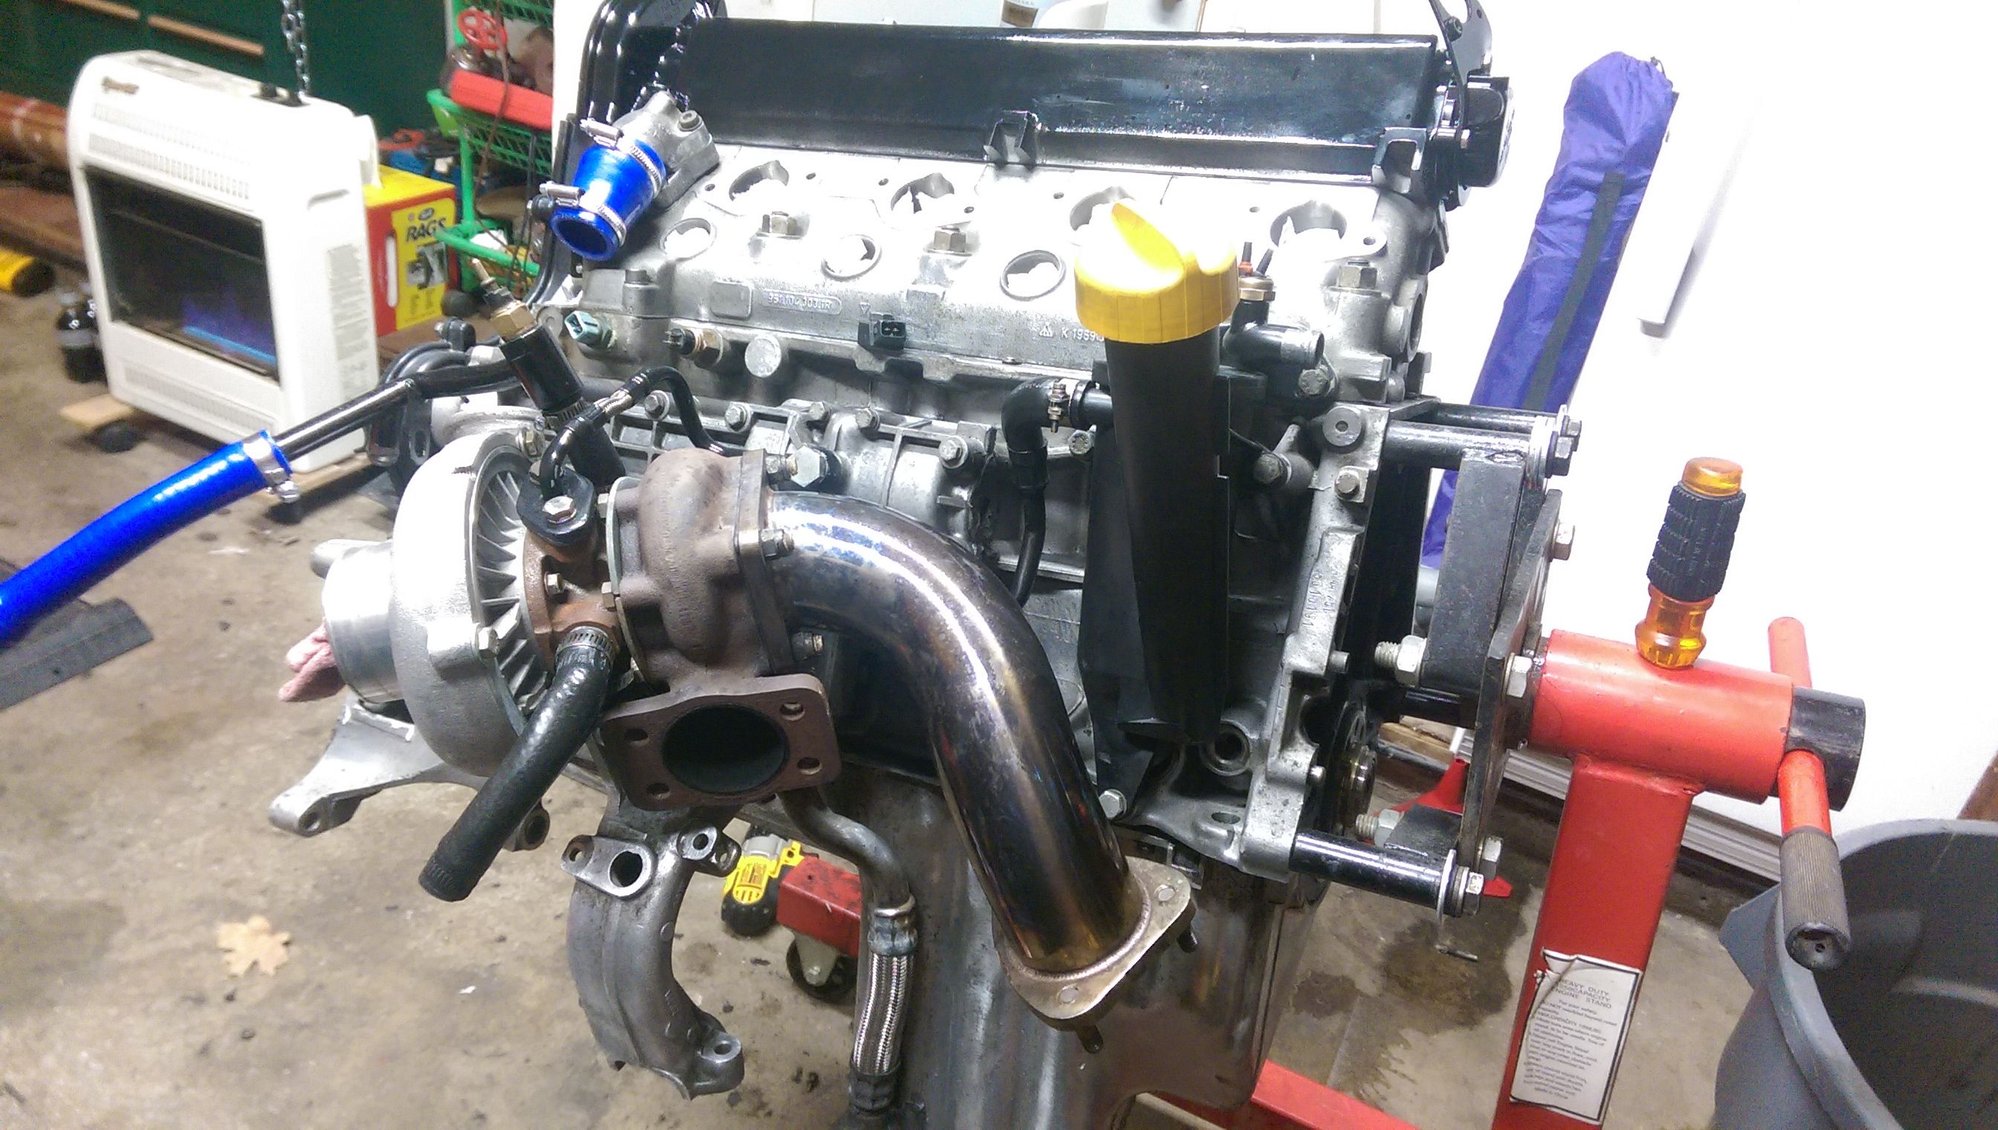
The engine is finally re-assembled, clutch and all! And oh how beautiful of a sight the clutch really is on the back of such a bristling powerplant
The timing went very well this time! Might have something to do with the engine being outside of the car... hmm... or the fact that I have the necessary tools this time (thanks arnnworx/paragon) still a long process but much less infuriating and back breaking than previous attempts.
Overall the powder coating and cleaning has went very well and the engine looks superb! its points like this in the project when you just have to stand back and smile. When it all begins to pay off. Well, pretty close anyway.
So, now to have the most fun yet! Putting it back in...

 03-14-2015, 09:36 PM


 ) it is finally cleaned up!
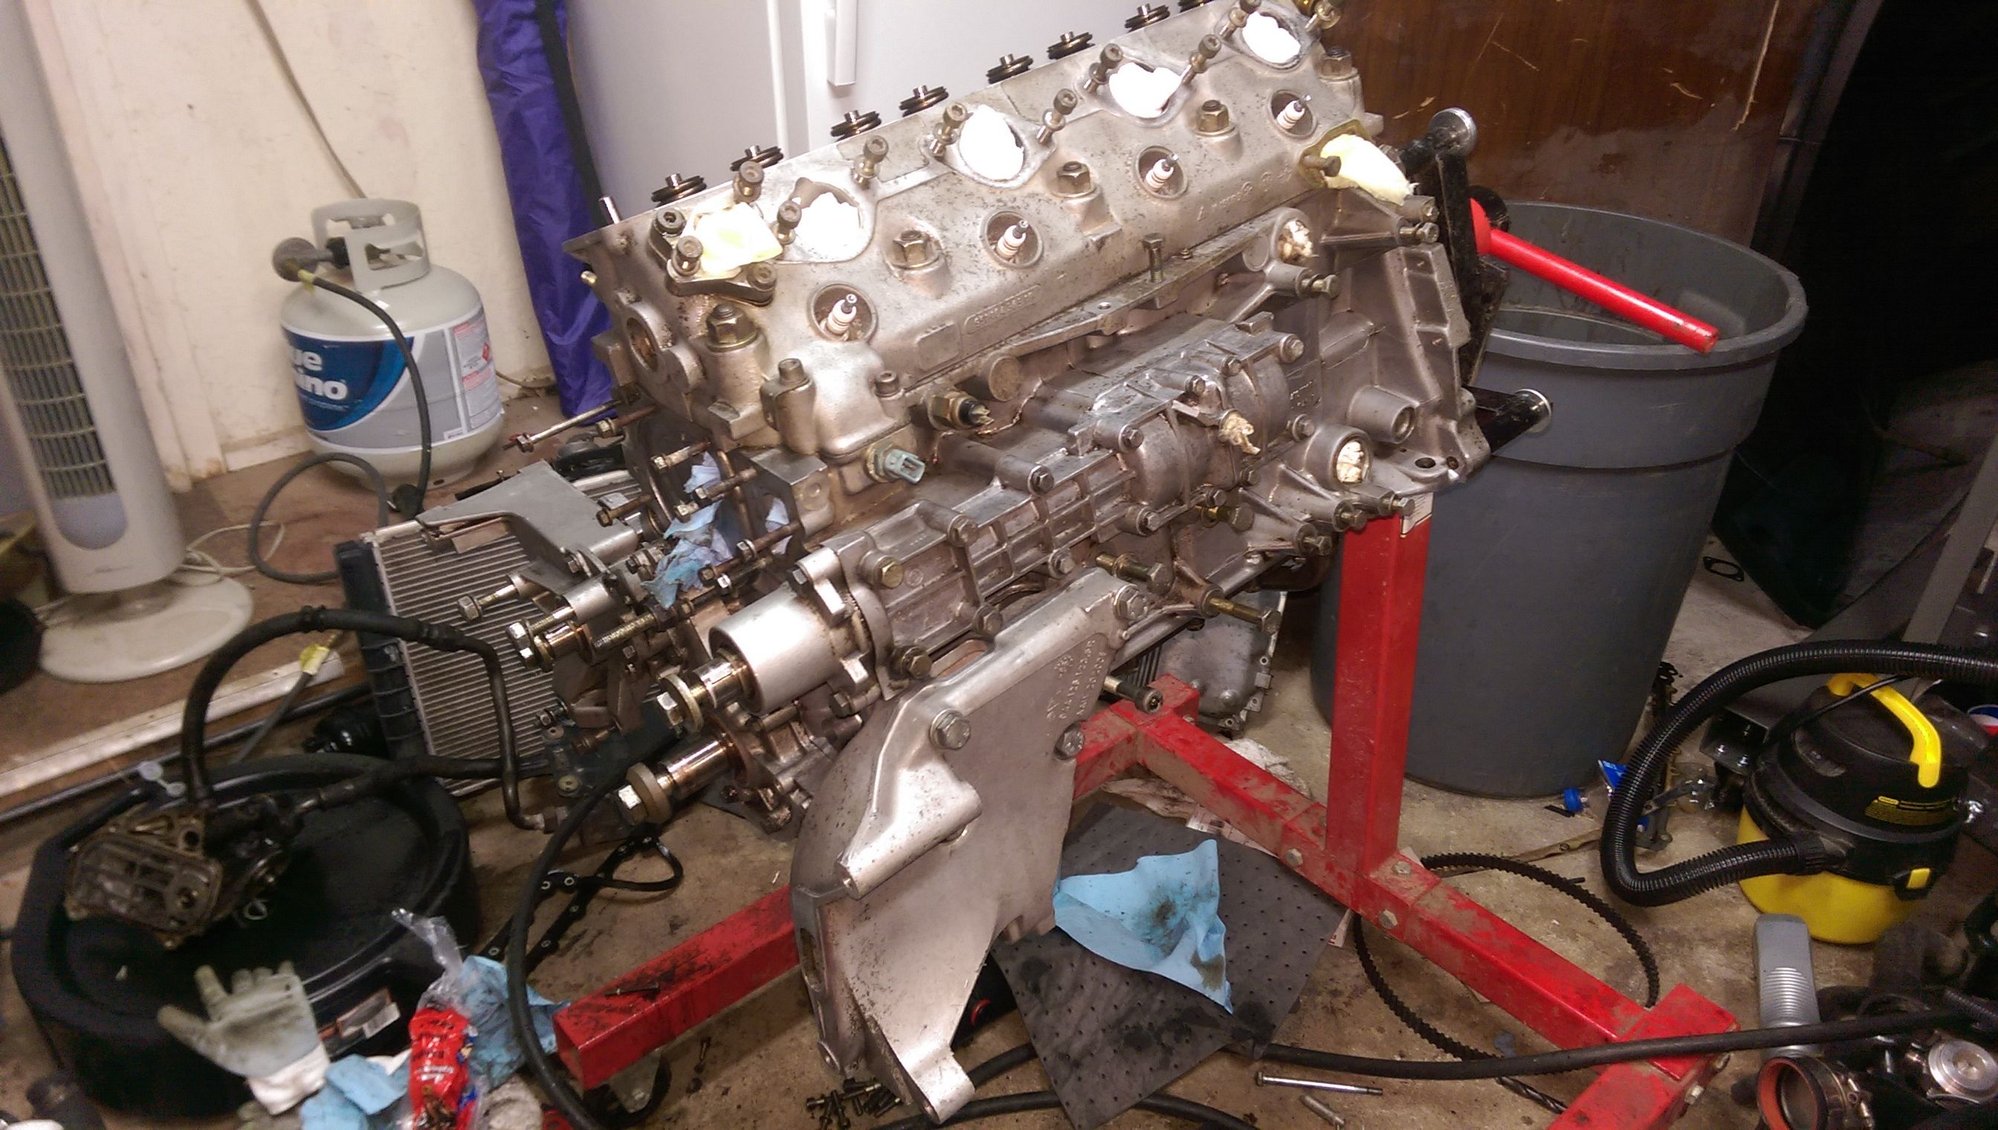


") )
)