

Redye project photos
 09-13-2009, 05:02 PM
#1
Rennlist Member
Thread Starter

Join Date: May 2005
Location: Mayflower, AR
Posts: 1,075
Likes: 0
Received 0 Likes
on
0 Posts
Well, since I have been very limited as to what i could do while recovering from surgery I decided to re-dye the seats and carpet in my 951 while the engine is out, I am also preparing for 968 door panels that are beige, to be burgundy along with the carpet.
Right now the 968 panels are 2 tone, black up top, and beige below. Should I leave the black as is and have two tone door panels? I am going to switch to a black 930S steering wheel and may switch to a black shift **** so that everything flows.
I have used all leatherique products, Rejuvenator oil, Prestine Clean, Prepping agent, Custom dyes, and crack filler for this project. I also used some laquor thinner to help get the old dye off since it was not water based dye.
I can really work on the engine yet, hopefully very soon. Anyway, I thought I would share some photos of before and after.
Before shots, one of the seats has been treated with Rejuvenator oil.
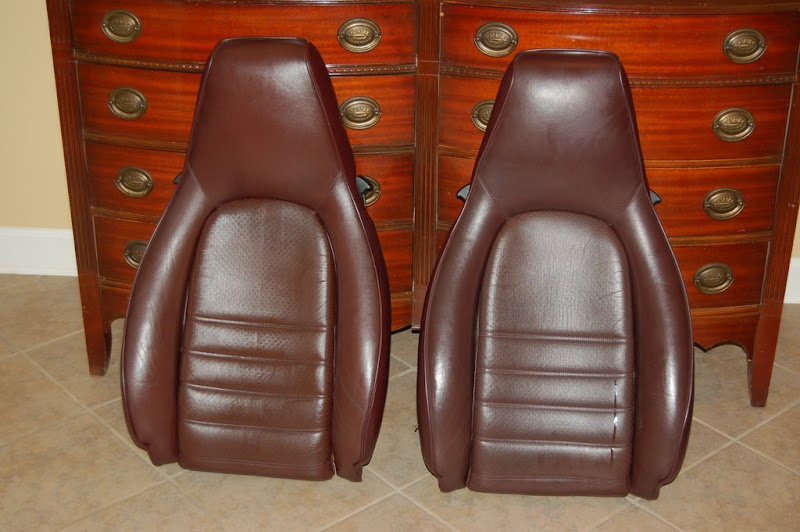
Before, Seat on right treated with Rejuvenator Oil, made a huge difference in leather feel and pliability. But as you can tell from the swatches, years of sun and use have faded them.
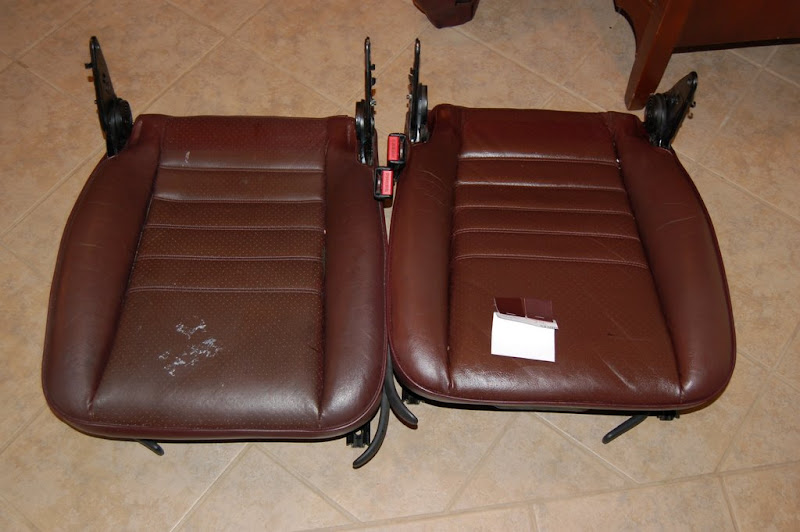
Photo of seat being prepared for re-dye.

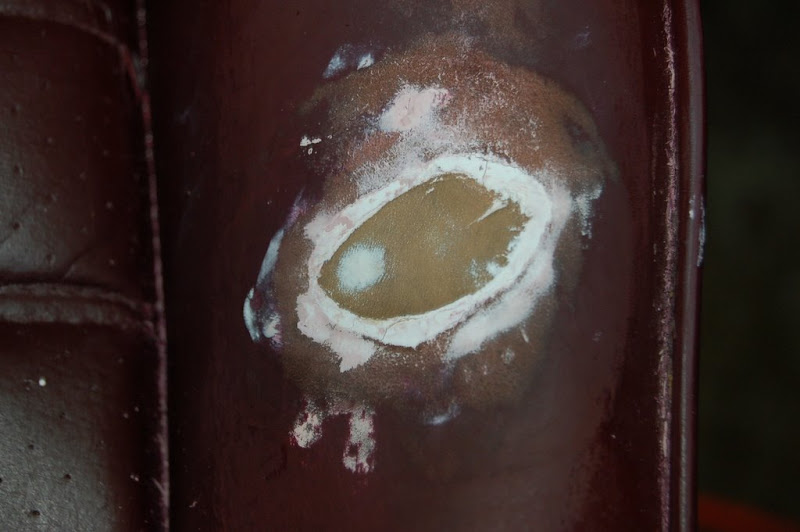
I uncovered some places where the leather was very thin, and was through the top grain, so I made repairs using donor leather from another Porsche Seat.
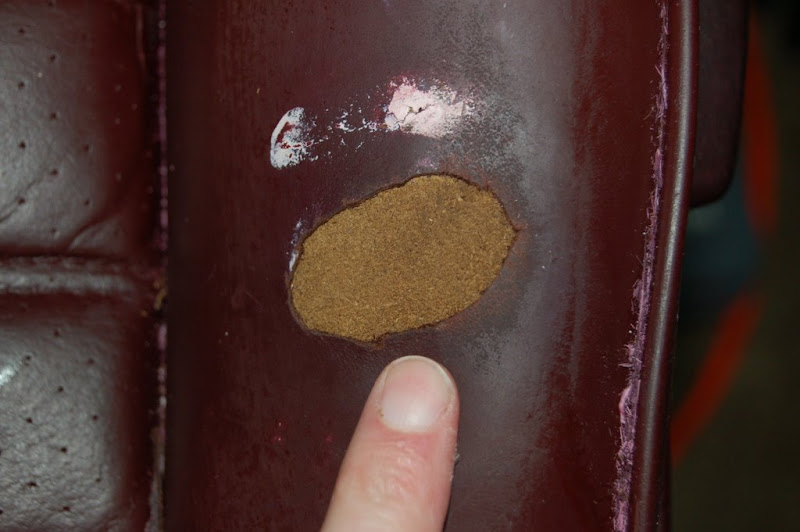
I used the leather, cutting out a section about 1" wider than the hole and put it back to back and used leather/fabric glue for the repair. This shows the size that is under the repair.
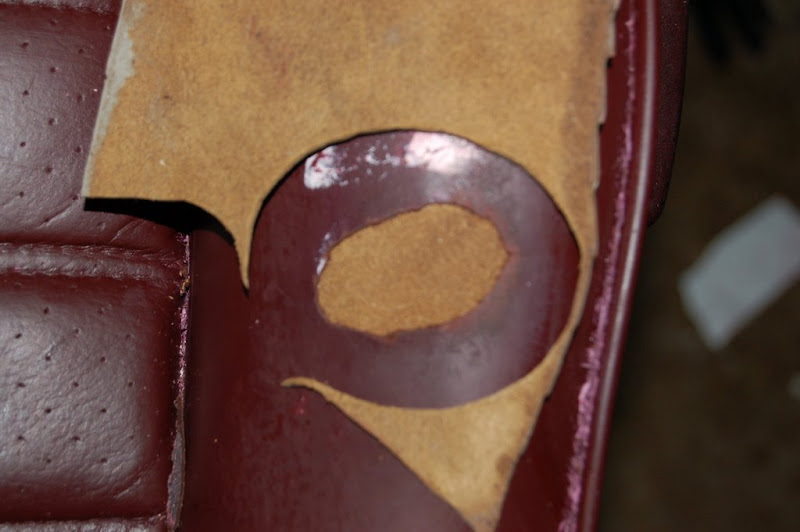
I then used paper and a sharpie to make a template to fit the hole, and transfered it to the leather donor piece
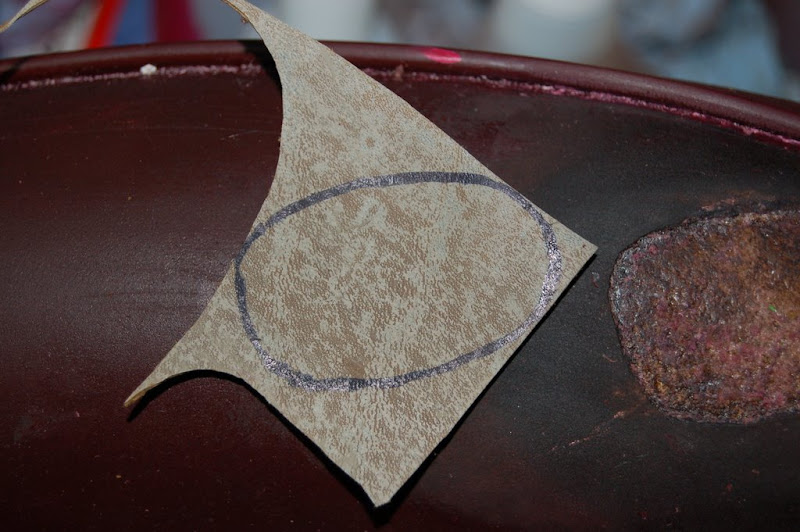
Here is the trimmed repair piece in place.

After the glue and crack filler cured, I sanded it down to a smooth finish for re-dye.
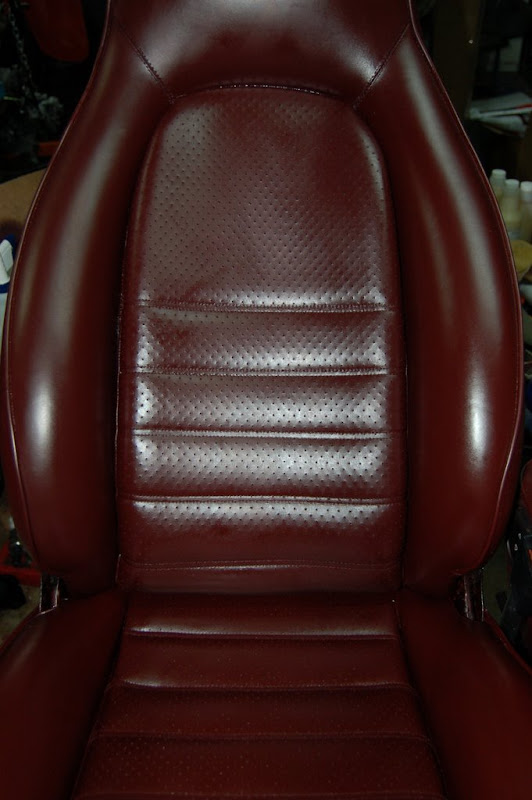
This is a finished dyed seat, dye cured and Rejuvenator oil applied for 24 hours. The leather is butter soft.
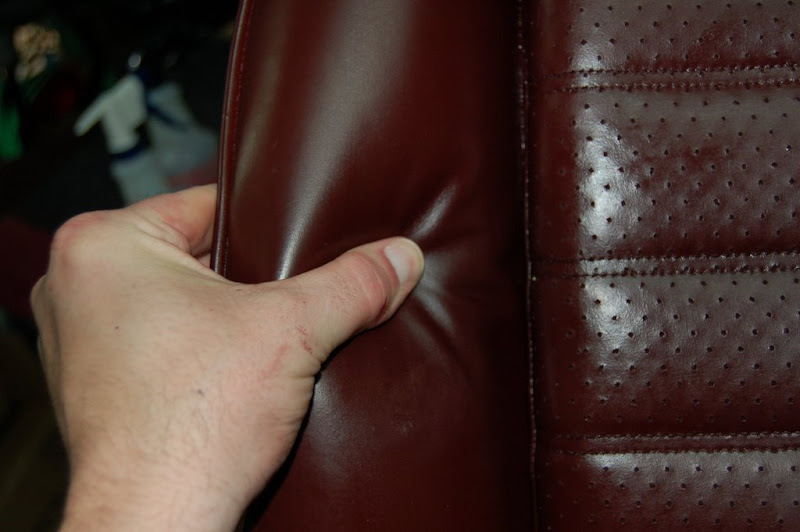
Since this was a "busy" project. I took the time to clean out every hole in the perforated leather. This made a huge improvement on the finished product.
Wish there was some way to allow you to feel the leather after this project and using Leatherique Rejuvenator oil. The 25 Year old leather is as soft and pliable as any new leather I have seen.
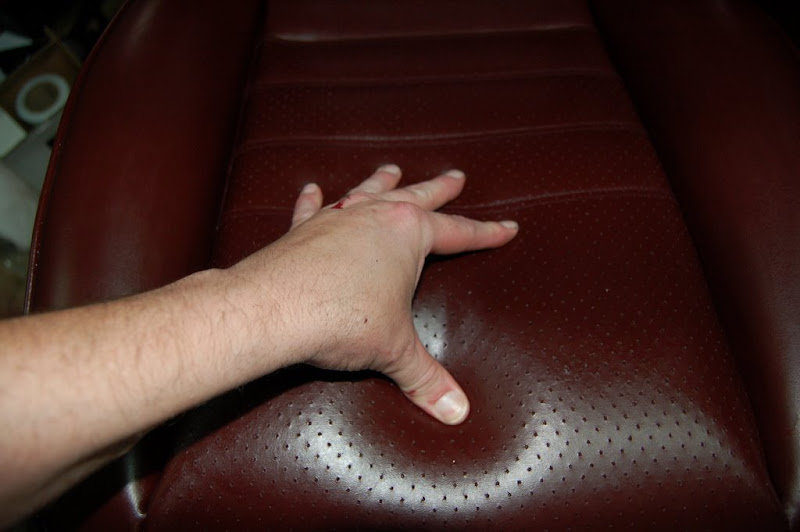
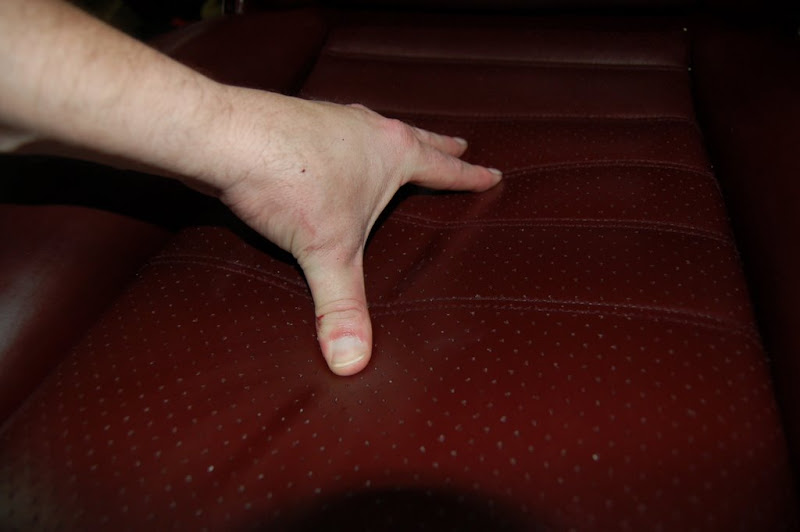
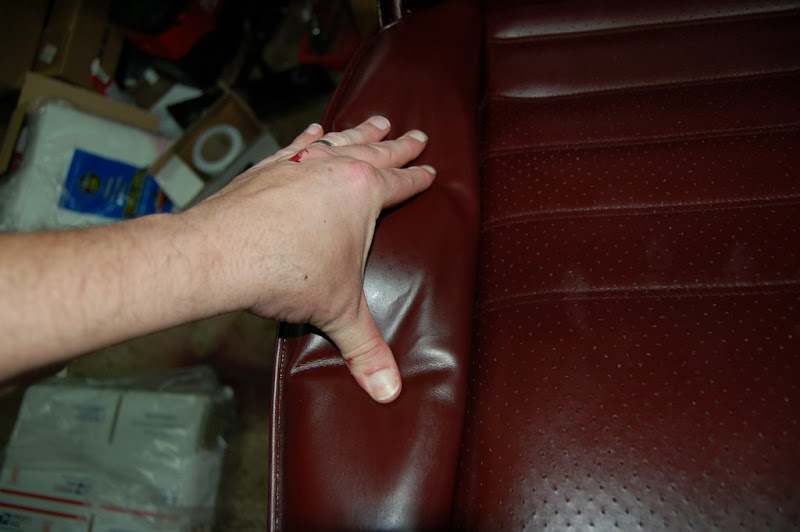
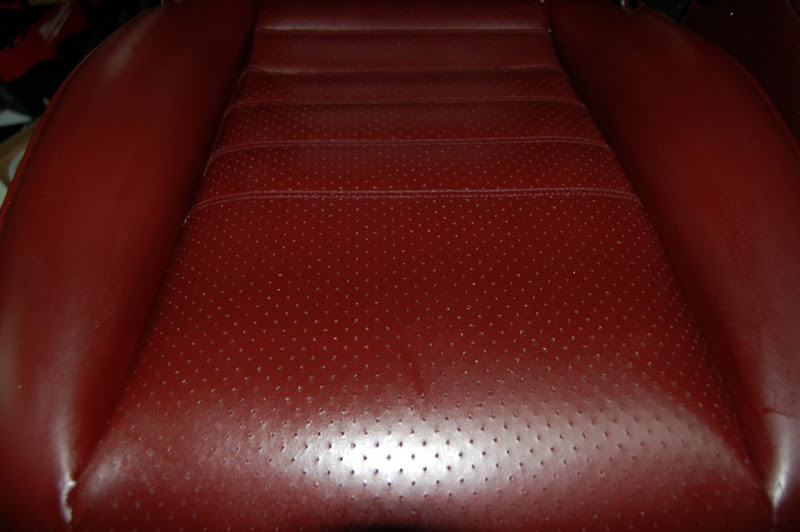
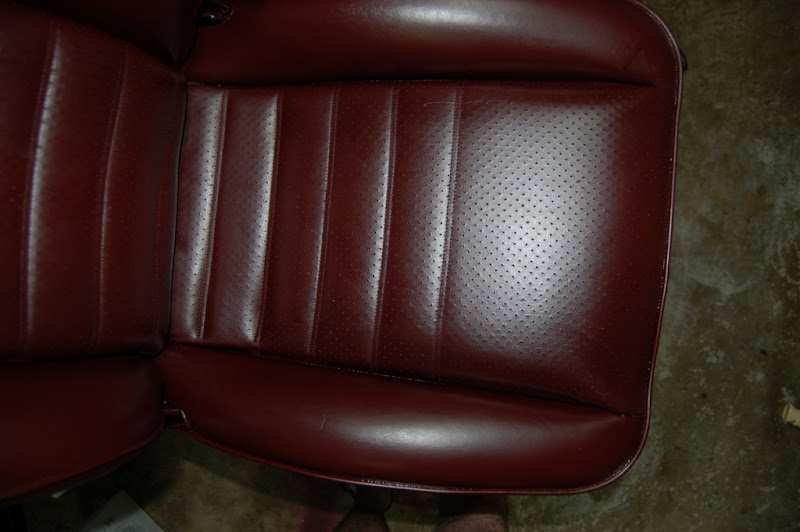
Photo of the complete re-dyed seat
Finally my 968 carpeted door panel redyed. One is the base read carpet dye, a swatch of the factory burgundy carpet and finally a carpet dye I custom matched to the factory carpet. I still need to add a little red to get a perfect match, but in regular light without the flash, this is a 99.9% match to the orginal.

If anyone has questions about the project, repairs or products I used, please let me know.
Right now the 968 panels are 2 tone, black up top, and beige below. Should I leave the black as is and have two tone door panels? I am going to switch to a black 930S steering wheel and may switch to a black shift **** so that everything flows.
I have used all leatherique products, Rejuvenator oil, Prestine Clean, Prepping agent, Custom dyes, and crack filler for this project. I also used some laquor thinner to help get the old dye off since it was not water based dye.
I can really work on the engine yet, hopefully very soon. Anyway, I thought I would share some photos of before and after.
Before shots, one of the seats has been treated with Rejuvenator oil.
Before, Seat on right treated with Rejuvenator Oil, made a huge difference in leather feel and pliability. But as you can tell from the swatches, years of sun and use have faded them.
Photo of seat being prepared for re-dye.
I uncovered some places where the leather was very thin, and was through the top grain, so I made repairs using donor leather from another Porsche Seat.
I used the leather, cutting out a section about 1" wider than the hole and put it back to back and used leather/fabric glue for the repair. This shows the size that is under the repair.
I then used paper and a sharpie to make a template to fit the hole, and transfered it to the leather donor piece
Here is the trimmed repair piece in place.
After the glue and crack filler cured, I sanded it down to a smooth finish for re-dye.
This is a finished dyed seat, dye cured and Rejuvenator oil applied for 24 hours. The leather is butter soft.
Since this was a "busy" project. I took the time to clean out every hole in the perforated leather. This made a huge improvement on the finished product.
Wish there was some way to allow you to feel the leather after this project and using Leatherique Rejuvenator oil. The 25 Year old leather is as soft and pliable as any new leather I have seen.
Photo of the complete re-dyed seat
Finally my 968 carpeted door panel redyed. One is the base read carpet dye, a swatch of the factory burgundy carpet and finally a carpet dye I custom matched to the factory carpet. I still need to add a little red to get a perfect match, but in regular light without the flash, this is a 99.9% match to the orginal.
If anyone has questions about the project, repairs or products I used, please let me know.
 09-13-2009, 05:34 PM
#2
Addict
Rennlist Member
Rennlist Member
Wow, looks terrific! I've perused the Leathertique sites and I am amazed at some of the examples.
How did you clean out the "holes" and was this during/after the dye process?
How did you clean out the "holes" and was this during/after the dye process?