
Phase two of my project - turbo swap pictorial
 12-15-2008, 07:21 PM
#1
Nordschleife Master
Thread Starter
If your in the tri-state area, im sure you know the past two days have been beautiful out. 45 but a bit chilly yesterday, 55 and partly cloudy today.. perfect weather. Anyhow after about 4.5 hours i managed to finally wrestle the turbo out.
Here is just a little pictorial .
.
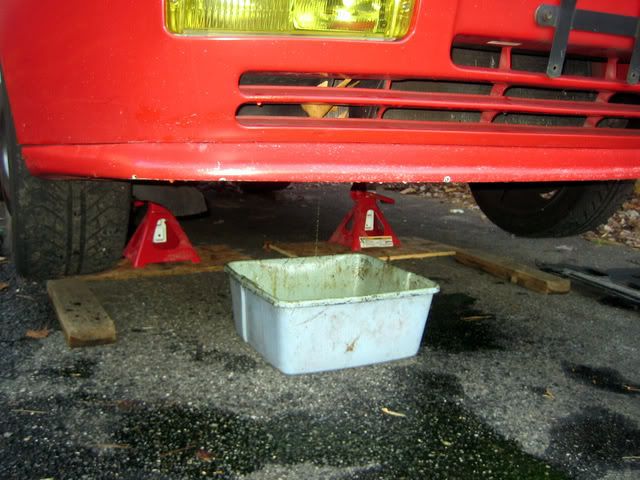
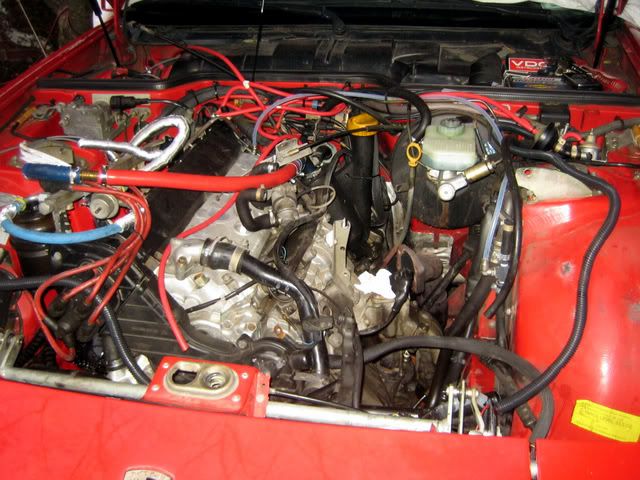
I started yesterday with just getting the car on jack stands (a project in itself cause the car is so freaken low).
Its not a good day of working on your car until you get coolant all over your arm..
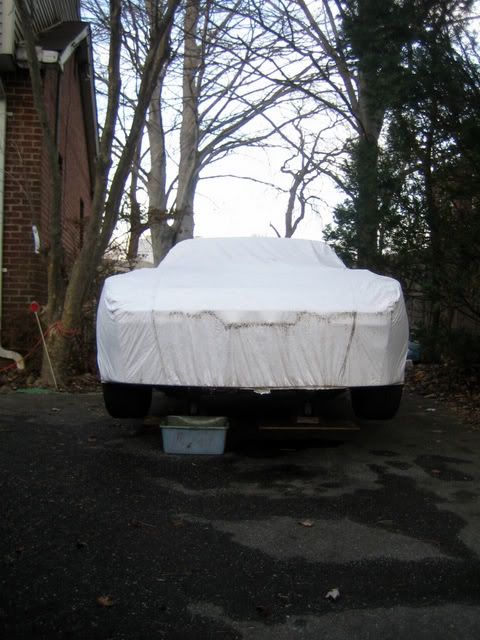
Called it a day early..
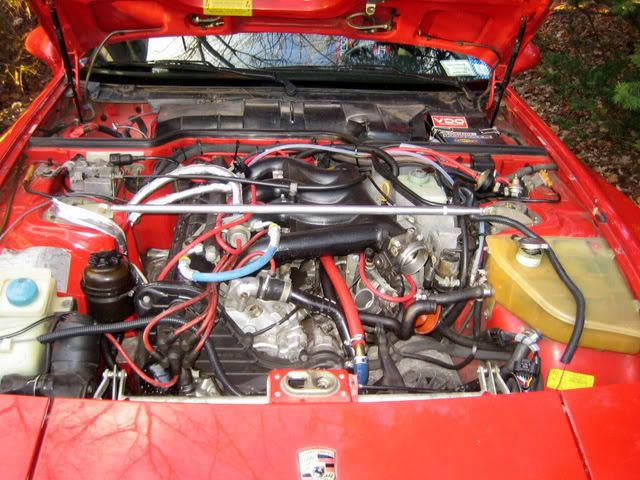
After another hour and a half, i had the intake manifold off the car. I have removed the intake manifold on a 944 series car a dozen or so times now and i still always forget to disconnect the speed/reference sensor bracket. It never fails..
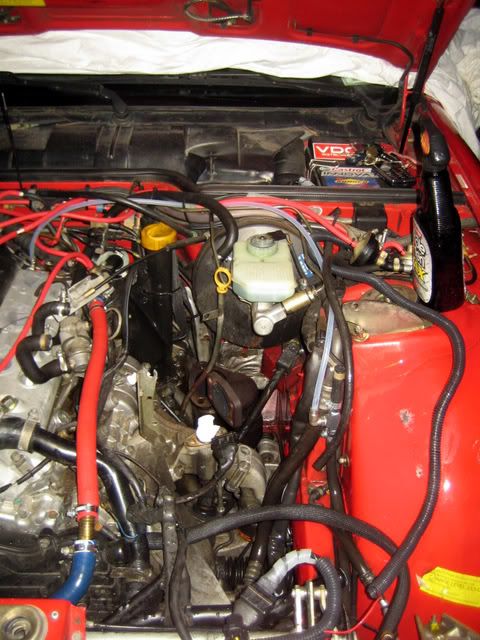
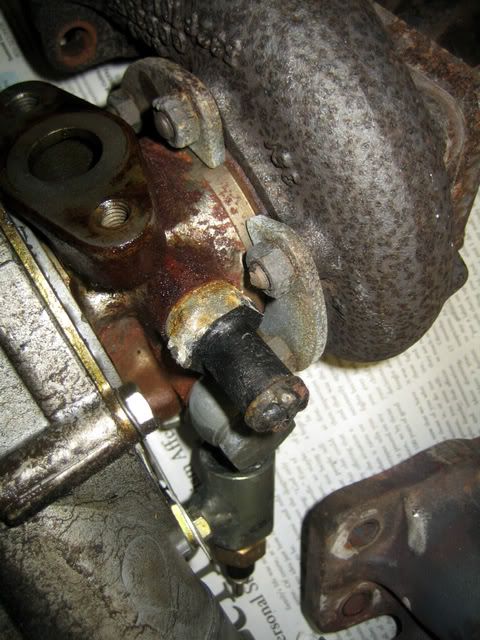
And a nice straight (figuratively speaking) at the turbo..
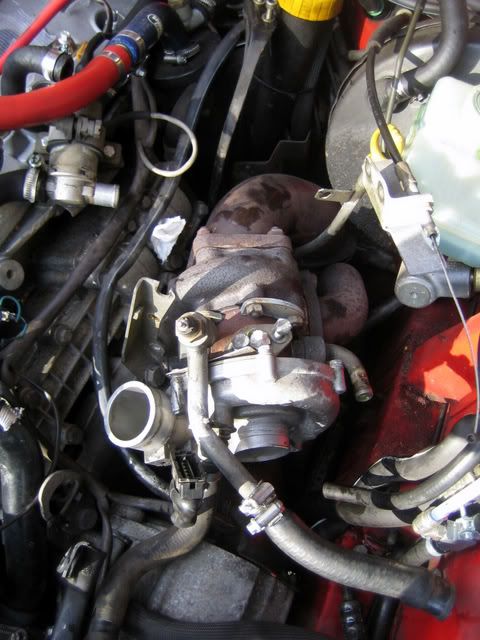
I also removed the coolant expansion tank (replacing with a aluminum one) and took the brake booster heat shield out aswell. A few of the turbo replacement walkthroughs say removing the heatshield is optional, but frankly i cannot see how you would be able to get a clear shot at the crossover pipe flange bolts without having it out. Besides, its only 4 nuts to get it out and it makes life about a million times easier. A no brainer if you ask me. And with that, a pretty straight shot at the turbo now.
Disconnecting the turbo is pretty straight forward. Remove the top oil feed line from both the turbo and the balance shaft cover. Then remove all the hoses for the water connections. Disconnect the 3 bolt flange at the downpipe to midpipe connection and also disconnect the crossover flange (inlet of turbo). The 3-bolt flange to midpipe may seem like a tight fit, but they are actually very easy to get too with a long enough extension and a wobble joint (flex joint). The nightmare however is the crossover flange bolts. There are not pictures of this because i was having such a wonderful time trying to get them out. Truthfully, 3 of them are easy to get right from the top, a stubby wrench helps emmensley at holding the backside nut. The real downer is the lower rear bolt due to very tight spaces. I had to remove the O2 sensor to get a good shot at it and it still took about 15 minutes to get that bolt out from under the car. Not an impossible job, just a real pain in the ***.
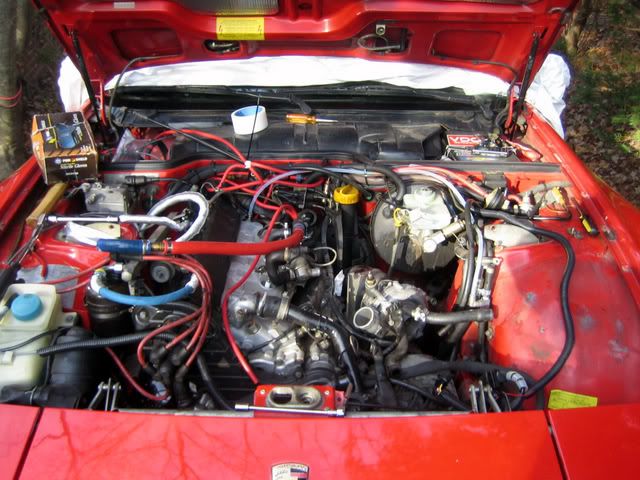
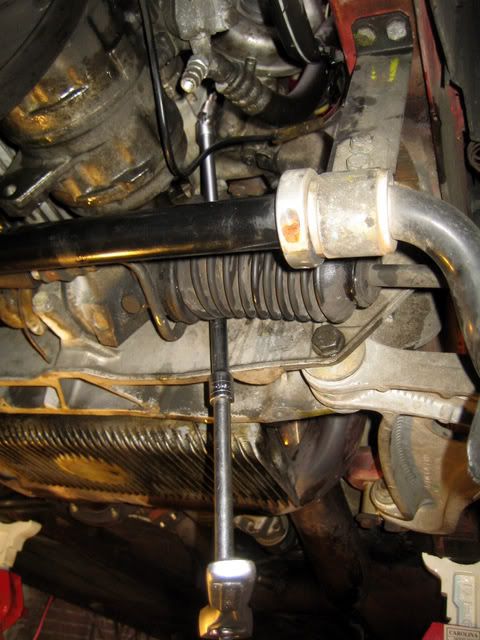
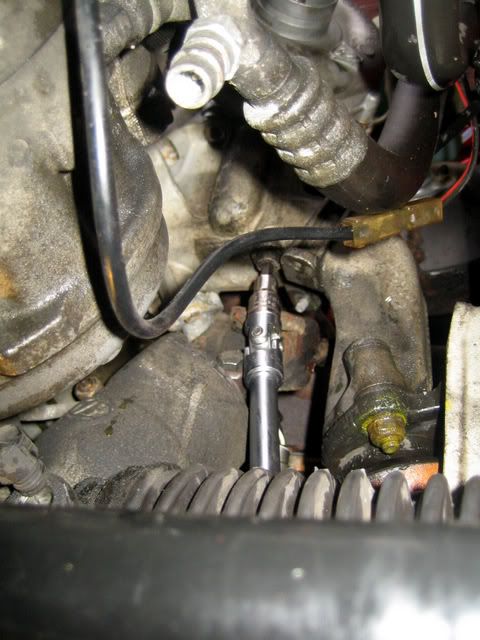
Now with everything disconnected from the turbo, it was time to take out those imfamous turbo mount bolts. I read alot about these things stripping and being a pain in the *** to get out. Luckily mine came out without too much drama. Some notes on removal.. spray screw loose or PB blaster (whatever you use) onto the threaded boss where the bolts thread into. You can see where they are if you look at the center section of the turbo. Im not sure how much it actually helped, but take what you can get. Its easily accessible from the top of the car. Also looking at everything from under the car with the alternator in place, there seemed to be no room to really work. I had already loosened the shroud on the alternator (i hate taking that thing off) and had it sorta free floating between the turbo and the alternator (no space to take it out completley). I decided to just bite the bullet and remove the alternator completley (i need to change the voltage regulator on it anyhow). I have been debating going with the popular Nissan Quest alternator (smaller size, similar amp output) but think i may pass on it. Getting the alternator out is a real pain in the *** (gee, i use that expression alot on this car!) and i swear it took me longer to do that than to get the actual turbo out of the car. The shroud will have to be modified to fit the larger turbo, but i cover that on reinstallation ( i know what needs to be done already).
Secondly, wake up the bolts by sticking the 6mm allen socket in and giving it a few good shots with a hammer. This effectivley shocks the threads and usually is helpful at loosening upanything that may be seized (to an extent of course). Now, i read alot of stuff saying i would have to unbolt the steering rack from the crossmember (4x bolts, easy to do..but a pain in the *** to get the rack back into the mounts) in order to get clearance for the turbo mount bolts. I did not find this necesary, however i did have to rotate the steering wheel a little so the steering shaft u-joint allowed more clearance. I was able to reach both of the mount bolts with a 6mm allen head socket, 3/8'' wobble and roughly 18-20 inches work of extensions. The long bolt came out no problem..the short bolt on the other hand required some serious torque to loosen. I had about 1/4 turn of deflection on the ratchet before it finally broke loose with a healthy 'cracking' sound. Lucikly it came right out and did not snap off or strip the head. Note to self, apply liberal antiseize on reassembly =D. Here are some picture of how i accessed the mount bolts..
Ok so i thought i was being crafty by not taking out that steering rack, funny thing is i need to take it out anyway to install a delrin steering rack bushing that has been in my glove box almost a year now....and you sorta need to take the rack out so you can actually remove the long turbo mounting bolt...heh heh. so not neccesary in my experience to take out the rack to access the bolt, but if you want to remove it to replace it (a good idea) than yes, its needed.
And finally the turbo out..
After a little scrub down with simple green..
3 bent compressor blades.
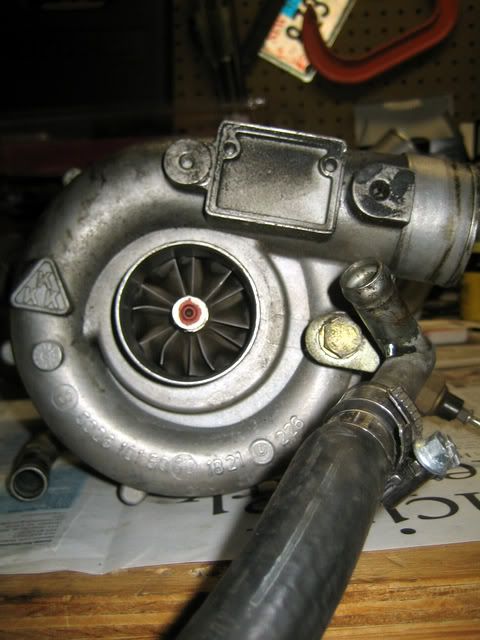
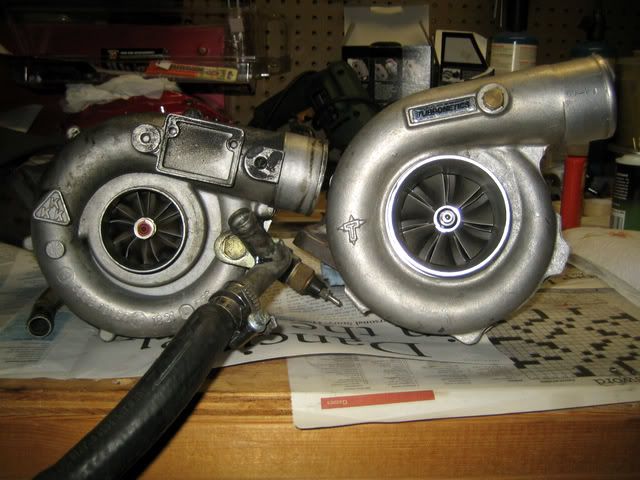
And the standard comparo picture. K26/6 and 60-1 HiFi with #8 hotside.
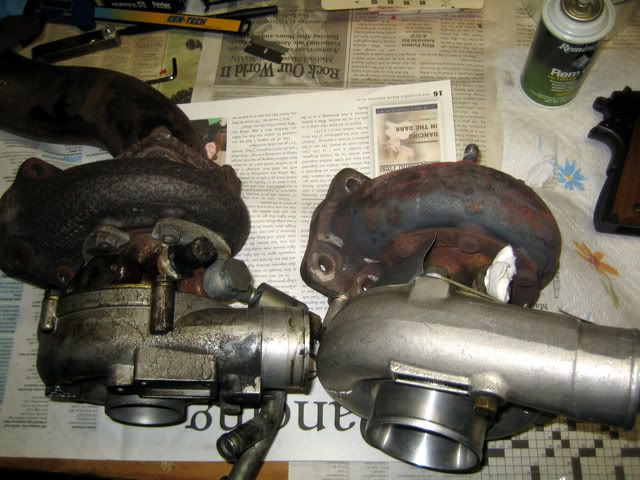
Interesting fitting on the K26.. it was rebuilt previously, not sure what center section they used..
Getting the bottom most crossover bolt out (one with nut welded to the flange) was a hellish experience
Getting the alternator out was a pain in the ***.. i am strongly considering putting in the Nissan Quest alternator to make life easier. That shroud is so annoying!
Thankfully however i had no other problems..no broken bolts, striped heads..etc.
I probably wont have the reassembly started for a couple weeks, i still need to order a bunch of parts before i start putting it back together. Not to mention i have to psyche myself up to brave the cold of a north east winter... The other side projects that need to get done are replacing the battery cable between the alternator and starter and finally installing Iceshark's headlight harness.
Here is just a little pictorial
.I started yesterday with just getting the car on jack stands (a project in itself cause the car is so freaken low).
Its not a good day of working on your car until you get coolant all over your arm..
Called it a day early..
After another hour and a half, i had the intake manifold off the car. I have removed the intake manifold on a 944 series car a dozen or so times now and i still always forget to disconnect the speed/reference sensor bracket. It never fails..
And a nice straight (figuratively speaking) at the turbo..
I also removed the coolant expansion tank (replacing with a aluminum one) and took the brake booster heat shield out aswell. A few of the turbo replacement walkthroughs say removing the heatshield is optional, but frankly i cannot see how you would be able to get a clear shot at the crossover pipe flange bolts without having it out. Besides, its only 4 nuts to get it out and it makes life about a million times easier. A no brainer if you ask me. And with that, a pretty straight shot at the turbo now.
Disconnecting the turbo is pretty straight forward. Remove the top oil feed line from both the turbo and the balance shaft cover. Then remove all the hoses for the water connections. Disconnect the 3 bolt flange at the downpipe to midpipe connection and also disconnect the crossover flange (inlet of turbo). The 3-bolt flange to midpipe may seem like a tight fit, but they are actually very easy to get too with a long enough extension and a wobble joint (flex joint). The nightmare however is the crossover flange bolts. There are not pictures of this because i was having such a wonderful time trying to get them out. Truthfully, 3 of them are easy to get right from the top, a stubby wrench helps emmensley at holding the backside nut. The real downer is the lower rear bolt due to very tight spaces. I had to remove the O2 sensor to get a good shot at it and it still took about 15 minutes to get that bolt out from under the car. Not an impossible job, just a real pain in the ***.
Now with everything disconnected from the turbo, it was time to take out those imfamous turbo mount bolts. I read alot about these things stripping and being a pain in the *** to get out. Luckily mine came out without too much drama. Some notes on removal.. spray screw loose or PB blaster (whatever you use) onto the threaded boss where the bolts thread into. You can see where they are if you look at the center section of the turbo. Im not sure how much it actually helped, but take what you can get. Its easily accessible from the top of the car. Also looking at everything from under the car with the alternator in place, there seemed to be no room to really work. I had already loosened the shroud on the alternator (i hate taking that thing off) and had it sorta free floating between the turbo and the alternator (no space to take it out completley). I decided to just bite the bullet and remove the alternator completley (i need to change the voltage regulator on it anyhow). I have been debating going with the popular Nissan Quest alternator (smaller size, similar amp output) but think i may pass on it. Getting the alternator out is a real pain in the *** (gee, i use that expression alot on this car!) and i swear it took me longer to do that than to get the actual turbo out of the car. The shroud will have to be modified to fit the larger turbo, but i cover that on reinstallation ( i know what needs to be done already).
Secondly, wake up the bolts by sticking the 6mm allen socket in and giving it a few good shots with a hammer. This effectivley shocks the threads and usually is helpful at loosening upanything that may be seized (to an extent of course). Now, i read alot of stuff saying i would have to unbolt the steering rack from the crossmember (4x bolts, easy to do..but a pain in the *** to get the rack back into the mounts) in order to get clearance for the turbo mount bolts. I did not find this necesary, however i did have to rotate the steering wheel a little so the steering shaft u-joint allowed more clearance. I was able to reach both of the mount bolts with a 6mm allen head socket, 3/8'' wobble and roughly 18-20 inches work of extensions. The long bolt came out no problem..the short bolt on the other hand required some serious torque to loosen. I had about 1/4 turn of deflection on the ratchet before it finally broke loose with a healthy 'cracking' sound. Lucikly it came right out and did not snap off or strip the head. Note to self, apply liberal antiseize on reassembly =D. Here are some picture of how i accessed the mount bolts..
Ok so i thought i was being crafty by not taking out that steering rack, funny thing is i need to take it out anyway to install a delrin steering rack bushing that has been in my glove box almost a year now....and you sorta need to take the rack out so you can actually remove the long turbo mounting bolt...heh heh. so not neccesary in my experience to take out the rack to access the bolt, but if you want to remove it to replace it (a good idea) than yes, its needed.
And finally the turbo out..
After a little scrub down with simple green..
3 bent compressor blades.
And the standard comparo picture. K26/6 and 60-1 HiFi with #8 hotside.
Interesting fitting on the K26.. it was rebuilt previously, not sure what center section they used..
Getting the bottom most crossover bolt out (one with nut welded to the flange) was a hellish experience
Getting the alternator out was a pain in the ***.. i am strongly considering putting in the Nissan Quest alternator to make life easier. That shroud is so annoying!
Thankfully however i had no other problems..no broken bolts, striped heads..etc.
I probably wont have the reassembly started for a couple weeks, i still need to order a bunch of parts before i start putting it back together. Not to mention i have to psyche myself up to brave the cold of a north east winter..
. The other side projects that need to get done are replacing the battery cable between the alternator and starter and finally installing Iceshark's headlight harness.
Last edited by Techno Duck; 12-16-2008 at 12:25 AM.
 12-15-2008, 08:30 PM
#3
Three Wheelin'
The alternator was one issue I had with that turbo, going with a smaller one will definetly allow the MAF to be set in the right position. Have you thought about the turbo water pipe clearance...there have been several threads on the subject. I ended up modifying the existing and re-zincing. Do a search on this. There is a pic somewhere. Have fun and enjoy!
12-15-2008, 08:44 PM
#4
Nordschleife Master
Thread Starter
Fluid, i did a bunch of reading about the waterpipe. I am going to do the same thing as was done in this picture..
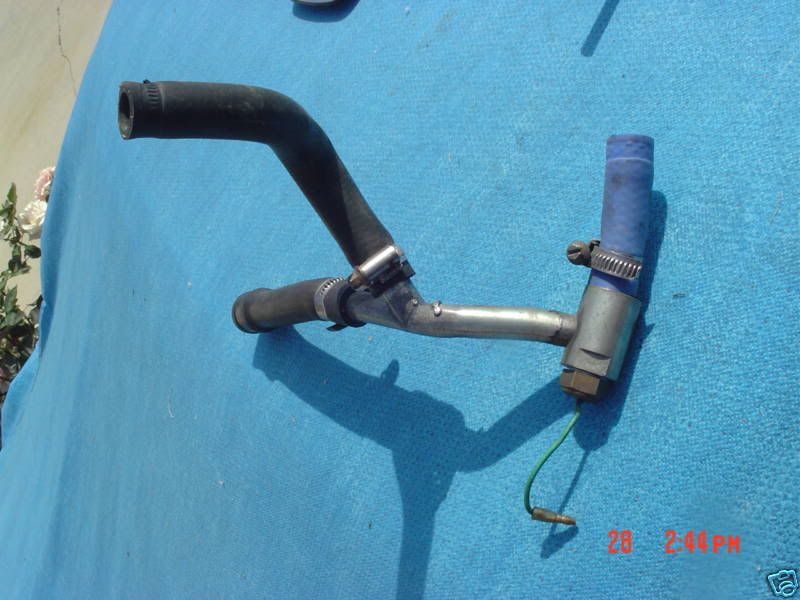
Basically cut off the banjo fitting and use a piece of hose to extend it. The banjo fitting will be replaced with one used on the PS system (same size and has barbed ends).
That picture is courtesy of Lart.
Basically cut off the banjo fitting and use a piece of hose to extend it. The banjo fitting will be replaced with one used on the PS system (same size and has barbed ends).
That picture is courtesy of Lart
.
12-15-2008, 10:08 PM
#7
Nordschleife Master
Thread Starter
John, oh snap, i didnt even realize that. That saves me a ton of trouble in that case. BTW, ill have the check out tomorrow .
Jeff, the bent blades happened sometime after i did the headgasket last year, i noticed it when i pulled the j-boot off just to inspect things. One of the things i noticed was the spool up sound was extremely loud (which i hear is a symptom of bent blades), even when i was still running the AFM. When i put the MAF on, it sounded like a jet engine..extremely loud. Im not sure what caused the bent blades, it could be anything though.. maybe a few grains of sand got sucked in. Anything spinning at 120k rpm..it dosent take much to tweak them a little.
.Jeff, the bent blades happened sometime after i did the headgasket last year, i noticed it when i pulled the j-boot off just to inspect things. One of the things i noticed was the spool up sound was extremely loud (which i hear is a symptom of bent blades), even when i was still running the AFM. When i put the MAF on, it sounded like a jet engine..extremely loud. Im not sure what caused the bent blades, it could be anything though.. maybe a few grains of sand got sucked in. Anything spinning at 120k rpm..it dosent take much to tweak them a little.
Trending Topics
12-16-2008, 01:20 AM
#8
Rennlist Member
FYI, if you do modify the coolant pipe in that method, you have to run some sort of wire to ground the pipe out. The temp sensor grounds out through the pipe and then the rest of the engine to complete the circuit when the water pump gets engaged, but with the rubber hose connection there the sensor has no way to ground out and complete the circuit to turn on the water pump.
12-16-2008, 01:42 AM
#9
Yes, my turbo isn't in the best of health either. I'm I am pretty sure it swallowed the bolts from the airbox at some point cause the PO had epoxied the holes closed.
...and yes my turbo is very loud as well! Sounds like it is chopping up the air instead of a nice smooth whoosh sound, obviously you can tell why.
...and yes my turbo is very loud as well! Sounds like it is chopping up the air instead of a nice smooth whoosh sound, obviously you can tell why.
 12-16-2008, 02:22 AM
#11
Pro
Somebody needs to donate some garage space to this guy.
When you finish, you'll have to tell us if it was really worth all the pain. What else are you changing in the intake and engine management to complement the bigger turbo?
When you finish, you'll have to tell us if it was really worth all the pain. What else are you changing in the intake and engine management to complement the bigger turbo?
12-16-2008, 02:38 AM
#12
Race Director

IRRC, He already has a Vitesse MAF (the bastard!) so as long as he keeps the same injectors (or gets new chips burned for different injectors) he should be good to go. I have a MAF/ARC2 (waiting on my replacement maxtronic) 3 bar FPR and 85lb injectors to run my 60-1..
 12-16-2008, 01:07 PM
#15
Nordschleife Master
Thread Starter
jmj951, as Mike said i have a Vitesse MAF and 72# injectors i put on back in August. I ran it with the K26/6 (mega over kill) but knew i was eventually going to go with a bigger turbo. The bent compressor blades sorta sped up that turbo replacement process. I did a bunch of work on the top end right around spring time of last year to support the extra power. LR stage 1 o-ringed head, widefire headgasket and replaced every vacuum line and hose. CV delete, tial wastegate..blah blah.
Bill, good tip on the coolant pipe. Surely if i needed to modify the pipe in that way still (i still cant believe i missed the ground down compressor housing!) i would have been posting a thread about how my turbo water pump dosent work anymore.
Funny thing is i have my fathers shop which is about 30 miles away i could have done the work at. That has two lifts, compressed air and a nice big old heater. I decided to not do the swap there because the car would have to be pushed off the lift every night, not to mention i would need to carry all of my tools down there and drive 60 miles round trip just to work on the car. Another friend of mine offered his well equipped heated garage..but again, about 45 miles round trip. Its much easier for me to roll out of bed at noon and work a few hours on it, even if that does mean freezing my *** off.
Bill, good tip on the coolant pipe. Surely if i needed to modify the pipe in that way still (i still cant believe i missed the ground down compressor housing!) i would have been posting a thread about how my turbo water pump dosent work anymore.
Funny thing is i have my fathers shop which is about 30 miles away i could have done the work at. That has two lifts, compressed air and a nice big old heater. I decided to not do the swap there because the car would have to be pushed off the lift every night, not to mention i would need to carry all of my tools down there and drive 60 miles round trip just to work on the car. Another friend of mine offered his well equipped heated garage..but again, about 45 miles round trip. Its much easier for me to roll out of bed at noon and work a few hours on it, even if that does mean freezing my *** off
.