A Rebuild - new pics
 03-07-2006 | 07:53 AM
#32
Thread Starter
Addict
Rennlist Member
Rennlist Member
Got the head on today and torqued down. Finished up the oil pump and got the lower balance shaft front/power steering mount on.
OIL PICK UP TUBE ORING - this part does not come in the lower seal kit. The black or clear seal is actually the wrong one. The black one(thanks Magown) seems to be part of the NA kit. The clear one, as some have said, seems to melt over time. The Parts and Technical reference, give part number 944 107 136 03 as the oil pick up tube oring. I'm waiting on the correct one before installing the pan, one as well for my spare I'm building. I'll get the engine mounts on today, water pump, back belt cover, couple of rollers - post some pics tomorrow. part number listed on the left, kit pc on the right.

OIL PICK UP TUBE ORING - this part does not come in the lower seal kit. The black or clear seal is actually the wrong one. The black one(thanks Magown) seems to be part of the NA kit. The clear one, as some have said, seems to melt over time. The Parts and Technical reference, give part number 944 107 136 03 as the oil pick up tube oring. I'm waiting on the correct one before installing the pan, one as well for my spare I'm building. I'll get the engine mounts on today, water pump, back belt cover, couple of rollers - post some pics tomorrow. part number listed on the left, kit pc on the right.
03-07-2006 | 12:29 PM
#34
It should be in a bottom-end reseal kit. It's been in every set I've ever ordered, and they've always been sealed-up Victor Reinz kits.
That said, the black one in the kit is probably for the oil cooler, or if not, I don't remember, it's been too long since I had one of these engines apart.
It all looks good so far! I was wondering what to do with that stupid little coolant pipe, can't polish it since it's steel. I like the jet hot coating on it. I plan to polish the fuel rail, intake, etc. However I was hoping to coat the headers, crossover and downpipe, so doing the coolant pipe wouldn't be that much more.
Thanks for the info, and the build is looking good!
03-07-2006 | 06:45 PM
#35
Thread Starter
Addict
Rennlist Member
Rennlist Member
The pc on the right is the wrong one, the one on the left is correct. The kit I got a few days ago for Rhobs car had the one on the right in it. It will work but it's kinda like the substitute, not the real thing. If I had had the right one today, hell I could have put that on, the gasket and pan and stabbed the engine.
03-07-2006 | 07:34 PM
#37
UAE Rennlist Ambassador
Rennlist Member
Rennlist Member
Originally Posted by Tom M'Guinn
BTW, I wanted to coat my intake too, but Scott Gomes talked me out of for heat-management reasons... I love the look and am still tempted....
Ski: Very nice work, how many engines did you rebuild so far? will you ever stop?
 03-07-2006 | 08:13 PM
#38
Thread Starter
Addict
Rennlist Member
Rennlist Member
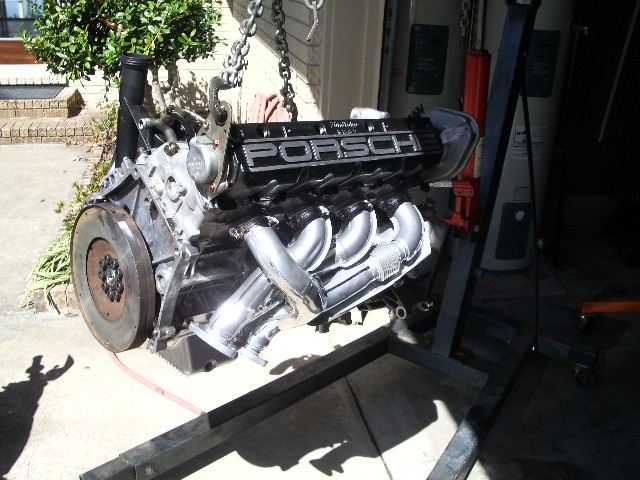
Here is a pic of the long block, well, no lifters in, cause I don't want to put the bell housing on until it's in the car, more room from install from the top. I'll pull the cam tower, time the flywheel, then reinstall the cam tower and fully time everything. It's an extra step but we're actually a week ahead of schedule and the turbo, WBO2, and the rest of the goodies arrive Friday. Who knows, we may get an attempt at start next week if Rhob makes it home. Few pics...
block views


local shop rebuilt the alternator and starter, good $$ too!

Rhob is out in Long Beach CA, giving poor FedEx pilots lost engines, poor weather, lost hydraulics, and other simulator experiences - are you checking the computer from afar?
block views
local shop rebuilt the alternator and starter, good $$ too!
Rhob is out in Long Beach CA, giving poor FedEx pilots lost engines, poor weather, lost hydraulics, and other simulator experiences - are you checking the computer from afar?
03-07-2006 | 09:27 PM
#39
Three Wheelin'
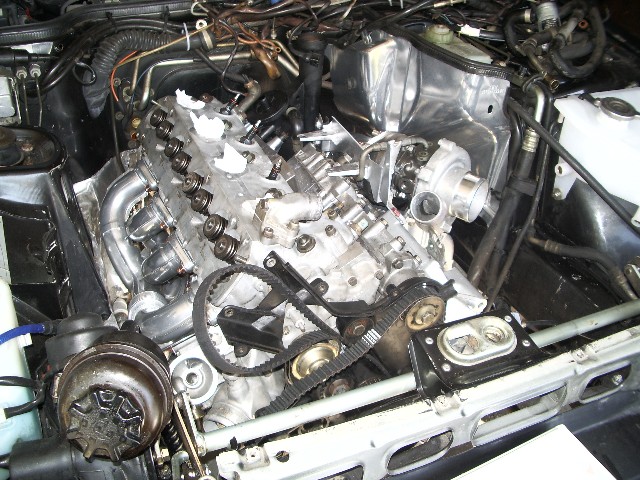
"Here is a pic of the long block, well, no lifters in, cause I don't want to put the bell housing on until it's in the car, more room from install from the top. I'll pull the cam tower, time the flywheel, then reinstall the cam tower and fully time everything. "
That doesnt make any sense to me, can you explain why you need the bellhousing off to line the crank and cam up? I think you are doing too much work intalling and removing the cam box for no reason.
That doesnt make any sense to me, can you explain why you need the bellhousing off to line the crank and cam up? I think you are doing too much work intalling and removing the cam box for no reason.
03-08-2006 | 12:11 AM
#40
Thread Starter
Addict
Rennlist Member
Rennlist Member
[QUOTE=mark944turbo]"I don't want to put the bell housing ON until it's IN the car, more room QUOTE]
I think you misunderstood when I said time everything else. Or maybe I typed it in a way that didn't make sense, no I NEED the bell housing to time it, I didn't make a mark on the block for the timing mark. Looking at the dowel, with regards to the notch in the flywheel, it's close, yes the pistons are where they should be but this engine is for someone else. Yes, I'm doing a few steps extra to be accurate all the way.
I time the flywheel to the bell housing notch, then I install the flywheel lock and do the cam tower assembly, then belt.
 03-09-2006 | 09:27 PM
#43
Thread Starter
Addict
Rennlist Member
Rennlist Member
UPS came today...
Sport turbo, wires, DP wastegate, tees, fuel rail kit, copper gaskets, dual pillar pod, hose, WBO2 kit and bung, venturi delete kit, numerous orings and crush rings, new slave cylinder hose, AFPR not in picture along with new belts.

Sport turbo, wires, DP wastegate, tees, fuel rail kit, copper gaskets, dual pillar pod, hose, WBO2 kit and bung, venturi delete kit, numerous orings and crush rings, new slave cylinder hose, AFPR not in picture along with new belts.