When you click on links to various merchants on this site and make a purchase, this can result in this site earning a commission. Affiliate programs and affiliations include, but are not limited to, the eBay Partner Network.
As we've all probably experienced, the engine harness in these cars gets dangerously brittle with age/heat cycles. Additionally, aftermarket standalone ECU's are getting better and better while many are maintaining very competitive prices. For these two reasons, in addition to boredom, I decided to convert to standalone myself. As the saying goes, there are many ways to skin a cat�.The following is the process I went through.
Deciding on an ECU supplier:
There are so many good options to choose from. Picking an ECU that a tuner near me was already familiar with was not a criteria as I would be tuning and configuring my own. Therefore my main criteria was:
1. Must have good internal logging capability, both in space and bandwidth.
2. Must be well known and well respected.
3. Must have a user friendly and comfortable software package.
4. Must be fairly competatively priced.
5. Must have good tech support/manual.
With the above criteria I narrowed it down to:
1. Link - Checked all of the above boxes. This is what I went with.
2. Motec - Checked all except for price. Already being familiar with their SW and Motec being basically the gold standard made it hard not to choose this one.
3. Haltech - Didn�t like their SW (just my personal preference on user interface, nothing wrong with their actual SW or logic), logging capability is poor.
4. ECUmaster - Very good pricing but that's about it. Could be a very good option, but just not for me at the time.
Harness build process:
Basically two fundamental options:
1. Buy a "terminated" harness from ECU supplier (terrible name for a product as they can hardly be referred to as terminated�)
2. Build your own - I went with this option as I enjoy wiring work and wanted the freedom to design it how I like, and use the wire type I preferred. In the end, there is a lot of work involved which is not to be underestimated. However the total price will be significantly less than an aftermarket harness built by someone else, and depending on the materials you choose, you can build something much more reliable, robust and professional.
My harness specs:
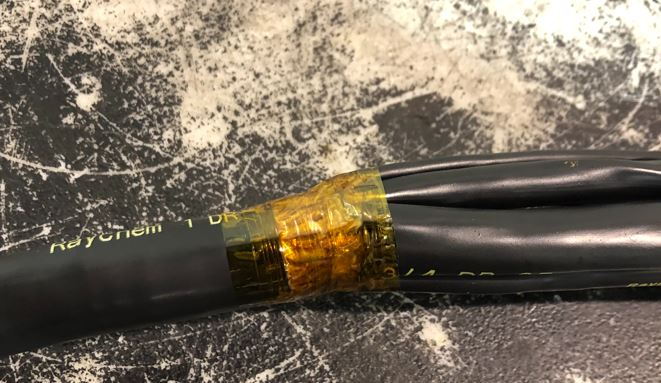
Wire = M22759-16 and some -32
Sheathing = DR-25
Booting = Combination of SCL, ATUM, and Raychem molded boots
Connectors = DTM/DT, Bosch, Delphi, AMP
Overall Design - Fairly time consuming process depending on how complicated you want to get. If it helps anyone at any point I can attach or send the document I made for my harness, however it should only be used for reference. Couldn't recommend anyone copy exactly what I did as I made a few compromises and did things for my own personal reasons/preferences which may be different from other tuners/builders preferences.
Analog Inputs I chose to use:
Water temperature - OEM sensor and location
Intake air temperature pre-turbo - RaceGrade DTM thermistor
Intake air temperature pre-throttle body (TMAP)
Intake manifold air temperature (TMAP)
Intake air pressure pre-throttle body (TMAP)
Intake manifold pressure (TMAP)
Fuel pressure - Honeywell
Exhaust pressure - Honeywell
Crankcase pressure - Kavlico
Water pressure - Kavlico
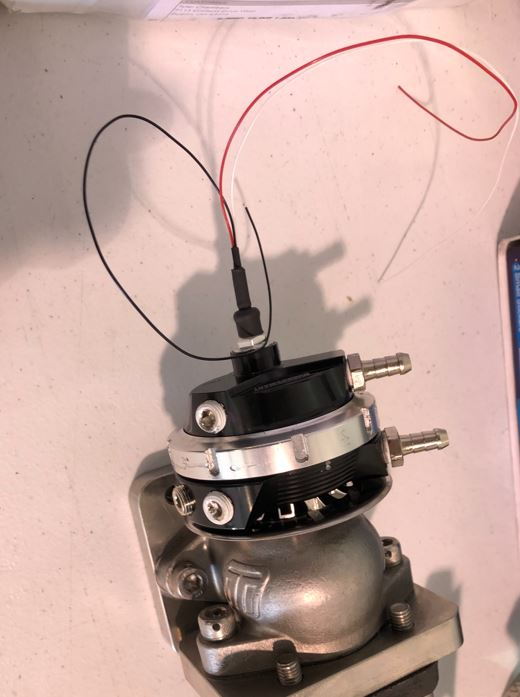
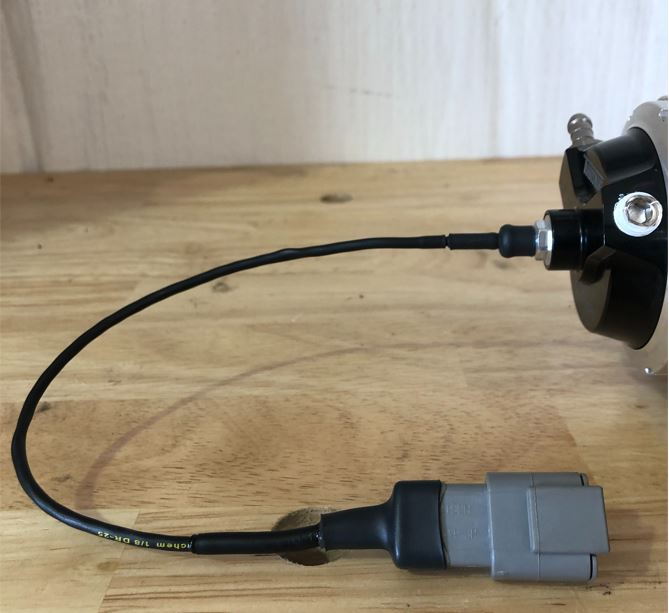
Waste gate position - Turbosmart sensor cap kit
Longitudinal acceleration - ECU has internal g-sensor but I like to have one positioned as close to possible to the driver position and aligned in the longitudinal direction for drivability reference.
Exhaust temperature - MSEL K-Type amplifier - Measured at the turbine housing inlet
Knock - 2 standard Bosch knock sensors used - same location as 3.0L cars. I use the OEM location with a third sensor for listening for knock while tuning with Link's KnockBlock audio knock device.
Digital inputs I chose to use:
Log - Repurposed a spare latching rocker center console mirror switch to be used for enabling internal logging when I'd like to log data while driving/road tuning
Flag - Repurposed a spare momentary alarm toggle switch to be used for adding a flag to the data if I have a drivability related concern I'd like to look back at
Launch/Anti-lag - Otto P9 latching
Vehicle speed - taken from gearbox speedo output
Brake switch - taken from the brake switch
Clutch switch - taken from the clutch switch
A/C clutch switch - taken from the 14 pin connector at the brake booster
Outputs I used:
Injectors - Injector dynamics ID1050X
Coils - GM D514a - I hate mechanical fabrication, Rennlist member @Pauerman has a nice bracket kit for mounting these coils on the cam tower. Quality kit and nice guy to deal with.
EBC - Generic 3-port MAC valve
Idle stabilizer valve - OEM valve
Fuel pump output - OEM DME relay
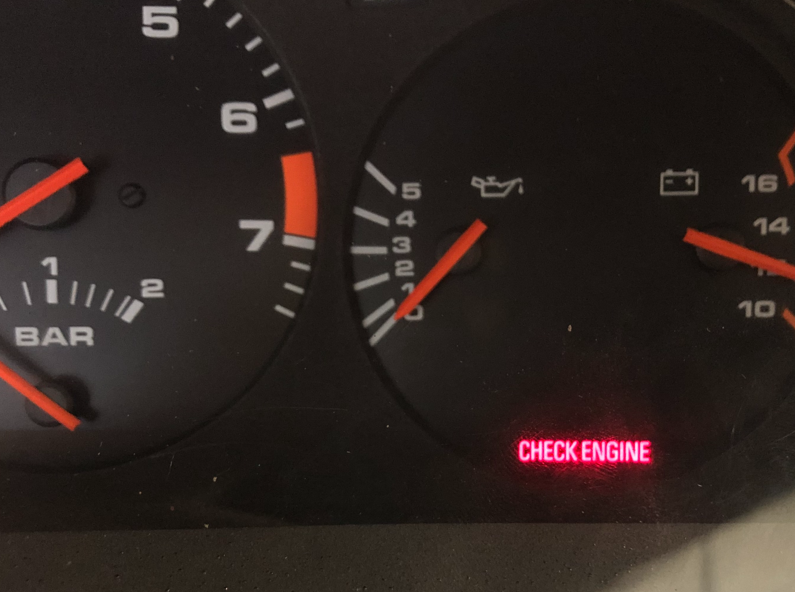
Check engine light - Used spare dash from late model with check engine light built into right side sending unit module. Just needed to add a ground output from the ECU to pin 6 on the "B" connector.
Tach output - ECU output to 4pin red connector on chassis harness.
Aux water pump - OEM aux water pump
CAN inputs/outputs I used:
Lambda - Lambda to CAN used for Lambda input to ECU for CL control
Spare CAN in the engine room
Obligatory pictures of the build�.
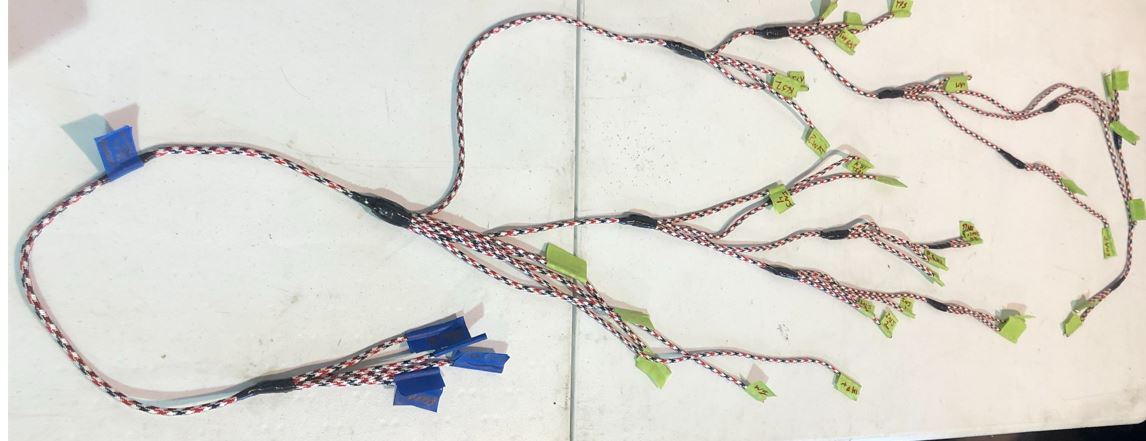
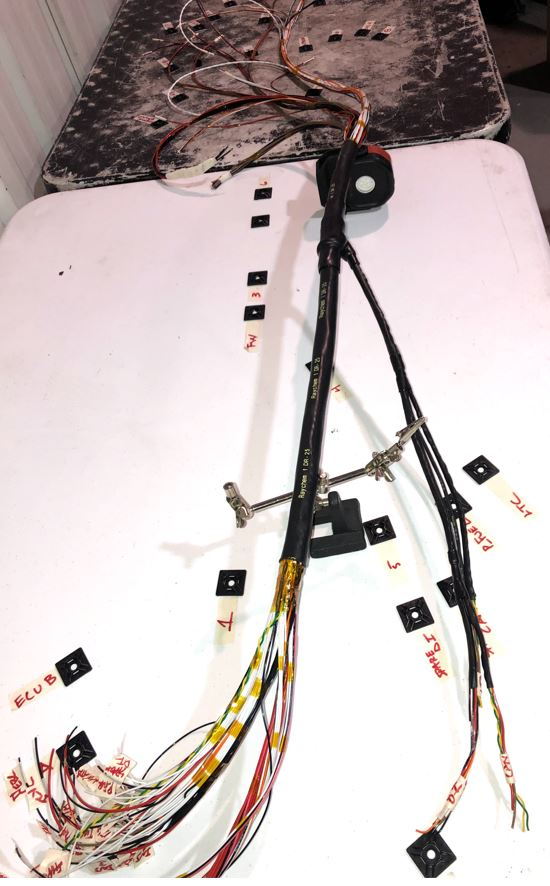
Building/routing a mock up harness using rope:
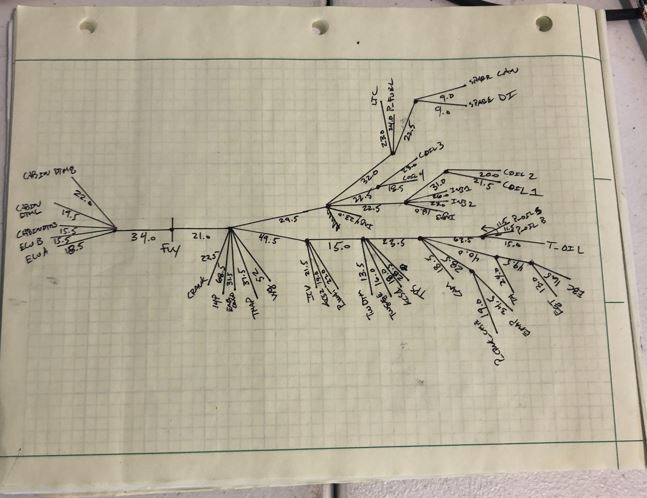
Measuring and documenting each branch length:
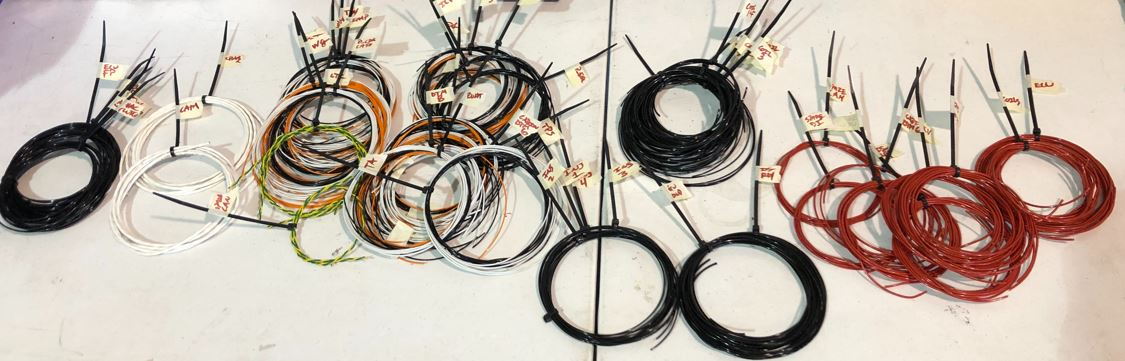
Individually measuring/Cutting each wire to length based on documentation:
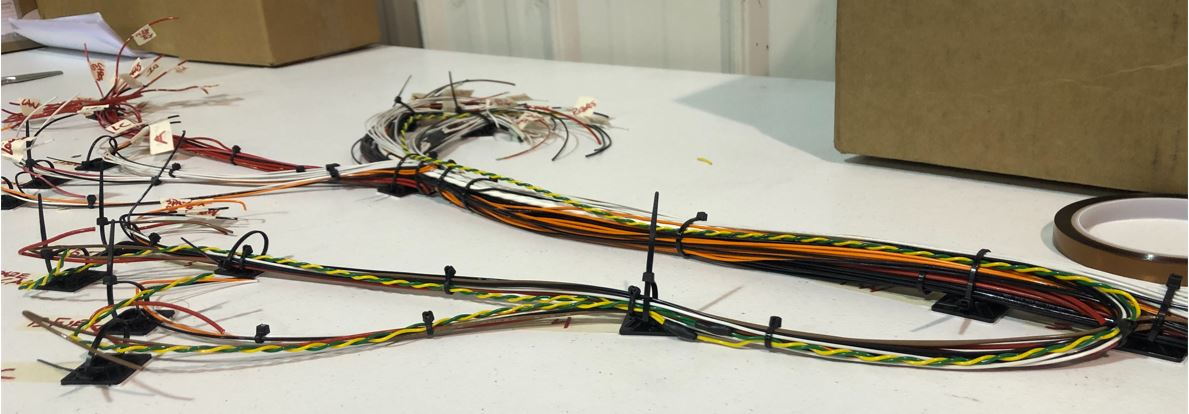
Routing/bundling:
Measuring bundle diameters and sheathing per branch size:
Potting sensors for which I do not want to use OEM connectors for:
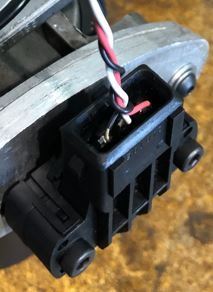
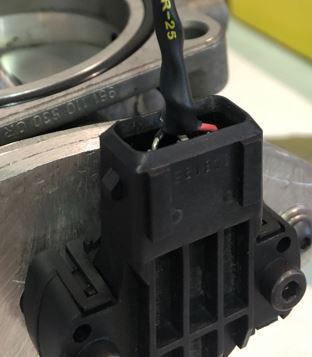
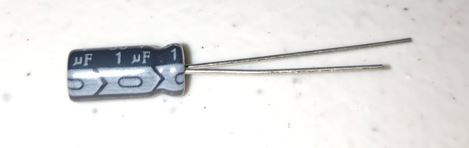
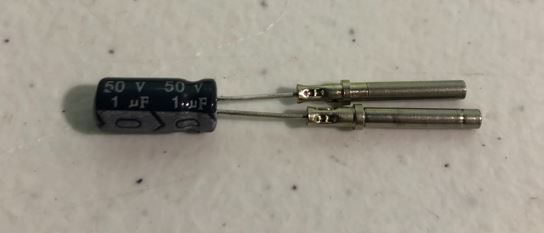
Coil Capacitor:
Some debate on the internet by various LS swap users whether it's actually needed or not but Link reccomends installing a capacitor in the power supply of the coils 12V supply. Didn't want mine to be permanent or require destructive means to replace in the future so I incorporated in a sealed DTM connector:
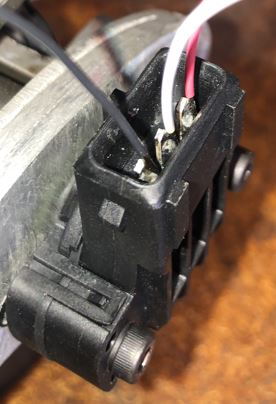
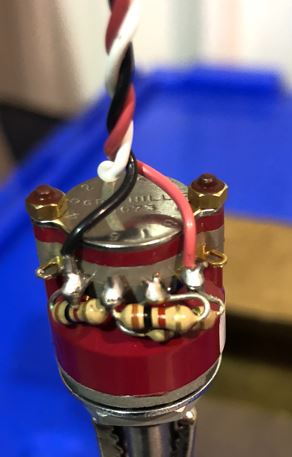
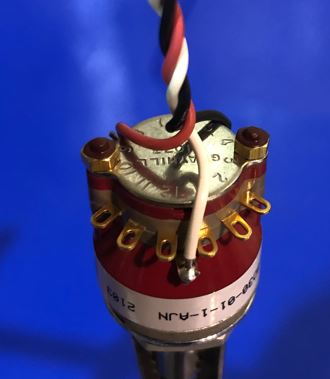
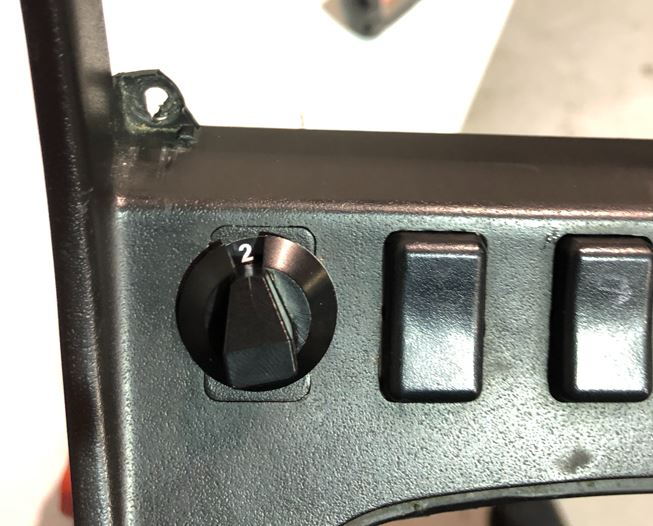
Creating boost map rotary:
Grayhill makes very nice, quality, tactical feel, switches in various sizes. However most readily available versions are 10 - 12 position switches�who needs that many switch positions for an engine map switch??? So I copied what I've seen others do and made mine into a 4 position switch using the mechanical pin stop Grayhill supplies with the switch and some 1kohm resistors to create a varying voltage output to an analog input pin on my ECU. That can then be used to create a 3D map for target boost. I then partially recovered some SCL around the switch body to be used as a dam/pot for potting the sensor around the exposed resistors and flying lead.
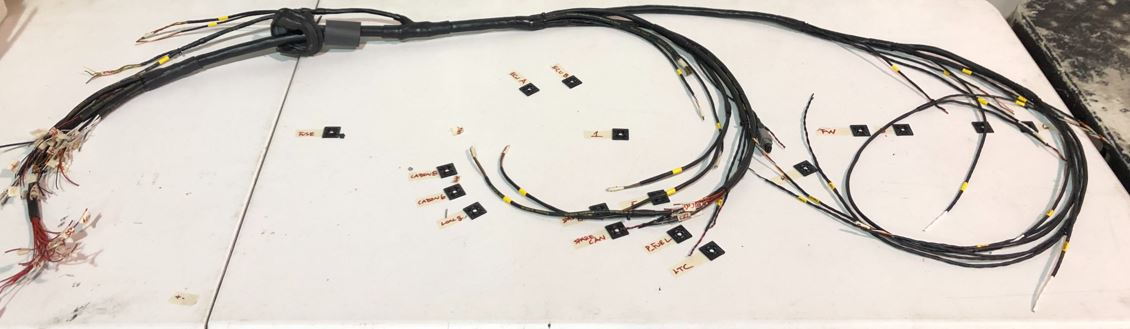
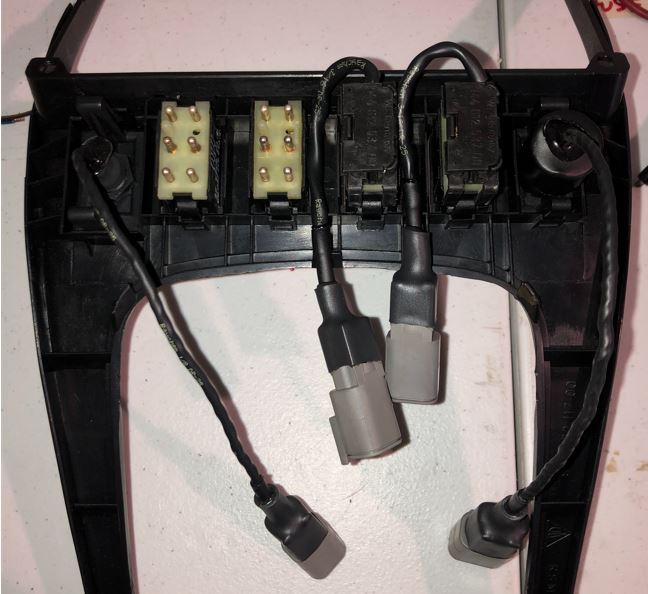
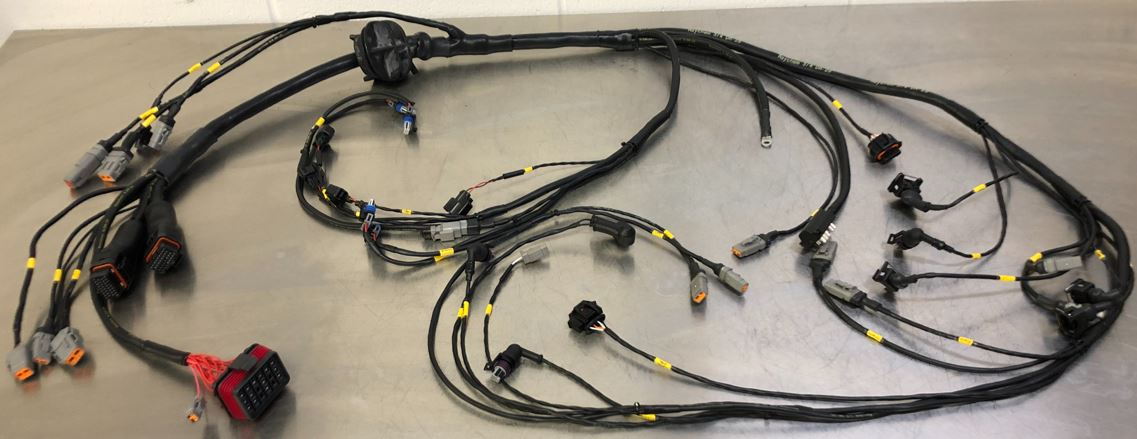
Finished harness:
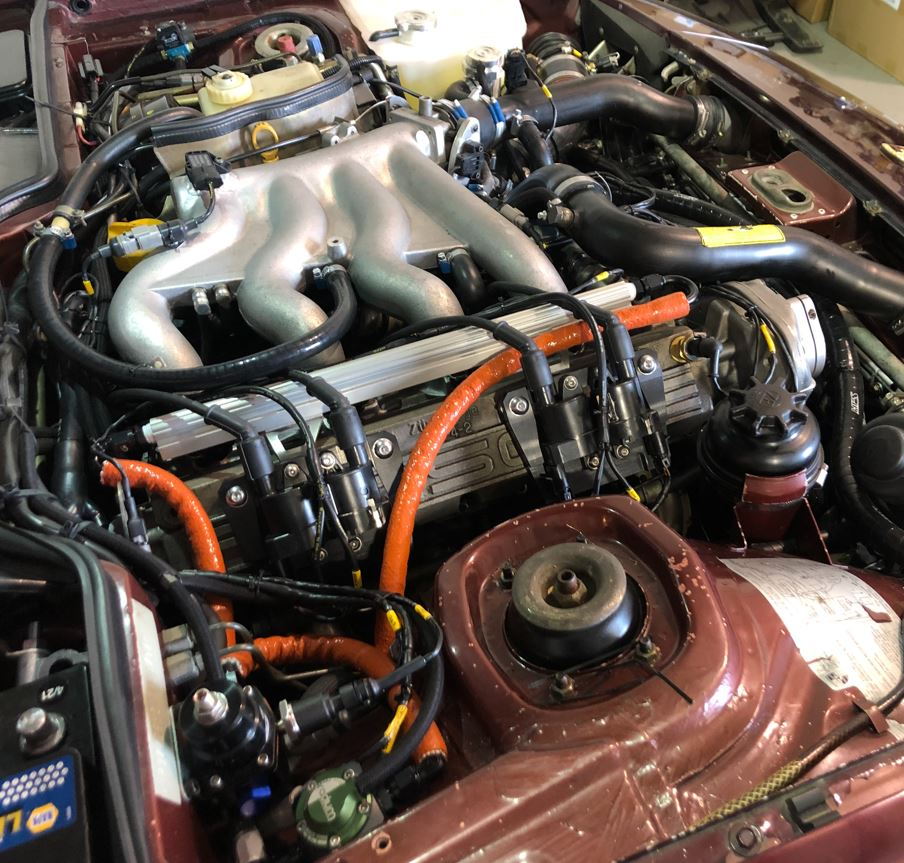
Installed:
Check engine light:
Late model cars apparently have a check engine light. I had a spare dash with the check engine light in the right side sending unit so I swapped it into my dash and terminated pin 6 on the connector to allow the ECU to control the light.
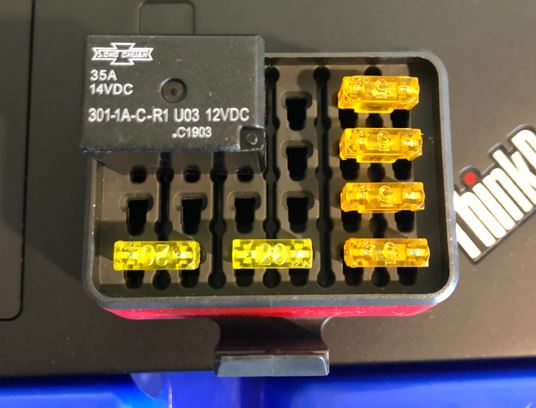
Added sub relay and fuses for necessary circuits. Nice compact unit:
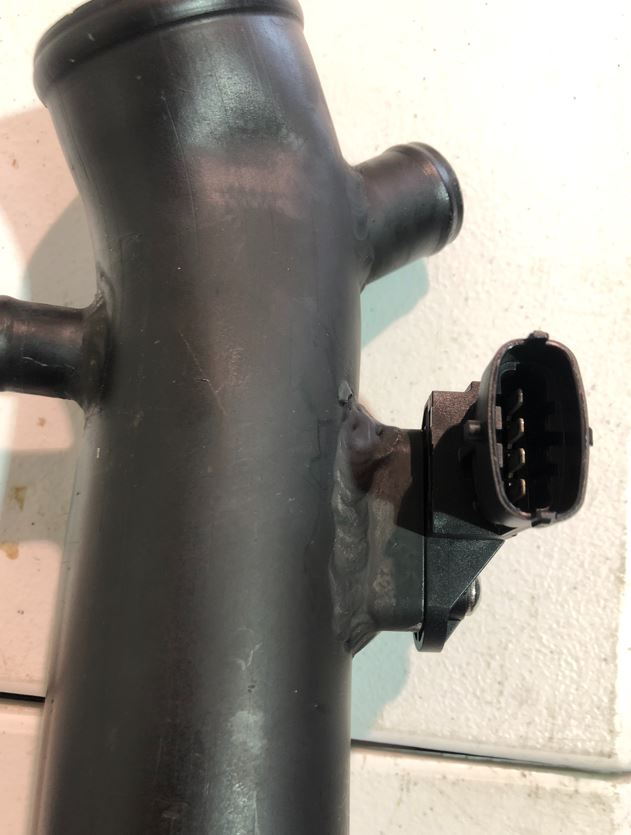
TMAP bung welded pre-TB:
Helpful resources for anyone looking to do something similar: Prowire USA (https://prowireusa.com//) - By far my favorite resource for wiring products. Massive inventory, great customer service, very quick processing and shipping, sends you candy with your purchase if it's more than just a few products. Can't say enough about this place. Milspec Wiring (https://www.milspecwiring.com/) - Good source for wiring products. Marginally more expensive than above but does have more motorsport products. Racespec (https://racespeconline.com/) - Another very good source for wiring products. Again, has more motorsport related products than Prowire. Link ECU (https://linkecu.com/) - Their tech support and some SW developers are on their boards basically 24-7. They are New Zealand based but they also have a tech support and shipping/receiving in the U.S. This company has been around for >30 years, they have a huge knowledge base and have really taken their manuals/help section seriously, which in the end means you can find the answer to basically any technical question you may have within their help section. It's clear that over the years they have taken note of the typical tech support requests and made sure to include those common questions in their help section with tips and tricks for install and configuration. They also have a lot of common sensor/actuator pin outs and wiring instructions included which is awesome. RB Racing (https://rbracing-rsr.com/wiring_ecu.html) - Pretty comprehensive coverage of basic wiring info as it relates to more professional/motorsport practices. Good resource for anyone new to it.
Finally, if you are pondering going full-in with a Standalone, do it! You won't regret it. The end result in performance, tunability, cool features, and drivability are more than worth the effort. Any of the current crop will impress as they all basically offer the same fundamental controllably. That being said, I'm admittedly a bit biased, but I really can't speak highly enough about Link. If you're considering converting to standalone definitely check out their products. Not just their ECU's but their supporting HW offerings are awesome as well. KnockBlock, CAN Lambda, etc. Their PCLink SW is excellent and has all the same features and then some compared to other suppliers. Their log file display and other parts of their SW actually looks like a copy of Motec's i2Pro and M1Tune. I'm not sure who copied who but honestly don't care as I like that style of layout. Given they are both NZ/AUS companies and I think some of those engineers/SW developers move around a bit, it's probably not surprising that there are some similarities.
I skipped on the molded boots and just carefully planned my junctions. From what I saw and discussed with a friend who used them, they added bulk.
Also V-25 from pro wire is a budget option if DR-25 is too expensive.
Yes, good call on BM. I forgot them, they have a pretty broad supply of OEM connectors and pins. Great resource.
Originally Posted by Darwantae951
Crank trigger is a cherry hall sensor. Cam is a Audi sensor with VW reluctor and custom adapter to mount it.
Looks like the kit CW makes? I like that one a lot, looks clean and OEM. Also having an OEM VAG sensor that can be bought from pretty much any auto parts supplier is nice too. Looks non adjustable though? One thing that I liked about the one I got from Pauer Tuning is that is is finely adjustable, which made ensuring that the cam trigger occurred between crank teeth very easy.
Yes, good call on BM. I forgot them, they have a pretty broad supply of OEM connectors and pins. Great resource.
Looks like the kit CW makes? I like that one a lot, looks clean and OEM. Also having an OEM VAG sensor that can be bought from pretty much any auto parts supplier is nice too. Looks non adjustable though? One thing that I liked about the one I got from Pauer Tuning is that is is finely adjustable, which made ensuring that the cam trigger occurred between crank teeth very easy.
What mattered most with the link was that the cam sensor was at least 90deg off sync with the crank trigger gap. After that, the cam is only looked at on initial start so that the system knows when to establish timing, then doesn't look at it again. According to the link forums, that is what causes a slightly longer cranking before actual start.
Which ECU did you go with? I went with a Monsoon-X. Was much simpler as I only needed "A Loom" so I bought the 2.5m one. My wire choices were a mix of Tefzel and TXL. I also found a terminal advertised as a starter solenoid connector for old fords that fits our oil level sender perfectly. It's definitely not factory looking, but an option considering the "stock" MB part is NLA right now.
Forgot a picture of the Turbosmart WG position sensor. A bit price but a pretty cool product. Not sure how long term reliability of a hall sensor will be with the higher exhaust temps our cars seem to have, but we'll see. Turbosmart's products in general seem top quality, better than Tial IMO.
What mattered most with the link was that the cam sensor was at least 90deg off sync with the crank trigger gap. After that, the cam is only looked at on initial start so that the system knows when to establish timing, then doesn't look at it again. According to the link forums, that is what causes a slightly longer cranking before actual start.
Which ECU did you go with? I went with a Monsoon-X. Was much simpler as I only needed "A Loom" so I bought the 2.5m one. My wire choices were a mix of Tefzel and TXL. I also found a terminal advertised as a starter solenoid connector for old fords that fits our oil level sender perfectly. It's definitely not factory looking, but an option considering the "stock" MB part is NLA right now.
I went with the XtremeX. Actually ordered the Fury but I accidentally ordered it in the G4+ version, when I intended to order the G4X. By the time I received it, realized, then contacted the supplier to have it exchanged, Link had dropped the Fury G4X off their website due to supply issues (was right in the peak of the pandemic last year). They weren't sure on ETA, so being impatient and not wanting to wait for the Fury to come available again I settled for the ExtremeX. Same ECU except no onboard Lambda controller. Which is pretty unfortunate but whatever.
I went with the XtremeX. Actually ordered the Fury but I accidentally ordered it in the G4+ version, when I intended to order the G4X. By the time I received it, realized, then contacted the supplier to have it exchanged, Link had dropped the Fury G4X off their website due to supply issues (was right in the peak of the pandemic last year). They weren't sure on ETA, so being impatient and not wanting to wait for the Fury to come available again I settled for the ExtremeX. Same ECU except no onboard Lambda controller. Which is pretty unfortunate but whatever.
I wish they offered the onboard lambda on other ECUs. I chose the Monsoon-X because of the onboard MAP.
This is good inspiration to take my setup to the next level. My 951's engine harness is in good shape, so I went the VEMS "plug and play" route to dip my toe into the standalone waters. Everything was very straightforward and easy to tune, and luckily I didn't have any of the trigger issues that some other VEMS 944 users seemed to have. The built-in Wideband controller and boost control also work very well, and throttle response is amazing for a 35+ year old 951 with 180K+ miles on the bottom end and stock headers and crossover pipe.
Of course the current VEMS setup is over 10 years old now, and it has a limited amount of inputs/outputs and datalogging capability, but the price was right and it does what I need at the moment for a fun street/track car. My ultimate goal would be a VW/Audi 07K engine swap, which would automatically come with proper crank and cam triggers and individual coils, so the bulk of the wiring work would be the requisite extra sensors. However, this would all be difficult while remaining smog legal in California. My current VEMS setup is flexible and stealthy enough to pass CA tailpipe emissions test with 800cc Siemens-Deka injectors, so it works out well for my current needs!
Yea, the 07K swap is pretty damn awesome. In addition to the car in this thread I also have an NA track car that will need an engine swap at some point. I'd prefer to K20/K24 swap it but with the boost brothers already having done all the work for the 07K swap, it's really quite tempting...

 07-10-2021, 08:10 PM