When you click on links to various merchants on this site and make a purchase, this can result in this site earning a commission. Affiliate programs and affiliations include, but are not limited to, the eBay Partner Network.
Also pulled the oil thermostat housing. It looks pretty good. The OPRV doesn't have an o-ring (?). I disconnected the oil line at the external cooler; the stuff that came out of the cooler was 100% mixed with coolant...
Ok remember that sleeve I told you to order and you did for $14 at your local Porsche dealership? I really suspect that now. And where is your O-ring for your OPRV att? Still in the block? And is the seat where the sleeve sets real corroded? Have you picked up the alignment tool for the oil housing? You have an 88 correct so it's different then the 86 and earlier blocks. They make metal and plastic alignment tools. I'm sure your aware of that but just recapping. And I have used a knife sharpening stone and lots of WD40 before with great results on the block but only after cleaning it with scotchbrite pads first. You just have to be extra carful not to take of any aluminum. And it takes a long time. Like a long time. And make sure you keep clean rags in the cylinder holes. https://rover.ebay.com/rover/0/0/0?m...2F112408352520 https://rover.ebay.com/rover/0/0/0?m...2F391248351235
The alignment tool is already on its way along with the gasket kit. It's the metal one. When I get back home today, I'll take a pic of the OPRV; it's full of oil so maybe I missed something. Stuff the rags into the cylinders.. got it. I suppose I can try and stuff the water holes too
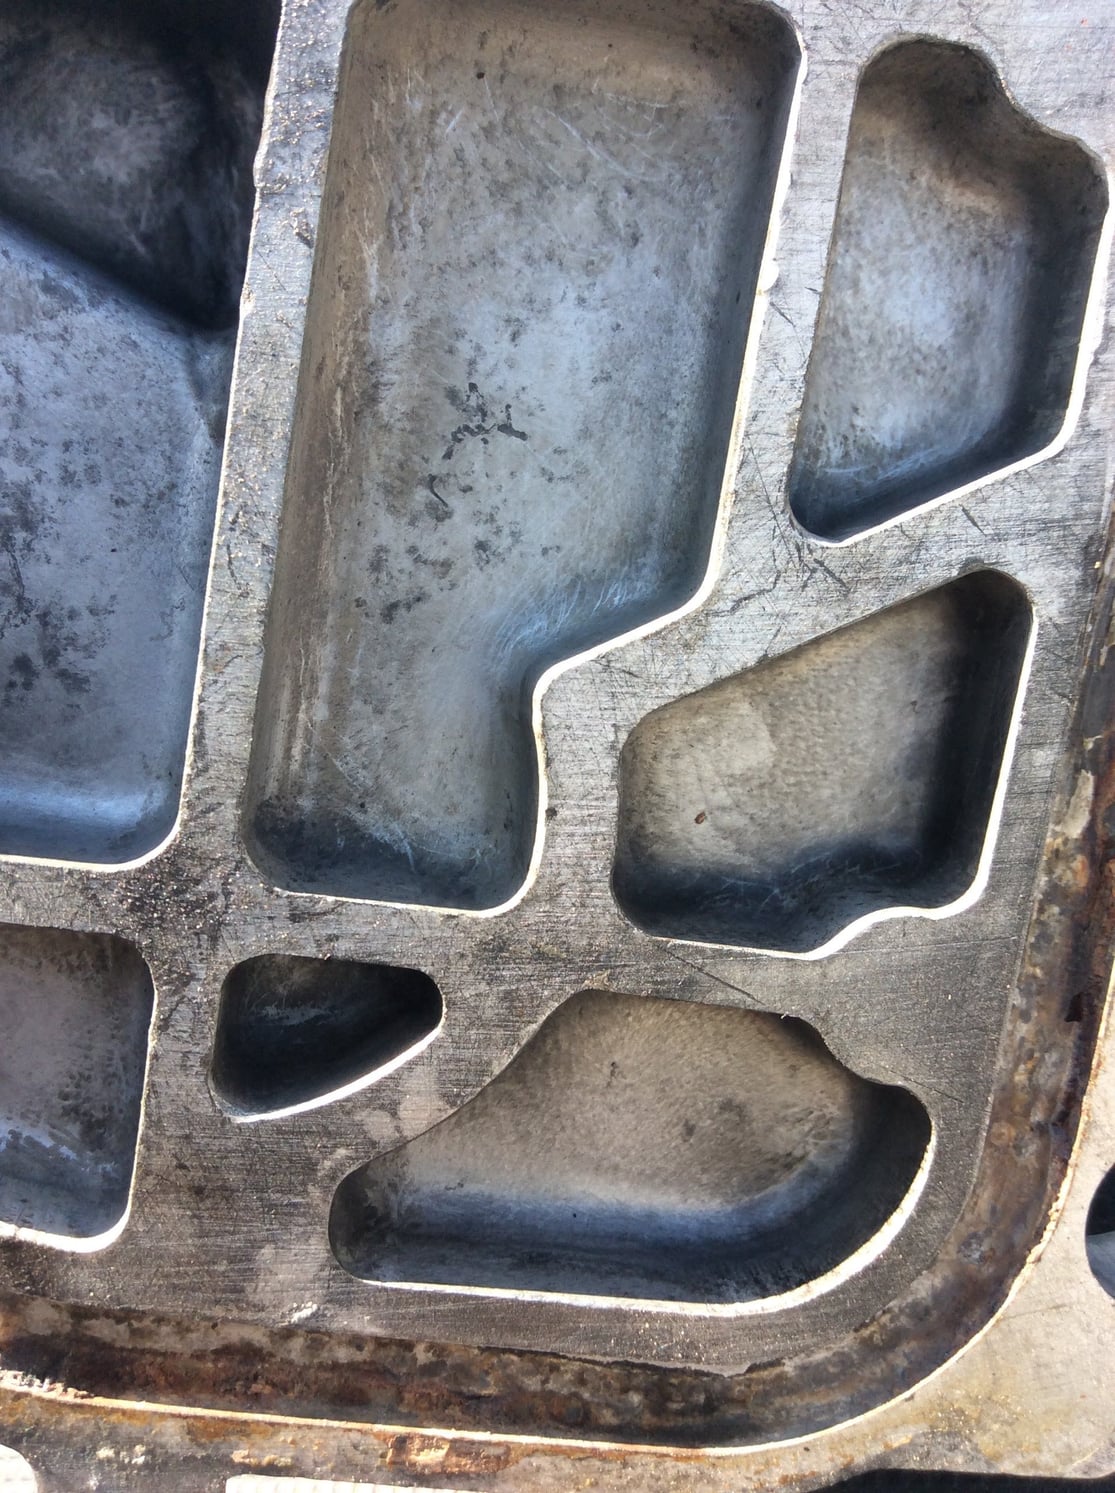
When I had the intake off in Sept, I cleaned with emery cloth.. seemed to work well. The block is scary
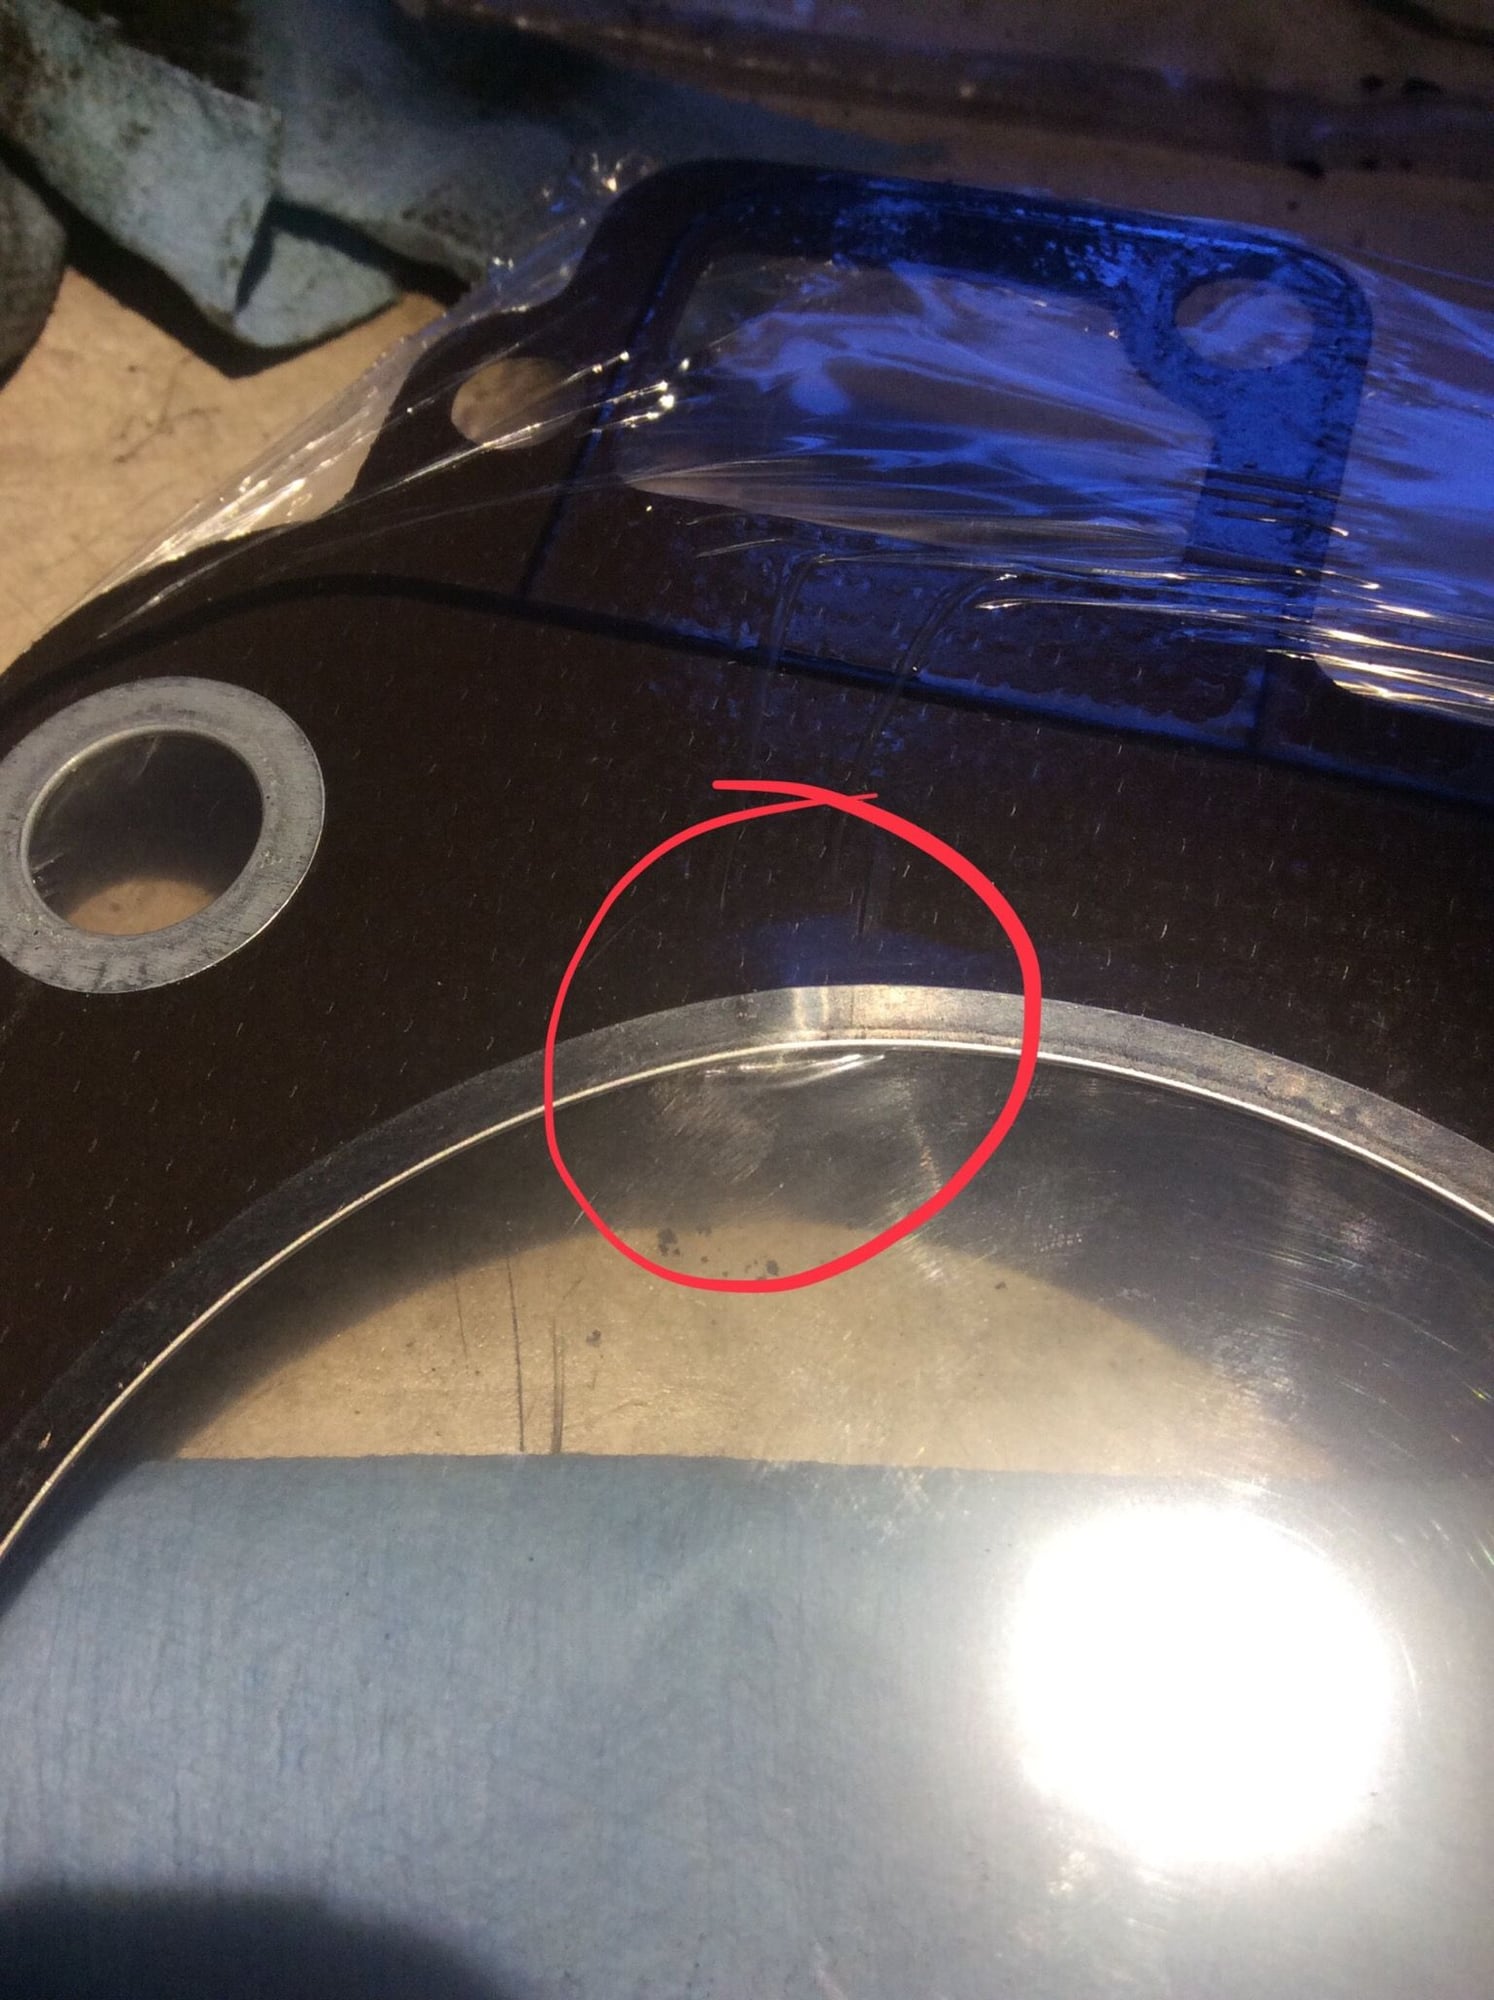
I would not use emery cloth on the block -- just too much risk of creating a low spot. Green Scotchbright pads are still abrasive, but way less aggressive. I put paper towels in the bores and wet them with wd-40 to help trap debris. Then I use a shop vac and compressed air, and an eagle eye, to make sure there is nothing trapped in crevice between the top of the piston and cylinder wall. Looking at the head and gasket more, I'd say there's a good chance it was leaking between 3 and 4, and on the side of 1 away from the water passage area. See how those areas are discolored compared to the rest (black on the block, brown on the gasket). No guarantees, but I've had gaskets look better and leak worse. That ps bushing should come out freely. Maybe soak it with penetrating oil and, if needed, use a brass drift to tap it free. On the header nuts, use a torque wrench on the nuts you can access, then calibrate your arm to the tightness of those nuts with a wrench and apply the same amount of force to the others. You can get surprisingly close that way, or at least that's what I tell myself. The oprv has a groove on the end that goes into the block, which should have an o-ring. If it's not there, then look in the port on the block that the OPRV goes into (on the block, behind the oil thermostat console) and see if it came off in there when you removed the oprv. Either way, you need a new one on re-assembly. I'd flush the oil at least a few time given all the coolant that was there and/or added in the process. Drain the cooler, fill the motor and turn it over a bit (by hand or with starter motor and relays pulled), then drain and repeat... I'd probably then change the oil after the first heat cycle too, and before putting much load on the motor.
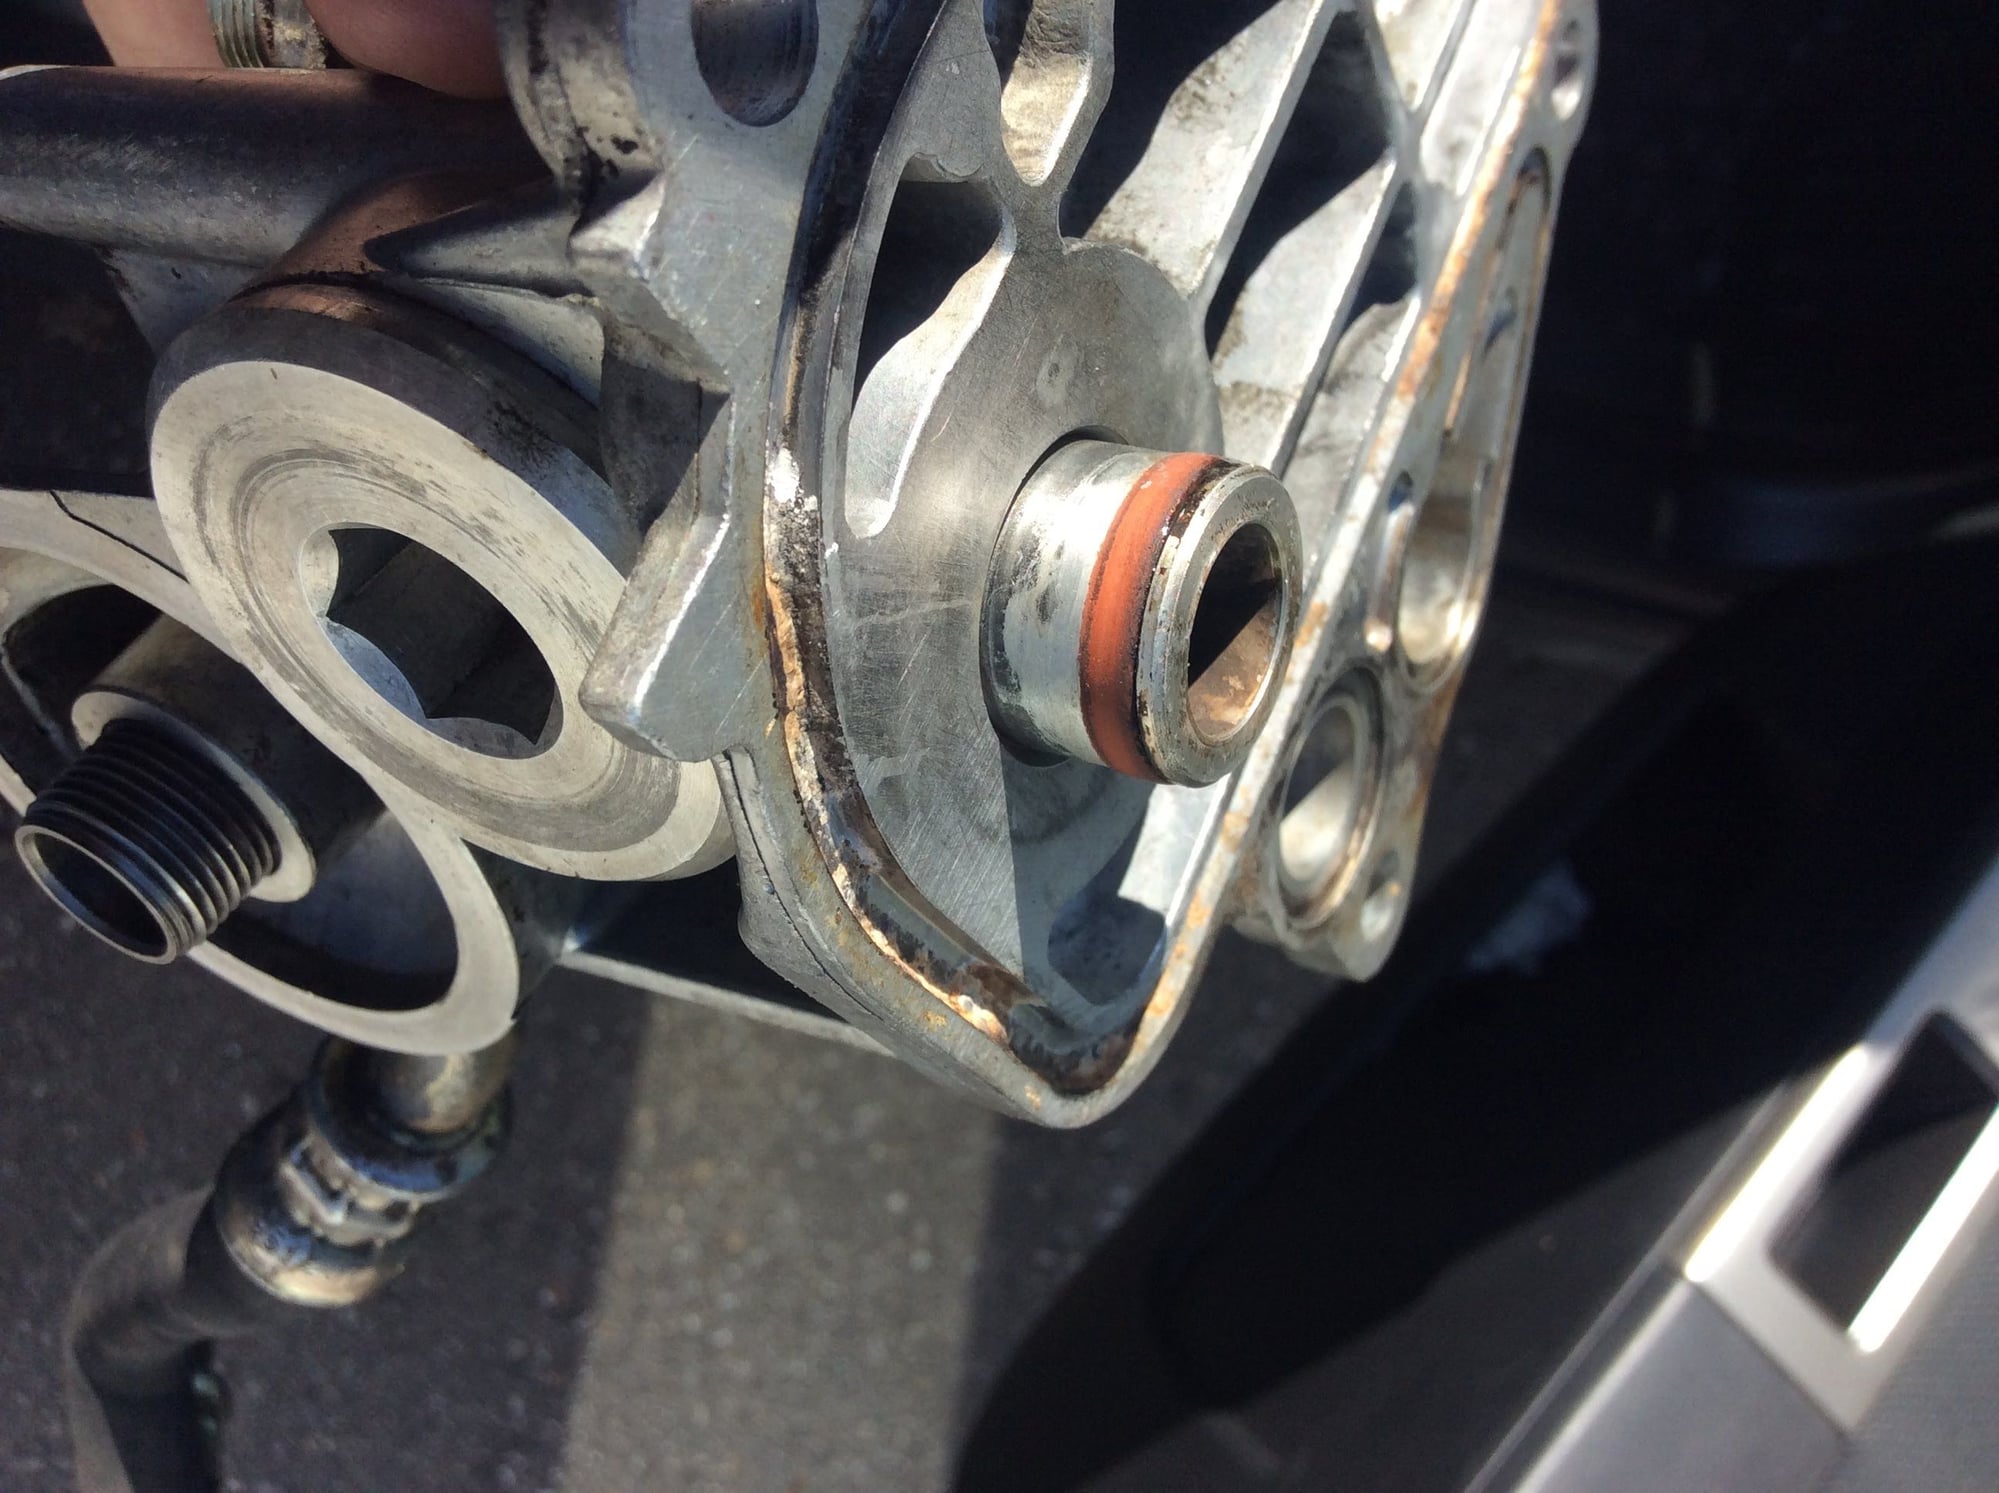
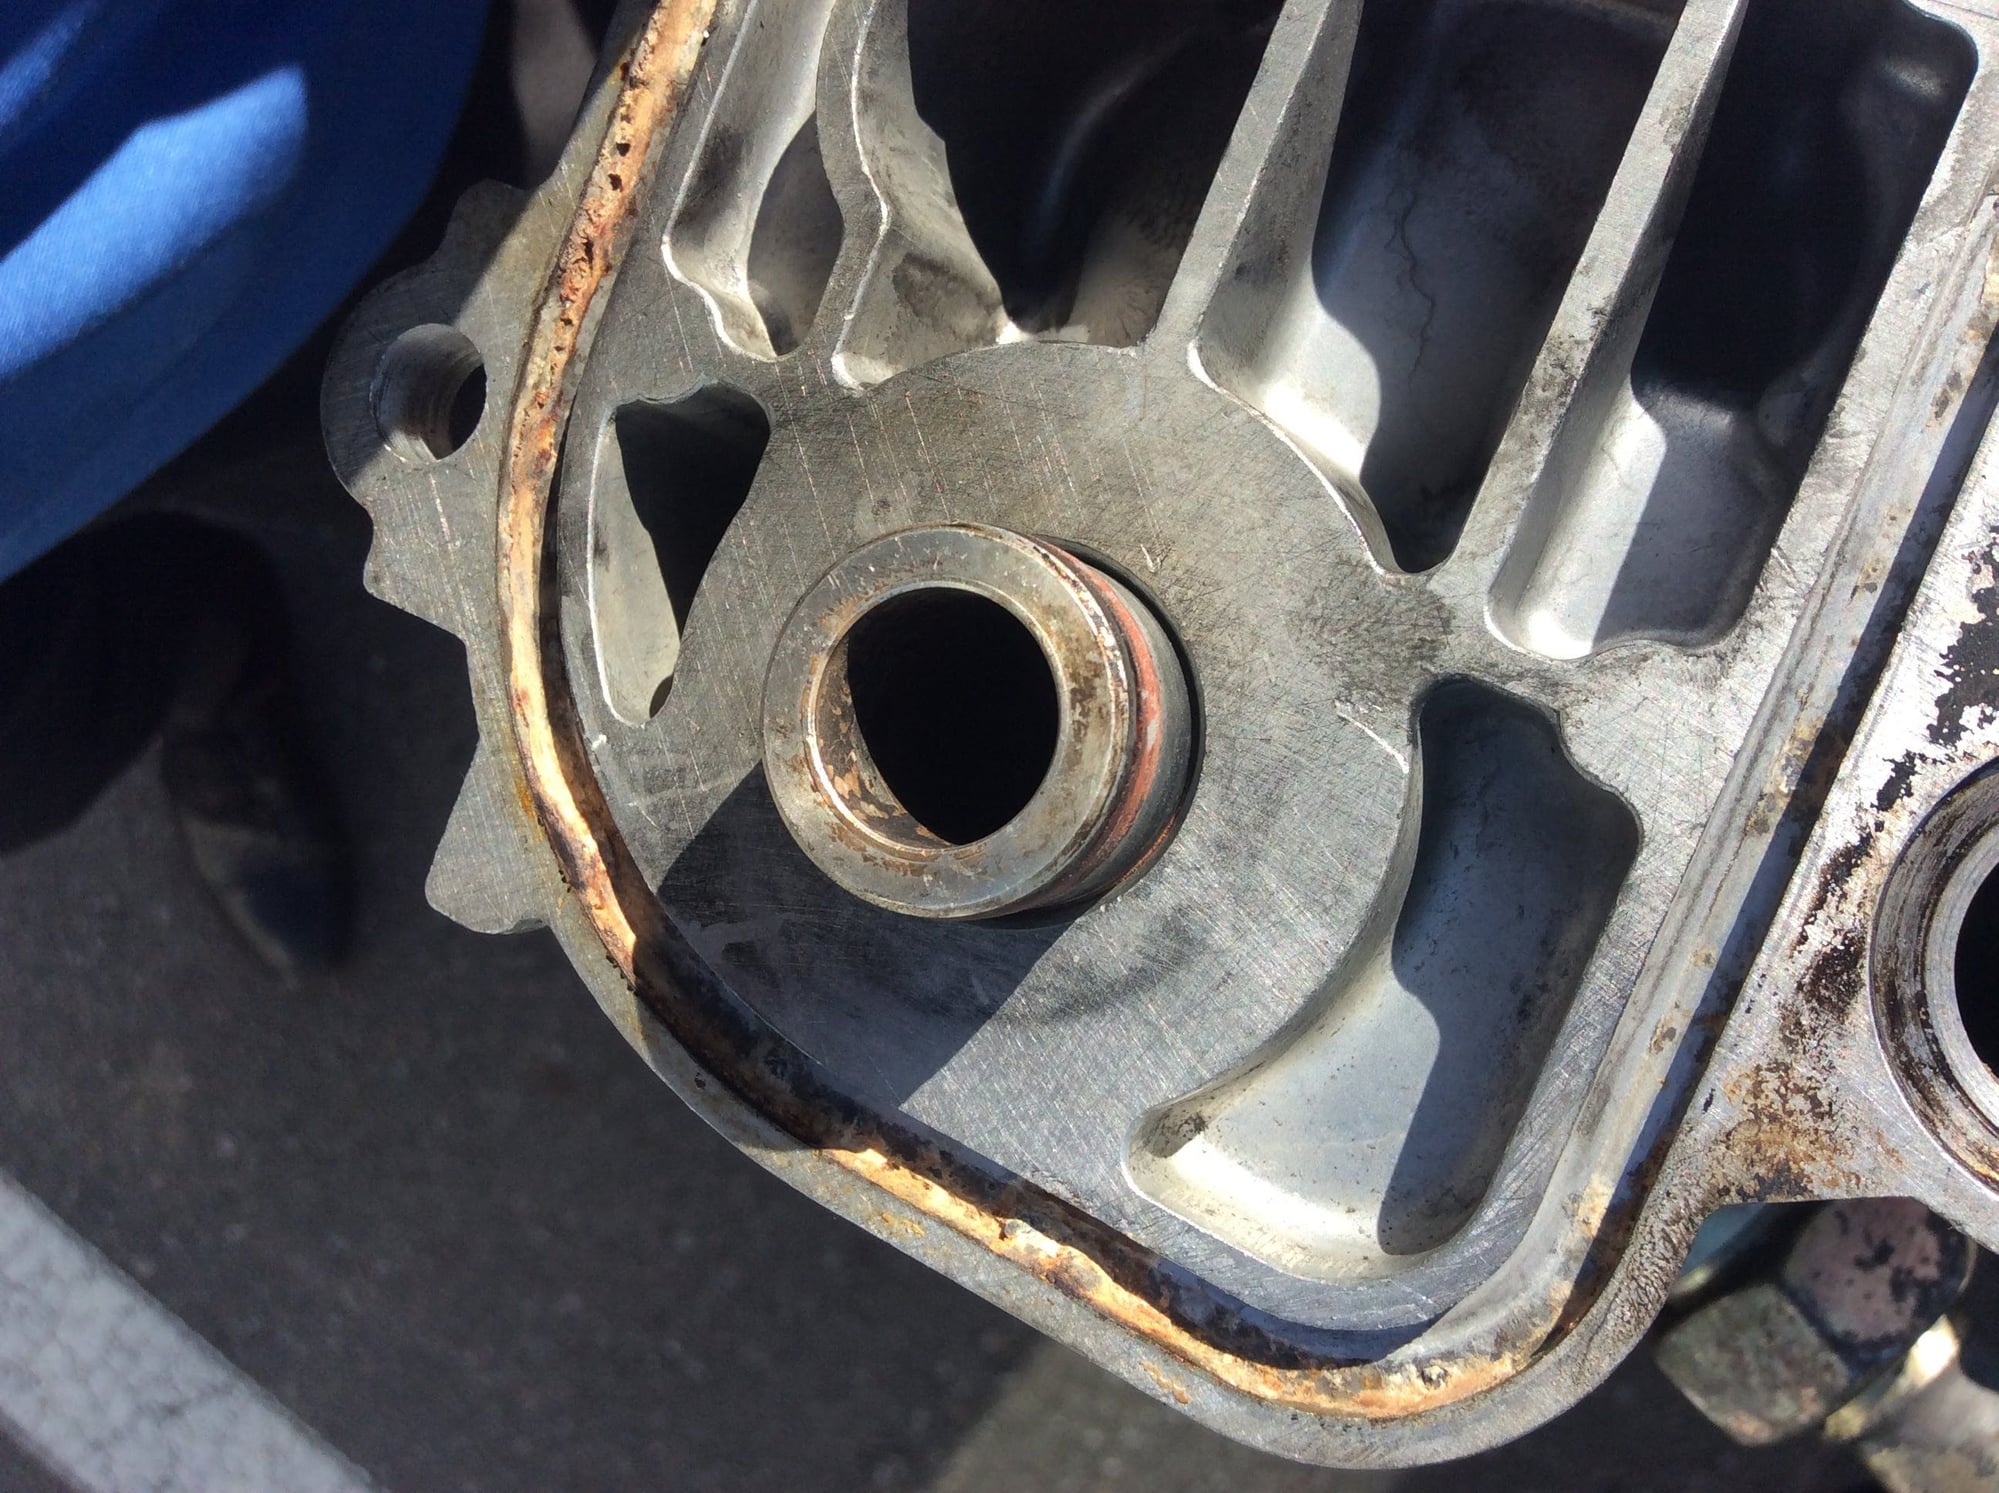
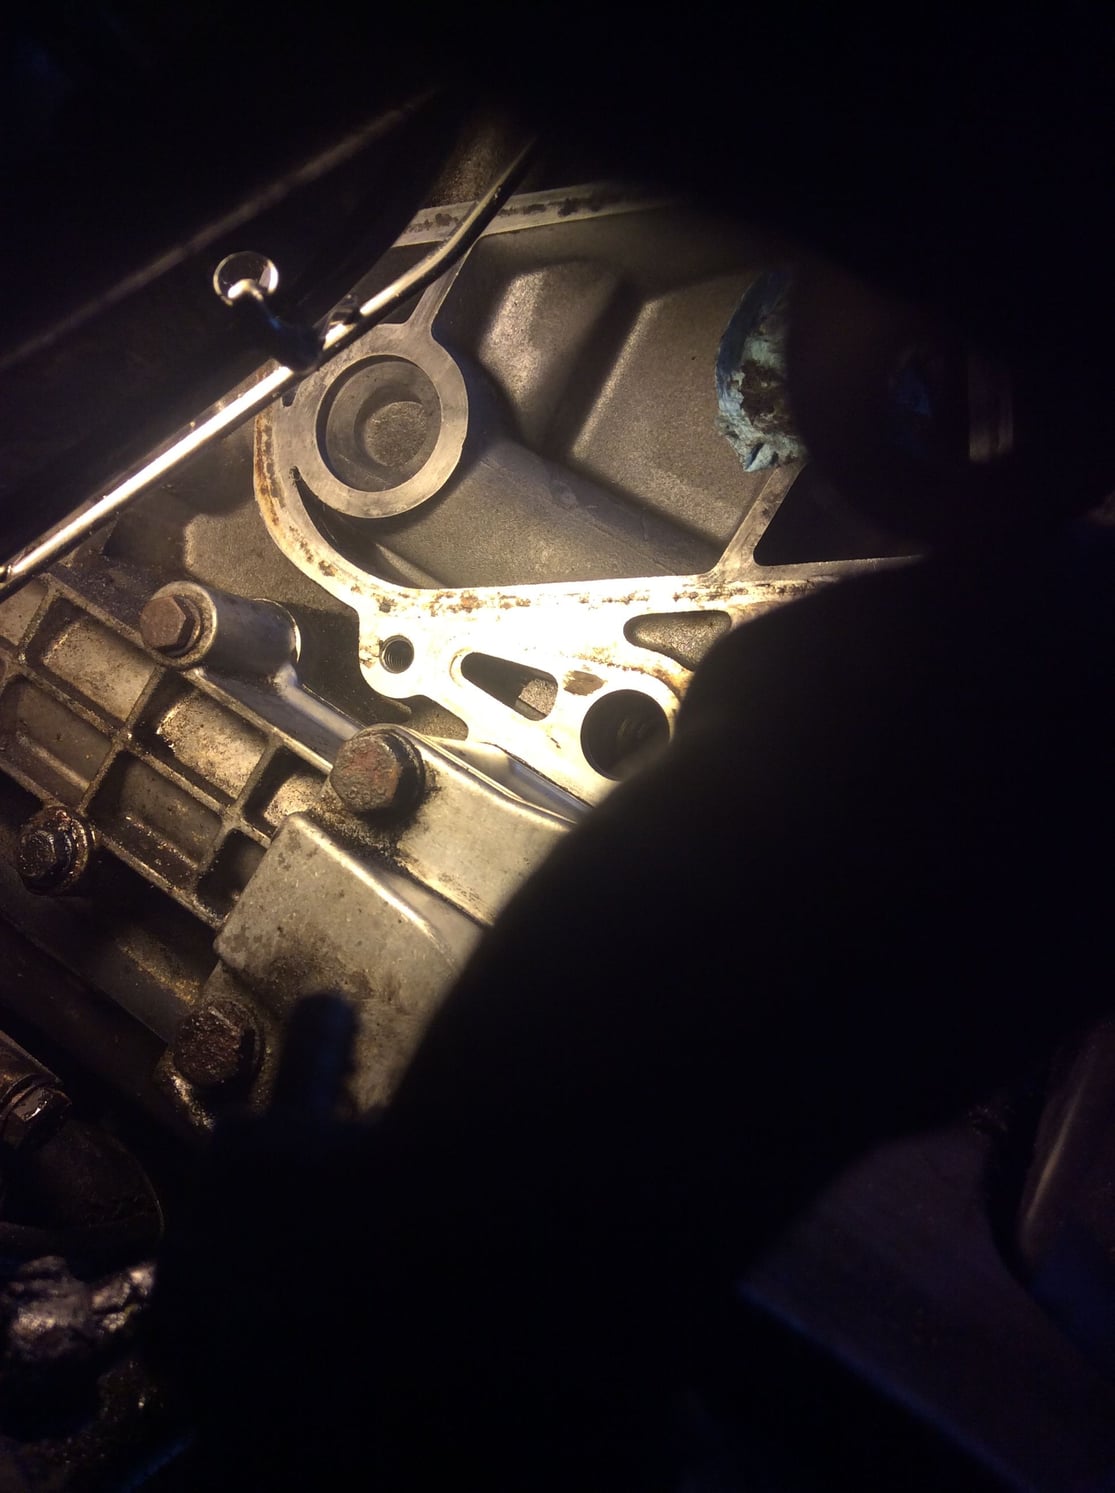
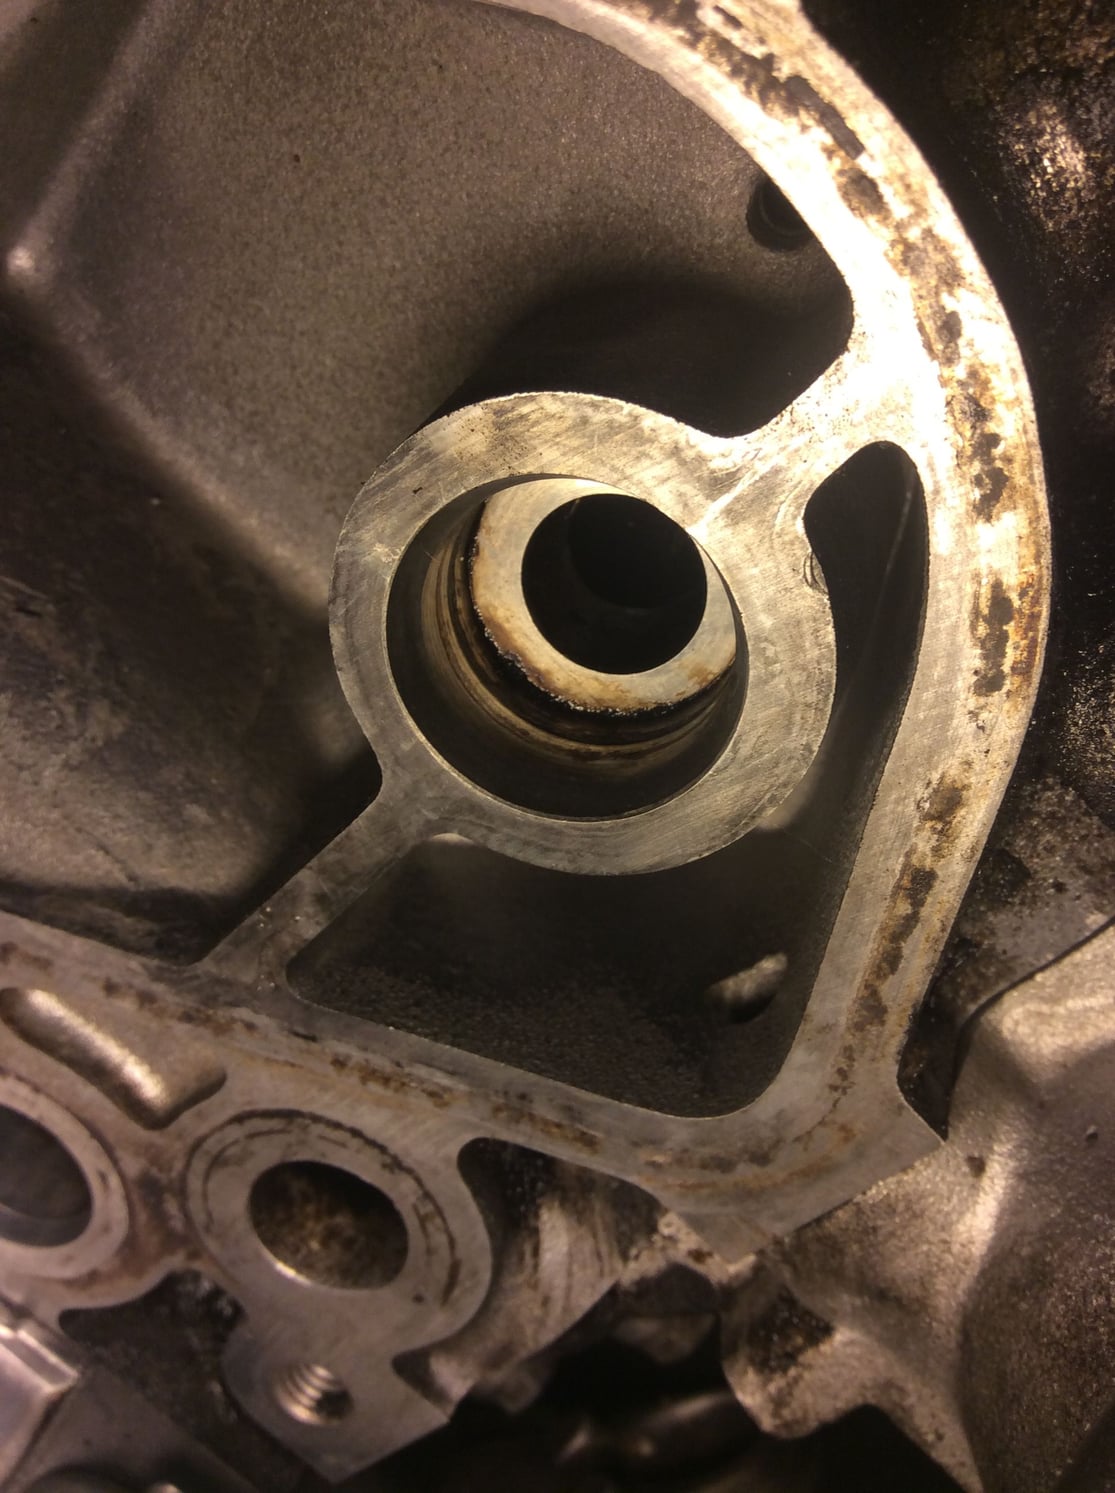
Here's some pics of the now-cleaned oil thermostat housing. That sleeve doesn't look too bad. But, old gasket material is rock hard in that groove. Gotta get that out somehow without marring the surface grrr
That ps bushing should come out freely. Maybe soak it with penetrating oil and, if needed, use a brass drift to tap it free
I was trying to pry it with a long handle wide tip screwdriver jammed in that open space; nothing. It's like the spacer is part of the bracket. Not sure how I'll get a punch / hammer combo in there; maybe I'll apply a little heat with a propane torch?
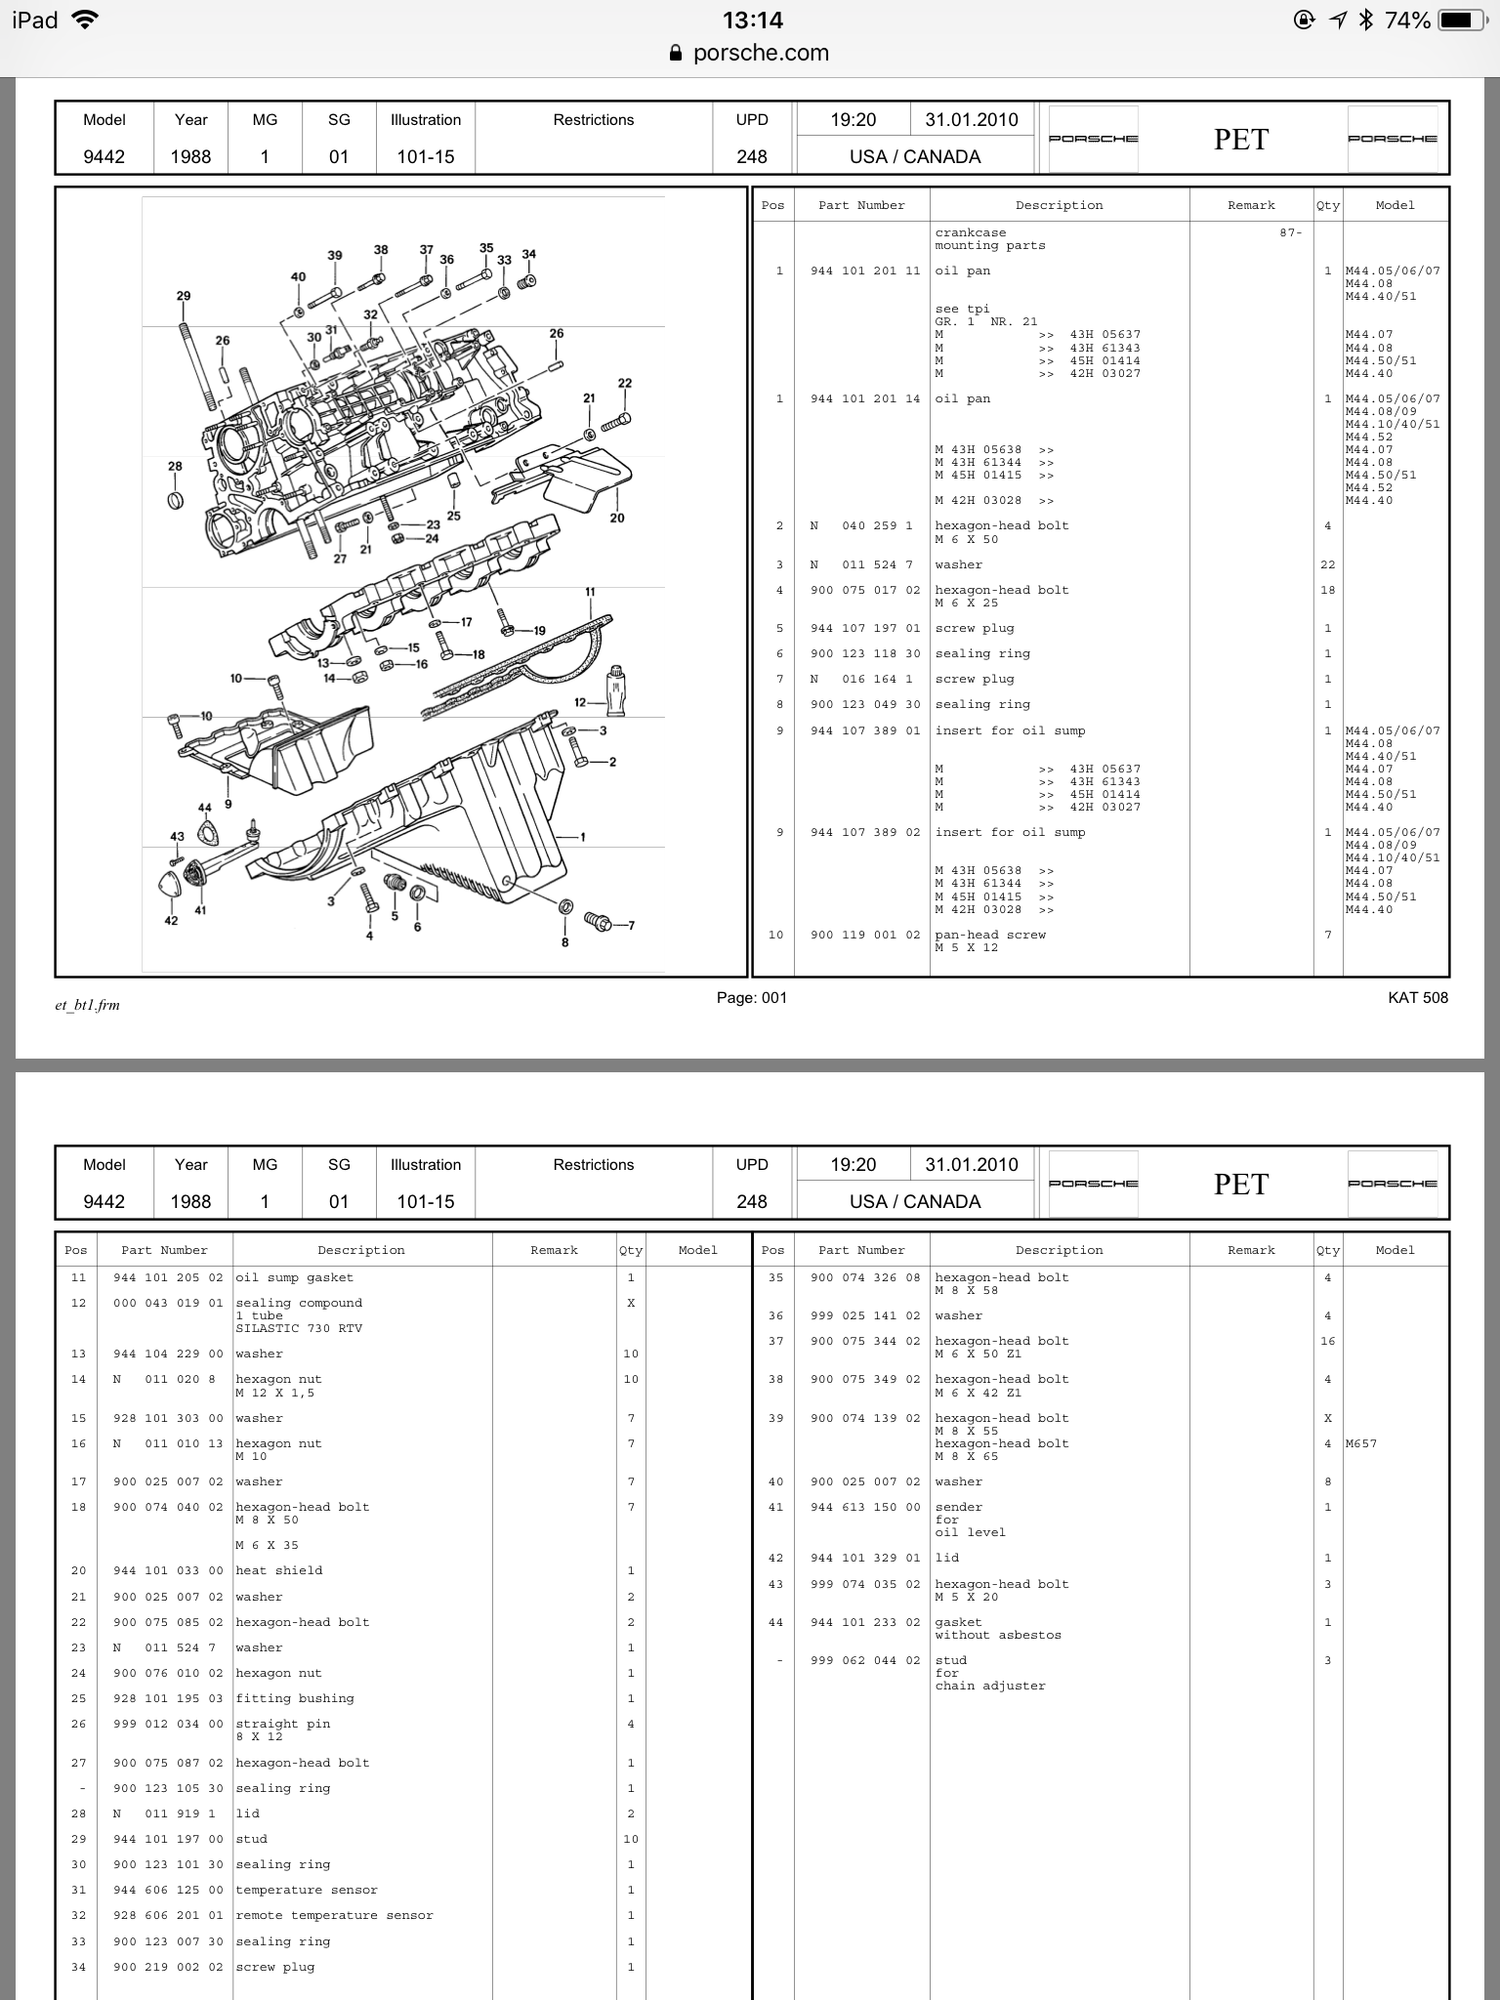
After preparing the block and just before installing the HG, I'd like to drain the rest of the coolant from the block (it's up to top edge on the low tilted side). I think I've found that drain plug. But, I can't confirm the seal ring in the PET.
The closest I can get is #27 here (the bolt, 900 075 087 02) which has a part number under it--but no # reference on the diagram--for a 'sealing ring': 900 123 105 30. Oddly, it shows a washer #21 for that bolt. I wonder if this is it? Confusing!
Coolant is $$ up here. I plan fill with distilled water and drain, maybe a couple of times. This will require draining the block to ensure I get the right mixture when I fill for real
Yes, that is/was the OPRV o-ring. That one, and the ones on your oil thermostat sleeve, have reached the end of their useful lives! Since you have a new sleeve, you can just yank the old one out with vice grips Re block draining, the 100mm bore blocks like yours do have an M8 drain bolt, located on the rear passenger side of the block. But don't bother. With the head off, you would simply be opening a port at the bottom of the now-open coolant jackets. It would be like drilling a hole in the bottom of a bowl to get the soup out. Just take a shop vac (or towels) and suck any remaining coolant out of the water jackets around the cylinders. Might as well suck out the heater core while you're at it, via the heater hose you disconnected to get the head off too. If you are determined to open the drain bolt (ahem), they show that 900 123 105 30 sealing ring for up to 86 (see the page before the one you posted), and that washer for 87 and on. Not sure what's up with that un-numbered reference to the 105 30 part in the 87 diagram, but they probably switched mid year. I'd order both and use the one that looks most like what you have.
Understood. When the engine is back together, though, if I fill & run with plain water first, I’ll need to drain the block to get all the water out. It’s $40 worth of coolant per ‘flush’ up here!
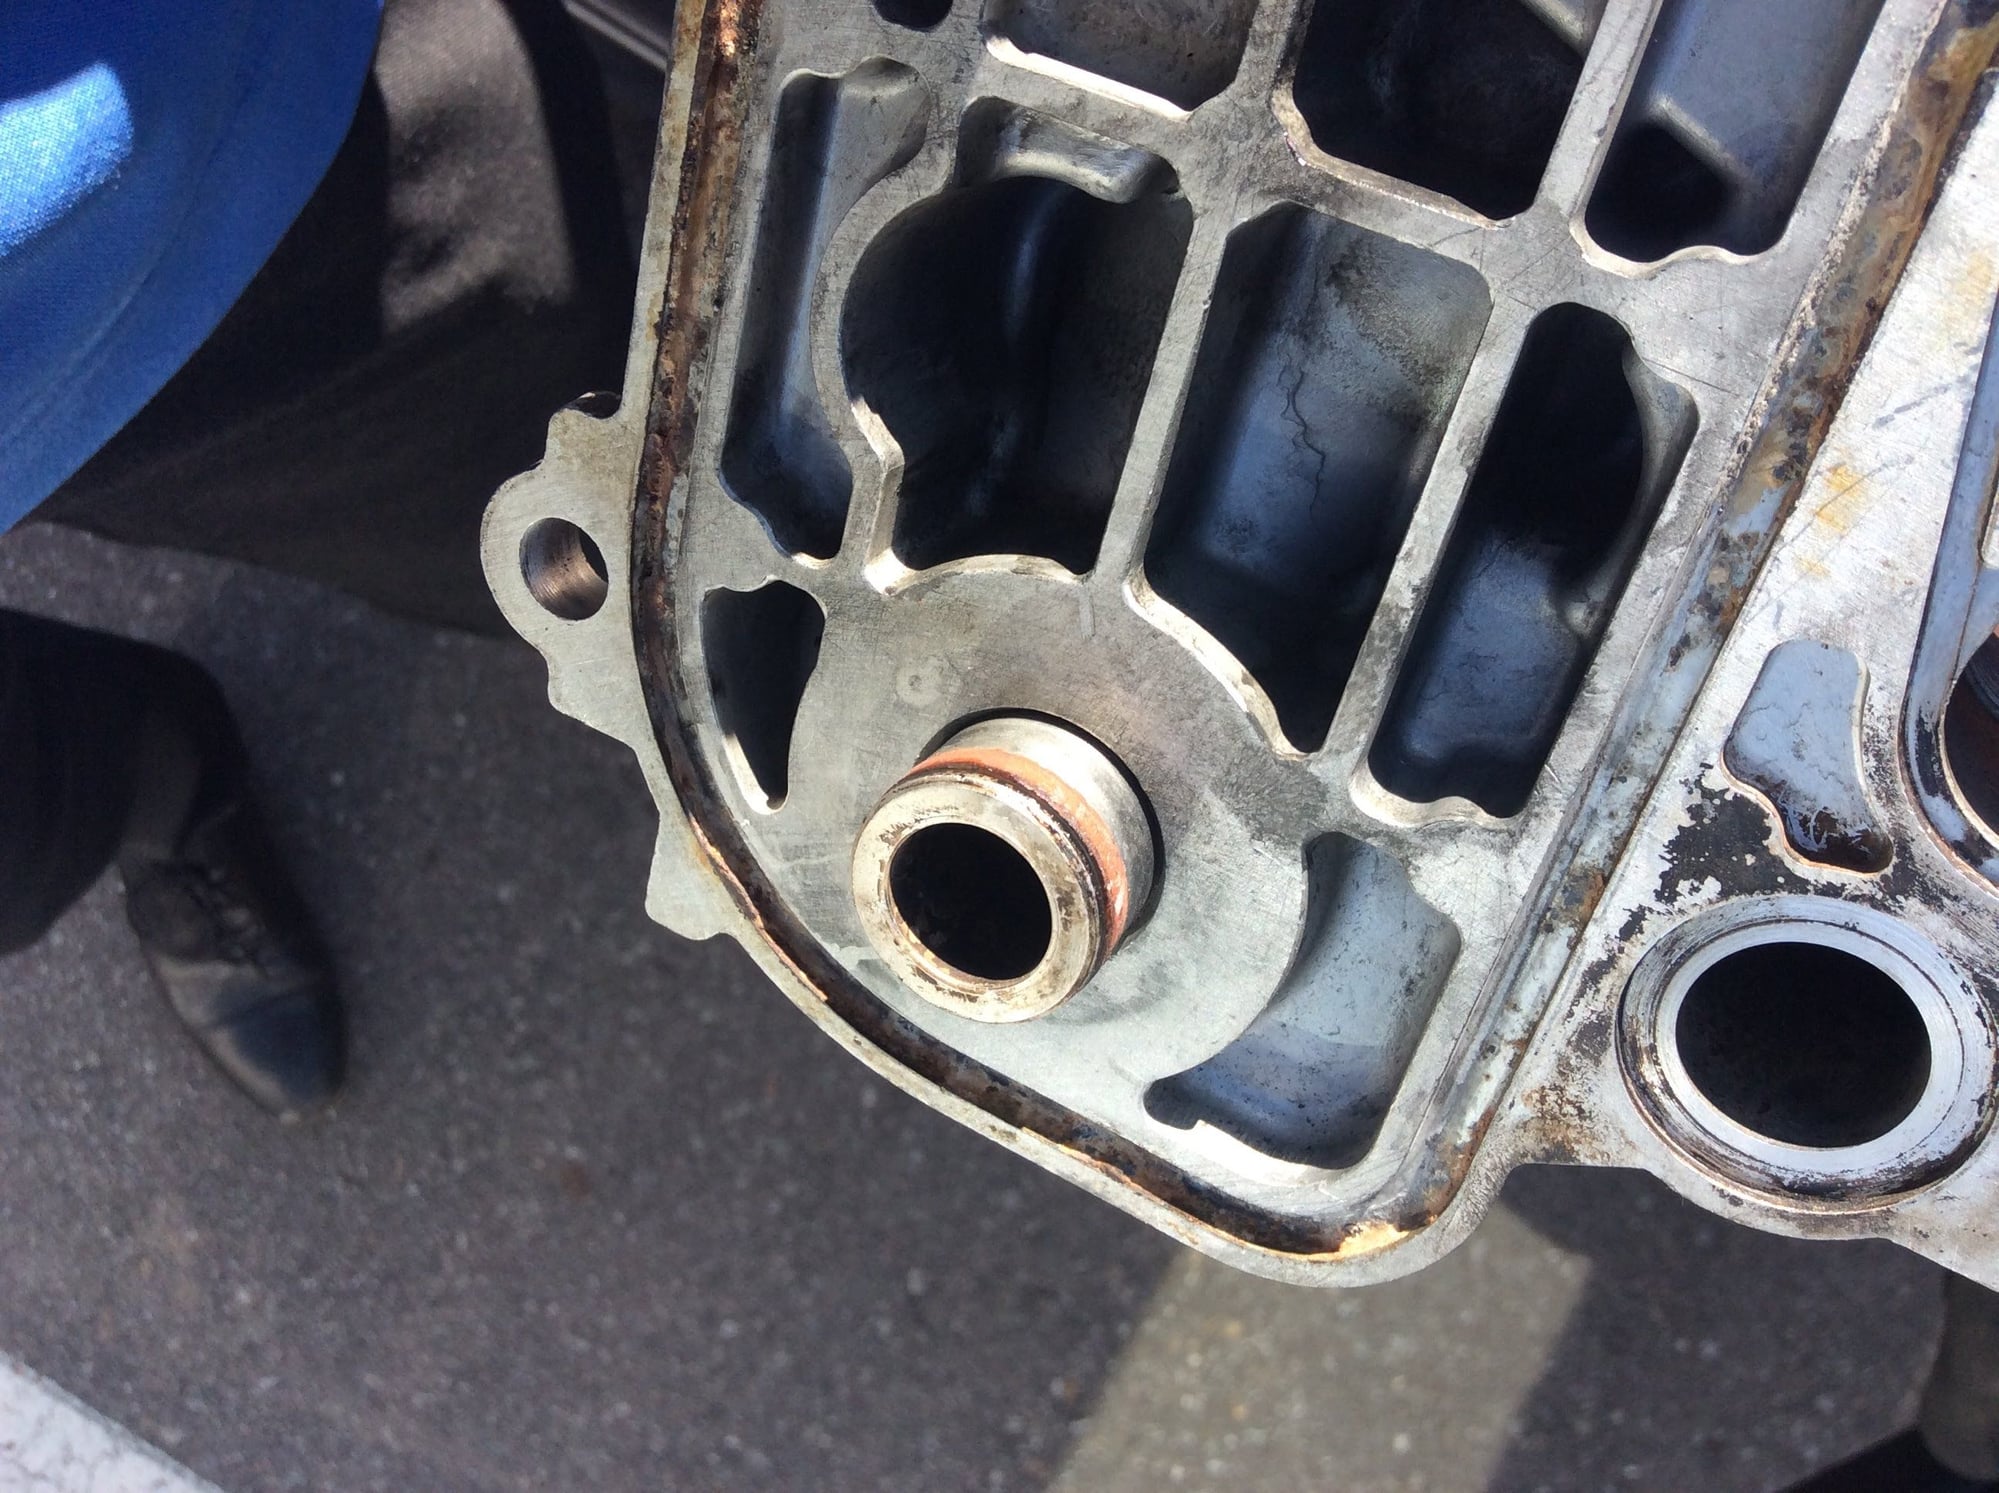
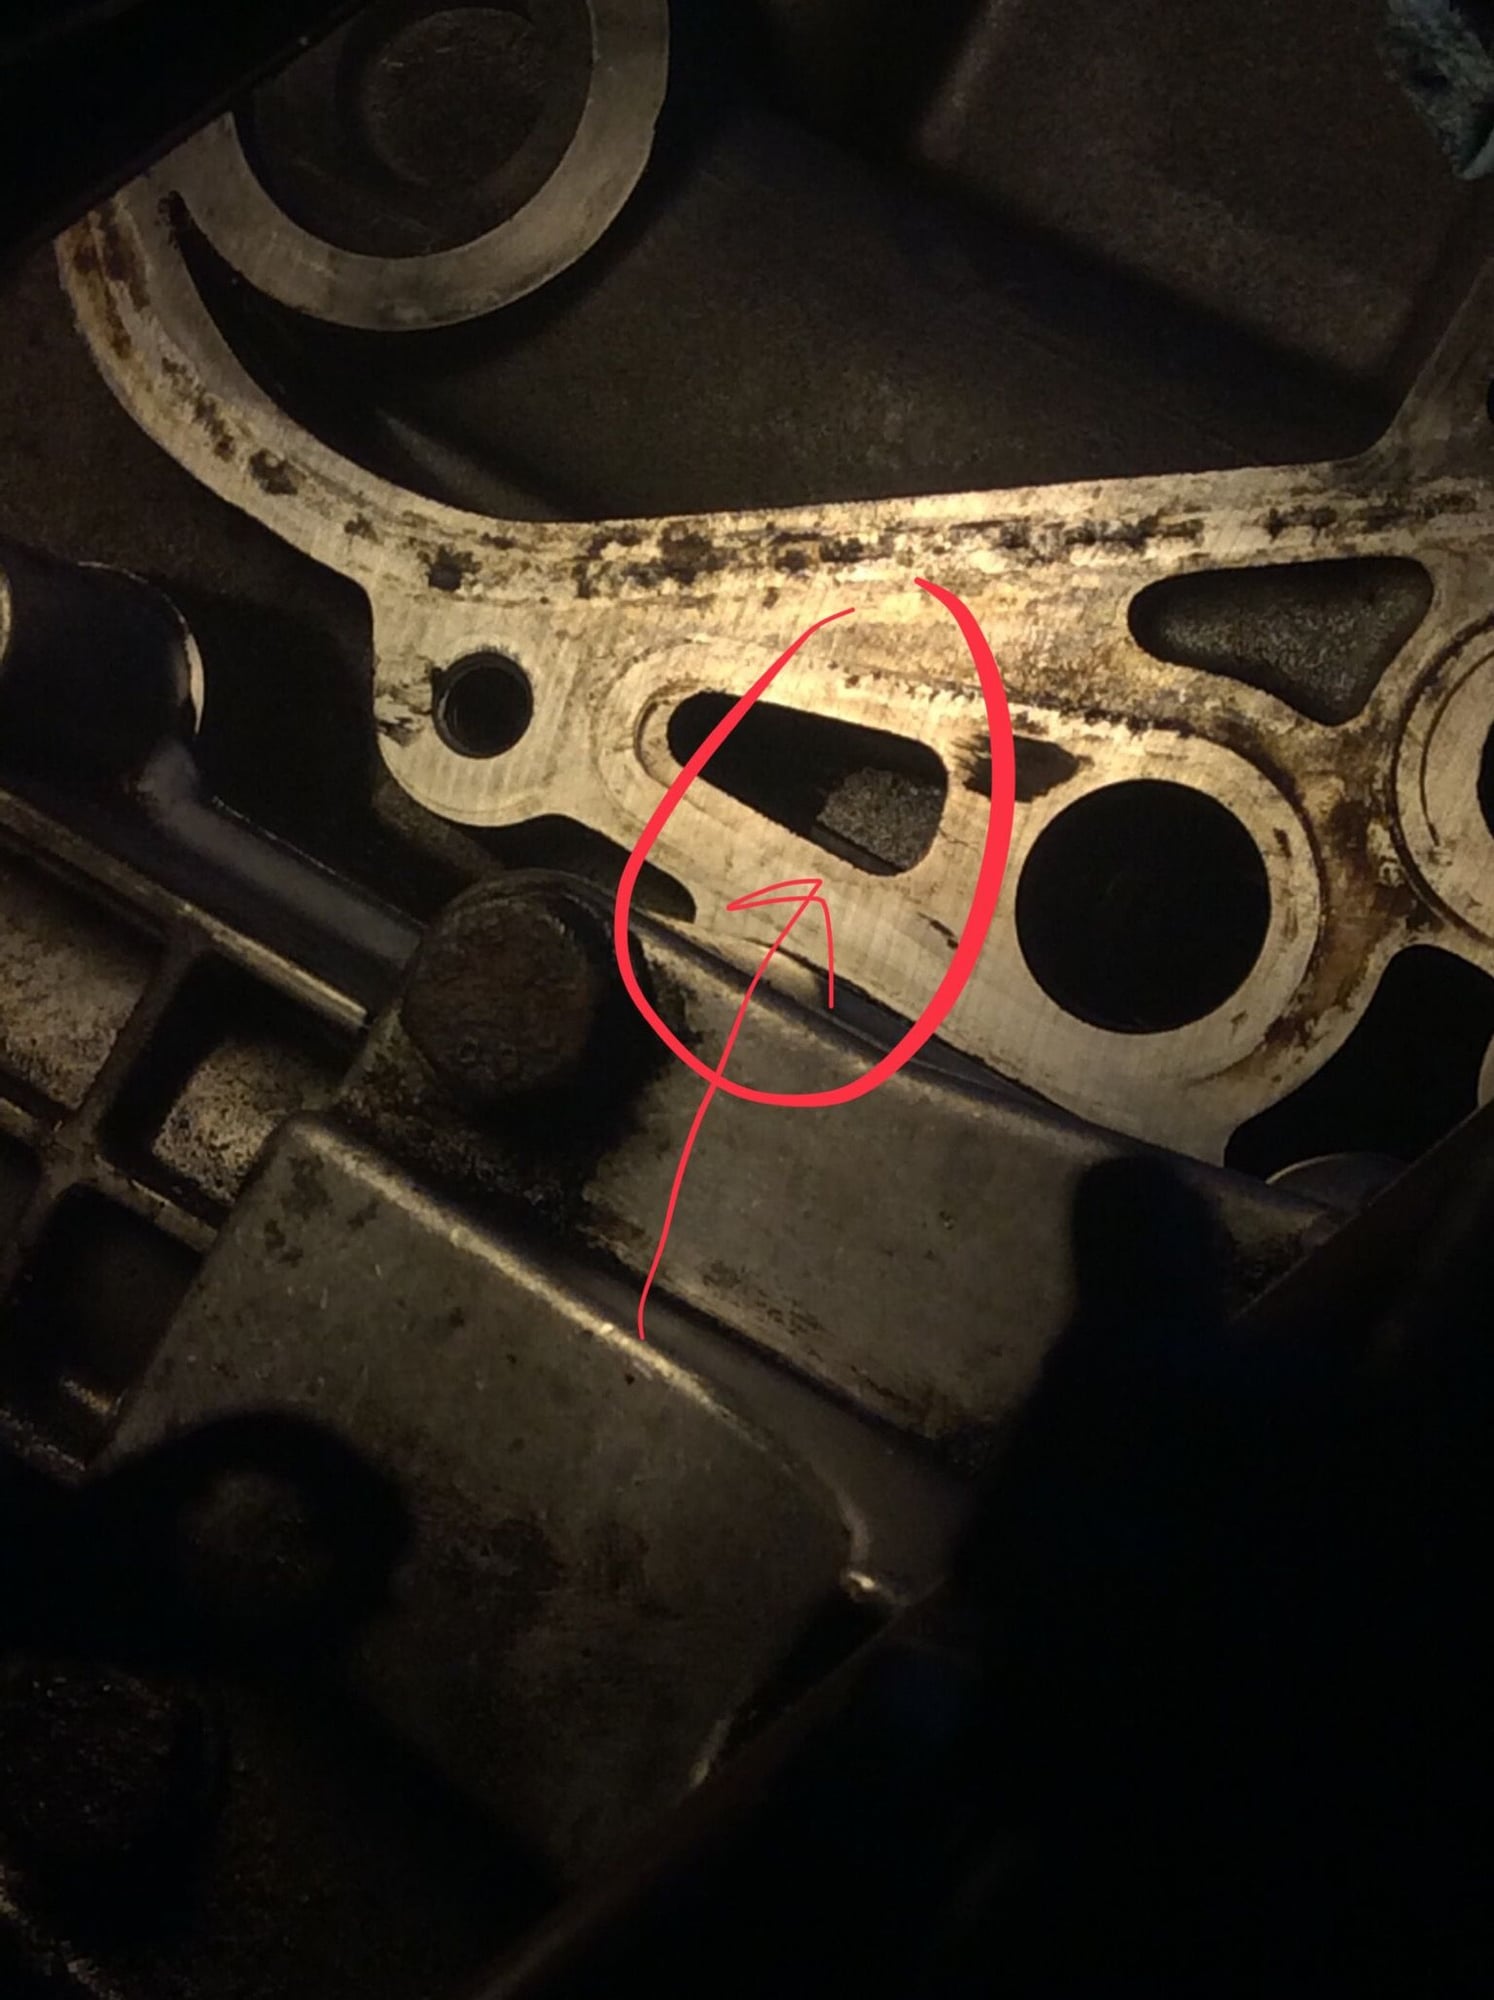
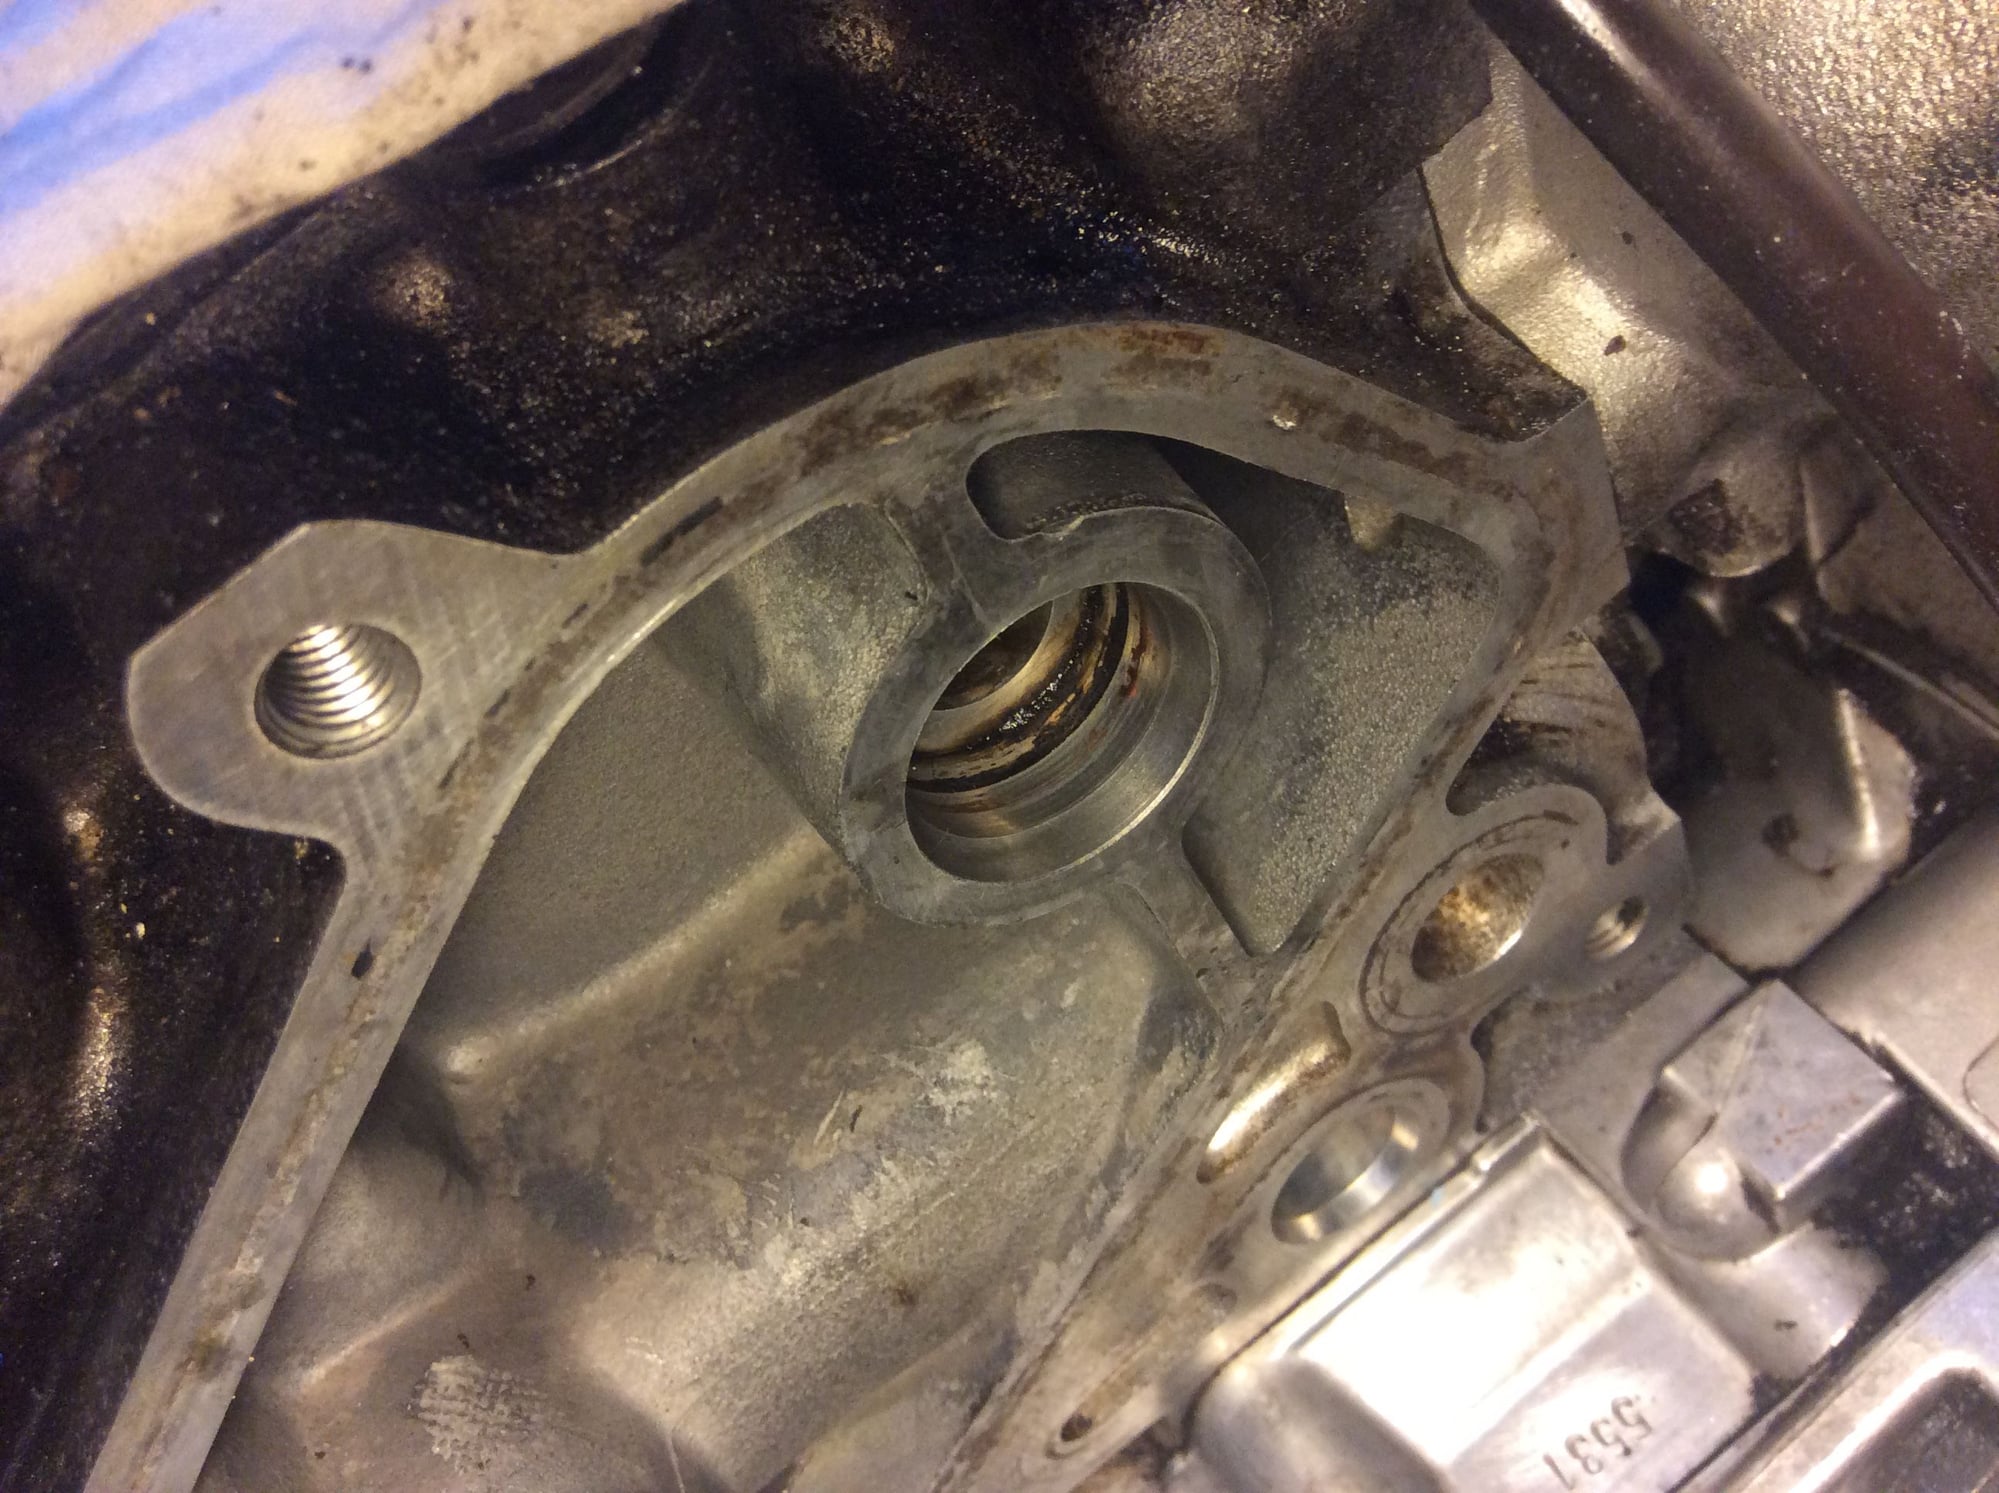
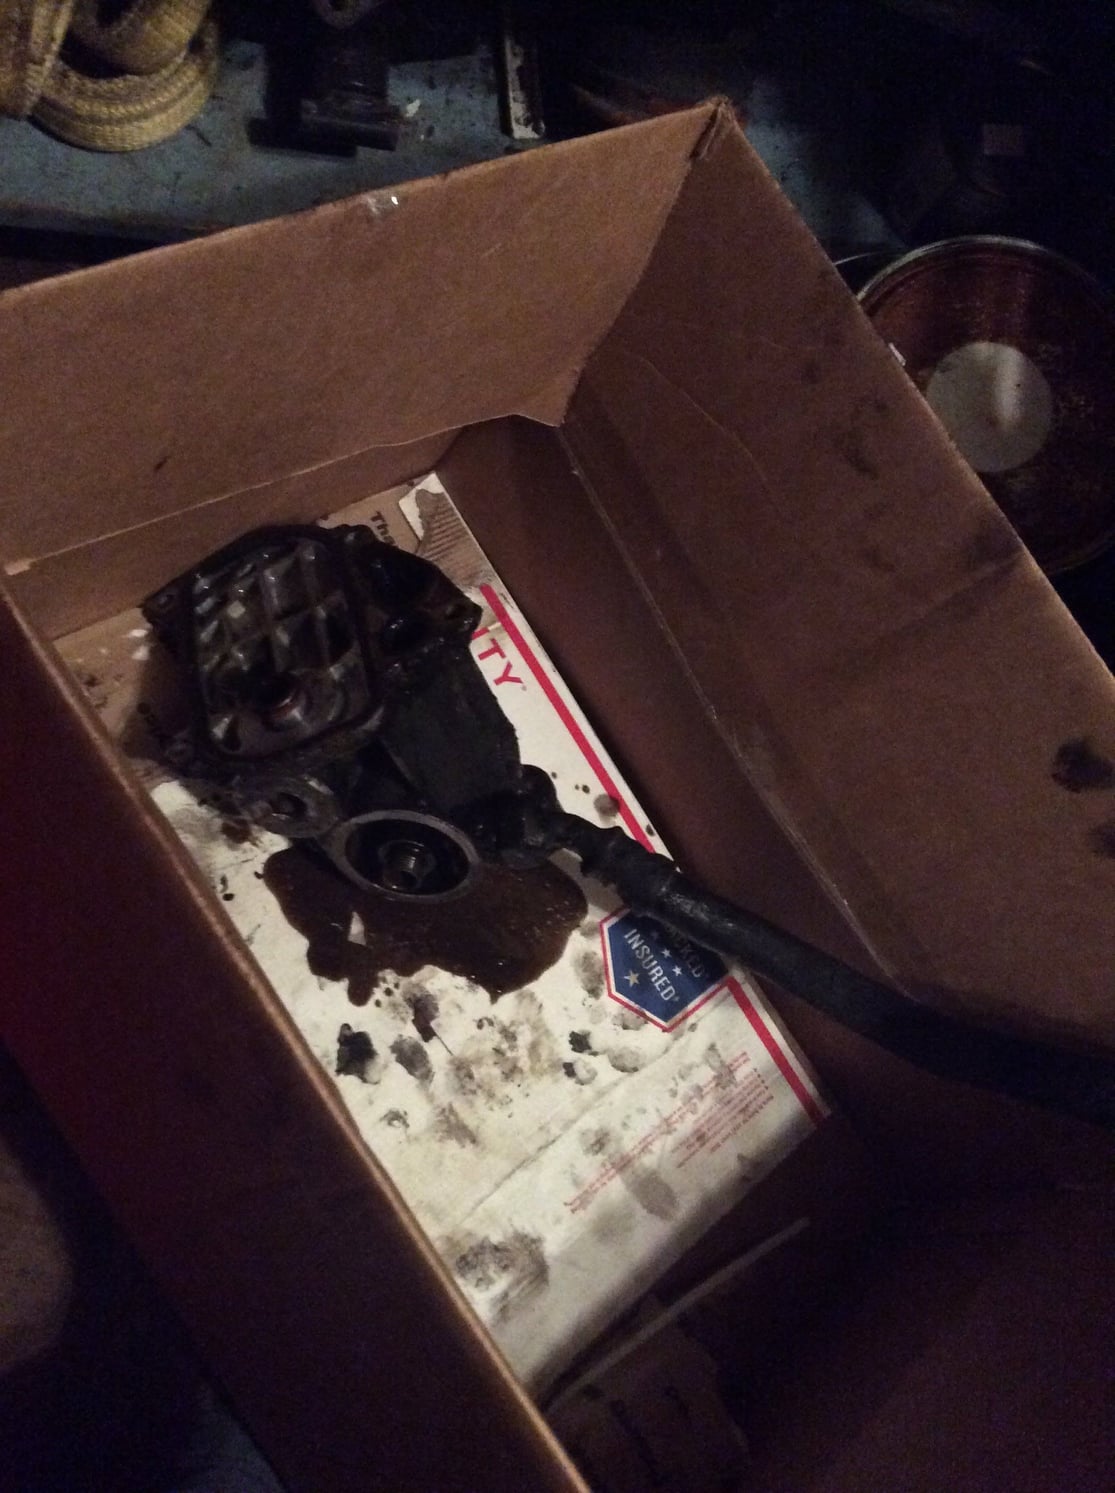
Guys... what’s up with this piece in the block part of the oil thermostat area? It looks like something is broken in there?
And it’s gonna be tricky getting the old stuck on seal bits out of this hole
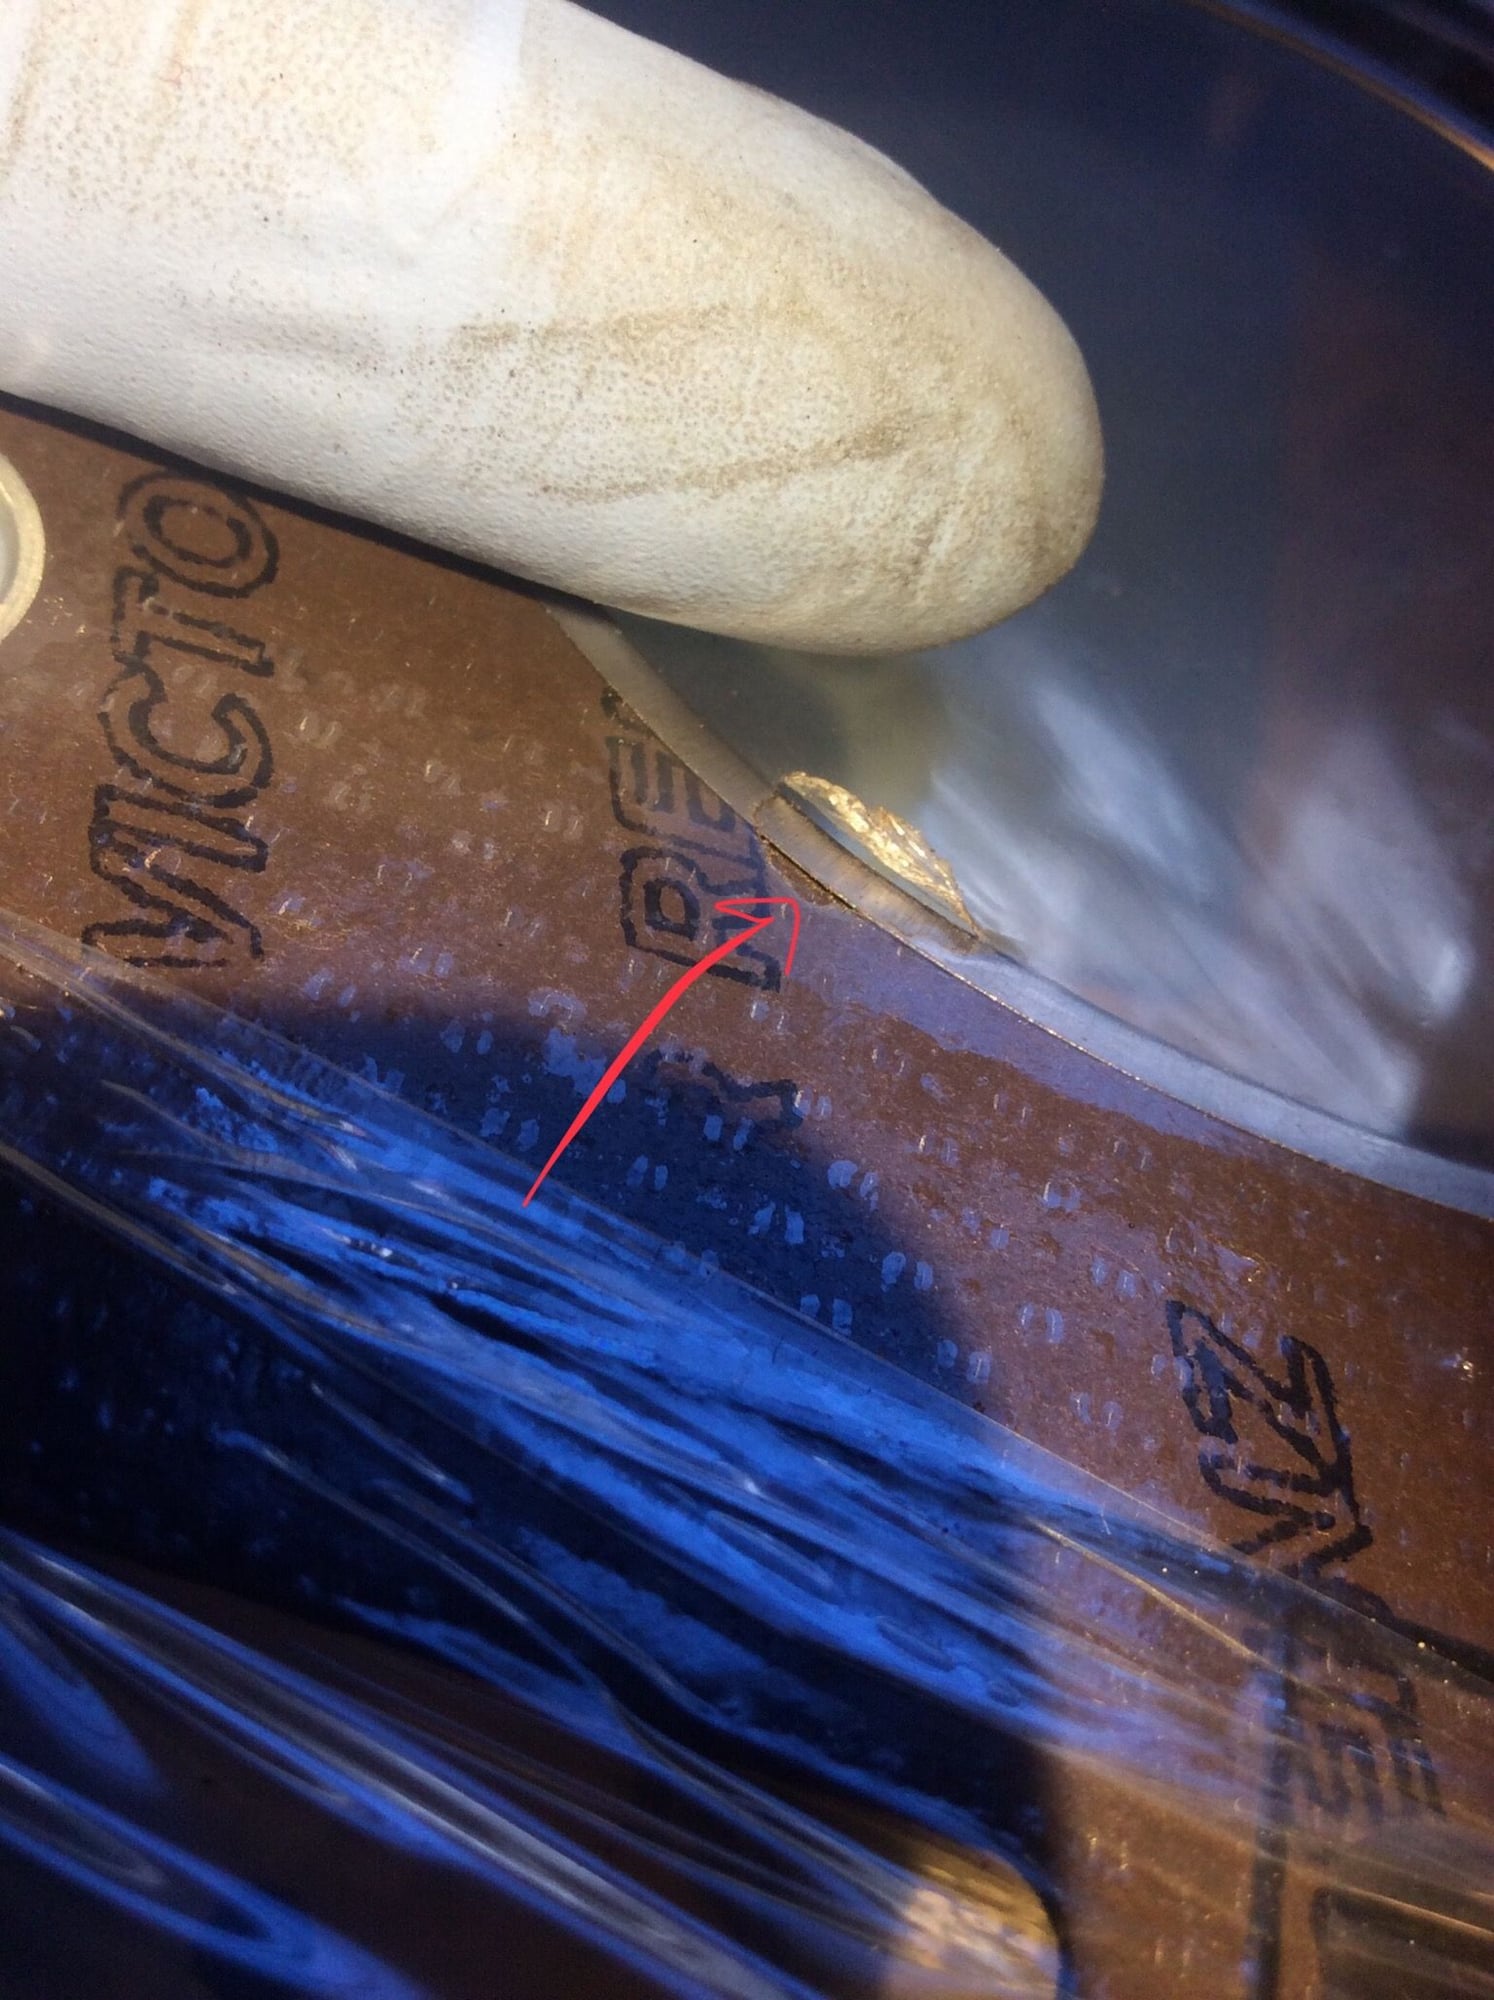
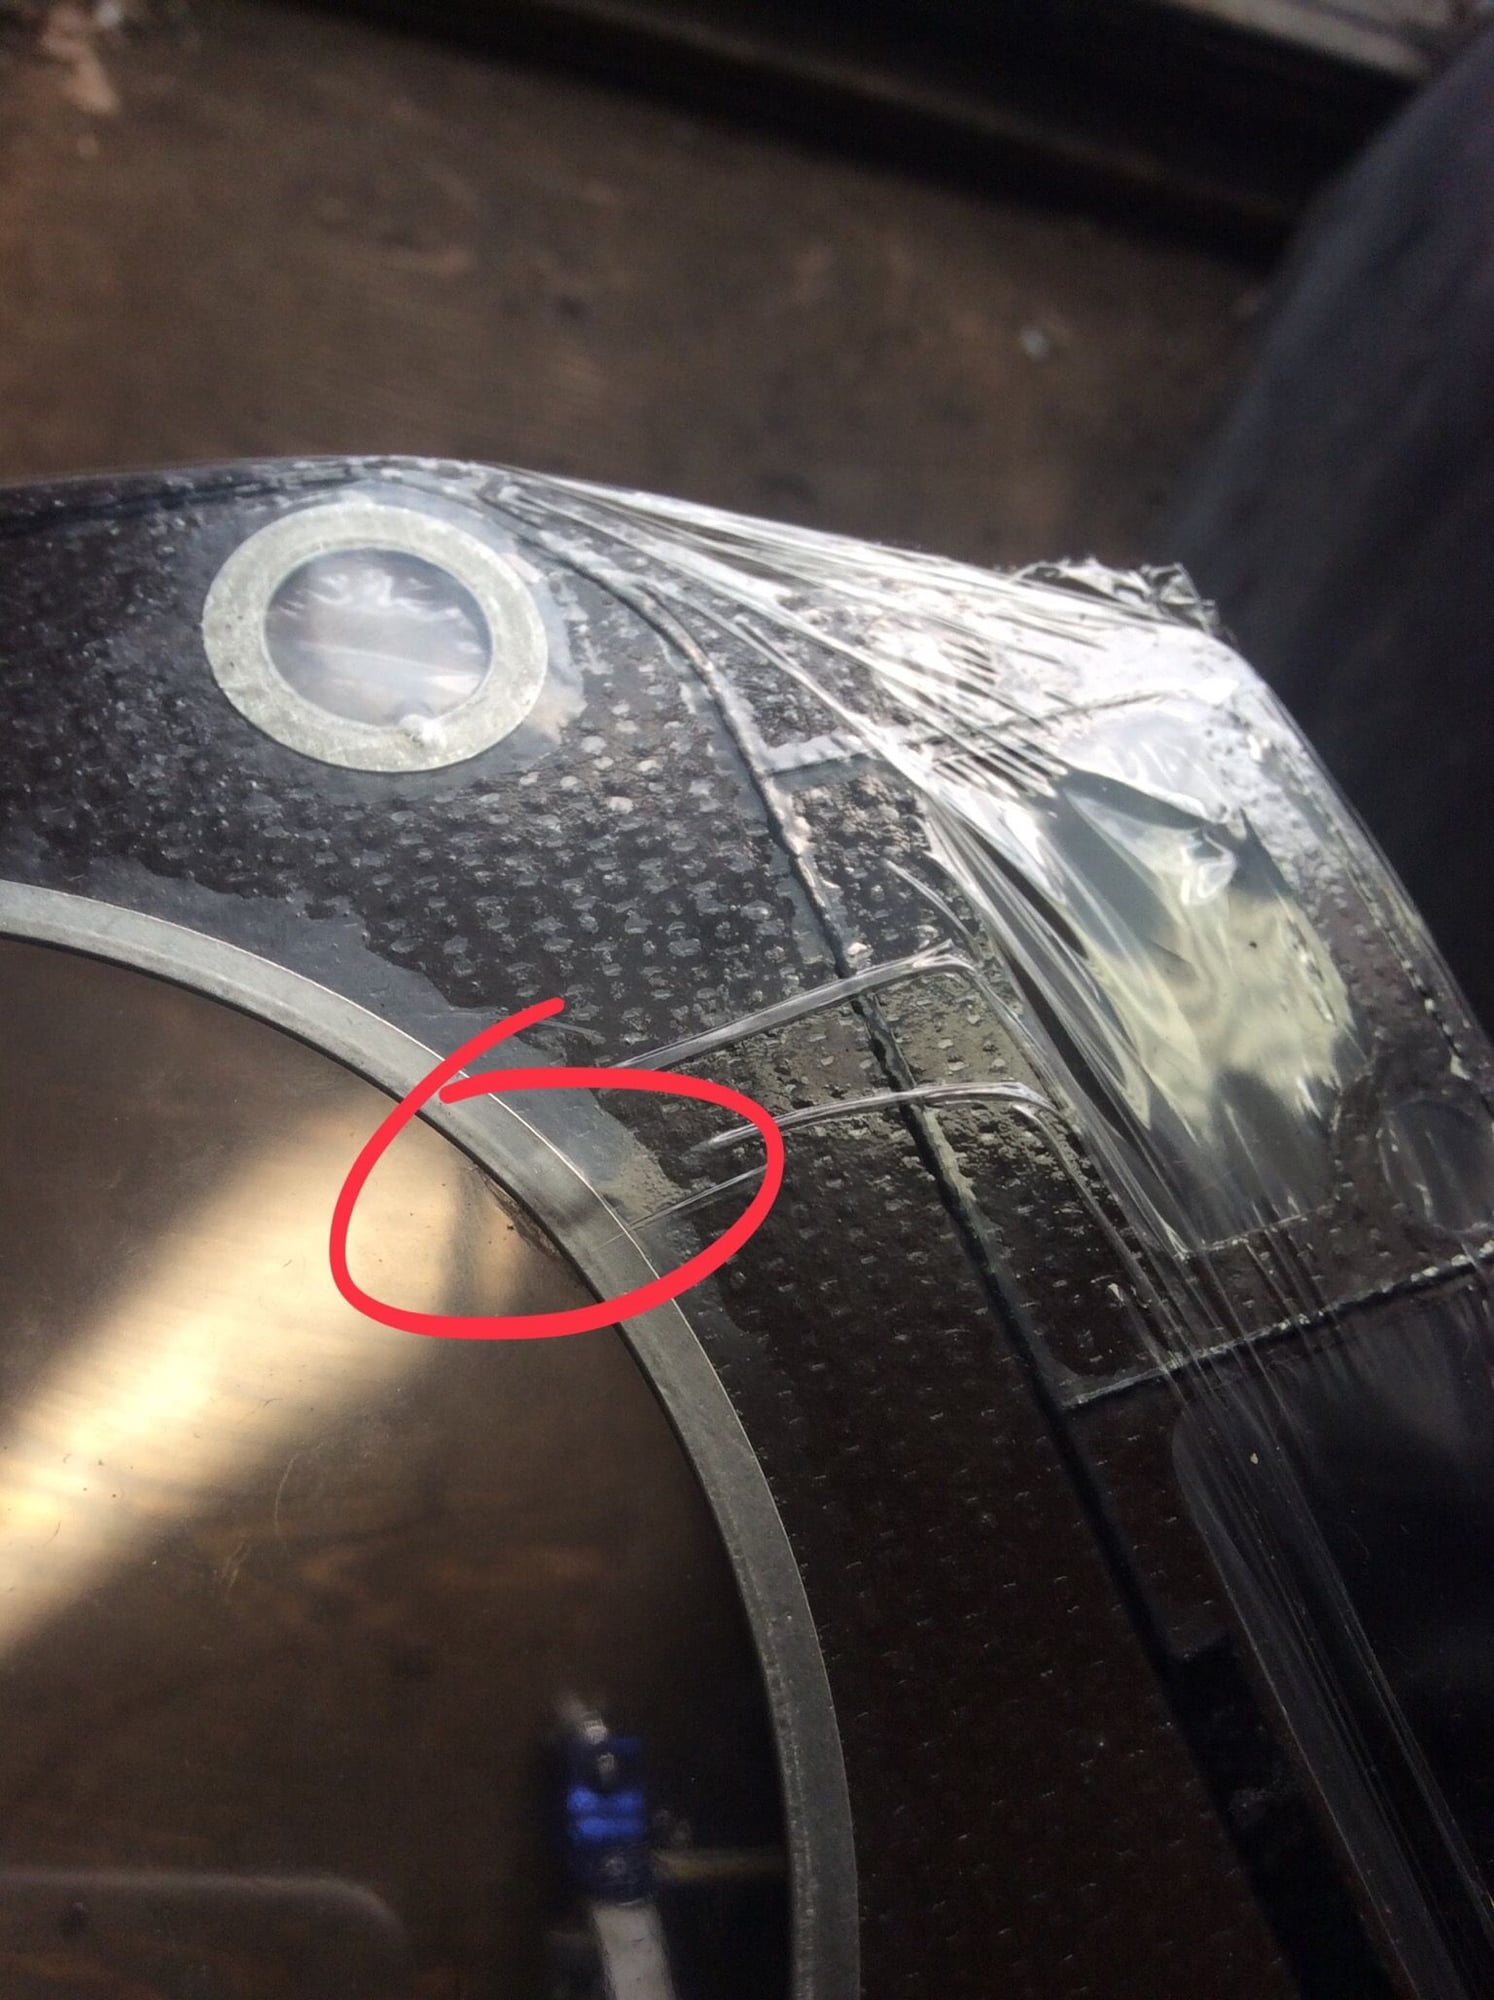
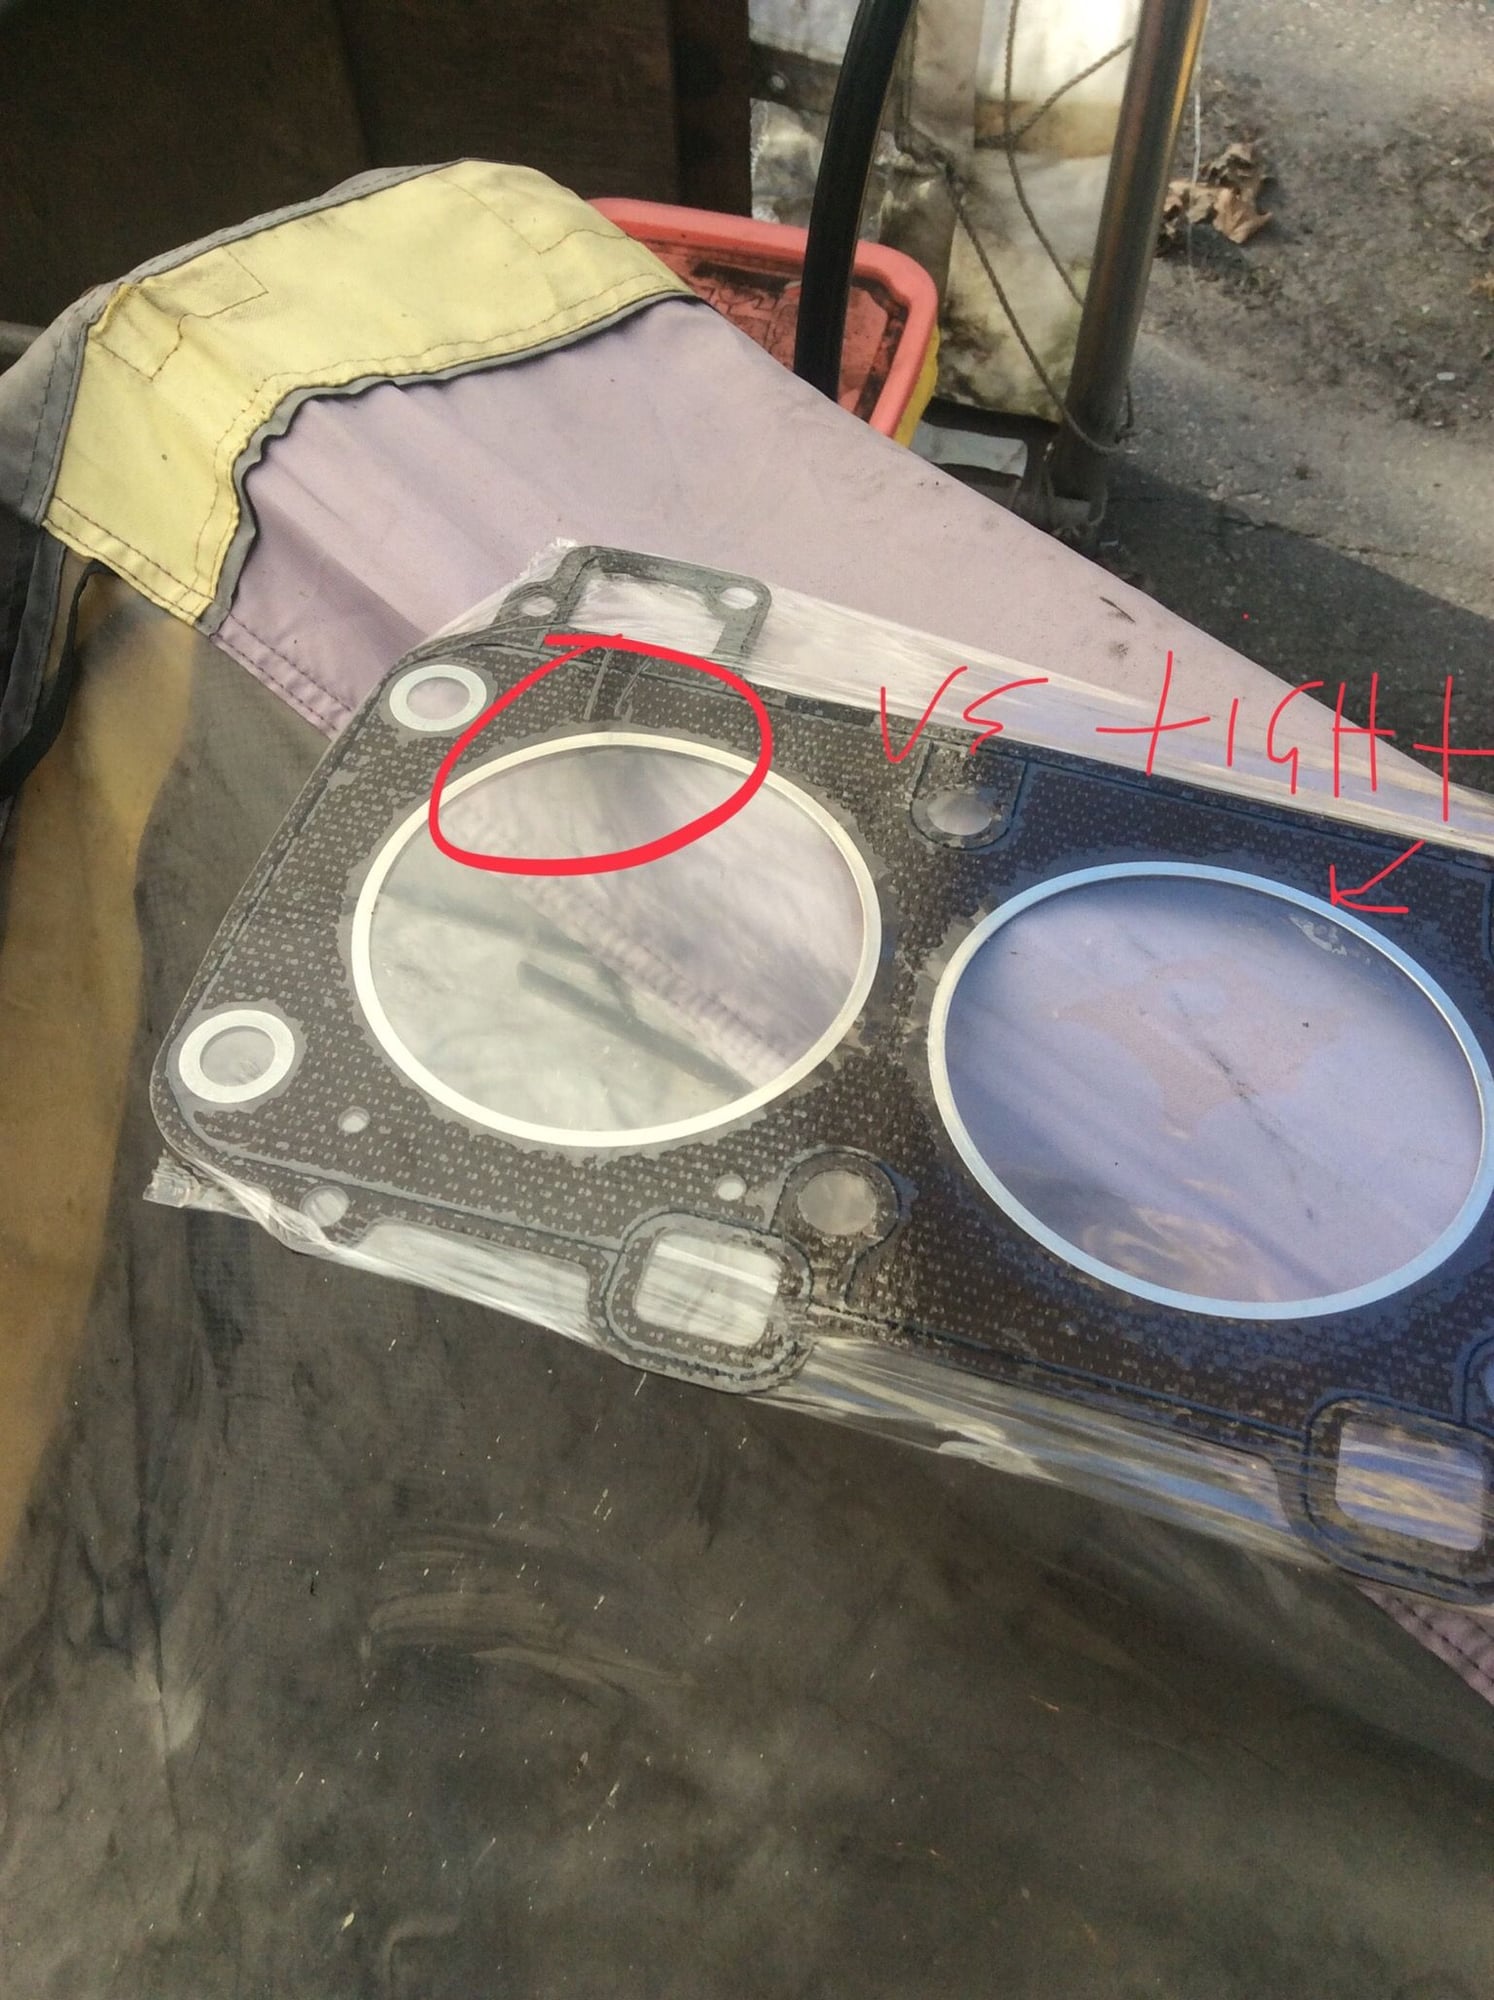
The new HG has this flaw: on one side, it’s a bump; on the other, the metal ring lifts from the material at the same spot. Note that it’s still in shrinkwrap.
I would not use it personally but others may have a different opinion or experience. Seems like it would be a weak spot in the seal it the metal has been fatigued.
I would not use it personally but others may have a different opinion or experience. Seems like it would be a weak spot in the seal it the metal has been fatigued.
Agreed, it will probably squish flat and seal fine, but for all the effort, why take the risk.

 05-07-2018, 11:06 PM


 The oprv has a groove on the end that goes into the block, which should have an o-ring. If it's not there, then look in the port on the block that the OPRV goes into (on the block, behind the oil thermostat console) and see if it came off in there when you removed the oprv. Either way, you need a new one on re-assembly. I'd flush the oil at least a few time given all the coolant that was there and/or added in the process. Drain the cooler, fill the motor and turn it over a bit (by hand or with starter motor and relays pulled), then drain and repeat... I'd probably then change the oil after the first heat cycle too, and before putting much load on the motor.