When you click on links to various merchants on this site and make a purchase, this can result in this site earning a commission. Affiliate programs and affiliations include, but are not limited to, the eBay Partner Network.
How to drop the steering rack to remove motor mounts, 1981 model.
Hi !
I just removed the trashed heat shields, cleaned up the remaining fragments of loose deadly asbestos (lol)... and now I'm s l o w l y moving closer to the bolts securing the motor mounts for exchange and replacement thanks to Roger...
So far...
Now the rack appears completely exposed, and I am uncertain of the next step...
And looking from above at the rack, I am wondering which (any) fasteners need to be loosened/removed?
Any advice will be very greatly appreciated, and I will promise to repay your kindness with a shipment of turkey bones, pie crust, and something that's in the bottom of a large mixing bowl....
Dan
Last edited by Daniel5691; 11-26-2016 at 11:05 PM.
Undo the for main bolts for the sway bar and just swing it out of the way. Undo the pressure and return lines attached to the rack, have a bucket underneath to catch the fluid. After that undo one of the bolts that hold on the steering knuckle this can be a pain but it will give you the clearance to get to the bolts you need on the mounts. I did the lower one. Once you get that just lower the rack down you don't have to completely remove the rack (leave the tie rods attached) you can just have it hang down for the clearance, and once you remove the mounts temporarly fasten in place with a couple of bolts for the rack. The mounts that Roger gets refurbished are very nice. I just installed a pair! Good luck it shouldn't be to much of a pain.
You may find it easier to loosen the upper pinch bolt clamp for the steering knuckle with the engine pulled. Looks like your 928 is getting some TLC. Your effort will be worthwhile. Miles of smiles ahead.
I have decided to call my 928 experience "The World's Longest and Most Expensive Cam Tower Leak".
LOL ! ! !
I have been having a blast going through this awesome car one system at a time. I'm in no rush. I am learning so many new things in this process. I am committed to doing the most perfect job possible with each step and each detail.
Without you guys on Rennlist, utterly impossible.
Thanks again.
PS Looks like you guys are facing The Huskies tonight. Go Toppers ! (except when you play Eastern LOL)
PS Looks like you guys are facing The Huskies tonight. Go Toppers ! (except when you play Eastern LOL)
Although I grew up a Kentucky boy, I was brainwashed to be a UGA fan from birth. All of my family on my mother's side was from Georgia. At least 3 family members played sports there and practically all of them went to school there. It's "Go Dawgs" for me.
I followed Dwayne's write-up and I never removed any of the PS lines. . Of course it looks like your engine has been removed and is an OB so it may or may not apply. See it all in pictures at this link http://dwaynesgarage.norcal928.org/MotorMounts.htm
You might get enough clearance if you remove the 10mm bolt holding the clamp that keeps the PS lines up against the inner fender. It would be worth a try. I'm was just telling you how I did this job a few weeks ago. There are always a few ways to skin a cat.
Dan, You're going to have to remove the cross-member and swaybar for stripping and paint (along with the bottom-plate), so you might as well remove the rack altogether. You will need to pull the thru-bolt from the lower u-joint to get it free of the rack, but do pay attention to the orientation of the steering wheel, u-joint and rack to make reassembly simpler in a few years when it goes back together.
And of course the rack likely needs rebuilding, but since it is on the bench it is easy to either send it off or do it yourself. The thing to pay attention to is the radial play, especially at the driver's end. Wiggle the steering shaft back and forth a few degrees, the rod-ends should move in/out a fraction of an inch, but not at right angles (i.e. fore/aft as it sits in the car). And don't bugger the splines on the steering shaft with the vice-grips whilst wiggling, that will cause a world of hurt.
My Ninja Supermodel wife just cut power to the garage for the night.
(My turn to babysit the new puppy ha ha)
I will go at it fresh and full of intimidation in the morning.
Jim I laughed out loud at the "in a few years" comment ! Too funny ! You mean you don't think I'll have this car back out on the road in a week or two ?????
I'm in the running for longest cam tower leak as well. Wife wouldn't drive it with the leak and parked it 4 years ago.
Brought it into the shop about 2 months ago, pulled the motor, freshened up the M28/11I pulled out of the Euro, and have been going through all the systems as I wait for parts (read money).
I dropped the sway bar at it's mounts and pulled the rack aside to change the motor mounts, quick and easy.
Still have the pilot bearing and rear main seal to do.
Thanks to the great advice and pointers here, I finished the job a few moments ago and want to record the steps I took. maybe some other poor hopeless n00b will find this thread thousands of years from now when he tries to drop his steering rack...
I loosened and lowered the sway bar:
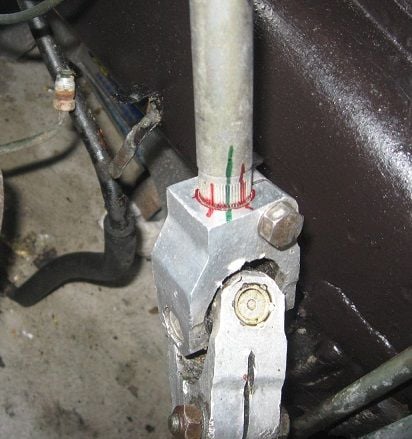
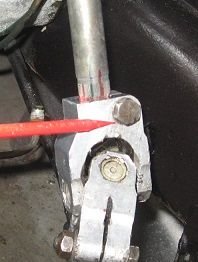
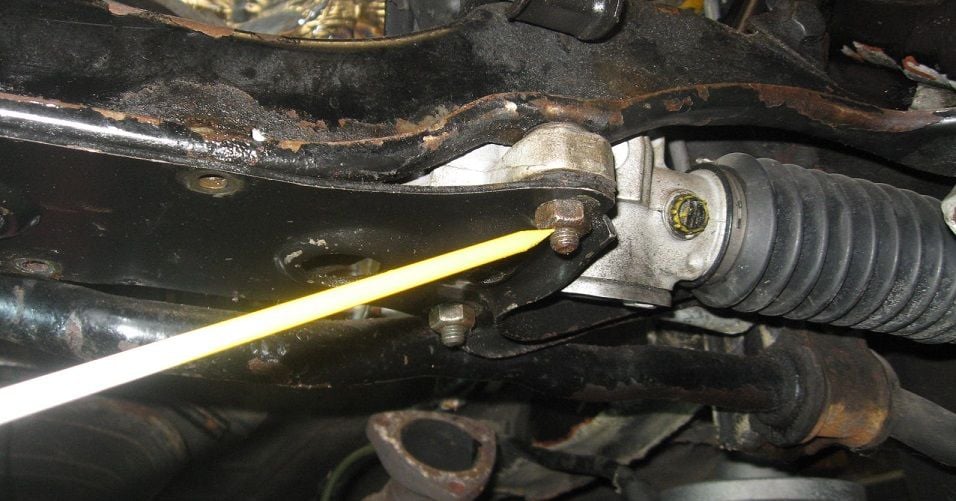
Next, I carefully photographed and scribed the steering shaft above the pinch bolt prior to loosening..
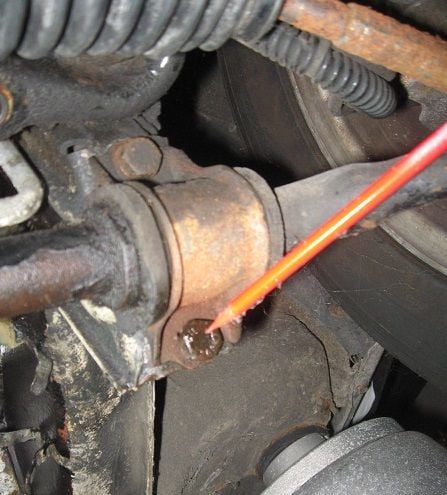
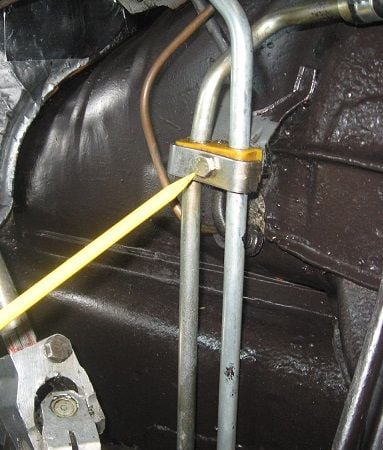
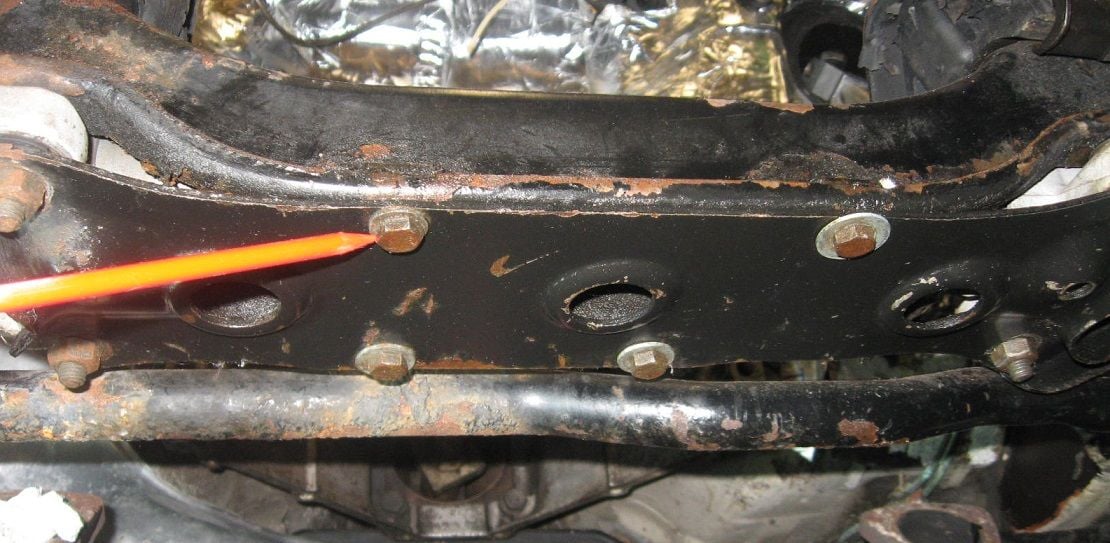
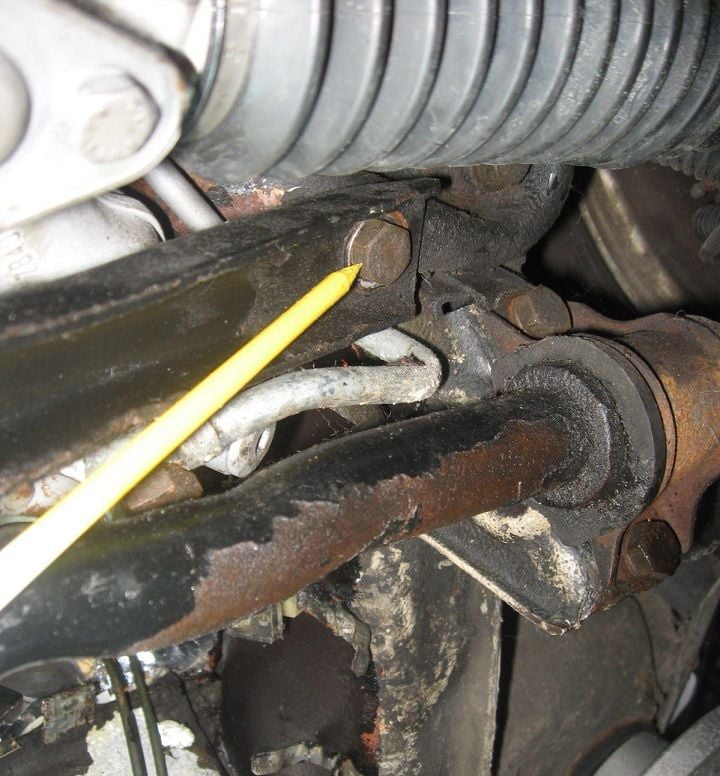
This is the bolt loosened to allow the steering rack to drop downward below the crossmember...
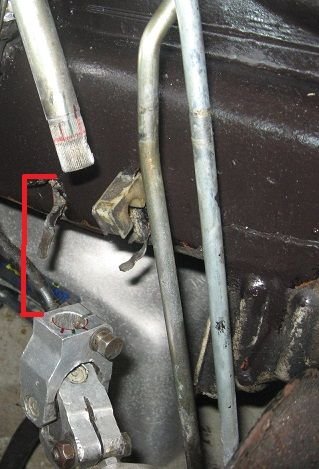
Since my motor is out, and the power steering lines are already loose, I allowed them to move downward by loosening this clamp on the driver side engine bay...
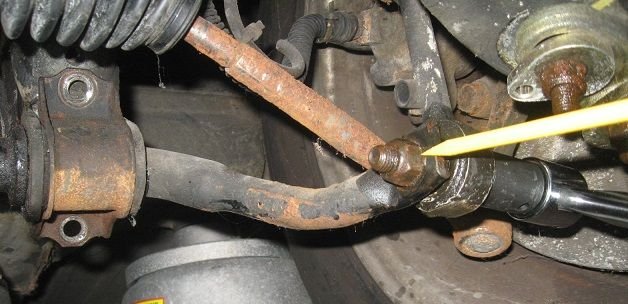
The rack moved easily down, with a few easy taps from a rubber mallet at the pinch bolt.
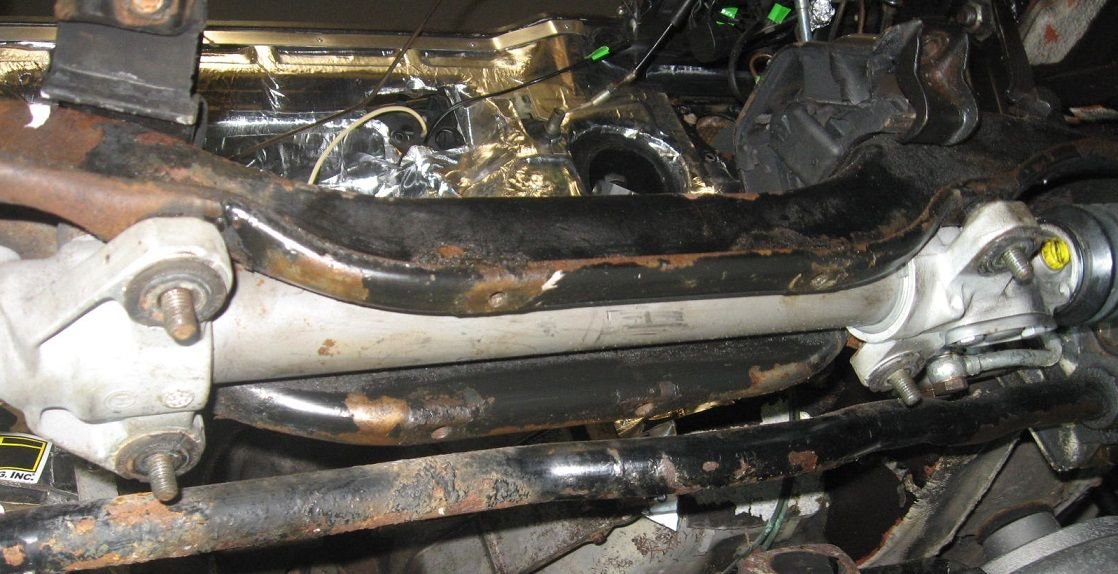
This shows the length of downward travel, plenty to access the motor mount bolts
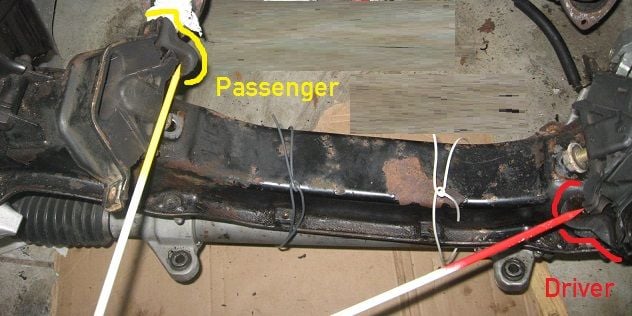
I tried to get a good image of the motor mount bolts, but this is the best I could do..
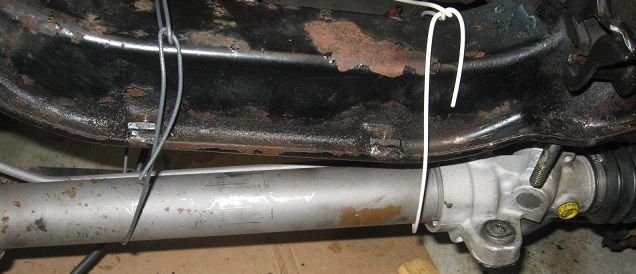
I supported the rack with a couple of heavy wires.
The Prior Owner had replaced the rack within the last months he owned the car, so I plan to leave this assembly in place.
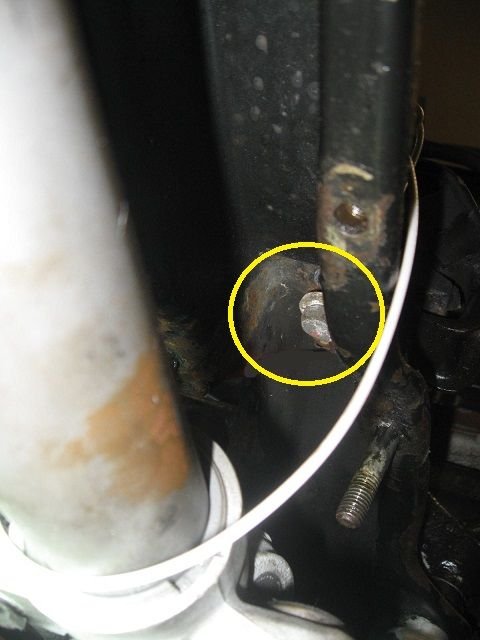
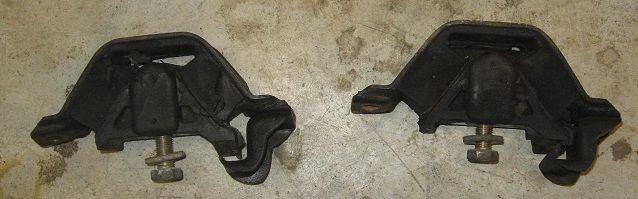
This image shows the orientation of the two motor mounts on the crossmember...
And here they are, ready to ship out to Roger at 928sRUs for replacement.
Again, thanks to everybody for the GREAT advice.
Thanks, Ryan. Those are actually to help me figure out how to put this beast back together.
I wish I could come up with a way to quickly add text to an image while I am out in the garage working. I am using an older Canon camera because it's the highest resolution device I have, and it really seems forgiving with different light levels.
Lacking text, those painted sticks help me figure out what I was doing. Also, God help me if I ever lose the chronological order of these images. I have them backed up on a couple of drives.... so far so good.....
Those colored skewers: brilliant idea. Interesting point about being able to annotate photos as you take them. Next time I go down a rabbit hole, I'll see what I can do with my fancy iPad Pro with Pencil. Probably get grease all over them, then drop them on the floor.

 11-25-2016, 07:27 PM


 Too funny ! You mean you don't think I'll have this car back out on the road in a week or two ?????