When you click on links to various merchants on this site and make a purchase, this can result in this site earning a commission. Affiliate programs and affiliations include, but are not limited to, the eBay Partner Network.
Yesterday I picked up my 1990 S4 from my mechanic. I'd taken it in for a number of things, including help finding and fixing the short that was causing fuse #24 to blow. The first report was that the short was in the front interior dome light and that it had been fixed. A few weeks later, after the other work had been done, I piked up the car. Everything I'd asked to be done was done, but the short had burned out the socket in the CE panel for fuse #24. Which means, while the short has been repaired, I still don't have a functioning dashboard and the A/C isn't working.
This leaves me with several questions: Can the socket be repaired or does the entire panel need to be replaced? As a temporary fix, is it possible to rewire the CE panel to take advantage of one of the unused fuse locations or to install an inline fuse that bypasses the CE panel? If the panel must be replaced, how's the best way to source one (new or used)? Finally, can Julie find happiness with Paul? (That last question has nothing to do with the CE panel, but it's always something I wanted to know.)
A little frustrated, but still enjoying the journey.
Hi, the first thing I would do is to make sure all the fuses are the correct value, this will keep the wires from melting.
If the fuse holder in the CE was damaged / burnt, this is the result of dirty / oxidized contacts on the fuse and the holder, so check the others and clean them all.
Now as to your questions, Yes, Yes, yes
The Fuse Block can be replaced but it needs to be from the correct MY and location (the positive connections are ganged different inside). the CE must be removed to do this.
Yes you can use an "inline" fuse holder to bypass the burnt one.
Yes you could use an unused fuse socket however this is not the best fix as you will need to find one that is compatible and it make it a bitch for the next owner.
Someone did this to one of mine for the windows, found out after removing all the "unused" fuses and later no window movement as I was loading it onto a trailer
Luckily I remembered what I had done
Edit: sorry I don't get involved in others domestic relationships
Dave -- Thank you for the response. If any of the rest of you would like to chime in, I'd appreciate the help. Sounds like there are several ways to go and I've some thinking to do.
I'm doing this job now. https://rennlist.com/forums/928-foru...nor-block.html
I'm going to try leaving the plastic block in place, and just replace the copper contacts and block face (from a donor panel). Not the most challenging job, except for the plastic being brittle from age and generally designed to snap together - not slip apart.
Do you need to remove the whole panel to perform this surgery, or is it something you can do while everything is still in the car?
that is a workbench job. You cannot do it with the panel in place. The panel is very easy to remove however. Just be slow when disconnecting the plugs on the bottom row, so that you do not break the tabs.
I know it seems daunting to remove the panel - it is however actually very easy and almost impossible to replace wrongly. It's possible to screw up repairs - but taking the panel out and replacing it are easy - once you have done it the first time you will have no fear of it again.
Steps: (described for an 85+ car).
1) Disconnect the battery (always)
2) Uncover the panel - you need good access all round - so remove the passenger mats - fold carpet well back & out of the way
3) Pull out the red unlocking tab in the center bottom - make sure the disengagement bar slides to release the bottom tab of the plugs (early years <'85 don't have this)
4) Remove all the plugs - use puller tools (or make one - big paper clip & pliers?). Each plug has 2 loops (diagonal offset) you can use - avoid breaking the top (tiny) 'lock' tabs (caution brittle - ease it)*
5) Unbolt & remove the top panel red wire connections (different connections on <'85 cars)
6) Unbolt the panel - top & bottom of panel (detail varies by year - early cars have a bottom hinge)
7) Ease the panel out from behind the ECU's (more awkward on 85+ cars - bigger panel)
8) Fold the panel down & remove the ground connections above the panel location
9) Remove the panel from the car.
Replacement is simply the reverse
Step#1 is the most important - always!
* NB don't worry about plug order - they are all color coded and have a physical interlock scheme. No plug of the correct color will fit in the wrong slot of that color. Plugs will just not fit into slots adjacent to where they should plug in by many slots either side. Basically with the panel bolted in place - you simply cannot practically fit any plug in the wrong slot - the only ones that are possible mismatches don't actually reach. So match colors and you are golden. (NB this is true for >'85 cars only - take a bit more care on early cars)
Alan - Thanks for the step-by-step removal instructions. I've so far been practicing on the donor panel. What are your favorite tools for removing the fuse blocks and taking them apart? I'v done it...but I think my tools (small screw drivers) and techniques are not ideal.
Step #1 and the slick "fool-proof" physical/color-coded plug design were all I knew when I started this project. I discovered what the red lever does by accident. For those who've never done this...think of yourself as a prison guard. You can lock or unlock ALL of the cells (plugs) by pushing or pulling the red lever at the bottom edge of the panel. It's a smooth functioning design that has the added benefit of not relying on the plastic tabs that become brittle and break easily.
Alan - Thanks for the step-by-step removal instructions. I've so far been practicing on the donor panel. What are your favorite tools for removing the fuse blocks and taking them apart? I'v done it...but I think my tools (small screw drivers) and techniques are not ideal.
...
Jon hopefully Alan will still respond, but removing those blocks requires practice, patience and dental tool style picks. Little screwdrivers will not be adequate. You can buy the sharp and pointy and curved tools at just about any auto parts store, and they come in handy for many jobs on our cars. I practiced removing the blocks on a donor panel, and was glad that I did.
Alan -- Thank you for the step-by-step how-to explanation. It's appreciated. And, thanks to everyone else who chimed in. A new replacement panel from 928 International is close to $4,000. A used one, if available, might not be any better than my own. I think repair is the best option.
They were really cheap ones from a $ store, here cheap is probably better than expensive (blades are thinner and likely easier to cut).
I filed the ends flat & then used a nibbler tool to cut a notch in from the side just down from the end - to disengage the locking tabs just enough to release but not so much that they break (they have almost certainly become brittle) - file it smooth... Essentially it's like having a depth stop. Motivation to make the tool like this was that I broke the tabs on the first 2 I tried to remove. You need 2 of these - 1 each side.
For the front face removal - only did this with the block out and used some terminal removal tools I already had - very similar to the spatula (thin spring steel) but very narrow (~1/8").
Thanks Ed - I have tried my set of cheap HF picks, but the points bend and they flex a lot. Time to get a quality set. I too am practicing on a donor panel. I've got a bit more practicing to do before I try removing the 26-30 block on the original panel in my car. I may remove just the face and disconnect just the wires to the 28 and 29 (cooling fans). Doing so lets the copper bits fall out toward the front easily. Put in the donor copper bits, press on the "new" numbered face, then reconnect the wires. This is what I've practiced on the donor panel and it worked well. Of course, if the block innards are in bad shape from overheating I'll have to replace the entire block.
Originally Posted by linderpat
Jon hopefully Alan will still respond, but removing those blocks requires practice, patience and dental tool style picks. Little screwdrivers will not be adequate. You can buy the sharp and pointy and curved tools at just about any auto parts store, and they come in handy for many jobs on our cars. I practiced removing the blocks on a donor panel, and was glad that I did.
They were really cheap ones from a $ store, here cheap is probably better than expensive (blades are thinner and likely easier to cut).
...
Alan
I was thinking of adapting an artist's palate knife for the purpose. Unfortunately, with palate knives cheaper most likely isn't better. The really good ones are thin and flexible. The cheap ones aren't.
Well, first step is to remove the CE panel. Then, I'll see what I have available (or have to buy) to make an acceptable tool. Thanks again for your help.
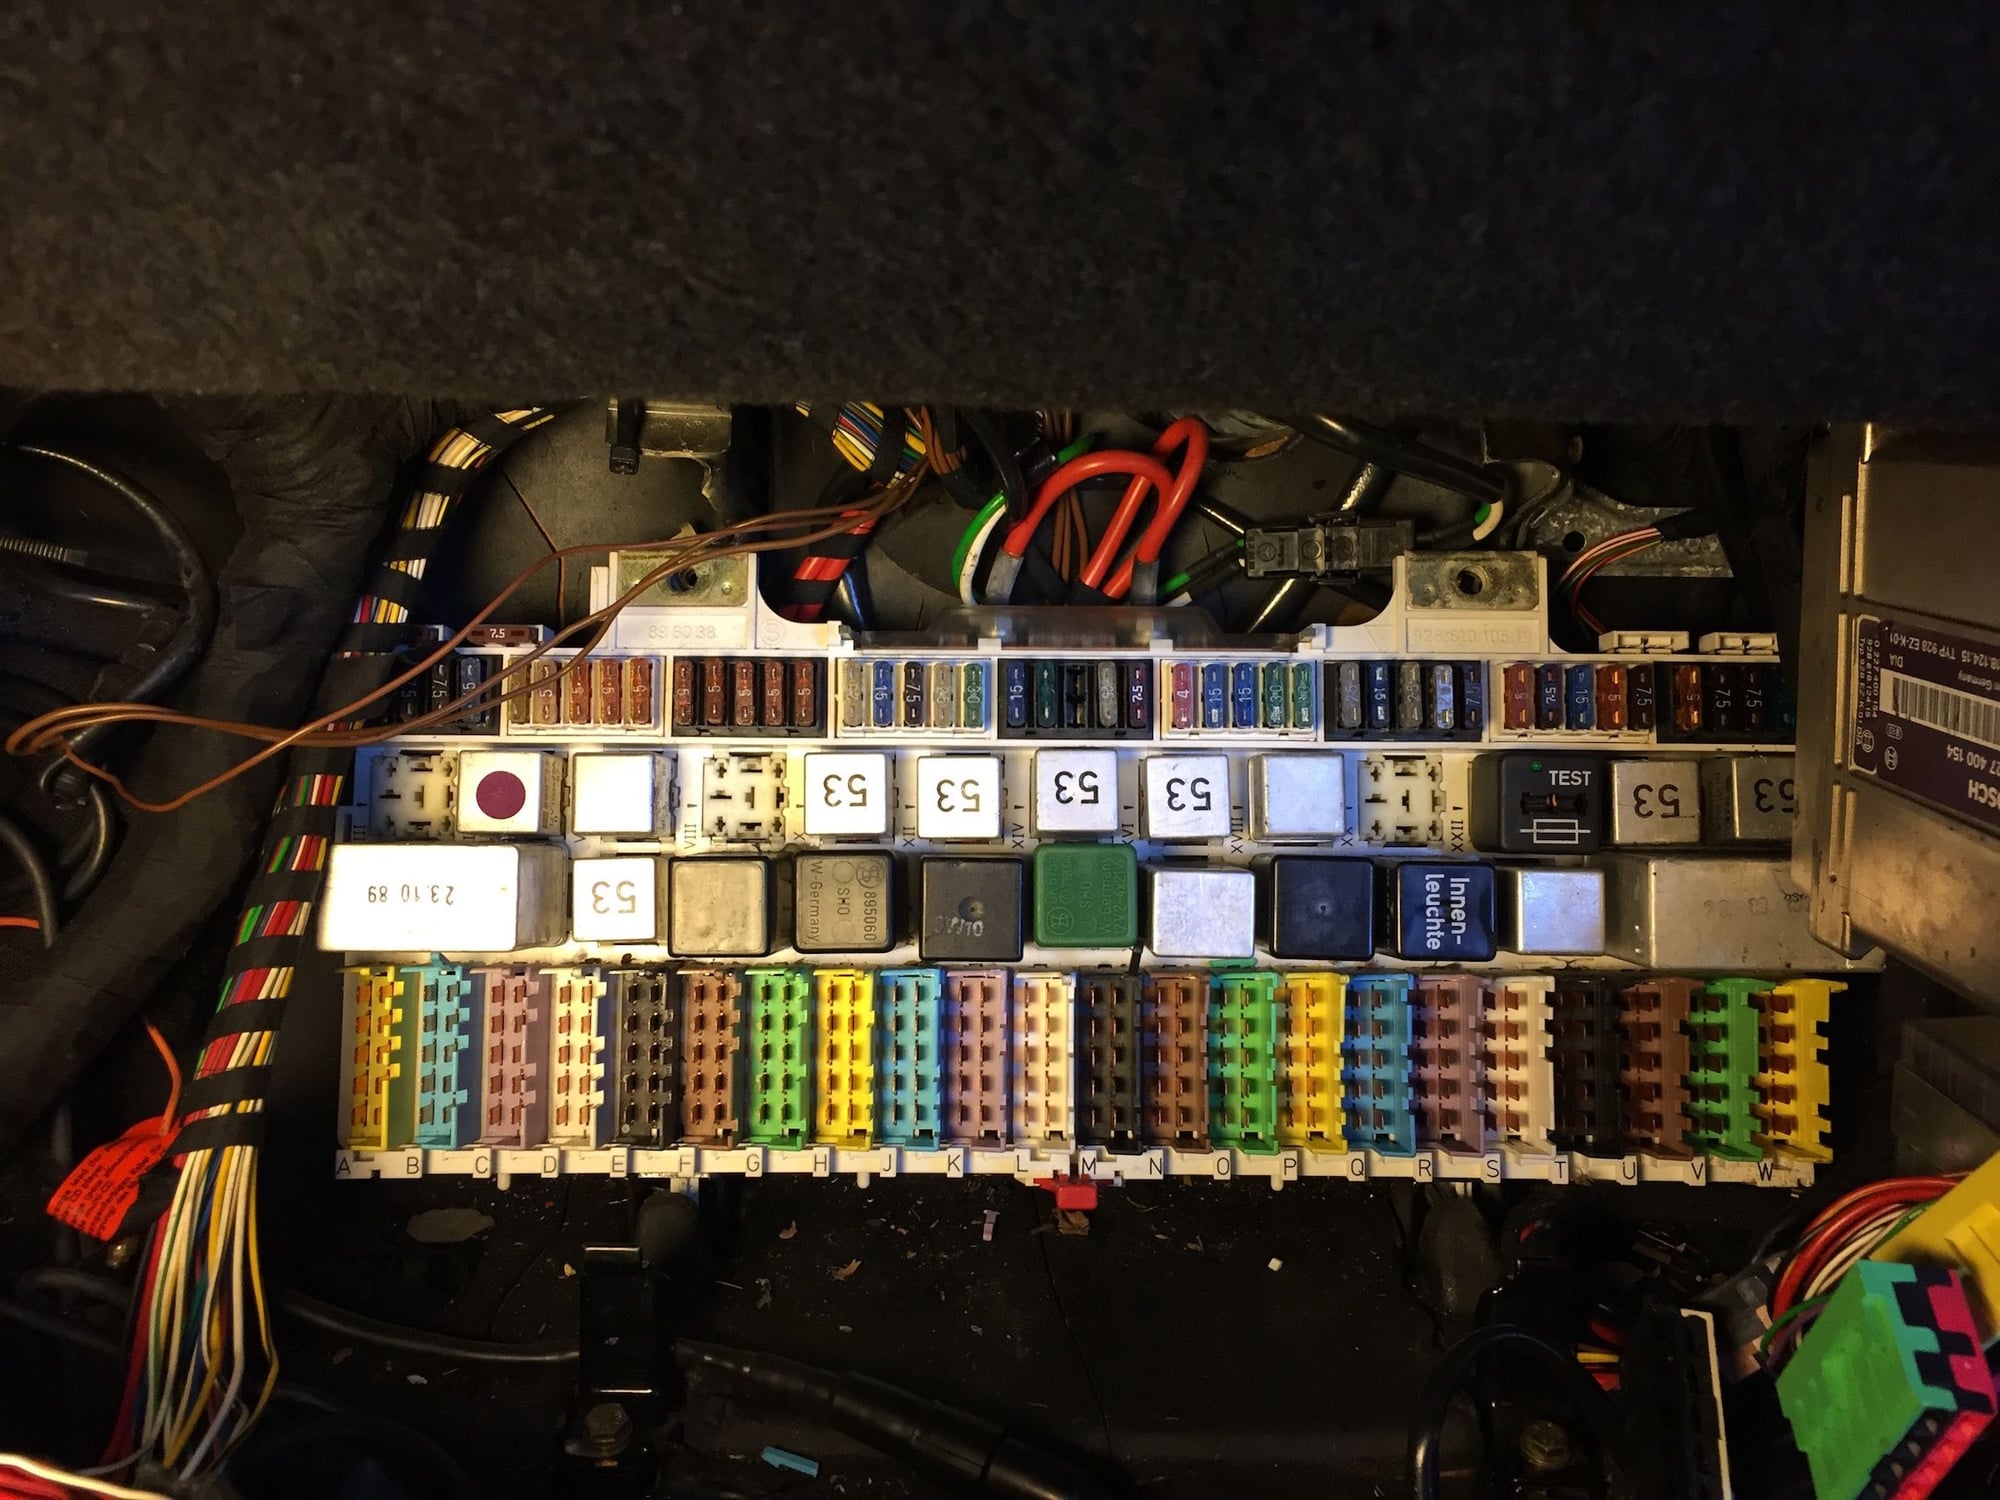
I finally removed the plugs at the bottom of the CE panel. (Life got in the way!) As the attached picture shows, despite being very careful I broke off several of the tabs in the process of removing the plugs. How big a deal is this? Is there another way of securing the plugs when everything is reassembled?