When you click on links to various merchants on this site and make a purchase, this can result in this site earning a commission. Affiliate programs and affiliations include, but are not limited to, the eBay Partner Network.
I thought I would document my progress refinishing a spare set of TeleDial wheels. I picked up a set that someone had done a poor job respraying.
I have learned the hard way that the final product using paint depends on the prep. So far I have about 2 hours per wheel to get them stripped and cleaned.
Here is what I have done so far. First pic is what I'm starting with.
Notice the flaking paint.
Second pic is after application of a gel paint stripper. I used a paint brush, left it on for 15 minutes and then scrubbed with a wire brush. Use nitrile gloves and safety glasses, be careful! I had just a little drop splash up on my wrist and drip down into my gloves and boy did it burn.
Third pic is after a power wash to get all of the paint goo off.
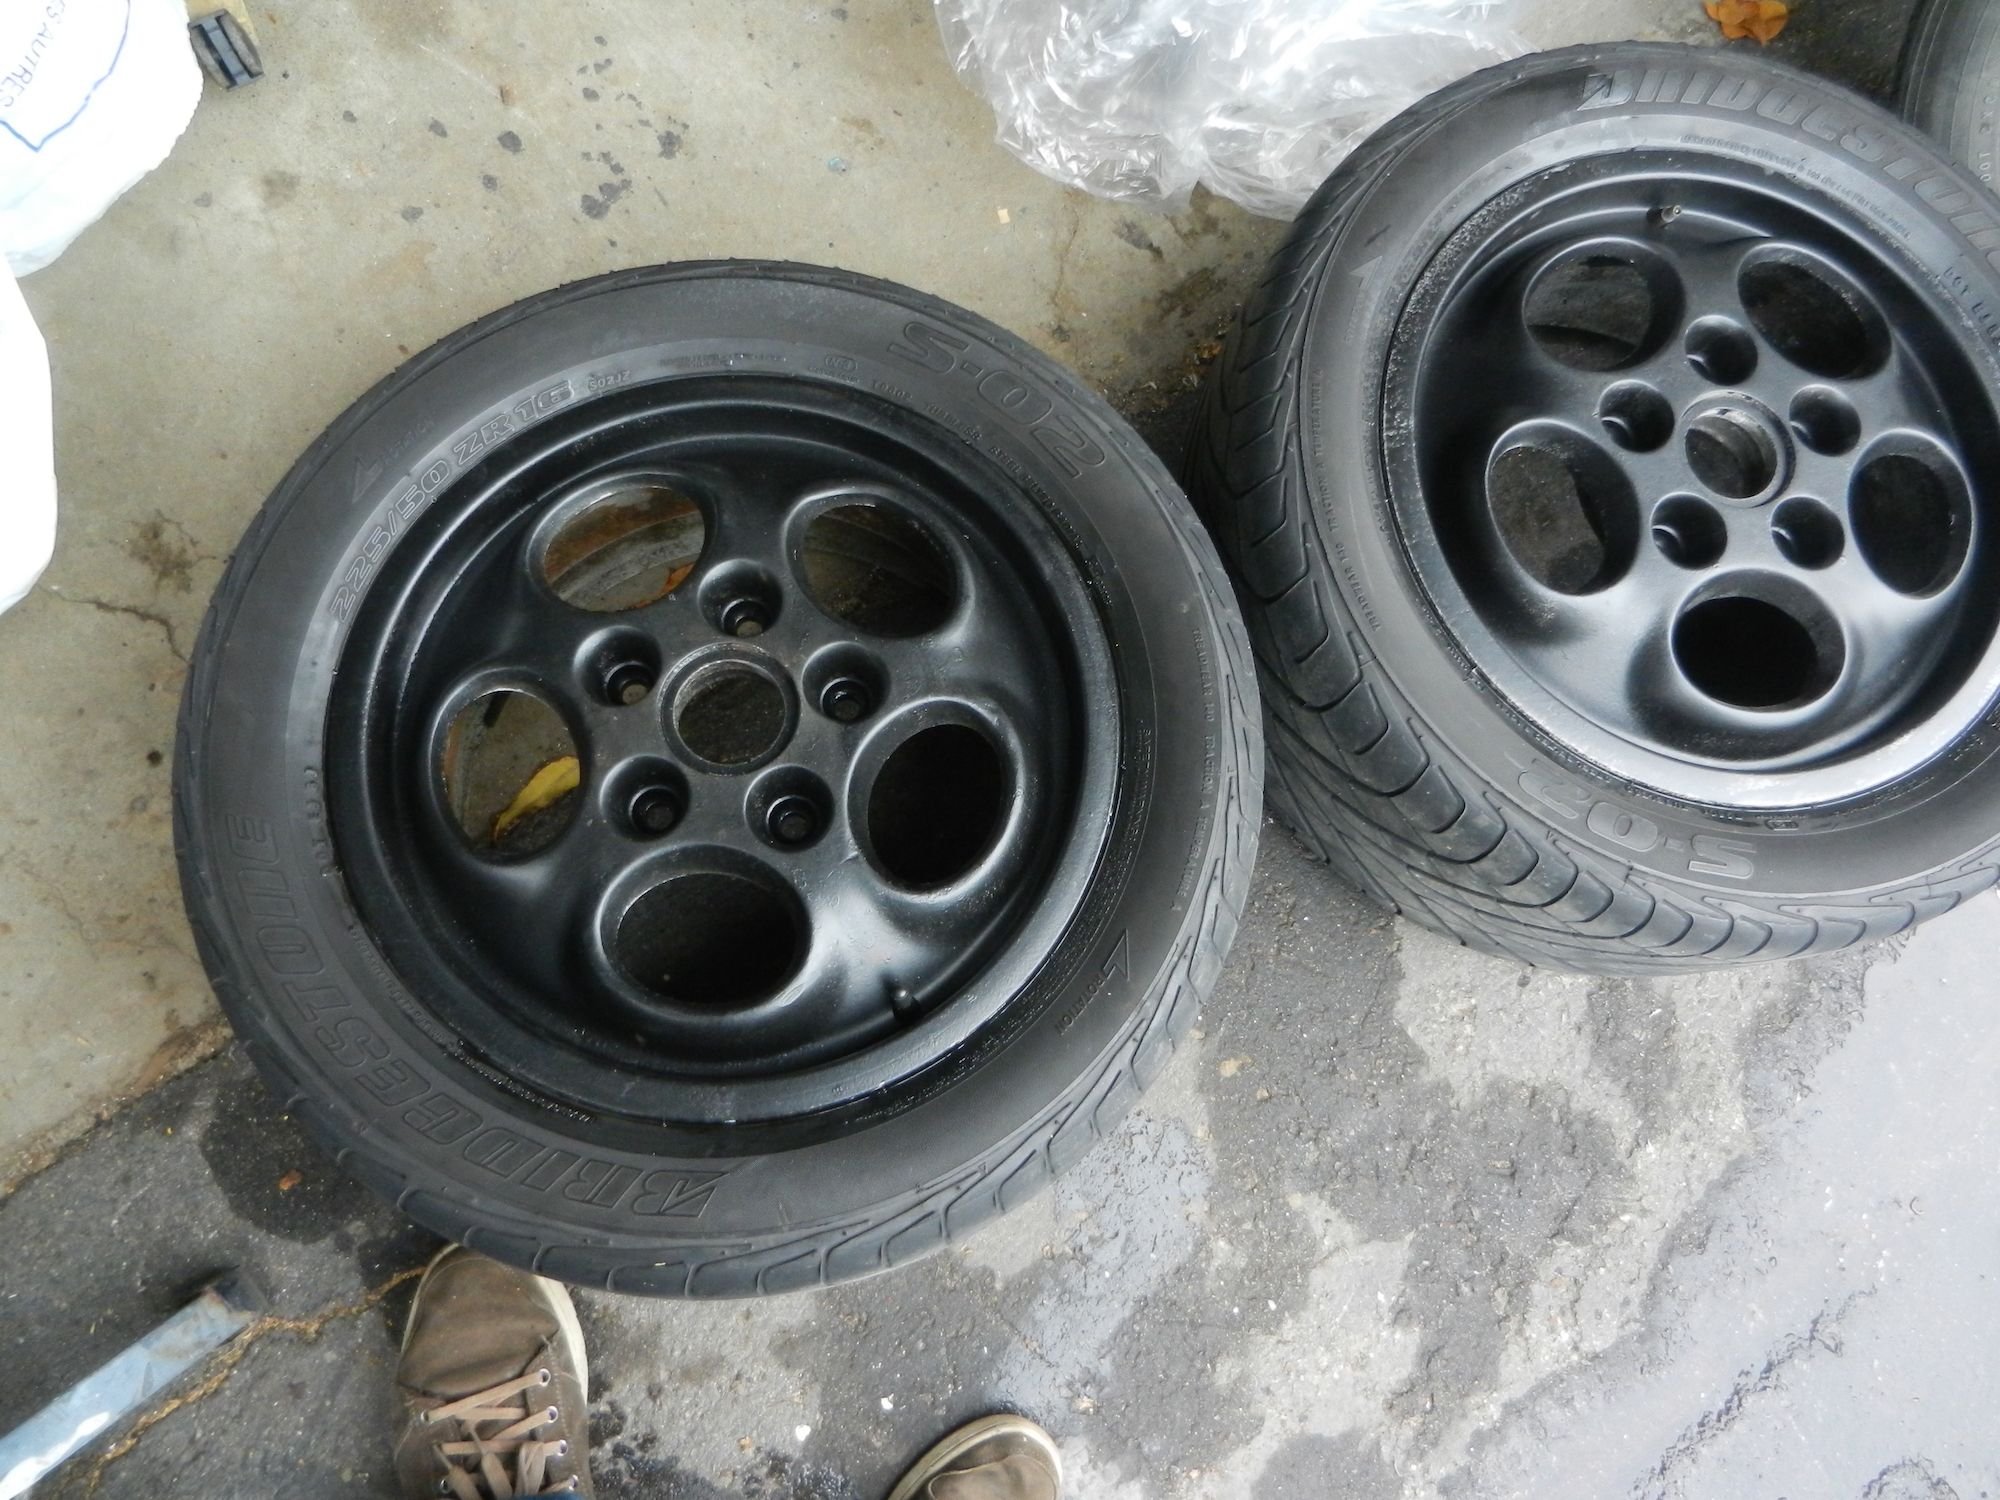
Fourth pic is work in progress in removing the left over paint. I used a Dremel tool and an assortment of stainless steel rotary brushes to get into all of the tight spaces.
Fifth pic is the wheel after all paint is stripped.
Next up will be filing down the blemishes and a little fill with body putty on a couple of deep scratches.
I'd also recommend pulling the tires before spraying.
Forget "powered coating", ad it's difficult to spot repair if needed. "powder coating" is tossed around in discussions almost as much as the phrase, "sports car". Misused, as most wheels are painted, anyways.
And if you give up or need a shop to paint, I have used Ye 'Ole Wheel Shop in Elkridge MD for over 2 decades. They can fix/straighten wheels, weld aluminum and magnesium, and paint/refinish.
I hope this helps.
Here are my "new" phone dials refinished the lazy way with PlastiDip, since they are not my primary wheels. They were in much worse shape than the OPs, someone had started sanding them.
My first try with PlastiDip but they are OK... a good job at 10 feet like my 928's paint I think black wheels on black will look cool.
(I have added another coat since the picture was taken...)
Where are you located? I have painted mine myself and I have used Wheelcollision.com in York Pa. They paint em. They do lots of insurance and luxury car dealer work and have a truck(s) that pick up at dealers and shops in Pennsy, NJ and environs. So if you are in their territory you can avoid cost and hassle of shipping.
Here is a picture of my S4 wheels that just got powder coated metallic black, they look great the rims were pretty worn from corrosion so this turns them around,
I will take more pictures in the day they also have a coating of pollen on them
So almost a year later here's an update on my teledial wheel project. After looking at the wheels closely, I decided that I just could not get the finish I desired trying to paint them with the tires still on the rims. So I had tires removed and took the rims to a soda blaster to have all of the paint removed. That process turned into a nightmare where the guy quoted me 1 week and $30 per wheel then it took him over a month to do it. And another few weeks to catch him at his shop. He held them hostage for $60 per wheel.
I now have them back and I cleaned them with a power washer to get rid of any soda dust and wiped then down with acetone. Next I looked for any imperfections and used a jewellers file to address any high spots and glazing putty to fill in low spots. Then I shot it with sandable primer. At that point I had a uniform finish. Took them out in the sunlight and moved them at different angles to show any leftover imperfections. Boy the sun/shade shows everything. I hit them again with glazing putty then another coat of primer and now I'm ready to spray them with the Wurth Rattle can silver.
I can say at this point I'm very happy with the texture of the wheels. The soda blast did not effect the fine sand cast detail of the wheels. The glazing putty did smooth out some areas slightly but experimenting with distance and temperature of the primer, I was able to recreate the very fine rough texture on those areas.
I got the color coat laid down today. It's a nice bright metallic silver. I'm really happy with how the Wurth comes out of the can. It's quality paint.
Now the most difficult part, the clear. I'm using a 2K clear from a rattle can. After all this work I'm nervous. I might practice on a sample first.
Here is my attempt, came out pretty good. 1st, cleaned with foam n clean condenser coil cleaner (high alkaline), dry in sun, then scuffed up with 3m pad, then masked off and painted with 3 coats of self etching primer, 3 coats of wheel steel paint (from HF, and also no longer available...grrr, the color was perfect) , then 3 coats of lacquer/enamel clear. I then hand painted the centers. Very happy with the outcome.
Here is my attempt, came out pretty good. 1st, cleaned with foam n clean condenser coil cleaner (high alkaline), dry in sun, then scuffed up with 3m pad, then masked off and painted with 3 coats of self etching primer, 3 coats of wheel steel paint (from HF, and also no longer available...grrr, the color was perfect) , then 3 coats of lacquer/enamel clear. I then hand painted the centers. Very happy with the outcome.
Those look Great! I can see the gloss reflection. I'm painting the black in my caps tonight. Steady hand required.
As easy as rattle-cans can be, I have a tough time keeping the metallic part even. The color and contrast change quickly with different thicknesses. I've been having much better results on projects like these using even a cheap HVLP touch-up gun and real paint. Last I looked, my local WalMart (!!) sold quarts of both the silver metallic and the clear-coat. Of course there are online premium options like House of Kolor too, plus your local auto paint supply store. Filter the paint so no lumps go into the gun. Dry your spray air before and after the primary regulator. Lots of thin coats (same instruction we ignore with the spray can...) gives best results.
On painting the black or colors in the center caps -- Testors enamel and a toothpick, done under the bench magnifier with a wrist rest. Clearcoat to match the wheels.
Funny thing for me, I was expecting crappy results, and was shocked at how amazing they came out. In person, they are quite magnificent. I have to repaint the phonies on my other 2 as well....you can bet I put a little more effort into the next ones. I ordered wheel paint from summit....hopefully I can find the time to paint them before fall comes.
I did these 2 years ago. On the centers, Used testers black and a very fine art brush. Did it freehand on the dining table. Now at the spry age of 48, I have a shaky hand and have to wear glasses....I'll have to do the magnifier and arm wrest on the next ones...


 10-20-2016, 02:57 AM

 I think black wheels on black will look cool.