When you click on links to various merchants on this site and make a purchase, this can result in this site earning a commission. Affiliate programs and affiliations include, but are not limited to, the eBay Partner Network.
Hi Hans, It was sometime in 2017 I think I had read your posting on the shifter, but as luck would have it I ended up in surgery.
It's 2020 and I still have not completely recovered. I think I might be able to install that shifter and want to give it a try.
I have two 1987 S4's, one black with auto and the white 1987 is a five speed.
Let me know if you have one and thanks for all you do to help us keep 928's on the road.
Gary Hendryx
I got the shifter kit (adjustable lever and pivot clamp) from Hans early this year (Jan) and in the 5 months I had it sitting in the house - every one who saw it was intrigued... Its just cool to look at and play with. I just got around to installing it a few weeks ago - the stars need to align - you really have to drop the exhaust & TT to modify the foam seal correctly (e.g. minimally). Wow what a difference, my rear 'cup' and 'tube' rubber bearing were totally shot - shifts were ridiculously sloppy (cold very hard to even engage 1st gear), front ball cup was worn but not too bad (I'd already replaced it years ago). Honestly the crappy shifting had really impacted my enjoyment of the car (felt like an old jalopy). Hans's kit and a delrin rear really tightened things up. Its a slightly shorter shift but not by much and no added effort - so smooth and - snick - snick - snick straight in every time no notchiness at all. Even cold - all shifts are clean (unlike before).
I've had the car since a just few years old and very low miles - and I can say for sure this is the best the shifting has ever been - by a long way!
My mechanic was raving about it (where can he get one/how much?). My expectations of Han's work are high - and I'm not in any way disappointed - just an excellent, fantastic product (as always!).
Totally recommended - shame the Roger-box guys just have to miss out on this.
I have recently purchased the pivot clamp and shift lever from Hans and I'm very impressed with the whole setup. Combined with Roger's rear shift coupler bushings, it really makes the car much more fun to drive as others mentioned in previous posts.
I wanted to share my installation method with anyone who wants to take advantage of this fantastic product without the need to drop the TT or exhaust. My car is an '83 model and i don't know if my method will work on other model years but this is what I've done:
1. I lifted the front left corner (UK passenger side) and secured it on axle stands.
2. I took off the heat shield and cross member.
3. Using two pry bars, I inserted one each side between the torque tube and front ball joint (item 7 in the illustration). I applied equal pressure on the pry bars until the joint popped out.
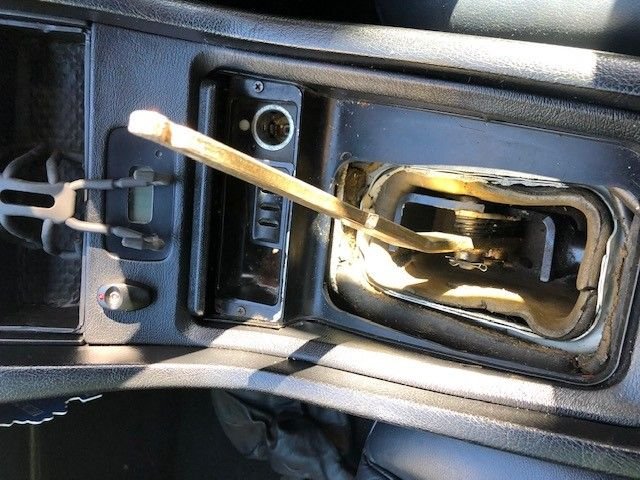
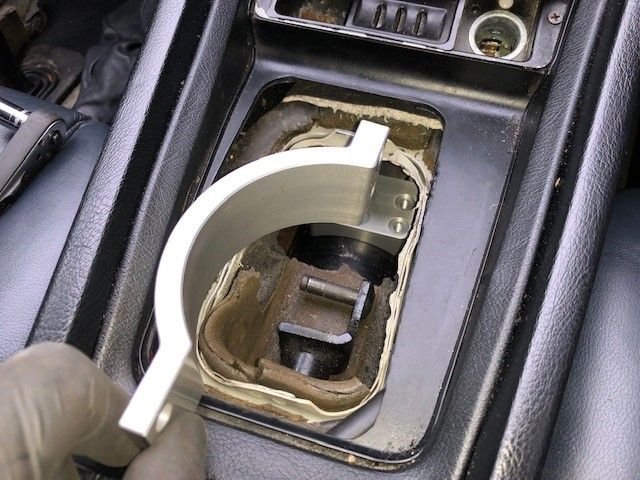
4. I removed the gearshift **** with leather bellow, rubber sleeve and gearshift lever (items 20, 21A & 14).
5. I pulled back the front guide tube as far as I could (item 3).
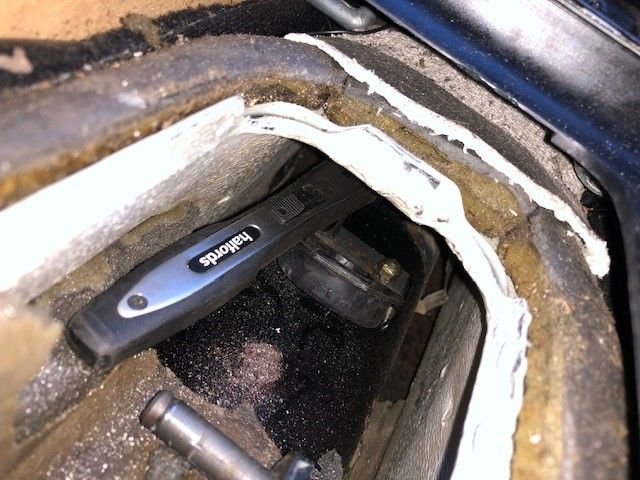
6. Using a multi tool with metal blade I cut the front guide tube as close to the bearing bracket as possible (item 4)
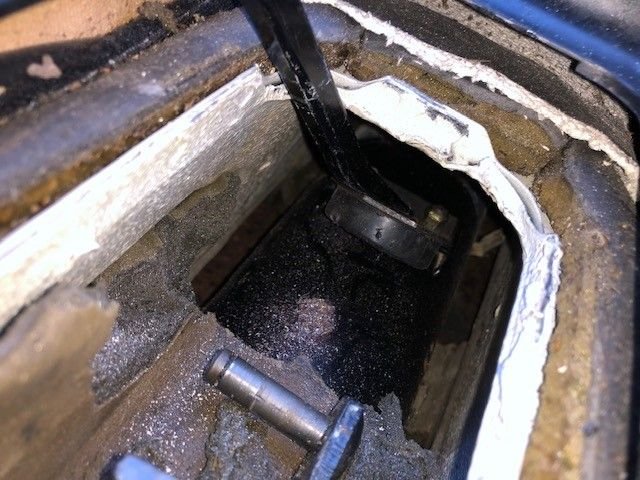
7. I removed the cut-off end and pushed the front guide tube forward through the bearing bracket. I removed part of the sound absorber foam around the bearing bracket area. From underneath the car I removed the guide tube and ball joint.
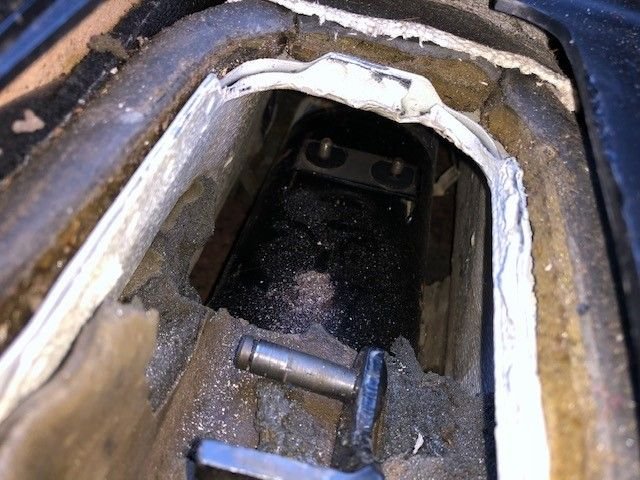
8. From inside the car using a pry bar I pulled backward the bearing bracket in order to access the M6 hexagon nuts (items 6).
9. I removed the bearing bracket and washers.
10. I attached the stainless tie plate to the upper clamp using the two M6x12 round-head screws and thread lock.
11. I couldn’t find a way to insert the M8x90 provided with the kit through the side clamp and upper clamp as there’s not enough space so I had to improvise: I cut two sections of M8 threaded rod at 100mm length and inserted them in the upper clamp fixing holes.
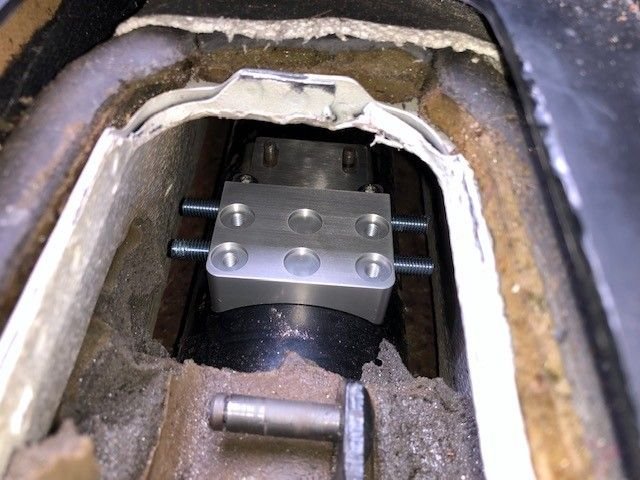
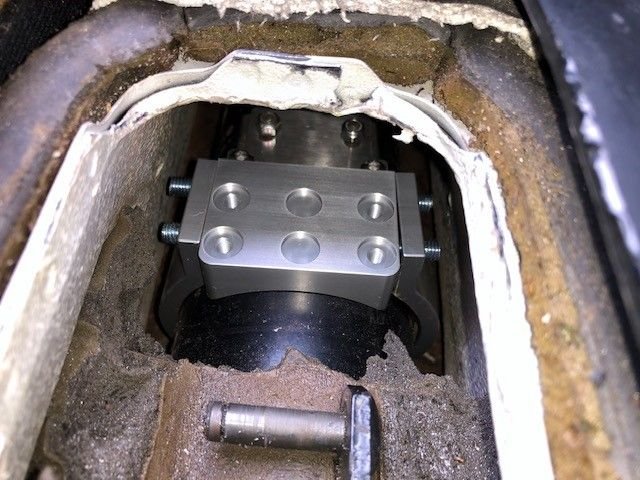
12. I placed the upper clamp with threaded rods on top of the torque tube and secured the stainless tie plate with the M6 locknuts.
13. I took one clamp arm and holding it by the top end, I pushed it on top of the Torque tube (the end that goes at the bottom of the clamp went in first). I pushed the clamp towards the front where there is more room between the torque tube and side walls. There was enough room to drop the clamp to the side of the torque tube and pull it back towards the upper clamp with a pick tool.
14. I pushed the threaded rods out of the way and aligned the clamp arm and upper clamp holes. I pushed back the threaded rods through the clamp arm holes until they touched the side wall.
15. I repeated the process for the second clamp arm, and I ended up with the clamp arms hanging on the threaded rods either side of the upper clamp.
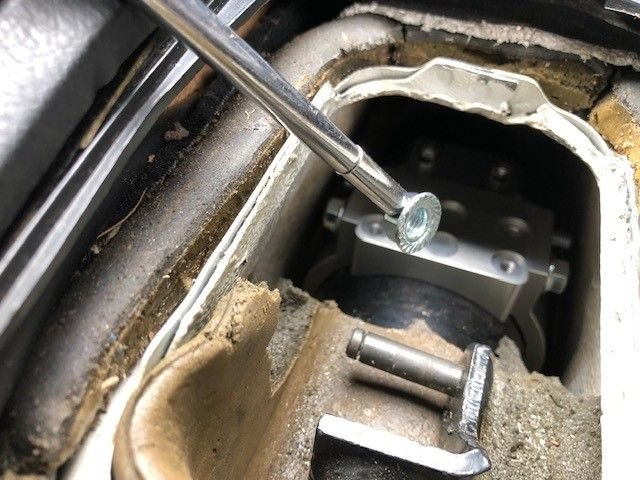
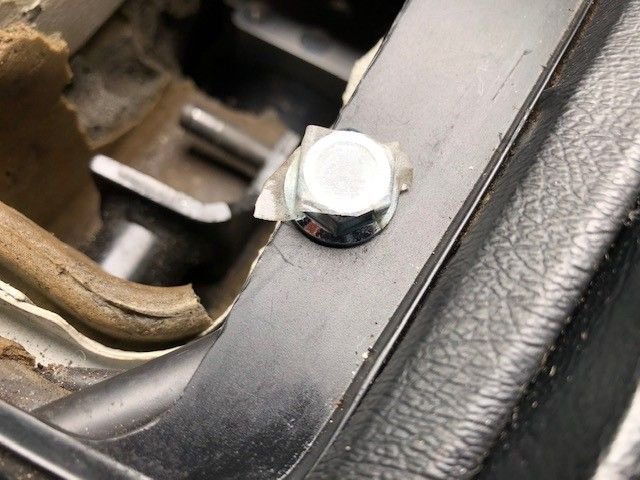
16. The next step was the most time consuming and requires lots of patience but it can be done: using a combination of magnetic pen, pick tool, small pry bar and double sided sticky tape to secure the nuts to the spanner, I managed to put the M8 flange head nuts onto the threaded rods.
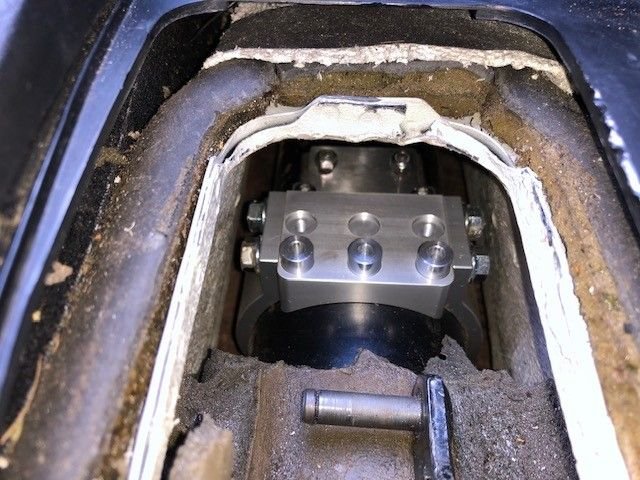
17. I tightened the four flange head nuts securing the clamp arms to the upper clamp.
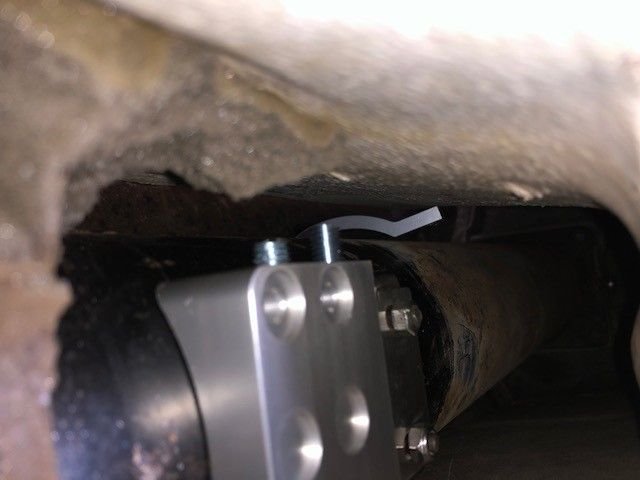
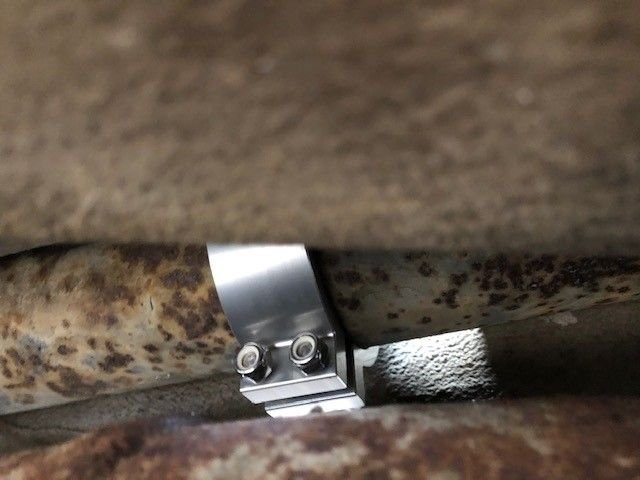
18. From underneath the car I connected the clamp arms using the M8x50 bolts and M8 locknuts.
19. I installed the heat shield and cross member.
20. I removed the jack and axle stands.
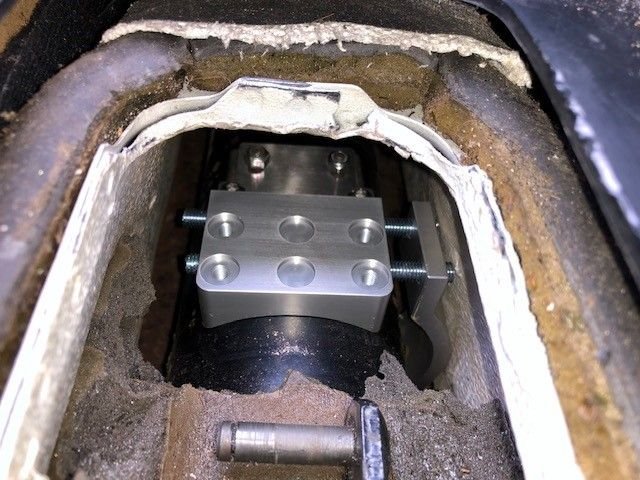
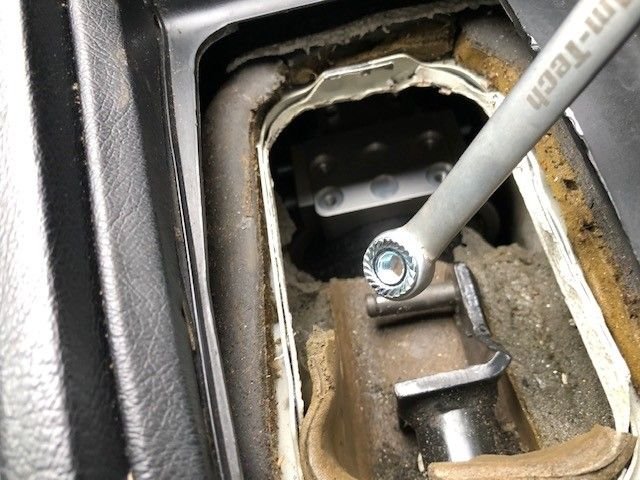
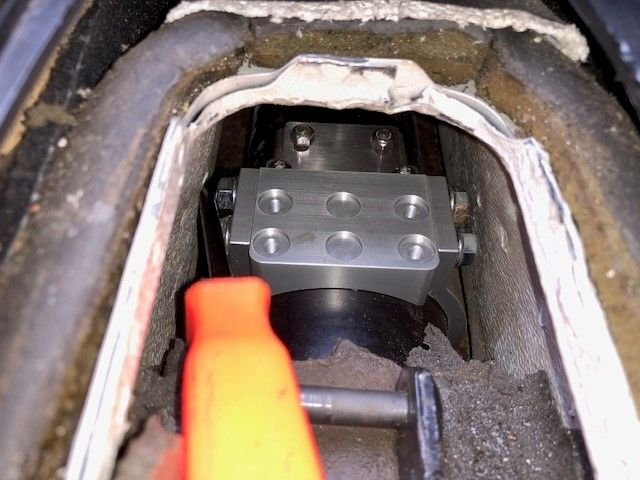
21. From inside the car I placed the three 10mm spacers in the upper clamp slots.
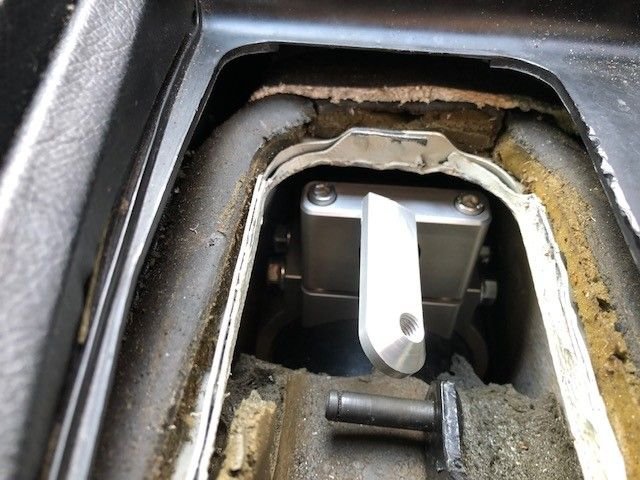
22. I inserted the relevant screws in the bearing housing holes and applied thread lock. Next, I placed the bearing housing on top of the three spacers and turned the screws by hand. There was very limited space on top of the screws to insert a hex key. I improvised by cutting a 6mm section of hex key and attached it to a spanner with duct tape. I secured the bearing housing to the upper clamp by tightening the hex screws.
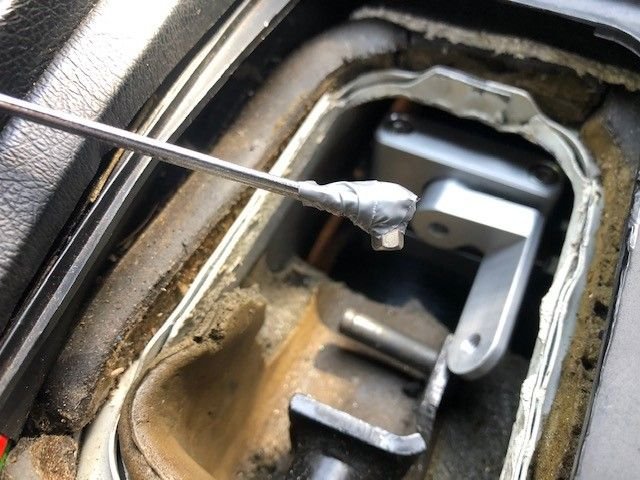
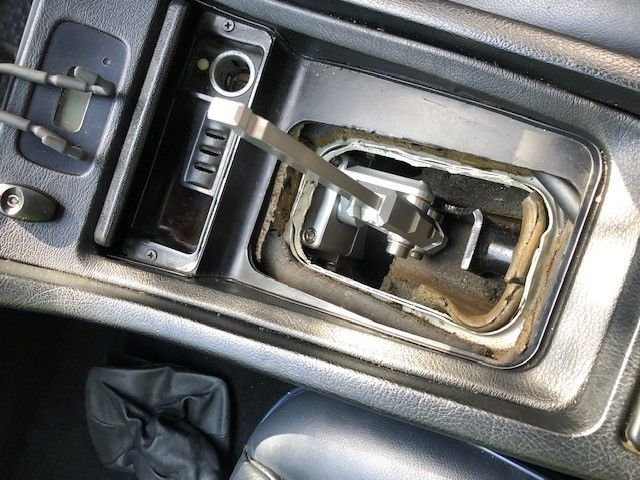
23. Last step I connected the P9-MS01 shifter following Hans’ instructions and reinserted the sound absorber foam around the clamp and bearing housing the best I could.
The gear shift rod (item 1 in PET) supposed to lean in its resting position by a few degrees as Hans pointed out to me. That was a mistake on my part as prior to installing the clamp I changed the rear shift coupler bushings with updated ones from Roger and didn’t consult the manual. I later rectified that.
Dan,
Wow - you did it, but you had to make some adaptations for the width-ways access (that was always going to be a big issue - the sliding threaded rods are good idea for that). Looks like you removed quite a bit of foam from the front half of the shift lever area - did it cut out cleanly? - It doesn't look like you ended up with as much back in at the end? Will you consider adding more fresh foam ?
For home installation I can see the desire not to remove the TT - I took a look at it and decided that to preserve the foam and my sanity there was no way I could do it well - so I waited for a the opportunity when the car was up on a lift anyway (PSD & Trans work). This delays things a lot and makes it much more expensive to do of course. Well done for making it work, I know you are enjoying the results.
Dan,
Wow - you did it, but you had to make some adaptations for the width-ways access (that was always going to be a big issue - the studs are good idea). Looks like you removed quite a bit of foam from the front half of the shift lever area - did it cut out cleanly? - It doesn't look like you ended up with as much back in at the end? Will you consider adding more fresh foam ?
For home installation I can see the desire not to remove the TT - I took a look at it and decided that to preserve the foam and my sanity there was no way I could do it well - so I waited for a the opportunity when the car was up on a lift anyway (PSD & Trans work).
This delays things and makes it much more expensive to do of course. Well done for making it work, I know you are enjoying the results.
Alan
Alan,
The foam didn�t come out cleanly but I was Planning to replace it sometime in the future when I drop the TT for other works. I was thinking in the meantime I could use expanding foam in small ziplock bags as an alternative, that way the foam won�t stick to Anything and will be easy to remove when dropping the tube.
I own a 1989 S4 5-speed and would like to upgrade and tighten-up the old factory shift linkages. Is your product available for purchase. I hear only good thinks about your design and quality.
Thanks.
I own a 1989 S4 5-speed and would like to upgrade and tighten-up the old factory shift linkages. Is your product available for purchase. I hear only good thinks about your design and quality.
Thanks.
Don
If you want to upgrade the shifter and/or linkages you can:
good: $replace the front ball cup and rear shifter coupler
better: $$replace above and add Hans shifter
best:$$$$& replace rear coupler and upgrade to Hans full setup.


 06-01-2020, 12:36 AM