When you click on links to various merchants on this site and make a purchase, this can result in this site earning a commission. Affiliate programs and affiliations include, but are not limited to, the eBay Partner Network.
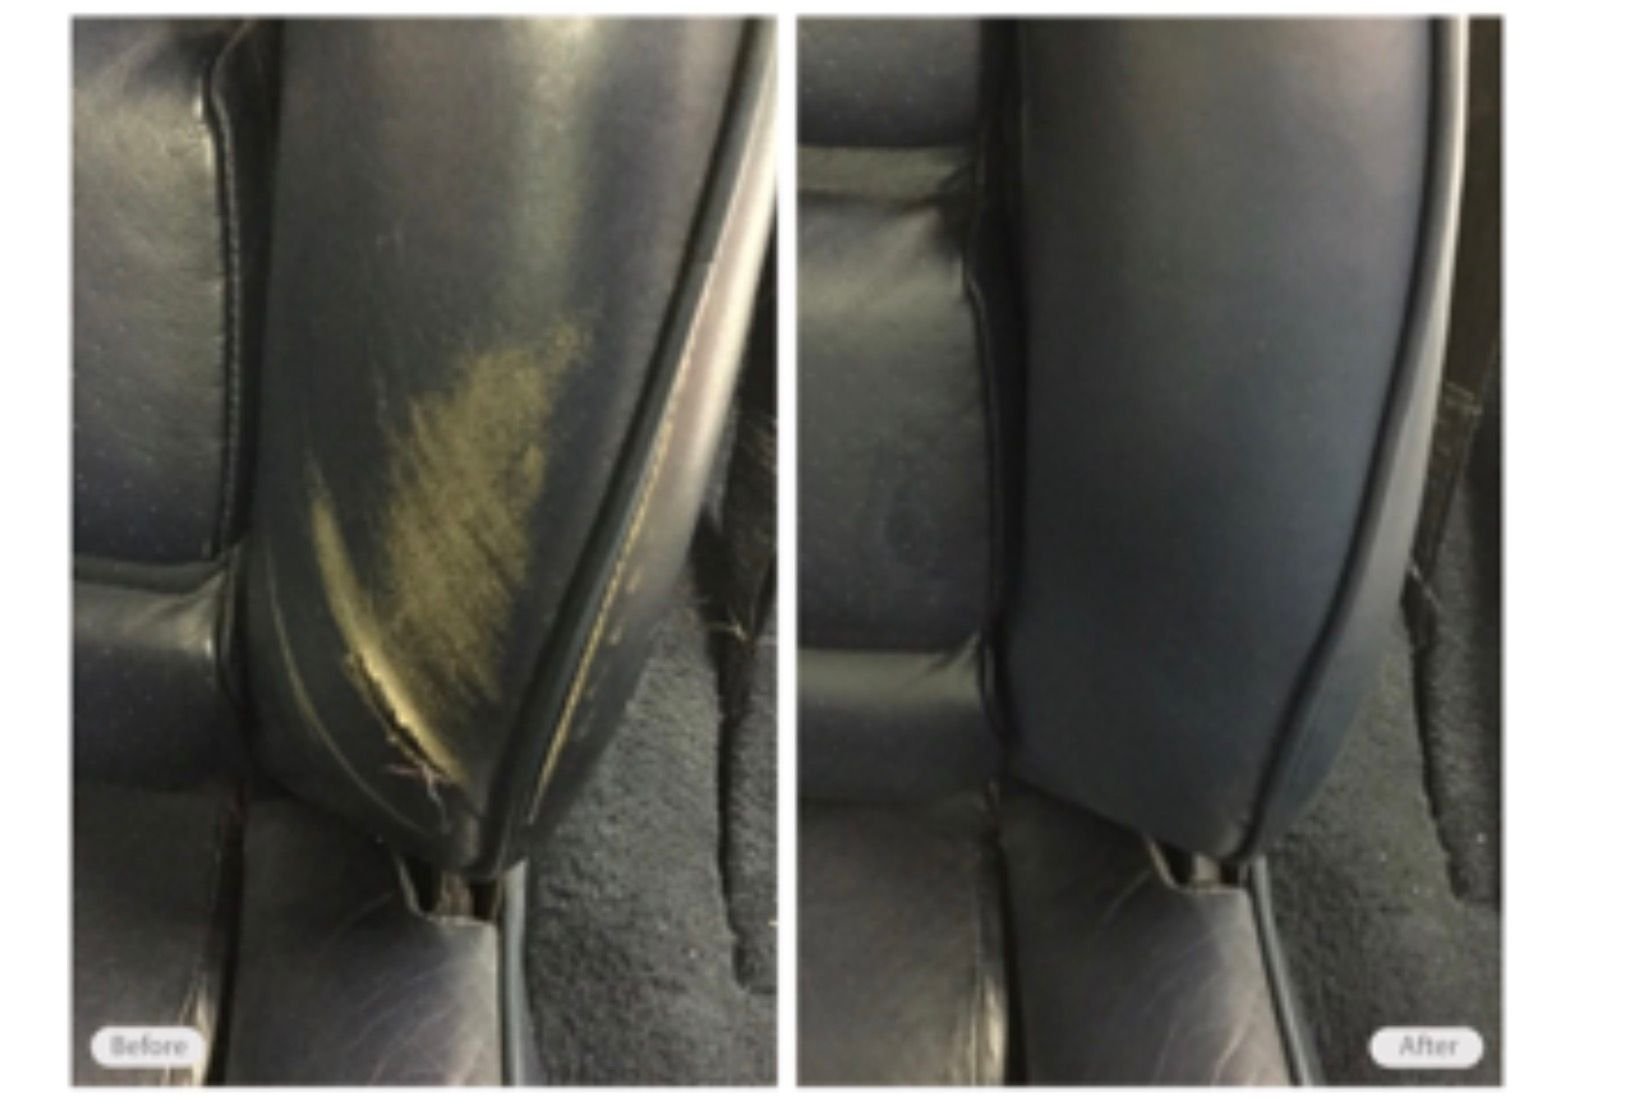
Here are my before and after shots, also from Fibrenew. Cost me $225...you'd never know unless you knew (as Yogi might have said). That was a tear towards the bottom that she fixed, about two inches long.
So, those repairs look fantastic! I'm guessing they replaced the entire leather section that had the tear, and then (at least in palw's case) refinished the whole seat?
My attempt at a patch was awful, so I ended up for now just putting an adhesive patch over it to prevent further wear. I did get an estimate from a local upholsterer to replace that leather piece for about $250. My biggest concern there is if the condition of the leather in general warrants the cost, or if I should just save up and get an entire new covering...it's pretty hard and pulled tight, and no amount of Soffener or German Nivea seems to change that.
I've played at repairs and results have been good to great. But it's still a repaired piece and not as good as it was. The good news is that you can buy full seat cover leathers that truly will take care of all your worries. The other good news is that even with new covers in your hand, installation is hardly a snap if you want them to look and feel perfect. The foam cushions suffer with age. Getting the cover to fit "just right" means there are no high or low spots, no bunching or uneven squeezing of the foam cushions, etc. It takes a knowing eye and strong hands to move the foam around under the covers as you assemble. It takes me a few tries to get each section "just right", and could take a lot of hours for a full seat. Got four right hands, a couple extra arms to pull and stretch and fold while setting hog rings?
For my tear repair, I used a small piece of vinyl for the patch. I feathered the edges of the patch piece with sandpaper so there would be no hard edges showing through. The patch piece goes under the leather, is glued to the leather from behind. I used Gorilla Glue this last time, applied -after- the patch piece was in place. I used a couple pieces of red plastic stucco tape (like duct tape but leaves no residue) to pull on the leather to get it back to original position as the glue dried. The glue dried overnight. It foams a little so the final detailing includes cleaning that squeezed-out glue, plus a little sanding to detail the edges of the leather some. Then a thin film of acrylic filler (Alex painters caulk), light sanding to remove marks in the filler. I did a little more touch-up detailing with sandpaper and filler until the shape was just right. Then paint.
You posted in June to the original thread that included my efforts, so you have some idea of what happened, how it started out and how it came out. The PDF I included in that thread has more info on what I did and how it came out.
So, those repairs look fantastic! I'm guessing they replaced the entire leather section that had the tear, and then (at least in palw's case) refinished the whole seat?
My attempt at a patch was awful, so I ended up for now just putting an adhesive patch over it to prevent further wear. I did get an estimate from a local upholsterer to replace that leather piece for about $250. My biggest concern there is if the condition of the leather in general warrants the cost, or if I should just save up and get an entire new covering...it's pretty hard and pulled tight, and no amount of Soffener or German Nivea seems to change that.
They didn't replace any leather on my seat. They put some kind of a backing patch into the hole and then patch the leather using a color coded system. It's a patented process and I wasn't allowed to watch the whole thing, but the end result for $225 and roughly three hours of time is amazing.
That's exactly what I tried to do...possibly the fact that my existing leather (even the "good parts") is so hard, and the new stuff for the patch was soft, lead to it not working. I couldn't really get it to look not obvious, and the filler would end up pulling away. I think my bolster was just too far gone.
Randy, I didn't post up a pic...it wasn't something I was very proud of so I have just covered it with an adhesive patch, but I should have taken a pic and posted it...documenting failure can also be helpful.
Originally Posted by dr bob
Jeff--
For my tear repair, I used a small piece of vinyl for the patch. I feathered the edges of the patch piece with sandpaper so there would be no hard edges showing through. The patch piece goes under the leather, is glued to the leather from behind. I used Gorilla Glue this last time, applied -after- the patch piece was in place. I used a couple pieces of red plastic stucco tape (like duct tape but leaves no residue) to pull on the leather to get it back to original position as the glue dried. The glue dried overnight. It foams a little so the final detailing includes cleaning that squeezed-out glue, plus a little sanding to detail the edges of the leather some. Then a thin film of acrylic filler (Alex painters caulk), light sanding to remove marks in the filler. I did a little more touch-up detailing with sandpaper and filler until the shape was just right. Then paint.
You posted in June to the original thread that included my efforts, so you have some idea of what happened, how it started out and how it came out. The PDF I included in that thread has more info on what I did and how it came out.
The prep for me included sanding/edging the patch piece before installation, so the edges were thin as possible. The glossy face was scuffed pretty well to give the glue a chance. Patch piece inserted and set in place, then Gorilla Glue with a small "acid brush" gets tucked in between the patch and the back of the leather. I used the red tape to pull the edges of the gap back a little tighter, and that also holds the edges of the leather snug against the patch. Instructions on the glue say to leave it overnight for full bond, so I did that. It's hard to just put something away and leave it completely undisturbed for a day, but that's what it takes. Once the glue is completely set up, a little more sanding gets the edges of the leather skimmed down so there's a minimal edge. Sand the exposed face of the patch too. Rub down the area with denatured alcohol to get any remaining residue off. The the filler goes on. The filler is sandable, but you really want to get the contours and surface pretty close to what you want to end up with, as sanding tends to grab and roll little bits of the filler material if you get too aggressive with the sanding.
I'm still REALLY kicking myself for not buying that full red leather interior that was available for such a low price. I think that would have looked awesome with a silver car and black carpet etc. Just didn't have the budget for it at the time...

 11-04-2016, 10:31 AM