
tail light assembly removal?
 10-23-2015, 07:35 PM
#1
Instructor
Thread Starter

just a quick question... does the rear bumper cover need to come off to get the tail light assembly out? i removed the 4 screws on the lens but had no luck getting the assembly out.. thanks!
 10-23-2015, 08:02 PM
#2
Addict
Rennlist Member
Rennlist Member
Yup,
Rear cover has to come off.
4 nuts holding each taillight assembly on.
Easier w 2 people. 1 to hold bumper cover, one to remove each assembly.
You'll also need to unplug each assembly from Wiring harness. It's been a while, but I think you need to fish it out of the body, then unplug them..
Rear cover has to come off.
4 nuts holding each taillight assembly on.
Easier w 2 people. 1 to hold bumper cover, one to remove each assembly.
You'll also need to unplug each assembly from Wiring harness. It's been a while, but I think you need to fish it out of the body, then unplug them..
10-23-2015, 10:35 PM
#5
Archive Gatekeeper
Rennlist Member
Rennlist Member
'81 would be my guess.
Bruno, any time you're gunning for info on any system in your car, list your model year- usually it matters for the answer you're looking for. Sometimes not, but usually.
Bruno, any time you're gunning for info on any system in your car, list your model year- usually it matters for the answer you're looking for. Sometimes not, but usually.
Trending Topics
 10-24-2015, 04:23 AM
#9
Rennlist Member
Take off rear wheels.
Chuck a wire brush into the long flexible extension shaft of a dremel.
Setup a bright light in the wheel well facing the back inside of the bumper cover.
Careful around gas tank
One by one identify each of the bumper cover studs and clean them with the wire brush.
Apply some lubricant, I sometimes use silicone dielectric grease.
Remove the 8mm nyloc retaining nuts. You will need a series of long and short quarter inch drive extensions, 8mm deep socket and a universal joint adapter.
The 4 nuts on the 4 studs on each taillight are removed similarly. These studs are notorious for breaking out of the taillight housings. you want to clean them carefully to minimize the torque when removing.
10-24-2015, 07:56 AM
#10
Take off rear wheels.
Chuck a wire brush into the long flexible extension shaft of a dremel.
Setup a bright light in the wheel well facing the back inside of the bumper cover.
Careful around gas tank
One by one identify each of the bumper cover studs and clean them with the wire brush.
Apply some lubricant, I sometimes use silicone dielectric grease.
Remove the 8mm nyloc retaining nuts. You will need a series of long and short quarter inch drive extensions, 8mm deep socket and a universal joint adapter.
The 4 nuts on the 4 studs on each taillight are removed similarly. These studs are notorious for breaking out of the taillight housings. you want to clean them carefully to minimize the torque when removing.
Chuck a wire brush into the long flexible extension shaft of a dremel.
Setup a bright light in the wheel well facing the back inside of the bumper cover.
Careful around gas tank
One by one identify each of the bumper cover studs and clean them with the wire brush.
Apply some lubricant, I sometimes use silicone dielectric grease.
Remove the 8mm nyloc retaining nuts. You will need a series of long and short quarter inch drive extensions, 8mm deep socket and a universal joint adapter.
The 4 nuts on the 4 studs on each taillight are removed similarly. These studs are notorious for breaking out of the taillight housings. you want to clean them carefully to minimize the torque when removing.
Those little studs in the rear rubber fasica can break loose and spin if you don't clean then properly and soak with penetrating oil. So, use great care.
Besides everything previously mentioned...you also have to remove the strip beneath the rear hatch, along hatch opening. If memory service me right, you kind of have to roll the fasica upperward and lift at the same time to get it to pop out along the top. There's two small nubs, along upper edge of the fasica, near the hatch corners area that need some careful attention when removing...don't force.
And like Landseer says, be particularly careful with the studs on the tail lights themself. The amount of material around the studs is minimal and they will/could tear through the mounting surface easily.
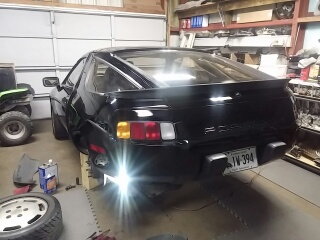
Good luck, with removal. Oh, and turn down that light along the body...the shine is hurting my eyes.
Brian.
10-24-2015, 11:08 AM
#11
Rennlist Member
I did it when the body shop totally screwed up the job of replacing the passenger side tail lamp assembly...they put some brittle piece of crap in from a junkyard so I bought a brand new setup from 928 Int'l....you don't have to remove it completely if you are only replacing one. I left the screws in the driver's side and just removed the big bolts, upper screws and right hand side ones and was able to get in there. I tied it up so it wouldn't sag...saved some time.
It is fiddly though.
It is fiddly though.
10-24-2015, 05:06 PM
#15
Racer
Join Date: Oct 2014
Location: Columbia, Missouri
Posts: 402
Likes: 0
Received 0 Likes
on
0 Posts
I broke a couple of studs off when I removed my bumper cover. I was able to drill out the old one and install new studs. I used JB weld to bond them to the metal bracket. Worked like a charm.
Before you reinstall, make sure the threads are very clean.
Before you reinstall, make sure the threads are very clean.