When you click on links to various merchants on this site and make a purchase, this can result in this site earning a commission. Affiliate programs and affiliations include, but are not limited to, the eBay Partner Network.
If after 20+ years, a door mirror glass falls off its mount when you shut the door; here are some thoughts on repair.
Firstly; the door mirror glass is heated when the defroster is activated. How the replacement mirror is reattached to the base is important as to if the glass will defrost, when activated.
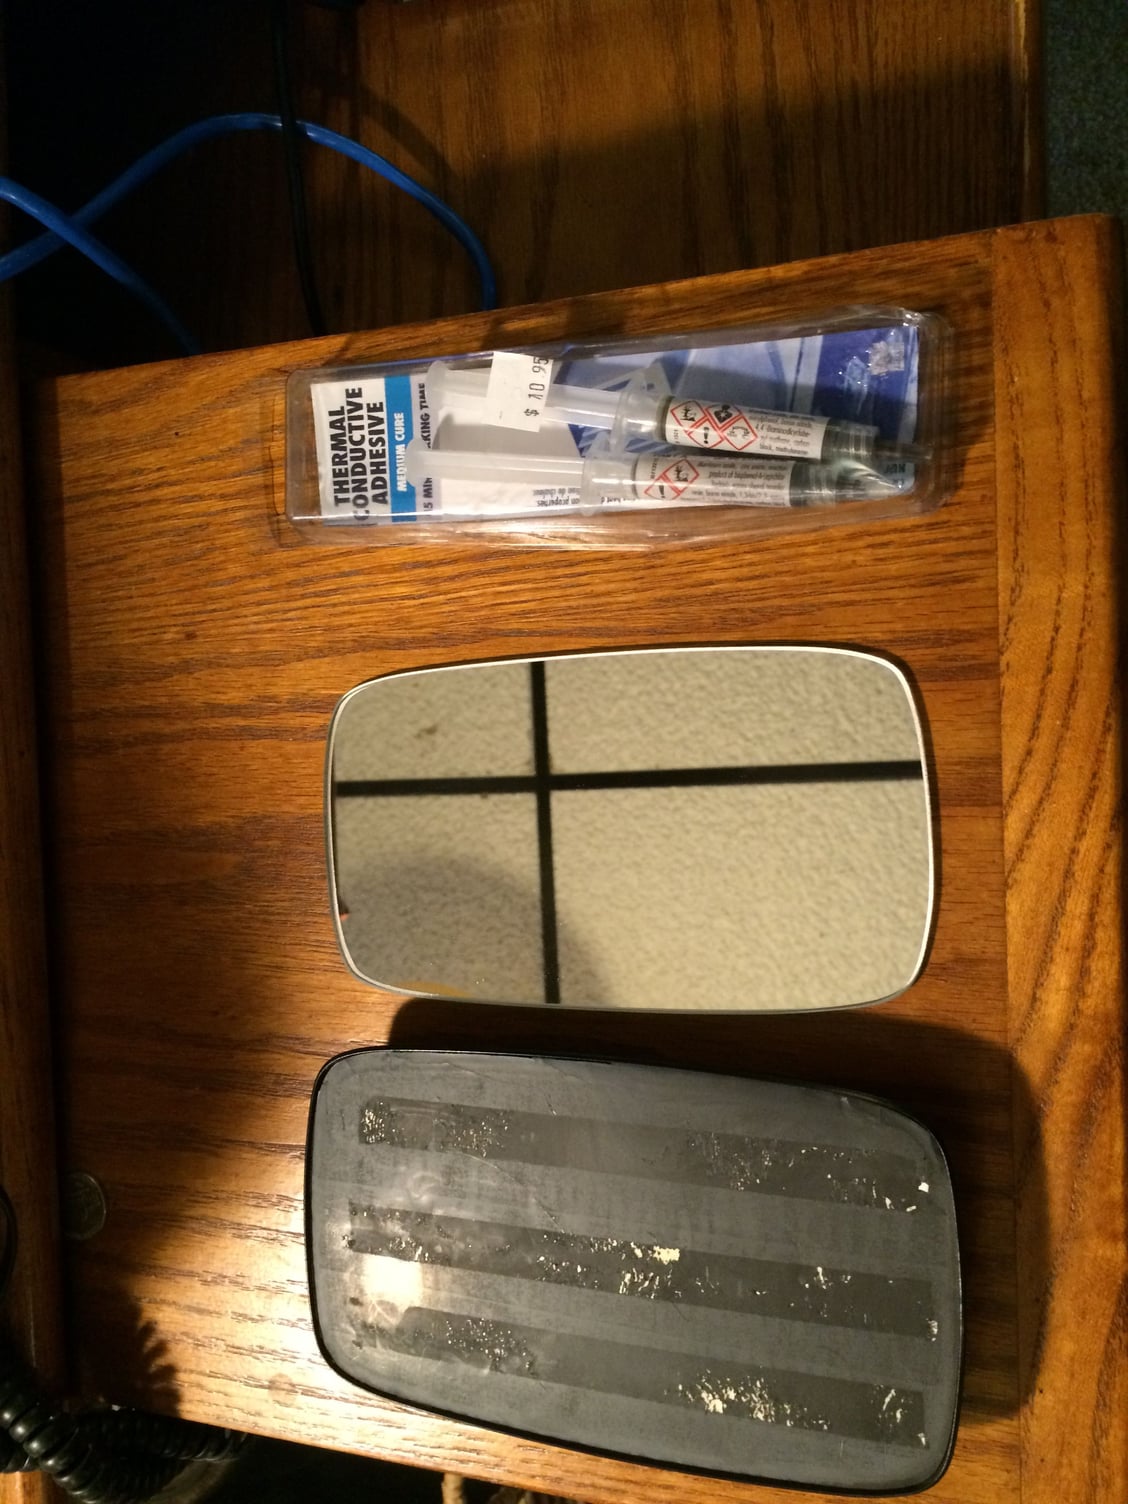
The steps that I have taken to replace the glass follow, AFTER having purchased a replacement glass plus a *thermally conductive* epoxy. ( see the photo). The purchased cut mirror must be able to sit within the side borders of the base.
1) pull the glass backing away from its three mount points on the door mirror housing by applying even pulling pressure on the base. Be careful not to tear the 2 electrical wires still attached to the base
2) carefully detach the electrical wires from the base
3) now is a good time to test the voltage at the exposed electrical wire contacts, with the defroster set to "on".
4) mix the thermal conductive epoxy and spread an *even* thin coat over the mirror base's surface.
5) place the mirror's rear surface onto the base and apply even pressure on the mirror surface, going over the mirror surface with your hands. Slightly move the mirror side to side within on base to further even out epoxy.
6) after the epoxy is thoroughly dry, you can reconnect the electrical leads to the base and reinsert the base into the mirror housing.
Remember ; in order for the glass to heat and defrost, you must have a consistent, conductive surface between glass and the base. If any one had other suggestions, feel free to chime in. The only parts necessary were the original mirror base, a new glass and thermal conductive epoxy.

 10-16-2015, 07:19 PM