When you click on links to various merchants on this site and make a purchase, this can result in this site earning a commission. Affiliate programs and affiliations include, but are not limited to, the eBay Partner Network.
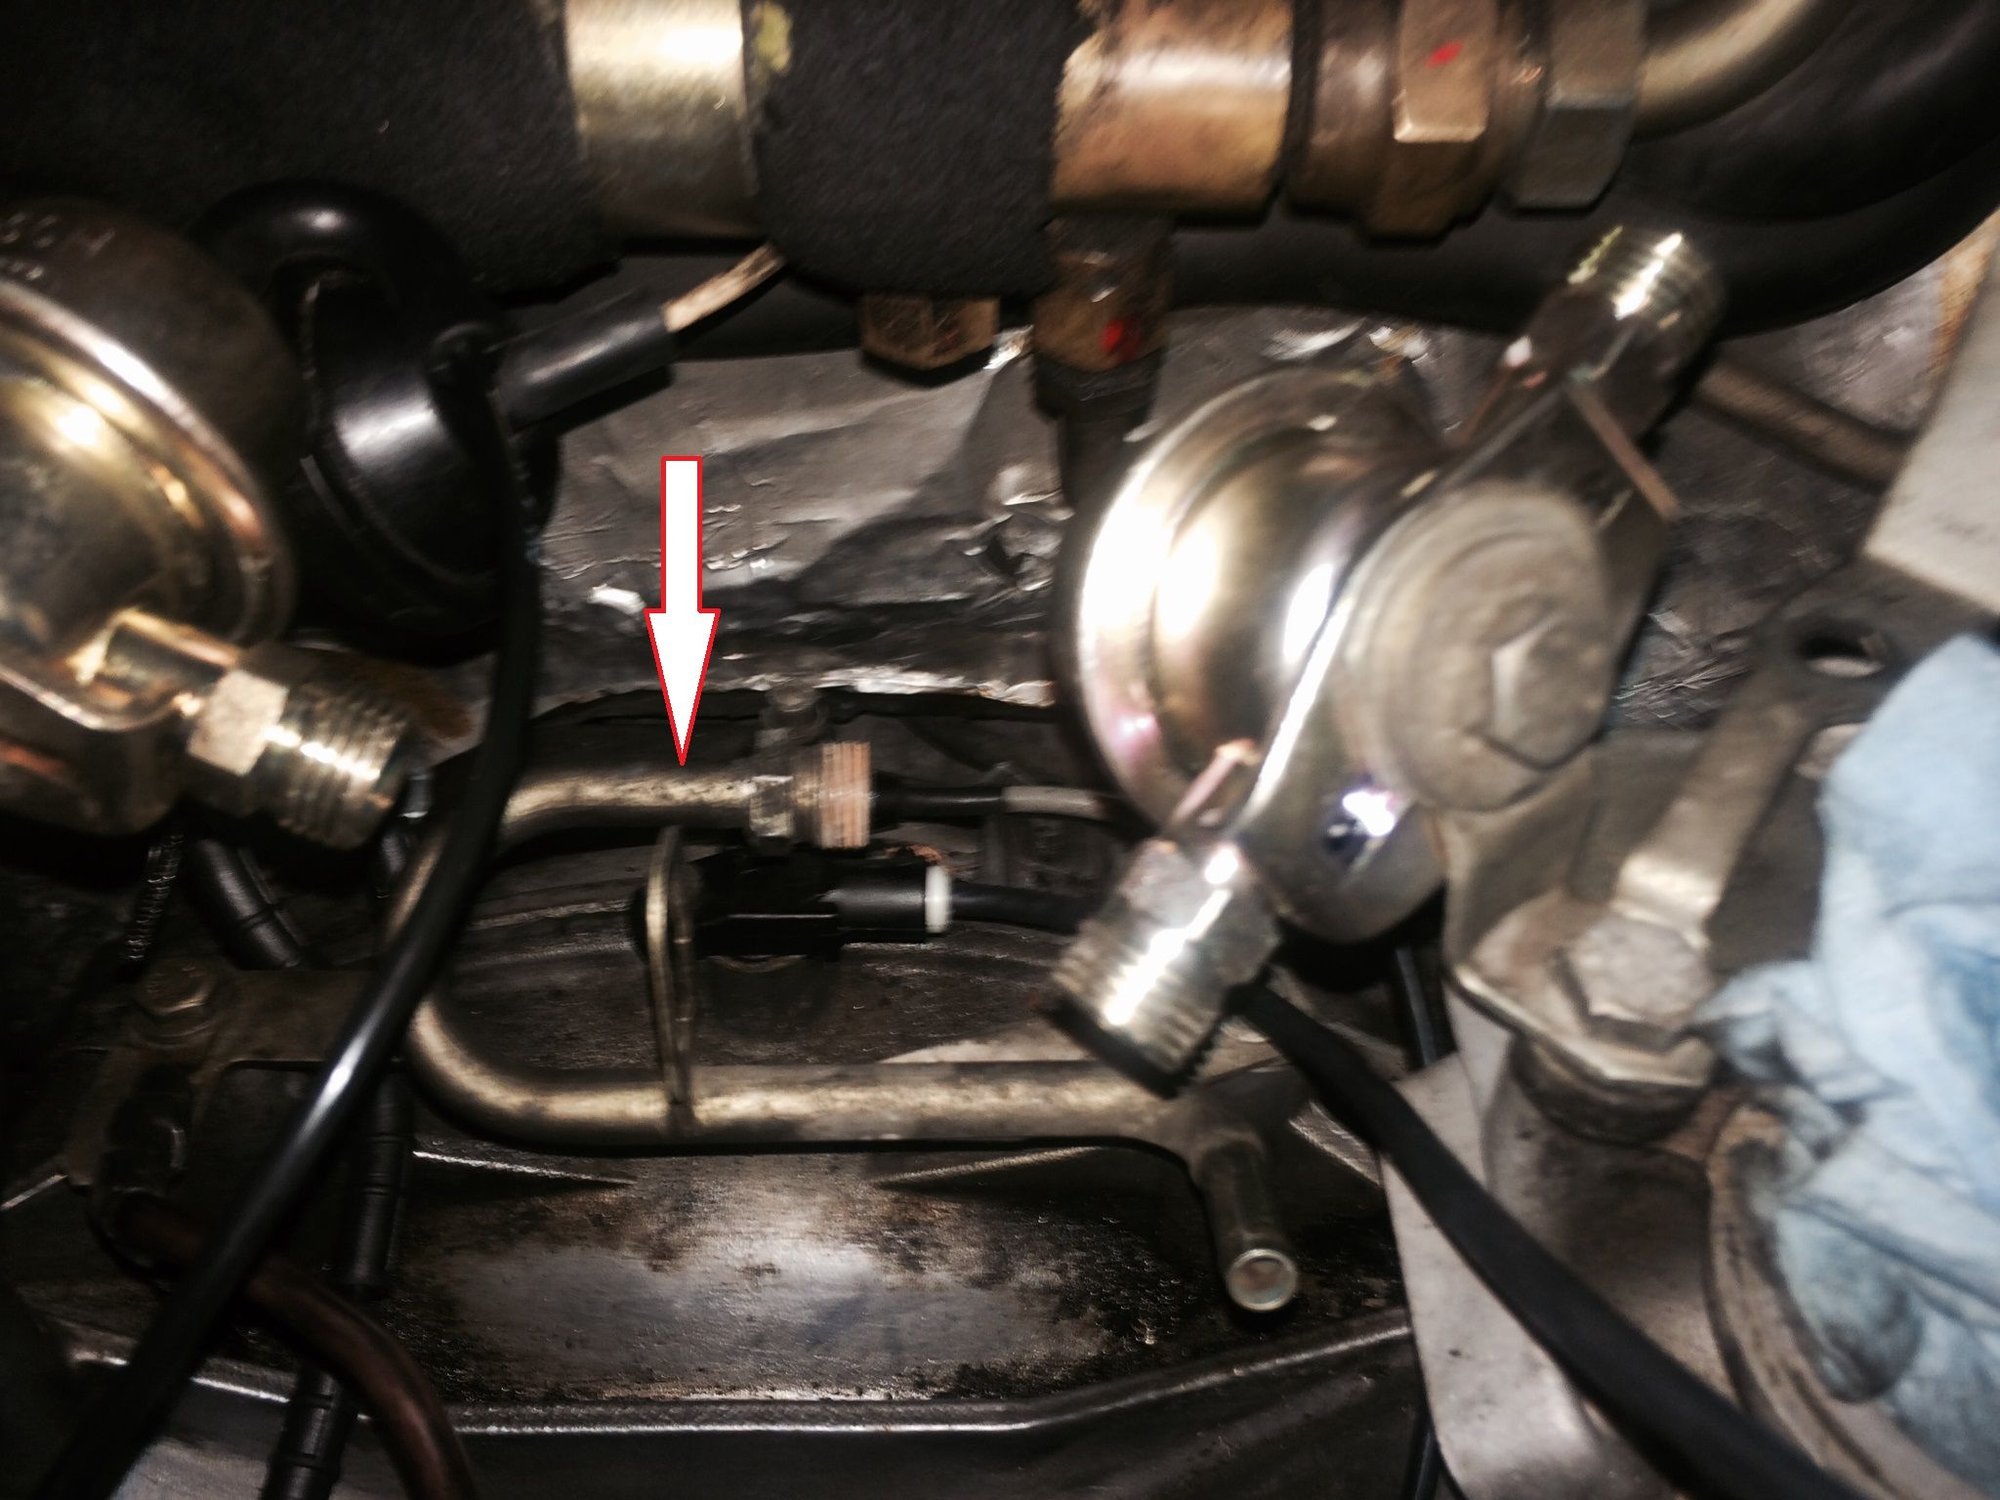
Starting reassembly after a hiatus to wait for parts and various emergencies at work. I bought Greg's fuel lines and an 88 FPR and just want to confirm that for the return line to the fuel cooler that the hard line below is not used any longer but that I should keep it to use the CPS connector holder.
After communicating with Greg we decided to keep the hard line installed so that the connector bracket can be retained.
Now for today's stupid question: I am about to install the oil filler neck which goes gasket/baffle/gasket/filler, do I apply hondabond on all four gasket surfaces or just on the two surfaces facing the baffle?
put the HB4 on every surface you may have some squeeze out.
NOTE refrigerate the HB 4 it will be thicker ,
but will also take longer to get tacky,
so you have more time to spread it
Finally got a free day to spend putting things back together, I've got the fuel system reassembled with Greg's fuel lines, new FPR, dampers and rebuilt injectors. Before I string the plug wires (also new) is there a safe way to pressurize the fuel system while it's relatively easy to check for leaks?
Finally got a free day to spend putting things back together, I've got the fuel system reassembled with Greg's fuel lines, new FPR, dampers and rebuilt injectors. Before I string the plug wires (also new) is there a safe way to pressurize the fuel system while it's relatively easy to check for leaks?
You can pull the fuel pump relay and use jumper wire to short the horizontal sockets on the panel, forcing the pump to run. You can remove the jumper after a few seconds. You can look for any obvious leaks visually (especially at points you have reconnected including fuel rails to dampers, injector tops to fuel rails) but it's better to have pressure gauge attached to test point on fuel rail.
Reading Scott's write up he pulled the ingnition relay and cranked the engine which is supposed to be marginally safer than jumping the pump.
Today I reassembled the replated throttle quadrant and to my dismay found that the needle bearings are gravelly and providing just enough resistance to prevent the idle switch from clicking. I managed to press the bearings out to see if it might be possible to service them but the seals disintegrated as I started flushing the old grease so that seems like it's a long shot.
Are the bearings available separately or do I just need to buy a used assembly from Mark?
Went ahead and cranked the engine with the ignition relay removed to test the fuel system, found leaks from the front line and the rail at the front damper, tightened up the connections there and everthing now looks good.
Unfortunately it appears I have an issue with Carl's plug wires as the 4 and 8 wires are much too short to allow attachment to the rails. Am I missing something?
From the pic you have way to much wire up front (cross over), I usually square that up first, also wire sets are different for an S3 vrs S4.
They are suppose to connect the the Fuel Rails and Loop down and then up to the plugs, using the small plastic clips in the Cam covers.
I'm not familiar w/ that wire set and if they were marked.
Best practices is to lay them all out on the floor and sort them by length, then using them where best fit, shorts being #1 and #5, longs being 2,3 and 6,7 as they cross over, medium 4 and 8.
I'm not familiar w/ that wire set and if they were marked.
Best practices is to lay them all out on the floor and sort them by length, then using them where best fit, shorts being #1 and #5, longs being 2,3 and 6,7 as they cross over, medium 4 and 8.
They are numbered and after exchanging emails with Carl I need to have this set swapped for the proper one.
I got a used throttle quadrant from 928Intl today and just got it installed.
I am noticing that the return to idle seems to be a bit weak. I am quite sure I installed the TPS in the exact same orientation as before but to get the idle switch to click consistently upon release I needed to adjust the throttle body rod, accelerator ball cup and throttle cable adjuster at the firewall all to be almost at max "looseness." Without the accelerator cable attached to the quadrant the return seems much snappier but as soon as it is attached the above behavior occurs and requires the max adjustment. I'm worried that this is going to translate to slop at the pedal. Note that prior to removal the old TPS idle switch would engage consistently at much tighter levels of adjustment.
Questions: Is this normal after replacing the o-rings in the throttle body bearings (I used 10mm ID x 2mm thickness o-rings)? If so, will it improve over time? If not is it possible I messed something up when reassembling the trottle body? Specifically how tightly does the large (outer) spring need to be wound? I did have to induce a fair amount when I seated the spring ends it but I'm wondering if I was supposed to somehow force an extra turn. Anything else I should be looking at?
Messed around a bit more with the throttle quadrant and got it working pretty well so then it was time to put attach the plenums and give it a go. Car started right away but felt like it was running on 7, as I double checked the plug wires (using my old ones while I wait for Carl's replacement set) I saw a huge puddle of oil on the driver side and to my disappointment discovered that I managed to pinch the bottom rear corner of the valve cover gasket without noticing it. So now it looks like it won't be back on the road until next week.
Question: Can I reuse the cover bolt o rings and rubber washers (these are the old style hex bolts)?


 10-11-2015, 06:21 PM