When you click on links to various merchants on this site and make a purchase, this can result in this site earning a commission. Affiliate programs and affiliations include, but are not limited to, the eBay Partner Network.
I've painted a few things with Imron. The most important thing to consider is that there's no forgiveness for any mistakes. Leave a little orange peel? Learn to live with it. Sag or run? Get used to it. There's no color sanding or polishing it out. The two-step systems available now are very forgiving. You put color on to get color, follow that with clear to get the protection and gloss you want. Imron requires some substantial breating gear when you spray it, including a full mask and independent air supply. Modern systems are water-borne until you get to the clear coat (on some), and air dry without heat.
My car is painted with Imron, I wouldn't do it again.
Dr Bob is 95% right but it can be carefully cut and buffed. (very carefully when cutting meaning most will 'f' it up) Runs you have to live with though.
You have a 3 day window maximum to cut and buff Imron, then it gets too hard.
Even if done w/in 24 hours one is left with deep bizarre scratches after wet sanding with 2000 gt that cannot be explained. So Dr. Bob is correct in that most simply live with the flaws. My paint is very good now but after multiple attempts. It was a very big headache.
Those that are very familiar with spraying single stage poly urethane paints can have great results because they have the experience.
When you color sand the finish, first rub the paper together, that will take off the high sharp spots on the paper. Put a little dish soap in the water to lubricate the paper & keep it clean. Every few strokes, stop & rinse the paper - get everything off it, use a scrub brush if necessary. When clean, dip it in the water & sand a little more. Change the water often. Also, use a rag to continually keep the area clean as you sand. A lot of sand scratches are from buildup of the sanded material. Sand with a light touch, it's going to take a lot longer than you would think, but the end result is worth it.
When you color sand the finish, first rub the paper together, that will take off the high sharp spots on the paper. Put a little dish soap in the water to lubricate the paper & keep it clean. Every few strokes, stop & rinse the paper - get everything off it, use a scrub brush if necessary. When clean, dip it in the water & sand a little more. Change the water often. Also, use a rag to continually keep the area clean as you sand. A lot of sand scratches are from buildup of the sanded material. Sand with a light touch, it's going to take a lot longer than you would think, but the end result is worth it.
I always wet sanded this ^ carefully. soap, change the water, light light touch,
lots of water..it is usually a relaxing part of the hobby. Not with Imron. You'll be shocked.
It only takes one fine long deep scratch and your panel is ruined. I've done a lot of careful wet sanding and have never seen anything like what Imron or other single stage polyurethanes do when wet sanding. It does remove some of the color too. It really should be shot and lived with.
Actually my single stage poly paint came with the instructions:
"Do not cut and buff"
To the original poster, I hope you take the advice and use basecoat clearcoat !
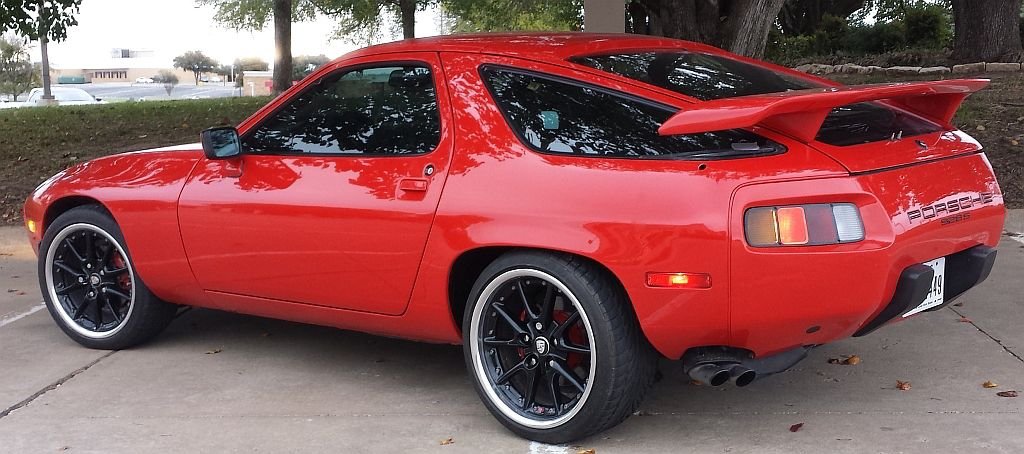
well it's back 8 days start to finish. two red sealer coats, 4 coats red, 4 coats clear. still got some detailing to do on this "quickie job".
now off to the alignment shop (sears in Denton).
Pictures look great, especially for an eight-day paint job. There are interesting stories from folks who've had the car in a paint shop for months; you must have a pretty good relationship with your paint guys.

 10-26-2014, 12:01 PM