

A 86.5 Timing Belt / Water Pump Picture Thread from a first-timer
 12-12-2013, 10:49 PM
#1
Burning Brakes
Thread Starter
Now that the intake refresh is done, I am turning my attention to changing the timing belt and water pump. Like the intake, this is my first time doing a timing belt- I'm a newbie.
I am going with the stock tensioner system. The PorKensioners are out of stock at the moment, and I need to do this job (quickly) before my fianc�e and I drive to Las Vegas at the end of the month to get married.
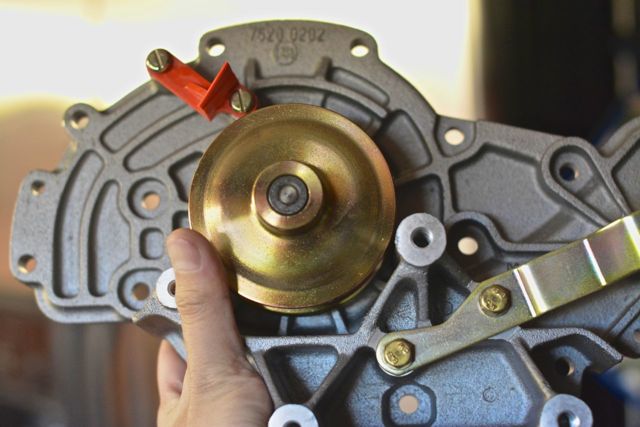
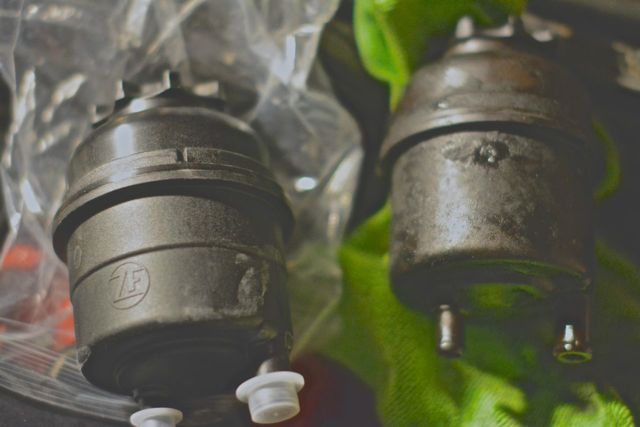
A nice care package of parts arrived from Roger today, including a new Laso water pump with plastic impeller.
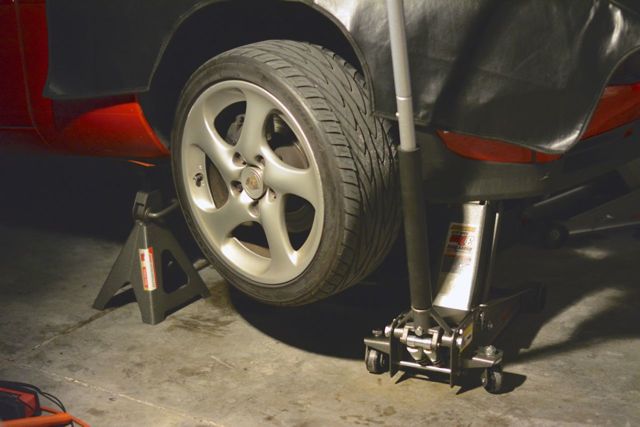
Here is the method I used to jack up the car. I do not have the PorKen Liftbars at the moment. I have two six-ton jack stands and two jacks, all from Harbor Freight.
I started by jacking up the passenger side of the car at the 'traditional' jack point. The reason I did this is because I could not reach the "bash plate" with my jack (it was too low.) Once the car was lifted slightly, I jacked up the car at the passenger side bash plate.
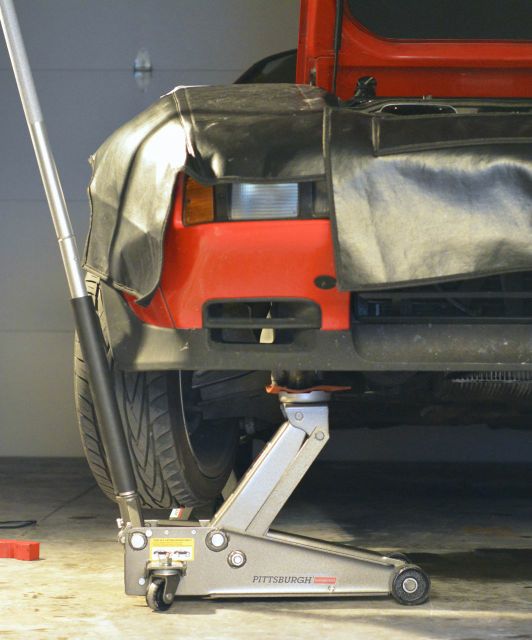
The car was raised sufficiently to allow me to get my second jack under the driver side bash plate.
Then, once the car was lifted sufficiently, I placed jack stands under the "traditional" spots behind the front wheels.
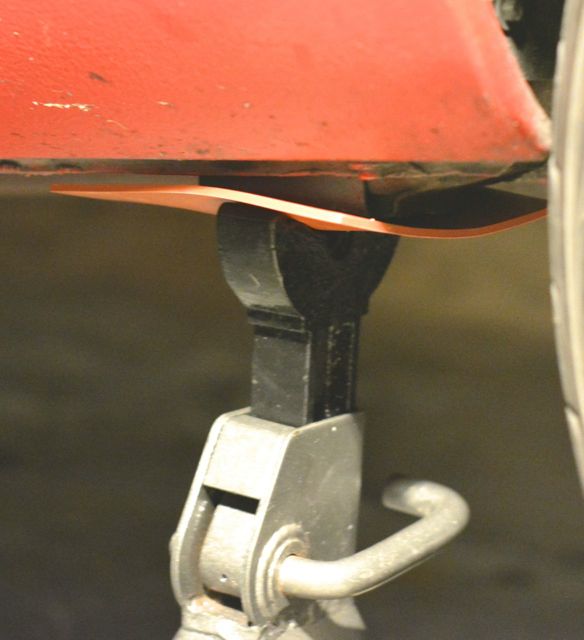
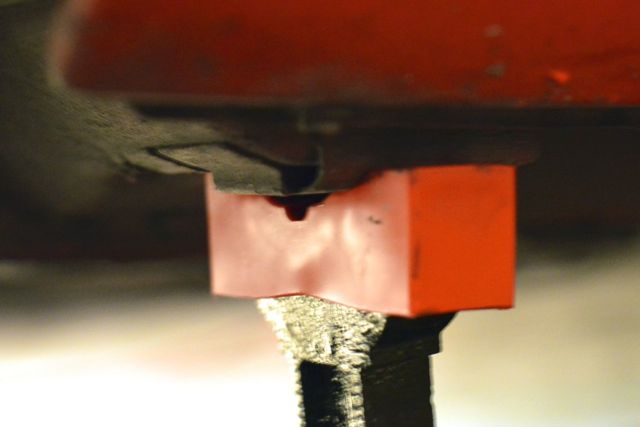
I made sure the jack stands were bearing the weight, tried to rock the car back and forth (I couldn't) and then put wheel chocks behind the rear wheels. (Parking brake was engaged and car in neutral.) Then, I raised the jacks and let them firmly touch the bash plates, as a "backup" in case the jack stands failed. This is how the setup looks. If anything here looks unsafe, please let me know- I am very open to the advice of Rennlist- I am here to learn.
With that, I was able to remove the two bolts to drain the coolant from the engine block. I was unable to do this with a regular ratchet, so I bought a ratchet with a Then, the coolant bolts came off easily.

Draining the coolant is a very messy job.
I got a new power steering fluid reservoir for $20, along with some new hoses. My old reservoir and hoses were cruddy and leaking, so time to change.
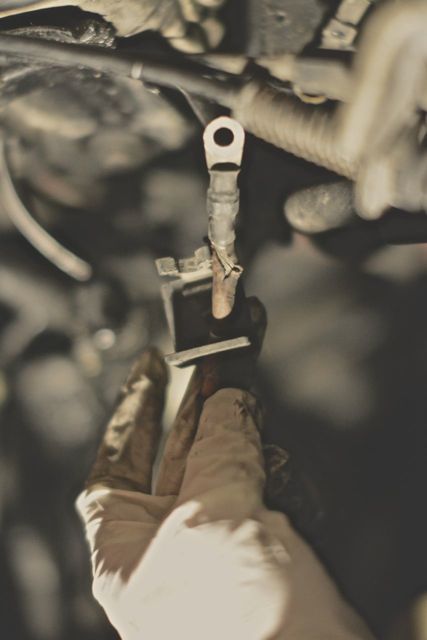
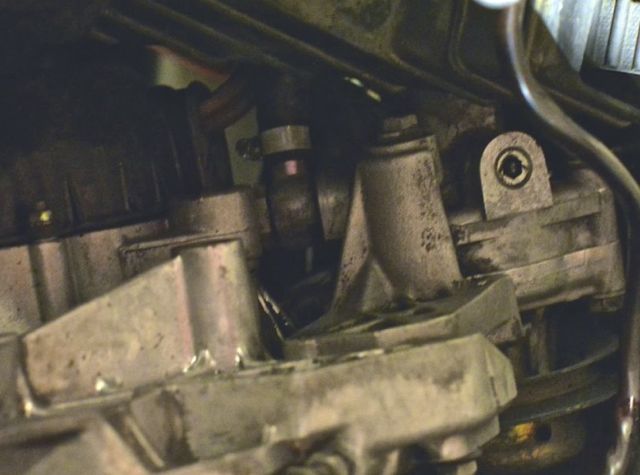
After the power steering fluid reservoir was removed, I was able to free a "power cable" that mounts to a bracket next to the power steering fluid reservoir. The insulation on the cable is starting to go.
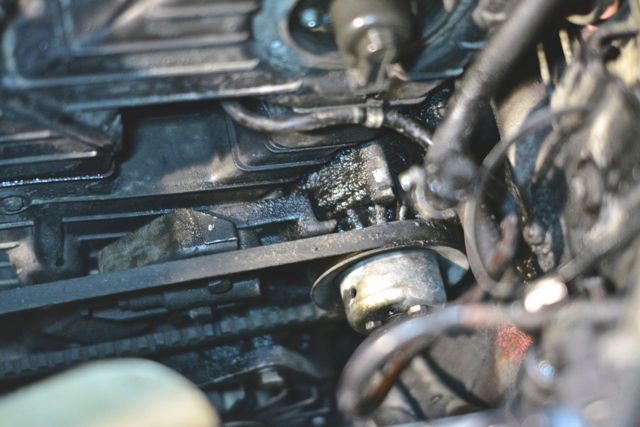
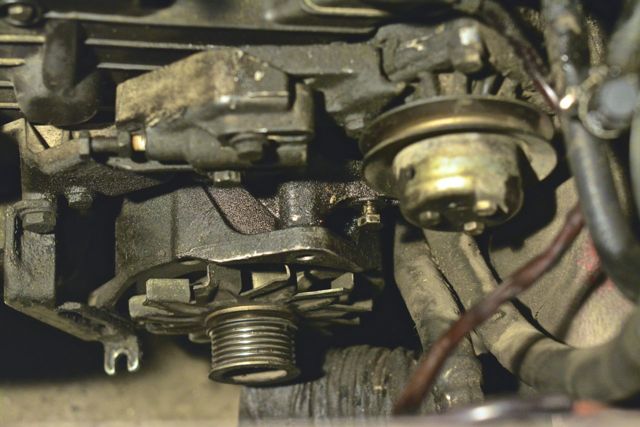
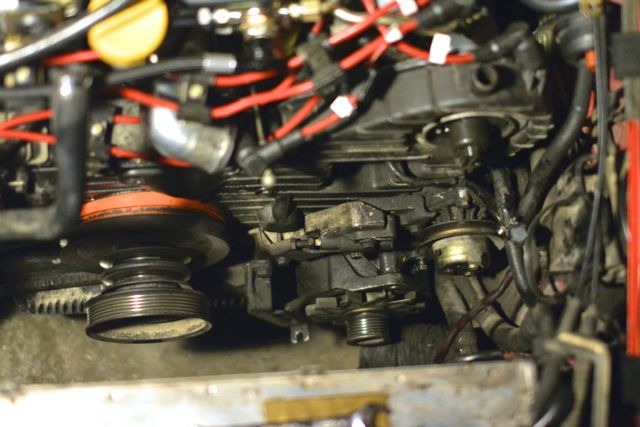
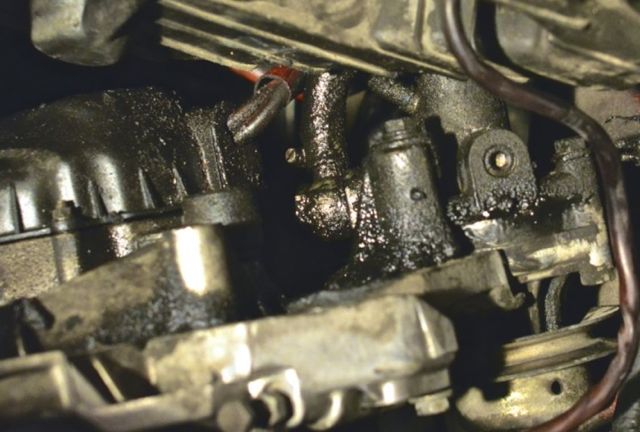
The top end of my engine looks good, but the front end looks like an oily mess. This will be a lot of work to clean up. I have a case of Brakleen, a jug of , and a whole bunch of brushes ready to scrub.
I am going with the stock tensioner system. The PorKensioners are out of stock at the moment, and I need to do this job (quickly) before my fianc�e and I drive to Las Vegas at the end of the month to get married.
A nice care package of parts arrived from Roger today, including a new Laso water pump with plastic impeller.
Here is the method I used to jack up the car. I do not have the PorKen Liftbars at the moment. I have two six-ton jack stands and two jacks, all from Harbor Freight.
I started by jacking up the passenger side of the car at the 'traditional' jack point. The reason I did this is because I could not reach the "bash plate" with my jack (it was too low.) Once the car was lifted slightly, I jacked up the car at the passenger side bash plate.
The car was raised sufficiently to allow me to get my second jack under the driver side bash plate.
Then, once the car was lifted sufficiently, I placed jack stands under the "traditional" spots behind the front wheels.
I made sure the jack stands were bearing the weight, tried to rock the car back and forth (I couldn't) and then put wheel chocks behind the rear wheels. (Parking brake was engaged and car in neutral.) Then, I raised the jacks and let them firmly touch the bash plates, as a "backup" in case the jack stands failed. This is how the setup looks. If anything here looks unsafe, please let me know- I am very open to the advice of Rennlist- I am here to learn.
With that, I was able to remove the two bolts to drain the coolant from the engine block. I was unable to do this with a regular ratchet, so I bought a ratchet with a Then, the coolant bolts came off easily.
Draining the coolant is a very messy job.
I got a new power steering fluid reservoir for $20, along with some new hoses. My old reservoir and hoses were cruddy and leaking, so time to change.
After the power steering fluid reservoir was removed, I was able to free a "power cable" that mounts to a bracket next to the power steering fluid reservoir. The insulation on the cable is starting to go.
The top end of my engine looks good, but the front end looks like an oily mess. This will be a lot of work to clean up. I have a case of Brakleen, a jug of , and a whole bunch of brushes ready to scrub.
Last edited by syoo8; 01-15-2014 at 10:11 PM.
 12-13-2013, 01:49 PM
#2
Nice so far. This job is fairly straight forward all things considered and not bad. I could probably do it again in a single day. Dwayne's guide is the best online free reference especially for all the torque values.
You will spend most of your time cleaning. Everything there is caked. Brake Cleaner does work but it may be more hazardous to work with in the cold stagnant air so have LOTS of ventilation. I'll probably try kerosene next time since it cuts better.
As a tip next time, loosen the lug nuts on the driver side front wheel in case you need to remove the wheel. It'll give you more room to work on that side and access to inside the fender when you replace and or re-snake the alternator cooling hose.
If you haven't already, clean out your alternator and replace the gasket and or hose.
12-13-2013, 02:12 PM
#3
Shameful Thread Killer
Rennlist Member
Rennlist Member
You have the right four-point jack stands, but I don't think I'm very happy with the orange pillow block in the pic. It's not secure to either the car, or the jack stand and could slide in the case of pressure put on the car. I'd just go with that flat orange pad, but the block isn't right.
I may get in trouble for saying this but I just lock the crankshaft at TDC and leave it there for the whole job. Unless you want to spin the cams around for fun or profit, there's no need to move the crank to 45deg.
Note which way the gear and washers go on the crank bolt and damper. Some have had trouble with that in the past.
If you want to do it faster, offer beer and brats to your local 928-ers and make a day of it.
YMMV, objects in mirror are larger than they appear, settling may have occurred, pro driver on a closed course.
12-13-2013, 02:27 PM
#4
You may also want to check and relieve tension on the flexplate while you have the car in the air. Took me 15mins extra plus I installed a P-Klamp too. Best to take care of it and get it out of the way for peace of mind.
S3s automatics are less prone to creep and subsequent TBF compared to S4s and above. I have 159k+ miles on the clock on my auto and when I checked, I was very well within spec. Wasn't ever touched before that. But it does still happen to the unfortunate so better check it than not.
Plus you get to clean that are too.
12-13-2013, 04:58 PM
#5
Burning Brakes
Thread Starter
Yeah, the problem is that there are no local 928-ers (any more.) If only I lived in Texas, or Anaheim...
Last edited by syoo8; 12-13-2013 at 05:24 PM.
12-13-2013, 04:58 PM
#6
Burning Brakes
Thread Starter
Does this apply to me if the car I am working on is a 5-speed?
Trending Topics
12-13-2013, 06:53 PM
#8
Shameful Thread Killer
Rennlist Member
Rennlist Member
12-13-2013, 07:27 PM
#9
Rennlist Member
Join Date: Oct 2005
Location: Gatineau, Qu�bec, Canada
Posts: 5,179
Received 1,322 Likes
on
500 Posts
Another great thread to follow...
Realy enjoyed your thread on the intake and valve covers R/R.
Very well writen one.
And as I always try to get better in English, I realy appreciate those.
With meticulous attention given to details like you showed, I'm sure that you will get through it quite easily.
Not a big job to do after all.
Great quality pictures too.
12-13-2013, 10:13 PM
#10
Burning Brakes
Thread Starter
Well, I got the belts off. John Kelly's manual- which I am following scrupulously- stated that if the air conditioning compressor belt was difficult to remove, to cut it off. My A/C belt had cracks in it, so I cut it off.
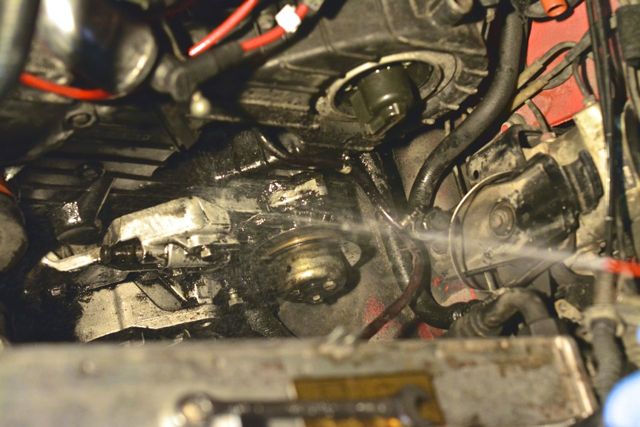
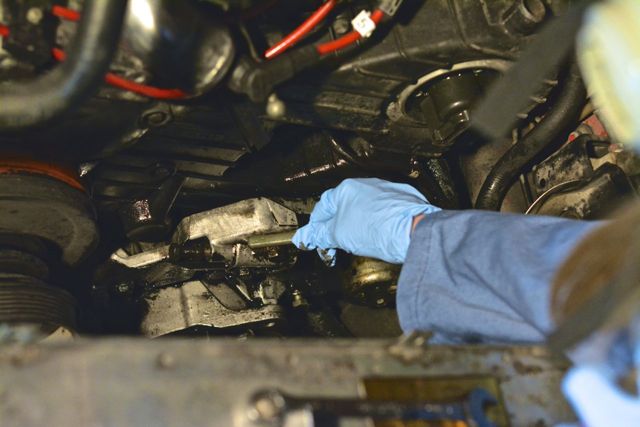
My fianc�e helped me clean up the mess with a can of Brakleen, a brush, and a gas mask.

She started with this mess:
And got to work.
I pulled off the driver's side and passenger side timing belt covers. The driver's side cover was easy.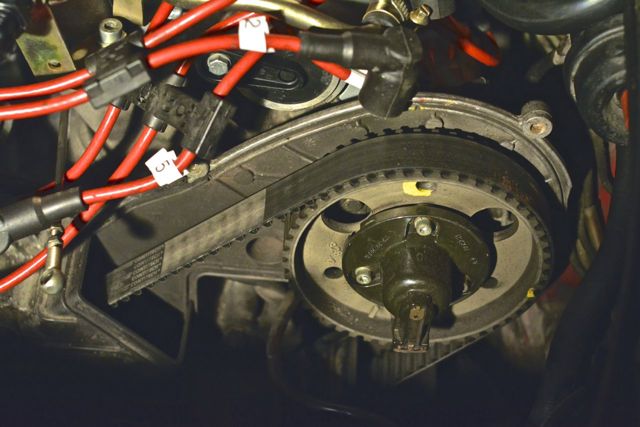
The passenger side cover was more difficult because the passenger side coil is kind of in the way.
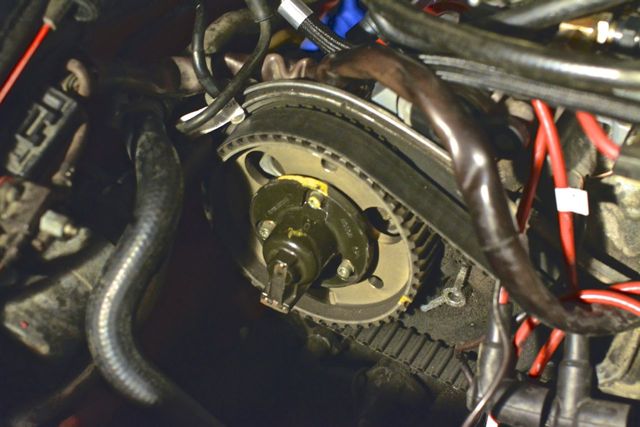
I think I caught a glimpse of some shininess on the cam gears. I am dreading inspecting them up close. Or, more to the point, I am dreading an $800 cam gear bill.
My fianc�e helped me clean up the mess with a can of Brakleen, a brush, and a gas mask.
She started with this mess:
And got to work.
I pulled off the driver's side and passenger side timing belt covers. The driver's side cover was easy.
The passenger side cover was more difficult because the passenger side coil is kind of in the way.
I think I caught a glimpse of some shininess on the cam gears. I am dreading inspecting them up close. Or, more to the point, I am dreading an $800 cam gear bill.
12-13-2013, 10:18 PM
#11
Lock it at 45 degrees if you're planning on touching the cam gears in whatever way. Just to be safe.
You can buy new aftermarket Roger ones from Roger for $600 I think and they should never require changing ever as opposed to new Porsche ones. If you do decide to replace them, you can clean thoroughly the backing plate behind the gear. They do pop off and you can change the hockey puck seals too...only if they're leaking.
How many miles? Some shiny isn't too bad. I'd personally buy Roger's gears and do away with it all. Porsche prices aren't going to be cheaper and if you plan on keeping the car and putting some good miles on it every year, it's worth it. An occasional drive...a couple thousand miles a year maybe....probably will get away without changing those gears.
FYI, I am terminally jealous of you. Even with the gear on obstructing, she's very cute. And the fact that she's willing to help and clean car gunk with you....
My advice:
Hold her tight and never let her go...and don't do anything stupid to make her sad.

 12-13-2013, 11:11 PM
#14
Shameful Thread Killer
Rennlist Member
Rennlist Member
So - if I understand this right, you're advising moving the crank to 45deg, and removing the cam gears from the cams.
12-13-2013, 11:21 PM
#15
Yea, should be no chance of the valves bending in case the gear rotates. I know you can do it at TDC as well just fine but 45 is safer. If the counter hold slips or something happens when you're trying to loosen or torque the gear could move to the point where the spring pressure takes action. Think mine was 2-4 teeth from where I marked it at 45 where it kicked. Scared the heck out of me. Had to rotate it all the way back.