When you click on links to various merchants on this site and make a purchase, this can result in this site earning a commission. Affiliate programs and affiliations include, but are not limited to, the eBay Partner Network.
Randy, Randy. I finally got the mill set up to finish one of the three finger tools for separting the gas cap. I hand finished it and then tried it in the other assembled devise I had made, with one of my gas caps, and IT WORKS!!!
I'll try it on your cap later and then be able to clean yours up and make the conversion and repairs and get it in the mail to you, probalby Monday.
Thanks Randy. Your cap came apart just as I hoped it would. The "magic" in my redesign of the three finger tool was to get it to stay in place in the cap once it is forced in enough to displace the three locking lugs. With my first design it would not do that. Once the pressure was released the tool would pop out. Now the new design stays in place, and then while it is all held in place with friction I can turn it over and push on the lock to take the cap apart.
It works without the application of heat, although I think there is still some risk of breaking the red part of the cap since it has to be forced out of shape pretty much. The problem with heat is that it seems to cause the red part of the cap to take a set in the sort of three-corner shape. Maybe heat again after it is apart will let it return to round, but I haven't tried that yet. That will depend on what kind of memory is built into the red plastic.
I have tried this tool on a couple of other caps and it works very well. It takes quite a bit of force to press the three-finger tool into the cap all the way, and I have had to turn the cap around 180 degrees to get it straight and pressed all the way in, but it stays there while I turn the cap around to press it apart by pressing on the lock with the other side of the Tool.
I think I'll go ahead and finish out the rest of the three finger tools and then decide what the heck to do with most of these.
Randy, your cap is in the mail as of yesterday by first class mail. I cleaned it up as much as I could and reassembled it the way you ordered and tried it on my gas tank neck. It ratchets about twice as firmly as my original which I think is just about right. Check your PM for the tracking number.
__________________
ReDesign by FEATHER
by Jerry Feather
Producer for 928 of:
-Hatch Latch Receiver Liner--All Versions
-Replacement Heavy Duty Spare Tire Cover
-Flush Center Console Conversion
-Cowl Cover, Cowl Seal, & Shell Stickers--All versions
(RHD included)
-Aluminum Gas Cap Ratcheting Pawl
Jerry,
Great job on the tool - what you have made is pretty much exactly what I had in mind when we discussed this. I could envisage something like this (generally) but don't have the tools (or skills) to make one. Glad you were able to (of course!).
I do think heat is a good idea - makes the caps much more flexible for removal and reheating after seems to get them back straight again in my experience. You don't need to get them too hot - boiling water seems to work OK for finishing this up.
Thanks for taking all this on - a lot of work!
Alan
Thanks Alan. It was in fact your suggestion about four years ago in your and JP's thread about the Pawls, that challenged/inspired me to take this on when you said something like "someone needs to come up with a tool . . ." or words to that effect. It's too bad that it has taken so long to finish. At least now the circle is nearly complete.
I have the remaining 8 three-finger tools to finish milling, but as usual, something else must be done first. My rotary table, now mounted in the mill, has developed quite a bit of back-lash, so I need to turn it over and see if I can make any adjustments to correct that.
Then I have only one place now to send one of these tools--To Mark A at 928 Intl. I had promised to put one of them there on permanent loan for his/their use in the business, but also to be available for any other 928'r to come by and use. I hope he is still open for that. I have to go out there in the next few weeks to pick something heavy up from him so I'll be taking one with me for that.
Last edited by Jerry Feather; 07-07-2018 at 10:00 PM.
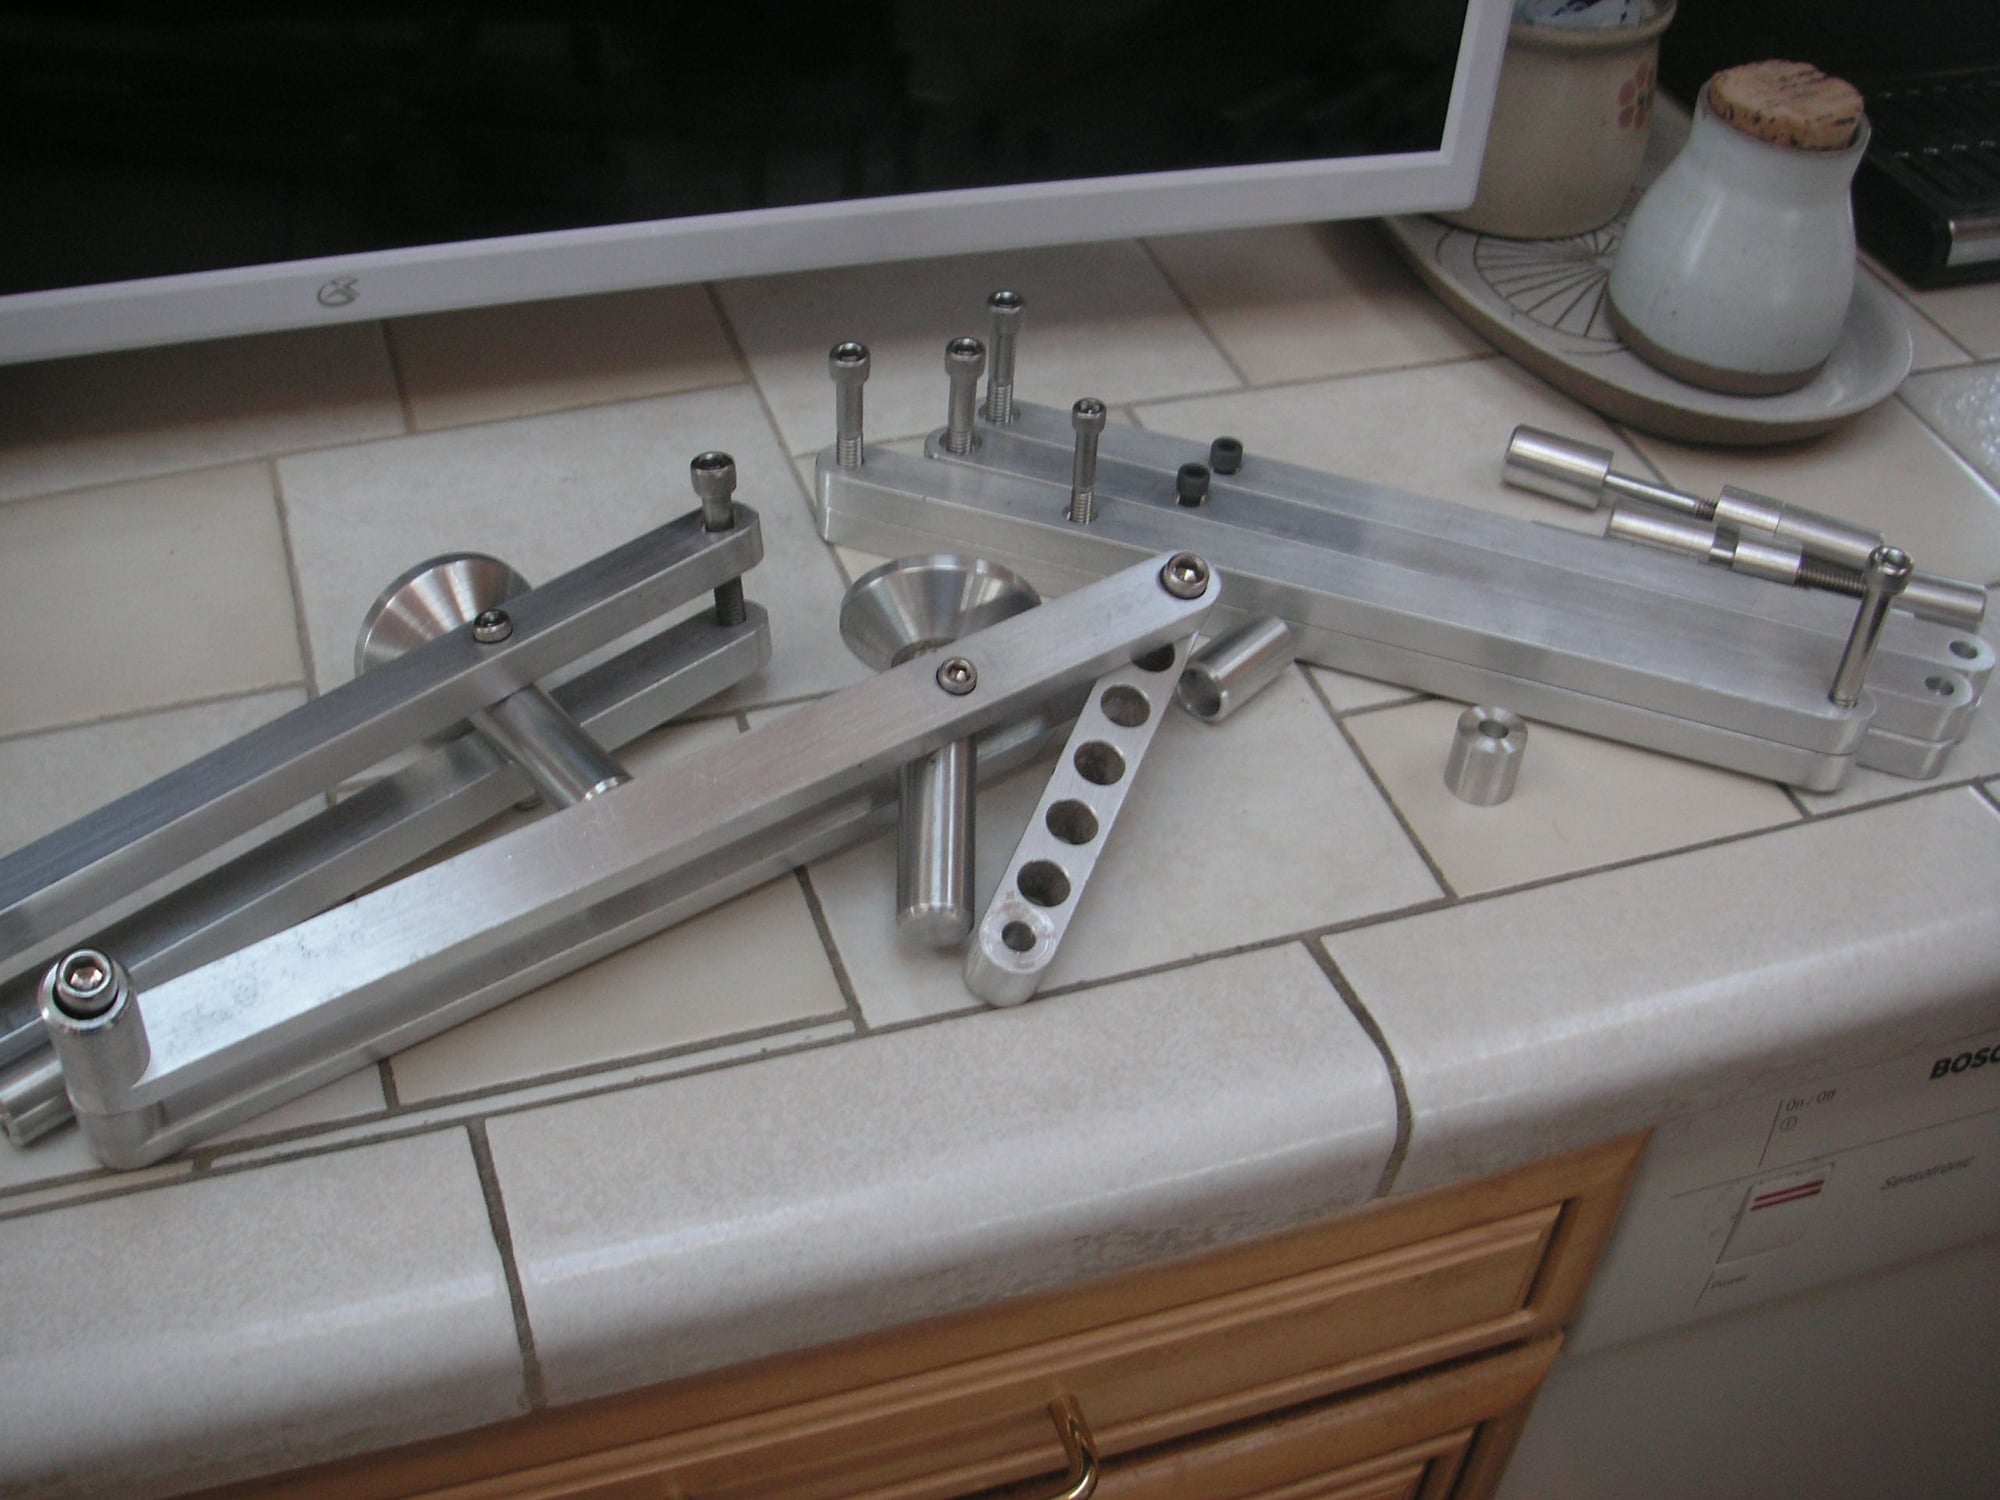
This separating tool and the pawls came up on Face Book, so I thought that while I am waiting for various applications of Epoxy to set on my Headliner Mold I ought to gather up the pieces of this project and see if I could get these finished up. I found all of the parts that I think I made, but didn't find any of the long pieces for the basic arms. I can't remember if I made them or not, but I guess it doesn't matter since in studying the one tool that I assembled to try I have decided that the arms need to be a bit longer and the hole spacing seems off about a quarter inch. I have cut some new stock and am finishing it out for the new arms. I also am missing one of the blanks for the three finger tool, but I think it is here in the house somewhere. If I can find it I'll be able to finish out all 9 of the tools.
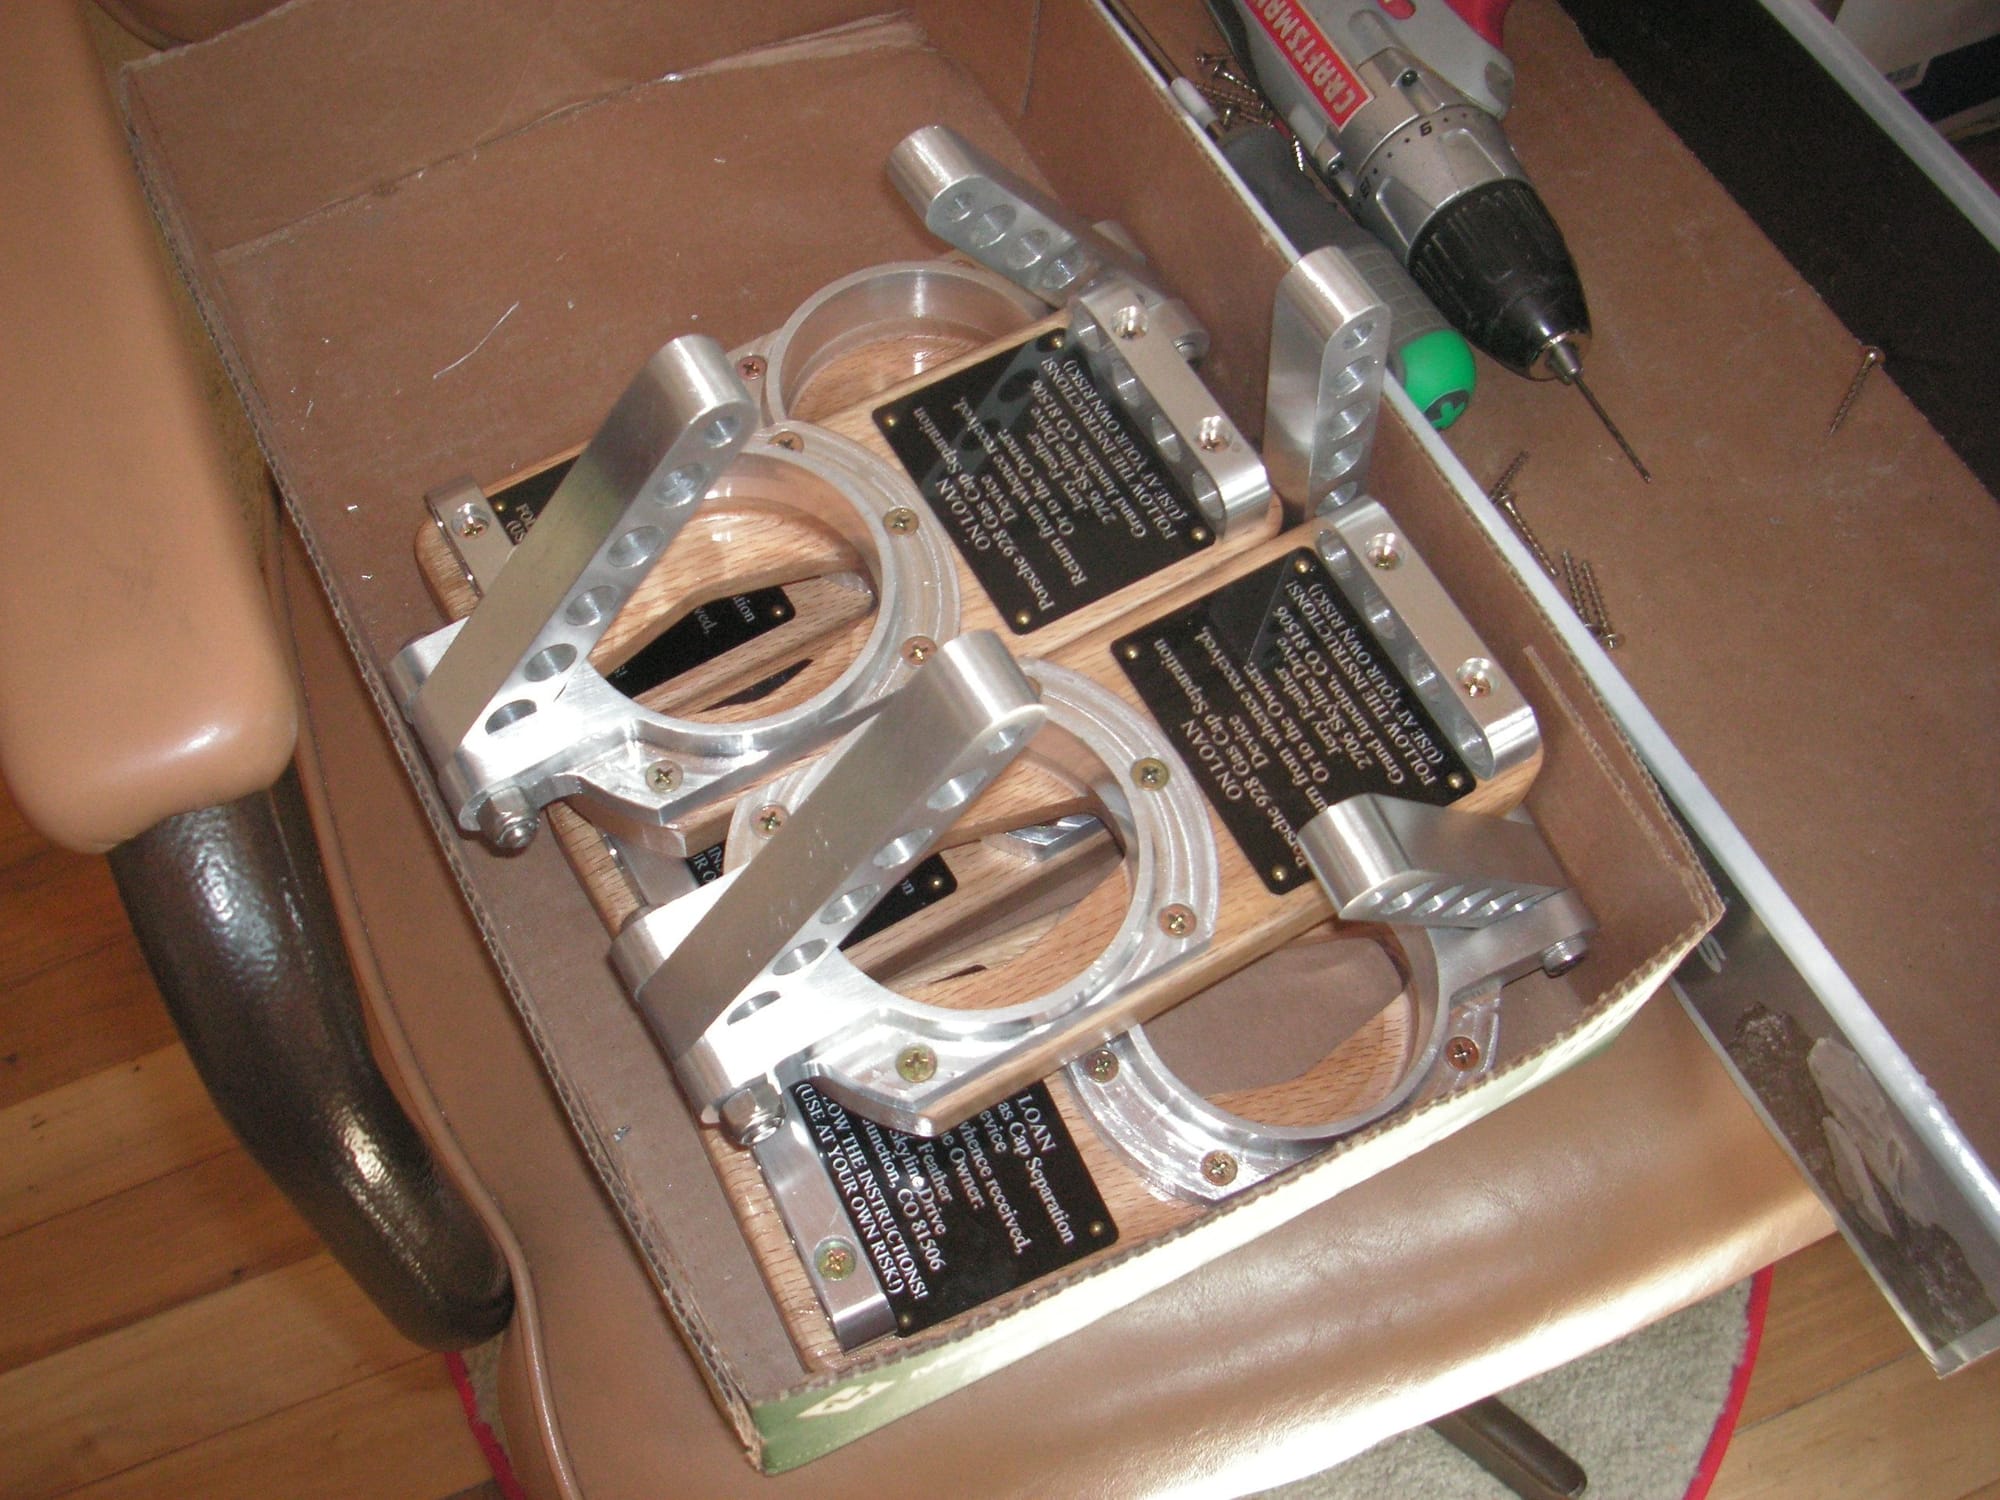
I cut, milled, drilled and tapped enough material for the 9 sets of long pieces for the arms of this tool. I just need to hand finish them some before assembly. I also found all the wood bases and have sprayed them with clear finish. I have all of the cups for the three-finger tools and will next mill them out to finish. I have also written out some instructions for use of this devise and will take some pictures to supplement that and have my Secretary work it all up to print so that can be sent with the tools.
Last edited by Jerry Feather; 07-12-2018 at 08:17 PM.
I have all the three finger tools finished and just about all of the aluminum pieces sanded smoother than they were. Then I lightly sanded and repainted the wood bases because the clear that I had finished them with was flat and it seemed to soil very readily; so I repainted them with gloss clear.
Then I assembled one of the devises and took these pictures to post, showing it in both modes. After that I actually separated the gas cap shown with the devise and found that my latest greatest fear about this whole process is going to become, or is, a reality.
That fear is that aside from the risk of breaking the red part in the process of pushing the three finger tool into the cap to separate the cap, I have found that after the three finger tool is pressed in and then held by quite a bit of friction, in the process of turning it all over and then pushing on the lock, which is the only thing to push on to make the final separation, if any force more than a light push is needed it is going to push the very center of the central part of the white part of the cap out. What happens is that the very center of that part of the white part has a recess in it to center the little spring that is holding the lock up and the plastic around the edge of that recess is only about as thick as the metal around the edges of the hole in the top of a snap top pop or beer can. In fact it is so thin that is looks simply like a coat of paint.
The result is, and it happened with the cap shown here, that the spring collapses and then pushes that center recess out. Now the cap is essentially destroyed, at least as a unit. I am now in the throws of deciding if this amounts to a fatal flaw in this whole program. Being a plastics kind of guy I can imagine gluing a new bottom onto the white part, but that is going to involve a whole different program than what I had in mind up to now; and there is the suggestion that with something glued on there that looks like a patch the cap will not pass an emissions test.
Jerry - I have a spare white part you are welcome to have for this one. In fact I expect 928Intl probably has a bunch of caps with broken red parts where the white part is fine.
So pushing the lock out - just pokes the lock part through the white cap?
Could you remove the center of your 3 pronged tool (leaving a rim to push on) so you could create another "friction tool" around the central stem to pull the white part (initially) loose.
Hi Alan. That is some great stuff. I accept the offer of the white part of the gas cap. I'll check with Mark A. about some broken caps for the same. Your thoughts about how to otherwise get the friction assembly apart without pushing on the lock stimulates some thoughts for me, but I'm not sure yet where that might lead.
The three finger tool is already open in the center to clear the central part of the white part of the cap, but when the three finger tool is pressed in and held with friction there is nothing left to push on except the lock. Pushing on it is putting pressure on the little spring inside at the bottom and that is in turn pushing the center of the white part out where it is very very thin.
My first thought about opening up the three finger tool in the middle would be to open it up much more so another tool of some kind could be slipped in over the central part of the white part and then clamped onto it some way and then pulling on that to get the cap apart. That will take another tool design of some sort.
In any case I think the program, if there is going to be any kind developed out of this, will be to devise some way of repairing the bottom center of the white part, and doing it in such a way that it does not appear as a patch. That is going to depend on my finding out just what the plastic is and if some kind of adhesive can be found to glue the patch permanently. I could then turn the edges of the patch in the lathe to a nice factory-looking finished edge. I will also need the correct color of plastic to make the patches.
Last edited by Jerry Feather; 08-16-2018 at 10:52 AM.
I have four of these implements complete and with a little bit of machine work to adjust some holes and such I'll have the other 5 done. I'm going to get one in the mail for Mark A. as promised a long time ago and let him work up whatever he likes in terms of offering any gas cap service, maybe including re-keying. I am sure that he intends to allow usage of the device by any comers in his area, or otherwise, but he will not be sending the device out on any further loan.
I separated another of my gas caps and did it without popping the center out of the white part. I am going to include a warning in the instructions that I am writing to help avoid that risk.


 02-02-2017, 02:30 PM