When you click on links to various merchants on this site and make a purchase, this can result in this site earning a commission. Affiliate programs and affiliations include, but are not limited to, the eBay Partner Network.
I have done both my 90S4and 91GT and reused the adjuster sleeve and nut. Like it has been said you have to clean the body of the shock thoroughly. The sleeve comes of the top. You need the nut to use as leverage to get the sleeve off. I used a lot of PB blaster to get in between the sleeve and the shock body. Then made a make shift wooden structure that the whole shock assembly can be placed on vertically with the nut resting on the edge and used a sledge hammer to hit the top of the shock body to dislodge the sleeve. It took a lot of hits but the sleeve and nut came off and were reused without any damage.
Hope that helps.
Bilal
Mine came off with a few gentle pops with the plastic hammer. No-corrosion Cali car.
It would seem that a piece of pipe over the shock body, seated on the adjuster ring, would let you put the shock in the Big Vise with the rod passing through the jaws. Old shocks are sacrificial, right? A few well-aimed blows with a small sledge on the end of that pipe would start the sleeve on its way.
Next option for me would be to cut the tube an inch above the top of the sleeve and -maybe- below it. Then collapse the tube inside the sleeve with a few radial impacts with the hammer and chisel, or more likely with the air chisel set to 'stun'. Shock tubes are amazingly tough though.
I have had a couple that have been a pain, but I have NEVER experienced anything like you are describing Greg.
I hope I never do either, but then again, I have enough spares that if I did, it would not even phase me.
These two were packed with a white substance that looked and felt like concrete.
I was shocked when welding a few beads around the inside did not make it just fall off.
One was glued so solid that the welding actually made the sleeve slightly oval shape, and it still almost did not come off in the press.
It took a a die grinder and Dremel tool to clean them after they were off and after they had soaked over night in carb cleaner.
Thanks to all of you for your response - both the ways that worked, and the difficulties sometimes experienced. I'll certainly try to get these off. The shocks are Boge OE, were only on the car about 10 years, and not in a dirty environment - thus there is very little dirt or grime on the shock tubes.
I'll find time to work on removal this week. Results to be posted after they are removed, or I give up!!
I think you misunderstood. I'm removing the threaded sleeves from a set of OE Boge. I will be installing them on a set of new Konis with Eibach springs.
With the suggestions you all gave, I was able to remove these quite easily. I'd had NO SUCCESS in a previous set I'd tried a few years ago, so thought I'd get instructions from the gurus on this forum. IT WORKED!
Used some Silikroil on the tubes at the sleeve, cleaned off the tubes, turned the shocks upside down, put the rod through a hole in a piece of 1" oak, put the adjusting nut about half way up on the sleeve, then used a 1 X 2 piece of wood about 12" long on the adjusting nut and a 12 oz hammer to hit the wood, going from one side of the shock to the other in subsequent strikes. Took about 3-4 strikes of the hammer before the sleeve started to move. Another 3 or 4 and it slid completely free of the bottom. No heat was needed, but I had my propane torch and wet towels ready!!
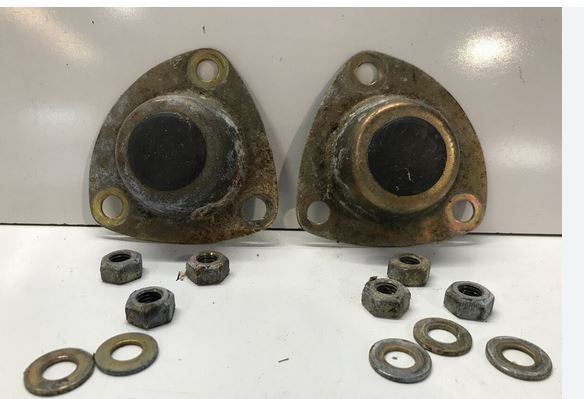
Can the three screws and rear strut cap be simply removed?
Or would there be more suspension considerations/complications involved?
I just want to replace these with a set i had recently re zinc'd/chromated. (not actual picture - for illustrative purposes only)
Last edited by 928Collector; 06-20-2024 at 03:07 PM.
Can the three screws and rear strut cap be simply removed?
Or would there be more suspension considerations/complications involved?
I just want to replace these with a set i had recently re zinc'd/chromated.

 11-06-2011, 08:48 AM