
FLUSH Center Console Development
 11-19-2010, 02:01 AM
#316
Addict
Rennlist Member
Rennlist Member
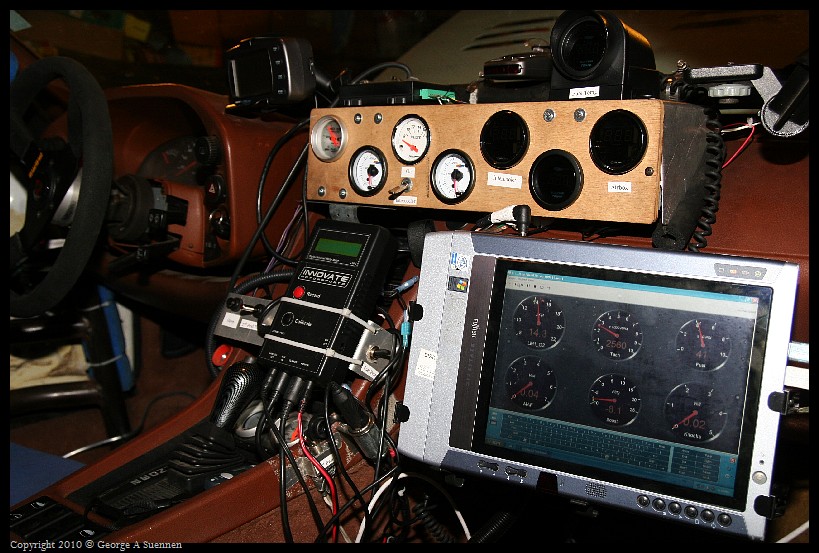
Ive always wanted something like this in a car..
http://www.jpinstruments.com/edm_930.html
You want data..I got yer data _riight heere_....
http://www.jpinstruments.com/edm_930.html
You want data..I got yer data _riight heere_....
 11-19-2010, 09:40 AM
#318
Rennlist Member
Thread Starter
That clutter is awful. Can we please get back to three gauges?
Does anyone wonder where or how we are going to place three gauges, or even two, and then place the rear AC controls, all in the lower trim piece? Does anyone care? Is anyone going to need or want that?
Jerry Feather
Does anyone wonder where or how we are going to place three gauges, or even two, and then place the rear AC controls, all in the lower trim piece? Does anyone care? Is anyone going to need or want that?
Jerry Feather
11-19-2010, 10:21 AM
#319
Rennlist Member
I need blank plastic cover(s) for the console openings and would figure that out custom for each car.
None run clocks. One car displays fuel pressure and AFM ratio. Would like to eliminate ashtray.
None run clocks. One car displays fuel pressure and AFM ratio. Would like to eliminate ashtray.
11-20-2010, 02:21 PM
#322
Rennlist Member
Thread Starter
The lower trim piece is less complicated in that there is not going to be doubler material put inside of it. The space for instruments is limited in each version of this piece, and the choices of placement are relative few.
Nevertheless, these suggestion are deserving of further consideration. Thanks.
Jerry Feather
11-22-2010, 07:46 PM
#323
Rennlist Member
Thread Starter
I finally got the center console out of my silver car so I can complete this development. I have cut the air vent out of it and will be putting it in the upper insert. I have also trimmed some of the plastic out of the lower area so I can do the final (hopefully) fitting of the indicator light/switch module.
I have also figure out how to design, and, I think, fabricate the air vent connector to fill in the gap between the moved/rotated slightly air vent from the console to the upper insert. I think that is going to be less complicated than I was expecting and can be done without the need to build some kind of forming machine to make it with.
I also finished the second version of instrument gauge bodies for Jimmy and now need to decide if I should leave them shiny aluminum or paint them black. I also have arranged with Prosport Gauges to sell me a bunch of spare gauge lenses so I can make some of these for anyone who might like gauges in their lower insert.
Again, I think there will be space in both versions of the lower insert for three gauges, and, in those cars with rear AC, room for the two controls with the gauges. In the manual version the gauge fronts will likely be reduced to 1 3/4 inches and be placed left to right in the new clock panel which is located where the ashtray was; and in the auto version they will be top to bottom starting in the upper right and in a line below. These will be like or similar to Jimmy's with each one getting a little smaller as they are placed lower.
I hope to have more of this done this holiday weekend, which will give me some extra time, aside from putting the tree up.
Jerry Feather
01-01-2011, 12:24 PM
#325
Rennlist Member
Thread Starter
Hi Ducman82. Sorry for the delay in getting back to your request for an update. I have been a little hung up on doing the gauge modification for Jimmy and doing some restoration of my center console so I can put it back in and finally work out the gear indicator lite component.
Right now I am thinking that simply using the lower shifter trim piece itself as the base for this lite module may be the way I have to go. Nevertheless, I still have to get the console back in the car to finalize that.
Since your car is a 5-speed the lites are not applicable. However, to determine that my lower trim piece for the 5-speeds is correct I need to put one in a 5-speed car. I have one available here that I can use, but it is in its own garage, so I have to go there and take it apart to see how close my trim piece is to correct. When that is done I think I can make a kit for installation in your car.
I have been waiting to get two or three console conversions covered so I can take pictures of them and then convert this thread over to my Sponsorship and start a commercial thread there. In the meantime I would invite you to PM me so we can talk about exactly what you have in mind for your car and perhaps I can start getting that together for you.
Jerry Feather
01-26-2011, 10:48 AM
#326
Rennlist Member
Thread Starter
Hi Jake. I thought I would respond to your PM here by way of an update on this project. I have been making only slow progress this month. I find it difficult to get myself out to the shop in the evenings because it is so cold and it takes over an hour to warm the shop up with my heater. By then I am about ready to come back in. So, my progress has recently been isolated mostly to the weekends. Too, I havet been able to take any afternoons off to work at home lately since I am training new help at work.
I would recommend looking back at this thread, Jake, to see how the HVAC and the warning/AC switch panels are going to be moved into the upper insert and mounted there. Too, I am taking the upper air vent out of the console and then glueing it into the upper insert. I am still developing the air flow connector for the space between the relocated vent and the air box under the dash.
The "stereo," or in my case, the Double DIN Nav units, are going to be mounted in a rack affixed to the console. Then the upper insert with the two relocated panels mentioned above and with the relocated air vent will be installed into the Flush position and the Double DIN placed into the rack fron behind.
Jake, as to the leather covering for BOTH the inserts and the console, I have not done that yet. I have a leather covered console from Jimmy that I am trying to use for this part of the development, and so far I am hoping that this can be done with leather that I have found that mikes out about .035 to .040 inch thick rather than 050 which is more common. The space I have allowed in these gaps is about 060, so the double thickness of leather is going to be a problem. I am hoping that I can cram two layers of the thinner leather into the gap, but if not I will have to skive one or both of them in the critical areas.
I am currently delayed in the leather covering because my trim guy who is going to help with the leather is moving his shop right now and there is no place to do this work.
Thanks for staying in touch.
Jerry Feather
01-26-2011, 12:28 PM
#327
Intermediate
Join Date: Feb 2010
Location: Weeki Wachee, FL
Posts: 33
Likes: 0
Received 0 Likes
on
0 Posts
Jerry, Thanks for the update. I mentioned earlier that I have an additional vinal console (83/84?) purchased from Mark A. The leather console you have is the 81 original but if the vinal presents fewer problems I will gladly forward. I believe the only difference between the two is the later model has the rectangle clock. As always, I can't wait to get my hands on your masterpiece. Stay warm, Jimmy.
PS No longer blue, this 81 Euro is now wrapped in beautiful GARDS RED!
PS No longer blue, this 81 Euro is now wrapped in beautiful GARDS RED!
01-26-2011, 10:16 PM
#328
Rennlist Member
Thread Starter
Hi Jimmy. I already have a vinyl console that I have been restoring for your project. As I mentioned before, your console was deformed enough on the right side to allow a pretty wide gap between the upper right side and the upper insert. I am beginning to find that most of these consoles are likely to have some deformation issues that I may have to deal with in trying to keep the new inserts to fit snuggly like I planned for them.
As to leather versus vinyl for the final finish, it will make no difference whether the one I am starting with has leather or not since the leather covered console from the factory started with vinyl. The leather is simply extra; and that is what I am having to deal with in terms of the extra thickness of two layers of leather.
I have the gauges finished and ready for anodizing and have fabricated the mounting points for them which I will glue in in the next day or so. I am still waiting for a nice day to do the final fitting of the indicator lites and I will have that part of the lower insert done. I have the upper insert finished and ready to cover with the rest. Getting close, very close.
Jerry Feather
04-19-2011, 10:55 AM
#330
Rennlist Member
Thread Starter
Hi Ducman, I have been busy reorganizing my workshop so that I can gert back to this project and the wheel well liner project in particular. I am glad to see that you still have some interest since I last suggested that your having had your console covered already was either fatal to the project or fatal to the new covering.
From what I have seen of the recovering that you have had on your console I am sure that it is JFB. However, with the french seams all around the upper edge of the console recess, that tends to add two layers of leather. My console conversion is designed to basically allow for one layer of leather and that is going to be the leather on the insert pieces. I had allowed about .060 of space in the gap between the console and the inserts. I have found one hide that is about .035 to .040 thick and think that I can both cover the console with it and cover the inserts with it and force it to fit together since there is a little give in the conponents.
I don't think that I can get the pieces to fit with three layers of leather in the gap, especially if the two on the console are the usual .050 thick. I am afraid that you are going to have to sacrifice the new covering on your console to get this conversion to work with your console.
However, rather than take it apart, I will probably be suggesting that we recover a substitute console for your project with the thinner leather and without the french seams around the top. Then the leather will match the inserts and you can use the other covered console in one of your other 928s.
I'll expect to get back to his project in about two weeks when the space in my shop opens up again. In doing the reorganization I have found that it got very much worse before is has just started to get a little better, but the work stations are still not yet cleared up. Thanks for staying tuned.
Jerry Feather