

Another Pod Recover thread

Thread Starter
Racer

Joined: Mar 2009
Posts: 496
Likes: 2
From: Flower Mound, TX
Hopefully, if some of you do-it-yourselfers are like me and tend to overthink a project before starting, here's the way I went about recovering my pod, ad nauseum.
For Christmas, my wife surprised me with a new dash and pod cover from Robb Budd at classic9leathershop.com in beautiful champagne, and I finally got tired enough of my old, dried, cracked blue interior to pluck up the courage and go for it.
All the nice complicated lines of the gauge pod are VERY daunting, but here's how I went about it.
Pardon my photography skills, I'm still figuring out my new camera, and how to take a picture without it looking like I'm having a fit.
I started off with crusty old blue pod
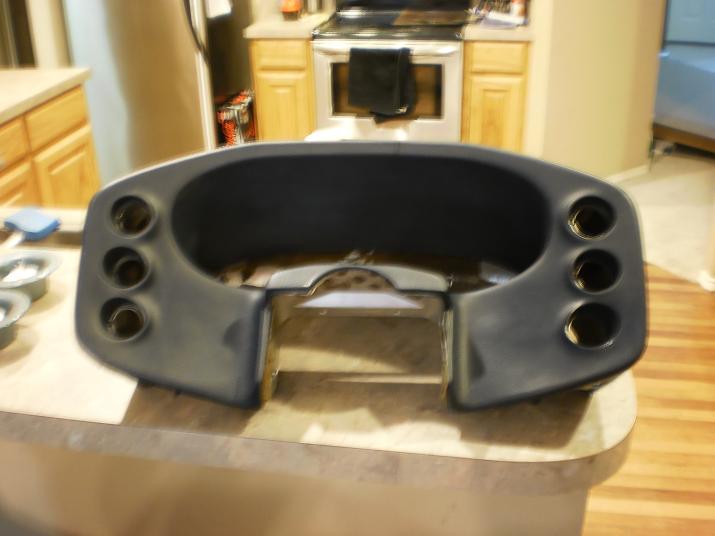
Which I cut a few additional cracks into to relieve the tension on the old vinyl, and sanded with 80 grit sandpaper to get something to adhere to.
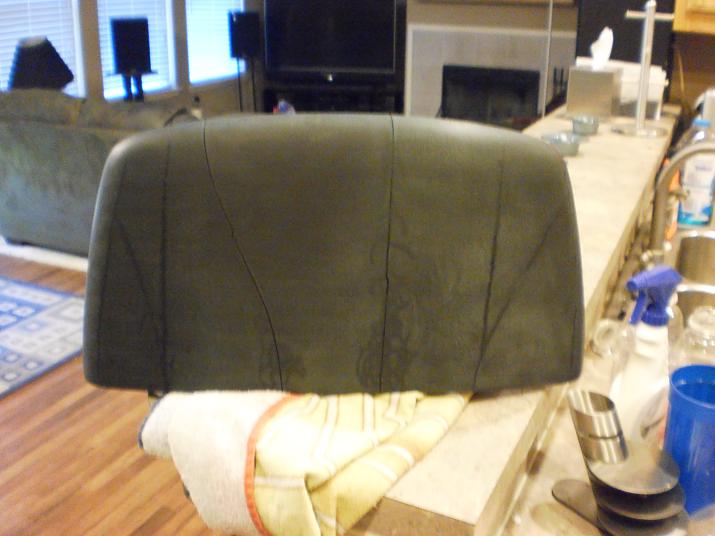
Applied some Bondo. I had some nice Dynalite and 3M body filler that had gone over, so I just stopped by O'Reilly Auto Parts and picked up what I could find. I didn't feel too bad after my wife pointed out that 3M makes Bondo.
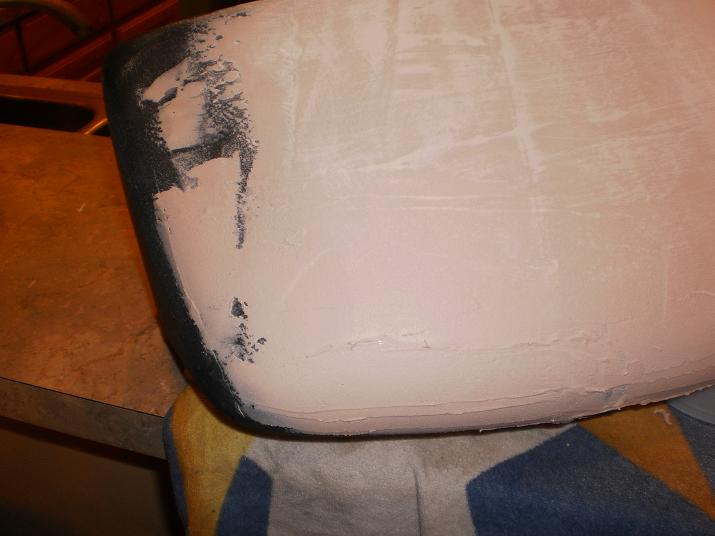
Sanded it down with 80 grit and then 120 grit sandpaper
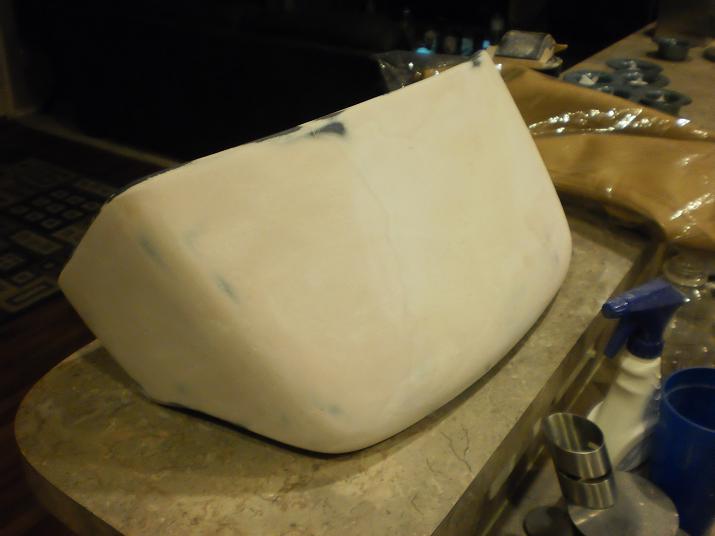

Finally after hours of applying and blending and feathering (I didn't worry about getting it perfect, because vinyl will hide the little pinholes that you'd normally be covering), I went to attack the cover itself. My initial plan was to start with the snout of the pod, since that's the most complicated part, but talked myself out of it. Instead I went for the straight section above the gauges, since that part would be the most important (since it sets the line for the whole nice smooth top of the pod. I figured if I mess up on the snout, it's going to mostly be covered by the steering wheel, if I mess up on the top, you'll be able to see it through the windshield.

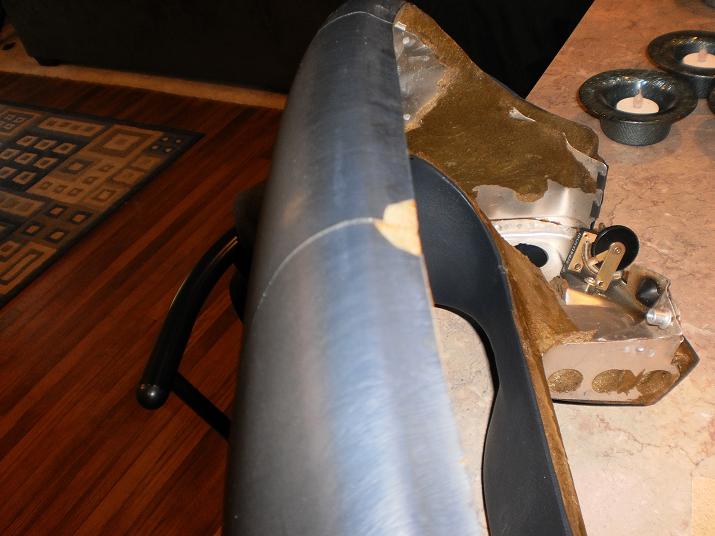
So here I started by applying contact cement to the straight section in the middle, before it curves downward. Then the same to the inside of the cover, only for the part that I was intending to stick. The thing about contact cement is once it's stuck, it's a huge hassle to remove, if at all. Once they were dried 15 minutes (probably doesn't take that long here in Texas, dry times never seem to take half as long as they do anywhere else) then I stuck them and pressed them into place. After they had set a little longer to make sure they were good and stuck, I flipped the cover inside out and applied contact cement to the face of the pod on the right side, and to the inside of the cover where it would touch.

Here I promptly forgot to take pictures again until I was totally finished. But I repeated the exercise on the left side, flipping that portion inside out and applying contact cement and then slowing working it back right side out, by chasing the seams and making sure they lined up with the edges. Once the face was totally stuck, I second guessed myself a lot and began to wish I'd paid someone to do it. Then (rightly) guessed it would look better once it was pulled around the top and sides. So I started again in the center, and applied contact cement to about the last inch of the top, and around the back, then to the inside of the cover. Now the cover is close enough to the shape that the exercise becomes preventing it from touching until it's had time to cure, so I used paint stir sticks to keep them separated. Contact cement only sticks well to dried contact cement, so even though the cement touched the stick on both sides, when I was ready to glue them together, they pulled right out. Then I pulled it nice and tight and stuck it in place, stopping about an inch from the corners (because corners are tricky to make look nice. If you take too much of a straight line, you end up with a big nasty fold that you have to cut to make look right, so the key is to make the curves very gradually. Using the same stick trick, I did both sides.
After the sides were done, I worked on the pod center, starting with the bottom, then after that was stuck I did the top, again leaving plenty of room to do the sides and corners all at once so I would have some room for adjustment. Then worked the sides in last. Trimmed everything about 1/2" past to allow for shrinkage, and used more contact cement to wrap around and glue it to the back.
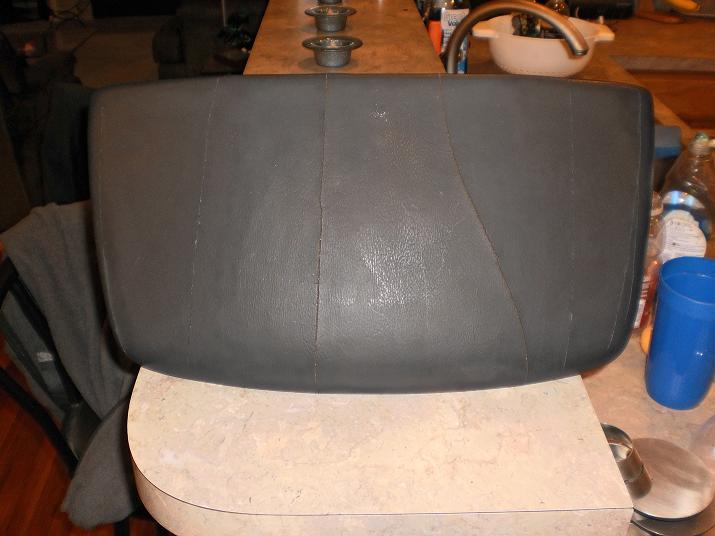
Here's the finished product.
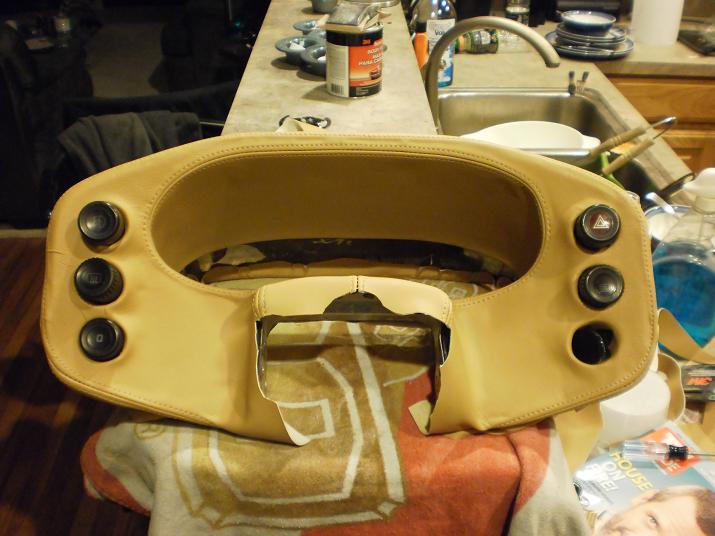
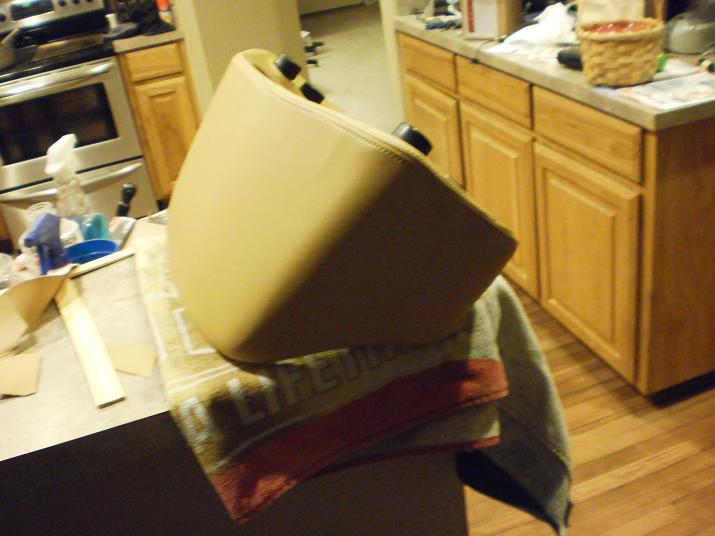
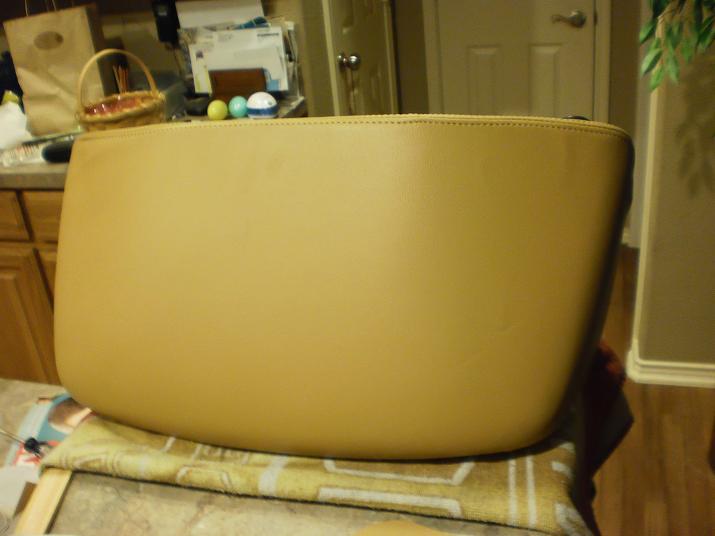
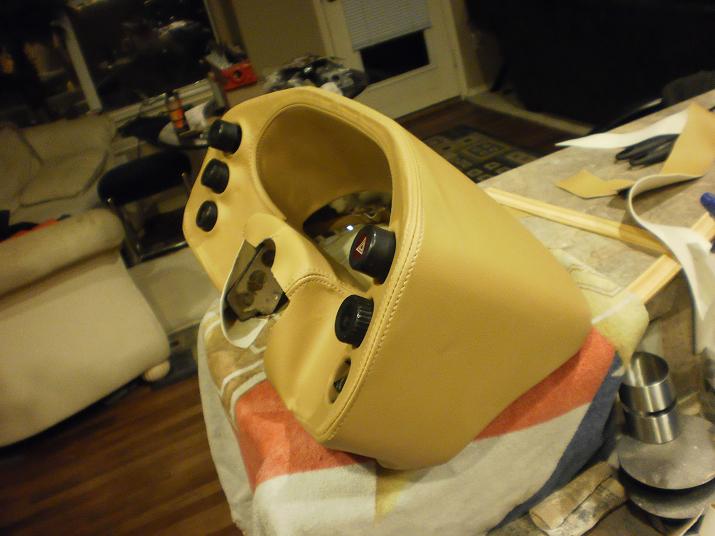
So, while not perfect, it's way better than what I had before, and I'm happy with it.
For Christmas, my wife surprised me with a new dash and pod cover from Robb Budd at classic9leathershop.com in beautiful champagne, and I finally got tired enough of my old, dried, cracked blue interior to pluck up the courage and go for it.
All the nice complicated lines of the gauge pod are VERY daunting, but here's how I went about it.
Pardon my photography skills, I'm still figuring out my new camera, and how to take a picture without it looking like I'm having a fit.
I started off with crusty old blue pod
Which I cut a few additional cracks into to relieve the tension on the old vinyl, and sanded with 80 grit sandpaper to get something to adhere to.
Applied some Bondo. I had some nice Dynalite and 3M body filler that had gone over, so I just stopped by O'Reilly Auto Parts and picked up what I could find. I didn't feel too bad after my wife pointed out that 3M makes Bondo.
Sanded it down with 80 grit and then 120 grit sandpaper
Finally after hours of applying and blending and feathering (I didn't worry about getting it perfect, because vinyl will hide the little pinholes that you'd normally be covering), I went to attack the cover itself. My initial plan was to start with the snout of the pod, since that's the most complicated part, but talked myself out of it. Instead I went for the straight section above the gauges, since that part would be the most important (since it sets the line for the whole nice smooth top of the pod. I figured if I mess up on the snout, it's going to mostly be covered by the steering wheel, if I mess up on the top, you'll be able to see it through the windshield.
So here I started by applying contact cement to the straight section in the middle, before it curves downward. Then the same to the inside of the cover, only for the part that I was intending to stick. The thing about contact cement is once it's stuck, it's a huge hassle to remove, if at all. Once they were dried 15 minutes (probably doesn't take that long here in Texas, dry times never seem to take half as long as they do anywhere else) then I stuck them and pressed them into place. After they had set a little longer to make sure they were good and stuck, I flipped the cover inside out and applied contact cement to the face of the pod on the right side, and to the inside of the cover where it would touch.
Here I promptly forgot to take pictures again until I was totally finished.
But I repeated the exercise on the left side, flipping that portion inside out and applying contact cement and then slowing working it back right side out, by chasing the seams and making sure they lined up with the edges. Once the face was totally stuck, I second guessed myself a lot and began to wish I'd paid someone to do it. Then (rightly) guessed it would look better once it was pulled around the top and sides. So I started again in the center, and applied contact cement to about the last inch of the top, and around the back, then to the inside of the cover. Now the cover is close enough to the shape that the exercise becomes preventing it from touching until it's had time to cure, so I used paint stir sticks to keep them separated. Contact cement only sticks well to dried contact cement, so even though the cement touched the stick on both sides, when I was ready to glue them together, they pulled right out. Then I pulled it nice and tight and stuck it in place, stopping about an inch from the corners (because corners are tricky to make look nice. If you take too much of a straight line, you end up with a big nasty fold that you have to cut to make look right, so the key is to make the curves very gradually. Using the same stick trick, I did both sides. After the sides were done, I worked on the pod center, starting with the bottom, then after that was stuck I did the top, again leaving plenty of room to do the sides and corners all at once so I would have some room for adjustment. Then worked the sides in last. Trimmed everything about 1/2" past to allow for shrinkage, and used more contact cement to wrap around and glue it to the back.
Here's the finished product.
So, while not perfect, it's way better than what I had before, and I'm happy with it.


Nordschleife Master
Joined: Apr 2008
Posts: 9,337
Likes: 4
From: Austin, TX
Yea, those first shots were almost UFO like they were so bad...couldn't tell WHAT THE HELL THAT WAS! LOL!!!
Looking good! You know that light color is really going to give you some windshield glare right? What did you use to fill the cracks? One of our interior leather repair shops here in town fixed my pod on my '81 but it only lasted a few years (and the car was NOT out in the sun much)...they used some sort of body filler I think. Apparently it was not flexible enough... I think if we had then covered the pod in vinyl or leather it would not show at all, but since we didn't you can see the cracks (or new ones...whatever) starting to show up again... SUCK!
I look forward to seeing the finished product! You will have to drive down to an Austin 2nd Sat. gathering when you get it all done so you can really show it off!
Thread Starter
Racer
Joined: Mar 2009
Posts: 496
Likes: 2
From: Flower Mound, TX
Yea, those first shots were almost UFO like they were so bad...couldn't tell WHAT THE HELL THAT WAS! LOL!!!
Looking good! You know that light color is really going to give you some windshield glare right? What did you use to fill the cracks? One of our interior leather repair shops here in town fixed my pod on my '81 but it only lasted a few years (and the car was NOT out in the sun much)...they used some sort of body filler I think. Apparently it was not flexible enough... I think if we had then covered the pod in vinyl or leather it would not show at all, but since we didn't you can see the cracks (or new ones...whatever) starting to show up again... SUCK!
I look forward to seeing the finished product! You will have to drive down to an Austin 2nd Sat. gathering when you get it all done so you can really show it off!
Looking good! You know that light color is really going to give you some windshield glare right? What did you use to fill the cracks? One of our interior leather repair shops here in town fixed my pod on my '81 but it only lasted a few years (and the car was NOT out in the sun much)...they used some sort of body filler I think. Apparently it was not flexible enough... I think if we had then covered the pod in vinyl or leather it would not show at all, but since we didn't you can see the cracks (or new ones...whatever) starting to show up again... SUCK!
I look forward to seeing the finished product! You will have to drive down to an Austin 2nd Sat. gathering when you get it all done so you can really show it off!
Trending Topics

Race Car
Joined: Jan 2010
Posts: 3,722
Likes: 5
From: Greensboro, NC
Quick tips:
1. Flash on
2. Half-press the shutter release
Camera should focus (if point & shoot---if it's an SLR-interchangable lenses-make sure autofocus is turned on).
3. elbows in (no chicken wings)
4. breathe in and hold
4. a. Exhale
5. Press shutter all the way
6. Repeat a few times
7. Select shots that are sharp
8. Post.
I'll send you to our website for more: nikonusa.com if you need, check out "Learn and Explore."