When you click on links to various merchants on this site and make a purchase, this can result in this site earning a commission. Affiliate programs and affiliations include, but are not limited to, the eBay Partner Network.
There is alot of adjustment in the pod, and may be set forward from it's current position.
And there is also ways for the steering shaft to migrate forward (check for play by pulling the steering wheel toward you).
Also pull the steering wheel (27mm socket), and check plastic hub cover for clearance on the backside to the inner hub. You may consider a thin piece for foam in between.
Have had all these problems. Initially it was no horn - copper wiper was displaced. Eventually got that fixed. My pod is fully leather covered, as is the wheel and its boss, and I had a squeak from the rear of the boss rubbing on the face of the shroud on the pod. Final solution was to slip a narrow washer onto the column under the wheel boss - a key ring is exactly the right size.
jp 83 Euro S AT 57k
Doug it looks like you have a leather covered pod - that would not have been factory (at least I don't think so, but Jim can validate one way or the other). Anyway, the thickness of the leather would be just enough to cause the interference. You may need to carefully "shave" that piece of plastic at the rear of the wheel where it interferes. A dremel tool with a sand drum could do the trick. Just a millimeter or so all the way around. Just a thought.
There is alot of adjustment in the pod, and may be set forward from it's current position.
And there is also ways for the steering shaft to migrate forward (check for play by pulling the steering wheel toward you).
Also pull the steering wheel (27mm socket), and check plastic hub cover for clearance on the backside to the inner hub. You may consider a thin piece for foam in between.
Thanks Jim. I toyed with some of the bolts underneath for a bit but couldn't get the pod to move around too much. I'll pull the steering wheel as my next step and see what I can do.
Originally Posted by jpitman2
Have had all these problems. Initially it was no horn - copper wiper was displaced. Eventually got that fixed. My pod is fully leather covered, as is the wheel and its boss, and I had a squeak from the rear of the boss rubbing on the face of the shroud on the pod. Final solution was to slip a narrow washer onto the column under the wheel boss - a key ring is exactly the right size.
jp 83 Euro S AT 57k
Thanks for chiming in about the spacer. That's what I figured I may end up having to do and it's good to hear that it's a viable option.
Originally Posted by linderpat
Doug it looks like you have a leather covered pod - that would not have been factory (at least I don't think so, but Jim can validate one way or the other). Anyway, the thickness of the leather would be just enough to cause the interference. You may need to carefully "shave" that piece of plastic at the rear of the wheel where it interferes. A dremel tool with a sand drum could do the trick. Just a millimeter or so all the way around. Just a thought.
Thanks Ed. You're right about the non-factory covering. Classic9 covered it in leather-look vinyl when the Pasha was redone. I thought that leather was optioned on some 928's out there, but I don't know about the OB. My plastic steering wheel rear covering has a tiny crack and the screw holes are stripped. I think I'll replace it with a new one and take the dremel to it instead of shaving the original. The 928 part number for this piece appears to be NLA, but Porsche still sells the part for the 3-spoke-equipped 911 and 944. I'm hoping that it's a totally interchangeable part between the 928, 911, and 944.
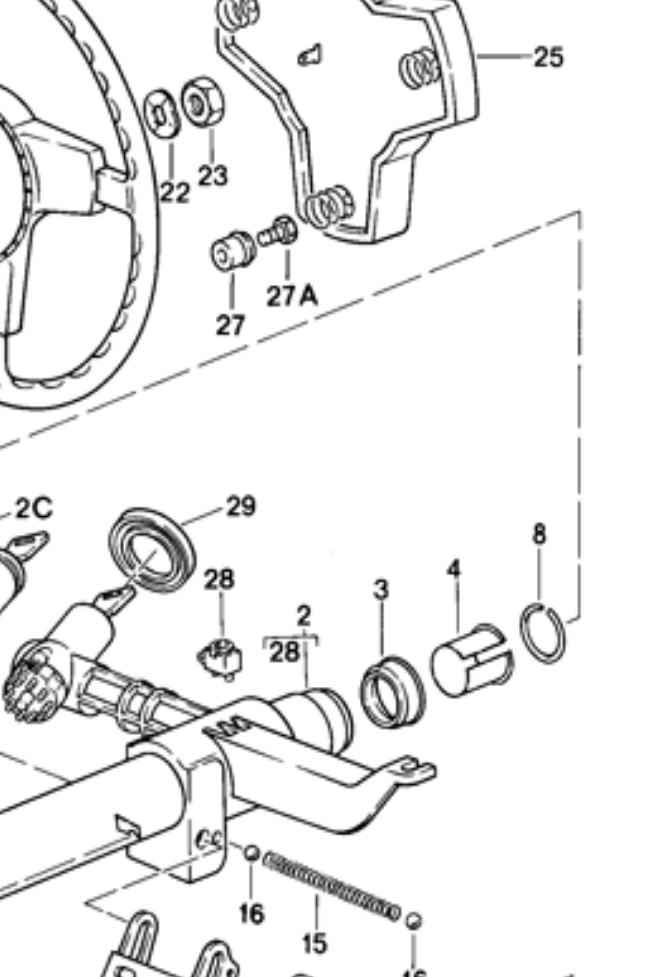
Circlip (item 8) is used as the wheel hub 'stop'. Check to make sure it's flat and not bent. Also, there is room to add a 2nd one, which would help with spacing out. P/N 113415531, however NLA shouldn't be hard to source.
Circlip (item 8) is used as the wheel hub 'stop'. Check to make sure it's flat and not bent. Also, there is room to add a 2nd one, which would help with spacing out. P/N 113415531, however NLA shouldn't be hard to source.
Ok I'll check that out when I pull the wheel. I'll see if I can dig up the clip from somewhere.
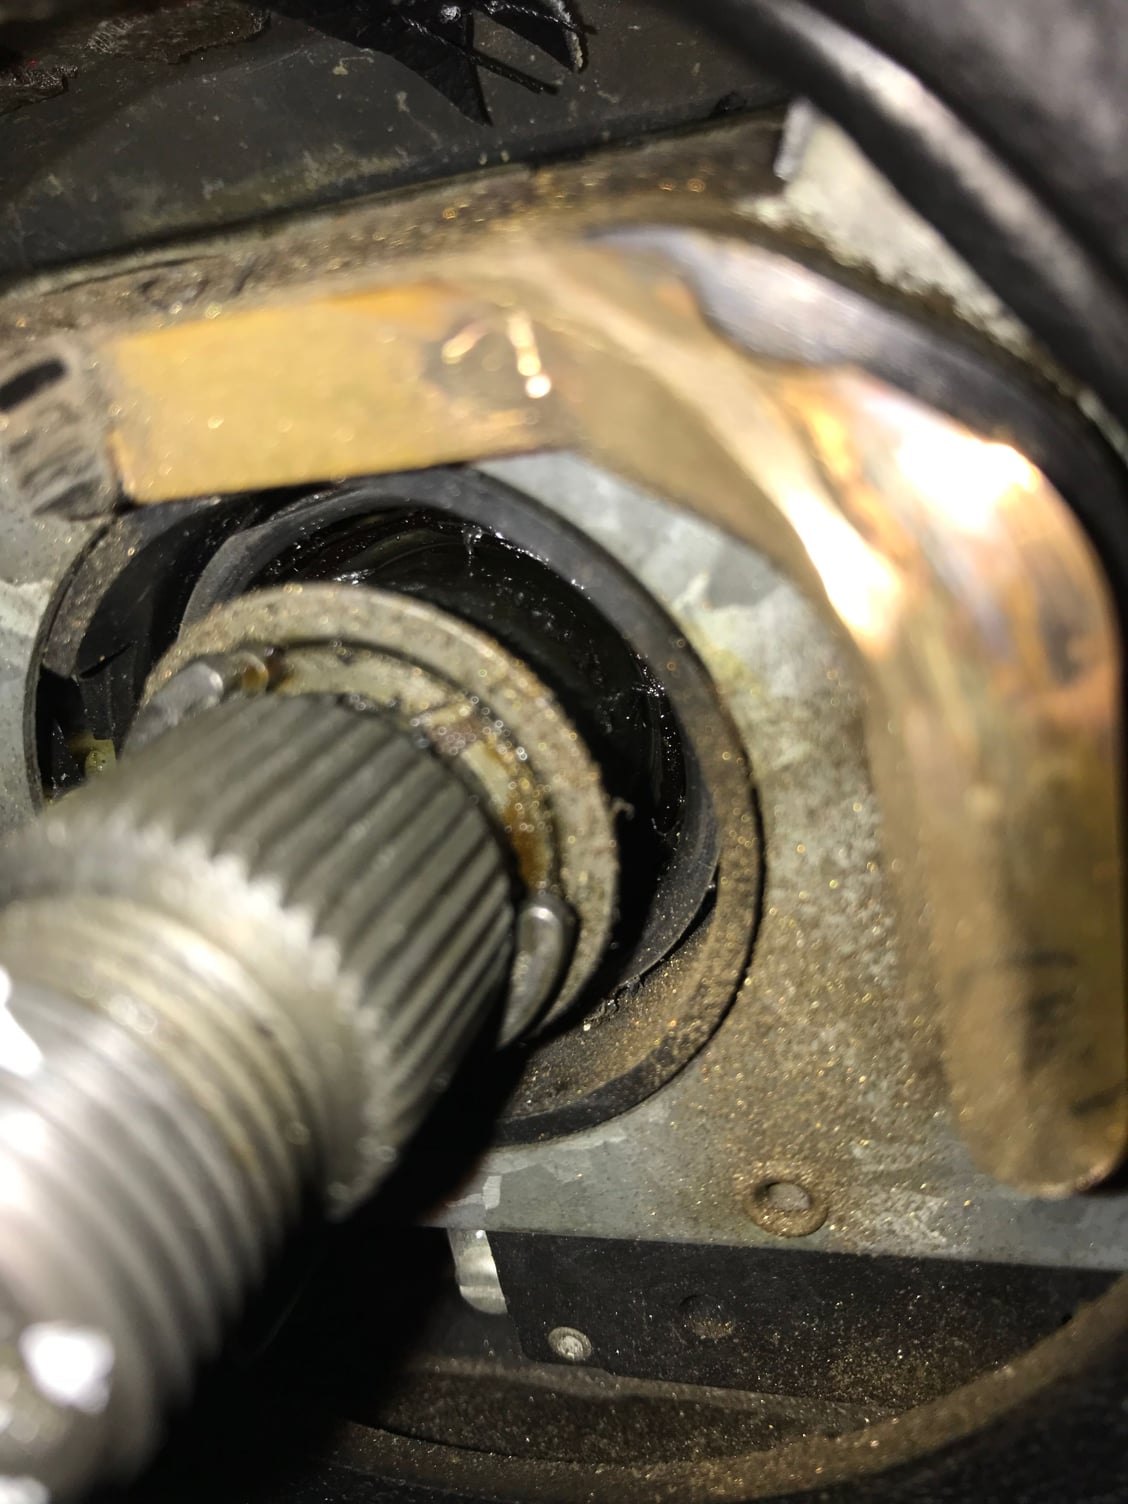
Well it looks like adding the extra spacer option won�t work. An extra one has already been added at some point, likely when the pod was covered. It�s difficult to see in the pic but there isn�t room in the groove to add another. I added a small amount of Vaseline to reduce the noise for now, but I think my next best recourse is to buy the 944 back covering and dremel it down just a bit.
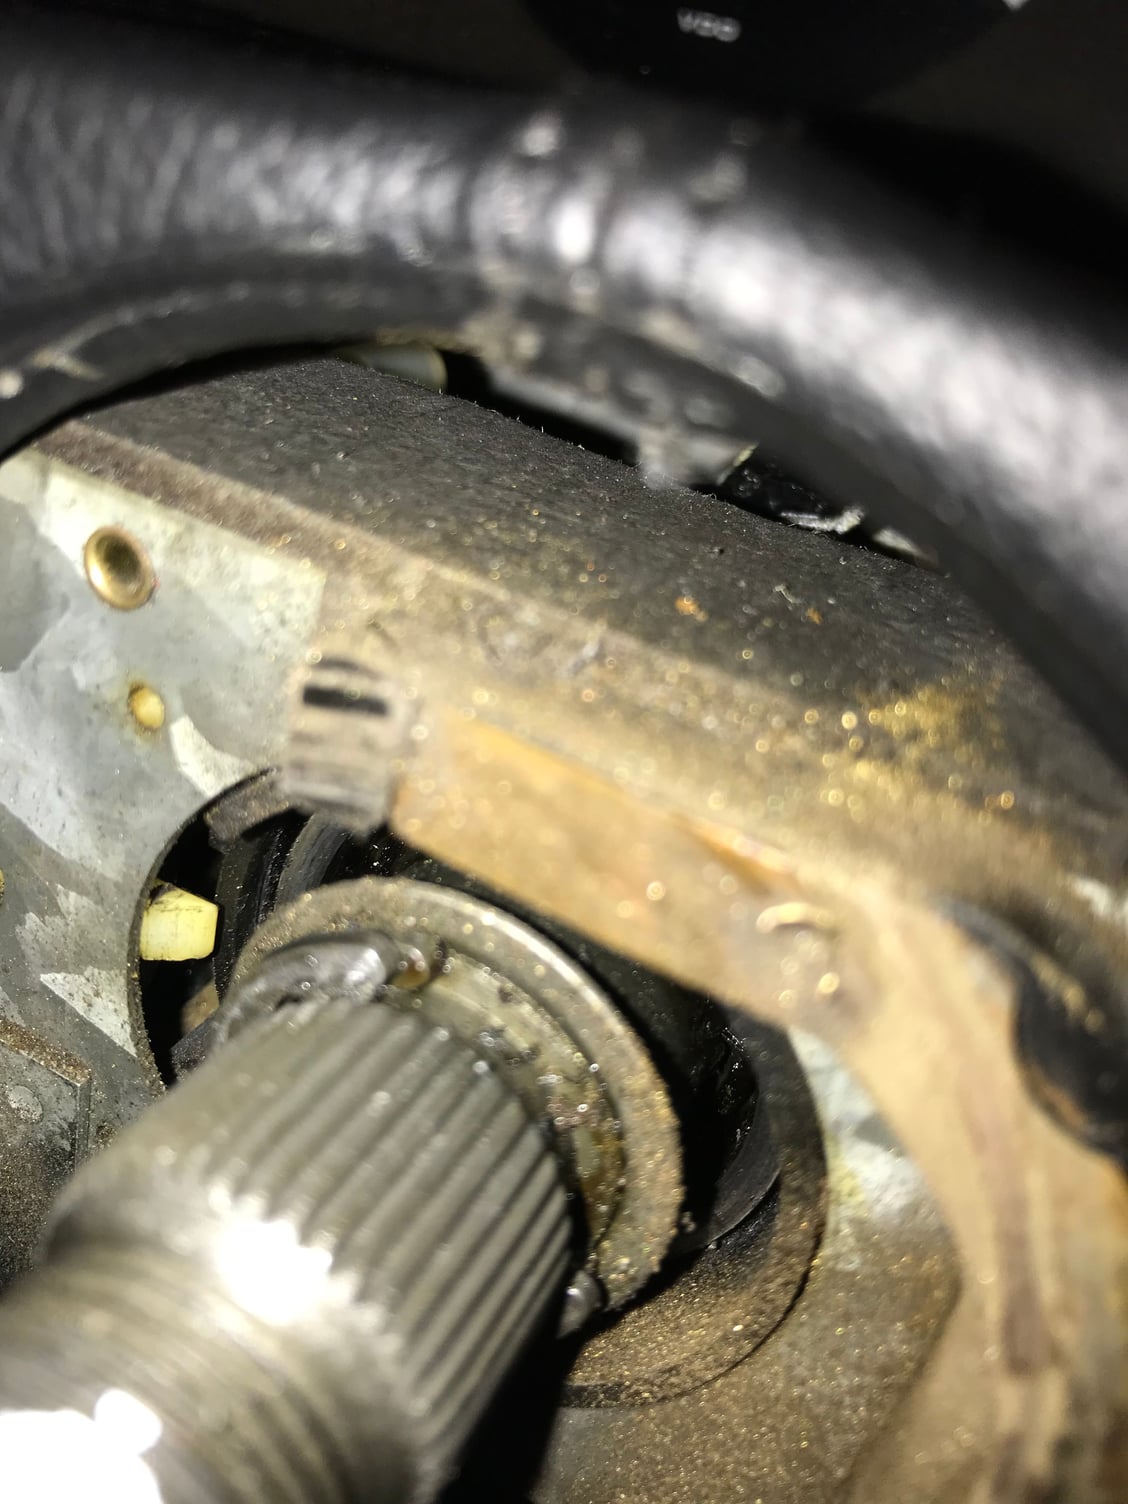
based on your picture the turn switch needs to be adjusted down as its rubbing on the back of the steering wheel.
You can adjust it by fitting the wheel then looking up at the back of the wheel to see how much its compressing the brass tang.
NOTE it sould deflect about 2 MM this is all it needs to make contact.
For the rubbing on the pod,
first loosen the bolt for the turn switch and push the switch down to get it out of the way,
loosen the back 2 of the anchor bolts then push the pod housing forward.
NOTE the 2 smaller bolts that hold the column cover on will stay out for the adjustments.
Once the pod is pushed as far as it will go tighten the 2 long bolts,
then refit the wheel and see how much clearance you have.
If its still rubbing take a block of wood and place over the area where the pod is touching and hit the wood with a hammer.
This will move the aluminum in the pod so not much force is needed, then fit the wheel.
If its still rubbing then remove the horn ring on the back of the steering wheel and get some 80 sandpaper,
glue it to a flat surface that has a hole in it so the wheel hub will fit and then grind the back of the steering wheel on the paper this will take a while to do
Once the wheel is fitting then adjust the turn switch.
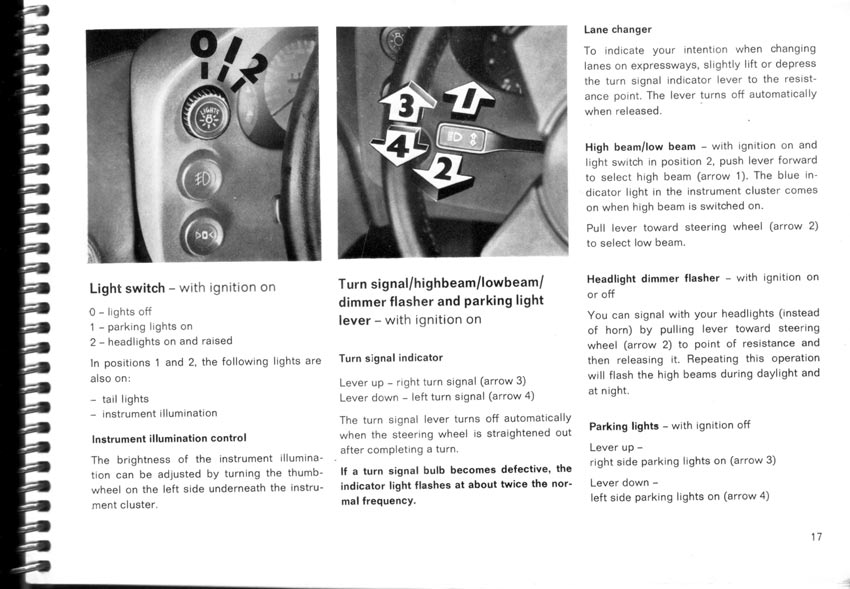
I'll be interested to hear what you find. I'm also curios to hear whether pulling back on the turn lever does anything, either with the headlights on or off. The explanation in the owner's manual sounds a bit suspect(under "Headlight Dimmer Flasher") as far as flashing the high beams during daytime, but mine didn't even flash them with the low beams on.
My '79 Does not flash the brights when I pull back on the signal arm. I thought something was wrong. Sounds like they don't have the flash momentary switch wiring in the early cars. I guess if you want to flash you just push forward and back. My 85 works like normal with the momentary switch when you pull back the brights flash. I know Porsche like options. Maybe in '78-'79 that was an optional extra!
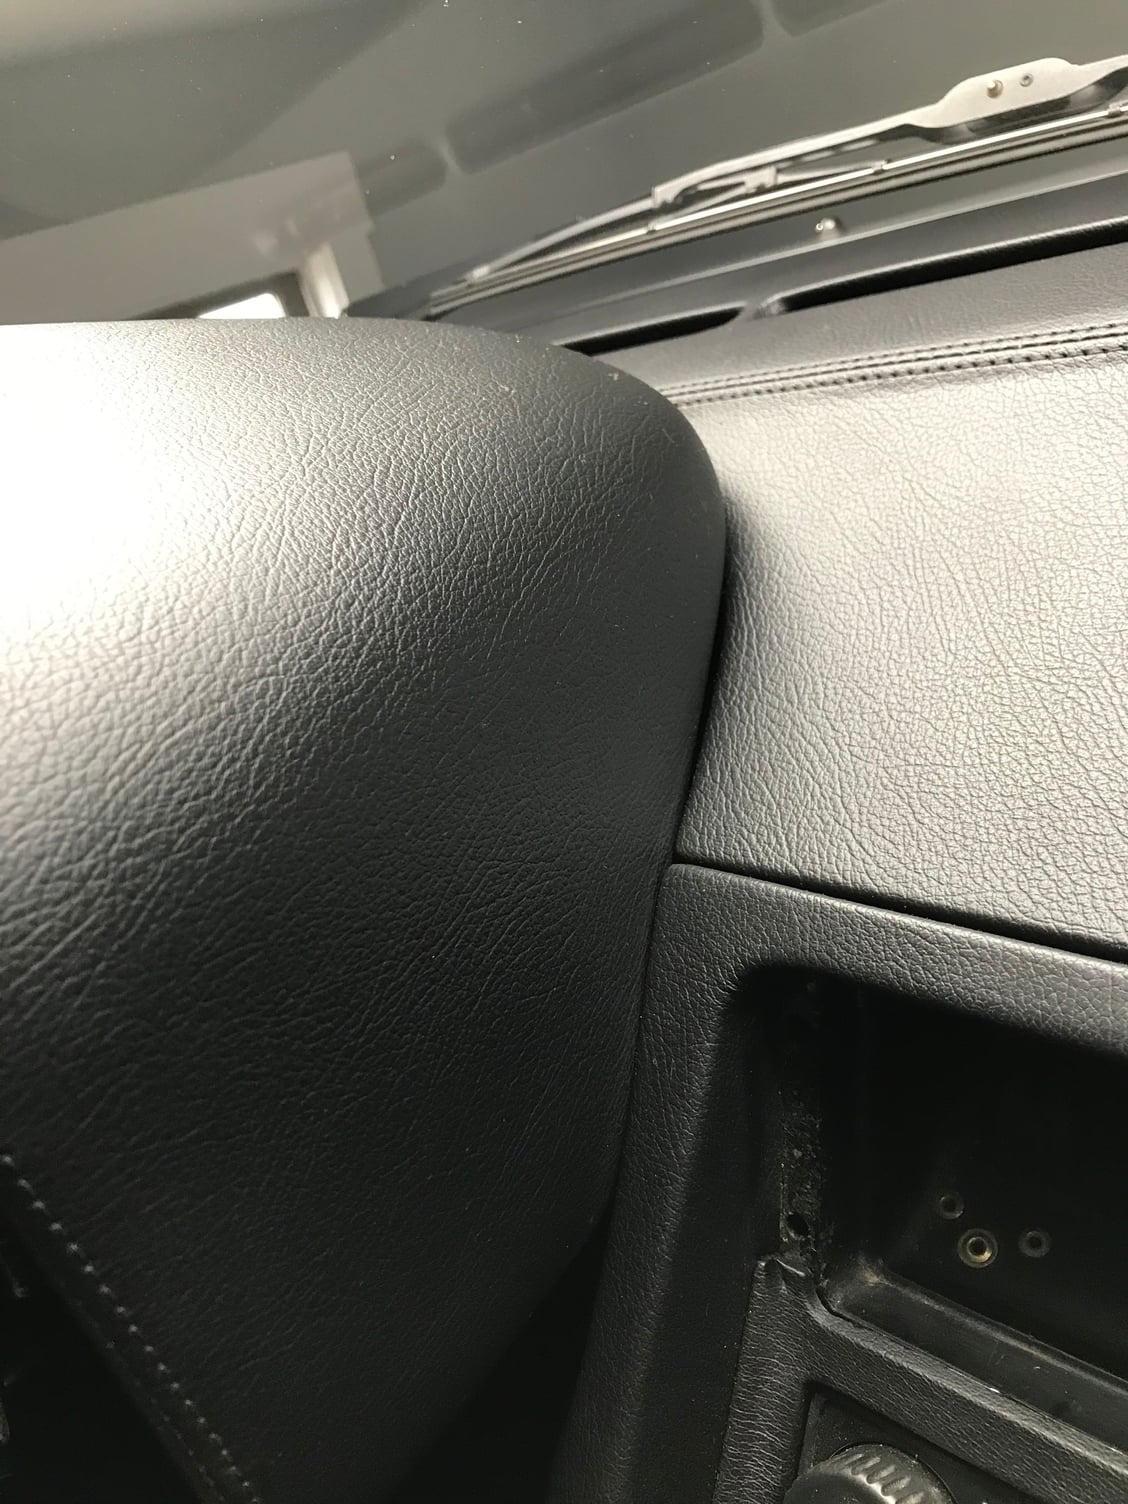
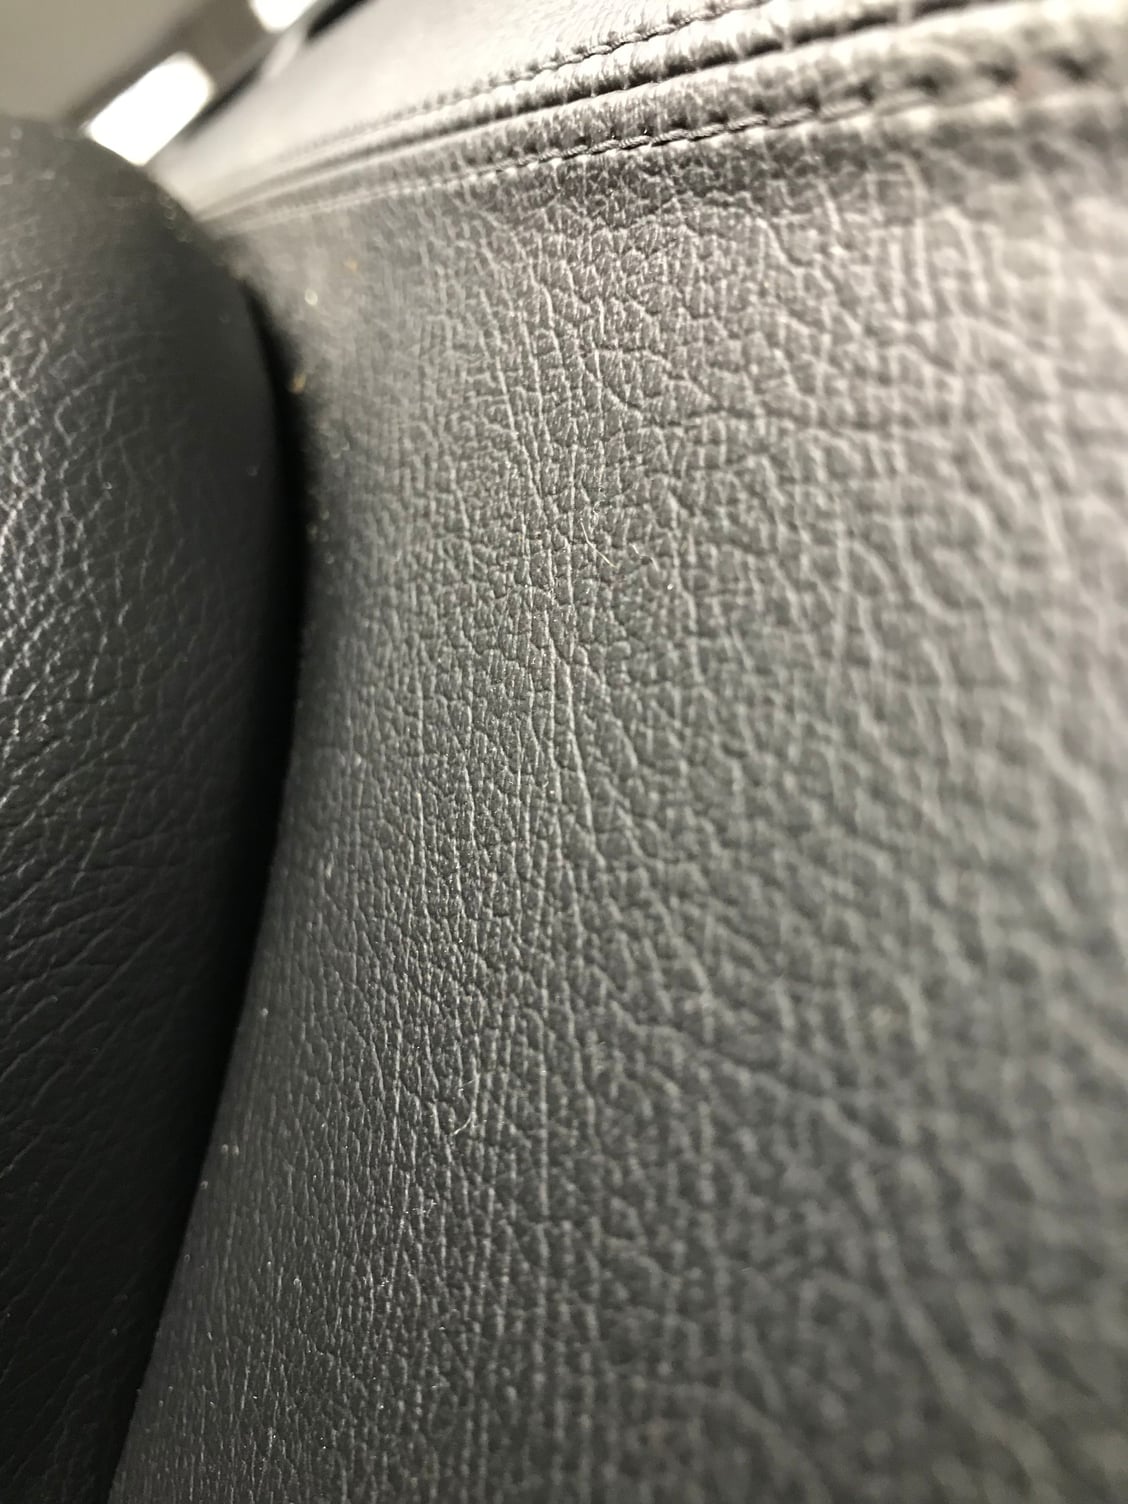
Forgive me as I still n00b my way around this car and learn more about it. But how can I possibly adjust the pod forward towards the engine bay? I just took these pics and I don�t see any extra clearance between the dash and the pod?....
Doug - I don't believe you can. The pod sits on two fixed points with bolts that thread up through rubber bumper like fixtures. The fixed points are on the frame attached to the steering column. Your pod is as far back as a pod can go - remember, you also lost clearance when it was covered in leather. I think when all is said and done, you will have to resolve your rubbing issue by removing a bit of material from that plastic piece. Spacers clearly will not do it, as seen in your photo. You can also see a lot of fine powder of metallic material that has accumulated from the rubbing - probably the horn tab. See Stan's comments for correct positioning of that.
The whole pod needs to move left and possibly up.
The steering column, and pod attached to it, can move up-down & left-right by the 4 bolts just behind the 'pod up-down lever'. This may give you the clearance you need.
Also, there's an offset pivot knuckle on the right side of the gauge cluster, just above the ignition cylinder. This adjusts too. May need to be rotated closer to the inside wall of the pod (touching, almost touching the inside wall).
Then the combo switch can move back, and the 2 lower bolts for the pod can move back too.
based on your picture the turn switch needs to be adjusted down as its rubbing on the back of the steering wheel.
You can adjust it by fitting the wheel then looking up at the back of the wheel to see how much its compressing the brass tang.
NOTE it sould deflect about 2 MM this is all it needs to make contact.
For the rubbing on the pod,
first loosen the bolt for the turn switch and push the switch down to get it out of the way,
loosen the back 2 of the anchor bolts then push the pod housing forward.
NOTE the 2 smaller bolts that hold the column cover on will stay out for the adjustments.
Once the pod is pushed as far as it will go tighten the 2 long bolts,
then refit the wheel and see how much clearance you have.
If its still rubbing take a block of wood and place over the area where the pod is touching and hit the wood with a hammer.
This will move the aluminum in the pod so not much force is needed, then fit the wheel.
If its still rubbing then remove the horn ring on the back of the steering wheel and get some 80 sandpaper,
glue it to a flat surface that has a hole in it so the wheel hub will fit and then grind the back of the steering wheel on the paper this will take a while to do
Once the wheel is fitting then adjust the turn switch.
I'm getting ready to tackle this project again and I do see that the long bolt on the left side of the column seems to allow for some adjustment. Can you help me understand how the bolt that inserts through the ignition allows for any extra adjustment? I just can't see how there is any additional play due to the fixed position of the ignition (and the mount that resides above it up inside the pod that the bolt screws into).

 02-05-2019, 05:16 PM